In todays article I’ll show you how to make a Smart Air Quality Sensor that works with Home Assistant. I’ll use a cheap and dumb Sensor from IKEA called Vindriktning, as well as D1 mini and Tasmota firmware. The whole procedure is very easy and it will take you only few minutes to assemble everything. On top, I will show you all of the needed steps in details so do not worry and let’s dive into it.
Table of Contents
What is IKEA Vindriktning Air Quality Sensor?
The Vindriktning is a dumb and cheap air quality sensor from IKEA that actually, it is not bad at all. It can detect PM2.5 fine inhalable particles. You cannot see these particles with naked eye, but you can inhale them and they can cause serious health problems.
What are PM2.5 fine particles?
The particles which are less than 2.5 micrometers in diameter are also known as fine particles or PM2.5, where PM stands for Particulate Matter. The 2.5 microns or micrometers is actually quite small. It is around 30 times smaller than the human hair.
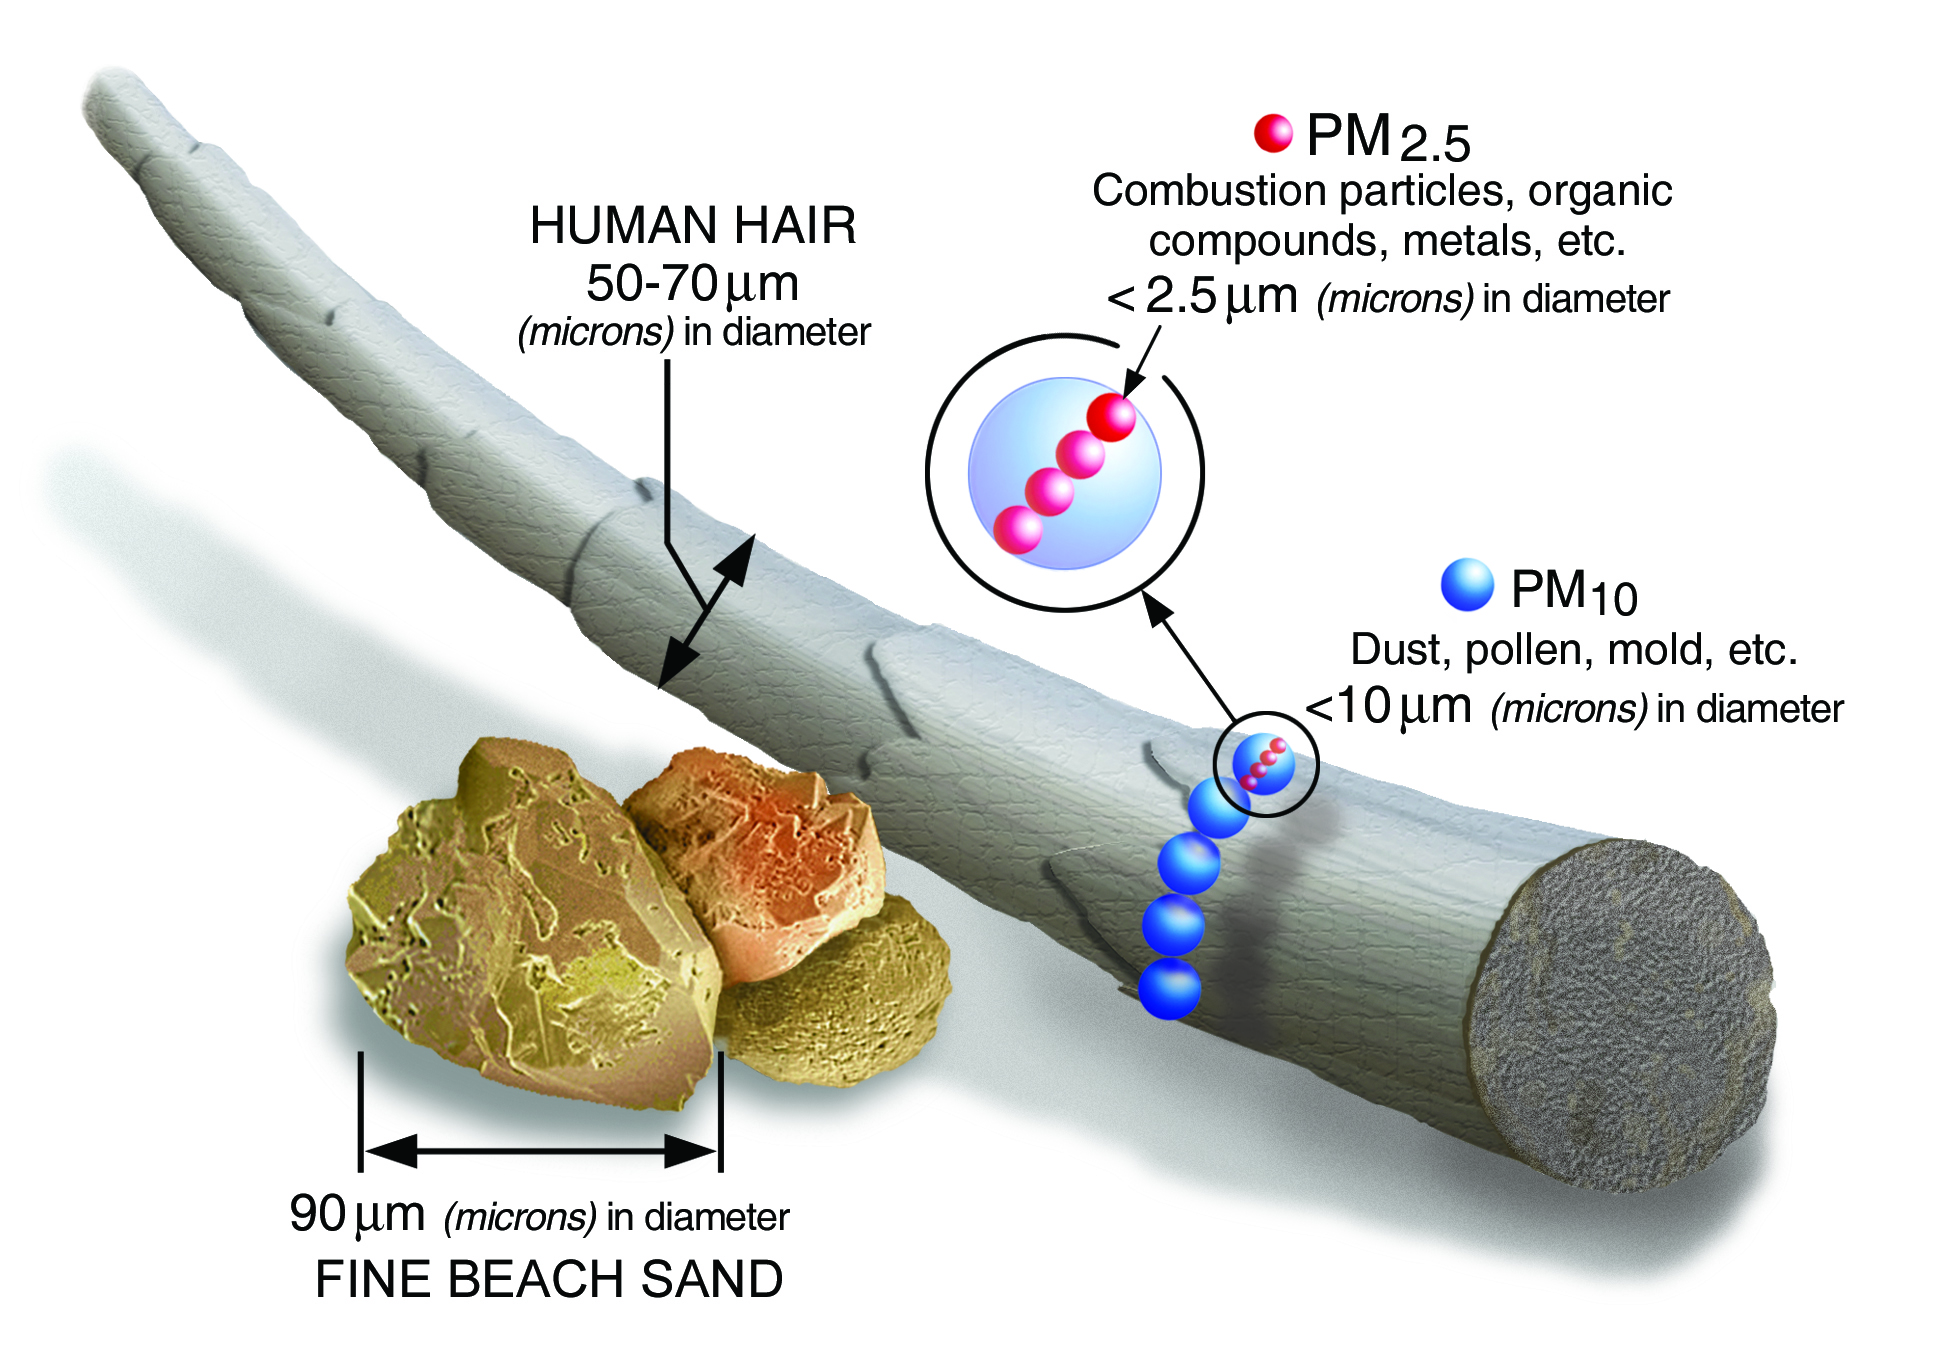
These PM2.5 particles are kind of mixture of solid particles and liquid droplets found in the air and they pose the greatest risk to your health as they can get deep into your lungs and some may even get into your bloodstream.
What are the two IKEA Vindriktning Drawbacks?
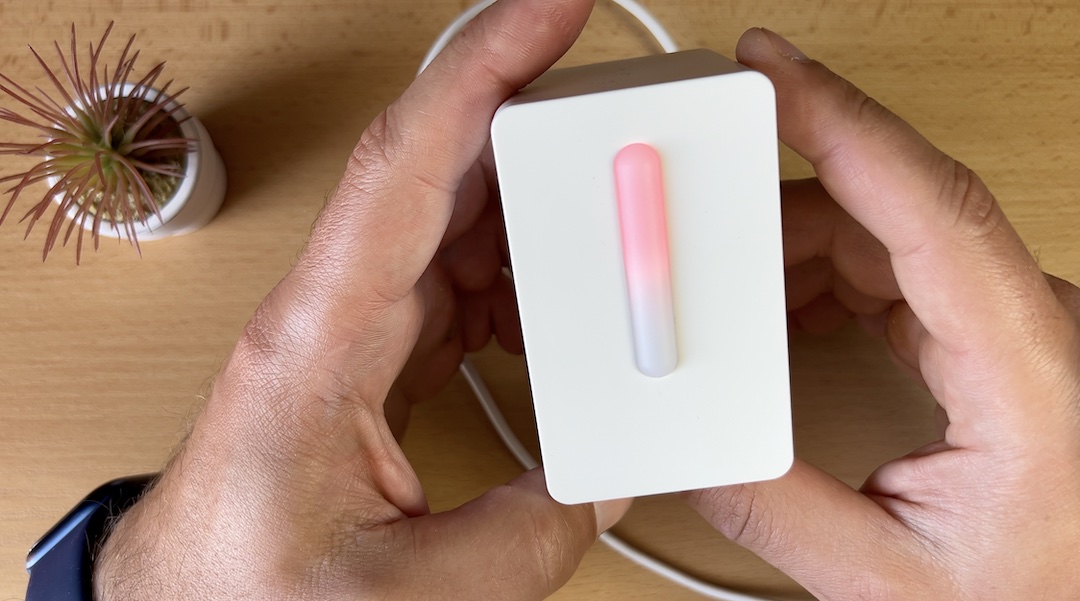
The Vindriktning, this little cheap air quality sensor that you can get from any IKEA store can catch these PM2.5 particles and warn you about their increased concentration, which is great.
However, the Vindriktning air quality sensor has two drawbacks:
- The first one is lack of USB-C cable in the package, but that can be easily fixed when you buy one.
- The second drawback is that Vindriktning is not a Smart device. You have to take a look at the LEDs colors in front of the device. If you see green then everything is fine with the PM2.5 particles, yellow/orange is a warning and with red the things are bad.

The second drawback can be easily fixed as well, because the Vindriktning air quality sensor from IKEA is kind of Smart Home ready. All you have to do is to attach a D1 Mini that is flashed with Tasmota or ESPHome and you’ll have a Smart Air Quality Sensor that works with Home Assistant for dirty cheap price.
And because D1 Mini is mini in size it can fit inside the case of the IKEA air quality sensor, so at the end nobody can tell that you have modified your sensor unless it opens it up.
But enough sweet talks and let’s get to action. I will first install Tasmota on the D1 mini and then I will attach it to the IKEA air quality sensor.
Everything that is needed to make Vindriktning Smart
Here is a list of everything that is needed for this mini project:
- A Vindriktning Air Quality Sensor,
- A D1 Mini,
- An USB-C cable,
- 3x Wires (Jumper Wires),
- A Micro USB Cable – it is needed just once during the D1 Mini Tasmota installing.
Below you can find some affiliate links to the needed components. If you purchase something from these links I will receive small commission with no additional cost for you.
- IKEA Vindriktning Air Quality Sensor (not an affiliate link) – https://www.ikea.com/us/en/p/vindriktning-air-quality-sensor-60515911/
- D1 Mini (AliExpress) – https://s.click.aliexpress.com/e/_AFgAIp
- D1 Mini (Amazon) – https://amzn.to/3sSaJRp
- USB-C cable (AliExpress) – https://s.click.aliexpress.com/e/_AsxKxd
- USB-C cable (Amazon) – https://amzn.to/3a7BhHI
- Micro USB cable (AliExpress) – https://s.click.aliexpress.com/e/_AnrsGw
- Micro USB cable (Amazon) – https://amzn.to/32tdxdF
- Jumper Wires (AliExpress) – https://s.click.aliexpress.com/e/_Aluq3z https://s.click.aliexpress.com/e/_A3YiR3
- Jumper Wires (Amazon) – https://amzn.to/3fRlXyK
Installing Tasmota on the D1 Mini
Time to see an actual D1 Mini Tasmota install demo.
- Start a Google Chrome or Microsoft Edge browser and open the Tasmota Web Installer page – https://tasmota.github.io/install/
- Connect your D1 Mini device to your computer with a Micro USB cable.
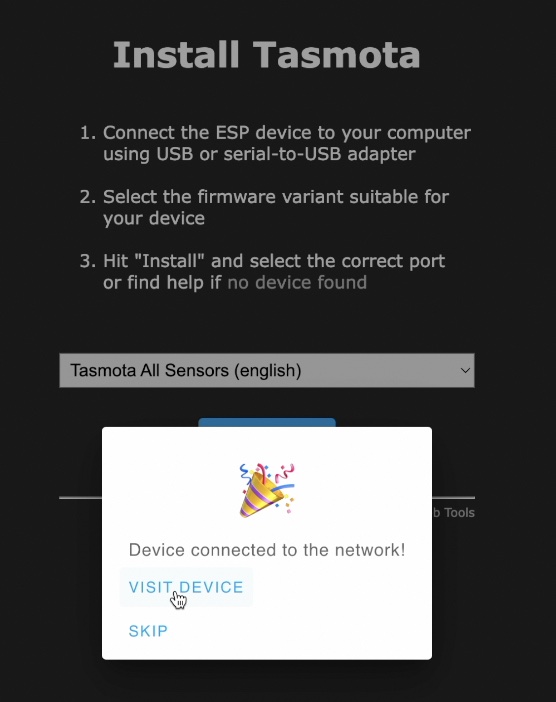
- From the dropdown list select a Tasmota All Sensors version.
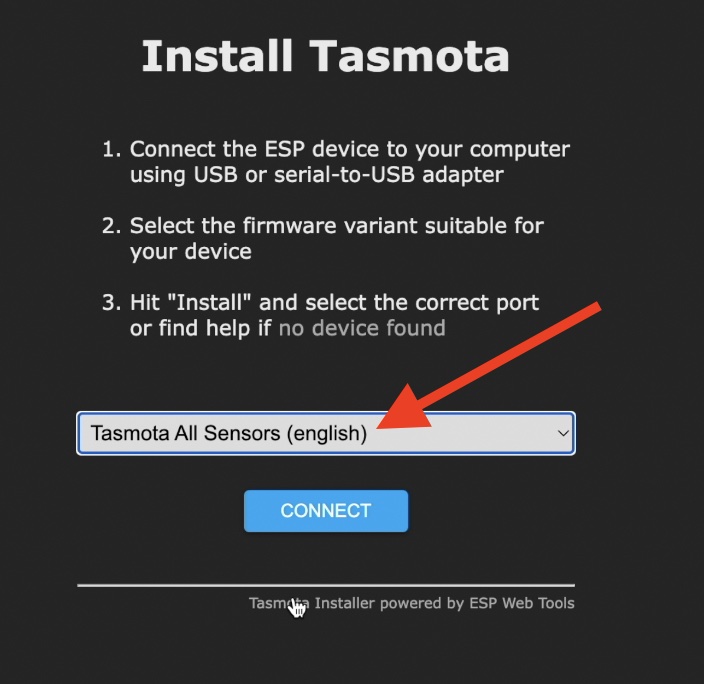
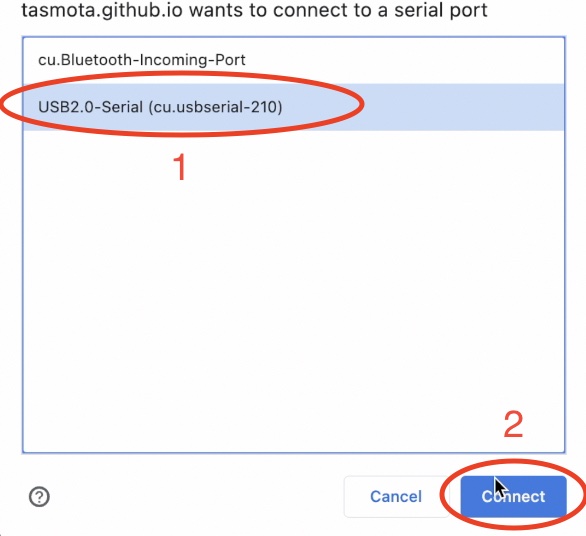
- Click on the Connect button and select the correct port on which your ESP device is connected, then click on the Connect button again.
- Another dialog will appear where you have to select Install Tasmota All Sensors...
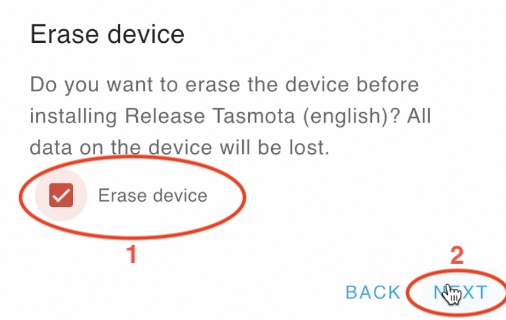
- On the next dialog, tick Erase device and click Next button and then Install button.
- Now you just have to wait a minute or two for the Tasmota installation to finish. It is important not to close the browser and even not to minimize it until all is done. Just leave it like that and enjoy the weather. When you see the installation complete dialog, click Next button and then you can close that page.

- Your device is now Tasmotized and you just have to configure your WIFI by selecting it and by entering your WIFI password. When you are ready click Connect button.
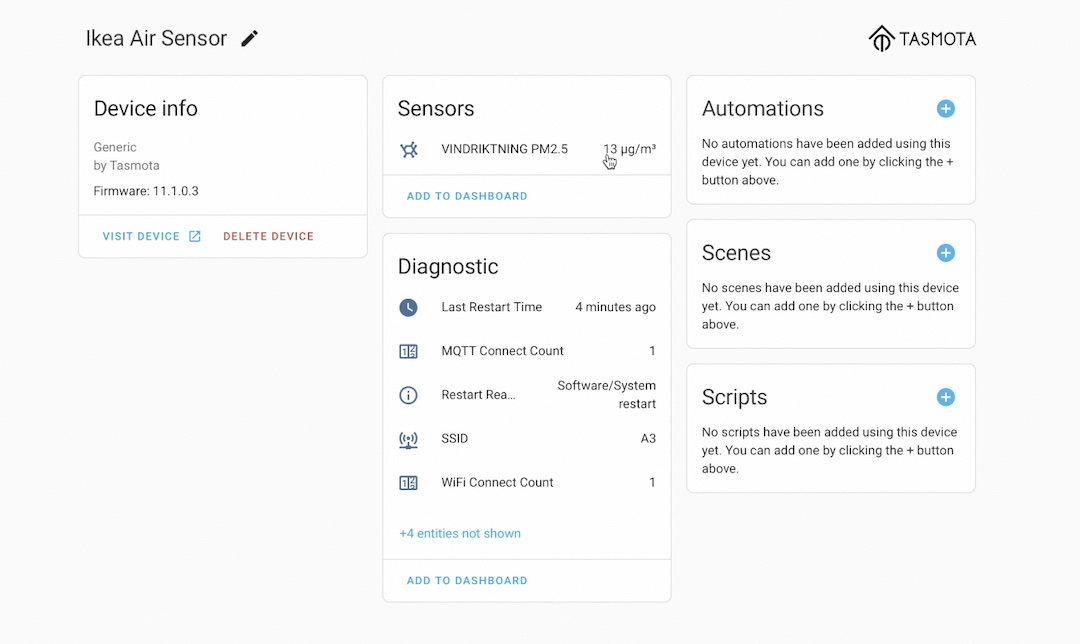
- Finally, you can click on the Visit Device link to open the Tasmota web interface.
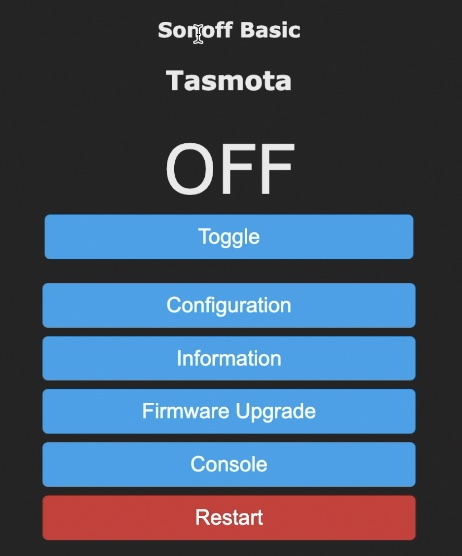
- You should be able to see the Tasmota home page from where you can control and further configure your device.
Congratulations, you made it! 🎉🥳
Your device is having a Tasmota firmware on it. Let’s configure Tasmota just a little bit, so everything to be ready for Home Assistant.
Tasmota configuration
There are some easy Tasmota configurations that needs to be done, so let’s get to work:
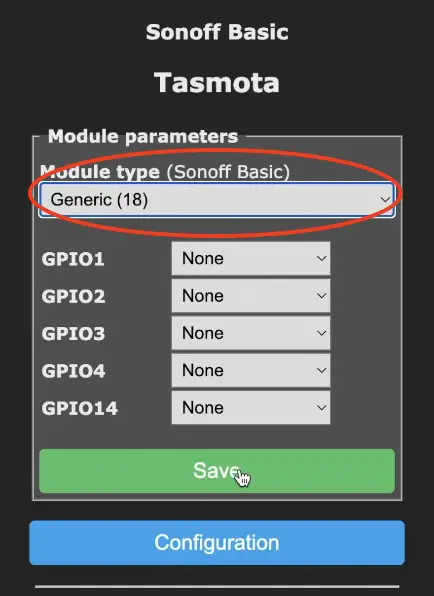
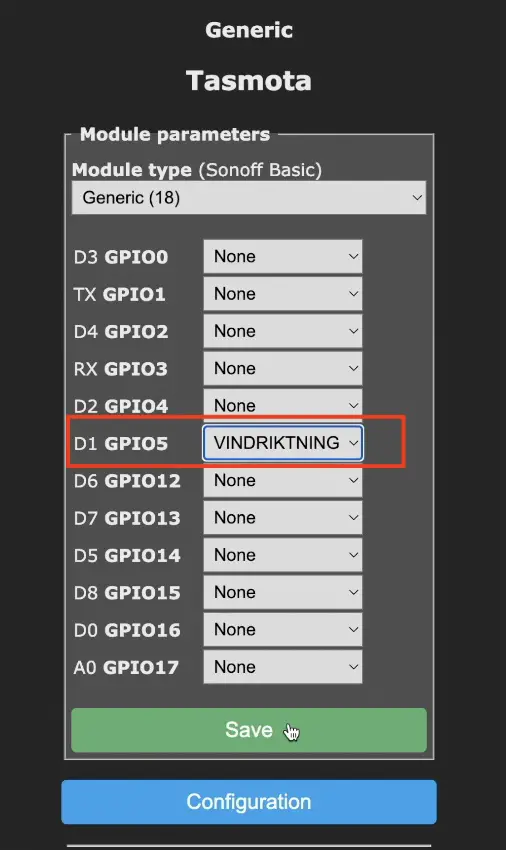
- In Tasmota, go to Configuration > Configure Module > As Module Type select Generic > Click Save button. The device will auto restart and after that your Module Type will become Generic, instead of the default Sonoff Basic.
- In Tasmota, go again to Configuration > Configure Module > for D1 GPIO5 select VINDRIKTNING from the dropdown list > Click Save button and the device will auto restart.
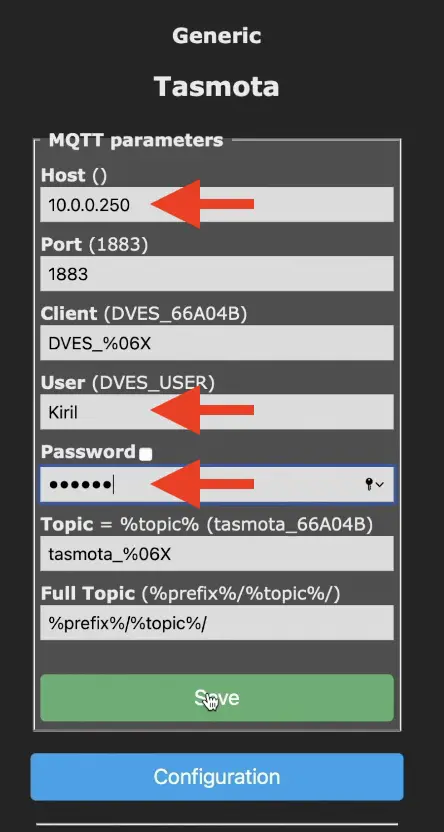
- In Tasmota, go to Configuration > Configure MQTT > enter your MQTT Host, User & Password > when you are ready click Save. If you don’t have a MQTT server, check this article of mine where I’m explaining everything – MQTT explained.
- In Tasmota, go to Console and type: SetOption19 0 then press Enter.
This command will enable Home Assistant Auto Discovery.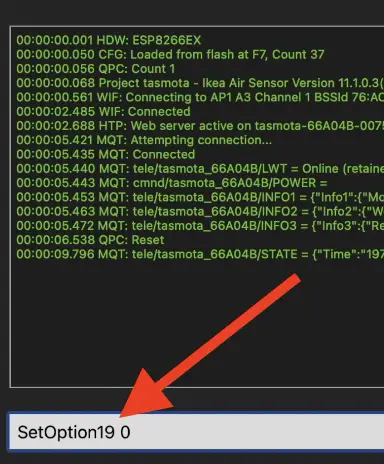
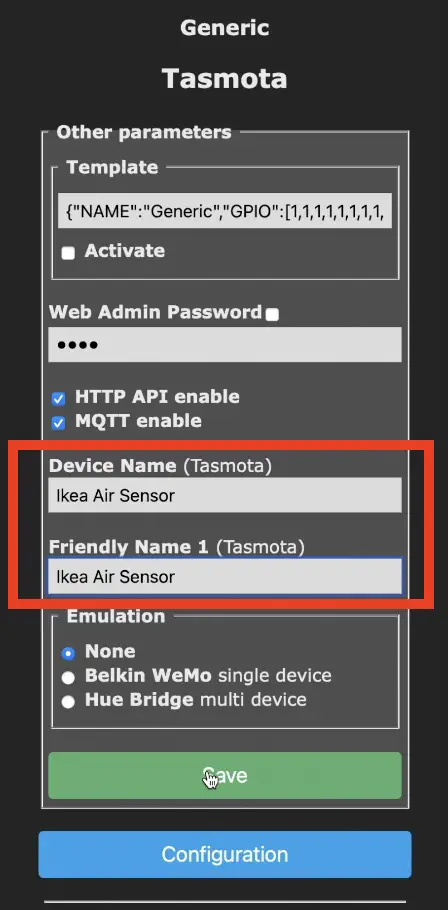
- This final step is optional, but I suggest to do it anyway. In Tasmota, go to Configuration > Configure Other > Change the Device Name and Friendly Name 1 to something more meaningful for you. For example: Ikea Air Sensor.
That was the final configuration that is needed and the D1 Mini is ready to be connected to the Vindriktning board.
How to connect D1 Mini to IKEA Vindriktning Air Quality Sensor?
The D1 mini is now Tasmotized and it is time to connect it to the IKEA Air quality sensor board. These are the needed steps:
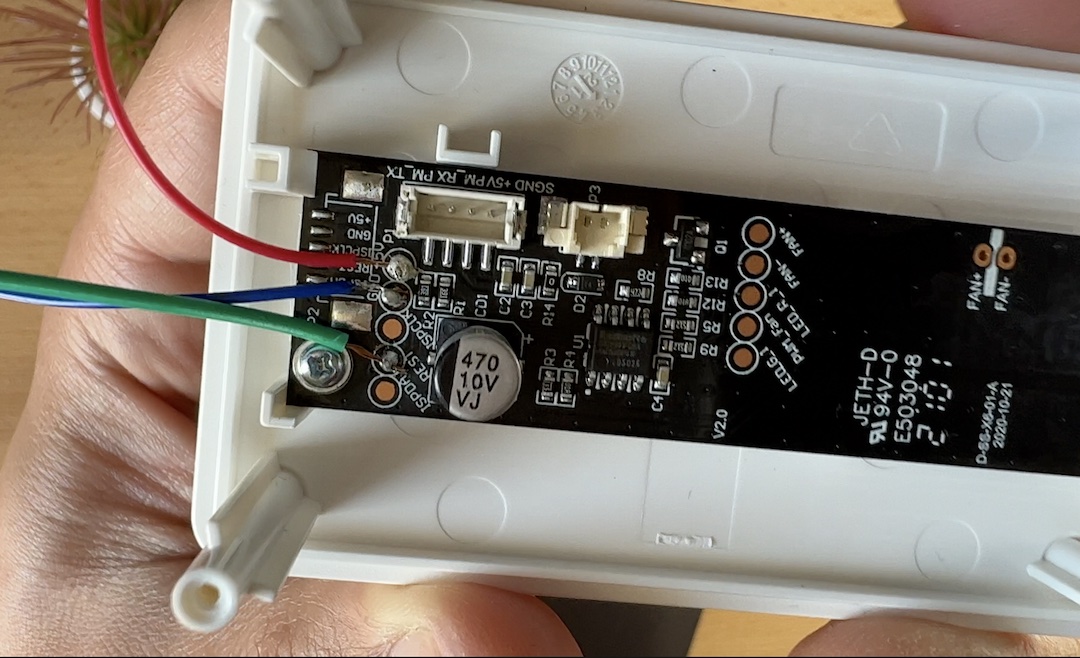
- Unscrew the 4 screws of the IKEA Vindriktning sensor, so you can access the board inside.
- Solder 3 thin wires on the Vindriktning board.
- I will use a blue wire and I will solder it to the GND pin of the IKEA Air quality board,
- Then I will solder a red wire to the +5V pin,
- Finally, I will solder a green wire to the REST pin of the Vindriktning Air Quality Sensor.
- After that I will solder the other end of the wires to the D1 Mini.
- The red 5V wire will go to the 5V pin of the D1 Mini,
- The blue GND wire will go to the ground pin on the D1 mini which was labeled with G,
- Finally, the REST wire, in my case the green wire will go to the D1 pin of the D1 Mini.
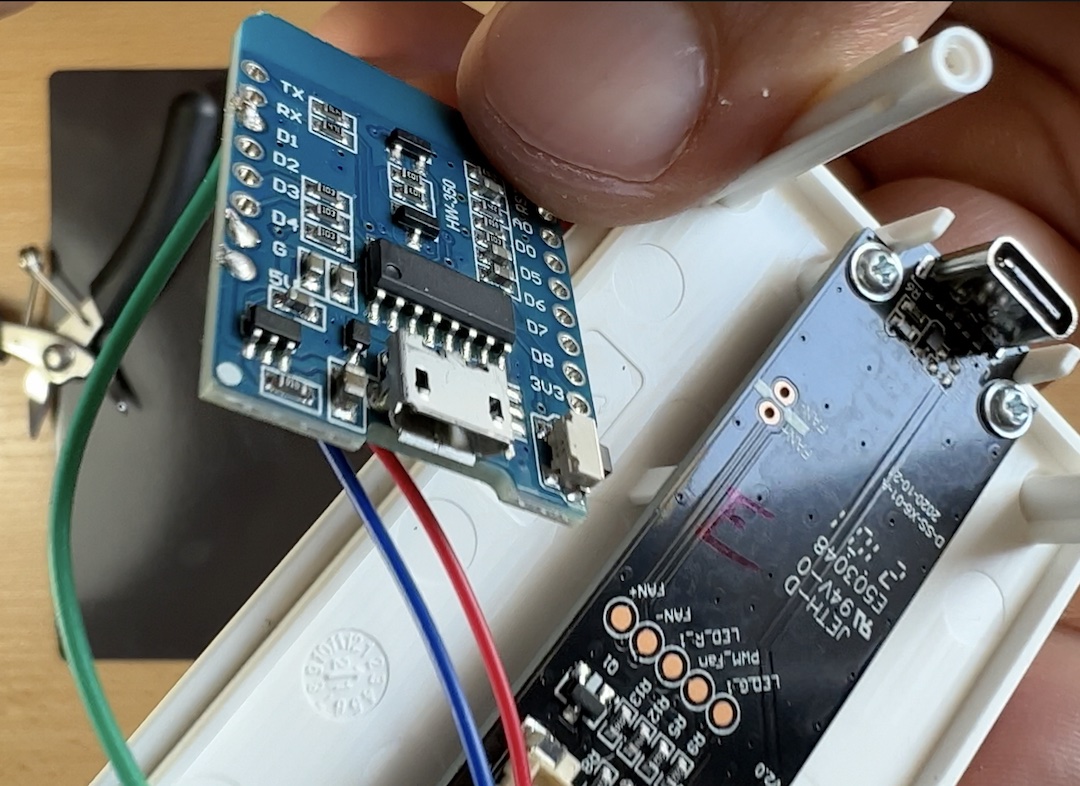
- The next step is to carefully insert the D1 mini into the case of the IKEA sensor and to screw the screws.
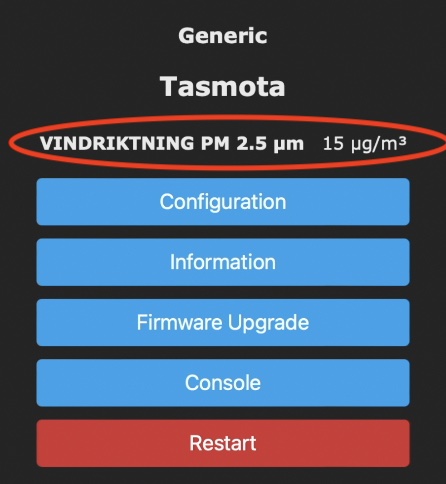
I successfully soldered the D1 mini to the IKEA dumb air quality sensor. Now, If I plug in the Vindriktning sensor so it can start up. I will be able to access the D1 Mini Tasmota web interface which now should have the PM2.5 readings.
Free Home Assistant Webinar
Before we continue to the Home Assistant Integration, I want to personally invite you to join my free Home Assistant Webinar. If you are still confused about the different installation types of Home Assistant – this 45 minutes webinar of mine will clear the fog around that topic.
I will show you all of the official ways to get Home Assistant + one secret and stupid easy way to get it. The Webinar is completely free and you can register on my other website – https://automatelike.pro/webinar
How to add Vindriktning in Home Assistant?
Let’s continue to the Home Assistant and Vindriktning IKEA air quality sensor integration, so finally this sensor to become a Smart one.
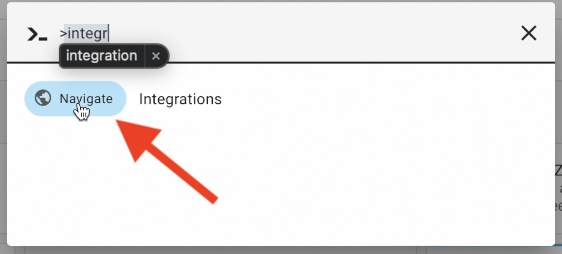
Go to your Home Assistant and press the “c” button on your keyboard to access the Home Assistant search bar. Inside this search bar type: integrations and click on Navigate: Integrations.
Alternatively, you can click on the My Home Assistant Link below:

When you are inside the Integrations section of Home Assistant you can look around for an Auto Discovered Tasmota device. If that is the case just click on the Configure button next to it. Otherwise, do the following:
- Click on the Add Integration button (in the lower right corner).
- Search for Tasmota and click on the result.
- Click Submit and then Finish Buttons.
You should now see a new Tasmota device added in your Home Assistant Integrations. If you click on it you will see the Vindriktning PM2.5 readings inside Home Assistant. That means you can use these readings from now in Automations and Scripts as you wish.
A Smart Home Glossary
I’m using a lot of Smart Home abbreviations and acronyms in this article and not only here. In this regard, I prepared a Smart Home Glossary for you that can help you further.
Inside this glossary you will find simple but quite useful explanations of the most used words and acronyms in the Smart Home World.
You can download that glossary free of charge on my other website – https://automatelike.pro/glossary
How to add Vindriktning Home Assistant Automation?
I will create one demo Home Assistant automation that will send a persistent notification when the PM2.5 concentration goes above 35 µg/m3. That should be the equivalent of Yellow/Orange light on the Vindriktning Sensor.
You can see in my video how I’m creating the automation using the Automations Editor or you can use the YAML code below and you can import it to your Home Assistant.
alias: When Air goes bad
description: ''
trigger:
  - type: pm25
    platform: device
    device_id: 49f5f0b16d0c63a73bcb45ecbbc824fc # Change this to yours
    entity_id: sensor.ikea_air_sensor_vindriktning_pm2_5 # Change this to yours
    domain: sensor
    above: 35
condition: []
action:
  - service: persistent_notification.create
    data:
      message: PM2.5 goes above 35
mode: single
Outro
As usual next week I will release a new Smart Home related video & article for you. If you don’t want to miss it subscribe for my Newsletter.
I’m Kiril and I’m done writing.


5 Comments
Richard · 28/05/2022 at 6:17 am
Just purchased a couple of these and the other stuff to set it up. One for inside and one to go with my weather station. Looking forward to integrating it.
KIril Peyanski · 28/05/2022 at 8:49 am
Great, it seems to me that you will have some fun ahead! Enjoy!
Wilfred · 01/11/2023 at 8:09 am
NICE!! but at what level will it go to red?? we can make a gauge with the three colors and a level indicator on the HA interface. Would also be nice 🙂
Wilfred · 01/11/2023 at 8:12 am
should have read the f…. manual 😀
LED indicators for air quality (PM 2.5):
Green: 0-35 /Good + Low
Amber: 36-85/OK + Medium
Red: 86- /Not good + High
KIril Peyanski · 04/11/2023 at 3:59 pm
thanks for sharing this as I also didn’t check the manual (which is not good apparently)