
Want to make your Home Assistant seriously smart? Like, “wow, it’s alive” smart? 🤔
What if you could run the most powerful AI models right inside Home Assistant… but for $0?
That’s not a typo. I found a crazy trick that lets you do just that. It’s all about using the Home Assistant Ollama Cloud integration in a very clever way.
You get to run the smartest, heaviest AI models on any regular computer (Windows, Linux, or Mac), and your Home Assistant can use them all for free. The best part? It’s super easy to set up.
Table of Contents
📺 Visual Person? Watch the Video instead!
If you’d rather watch the full step-by-step tutorial, I’ve got you covered. You can see exactly how this Ollama Cloud Home Assistant setup works in the video below.
Link to YouTube Video: https://youtu.be/s04kOLLqmU0
The Secret: Your Own “Personal AI Cloud”
The problem is that big AI models are… well, big. They need a powerful computer. Your Home Assistant (especially if it’s on a Raspberry Pi) just can’t handle it.
The Trick: We run the AI (Ollama) on any other computer you already have—your main PC, a Mac, or a Linux server. Then, we have Home Assistant talk to it over your local network.
It’s like having your very own beast AI model right in your house, but someone else to feed this beast and take care of it!
This Home Assistant Ollama Cloud method is fast, it’s not entirely private as your prompts leave your Home Network, but it’s 100% free and you don’t need to spend $20k+ for a computer to run them locally.
It only takes 3 simple steps to get it working.
Step 1: Get Ollama Running
First, you need to get the free Ollama software.
Just go to their website (ollama.com) and download the app for your computer (it works on Windows, Mac, and Linux).
Once it’s installed and running, you’ll need to do two quick things:
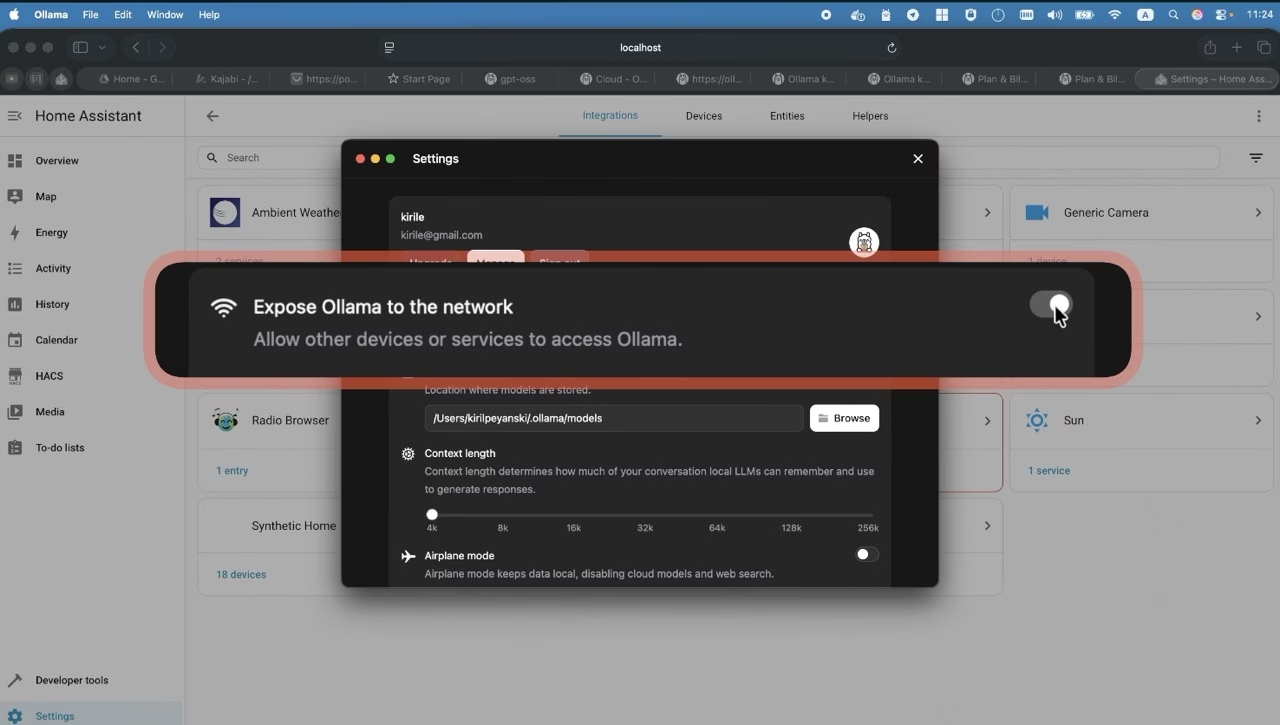
- Make sure it’s “exposed” to your local network. This is usually just a setting you check in the Ollama menu, so Home Assistant can find it.
- Create a free Ollama account and sign in to the app.
(The free PDF guide has the exact settings and for this part!)
Want the full step-by-step? All the commands and settings are in the free PDF guide. [Download the PDF Now!] (https://www.automatelike.pro/ollama_cloud)
Step 2: Add the Home Assistant Ollama Integration
This is the easiest part. You’re just telling Home Assistant where to find your new Ollama installation
Here are the basic instructions:
- In Home Assistant, press “c” and type “integrations” or go to Settings > Devices & Services.
- Click the Add Integration button.
- Search for Ollama and click on it.
- It will ask you for the URL. You just need to type in the IP address and port of the computer running Ollama. Use the following format: http://YOUR_IP_ADDRESS_OF_THE_PC_RUNNING_OLLAMA:11434
- don’t forget to add “http://” before the IP and “:11434” port after the IP
That’s it! The Ollama Cloud Home Assistant integration is now ready to go. There are a few more tips in the PDF to make sure the connection is perfect, but this will get you 90% of the way there.
Step 3: Start Using Your FREE AI!
You’re done. Seriously.
Now you can start building amazing automations, creating AI-powered sensors, or just… talking to your house. The Home Assistant Ollama Cloud integration opens up a whole new world.
You can use it for “thinking” (like summarizing a long notification) or even “visual” tasks (like describing what your camera sees).
Ready to build? Get all the copy-paste YAML code for my automations in the free PDF guide. Get the Free PDF Guide!
🚀 Get the FREE PDF Guide with All the Code!
Want the full guide? The copy-paste YAML code, the extra automations, and the deep-dive explanations? It’s all in my free PDF.
The YAML code can be found in my PDF. To get it, just type your name and e-mail at this link:
Click Here to Download the “Home Assistant Ollama Cloud” PDF
You will receive an e-mail from me where you can confirm that you are not a robot. And the PDF will be yours to have.
Inside the PDF, you will find:
- Step-by-step instructions for setting up Ollama Cloud Home Assistant.
- The difference between Local & Cloud AI.
- What “thinking” & “visual” mode means.
- All the automations YAML code from this video (plus a few extra bonuses!).
- Detailed explanations on how to modify the code for your setup.
You will also be subscribed to my newsletter where I will share news and updates. It is a free service, and if you don’t like it, you can unsubscribe at any time with just one click.
Thanks for flying in the clouds with me! Let me know in the comments what you build first with your new Home Assistant Ollama Cloud setup!
And if you want more HA & Ollama content, then check this out these 👉 articles