
The guys from Home Assistant released a new major version with a lot of new cool features like this beautiful Home Assistant calendar menu. To enable it you have to add a calendar integration to your home assistant and I will show you how you can easily do that with the google calendar.
Table of Contents
What you will find in this article?
Adding a Home Assistant calendar just to sit there and doing nothing else than showing the date is not as fun as using it with automations triggered when there is a calendar event.
Or exactly the opposite when something happens in your Home Assistant respectively your Smart Home you can automatically create an event in google calendar.
You can use these functionalities to control or monitor your Home Assistant remotely without any router port forwards or VPNs, right from the comfort of your hand using your phone and google calendar.
And In this video I will try to show you how to setup everything so you will have a Google calendar in your Home Assistant Calendar with fun automations in no time.
Now I have to schedule an appointment for а wholesale smashing of the like button for the YouTube algorithm, just kidding now let’s go:
Get the Google Calendar credentials for the Home Assistant Calendar
Open the following URL where the Home Assistant and Google calendar documentation is.
https://www.home-assistant.io/integrations/calendar.google/
After that to generate a Client ID and Client Secret needed for the Home Assistant Calendar – open this link.
This will start a mini wizard that will guide you during the process, but you better don’t just click on the buttons there without looking here, because you can easily get lost.
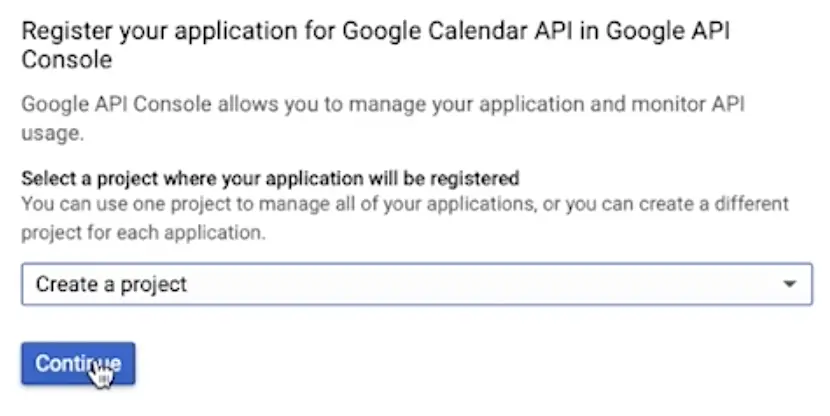
On the first dialog where “Create a project” is selected by default click “Continue”.
Then click on the “Go to credentials” button and on the next screen choose:
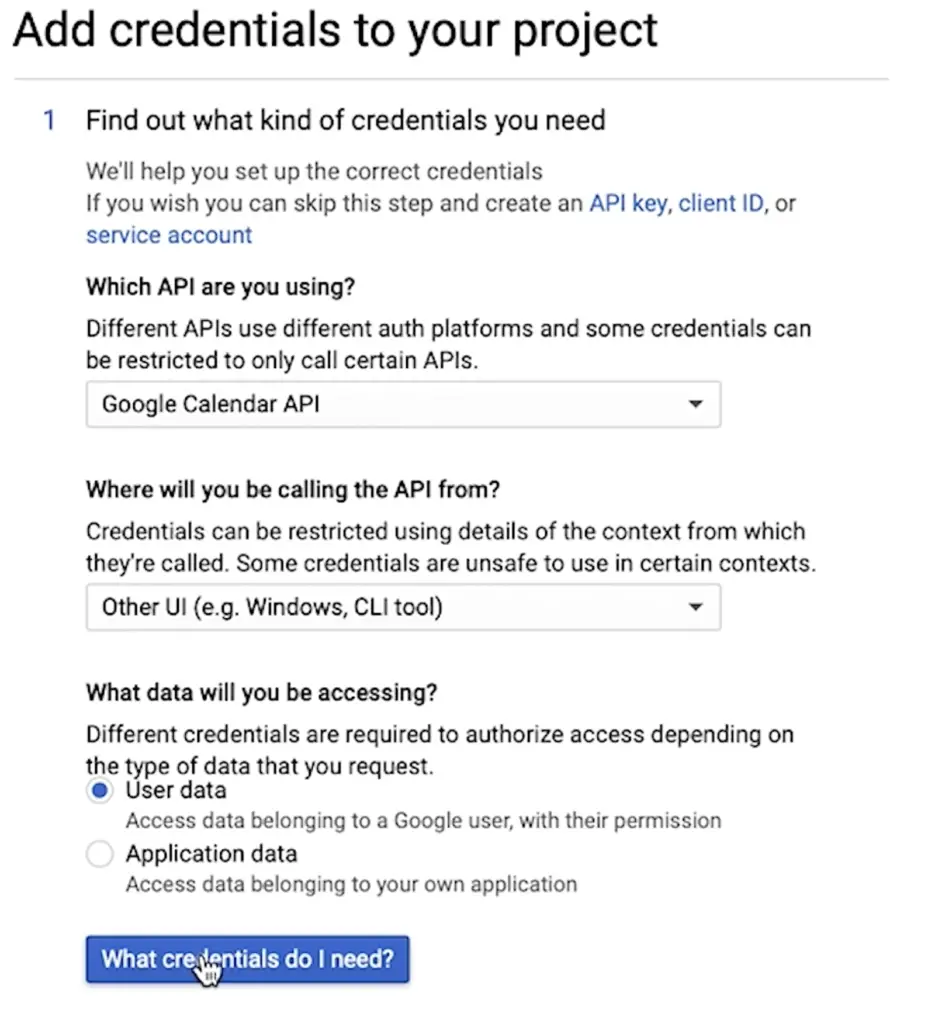
Other UI, User data and click on “what credentials do I need?” button.
A new mini window will appear – just click on “SET UP CONSENT SCREEN”. A new tab will be opened with another question for you. 😉

Just select “External” and click “CREATE” button.
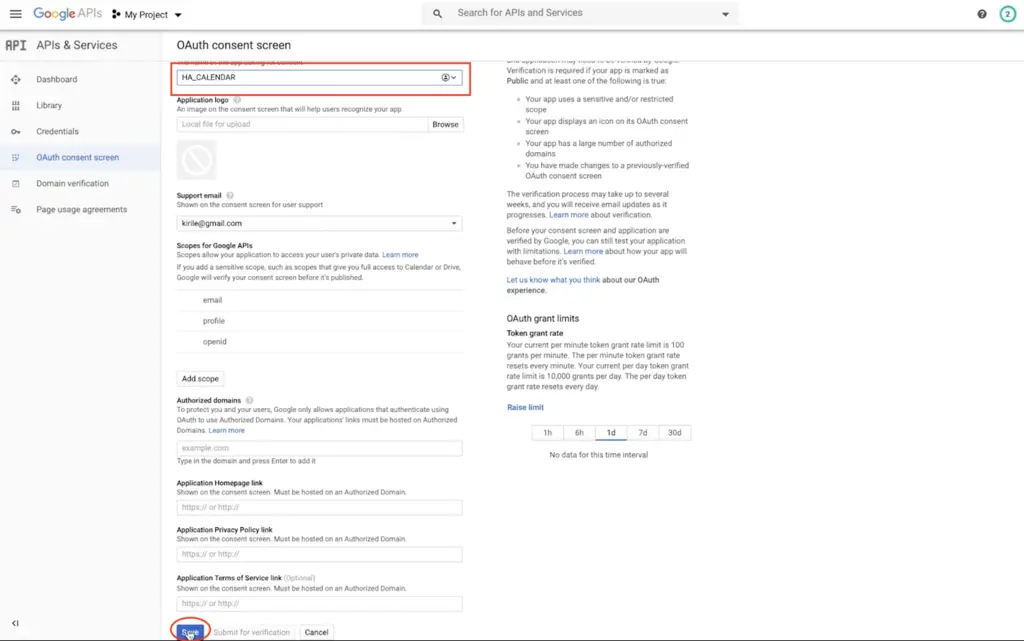
On the next OAuth consent screen type a name and you don’t need to change anything else just click “SAVE” on the bottom of the page.
Now click on “Credentials” in the left sidebar and then on “+ CREATE CREDENTIALS”
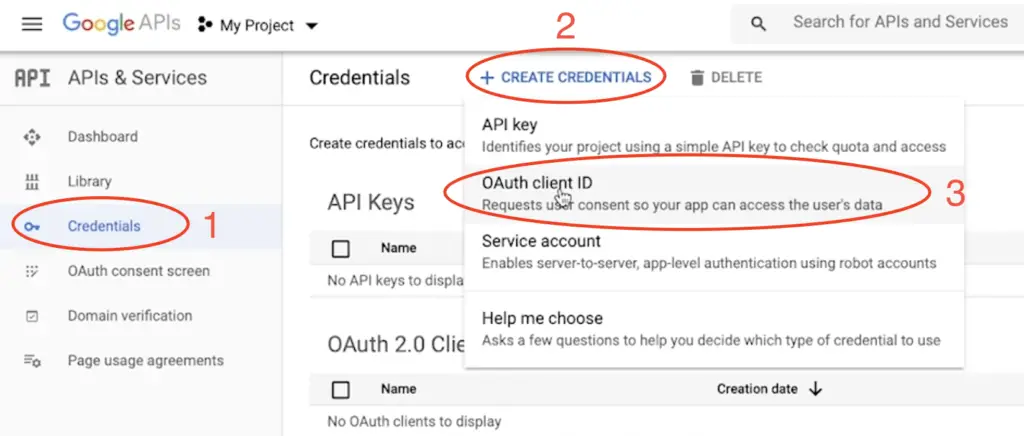
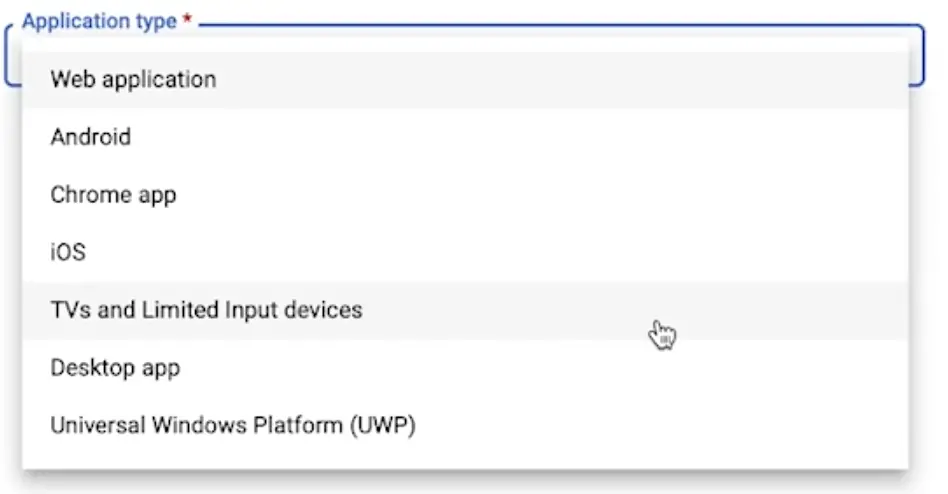
As Application type choose the option “TVs and Limited input devices” from the dropdown menu.
Then type a name or leave the default value and click on the “CREATE” button.
Finally you will get your credentials that we need for Home Assistant Calendar.
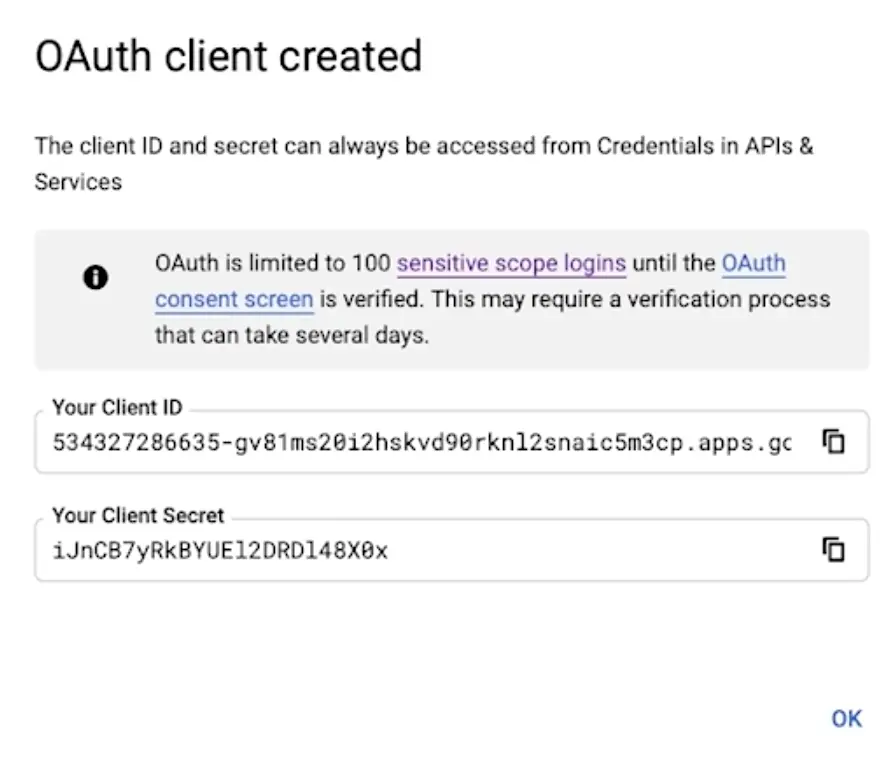
Copy these credentials and store them somewhere safe (or you can remember them 😭) we will need them in few moments.
Putting the Google Calendar credentials in Home Assistant
We have the needed Google credentials, now let’s put them in the Home Assistant configuration to enable Home Assistant calendar. Please do not share these credentials with anyone unless you really trust him.
Open you configuration.yaml file with your favourite editor. Mine is the “File editor” available in Home Assistant Add-on store. Then copy and paste the following:
# Google calendar configuration.yaml entry
google:
  client_id: !secret google_client_id_calendar
  client_secret: !secret google_client_secret_calendar
After that open your secrets.yaml file and copy and paste the following, but don’t forget to change the Client ID and Client Secret with yours:
# Learn more at https://home-assistant.io/docs/configuration/secrets/
google_client_id_calendar: PASTE_YOUR_CLIENT_ID_HERE
google_client_secret_calendar: PASTE_YOUR_CLIENT_SECRET_HERE
When you are ready, go to Configuration -> Server Controls in Home Assistant. Check your configuration and if it’s all OK – hit the “RESTART” button under Server Management section that can be found on the same page.
Enable the Home Assistant Calendar menu
After the Home Assistant restart you will have a new authorisation notification and few steps that you have to execute to enable the Home Assistant calendar menu.
Don’t worry I will now show you how to do it.
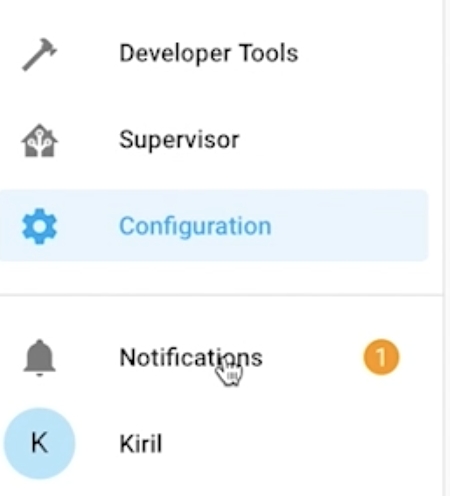
Click on the “Notifications” button in the lower left corner.
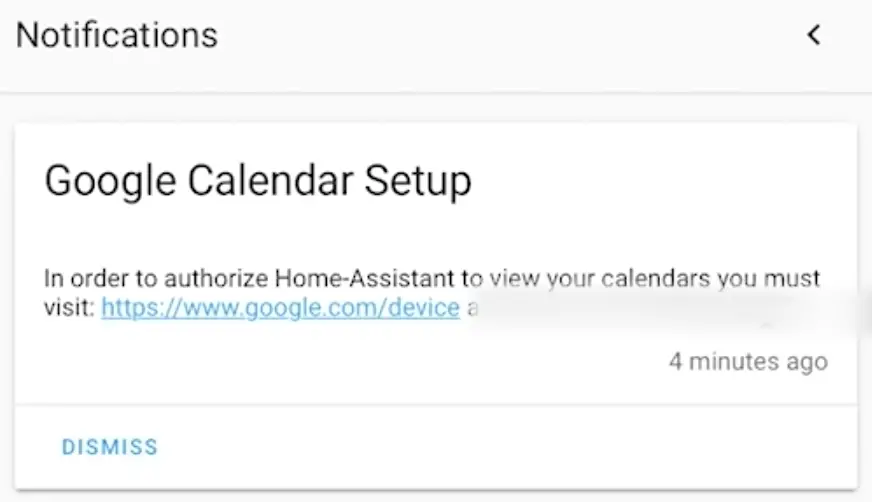
And you will see something similar. Copy the code that is Blurred on my picture and click on the link next to it.
Paste the code in the screen that you will see when you open the link and click “Next” button. Sign in with your Google account.
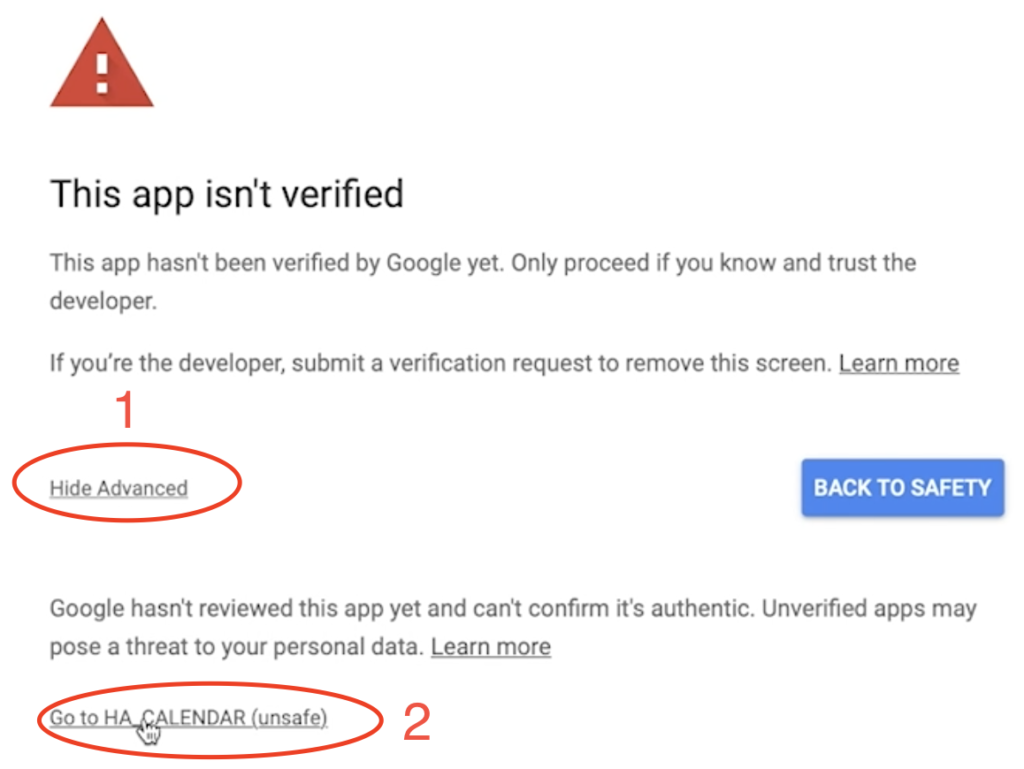
Don’t worry if you see similar warning! It’s quite OK just click on “show advanced” and then on “Go to YOUR_APP_NAME” buttons
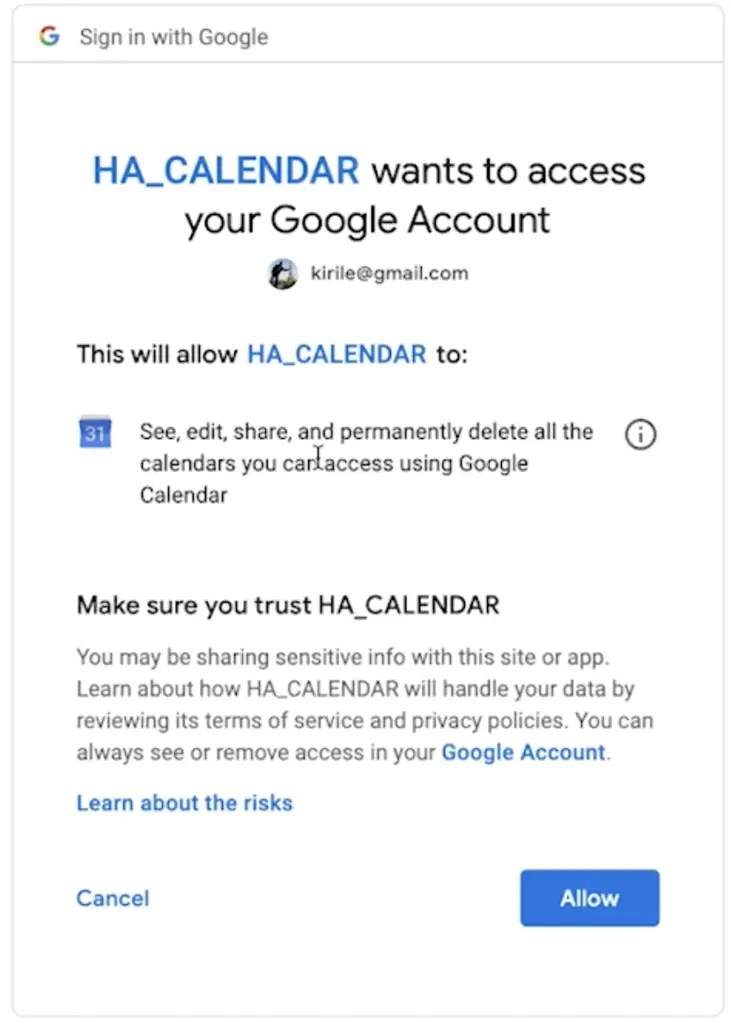
Finally, click on the big blue “Allow” button.
If you get an Error 403: access_denied here there is a quick fix thanks to Jim who said this in the comments section bellow.
Just navigate to the Oauth consent screen settings, scroll to the Publishing Status section and make sure it is set to In production.
Thanks Jim! Now let’s continue with our Home Assistant Calendar setup.
You should see a “Success” message when you do that and that means that you now have Google Calendar in you Home Assistant calendar.
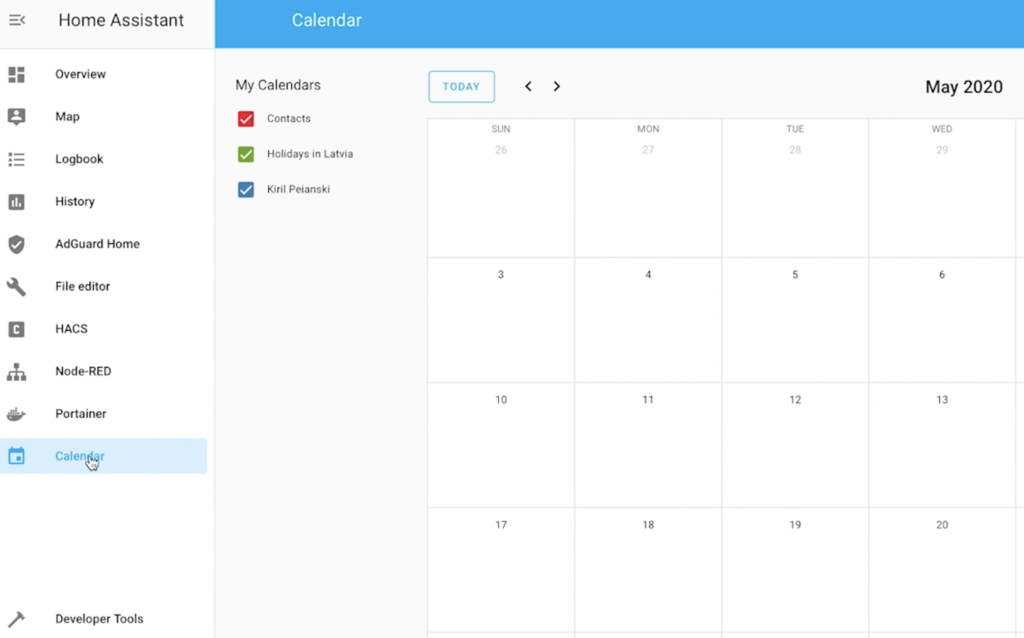
Congratulations! Now when there is an Event in Google Calendar you will see it in your Home Assistant calendar as well.
Check your calendar for a free 10 seconds slot!
Hey, can you please check your calendar and if you have a free slot of 10 seconds – use it to subscribe for my newsletter by clicking on the subscribe button below.
[sibwp_form id=2]
Thank you! Now let’s continue…
Creating a Home Assistant automation that will be activated when an event in Google Calendar starts
We have Google calendar integrated in Home Assistant and also the Home Assistant calendar menu is now visible. Let’s make a Home Assistant automation that will be activated when an event in Google calendar starts.
Open your automations.yaml file in your favourite text editor and copy and paste the following lines:
#put this in automations.yaml
# Send Telegram when google calendar event start
- id: '435256'
  alias: send Telegram when google calendar event start
  trigger:
    platform: state
    entity_id: calendar.YOUR_ID_FOUND_IN_GOOGLE_CALENDARS.YAML_FILE
    to: 'on'
  action:
  - data:
      message: "Google Calendar event started! Maybe a new cool website article is posted, not like Kiril's articles..."
    service: notify.telegram
Don’t forget to replace the following text “YOUR_ID_FOUND_IN_GOOGLE_CALENDARS.YAML_FILE” with yours ID.
As the text says you can find the ID in the auto generated file named google_calendars.yaml. You will have such file auto generated when you integrate Google Calendar and Home Assistant calendar.
This automation will be triggered when an event in Google calendar starts and it will send a Telegram message with the text entered in the message: field.
If you want to enable Telegram notifications in your Home Assistant you can follow my tutorial about it.
Of course you can change the action part in the automation to suit your needs.
To test this automation just create an event in Google calendar, you event should become visible in Home Assistant calendar as well and when the event start – you should receive a Telegram notification.
Question for You!
Are you using any digital calendar? If yes which one exactly? Let me know in the comments on the b
Automatically create a Google calendar event when something happens in Home Assistant
Let’s try the opposite automation now – when something happen in Home Assistant to automatically create a Google calendar event.
Open again your automations.yaml file and past the following lines inside it:
#put this in automations.yaml
# Create a Google calendar event when kitchen lights are turned on
- id: 'l34f43'
  alias: create an google calendar event when kitchen lights are turned on
  trigger:
    - platform: state
      entity_id: light.kitchen_lights
      to: 'on'
  action:
    - service: google.add_event
      data:
        calendar_id: YOUR_GOOGLE_MAIL
        summary: 'test'
        start_date_time: 2020-05-24 09:40:00
        end_date_time: 2020-05-24 10:40:00
Don’t forget to change the “YOUR_GOOGLE_MAIL” text with your Calendar ID available in google_calendars.yaml file. Usually this is your Google mail/account that you used during the API credentials generation process.
The trigger for this automation is triggering the kitchen_lights entity in Home Assistant to “ON”. You can use whatever entity (Switch, light, binary sensor, etc.) you wish for the trigger.
The action is to call google.add_event service that will create an event in Google Calendar that will have for a Title the text entered in the summary and it will last from start_date_time till end_date_time.
Unfortunately I didn’t manage to make the date dynamic, so the event start date to be the time when the Kitchen Lights is actually turned on.
I tried these templates as start_date_time, but they didn’t worked.
 # not working       start_date_time: {{ now().timestamp() | timestamp_custom("%Y-%m-%d %H:%M:%S", true) }}
 # not working       start_date_time: "{{ now().strftime('%Y-%m-%d %H:%M:%S') }}"
 # not working       start_date_time: "{{ as_timestamp(now())|timestamp_custom('%Y-%m-%d %H:%M:%S') }}"
If you know how to make them work – let me know in the comments below the article. I will update the article and I will give all the credits to you for that. Only if you allow that of course 😁
Dynamic Dates UPDATE!
The issue with the static and dynamic is now solved thanks to the DarkFoxDK that commented below and the Clifford W. Hansen that commented under my video in YouTube. So the solution is simple but elegant and works perfectly.
You just have to add data_template, so the full automation with dynamic start and end date will look like this:
#put this in automations.yaml
- id: 'l34f43'
  alias: create a google calendar event when kitchen lights turned on
  trigger:
    - platform: state
      entity_id: light.kitchen_lights
      to: 'on'
  action:
    - service: google.add_event
      data:
        calendar_id: YOUR_GOOGLE_MAIL
        summary: 'test'
 #       For fixed dates uncomment and use these options:
 #       start_date_time: 2020-05-25 12:50:00
 #       end_date_time: 2020-05-25 13:50:00
      data_template:
        # start_date_time will be time of the trigger event
        start_date_time: "{{ now().timestamp() | timestamp_custom('%Y-%m-%d %H:%M:%S', true)}}"
        # end_date_time will be +300 seconds later
        end_date_time: "{{ (now().timestamp() + 300) | timestamp_custom('%Y-%m-%d %H:%M:%S', true)}}"
Thank you DarkFoxDK and Clifford W. Hansen for the comments and help with this.
Support my Work!
Any sort of engagement on this channel does really help out a lot with the Google algorithm, so make sure you hit the subscribe, and share this article in your favourite social media.
Also feel free to add me on Twitter by searching for @KPeyanski.
You can find me on my Discord server as well.
I really hope that you find this information useful and you now know how to add Google calendar in Home Assistant and how to create automations after that.
Thank you for watching, stay safe and see you next time.
For templates to work in service calls you need to use “data_template” instead of “data”,
Like so:
– service: google.add_event
data_template:
start_date_time: “{{ now().strftime(‘%Y-%m-%d %H:%M:%S’) }}”
Thanks DarkFoxDK! The data_template solve the mystery, but instead of strftime I used start_date_time: “{{ now().timestamp() | timestamp_custom(‘%Y-%m-%d %H:%M:%S’, true)}}” I will give you and one other community member in YouTube named Clifford credits for the solution, because you figured it out almost simultaneously. Thanks one more time.
Good day! I could have sworn I’ve visited this blog
before but after browsing through some of the posts I realized it’s
new to me. Anyways, I’m certainly delighted I came across it and I’ll be bookmarking it and
checking back regularly!
I absolutely love your website.. Very nice colors &
theme. Did you build this site yourself? Please reply
back as I’m hoping to create my own blog and want to know where you got this
from or just what the theme is named. Thank you!
Reply one more time to this comment and I will tell you. I cannot understand which comment is from humans and which from robots anymore.
I could not resist commenting. Very well
written!
Good day, how to display several messages at once? If there is an all-day event, such as a birthday. Shows only 1 event, the rest are visible only in the GUI, but do not work in automation.
dor me the google_calendars.yaml & .google.token was never generated, I cant find the token in the config file, even hidden files…. i tried the process over… but need to delete the token :(.
any idea how to fix this? it would be really help full
PS. your videos are amazing
Thank you so much for posting this – worked!
Great to hear that. Check my other Home Assistant articles as well, they are all working 😉
I was getting the below error when trying to authorise home assistant with the code from the notification:
Error 403: access_denied
The developer hasn’t given you access to this app. It’s currently being tested and it hasn’t been verified by Google. If you think you should have access, contact the developer ([email protected]).
I googled this and to fix it I had to navigate to the Oauth consent screen settings, scroll to the Publishing Status section and make sure it is set to In production
Could you maybe edit the article to include the publish step?
Thanks for the guide 🙂
Thanks for the tips! I will update the article with your updates and I will give you credits there. Thank you one more time and stay safe.
Great tutorial, worked like a charm.. thanks!
Question : when I add a new calender to Google, this new calendar is not automatically shown in HA. Also not after reboot. How can I tell HA to update the calendar list?
Thanks very much!
Hi DenW, unfortunately I’m not sure about that.
Ok.. no worries.. thank you!
Hi all, I have managed to get to the point of authorising google with HA. I have got to the point of Google allowing calendar but then don’t receive confirmation in HA. Any help would be great.
thanks
That is strange. Do you have any firewalls or ad blockers enabled?
Very helpful article! Does anyone know if there is a way to create a new calendar event from the Lovelace calendar card? I was hoping to be able to click on the date and add an event.
Glad that you like the article, but I think that is not possible or at least I don’t know how to do it.