
The latest Home Assistant update includes an exciting new food-related integration: Mealie. Mealie is a free project where you can store all your recipes and cookbooks in one place. You can plan meals easily using its simple and intuitive web interface.
With the Home Assistant Mealie integration, you can sync all your Mealie calendars and events, enabling various notifications, scripts, and automations. Here’s what I’ve done with Mealie and Home Assistant, and I’ll show you how I did it.
Table of Contents
Upcoming Webinar and Free Smart Home Glossary
Before we dive in, don’t miss my upcoming Home Assistant webinar. We’ll discuss different Home Assistant installation types, their pros and cons, and a quick way to get started on a Windows PC.
The free registration link is here – https://automatelike.pro/webinar
What You Can Do with Mealie and Home Assistant
Display Today’s Meal
In my test Home Assistant setup, I have two cards related to the Mealie integration. The first card shows today’s meal. When I click on it, I see the name and some history, but it’s not actionable.

Daily Meal Plan Notification
The second card is a button linked to a script. When I click it, I receive a persistent notification that includes my daily food plan: breakfast, lunch, dinner, and a side meal. This notification can also be sent to my phone or included in other Home Assistant automations.
Feeling Tired of Reading?
Watch the full tutorial on YouTube!
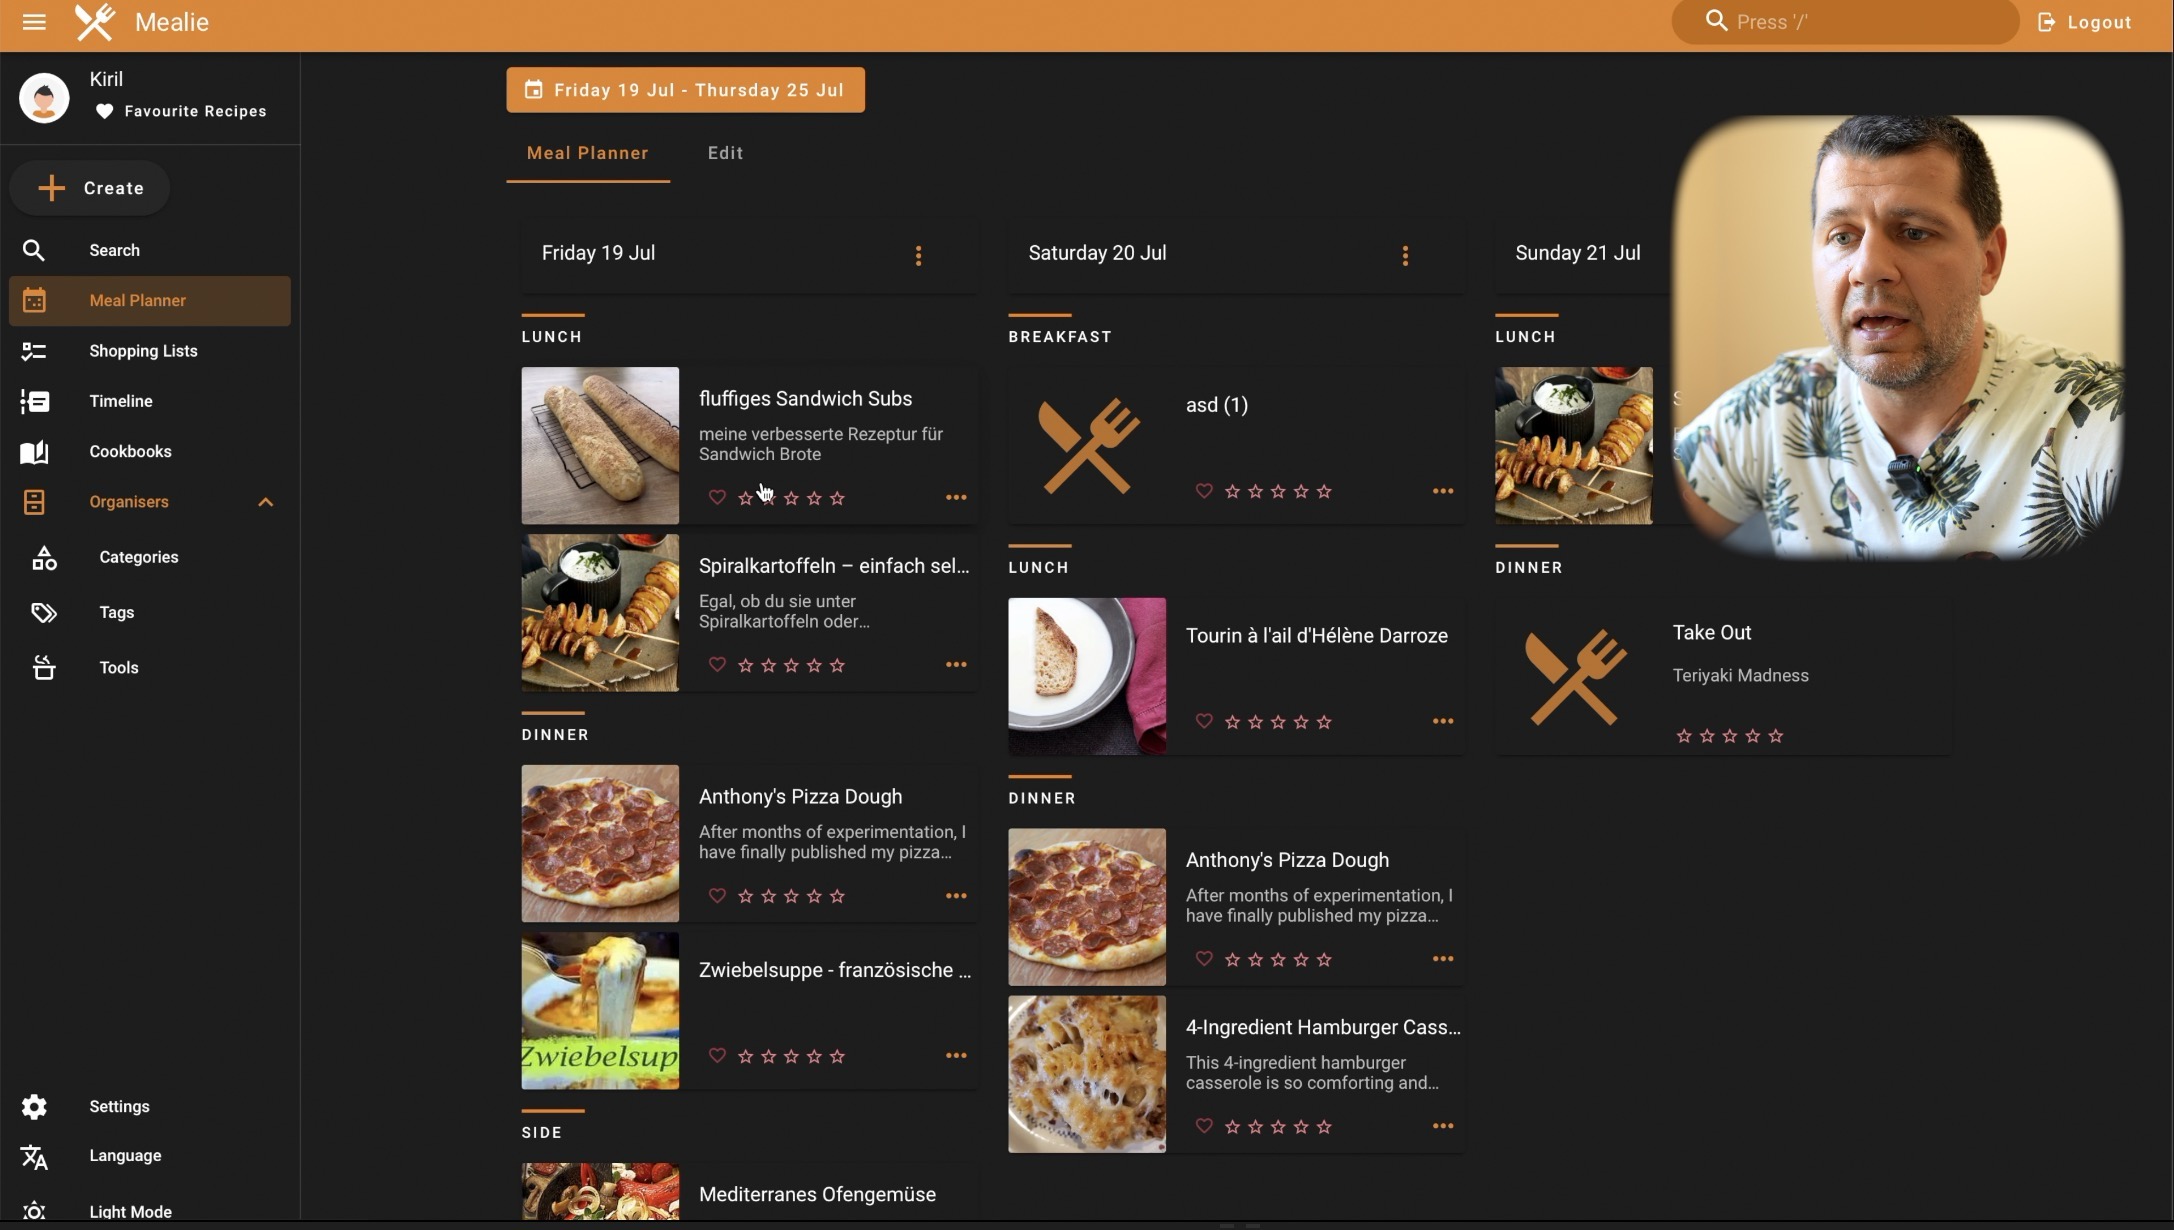
Setting Up Mealie
Mealie is an interesting project that I installed on my laptop using Docker. Below are some of the things that Mealie can do.
Dashboard and Features
- Recipe Management: Add recipes manually or import them from any URL. You can also plan meals and create shopping lists.
- Cookbooks: Create and manage cookbooks.
- Import Data: Import recipes and cookbooks from other sources.
Installing Mealie
- Download Docker Client: Available for macOS, Windows, and Linux.
- Create docker-compose.yaml file: I used the content from the official Mealie documentation and I only changed the version to latest and BASE_URL.
services:
  mealie:
    image: ghcr.io/mealie-recipes/mealie:latest #
    container_name: mealie
    restart: always
    ports:
        - "9925:9000" #
    deploy:
      resources:
        limits:
          memory: 1000M #
    volumes:
      - mealie-data:/app/data/
    environment:
      # Set Backend ENV Variables Here
      ALLOW_SIGNUP: true
      PUID: 1000
      PGID: 1000
      TZ: America/Anchorage
      MAX_WORKERS: 1
      WEB_CONCURRENCY: 1
      BASE_URL: http://127.0.0.1

volumes:
  mealie-data:
- Run Docker Command: Execute
docker compose up -dto download the Mealie image and start it. - Open Mealie: Access Mealie web interface and complete the setup wizard.
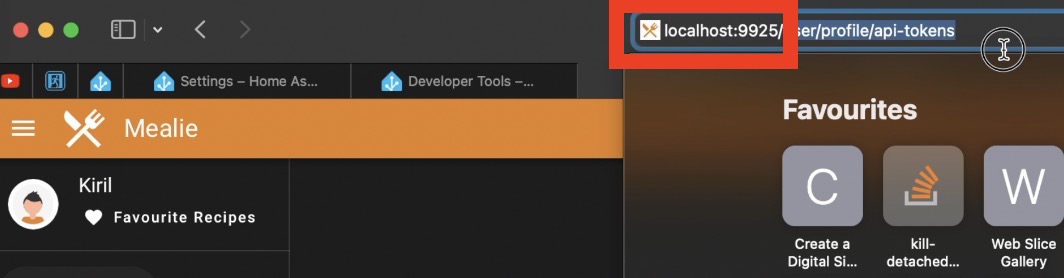
I imported recipes from the https://demo.mealie.io website to populate some data into my Mealie instance. I created a new backup there, then I downloaded that file and imported it in my Mealie. Note, that if you create an API key and import a backup, you’ll need to recreate the API keys.
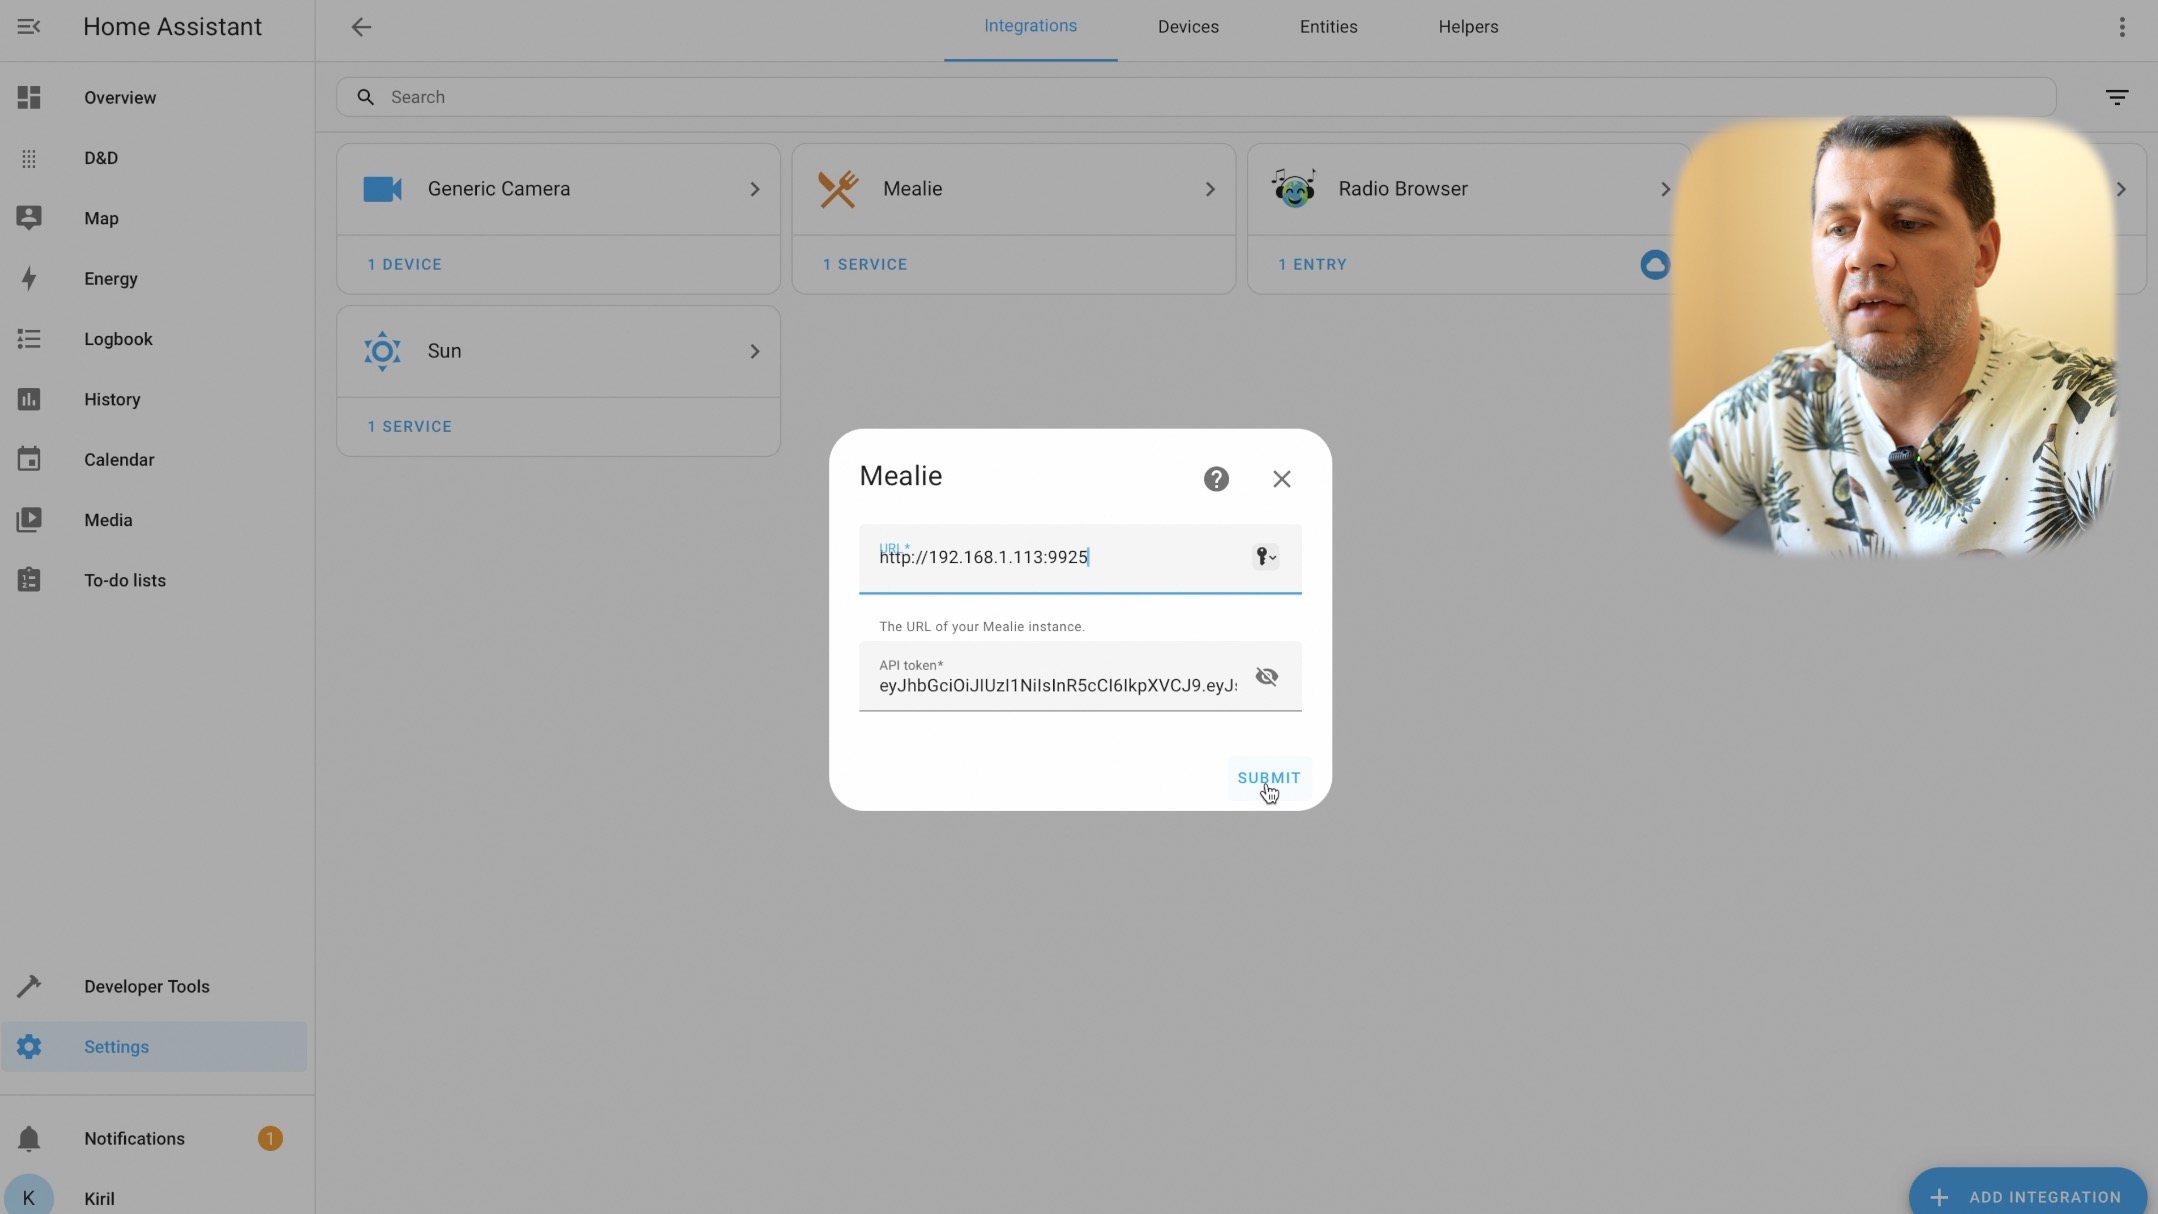
Adding Mealie to Home Assistant
- Get API Key: Generate and copy the API key from your Mealie user profile.
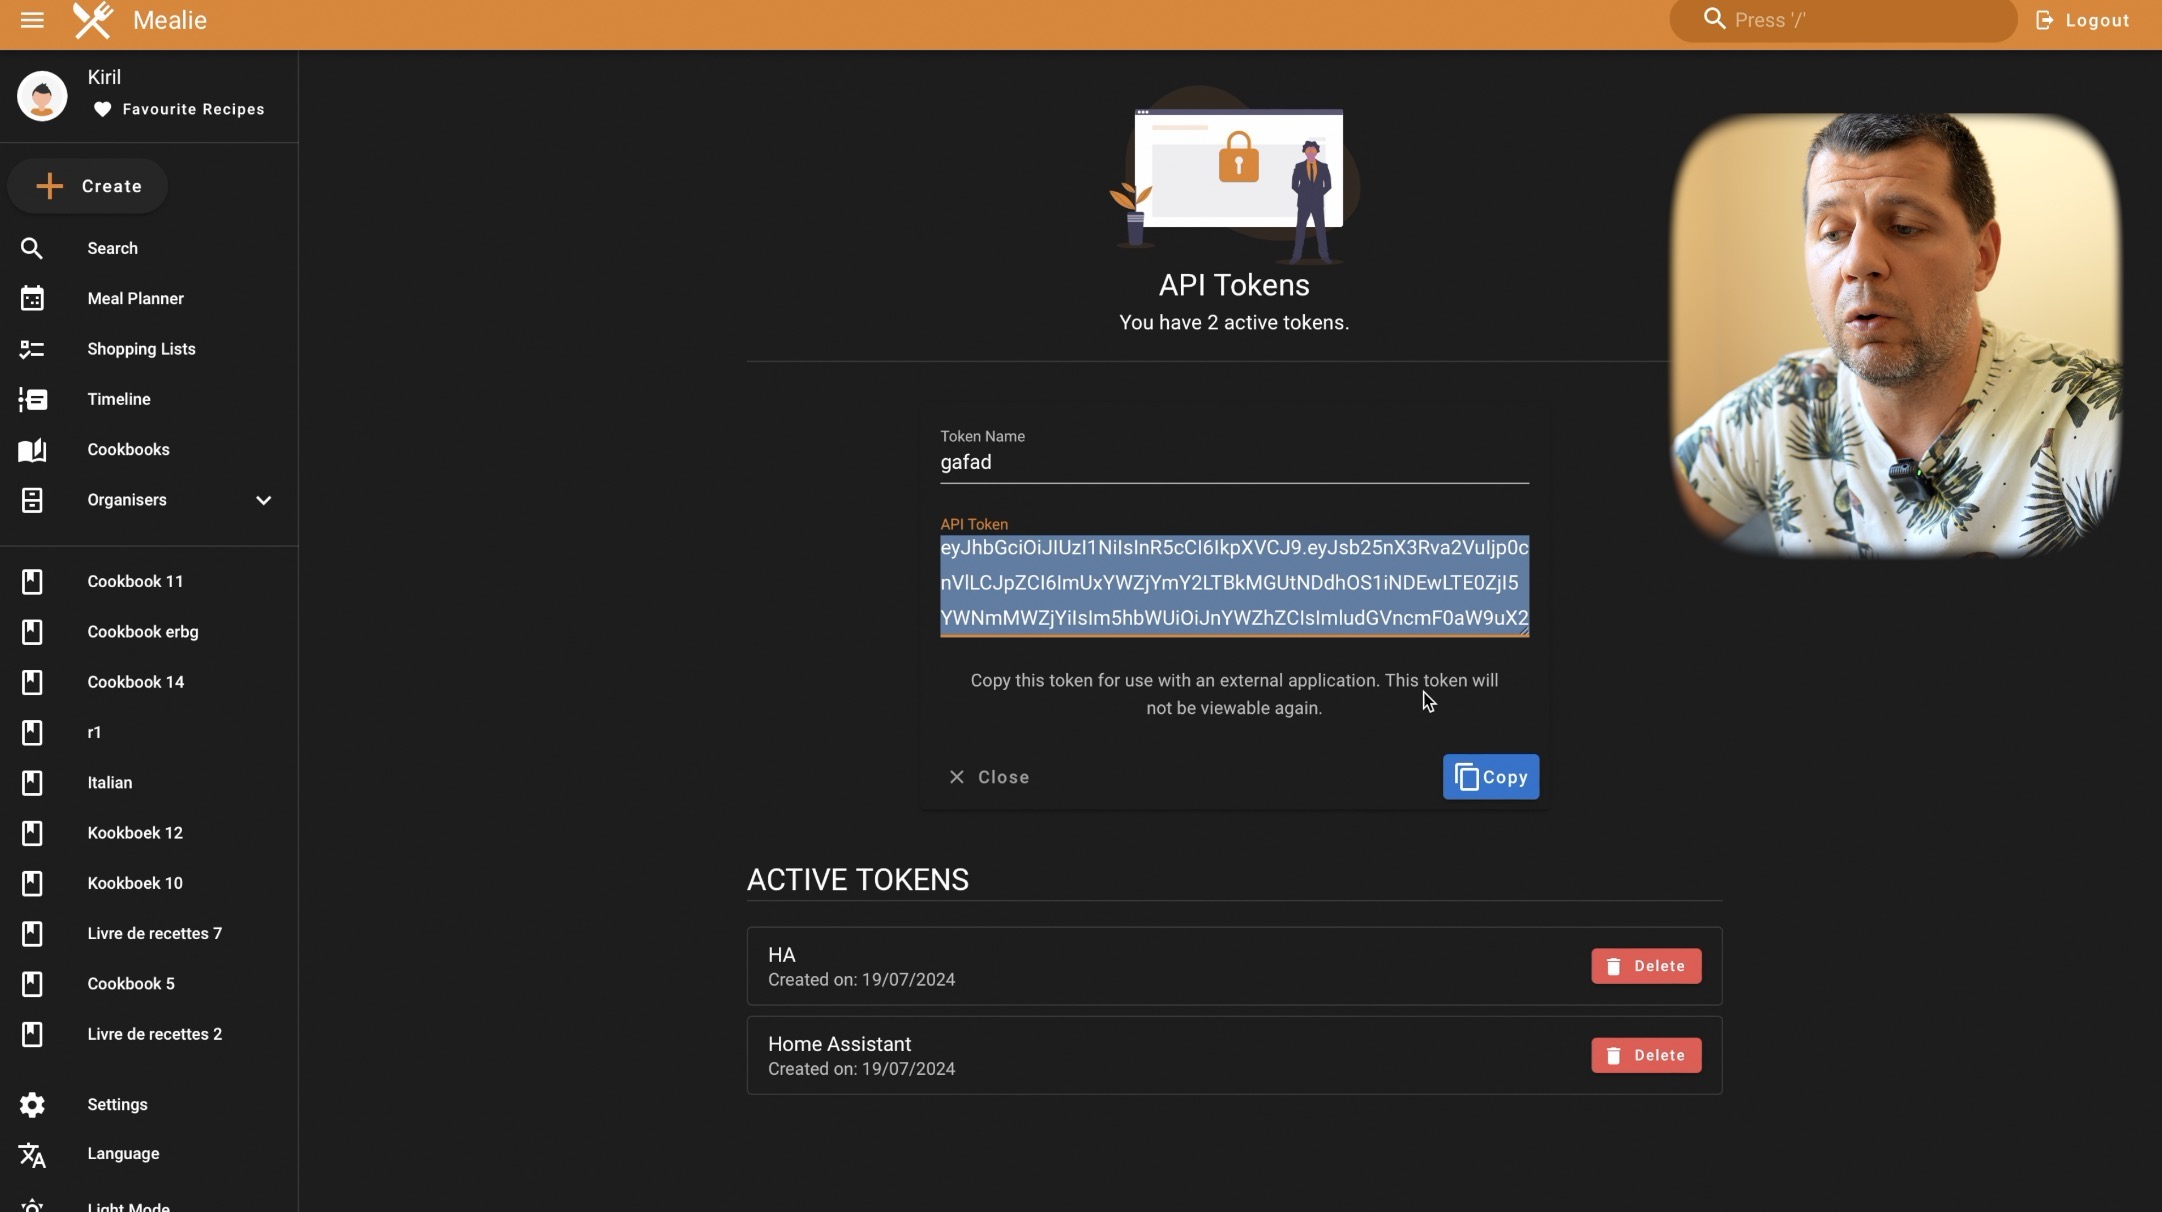
- Add Integration: In Home Assistant, add the Mealie integration, provide the URL and API token.
Creating Home Assistant Scripts
Mealie Calendar Script Example
- Get Calendar Events: Fetch events from the Mealie calendars (breakfast, lunch, dinner, side) for the next 24 hours.
- Create Notification: Generate a notification listing all the events.
alias: Mealie Calendar
sequence:
  - service: calendar.get_events
    target:
      entity_id:
        - calendar.mealie_breakfast
        - calendar.mealie_lunch
        - calendar.mealie_dinner
        - calendar.mealie_side
    data:
      duration:
        hours: 24
    response_variable: agenda
service: notify.persistent_notification
data:
  title: Daily agenda for {{ now().date() }}
  message: >-
    Your Breakfast calendar for today:
    {% for event in agenda["calendar.mealie_breakfast"]["events"] %}
    {{ event.start}}: {{ event.summary }}<br>
    {% endfor %}
    Your Lunch calendar for today:
    {% for event in agenda["calendar.mealie_lunch"]["events"] %}
    {{ event.start}}: {{ event.summary }}<br>
    {% endfor %}
    Your Dinner calendar for today:
    {% for event in agenda["calendar.mealie_dinner"]["events"] %}
    {{ event.start}}: {{ event.summary }}<br>
    {% endfor %}
    Your Side calendar for today:
    {% for event in agenda["calendar.mealie_side"]["events"] %}
    {{ event.start}}: {{ event.summary }}<br>
    {% endfor %}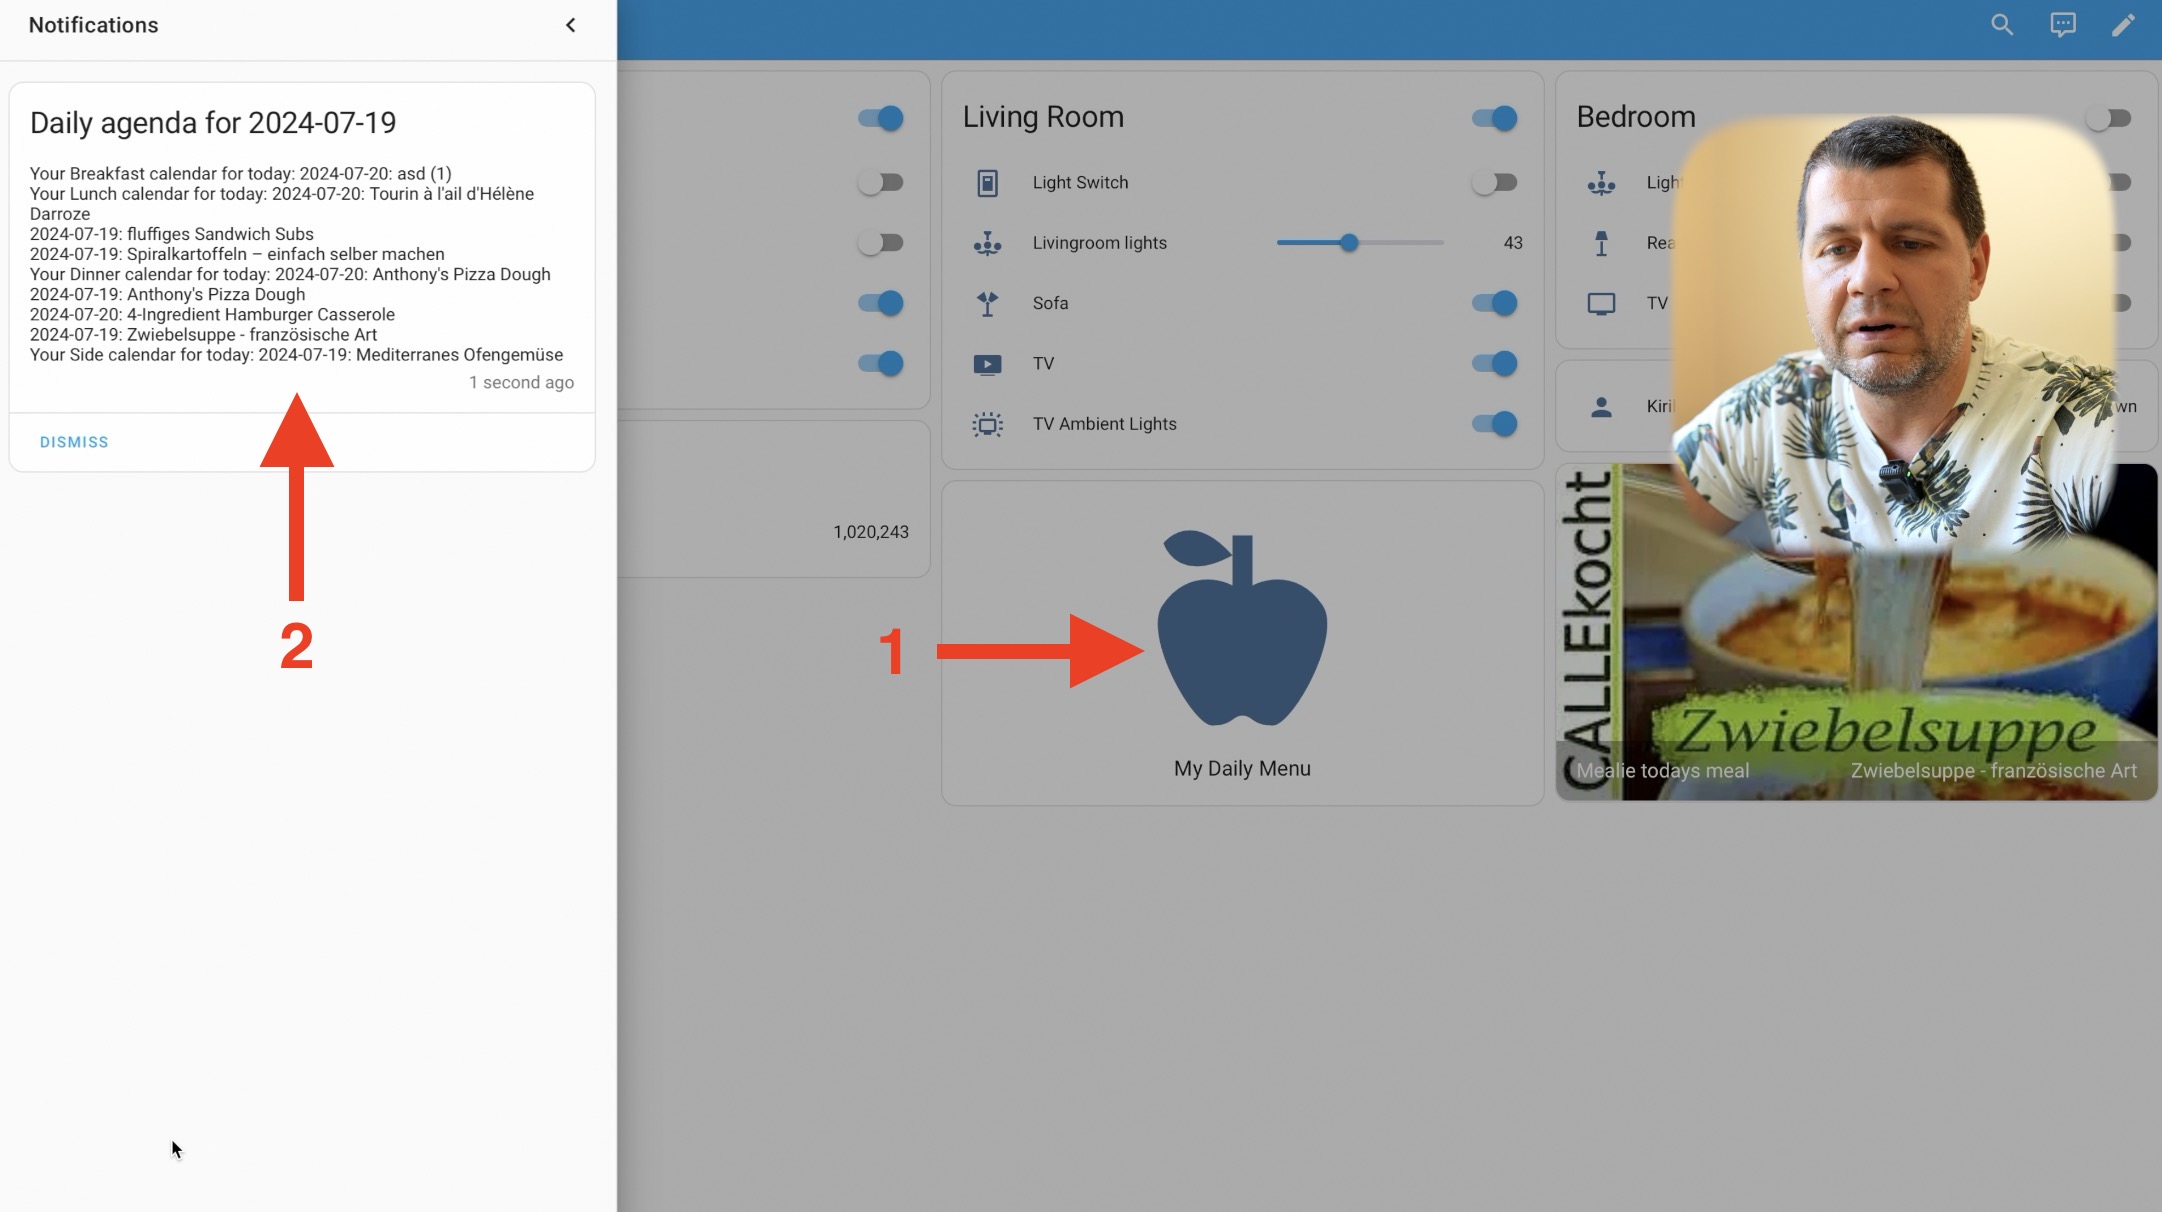
REST Sensors and Camera Entity
I created REST sensors and a generic camera entity to display today’s meal and its picture. Here’s how:
- Add REST Sensors: Modify the configuration.yaml file with your Mealie instance’s IP and port and API Token. Don’t forget to restart Home Assistant after adding these sensors.
- Create Camera Entity: Use a generic camera integration with the URL of your Mealie instance.
To create a Generic Camera I used the following instructions:
In Home Assistant’s
Integrationspage, create a newgeneric cameraentity.In the still image url field put in:
http://192.168.1.113:9925/api/media/recipes/{{states('sensor.mealie_todays_meal_id')}}/images/min-original.webpUnder the entity page for the new camera, rename it. e.g.
camera.mealie_todays_meal_image
The REST sensors below and the generic camera entity above are used in the Home Assistant dashboard to show meal information.
# configuration.yaml entry
sensor:
- platform: rest
  resource: "http://192.168.1.113:9925/api/groups/mealplans/today"
  method: GET
  name: Mealie todays meal
  headers:
    Authorization: Bearer YOUR_API_TOKEN
  value_template: "{{ value_json[0].recipe.name }}"
  force_update: true
  scan_interval: 30
- platform: rest
  resource: "http://192.168.1.113:9925/api/groups/mealplans/today"
  method: GET
  name: Mealie todays meal ID
  headers:
    Authorization: Bearer YOUR_API_TOKEN
  value_template: "{{ value_json[0].recipe.id }}"
  force_update: true
  scan_interval: 30
Conclusion
The Home Assistant Mealie integration opens up many possibilities for meal planning and automation. If you want to try this, share your plans for scripts and automations in the comments.
Thank you for reading, and I’ll see you in the next one. Bye!
If you liked this article, then subscribe for my newsletter and you can also Download my Smart Home Glossary for free, it is a PDF full of smart home wisdom.