
This step-by-step guide will show you exactly how to enable web search with Home Assistant and ChatGPT for the most natural smart home experience possible. Before we begin…
DOWNLOAD MY FREE SUMMARIZED PDF GUIDE HERE – Get a summarized, easy-to-follow version of this tutorial! Just enter your name and email, confirm via the email I’ll send you (this just verifies you’re human), and you’ll get instant access. Plus, you’ll receive my newsletter with the latest smart home tips (don’t worry, you can unsubscribe anytime with a single click).
Now, let’s dive into transforming how you interact with your smart home!
Table of Contents
Why Bother with Web Search using ChatGPT + Home Assistant
Imagine asking your home, “What’s happening in football today?” and getting the latest news read to you. That’s the power of combining ChatGPT’s intelligence with Home Assistant’s smart home capabilities. And yes football is just an example you can ask/search anything with voice, text or automations in Home Assistant.
Complete Step-by-Step Setup Guide
Step 1: Get Your OpenAI API Key
Before anything else, you’ll need an OpenAI API key:
- Visit the OpenAI Portal
- Log in or create a new account
- Set up billing with a valid credit card
- Consider setting usage limits to control costs (recommended!)
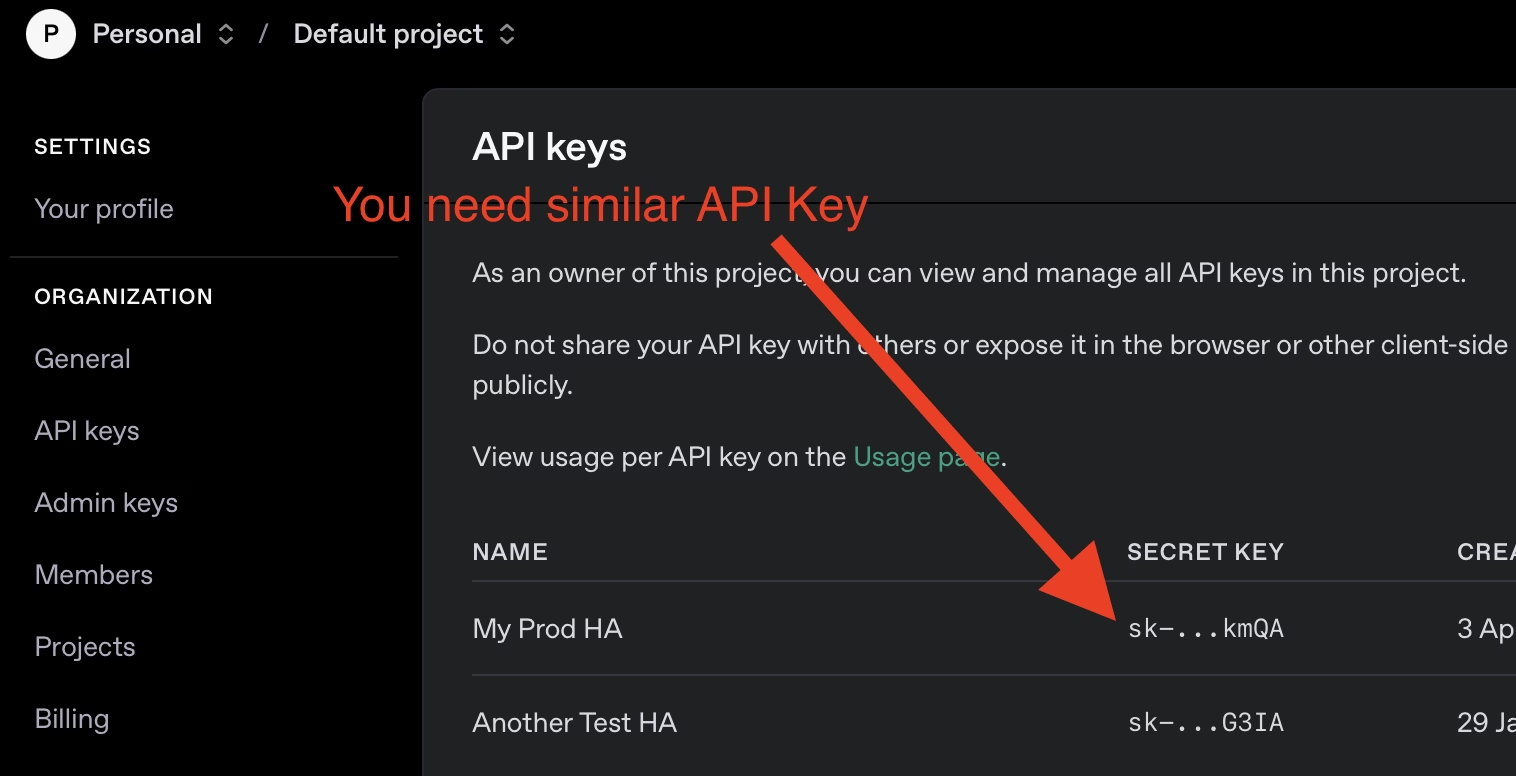
- Navigate to the API Keys page
- Create and copy your API key—you’ll need this later
Important Note: This is a paid service! Keep an eye on your usage in the OpenAI billing dashboard to avoid unexpected charges.
Tired of reading?
[Watch my detailed video walkthrough here instead!]
Step 2: Add OpenAI to Home Assistant
You have two ways to do this:
Easy Way:
Manual Way:
- Open your Home Assistant
- Go to Settings > Devices & Services
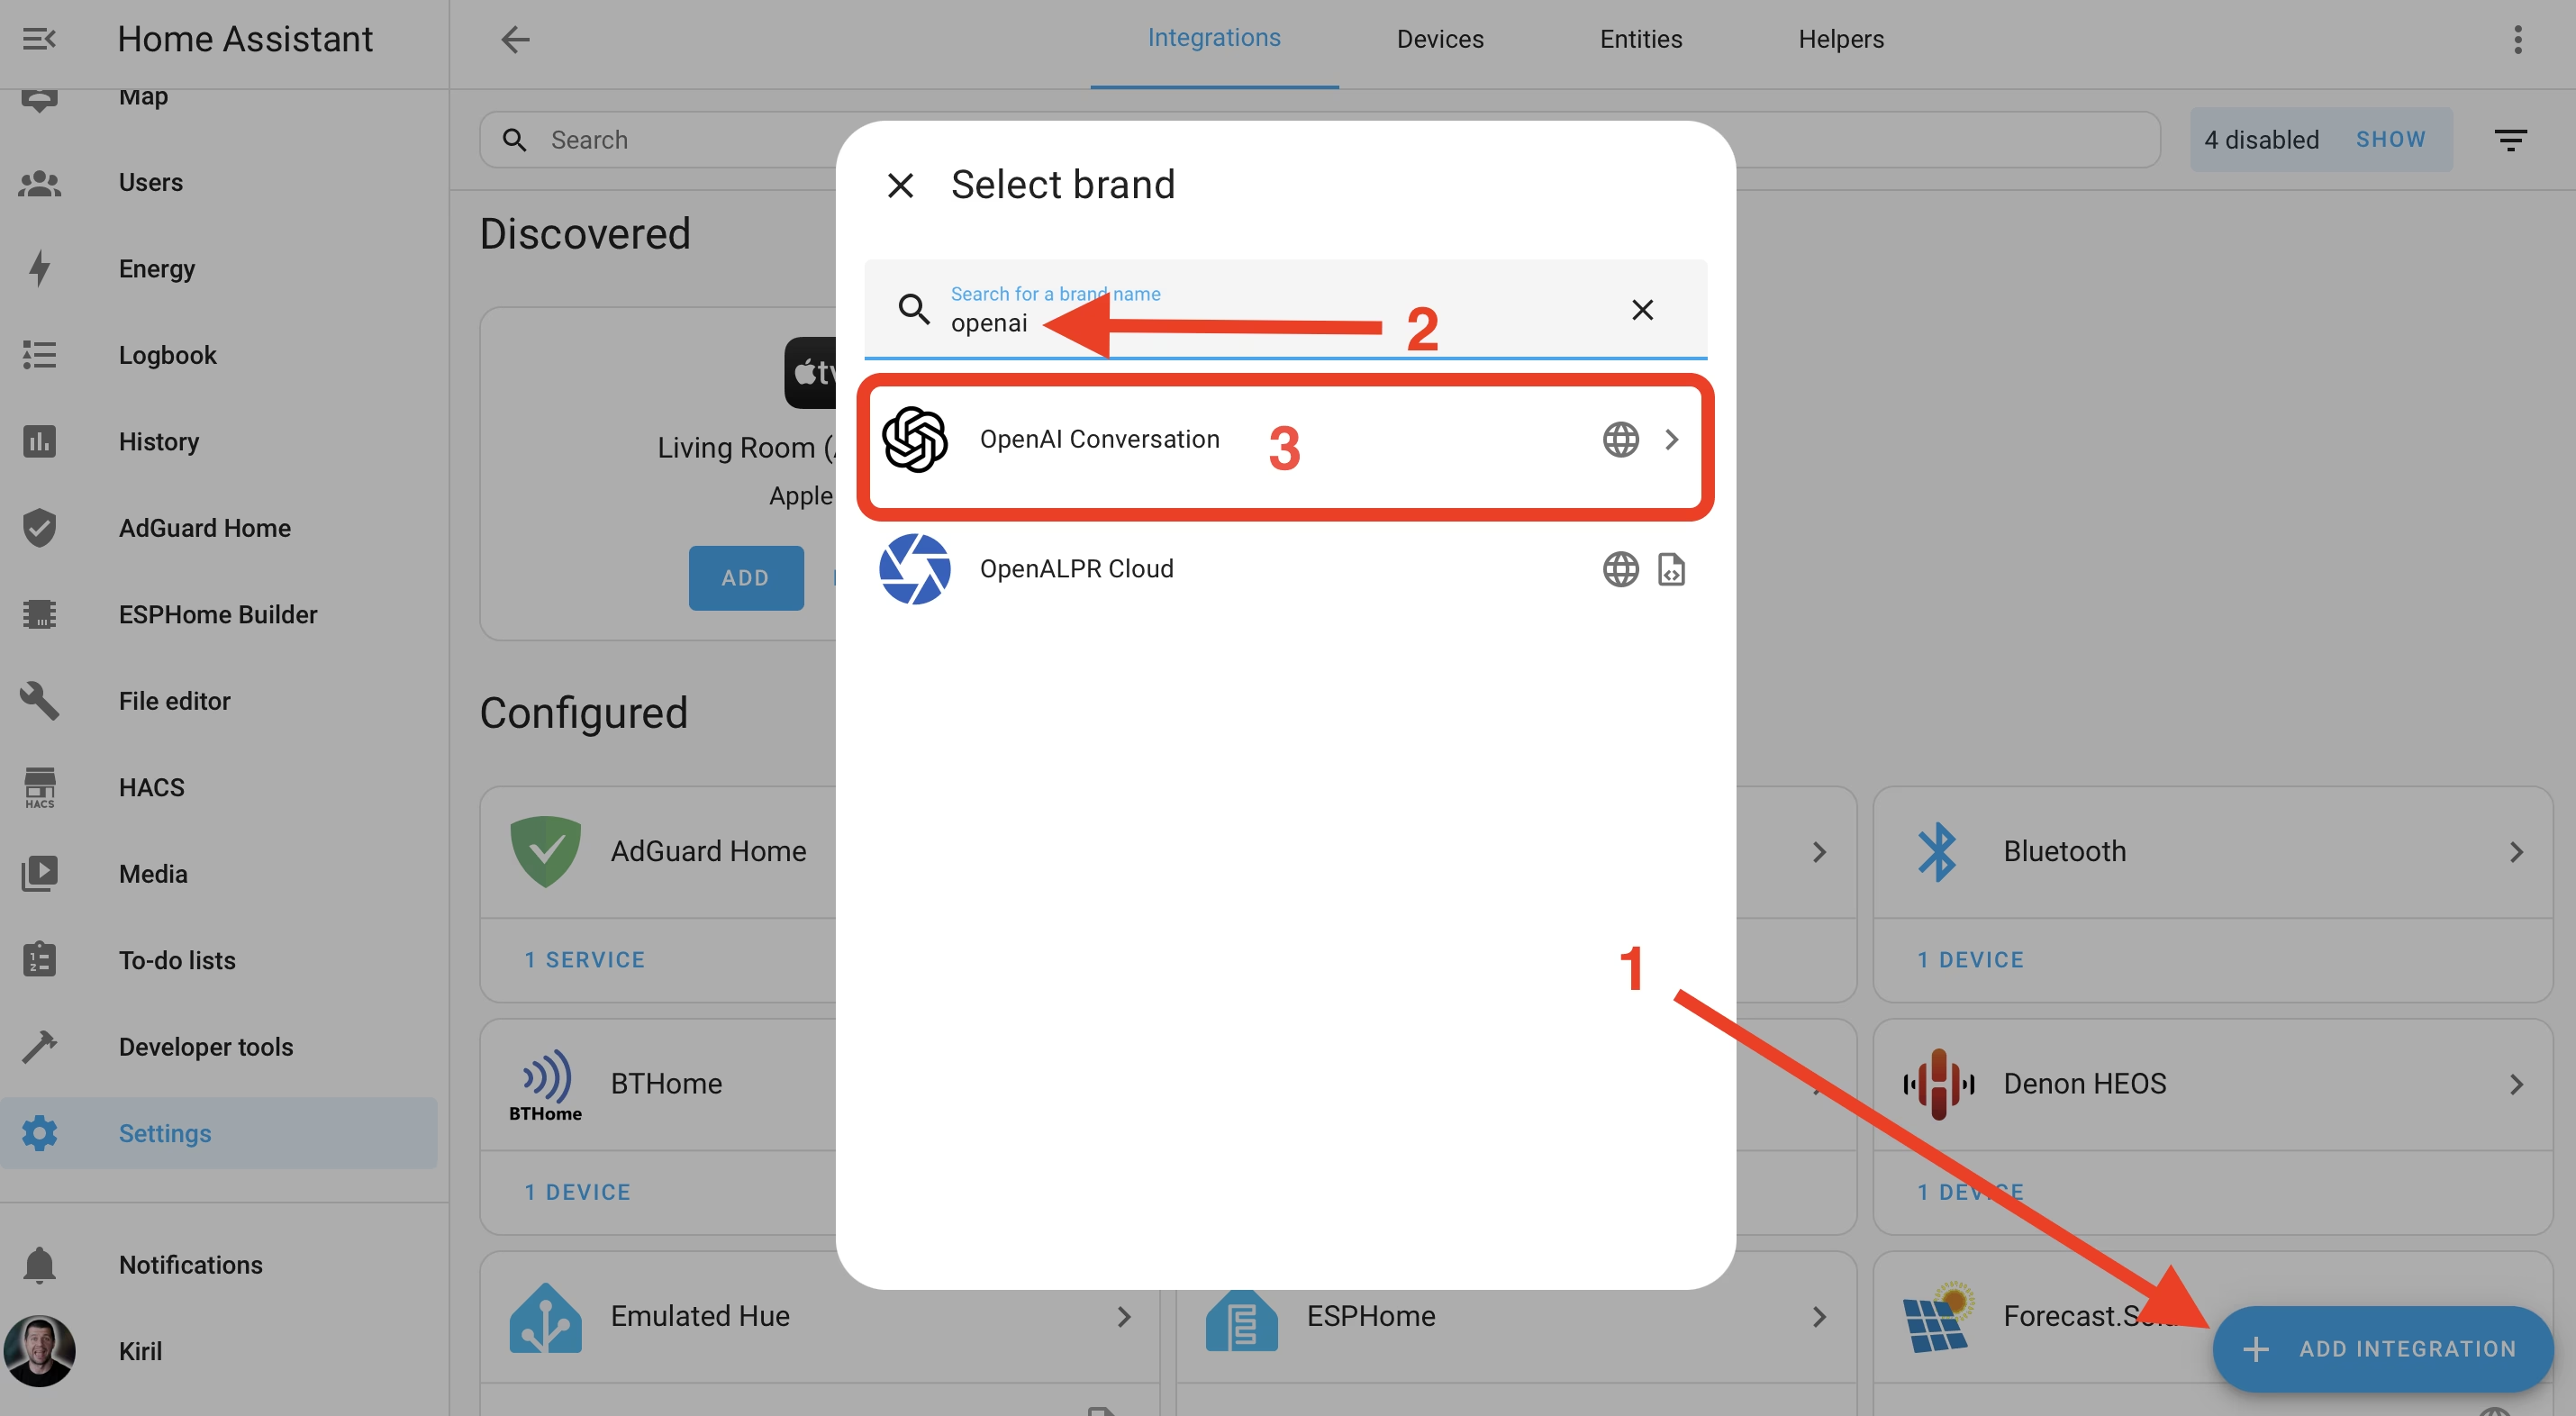
- Click “Add Integration” (in the bottom right)
- Search for and select “OpenAI Conversation“
- Paste your API Key from Step 1
- Follow the setup wizard prompts
Step 3: Configure OpenAI Options
Getting the settings right makes all the difference:
- Go to Settings > Devices & Services
- Find and click on the OpenAI Conversation integration
- Select “Configure“
- Choose between:
- “No control” (read-only mode)
- “Assist” (full control of your exposed devices)
Enable Web Search Capability:
During setup:
- Uncheck the recommended model settings
- Click Submit
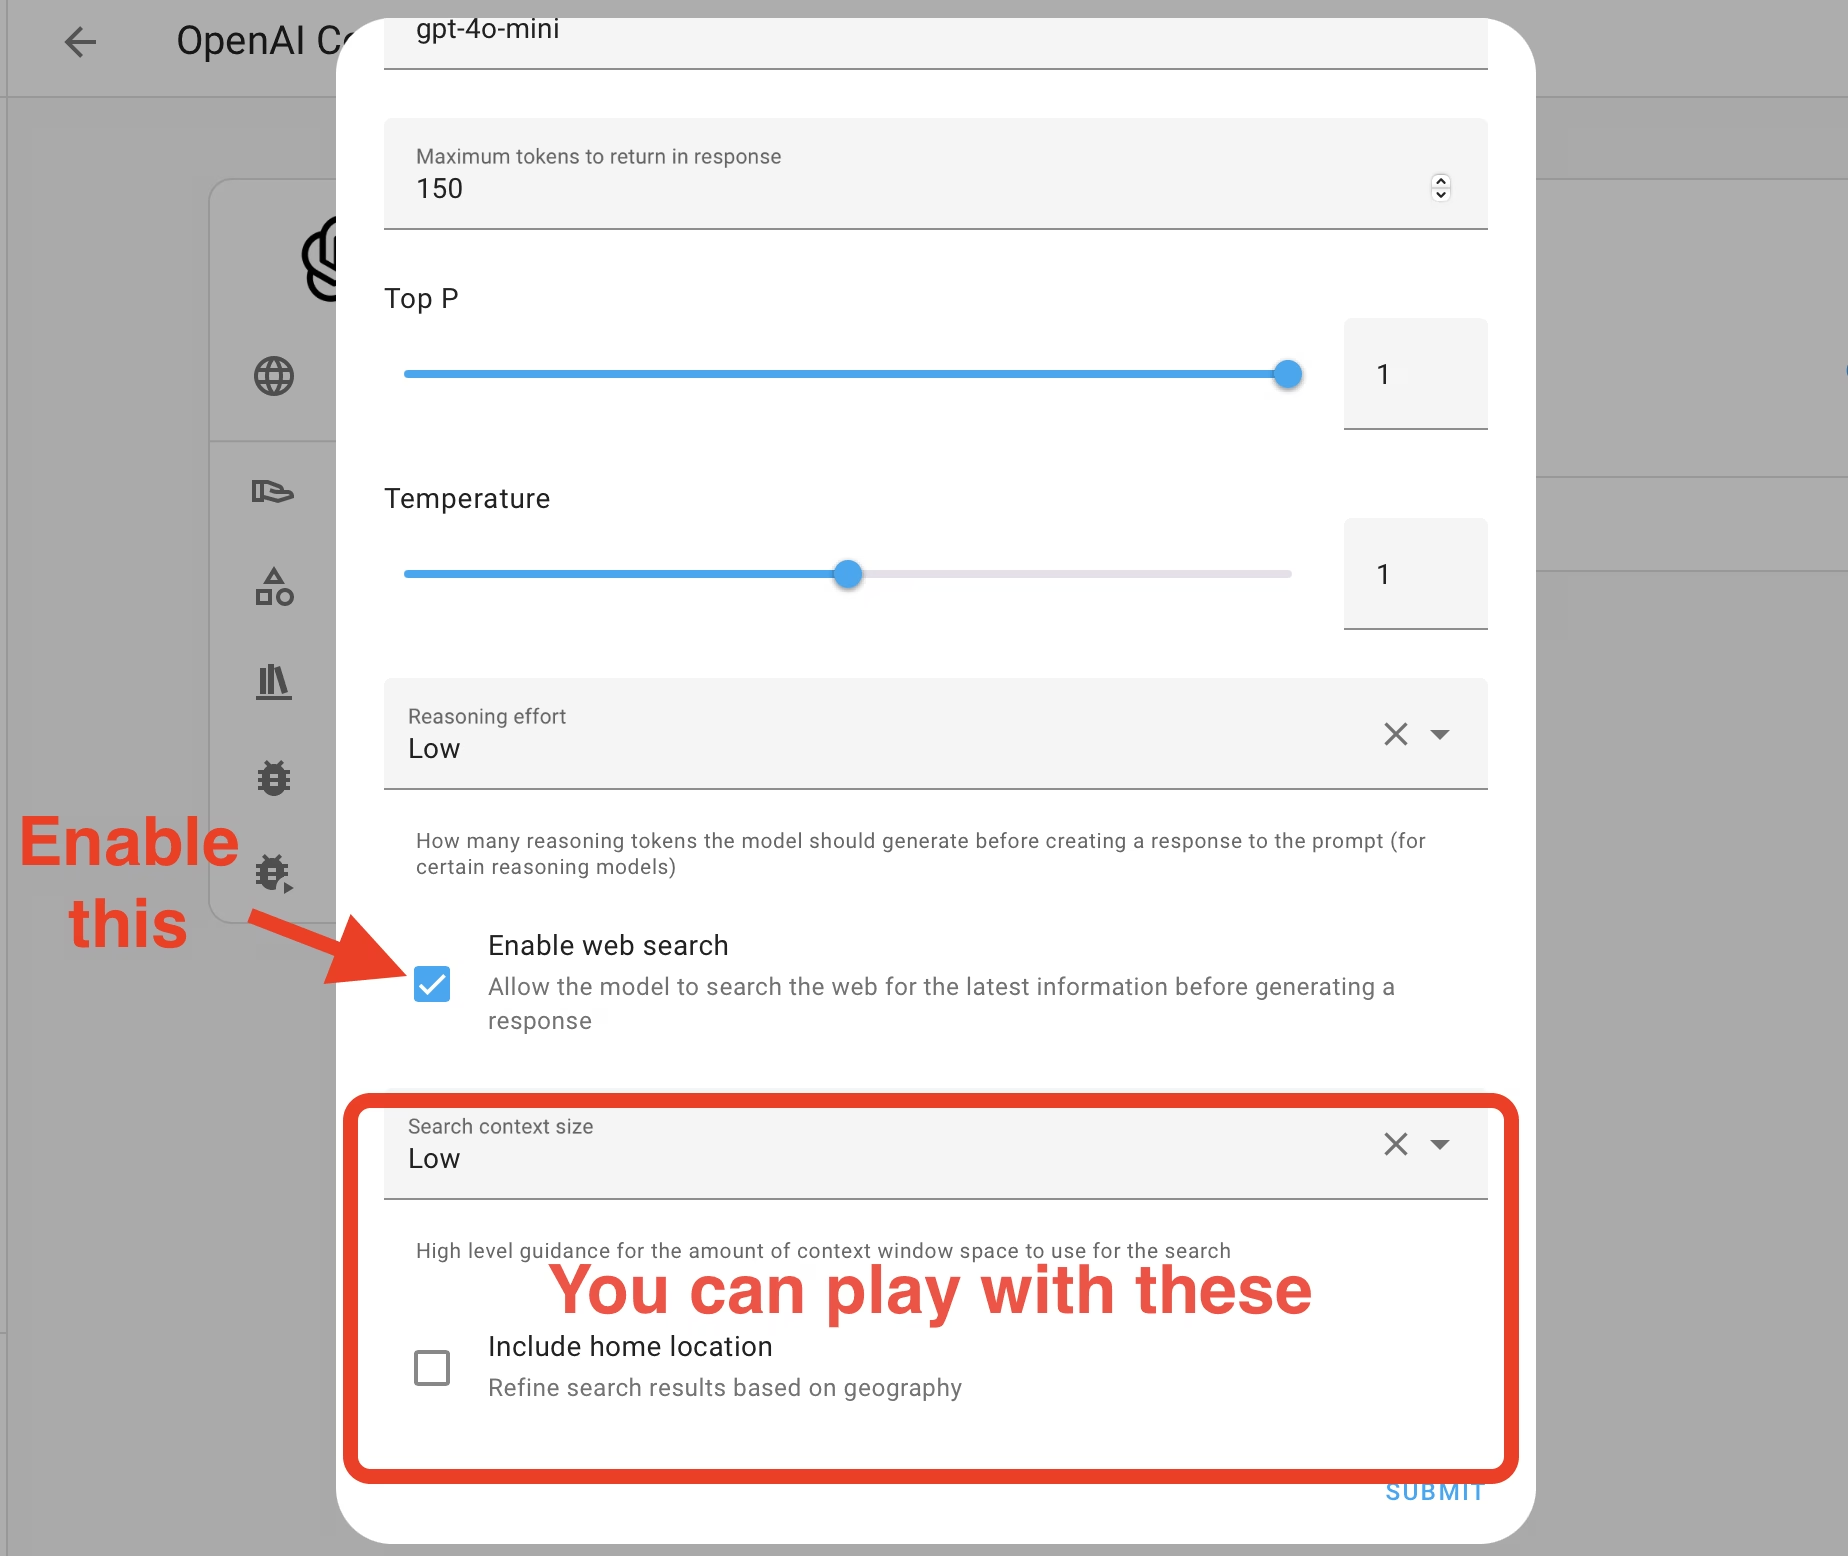
- Scroll down and enable “Web Search”
Note: Web search may not work with all ChatGPT models, so check the recommended ones in the settings.
You can also adjust:
- Search context size (affects both cost and speed)
- Whether to include your home location for more relevant results
Step 4: Set Up Your Voice Assistant
To speak or type to your home, you need to create an Assist pipeline:
Note for Home Assistant Cloud users: A voice assistant pipeline has likely been created for you already. However, you still need to create a new one specifically for ChatGPT. You can skip the add-ons section below and go straight to “Setup Your Voice Assistant.”
Install the Required Home Assistant Add-ons:
- Go to Home Assistant Add-on Store (while in HA press “c” on your keyboard and type “add-on store”)
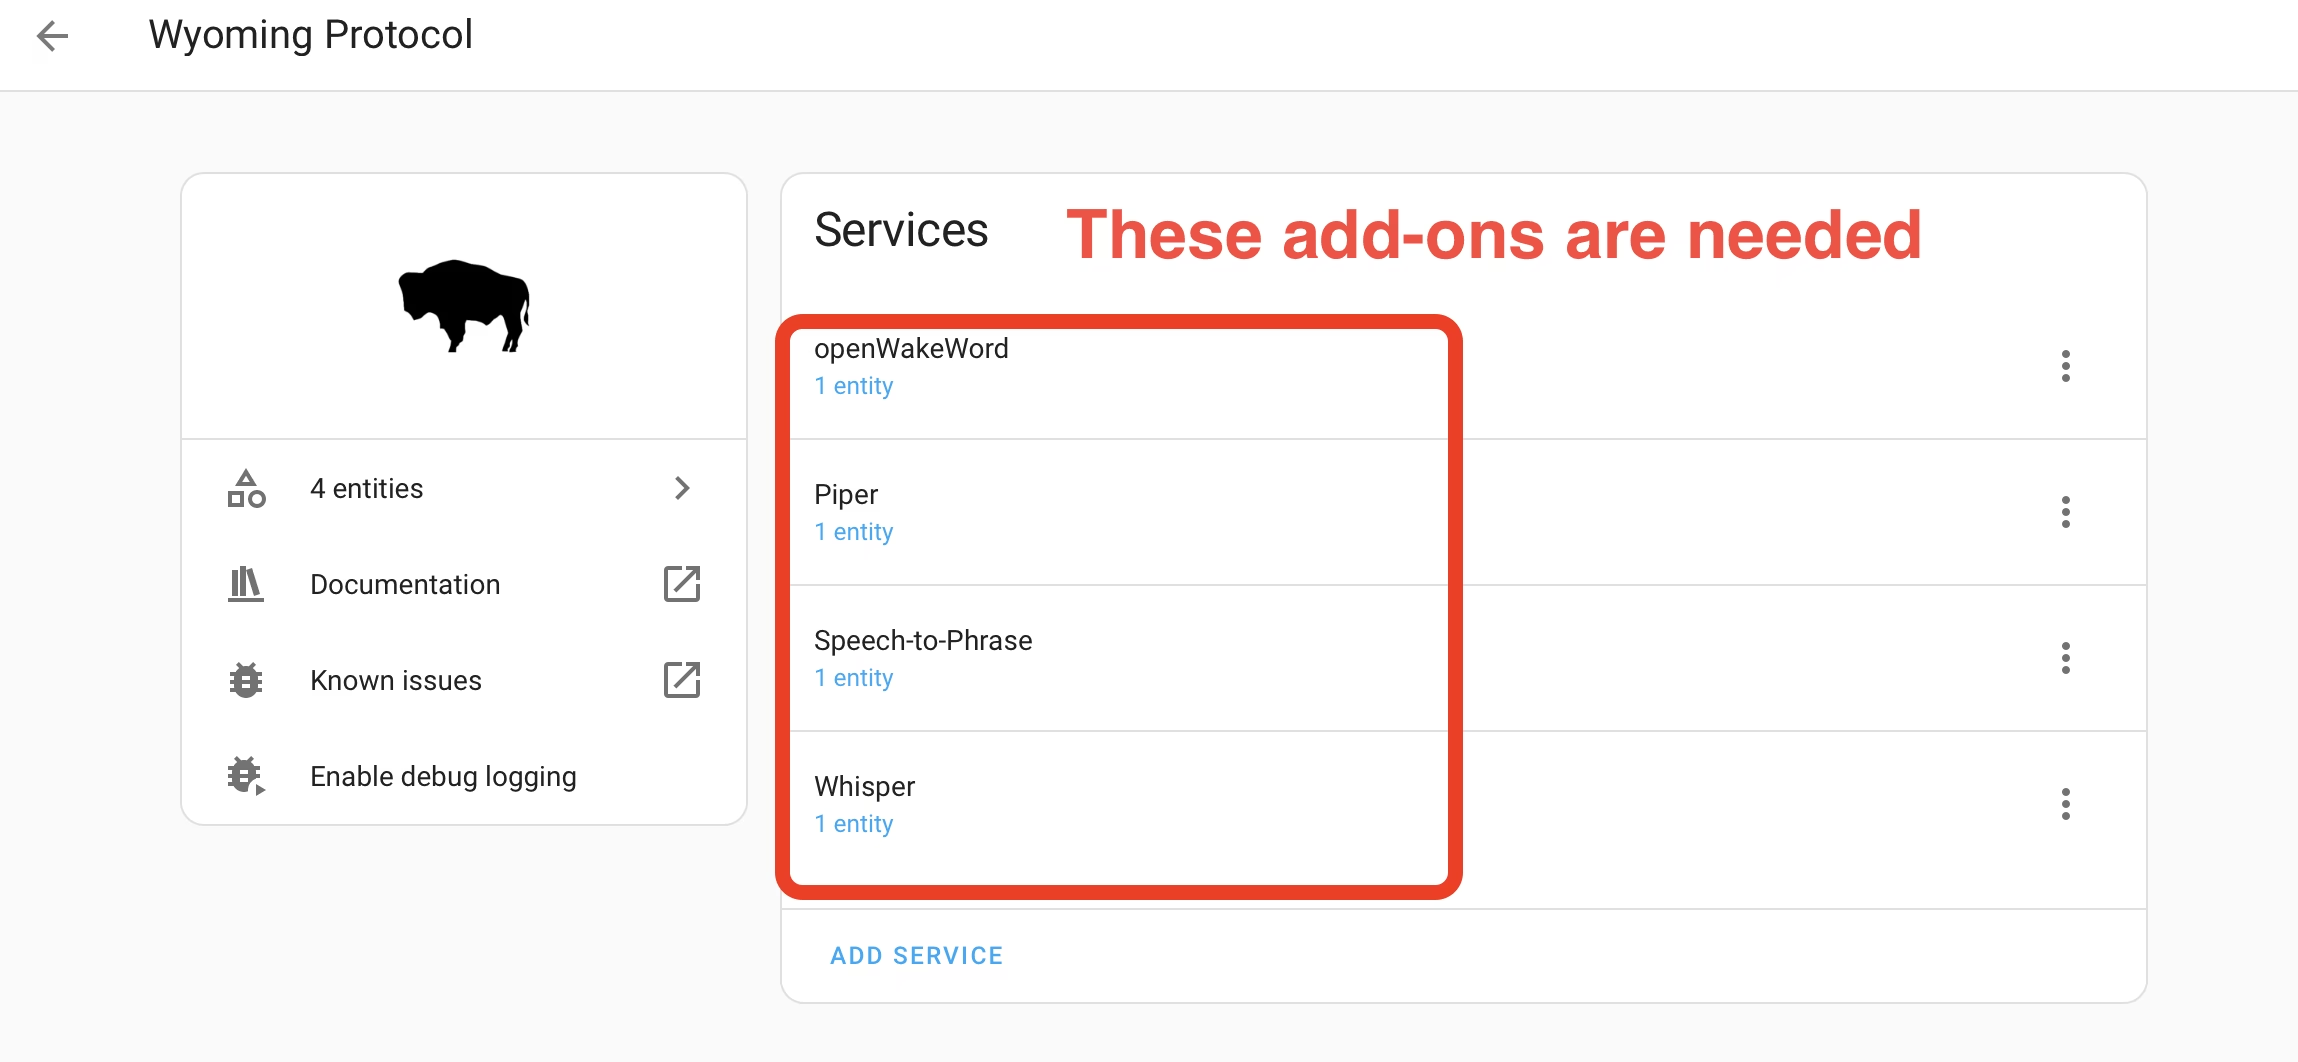
- Install speech-to-text add-on (choose between Whisper or Speech-to-Phrase)
- Install Piper (for text-to-speech)
- Start both add-ons
- Go to Settings > Devices & Services
- You’ll see these listed under Wyoming Integration
- Click “Add” for each one
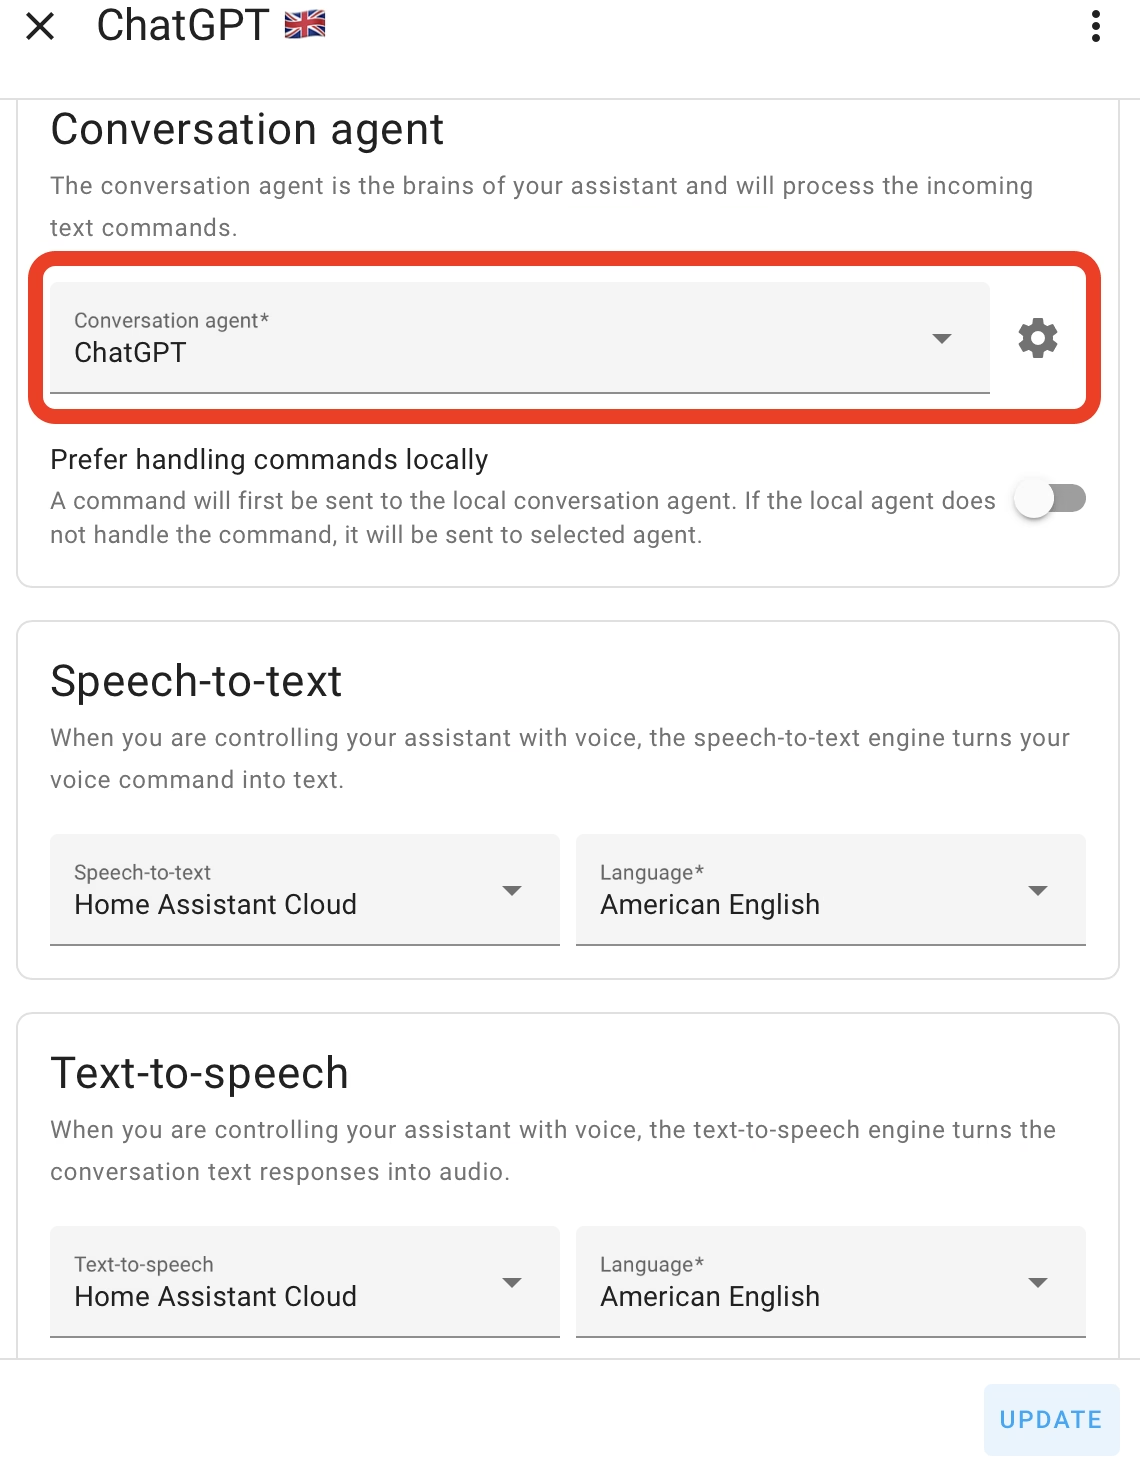
Setup Your Voice Assistant:
- Go to Settings > Voice Assistants
- Click “Add Assistant“
- Fill in the details:
- Choose any name you like
- Select your preferred language
- For Conversation agent → choose ChatGPT
- For Speech-to-text → choose your installed engine or Home Assistant Cloud
- For Text-to-speech → choose Piper or Home Assistant Cloud
- Select language variants if available
Now you’re ready to talk or type to your smart home and search the web using Home Assistant Assist and ChatGPT!
Step 5: Expose Devices to Assist Control
For your security, not all devices are controlled by Assist by default:
Pro Tip: While it’s tempting to expose all your devices, this can slow things down and increase costs if you’re using a language model like ChatGPT. Only expose the devices you’ll actually use with HA Assistant and voice/text commands.
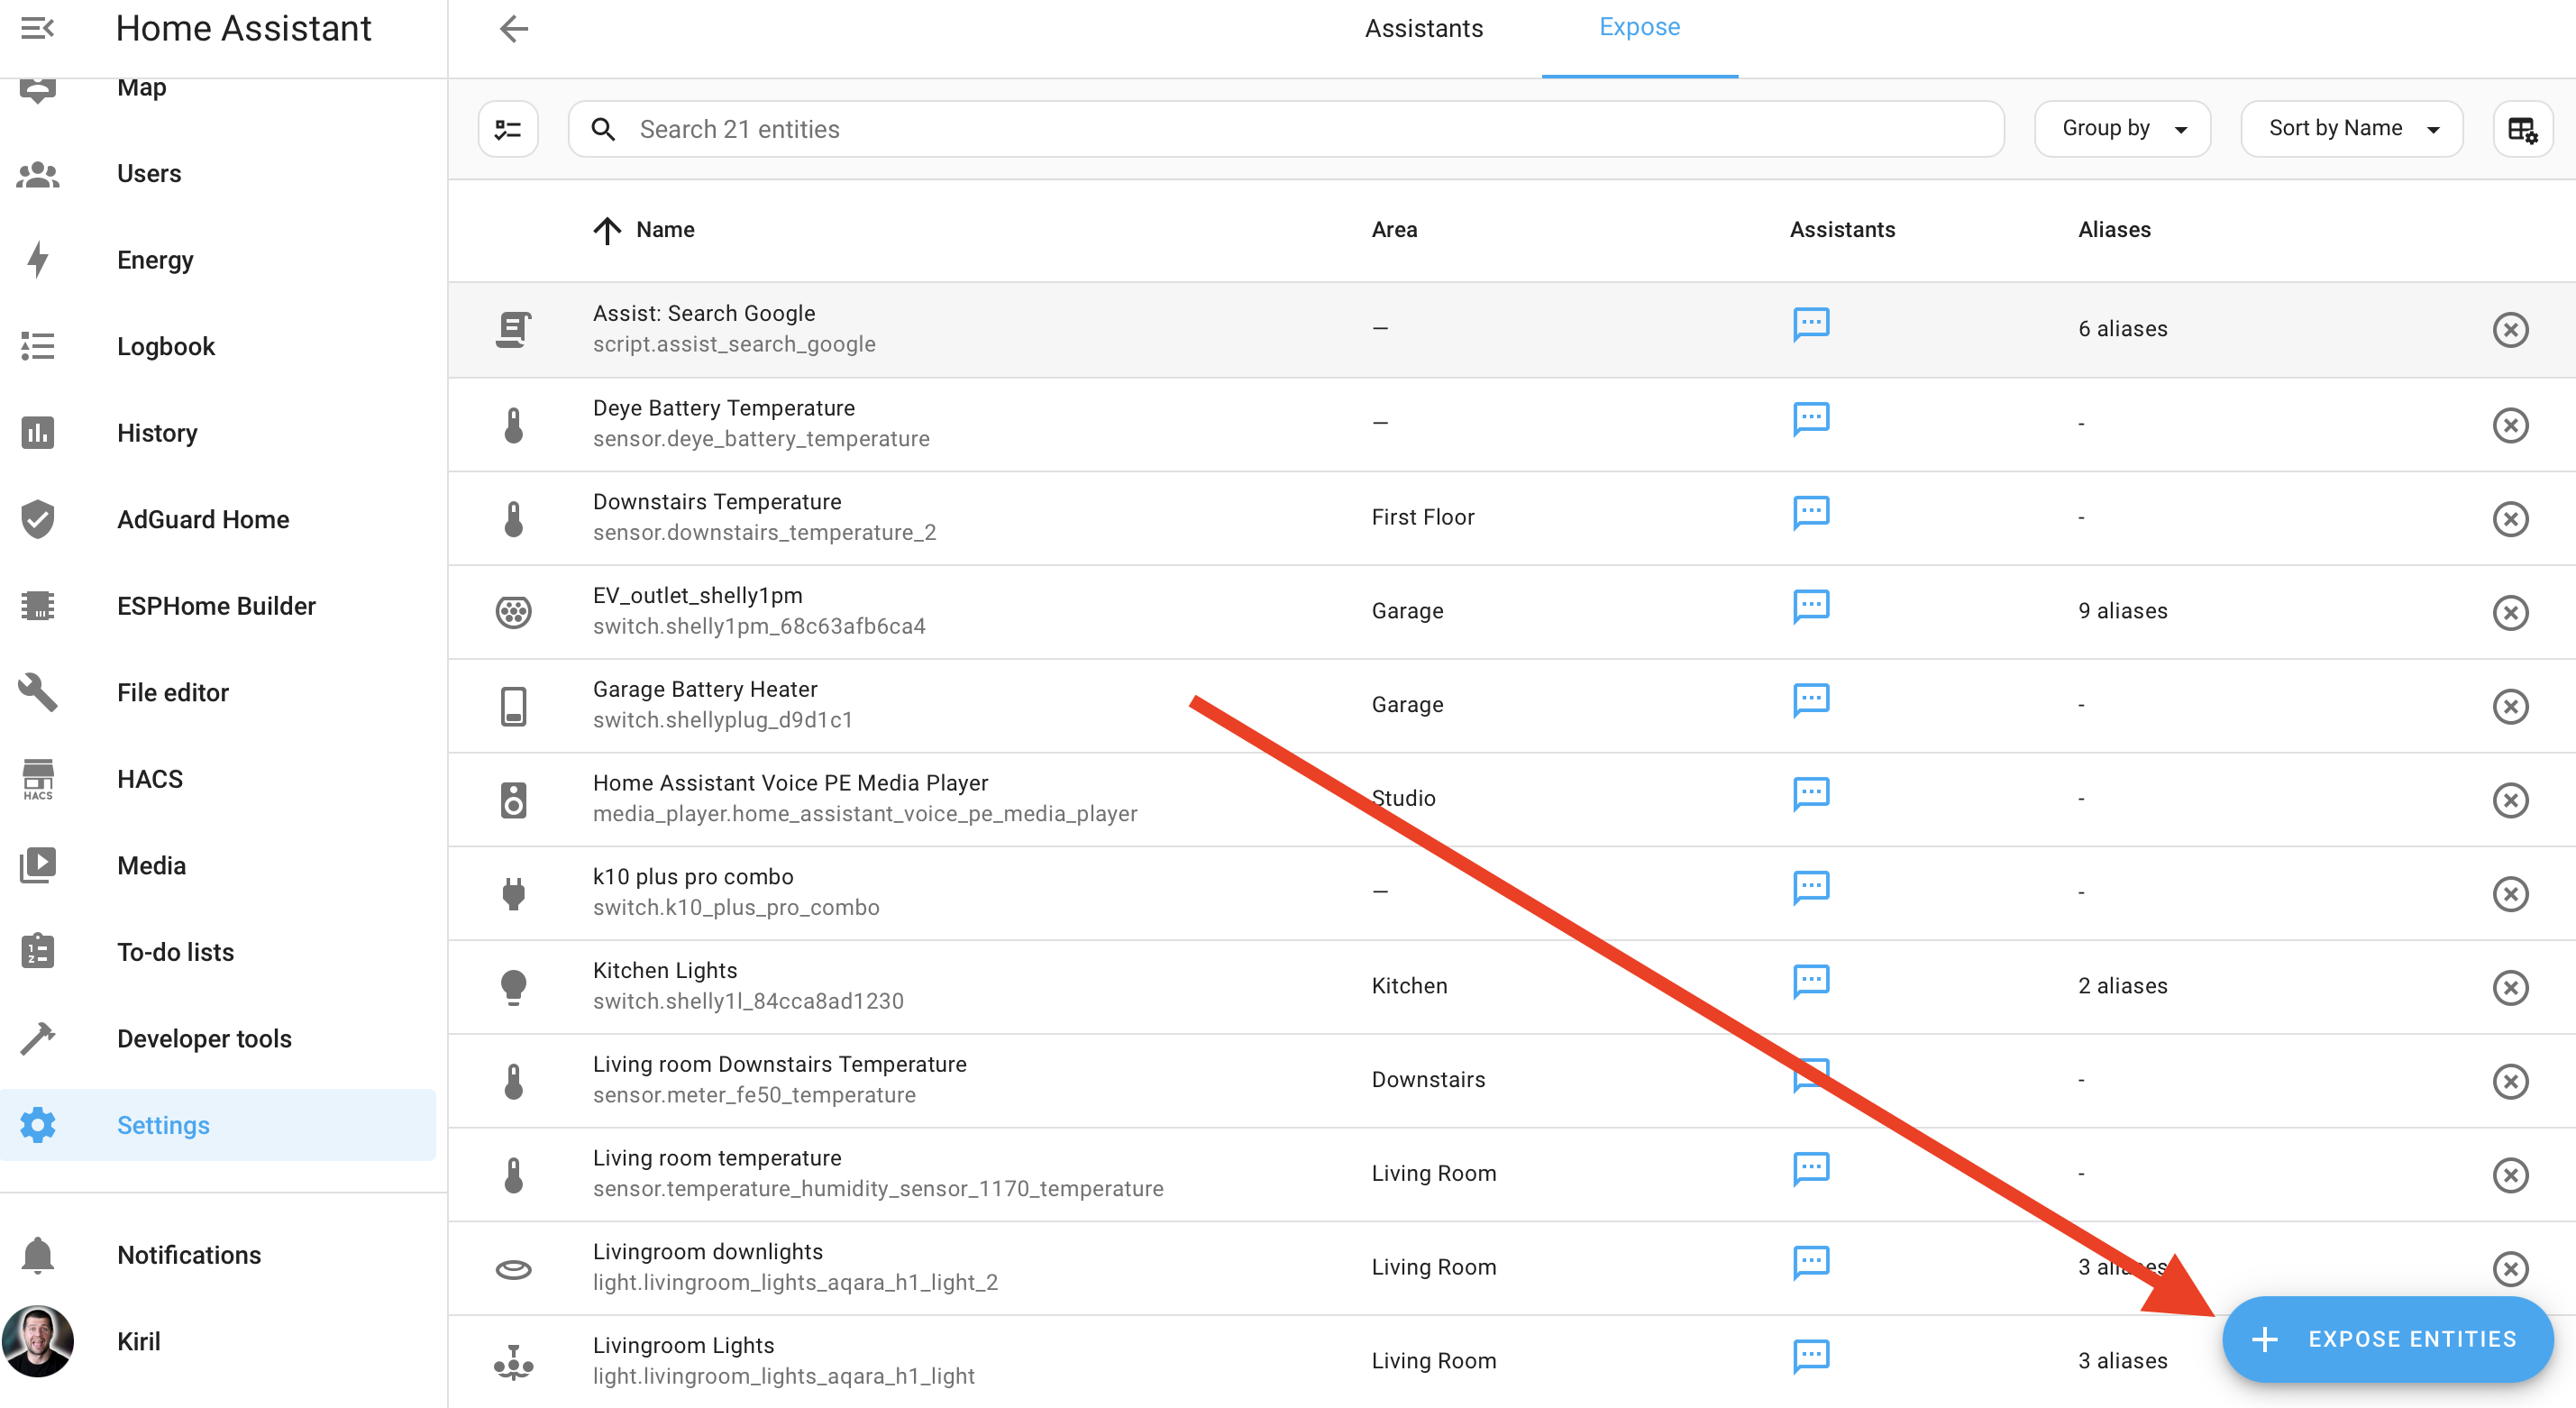
How to expose devices:
- Go to Settings > Voice Assistants
- Open the “Expose” tab
For a single device:
- Click it from the list
- In the popup, select where to expose it (Assist, Google, Alexa)
For multiple devices:
- Click “Expose Entities“
- Select all devices you want to control by voice
Safety Note: Devices like locks or garage doors aren’t exposed automatically—you decide what’s safe to control by voice.
Step 6: Create Home Assistant Automations
Let’s create some practical examples of what you can do:
Example 1: Automatic News Updates This automation searches the web for the latest soccer/football news after motion is detected:
yamlalias: search the web demo with ChatGPT
description: ""
triggers:
  - trigger: state
    entity_id:
      - binary_sensor.lumi_lumi_sensor_motion_aq2_motion # change with your motion sensor
    to: "on"
conditions: []
actions:
  - action: conversation.process
    metadata: {}
    data:
      agent_id: conversation.chatgpt
      conversation_id: "1"
      text: >-
        summarize me the most important soccer news in 2 short sentences in a
        funny passive aggressive style. Don't include sources, links, titles.
        Don't do any text formatting and go straight to point
    response_variable: ai
  - action: persistent_notification.create
    metadata: {}
    data:
      message: "Football news are: {{ai.response.speech.plain.speech}}"
  - action: tts.speak
    metadata: {}
    data:
      cache: false
      message: "Football news are: {{ai.response.speech.plain.speech}}"
      language: en-GB
      media_player_entity_id: media_player.home_assistant_voice_pe_media_player # change with your media player
    target:
      entity_id:
        - tts.home_assistant_cloud
mode: single
Example 2: Interactive News Request This automation asks if you want to hear football news and only searches for updates if you respond positively:
yamlalias: Ask for football news summary - ChatGPT
description: ""
triggers:
  - trigger: state
    entity_id:
      - binary_sensor.lumi_lumi_sensor_motion_aq2_motion # change with your motion sensor
    to: "on"
conditions: []
actions:
  - action: assist_satellite.start_conversation
    metadata: {}
    data:
      preannounce: true
      start_message: Do you want to hear the football news?
      extra_system_prompt: >-
        Only If answered positively, summarize me the most important soccer news
        in 2 short sentences in a funny passive aggressive style. Don't include
        sources & links. Don't do any text formatting and go straight to point
    target:
      entity_id: assist_satellite.home_assistant_voice_pe_assist_satellite # change with your satellite
mode: single
What Else Can You Do?
The possibilities are virtually endless! Here are just a few ideas:
- Ask about the weather while requesting specific lights to be turned on
- Have your home give you a morning briefing when you wake up
- Create complex routines that respond to natural language triggers
- Ask your home to search the web and read you information while you’re cooking
Ready to Take Your Smart Home to the Next Level?
Don’t miss out on my simplified PDF guide on this topic. To download it, simply click the link below, enter your name and email address, and you’ll receive a confirmation email from me. Once you confirm your email (this just ensures you’re human!), you’ll get immediate access to the PDF. You’ll also be subscribed to my newsletter with the latest smart home updates, offers, and news—it’s completely free, and you can unsubscribe anytime with just one click.
DOWNLOAD YOUR FREE CHATGPT + HOME ASSISTANT GUIDE HERE
Let me know in the comments if you have any questions or if you’d like to share your success story with this integration. Happy automating!
~ Kiril Peyanski
In the automation above, you seem to indicate that it is now possible to have a conversation with AI using the Home Assistant Voice Preview Edition? Or at least you make it ask for a confirmation in the automation. But I have never been able to do that with my HA Voice PE. It simply doesn’t keep the mic open for a follow up comment or input.
Please clarify.
This became available in 2025.4