
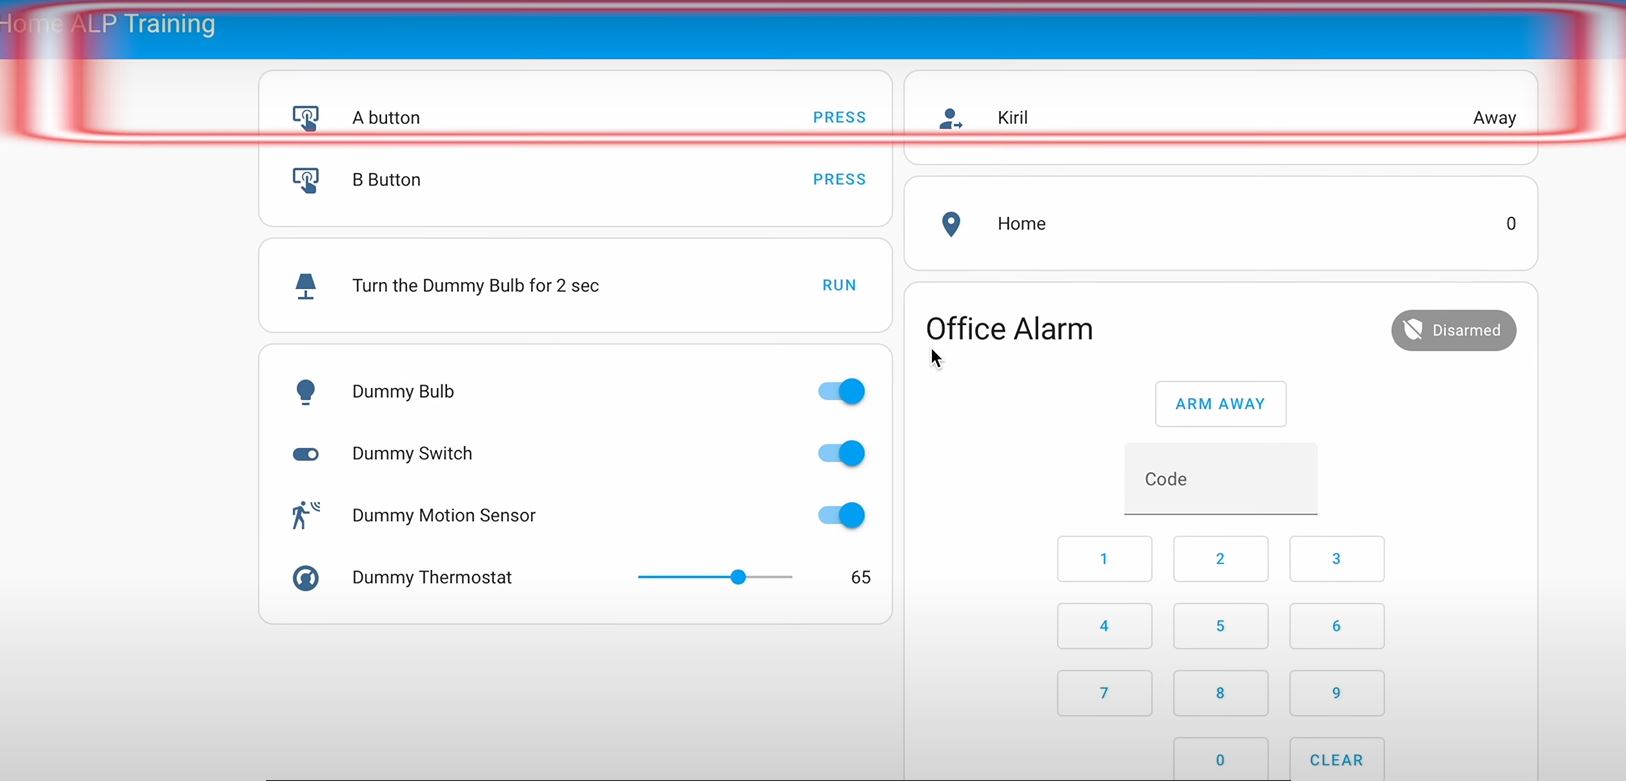
I bet you don’t know about all the Home Assistant Dashboard Tips & Tricks that you are about to see in few seconds and here is a challenge.
Table of Contents
Badges – Home Assistant Dashboard Tip #1
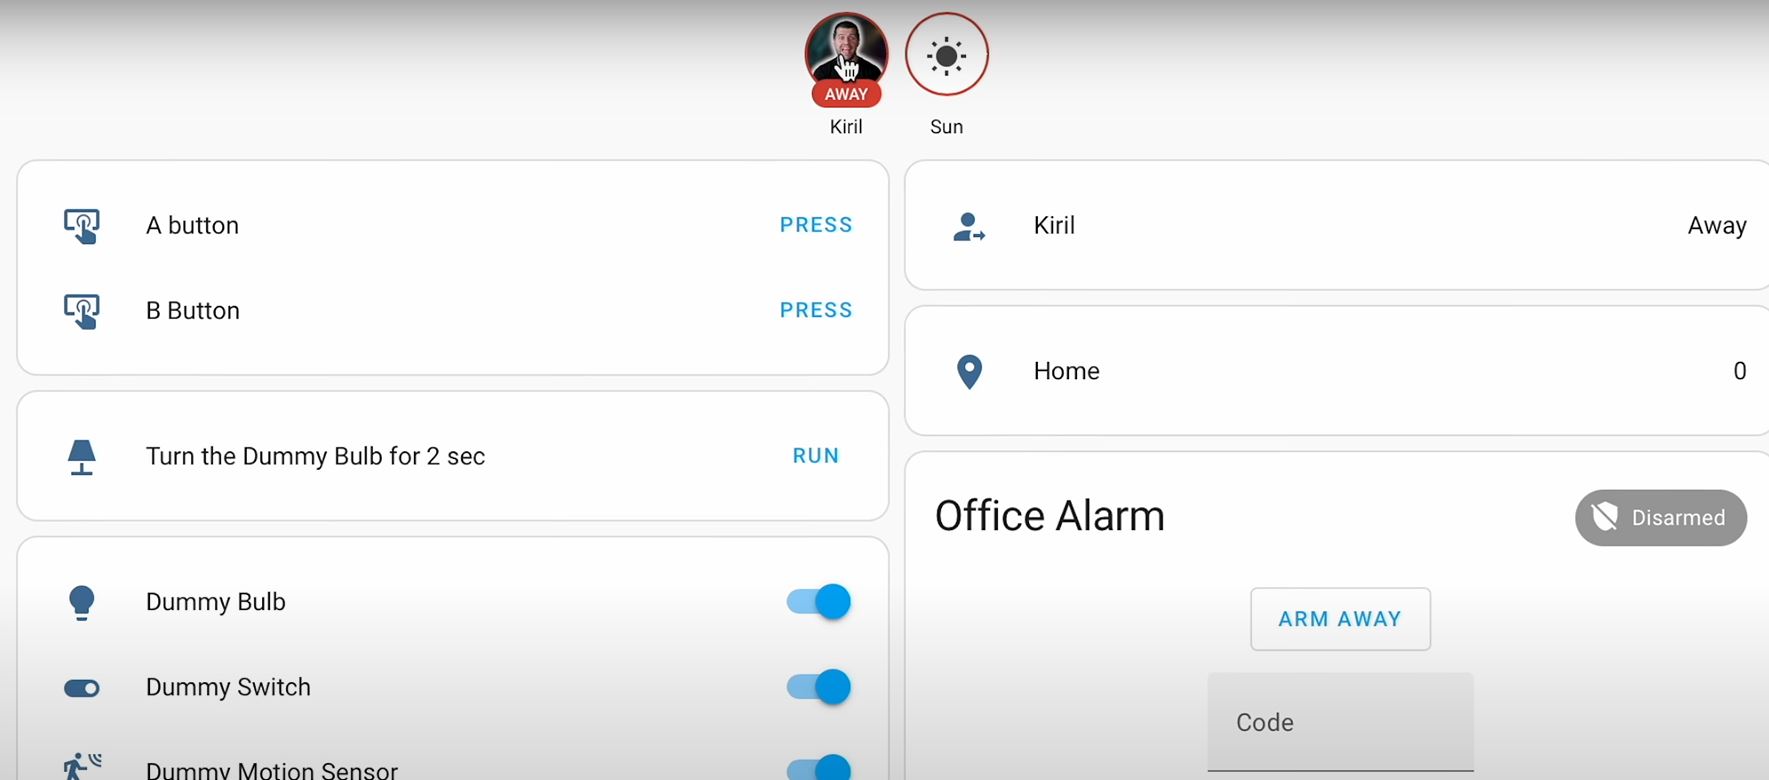
Without further ado here is the first one. Do you know that you can make Badges that are staying on top of your Home Assistant dashboards?
These badges or widgets are a little circles that can show different sensor or even pictures like thumbnail and they are not visible by default. You have to manually add them.
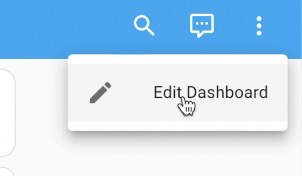
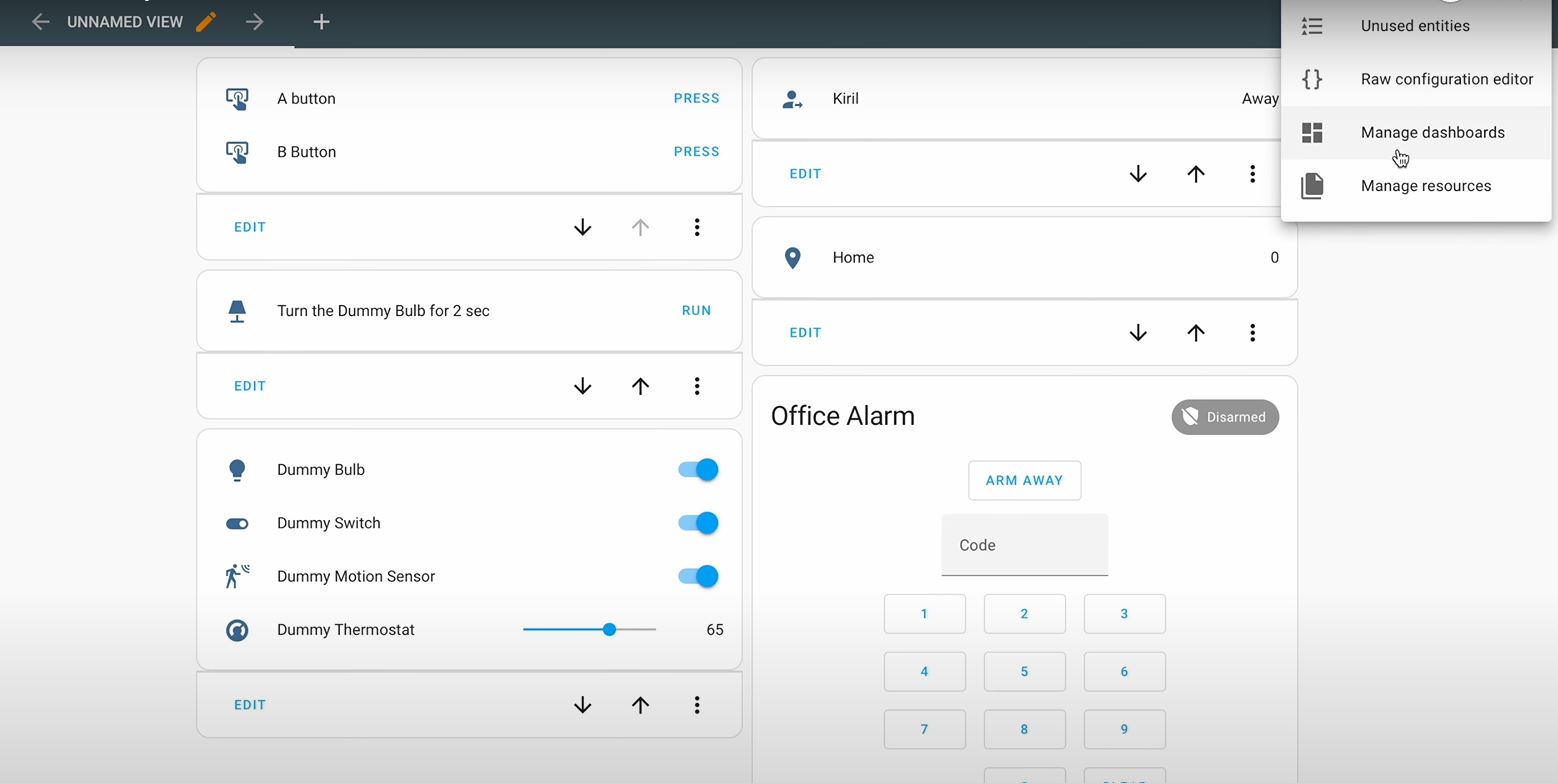
To add one or more of these badges you have to click the – Three dots menu (at the the top right) then > Edit Dashboard > Three dots menu again and > Raw Configuration Editor
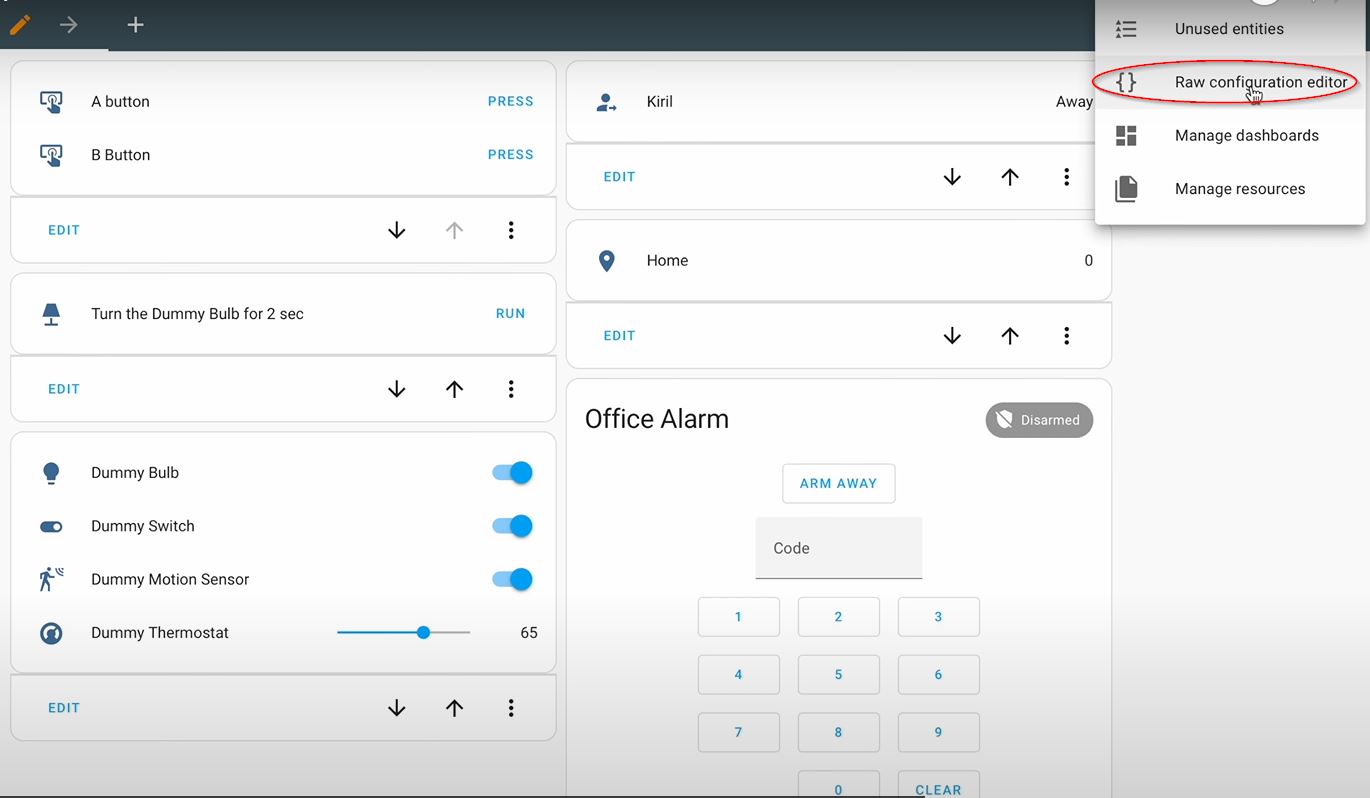
After that, below path: default_view or if you have more than one view you can do the same for them of course.
So below path: default_view line I’ll paste some entities that I want to show as badges for example I’ll show the person Kiril that’s me and an image that is pre-uploaded in my /config/www/ folder and the file there is named me.jpg. I’ll also show the Sun sensor.
title: ‘YOUR_VIEW_NAME'
views:
  - path: default_view
    badges:
      - entity: person.kiril
        image: /local/me.jpg
      - entity: sun.sun
I can also add as many sensors and as many entities I want below ,but for the demo I’ll stick to just these two then I’ll hit save then I’ll close this dialog and as you can see I have two badges myself and the Sun I can even click on these icons and I can see their detailed information.
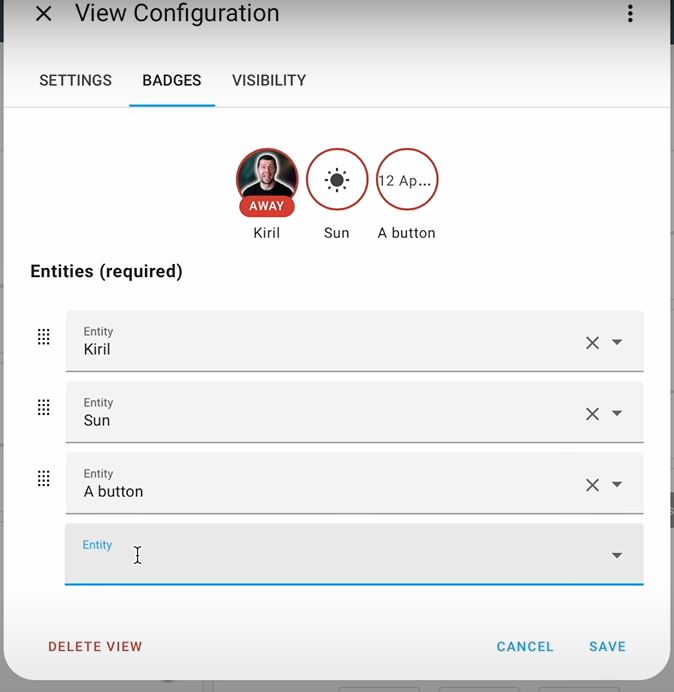
One faster way and even safer is to edit the dashboard and then to click on this pencil button then to go on this badges Tab and from here you can add whatever buttons and entities you wish that way you don’t have to deal with the raw code editor and the chance of breaking something is much much smaller.
Tile Cards Grouping using Grid – Home Assistant Dashboard Tip #2
Next quick tip is grouping of cards and more precisely grouping of Tile cards. Tile cards were introduced in Home Assistant 2022.11 and they’re quite smaller than the regular Home Assistant cards.
Nevertheless, if you have just one Tile card on your dashboard you’re losing space, so why don’t you group multiple Tile cards? Here is how:
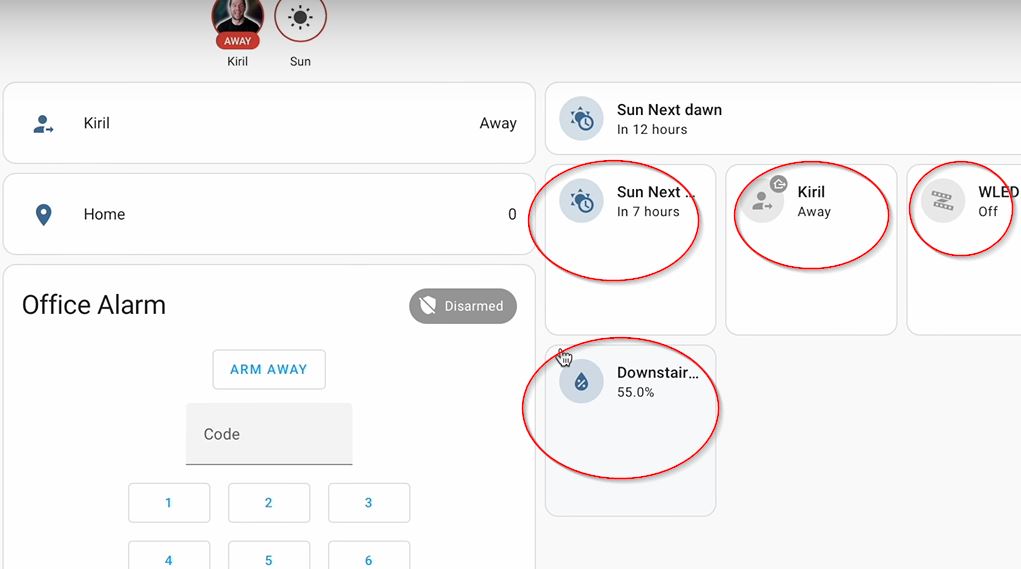
- I’ll edit my dashboard again

- I’ll add a new card and I will search for Tile card and I’ll add it, but as you can see this is not saving much space.
- instead of that I’ll add another card and I’ll search for Grid.

- And then I can search for Tile cards and add them as many as I wish
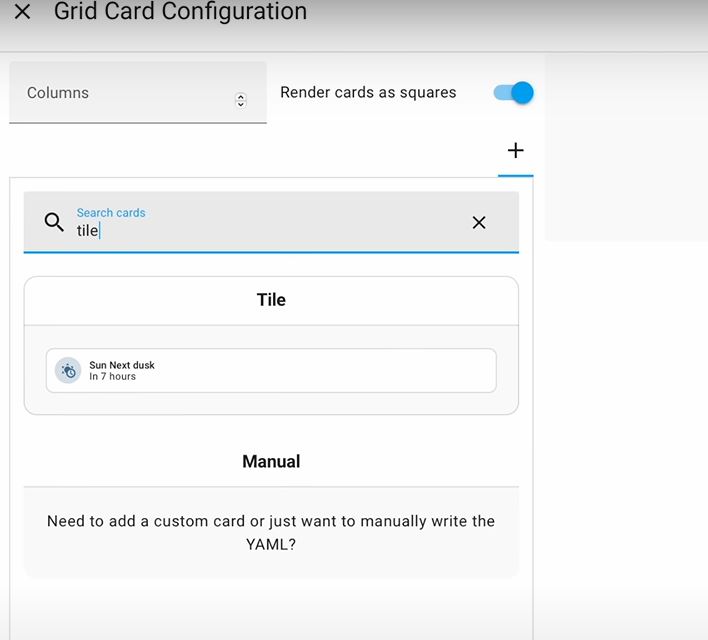
- When I save this Grid of Tile cards I’ll have a space that is similar to a regular card, but instead of one entity inside it I’ll have four or even six and I can click on them and I can open the detailed information about these sensors and entities.
Bonus Tip
Before I continue to the next tip, I just want to quickly share that all tips are quick and easy like downloading my Smart Home Glossary, which is full of useful info about most common Smart Home words and abbreviations and it is totally free.
Get it now from the link: https://automatelike.pro/glossary
Advanced Gauge Cards – Home Assistant Dashboard Tip #3
Gauge card is easy, you just have to add it and it works, but do you know that you can add severity and needle?
And here comes the tricky part.
By default, you can set some values for three colors green, yellow, and red. Similar to a traffic light. That is useful if you have a sensor that needs to represent 3 general states.
What if you want to add any number of segments and what if you want custom colors? Well, that is possible and I hope you don’t know how to do that so I can earn your respect.
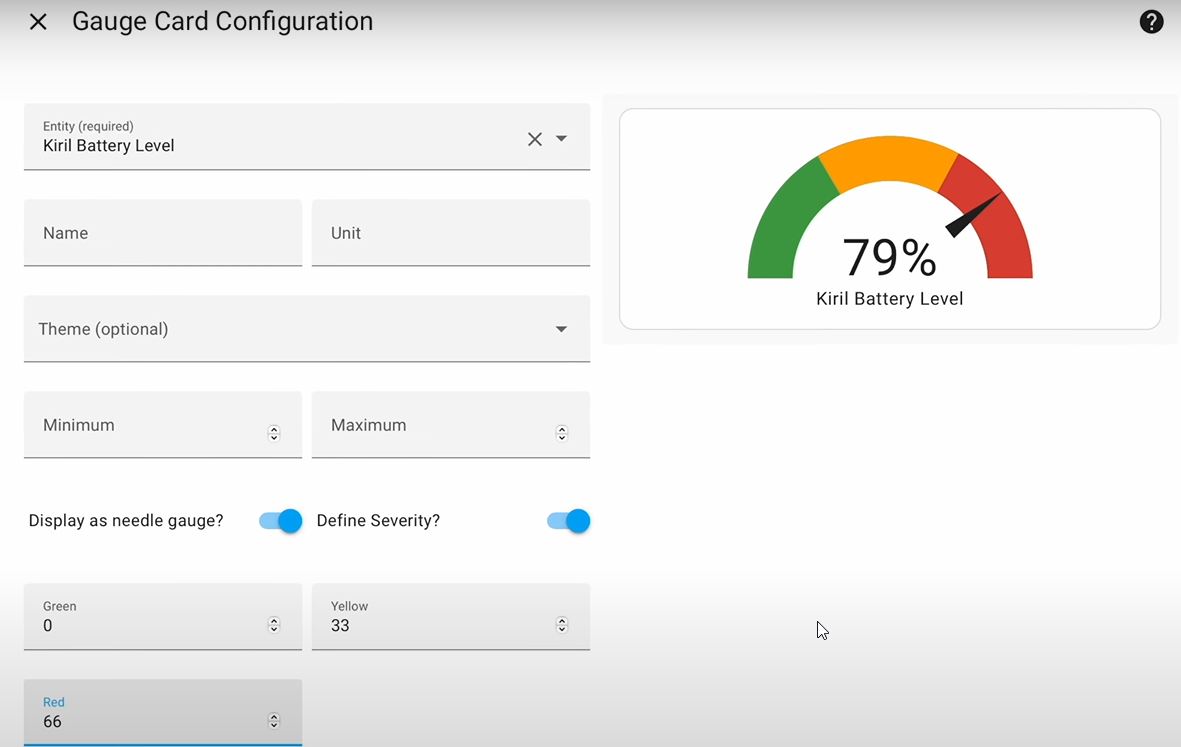
I’ll edit my dashboard again and I’ll add a Gauge card.
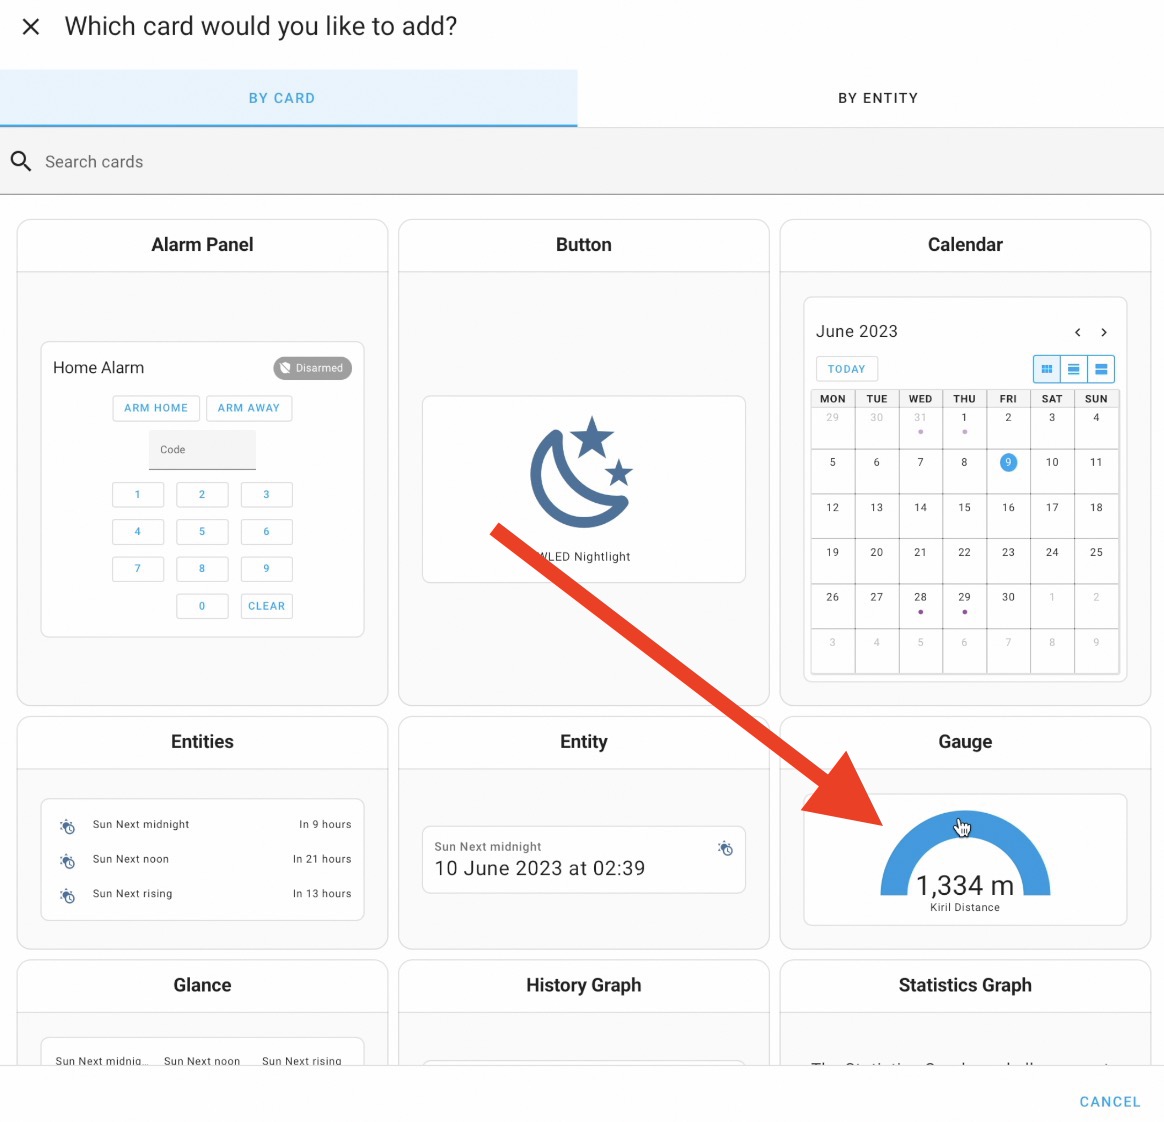
I’ll select my phone battery level for example as Gauge entity.
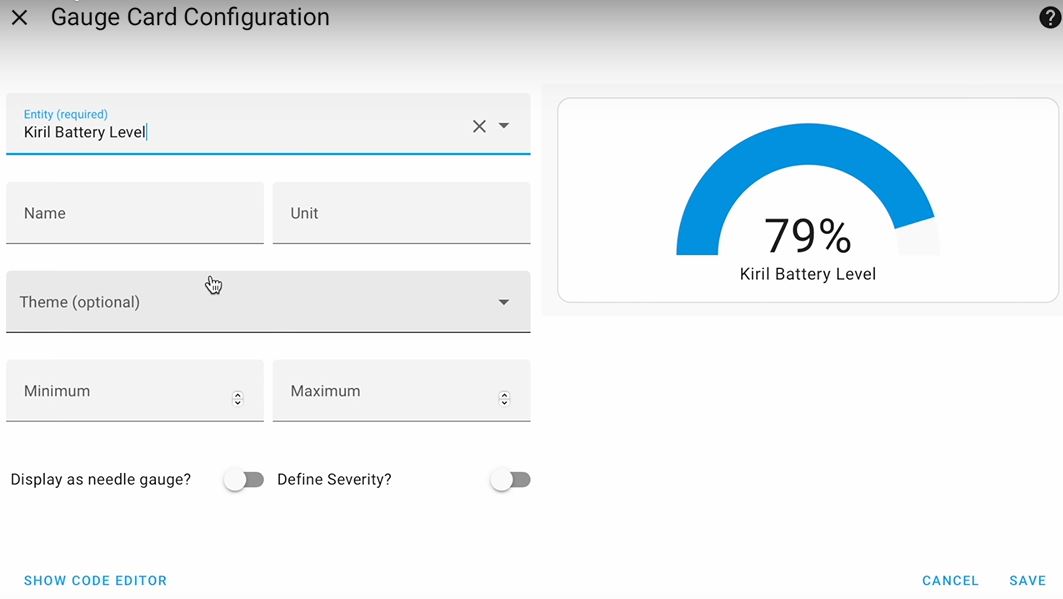
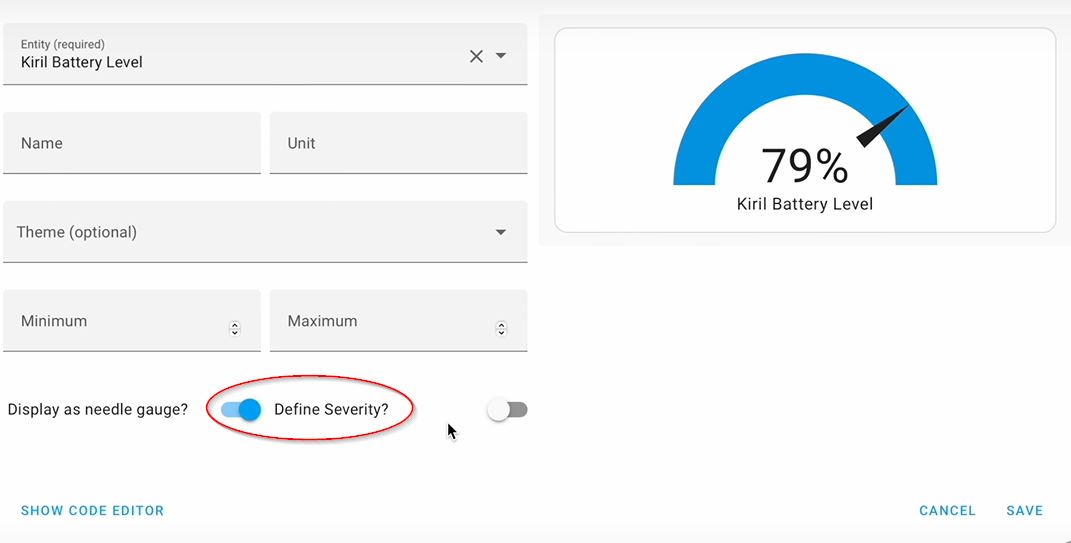
This is my phone and this is the battery of my phone down here I can display as needle gauge and Define severity .
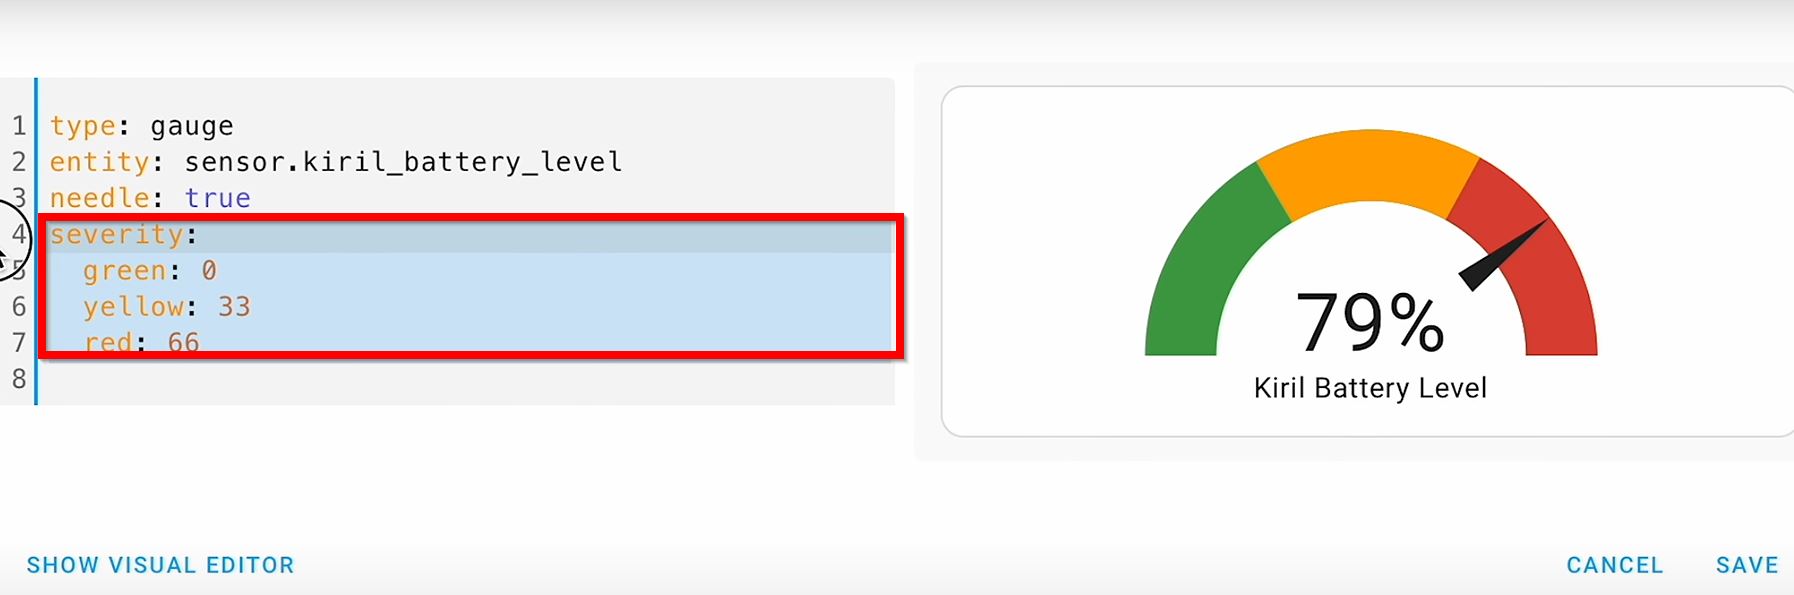
if I type 33 under the Yellow & 66 under Red the gauge will be divided in 3 equals zones which is kind of nice.

Then I’ll click on this show code editor and I’ll delete this severity.
Instead I’ll paste the following yaml code:
type: gauge
entity: sensor.kiril_battery_level
needle: true
segments:
  - from: 0
    color: '#FF0000'
    label: recharge
  - from: 20
    color: yellow
  - from: 40
    color: orange
  - from: 60
    color: '#0000FF'
  - from: 80
    color: '#0DD000'
    label: full
Instead of Severity I’ll add segments which are very similar from 0 to 20 the color will be red represented in RGB style similar to photoshop or HTML you can get these codes from internet everywhere.
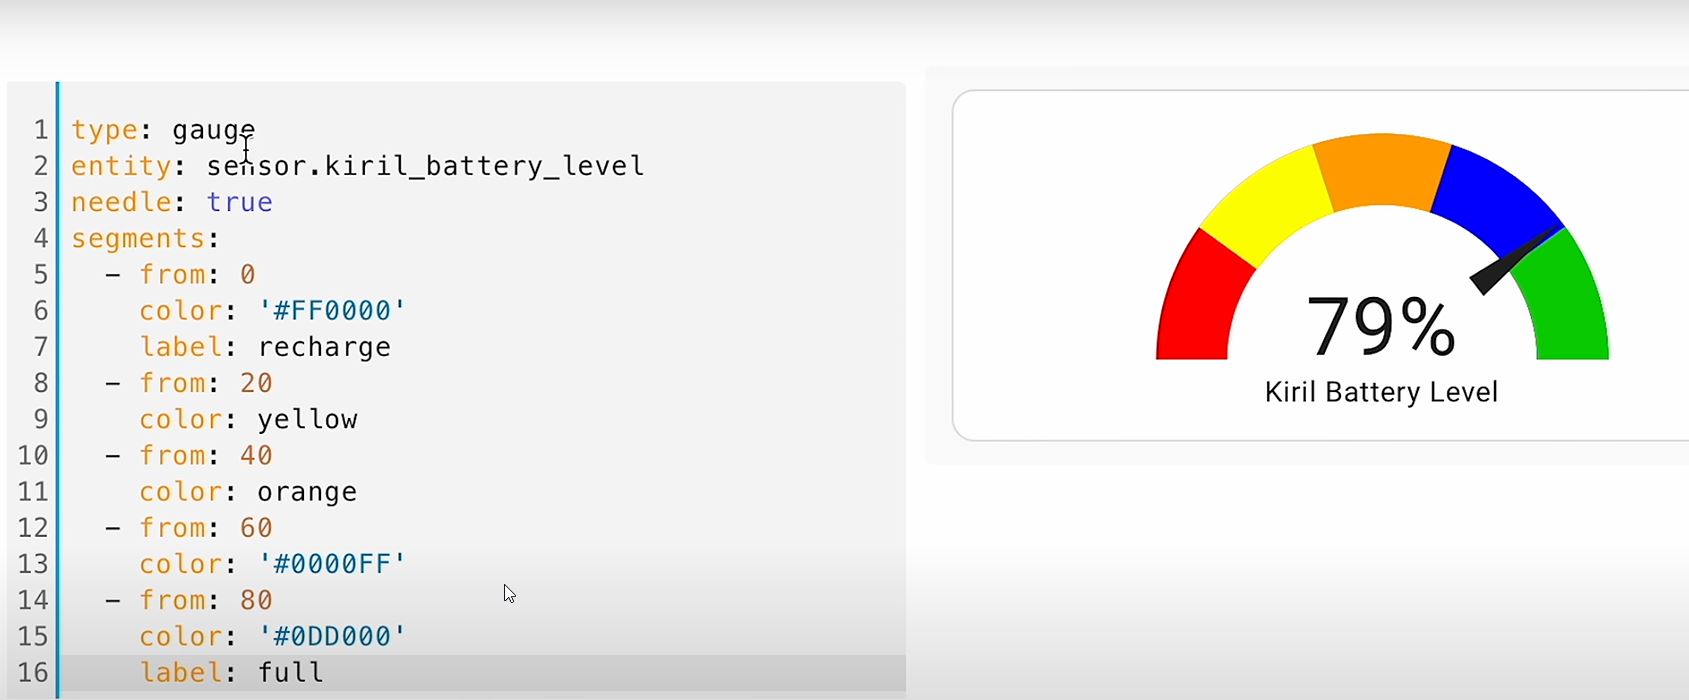
I’ll also add a label which is optional in my case the label will be “recharge”. That means, if the needle goes in this 0 to 20 zone – instead of percentage here there will be a text saying “recharge”.
Again this is entirely optional.
Then from 20 to 40 I’ll use yellow color notice here that instead of this RGB value I use a regular English word in my case yellow. Next I’ll have orange, then another color which is Blue from 60 to 80 and finally one more segment.
Of course, I can add even more segments or I can delete some.
Come on be fair, did you know all of that? I didn’t knew it either until I start throwing some random digits while creating this article. And I still don’t know it by heart, so I will have to re-read this again next time I want to create a fancy gauge card.
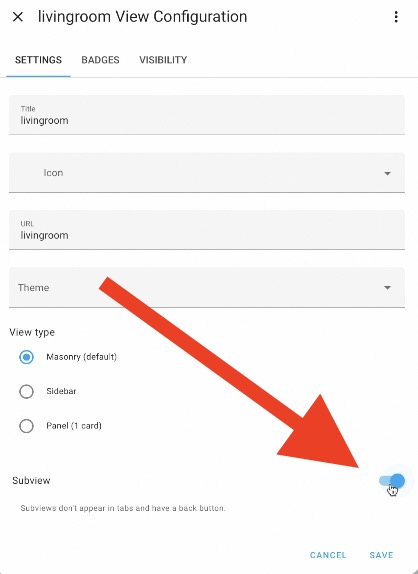
Sub-Views – Home Assistant Dashboard Tip #4
Moving to the next trick. There are views and sub-views in Home Assistant, but I got the feeling that sub-views are kind of not as widely used, which is a shame, because they are useful.
Ask your spouse about the Home Assistant sub-views and see what she or he knows about it if you don’t believe me.

Sub-views were introduced back in Home Assistant 2022.10 release and if you ask me how I remember that – the answer is I don’t. I just checked my notes about my older articles.
Anyways, Sub-views are created as usual, the only difference is that the Sub-view switch have to be enabled during the creation process.
Then, inside the sub-view I can add as many gauge cards as I wish (of course other cards as well) and I can order them the way I like, just like the regular view.
But here comes the differences. The Sub-views are not shown in the navigation bar, and they cannot be accessed the same way as the normal views. Instead, I have to link the subview to a let’s say a button and to place that button on a regular view.
For example, I can make a Livingroom button and I can link that button to a the Livingroom sub-view that I created earlier.
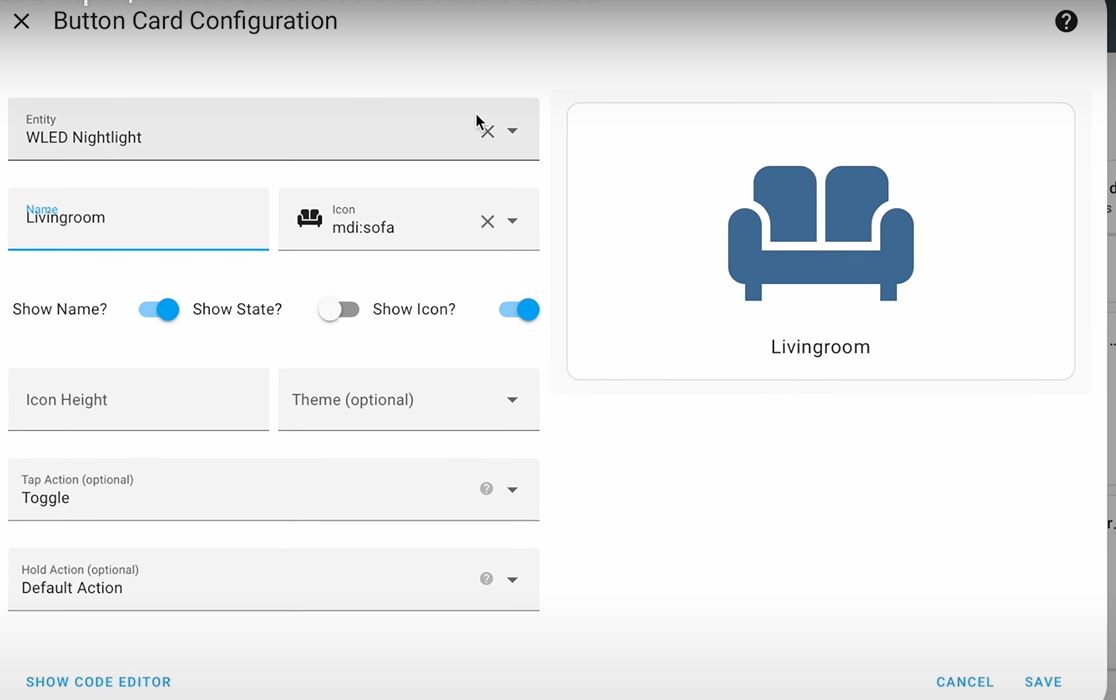
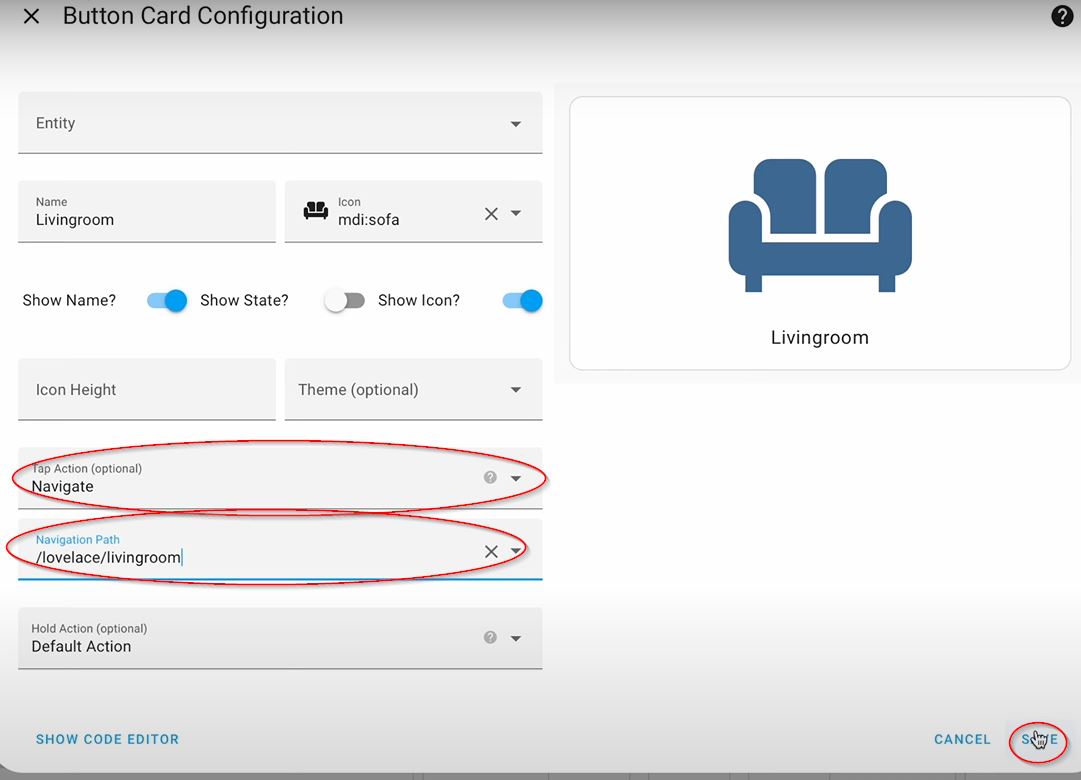
If I click now on the living room button, the living room sub-view will be opened.
So from now on I will have a Livingroom button that will lead me to all of my living room devices.
Let me know in the comments are you going to use that? Simple yes or no is enough.
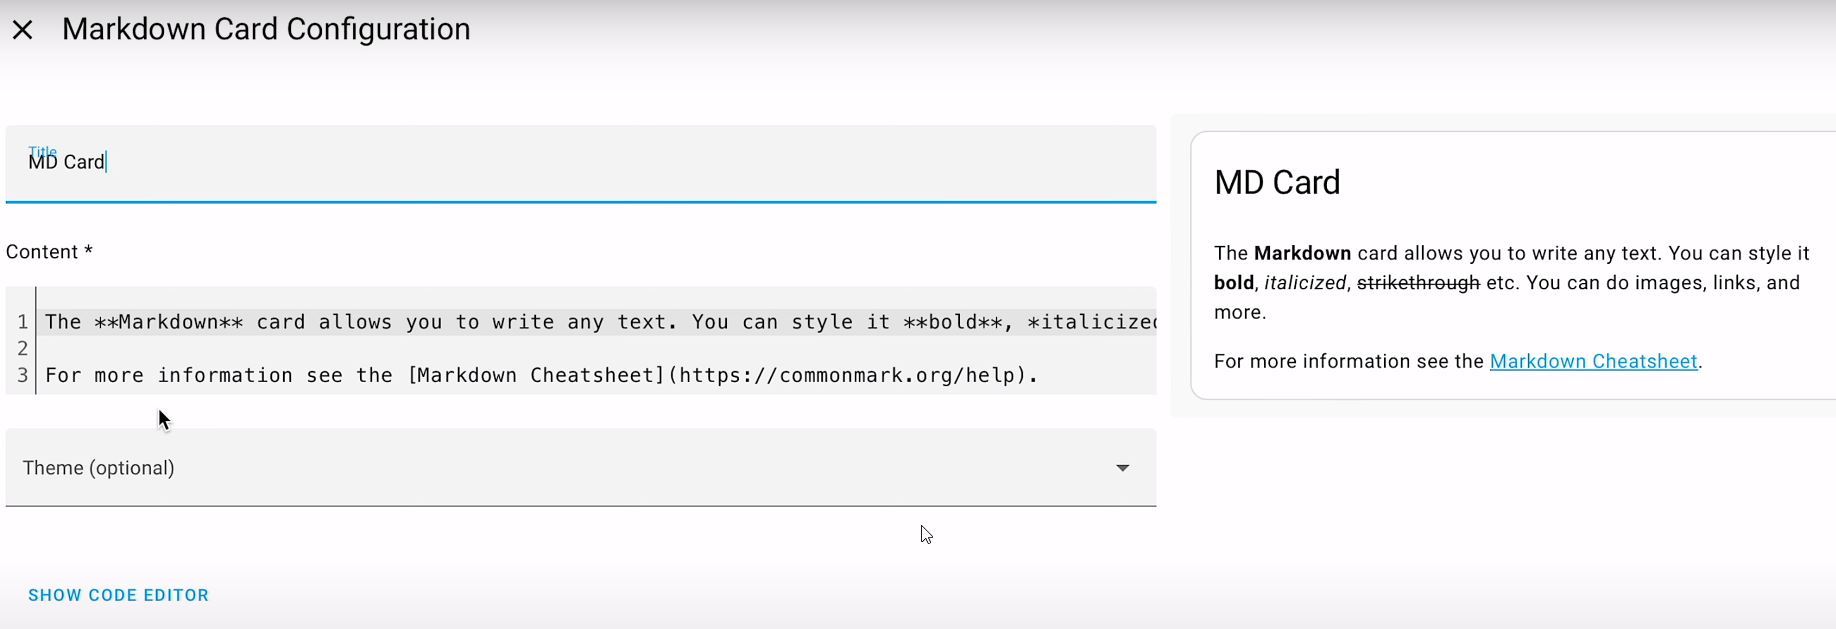
Markdown Card – Home Assistant Dashboard Tip #5
Do you ever wanted to add some text and hyperlinks on your Home Assistant dashboard, well using Markdown card you can do that very easily.
Markdown is a simple way to format text that looks great on any device. It doesn’t do anything fancy, just the essentials, like bold, italic & strike text, all of that using special symbols around the text that you want to format.
When you are adding a Markdown card in Home Assistant. Left side of the dialog is where you can type your text and where some useful examples are already added for your convenience. On the right side you can see the result.
What is missing among the examples in the markdown card is how to add images and linked images, but do not worry I will show you.
- I’ll edit the dashboard.
- I’ll add a Markdown card
- I’ll search for Markdown
- I’ll click on the markdown card and this is the content.
Тhis is the title and below that I can add my own code. For example this one:
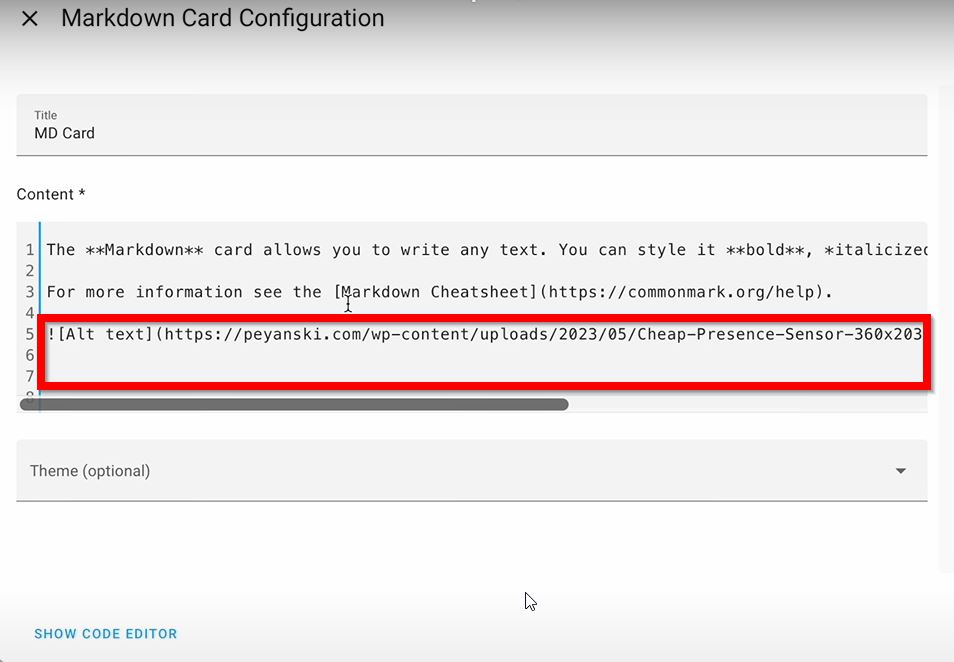
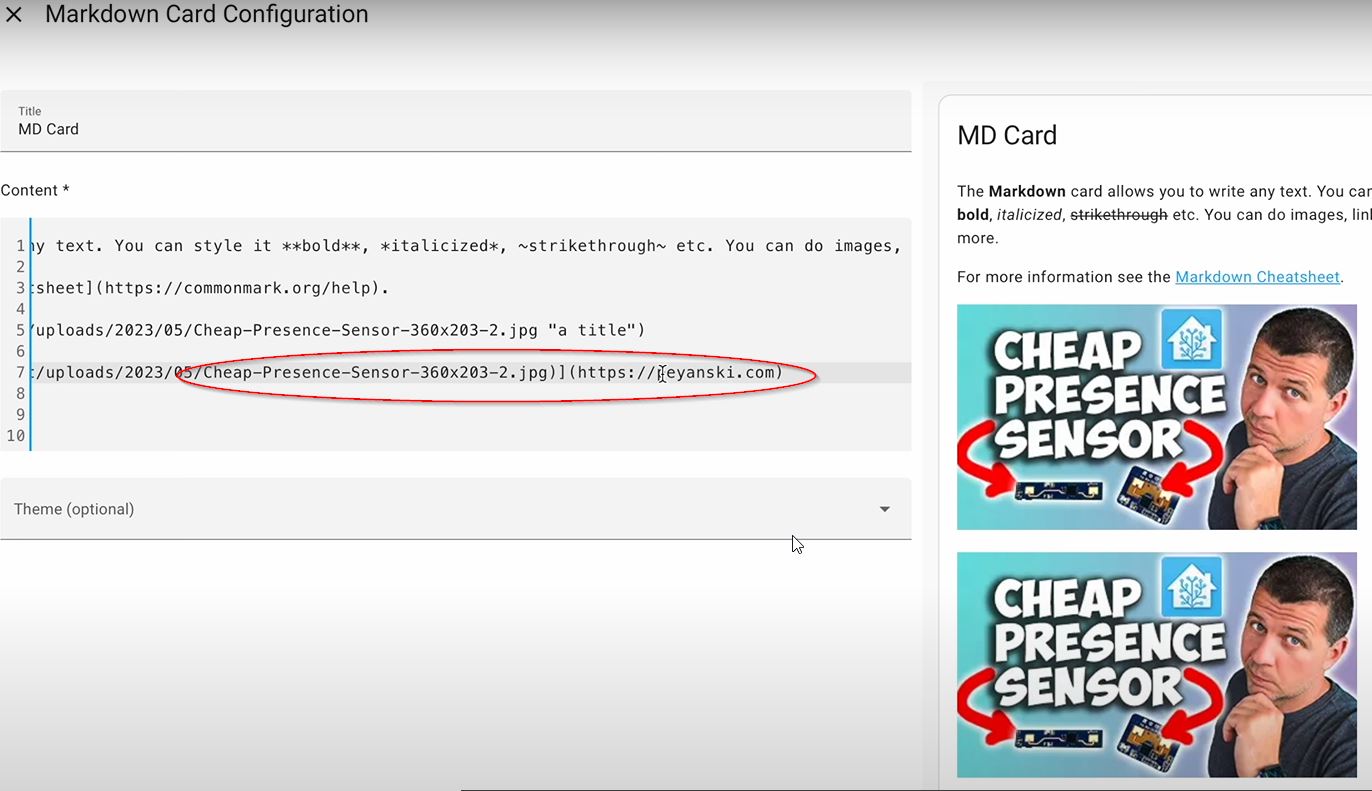
I have to add few lines below that to show it better to you so this is the syntax the alt text then the URL to a certain image available on the internet and a title if I hover my mouse on top of this image I’ll see the alt text.
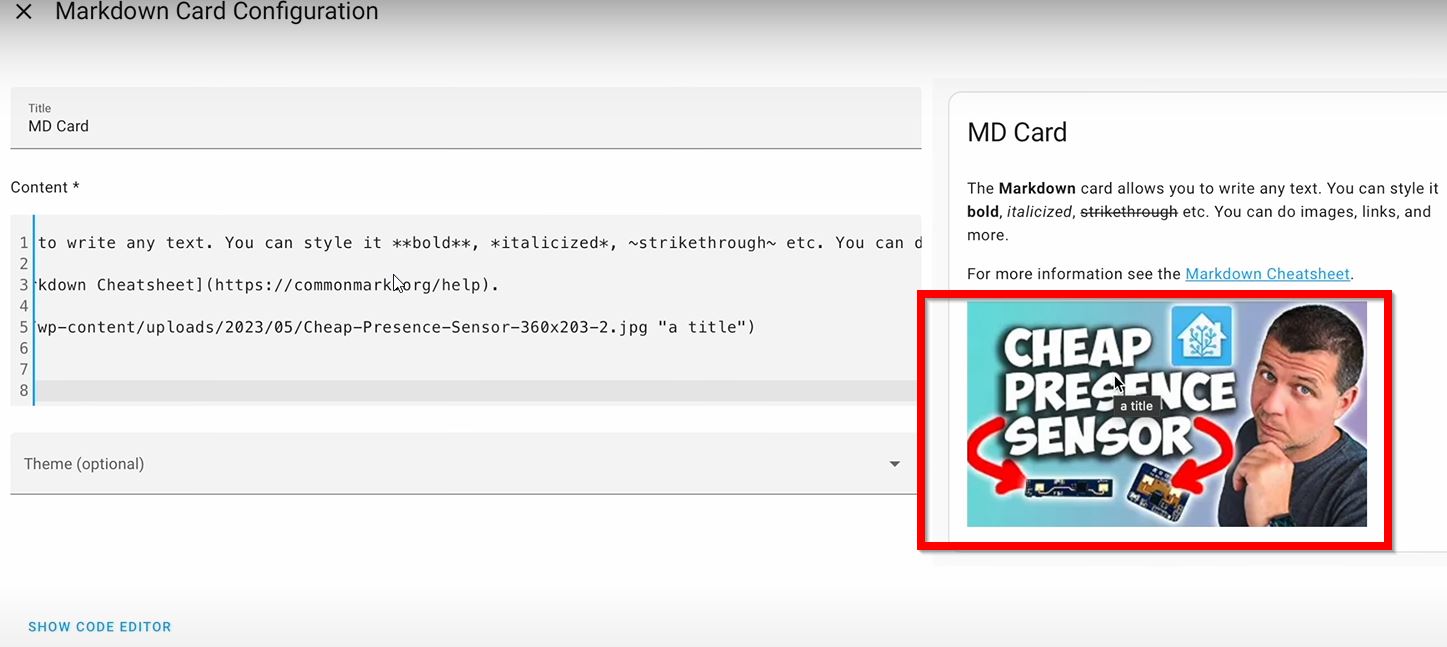
And if I want I can add a link to this image similarly to the above example I’ll add the image but then I’ll add the actual link:
[](https://peyanski.com)Now, if I click on this image it will lead me to my website peyanski.com I can save this and as you can see this is the link if I click on it it will open my website.
That above is valid if the picture that you are trying to show is hosted somewhere on the Internet. But, what if If you want to stay local only? For that you have to upload a picture in your Home Assistant /config/www folder. If you don’t have such folder yet you have to create it and then to restart your Home Assistant.
I’ll edit the card again and I’ll delete these two lines
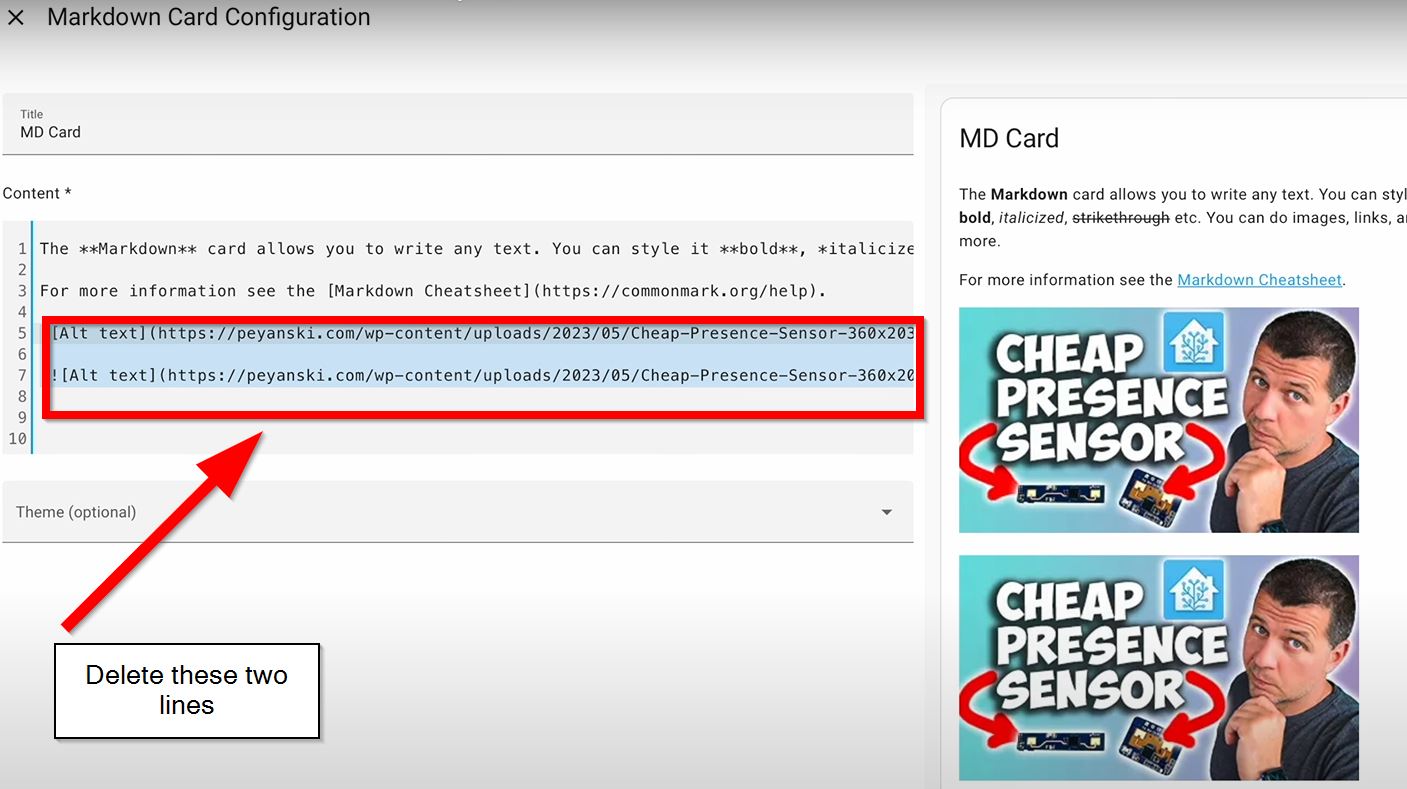
Instead of them I’ll add this one:
Again I have the alt text and a URL, but this time the URL is a local IP which is the IP of my Home Assistant and then slash local as a folder slash the file name of the picture.
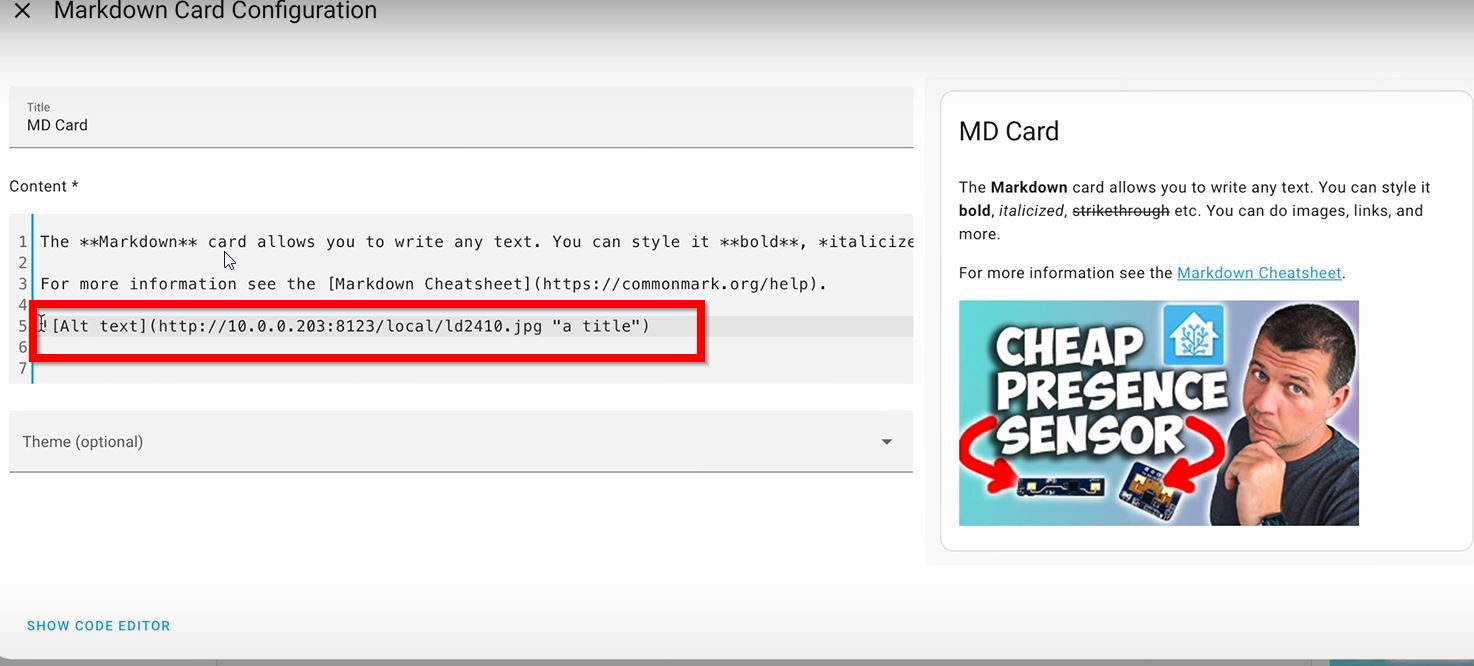
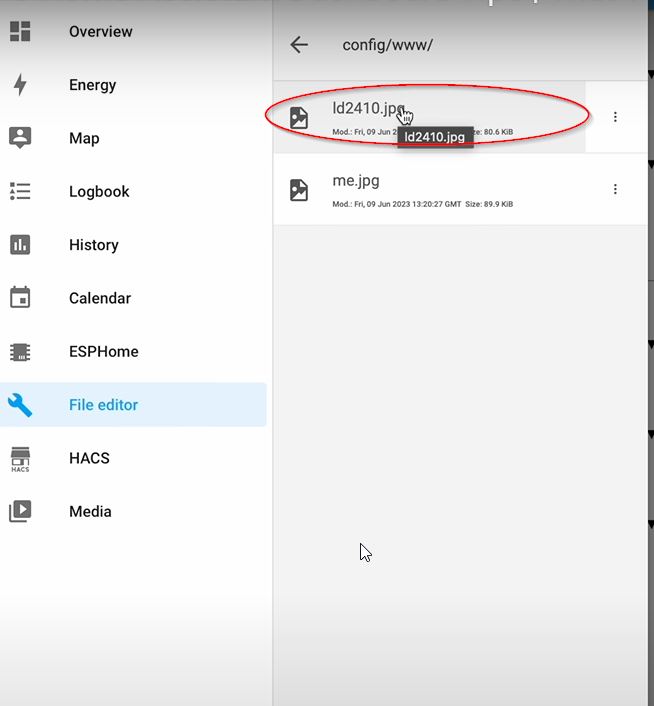
Just to demonstrate you that I uploaded this image in my config www folder here it is this is the image that I’m displaying but I refer to it as a local slash file name and that is the trickiest part here.
And that was one more trick in your Home Assistant sleeve hope you like them all and if you want to learn more feel free to register for my upcoming Home Assistant webinar. You can reserve your spot for free on my website https://automatelike.pro/webinar
Thanks for reading. I’m Kiril and I will see you in the next one. Bye!
I thought I was a beginner 😉 with Home Assistant, but alas, nothing new.
– badges: I missed a link to how to customize these.
– gauge: I missed the base color – blue, which appears for the unused segments
I stopped using the grid card (to static) and in place use the combination of a vertical and several horizontal stacks.
I use the sub-view to create a hierarchy of views,
E.G. the home navigation page consist of 1 panel with vertical and horizontal stacks each filled with area card with a nice photo of the room and a navigation path to the sub view which gives an overview of that room
An easy one with sub views: when you use icons for the visible pages, you can have up to 8 pages direct visible in the navigation bar on your telephone.