
Are you ready to install Home Assistant OS on Raspberry Pi 5? In this simple step-by-step tutorial, I’ll guide you through the process of turning your Raspberry Pi 5 into a smart home hub. Let’s get started!
Table of Contents
Step 1: Gather Your Parts
First things first, let’s ensure you have all the necessary parts to get started with your Raspberry Pi 5 and Home Assistant OS. Here’s what you’ll need:
- Raspberry Pi 5: Any model with 2, 4, or 8GB of RAM will work fine.
- SD Card: Aim for at least 32GB, the faster, the better.
- 27W USB-C Power Supply: Ensure it’s original for optimal performance.
- Raspberry Pi Case (optional): If you opt for one, make sure it has active cooling.
Now, if you’re ready to grab these items, why not make the process even smoother? Below are my Amazon affiliate links to some of the recommended products:
- Raspberry Pi 5 8GB
- CanaKit Raspberry Pi 5 Starter Kit PRO
- Raspberry Pi 5 8GB Starter Kit
- SanDisk Extreme Plus 64 GB microSDXC Memory Card
Optional Accessories
Additionally, here are some optional accessories you might find useful for your Raspberry Pi 5 setup:
- Raspberry Pi 5 Cases
- CanaKit 45W USB-C Power Supply with PD for Raspberry Pi 5 (27W @ 5A)
- Micro HDMI to HDMI Adapter
- Amazon Basics Low-Profile Wired USB Keyboard
- Amazon Basics Ergonomic 2.4 Ghz Wireless Optical PC Mouse
- Beikell Dual USB 3.0 and USB-C Memory Card Reader
Feel free to use these links to conveniently purchase the needed parts. Now, let’s move on to the next step and set up your Raspberry Pi 5 with Home Assistant OS.
TIP: The best part here is that you can target floors in the actions of the Home Assistant automations.
Watch the Video Tutorial
Feeling overwhelmed with all the steps? Don’t worry! If you prefer visual guidance, check out my video tutorial on this topic. Simply click the link below to watch:
In the video, I walk you through each step of installing Home Assistant OS on Raspberry Pi 5, making it even easier for you to follow along. So sit back, relax, and let’s get your smart home journey started!
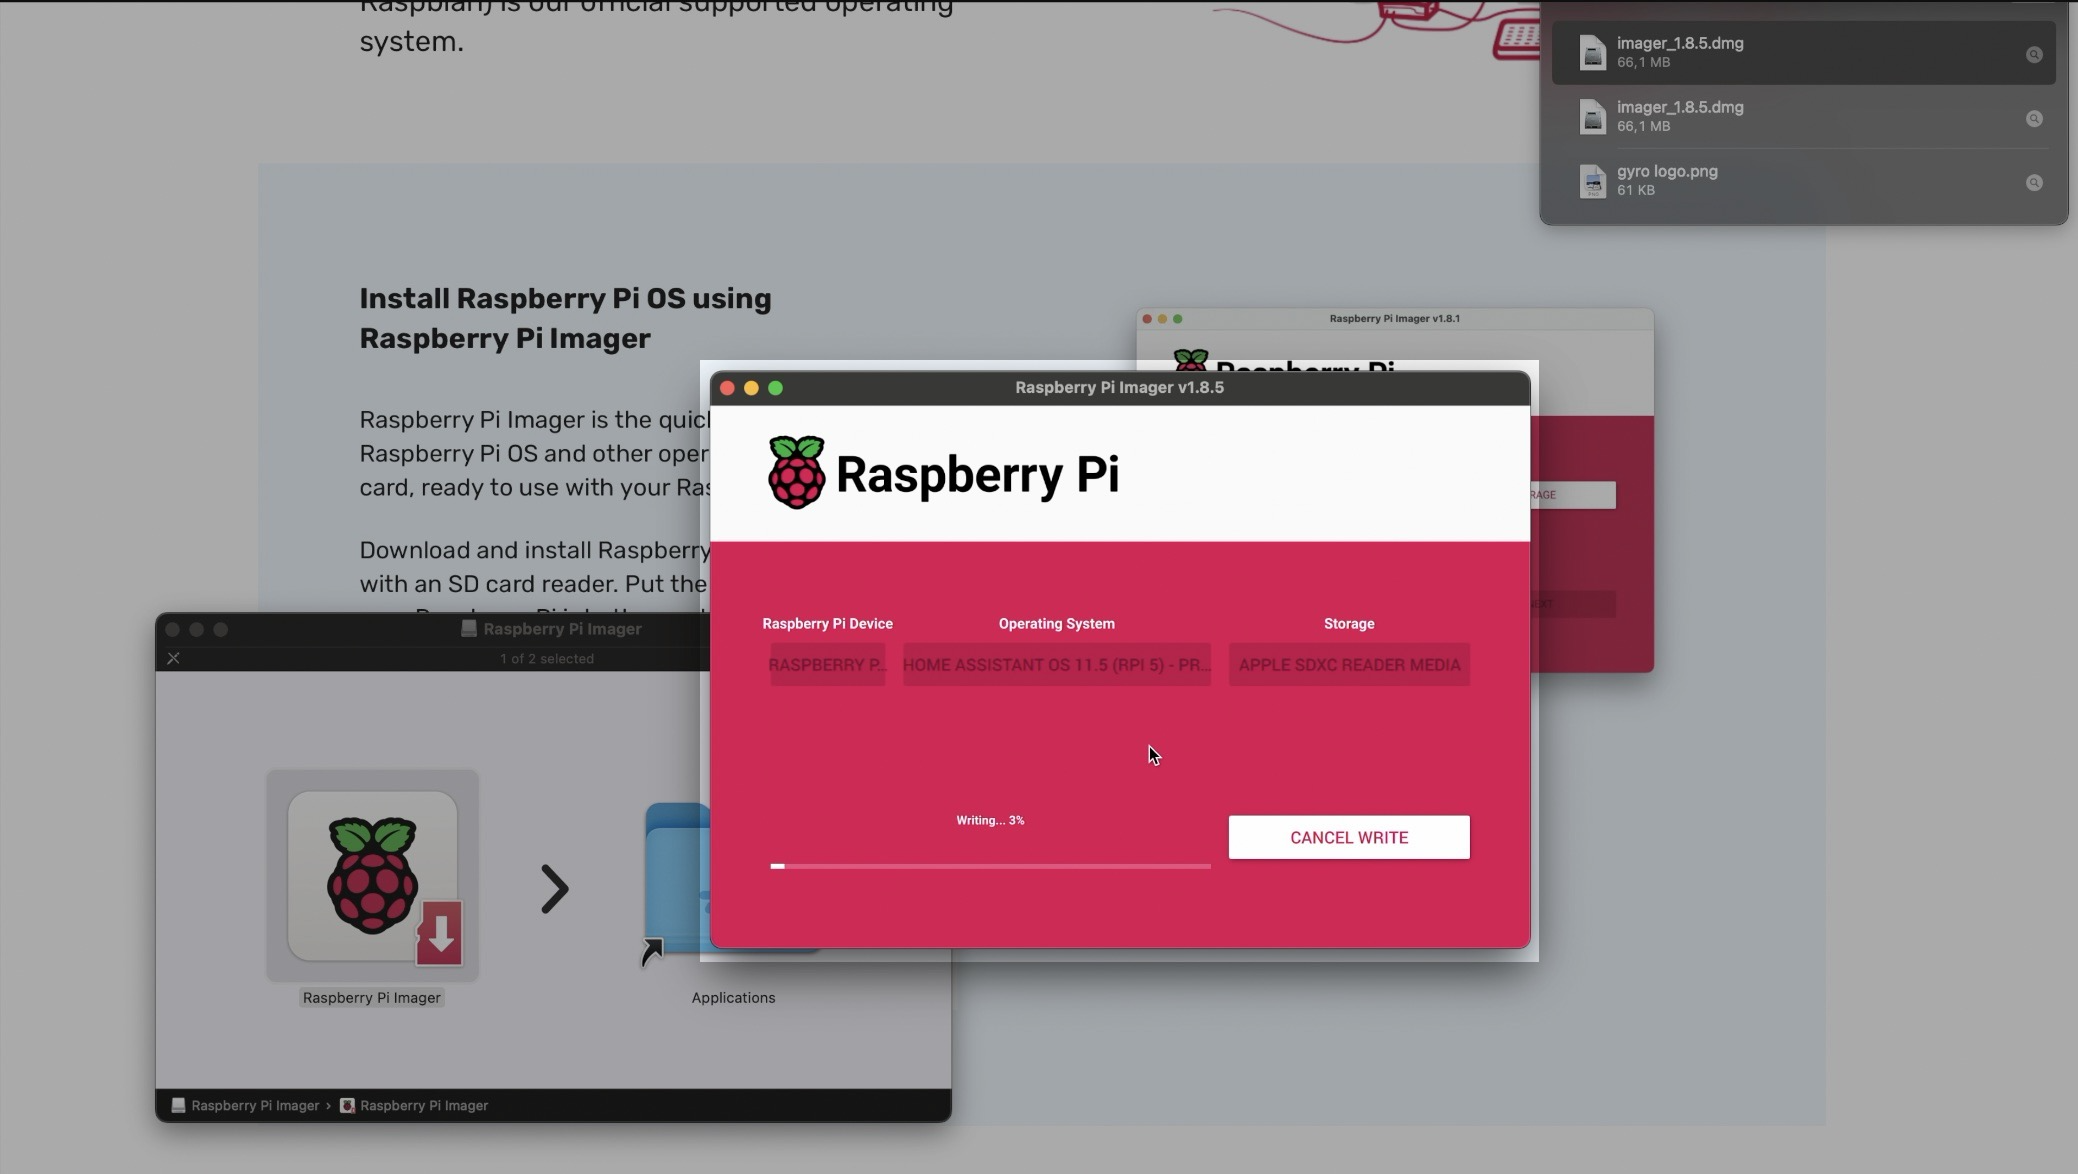
Step 2: Download and Install Raspberry Pi Imager
Head to the Raspberry Pi website and download the Raspberry Pi Imager tool – https://www.raspberrypi.com/software/
It’s available for Windows, Linux, and Mac. Install the tool and follow these steps:
- Select “Raspberry Pi 5” as your device from “CHOOSE DEVICE” button.
- Click on “CHOOSE OS” and navigate to “Home Assistant” under the Other specific-purpose OS section.
- Select “Home Assistant” again.
- Insert your SD card and click on “CHOOSE STORAGE” to select your SD card.
- Wait for the Home Assistant OS to be written onto your SD card.
Learn More About Smart Homes
Are you confused by all the fancy words and acronyms related to smart homes? No worries! I’ve put together a helpful guide called the Smart Home Glossary. It’s like a little dictionary that explains these words and acronyms in simple terms.
And guess what? It’s totally free! You can get it right now from my website: automatelike.pro/glossary
With this guide, you’ll understand everything about smart homes without any confusion. So why wait? Go ahead and download it!
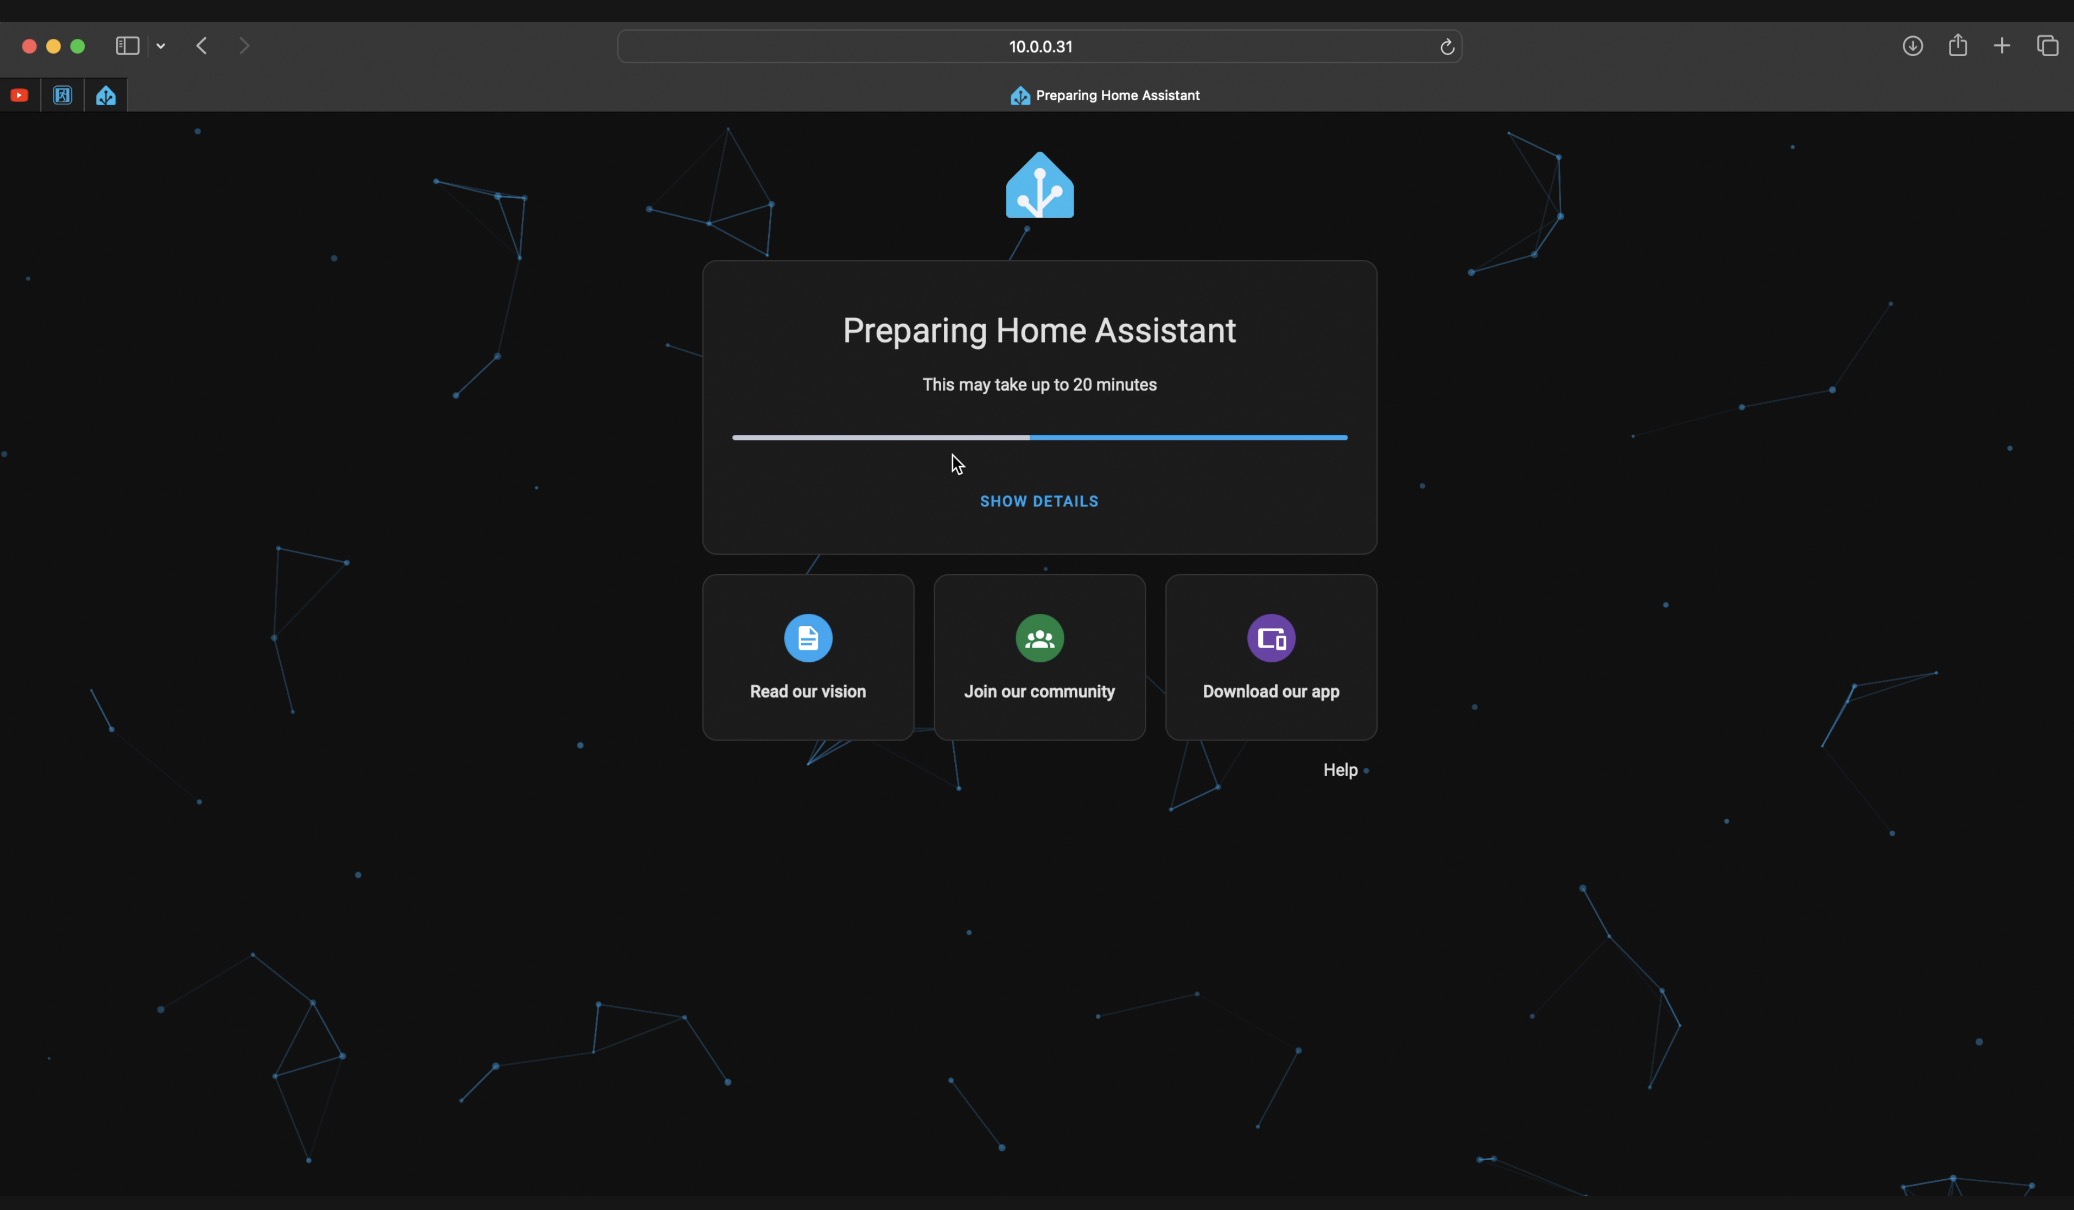
Step 3: Set Up Your Raspberry Pi 5
Once the Home Assistant OS is written onto your SD card, follow these steps:
- Remove the SD card from your computer and insert it into your Raspberry Pi 5.
- Connect your Raspberry Pi 5 to your home network using a LAN cable.
- Plug in the power supply to boot up the device.
- Wait for a minute or two for the boot process to complete.
- Open a browser on a device connected to the same network and type http://homeassistant.local:8123. If this doesn’t work, find the IP address of your Raspberry Pi 5 from your router interface and use that instead. Example: http://10.0.0.31:8123
- You should see a screen saying that few more minutes are needed to Home Assistant OS on Raspberry Pi 5 installation to finish and soon after the Onboarding screen.
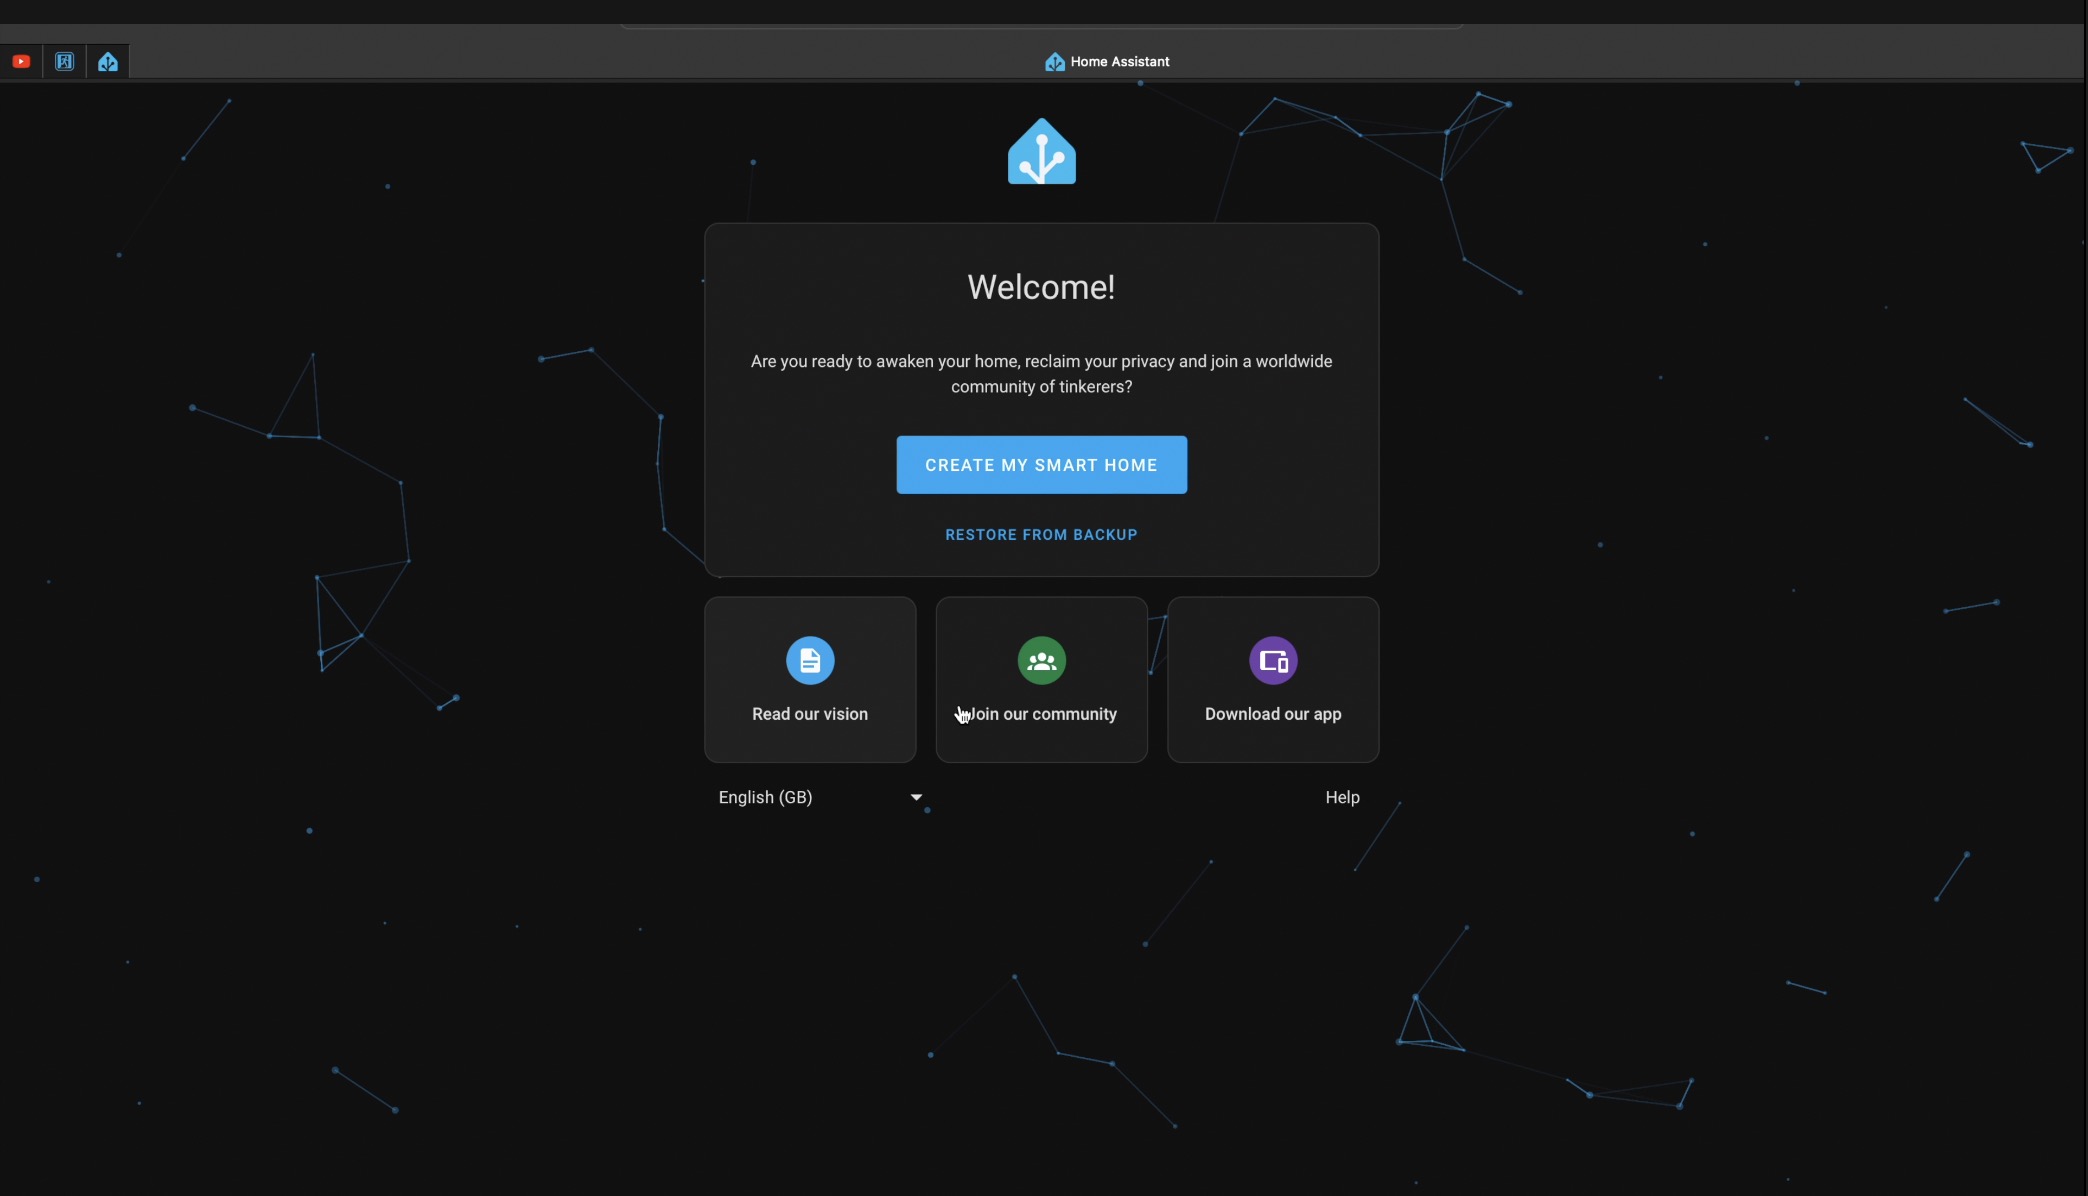
Step 4: Home Assistant Onboarding Process
Once you access Home Assistant via your browser, follow these steps:
- Select your preferred language.
- Then you have two options:
- Choose to restore from a backup (just click on the RESTORE FROM BACKUP)
- or start from scratch.
- If starting from scratch, enter a username and password.
- Select your location.
- Decide whether to share anonymized information from your installation.
- Home Assistant will detect compatible devices in your home (for informational purposes only).
- You will have a fully functional Home Assistant OS on Raspberry Pi 5
Home Assistant OS on Raspberry Pi 5 Conclusion
Congratulations! Your Home Assistant OS on Raspberry Pi 5 is up and running. You can customize settings, add devices, create scenes and home automations and explore the features of Home Assistant to create your dream smart home.
For further assistance, don’t hesitate to check out my free Home Assistant webinar: https://automatelike.pro/webinar
Thanks for joining me on this journey. Happy home automation!
Hi Kiril,
Is it possible to install home assistant on the rPi5 using and ssd drive?
Thanks
Yes, it should be, but I personally didn’t try that yet
Hi KIril, I am running 2024.1.0.dev20231218 and wondering whether I can update to 2024.2 using the regular update process?
Thanks
Make a full backup before that and try it out. No reason not to work…