
Xiaomi TH sensor is a great device for a Smart Home and it is working out of the box with Home Assistant, but unfortunately not every time.
Table of Contents
Native Home Assistant Integration is not working every time
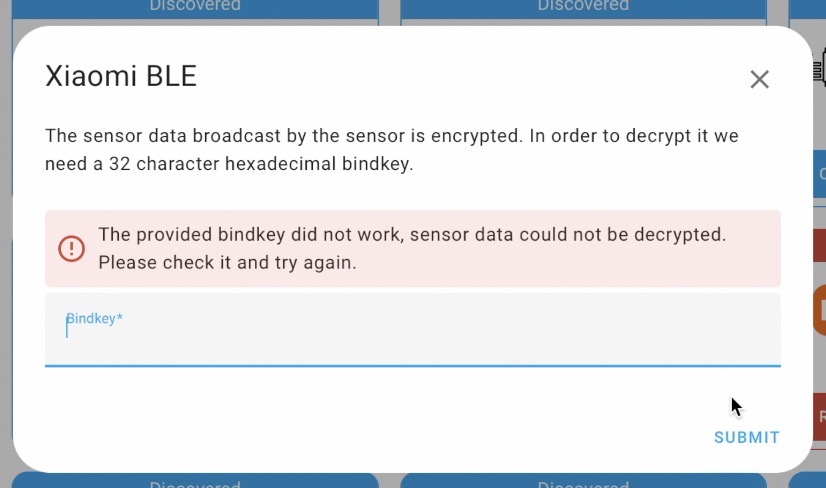
There is an easy process that needs to be followed to extract the BIND key which is kind of a password that encrypts the Bluetooth communication to and from the Xiaomi Sensor. This BIND key is then used to add the sensor in Home Assistant natively and that is if you have some luck. The problem is that there are multiple reports on the Internet and comments under my other videos & articles (Xiaomi Bluetooth Home Assistant Integration just Got Easier!) that on some devices this process just doesn’t work.
Maybe it is because there are different firmware version of the device, or because the device should be activated in the Xiaomi App first or it shouldn’t be activated at all. I’m not quite sure here. What I’m sure though is that the out of the box integration of this Xiaomi sensor with Home Assistant is questionable.
That is why I decided to revisit this topic and I found a way that is equally easy and way more reliable in my humble opinion. On top, it can add more features to your device with ease.
Few words about Xiaomi T&H Sensor LYWSD03MMC
Before I show you this new to me method step-by-step. I will say few words about the Xiaomi T&H sensor with model LYWSD03MMC.
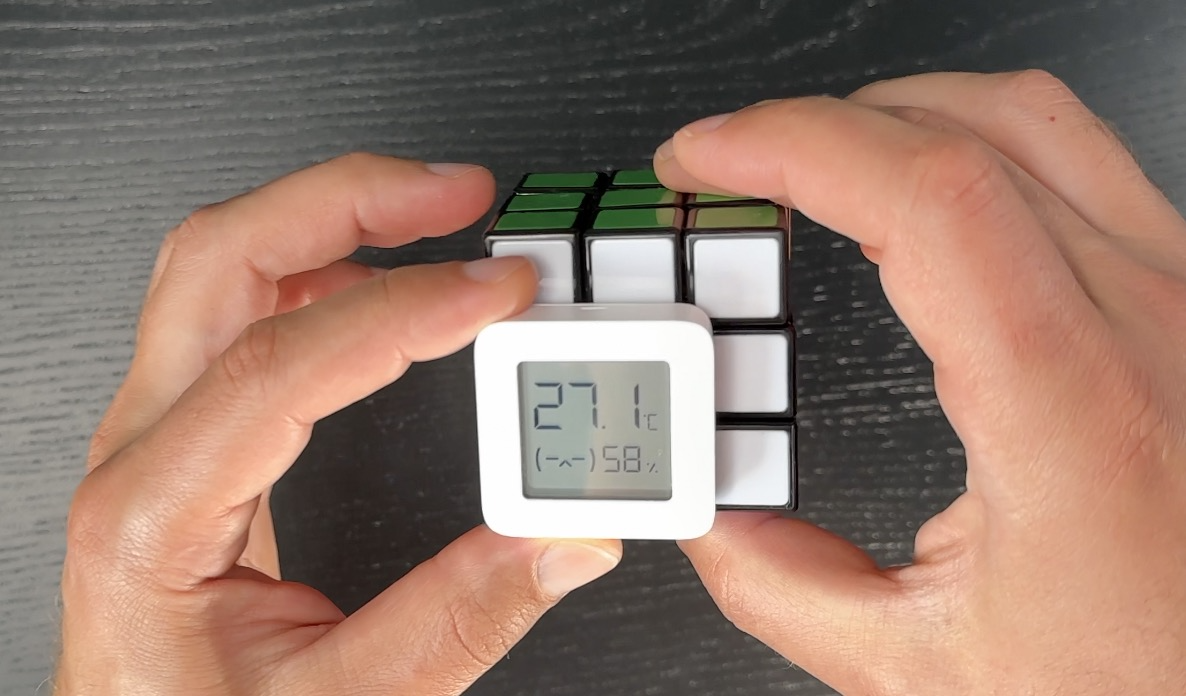
I already bought 4 or 5 of these little guys and I really like them. They are using Bluetooth for wireless communication, they are super tiny, their measurements are precise and their battery is lasting over a year.
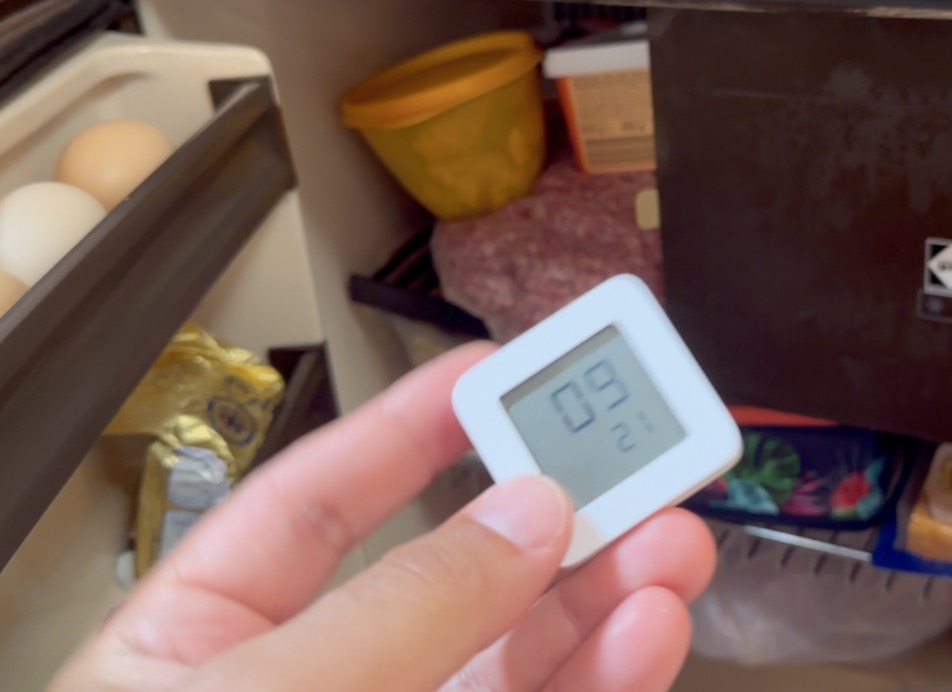
And because they are battery powered and super small in size you can put them virtually anywhere.
I can safely say that there is no better of-the-shelf smart Temperature & Humidity sensor for better price as they cost around $5 dollars in AliExpress or even less if you buy a pack of 4 or 5. And If you want to check their current price, you can use the affiliate links below:
- Xiaomi BT Thermometer – https://s.click.aliexpress.com/e/_DlsUEQv
- 4 Xiaomi BT Thermometers – https://s.click.aliexpress.com/e/_De5BN3P
- Xiaomi smart TH sensor – https://s.click.aliexpress.com/e/_DE3qNSt
- Xiaomi smart TH sensor – https://s.click.aliexpress.com/e/_DnS6DGN
- Xiaomi smart TH sensor – https://s.click.aliexpress.com/e/_DmhrlQv
They are slightly more expensive in Amazon, but as usual they arrive much faster, unfortunately they are not always available there.
Xiaomi T&H Sensor Cons
Of course, not everything is flowers & roses. The device have some cons and they are all related to the closed ecosystem that almost every vendor tries to impose.
Xiaomi in our case, is trying to restrict the usage of this sensor to their Xiaomi Home mobile app only. So, the typical use case and the general idea behind that is to install the Xiaomi app on your phone, so you can get the sensor readings remotely.
Eventually, at later stage you can buy some more Xiaomi devices, and you have to add them all in the Xiaomi app as well.
Afterwards, you will be able to make some simple home automations within the Xiaomi App which is not super fascinating and versatile as you are kind of restricted to the manufactured by Xiaomi devices and to the automation possibilities of the Xiaomi App. And if you buy some other smart devices from different brand they will be in another app. Which means another ecosystem and the story is repeated all over again.
How to cure the Xiaomi T&H Sensor issues?
To fix this issue you need a Smart Home hub and the best one available at the moment that also comes for free is called Home Assistant.
Basically, we are super close to the state where if a Smart Device is not working with Home Assistant there is something wrong with that device and you better avoid it.
More and more Smart Home brands are taking into consideration Home Assistant support very seriously and their fan base grows as well as their sales.
What if you don’t have Home Assistant yet?
So, If you are not having Home Assistant yet, then please join my Home Assistant webinar. I will explain there what are the official methods to run Home Assistant, their Pros & Cons + 1 secret way to get started on a PC in under five minutes.
It is all free and you can reserve your spot on my other website – https://automatelike.pro/webinar
How to add the Xiaomi T&H Sensor in Home Assistant every time
Now, back to the Xiaomi T&H sensor, and the new method that can be used to add that sensor in Home Assistant every time without depending on luck, stars or planets alignment.
For that:
- I will open the following website in Chrome browser – https://pvvx.github.io/ATC_MiThermometer/TelinkMiFlasher.html
- Then I will click on Connect button and I will wait to see the LYWSD03MMC sensor in the list.
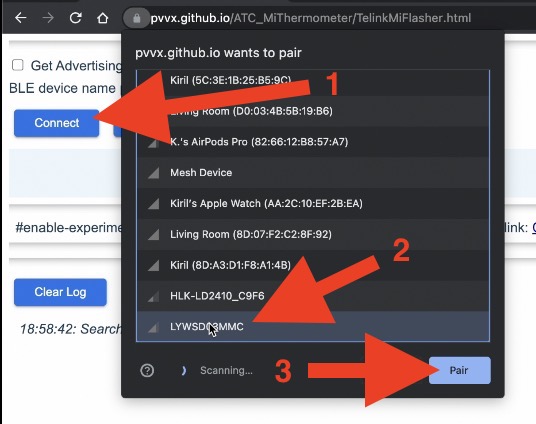
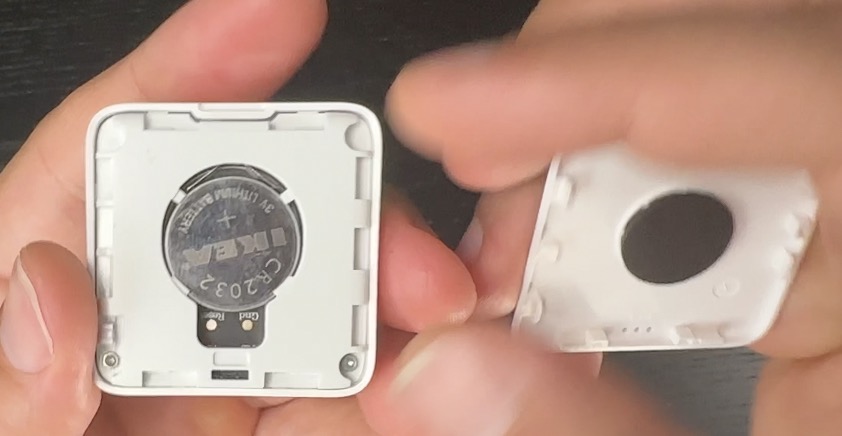
- I can filter the results and if the device is not visible it is a good idea to remove and insert the battery so the device to be awaken.
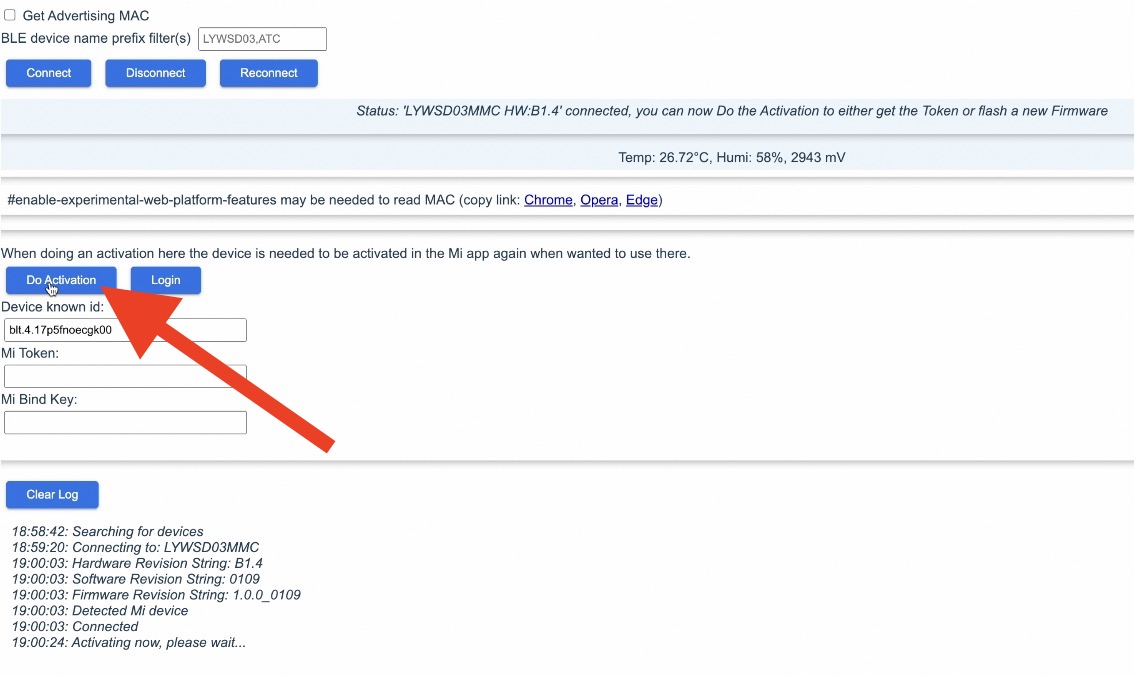
- Then I will click on Do Activation button
- I can flash a new custom firmware on the device by clicking either on buttons version 4.2 or 4.3 beta. And then on Start Flashing button.
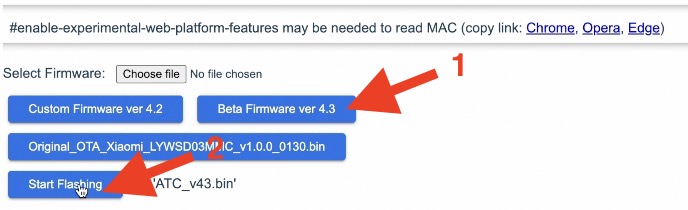
- This process takes about a minute and after that I have to connect to the device again, so I can start further tweak my device if I want to.
- The only thing that is needed if I just wish to add the Xiaomi T&H sensor in Home Assistant is to select BTHome option from this menu and to save the changes.

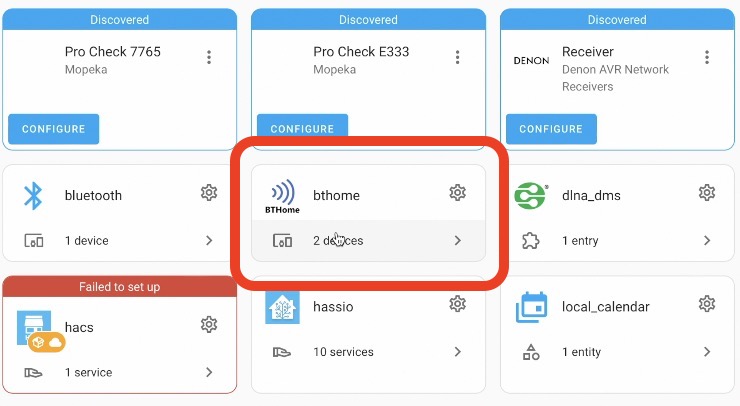
- Then I just have to wait a bit and the device will be auto discovered by Home Assistant in the Integrations section.
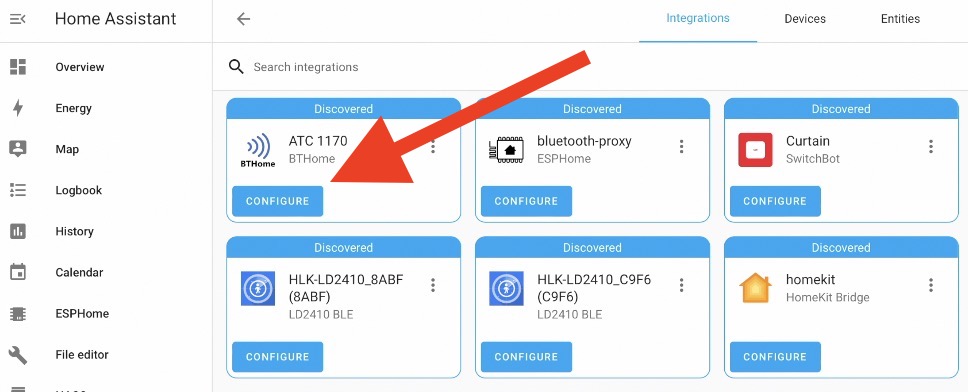
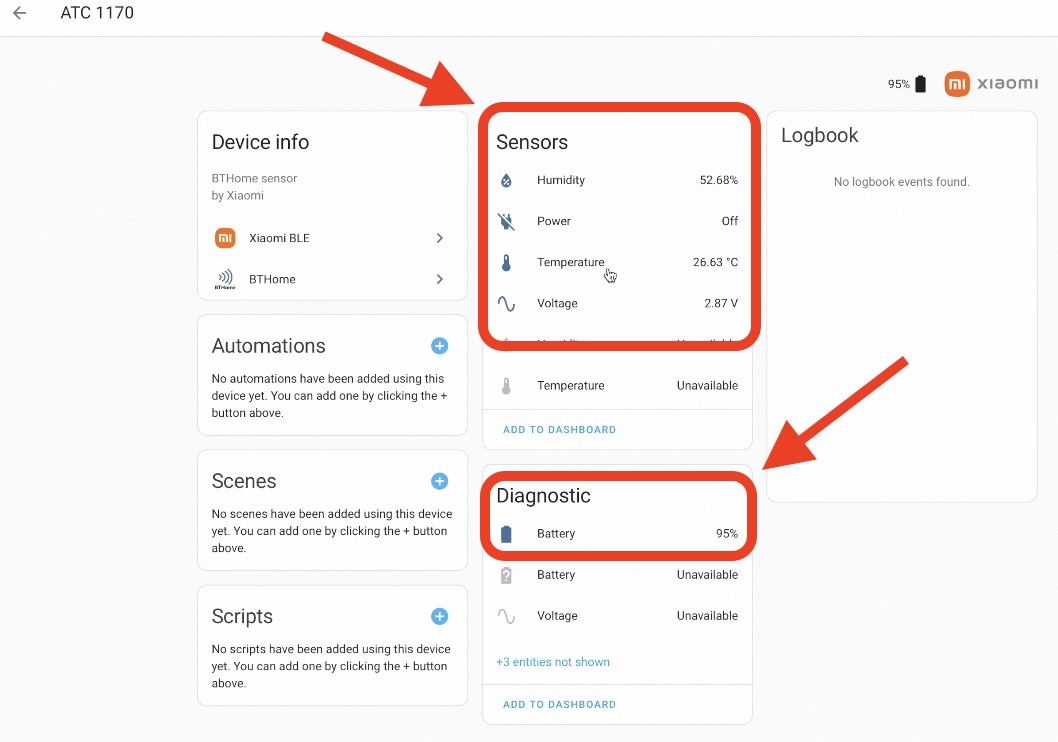
- I can then click on the configure button and with few more clicks I will have Xiaomi sensor added in Home Assistant.
- From there I can use the sensor readings to create home automations like start the heating or cooling if the temperature goes below or above some threshold or to send some notifications or everything altogether. Actually, the possibilities are endless.
Adding clock and battery readings to the Xiaomi T&H
What is cool about using this custom firmware is that you don’t have to deal with Xiaomi App at all, you don’t need to use Bind keys unless you want to and you can add some additional cool features to your device in just few clicks.
For example, I can show the battery percentage on the device display or I can add the clock.
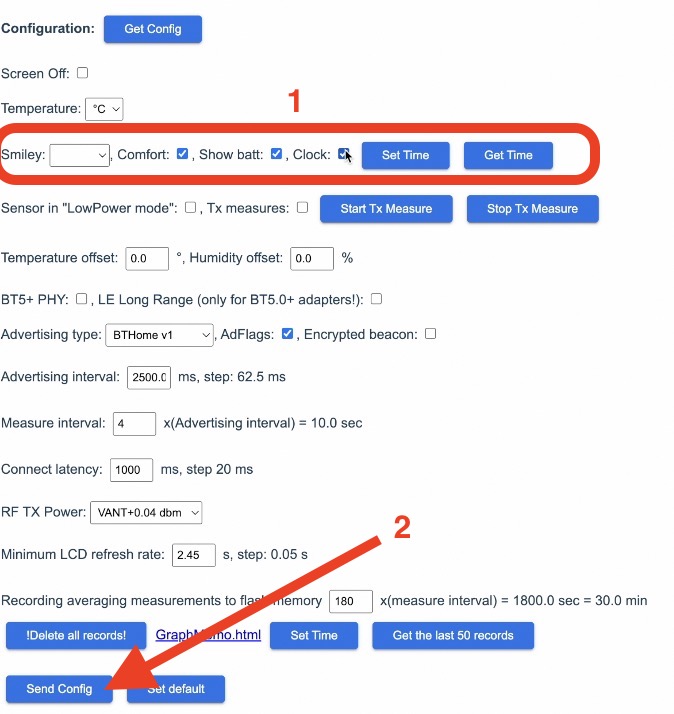
These features are not available at all in the stock Xiaomi firmware.
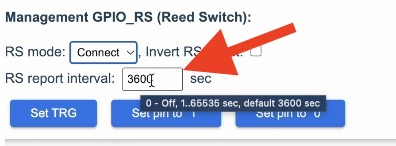
Playing with the update Interval of the sensor
You can also play with the update interval that is the time that the sensor is broadcasting the temperature & humidity readings to Home Assistant, but I suspect this will decrease the battery life, so I prefer to leave it as it is.
And here I have a challenge for you. Share your preferred firmware settings in the comments and if these settings affect the battery life of your device. If more of you are sharing these settings it will be a very helpful resource of info.
Smart Home Glossary for Free!
If some of the Smart Home terms that I’m using are not so clear for you, not because of my “perfect” English, but because you are just not sure what their meaning is.
Then, feel free to download my Smart Home glossary which is full of useful and simple explanations of these exact Smart Home terms and abbreviations.
The download link is here – https://automatelike.pro/glossary
I’m Kiril, Thanks for reading. I will see you in the next one.
Hi Kiril,
what do i do If I run the latest firmware on my Xiaomi sensor? Can I somehow flash and old Xiaomi firmware back to the sensor, so I can activate it via Telink?
Firmware Revision String: 2.1.1_0159
(!) Version: 2.1.1_0159 is temporarily not supported (!)
I got mine to work with the V2 Firmware. I used the guide from HA: https://www.home-assistant.io/integrations/xiaomi_ble.
Telink Flasher: https://atc1441.github.io/TelinkFlasher.html
But I could not get the bind key to work. I used the “Extract the keys from Xiaomi Cloud using a token extractor tool.”. https://github.com/PiotrMachowski/Xiaomi-cloud-tokens-extractor.
This worked for me.
Same problem here.. “Version: 2.1.1_0159 is temporarily not supported (!)”. Hope it is temporarily
Same problem here.. “Version: 2.1.1_0159 is temporarily not supported (!)”
same problem here as well ….
Cannot seem to see the options for custom firmware, just the once to add a file. I do the activation, but after that I’m stuck.
Hi, How do you get to the configuration page that you show in “Adding clock and battery readings to the Xiaomi T&H” ? was it before or after flashing to zigbee ?