
Home Assistant Container on Windows using Docker is possible! This article will be complication of super easy, step-by-step instructions on how to start Home Assistant on Windows machine using Docker. In other words, how to run Home Assistant Container, but there is more.
Table of Contents
What else is included in this Home Assistant Container on Windows article?
Here is what you can expect:
- I will show you how to update your Home Assistant when there is a new release and how to implement an automatic health check mechanism.
- If you don’t have Home Assistant yet this is a great way to finally get one and join in one of the fastest growing communities in the Smart Home world.
- On the other hand, if you already have Home Assistant, you can use this method to quickly spin a new test installation where you can start experimenting safely.
- I will also share which is the one and only drawback of this method in my humble opinion.
Just to mention that everything is free and it should work on any Windows version that is still in support and on any recent Intel or AMD Processor from the last 5 to even 10 years that support virtualization instructions.
Installing the Docker Application
First thing that is needed is a working Docker application. To achieve that:
- I will go to docker.com website where I can download the Docker application.
- I’m using a standard Docker installation and I’m accepting everything that is recommended (default installation).
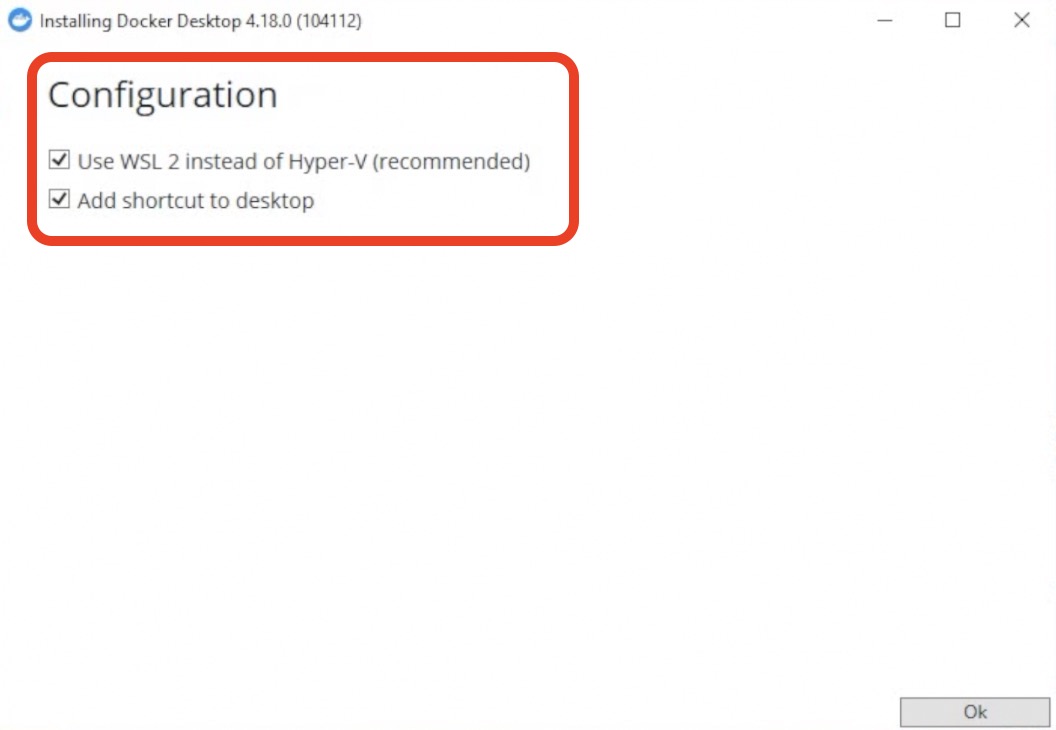
- Basically, I’m just clicking on the Next button until the installation is finished.
- After that, I will click on the Windows Start button I will search for Docker and I will click on it to start it.
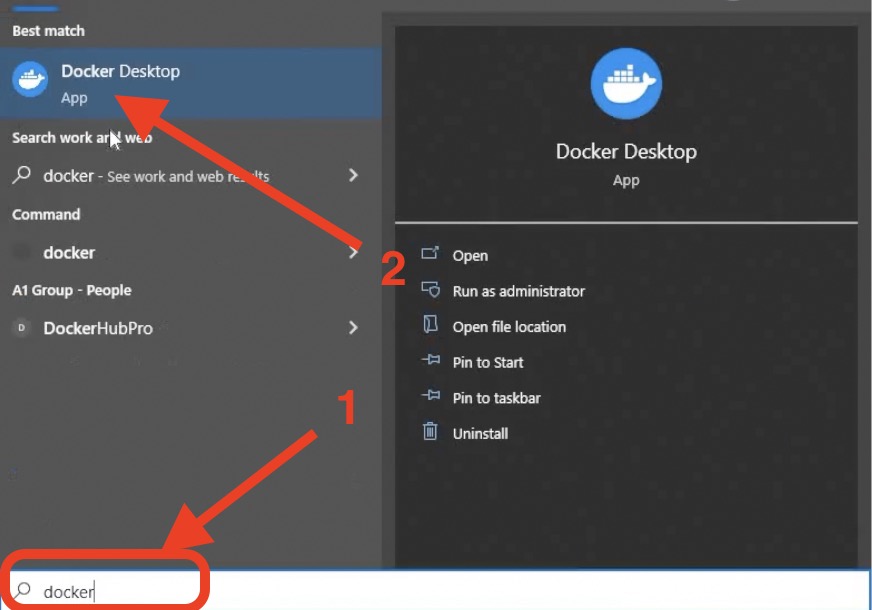
- At the end I would like to see a Green Whale saying that Docker engine is running. This means that everything is fine with the Docker installation.

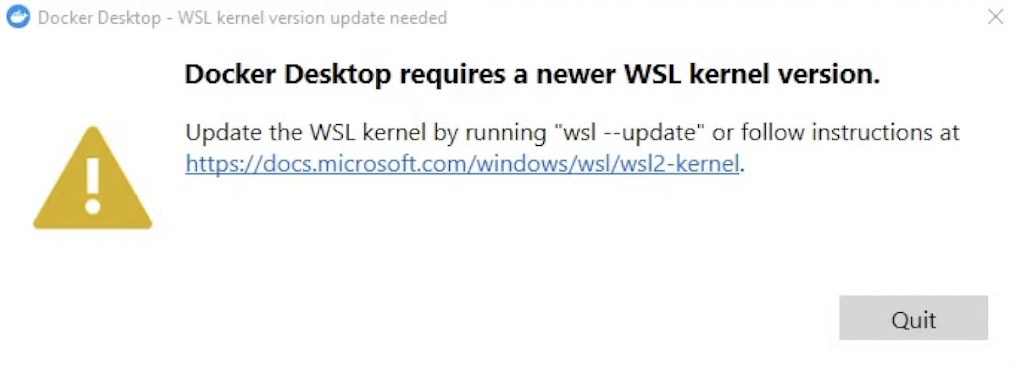
- By the way, If you get any warnings about WSL2 that is Windows Subsystem for Linux that Docker is using. Just follow the official Microsoft instructions to resolve the issue and you can find the link here – LINK
Start Home Assistant using docker-compose method
We finished with the Docker installation and it is time to move to the next steps.
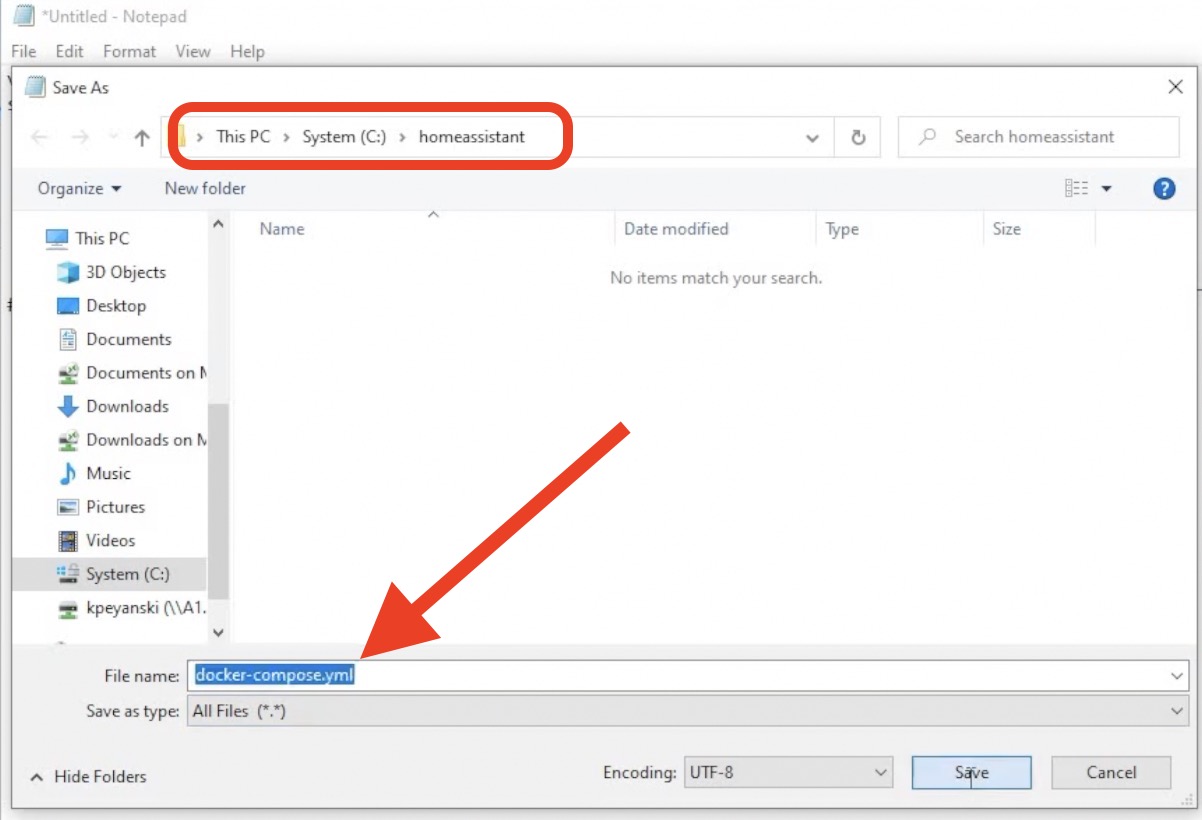
Next, I will create a new empty folder named homeassistant in my C:\ drive on my Windows machine.
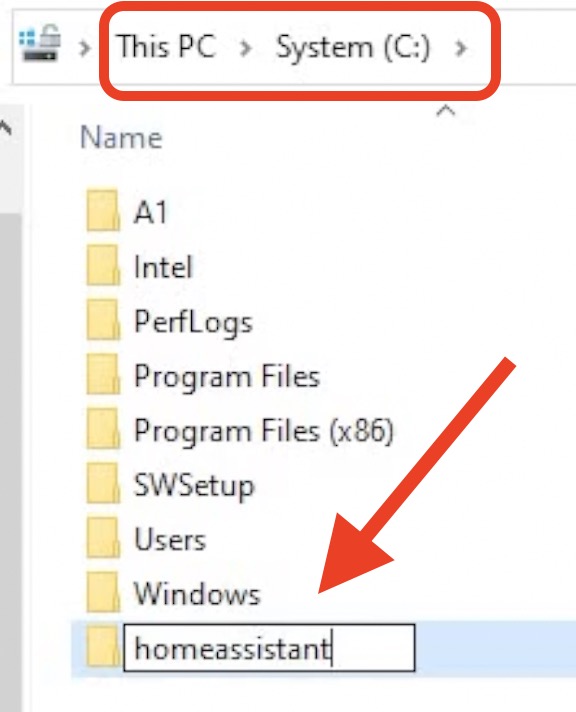
Quick Tip: I’m going to use this folder for the Home Assistant configuration. Be careful here if you want to replicate the steps that follows without any modification. Make the same folder inside your C drive and name it homeassistant exactly the same way all lowercase character without space or other special characters.
- After that, go to this GitHub link and either download the file as ZIP and unzip it or copy its contents and paste it in an empty Notepad.
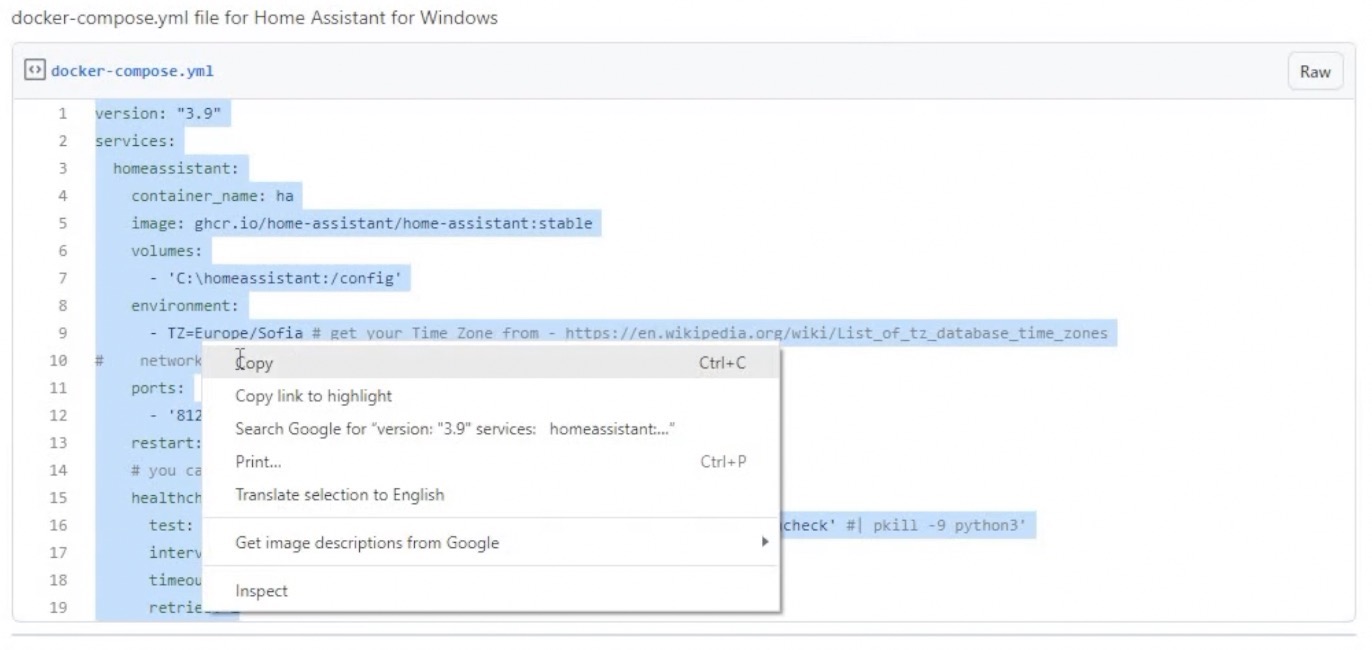
- Then name that file docker-compose.yml and save it in your homeassistant folder in drive C:\.
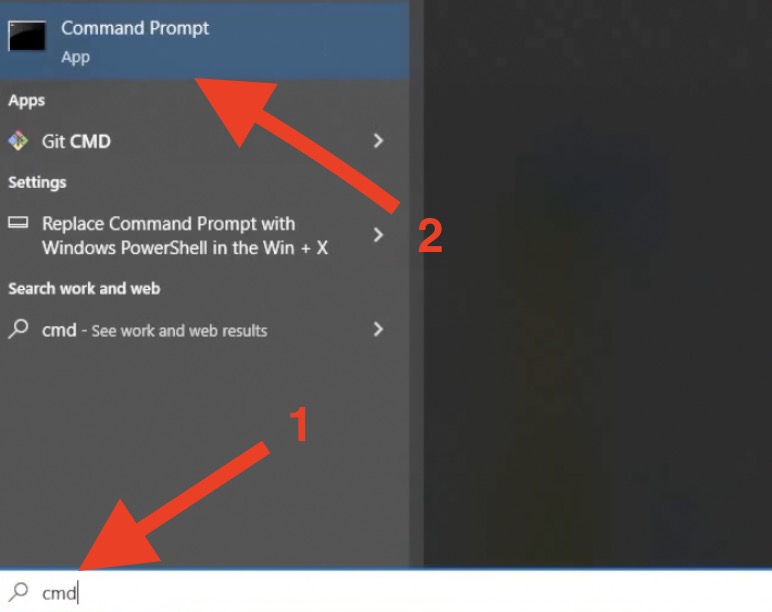
- Then click on the Windows Start button and type
cmdto run the Windows Command Prompt.
- Enter inside the homeassistant folder that we created earlier and in which we saved the docker-compose.yml file and type:
docker-compose up
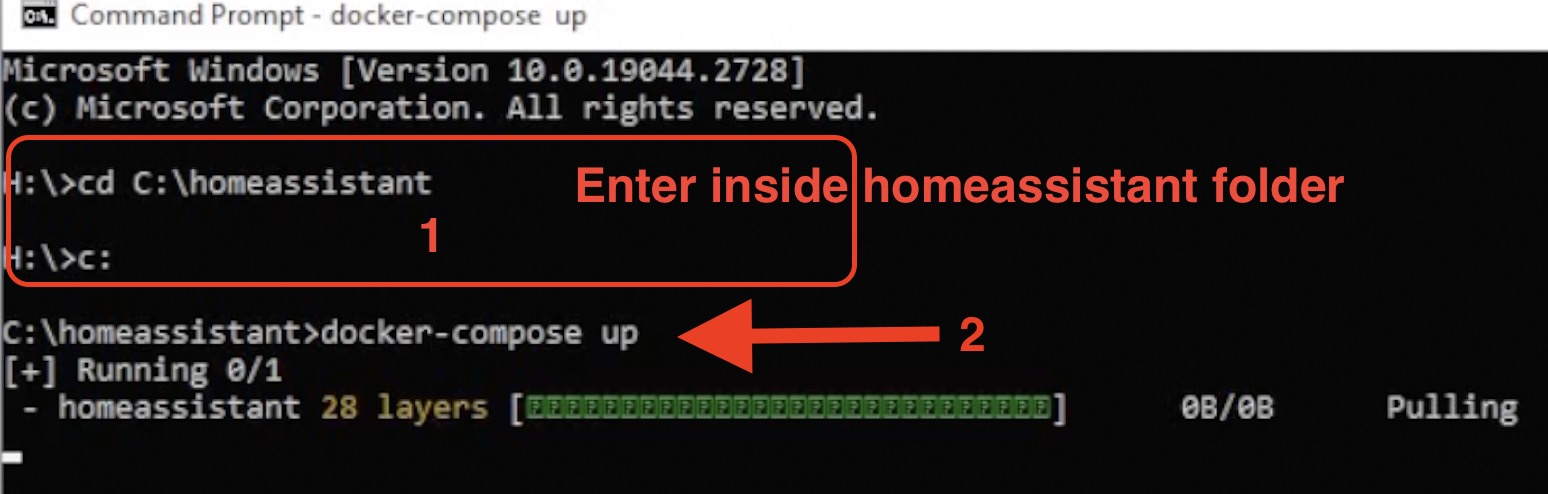
The above command will read the docker-compose.yml file and will execute the instructions inside:
- It will download Home Assistant Image,
- it will create a Docker container,
- it will map the Home Assistant config folder to the C:\homeassistant folder,
- it will set the time zone,
- it will expose the port 8123 where Home Assistant is running,
- and it will implement the health check mechanism.
At the end you will have a fully working Home Assistant.
How to check if Home Assistant is working
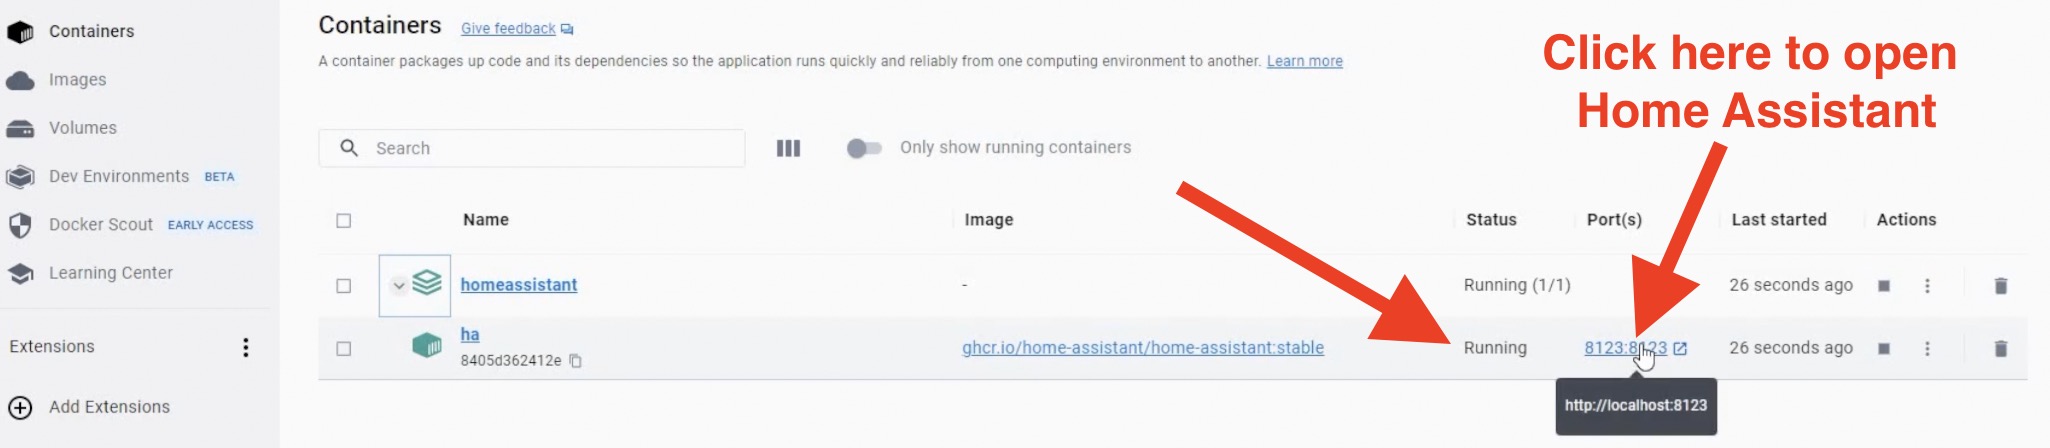
To check that everything is working you can open the Docker app where you can see that ha container is running and you can open the Web interface.
How to see the health check?
After 90 seconds, because we set that time in our docker-compose.yml file you can open a new Command Prompt and you can type the following command.:
docker container lsYou will see that that our automatic health check is running and the Home Assistant container is healthy.
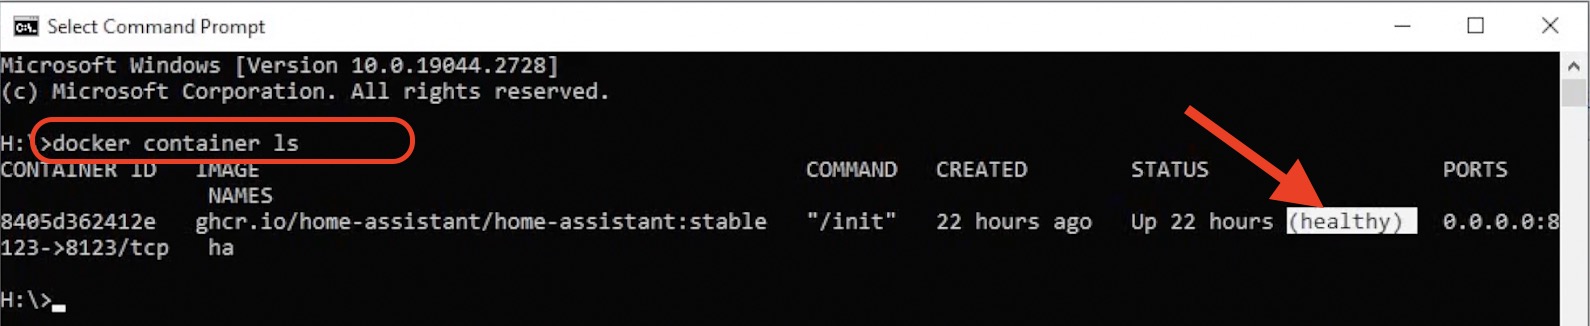
If for some reason localhost on port 8123 is not accessible this healthy status will not be shown.
Quick Tip: Don’t delete the docker-compose.yml file as we are going to use it for the future updates.
Start Home Assistant using docker run method
Instead of using docker-compose.yml method you can achieve the same result, but without the health check by using a docker run command.
To demonstrate you that I will stop & delete the ha container that docker-compose up created from the Docker app. Of course, this can be done from the Command Prompt, but using the Docker app is more visual friendly.

docker-compose up createdYou can get this command from the section below. You just have to paste it in the Command Prompt instead of docker-compose up command.
docker run -d --name="ha" -e "TZ=Europe/Sofia" -v "C:\homeassistant:/config" -p 8123:8123 ghcr.io/home-assistant/home-assistant:stable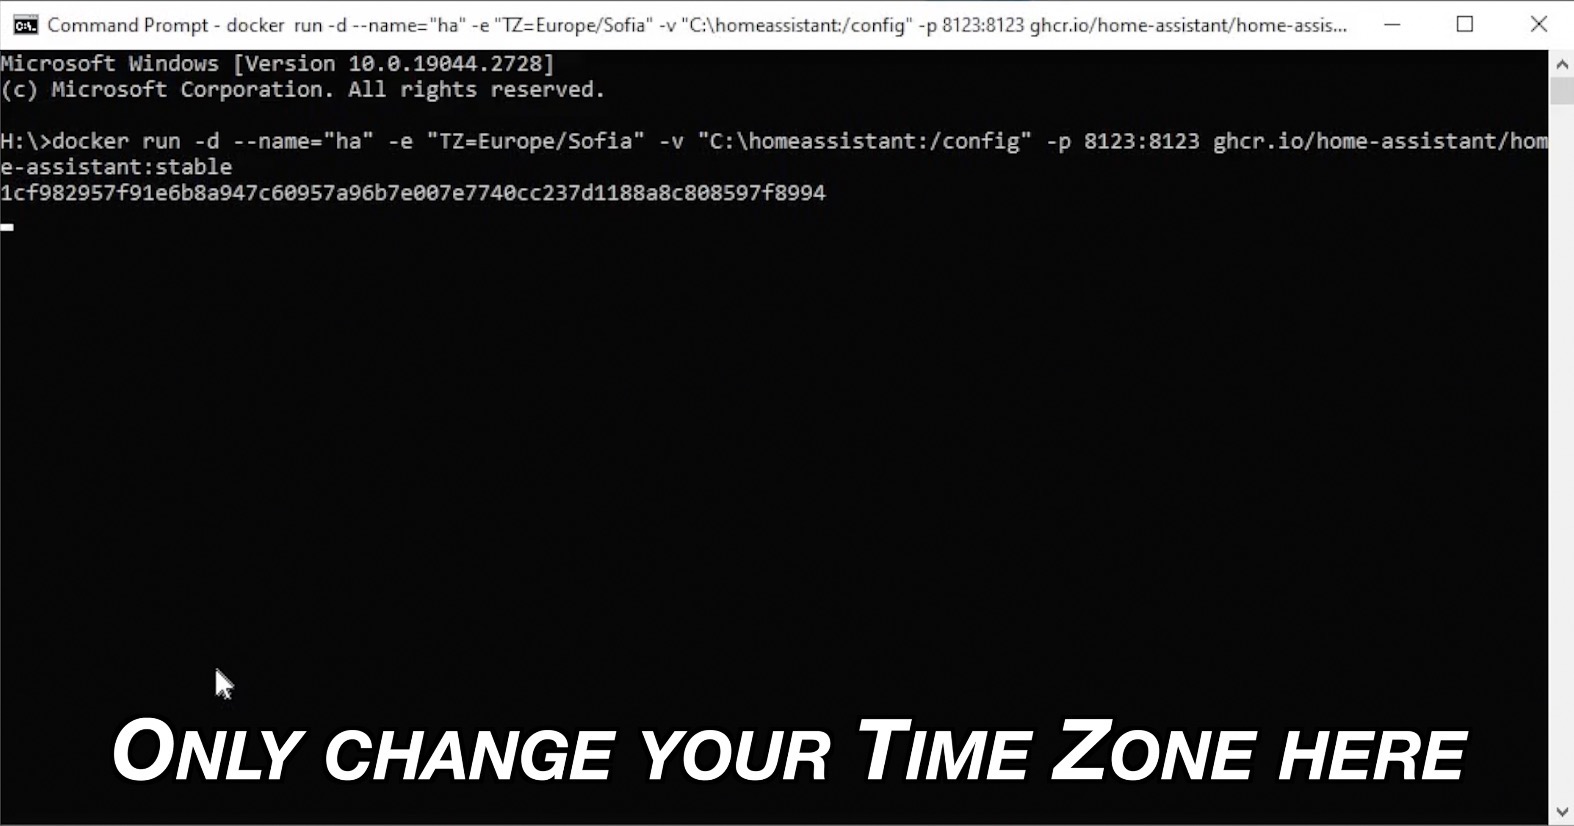
So, this is another method which may be even easier.
Home Assistant Onboarding
We now know two ways to start Home Assistant on Windows. And when Home Assistant is started it is time for onboarding which is super easy process:
- You just have to type a Username and Password,
- you can then name your Home Assistant installation,
- set a location, country, language, currency and stuff like that,
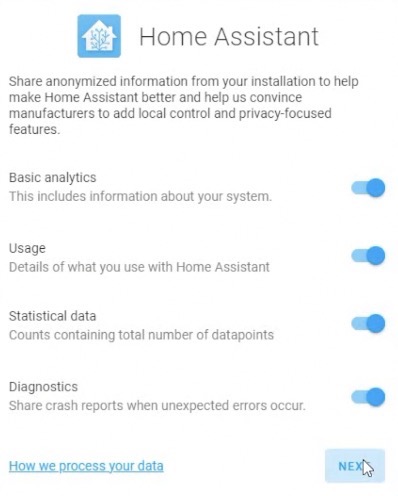
- then you can optionally opt-in for the anonymous Home Assistant statistics,
- the system will also try to auto-discover some devices and integrations nearby,
- and finally you are in.
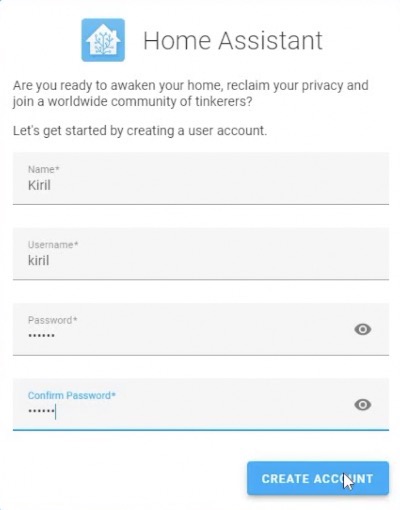
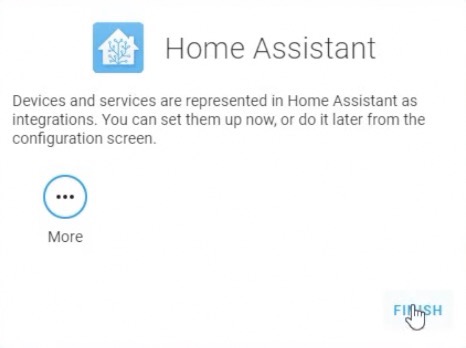
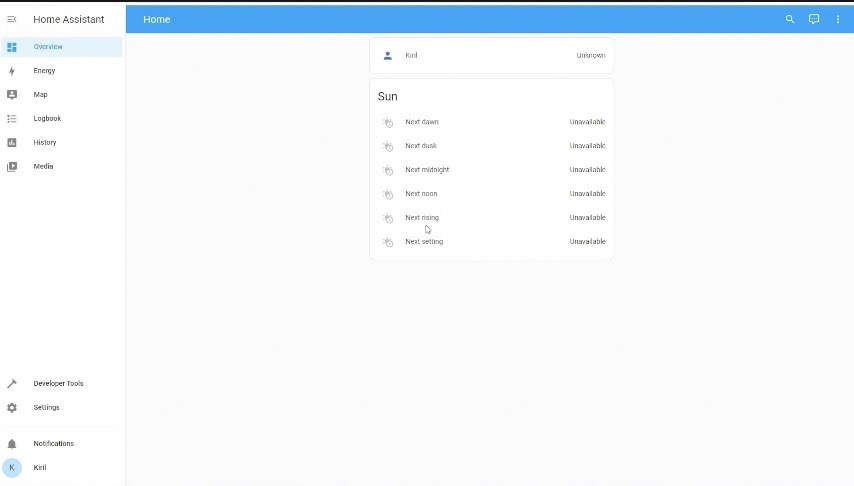
You can start using Home Assistant.
How to update Home Assistant Container?
What if you want to update Home Assistant? Every month there is one major new release and during that month usually more than 5 minor versions are released.
So, updating your Home Assistant is an important and regular task. With Home Assistant running on Docker or Home Assistant Container which is the official name of this kind of installation, the update process is easy.
# if this returns "Image is up to date" then you can stop here
docker pull ghcr.io/home-assistant/home-assistant:stable

# stop the running container
docker stop ha

# remove existing ha container
docker rm ha

# create a new ha container with docker-compose up
docker-compose up

# or you can create a new ha container with docker run
docker run -d --name="ha" -e "TZ=Europe/Sofia" -v "C:\homeassistant:/config" -p 8123:8123 ghcr.io/home-assistant/home-assistant:stable
Running Home Assistant container on other OSes?
The Home Assistant Container installation on Windows that we just did can be executed almost the same way on Mac and Linux Operating systems.
Just few minor modifications in the config folder mapping are needed.
docker run -d --name="ha" -e "TZ=Europe/Sofia" -v "/homeassistant:/config" -p 8123:8123 ghcr.io/home-assistant/home-assistant:stableFor whom Home Assistant Container installation type is?
This type of installation have almost everything and it is suitable for everyone from just testing type of installation to serious production environment where you can lose money if Home Assistant is down.
What is the Home Assistant Container biggest drawback?
The only thing that is missing in the Home Assistant Container is the Home Assistant Add-on store from where you can install some useful add-ons with just 1 click. Most of these add-ons are coming preconfigured and ready to use, so they are great if you are looking for convenience and functionality.
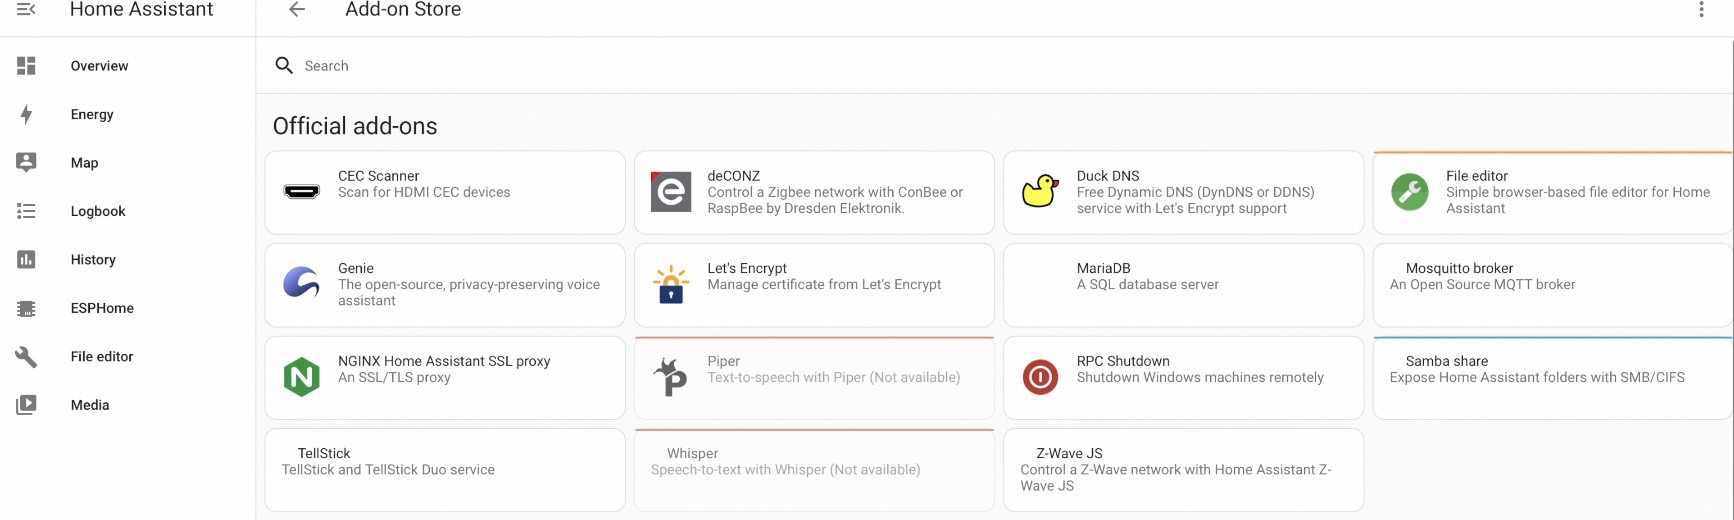
On the other hand, you may never need these Apps in the Home Assistant Add-ons store or you can manually install them.
So, that can be considered as a plus or minus depending of the point of view.
Free Home Assistant Webinar?
To understand more about the different installation types of Home Assistant, you can register for my Webinar where I’m talking exactly about that. Which Home Assistant installation types have Add-ons store, and what are their other pros and cons. It will help you find a method to start Home Assistant that is best for you.
The webinar is completely free and you can register from the link – https://automatelike.pro/webinar
How to uninstall Home Assistant Container?
Back to the current installation type. If for some reason Home Assistant Container is not your thing and you want to remove and clean everything. That can be easily done:
- Just delete the Home Assistant container from the Docker Application.

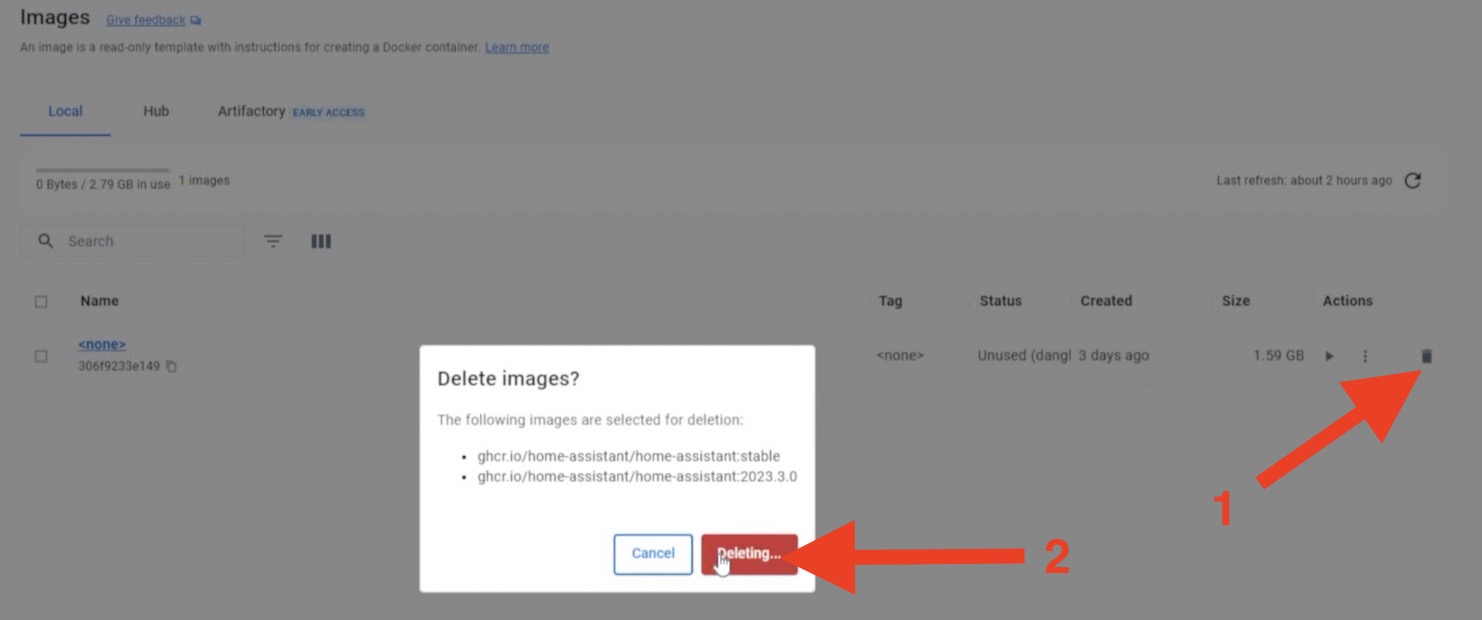
- Then delete the Home Assistant Image from the Docker app.
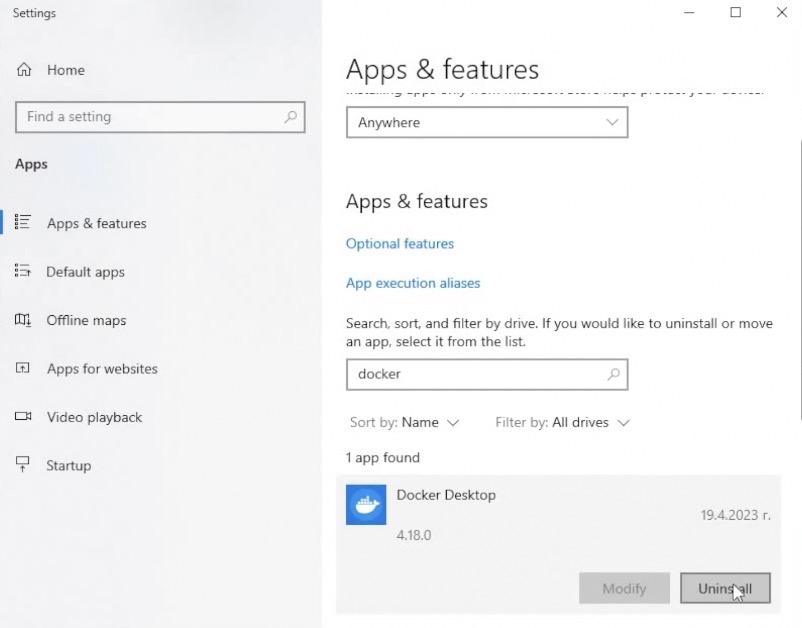
- You can even remove Docker from the Windows Add/Remove Programs.
Smart Home Glossary
With Home Assistant Container or not you can download my Smart Home Glossary if some of the Smart Home terms and abbreviations are not so clear to you. It will help you, because it is full of simple but useful explanations of these terms.
The Glossary is completely free and it is in a form of a PDF document, so you can use it offline on any device you wish.
Link to the Glossary – https://automatelike.pro/glossary
If you want to see more Home Assistant articles from me check this link – https://peyanski.com/category/smart-home/home-assistant/
Thank you for reading, I’m Kiril see you next week. Bye!
Hello and thanks for the guide! I’m getting my first taste of Home Assistant on an old NUC and I instantly see the appeal. However, I can’t get Bluetooth to work in HA and the only information I can find about BT in Docker is for Linux. Is it possible to get BT working when using Docker in Windows 10? FYI, I’m using an Asus USBBT-500 dongle