
This article will teach you how to install Home Assistant Supervised Installation on Debian Linux! Home Assistant is one of the best open sourced Smart Home platforms and it can be installed using several different ways. One of the officially supported methods to install Home Assistant is called Home Assistant Supervised. Such installation have to be run on top on Debian Linux to be truly supported and to avoid seeing an annoying running an unsupported installation label inside your Home Assistant menus.
Table of Contents
What will you see in this article?
In this article I will show you all the steps to run Home Assistant Supervised Installation on Debian from the very beginning till the end.
- I will install the latest Debian Linux inside VirtualBox (but you can also have Debian on an always on computer or even Raspberry Pi).
- Then, I will install all of the needed Home Assistant Supervised dependencies, including Docker and Home Assistant OS Agent.
- Finally, I will start the Home Assistant Supervised installation.
Meanwhile, you can try to install my Newsletter in your mailbox 🤣. You will receive articles like this one on a weekly basis and you just have to fill the form below:
[sibwp_form id=2]
Now, let’s start this article.
Get and install the VirtualBox
For this demo I will grab the latest VirtualBox software, which is available for Windows, Linux & Mac. This tool will allow me to start the Debian Linux image on my laptop as a Virtual Machine. If you want to do the same, download VirtualBox from the official site here 👉 https://www.virtualbox.org/wiki/Downloads and then install it.
TIP!: If you don’t want to mess with virtualisation and you have a computer that you wish to use instead, you just have to download and install Debian using the Debian installer which comes in a form of an image that can be written directly on a USB drive or CD/DVD media.
Get Debian Linux
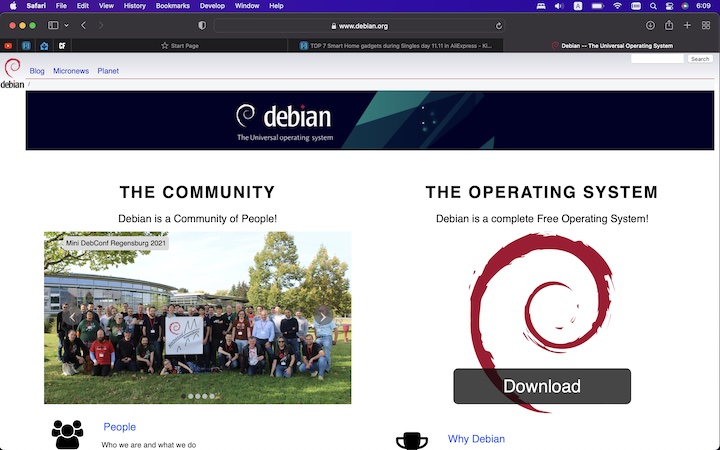
When the VirtualBox installation is complete I can download the Debian Linux image available on the official https://debian.org website. At the moment there is one big Download button that I’m going to click!
This is all I need for now and I can create the virtual machine.
Create & Configure the Virtual Machine
To create a Virtual Machine (VM for short) In VirtualBox suitable for Debian and Home Assistant Supervised do the following:
- Click on the New button to start the VirtualBox wizard that will guide you during the creating a VM process.
- As a name of the VM, type Debian and the fields Type & Version will be auto populated. Optionally, you can change the Machine Folder to folder you wish. Click Continue button after that.
- I will assign some virtual memory as well as virtual hard disk for the new VM. Depending of your system hardware you can set different amounts here, but please try not to go below 2GB of RAM and 20GB of storage, especially if you want to use this as your main Home Assistant installation.
- From the VirtualBox settings > System Menu I will Enable EFI option and I will assign 2 processors
- Then in the Network tab, I will select Bridged Adapter setting for the network adapter.

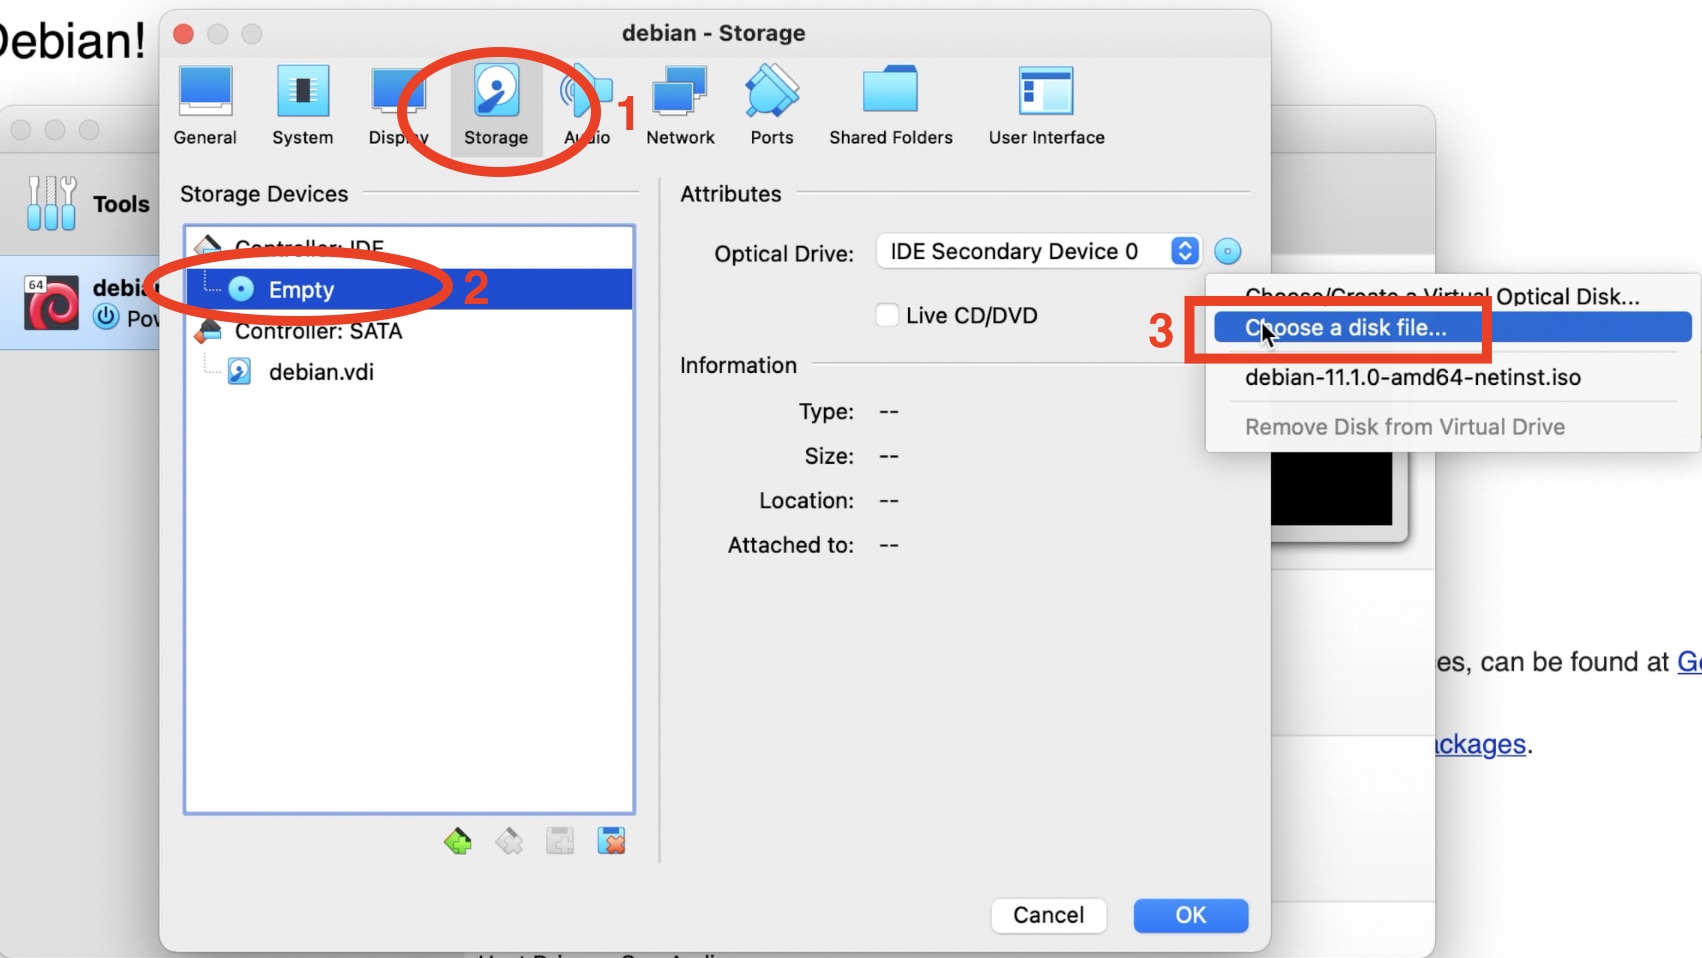
- As optical drive I will select the already downloaded Debian Linux image.
- Finally, I’ll just start the Virtual Machine, by clicking on the Start button (green right arrow).
Installation of Debian Linux in VirtualBox
This part is not hard, especially if you have ever installed any other Operating System in the past. The wizard will guide you through the whole process and I will mention only some key points that are important. If you face any difficulties, please watch my video where I’m showing everything.
So, here are the key points during the Debian Linux installation:
- Choose Graphical install at the initial screen.
- Select your language, location, keyboard.
- Enter a hostname you wish and leave the domain field empty.
- Enter a secure password for your root user.
- Enter your full name, username and a secure password for your regular user.
- Configure the clock.
- On Partition disks dialog select: Guided – use entire disk.
- Then select All files in one partition, Finish Partitioning and on Write changes to disk question select Yes.
- On Scan Extra installation media? question select No.
- Select closest to your location Debian mirror. This is the place from where the needed packages will be downloaded.
- On software selection dialog, apart form the default selection, you can only add SSH server if you wish to connect remotely to your virtual machine over ssh.
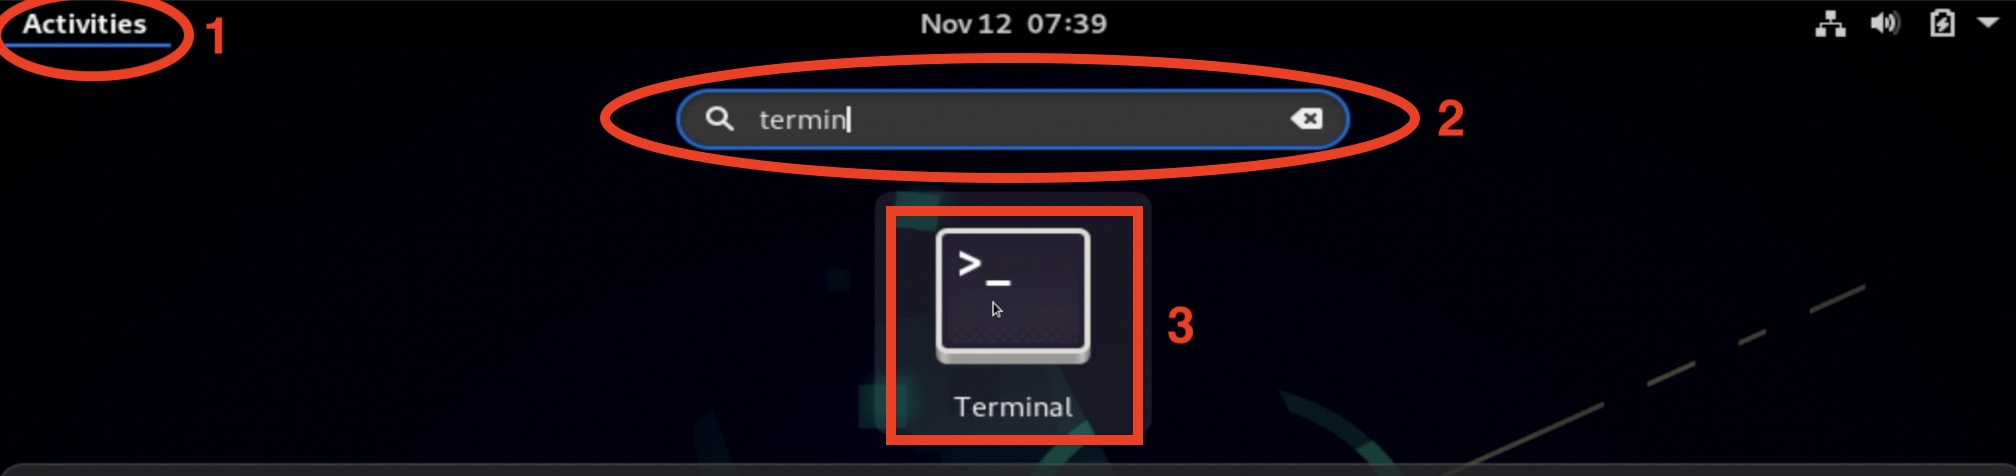
After all of the steps above are completed and everything is installed, the Debian Linux will reboot and will ask you for your regular user password. Login and from the Activities menu search for Terminal and start it. This Terminal will be our playground from now on because we have to perform the Home Assistant Supervised Installation on Debian.
Home Assistant Supervised Installation on Debian
After this point the actual Home Assistant Supervised Installation on Debian is starting. It doesn’t matter if you used the VirtualBox method described above or you have already up and running Debian Linux on a physical machine. Just follow the steps below and you will have Home Assistant Supervised in no time.
How to install Home Assistant Supervised dependencies?
Fast forward the Debian Linux is now up and running. If you reach this point, I will give you a big Like, because this is a major milestone in todays tutorial. From now on, everything else is kind of copy and pasting some commands.
So, pretty good job – really! 🥂
Now back to work, from the Debian Terminal enter the following commands:
- To switch from your regular user to the root user, use the command bellow and type your root password:
su -- To install almost all of the needed Home Assistant Supervised dependencies execute the following:
apt-get update && apt-get upgrade && apt-get install jq wget curl avahi-daemon udisks2 libglib2.0-bin network-manager dbus apparmor -yHow to install Docker?
Next big dependency for Home Assistant Supervised Installation on Debian is Docker! To install Docker I will use another one liner (that is the command on one line).
In Terminal I will execute the following official Docker script which will take care of everything that is needed.
curl -fsSL get.docker.com | shWhen Docker installation is finished, a good check to see if Docker is really installed and if it is working correctly is to type the following command:
docker —versionAs a result the Docker version should appear. If that’s the case, everything is fine and you are good to go.

How to install Home Assistant OS Agent?
Next step is to install Home Assistant OS Agent. Home Assistant OS Agent is used for better communication between the host OS and the Supervisor.
To get it, do the following:
- Download the latest package for your type of system from the Home Assistant OS Agent GitHub page 👉https://github.com/home-assistant/os-agent/releases/latest
- For example, if you are having 64bit system with Intel CPU, you will need this file (don’t forget to get the latest version URL from above link and to change the 1.2.2 with current version)
wget https://github.com/home-assistant/os-agent/releases/download/1.2.2/os-agent_1.2.2_linux_x86_64.deb- Install the downloaded package using the following command (change the name of the package if needed):
dpkg -i os-agent_1.2.2_linux_x86_64.deb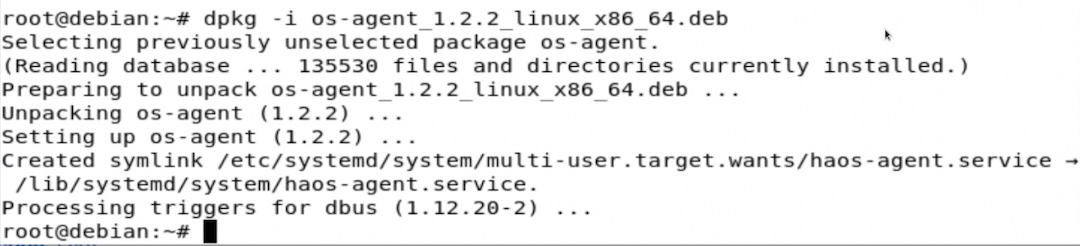
How to install Home Assistant Supervised?
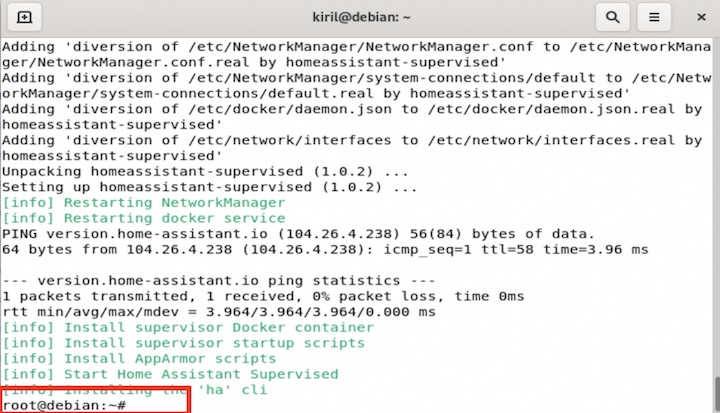
Finally, it is time for Home Assistant Supervised installation on Debian. I will use the official Debian package coming from the Home Assistant developers.
To get the official Home Assistant Supervised installation package do the following:
- Download the package using wget command:
wget https://github.com/home-assistant/supervised-installer/releases/latest/download/homeassistant-supervised.deb- Install the
homeassistant-supervised.debpackage
dpkg -i homeassistant-supervised.debWhen you see a prompt (hopefully without any errors), that means the installation is ready.
First start of the Home Assistant supervised can take some time. After a minute or 5 or even 10 you can try to open a new browser/tab and type your device IP as well as 8123 port.
TIP!: You can get your device IP either from your router or by type the ip addr command in the Terminal.
If everything is successful, you should see the following screen:
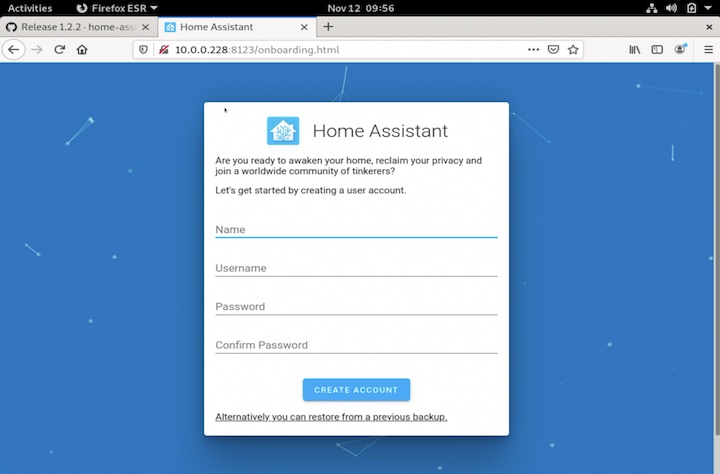
If that is the case, everything is fine and you just have to go through the initial Home Assistant onboarding process, which is a piece of cake compared to what you’ve been already passed through. If you face any difficulties here, just check my video for hints. I’m going through the whole process there.
What to do after you have Home Assistant up and running?
Now, when you have your Home Assistant up and running, it is possible and pretty normal to don’t know what to do next. Don’t worry, I’m here to help. You can check my Home Assistant Categoriy where you can find a lot of tutorials, tips and tricks. Here is a link 👉 LINK
Support my Work!
Having said that my Home Assistant Supervised installation on Debian Linux concludes.
if you wish to secure this website existence you can do one of the following or best all of them:
- Subscribe for my YouTube channel with the notification bell 👉 https://youtube.com/kpeyanski
- Subscribe for my newsletter where you will receive articles like this one on weekly basis 👉 LINK
- Check the available support methods in my support section and actually use one 😂 👉 LINK
- Join my Discord server where we help each other and discussing Smart Home & IoT 👉 LINK
- Follow me on Twitter 👉 LINK
Remember – Home Smart, but not hard!
I’m Kiril and I’m done writing. Bye!
thanks for the guide, but after 3 hrs home-assistant still not loading