
Yes, the SwitchBot Curtain can make your curtains smart in 30seconds and it can be controlled from your phone, Alexa, Google Home or Siri. But is SwitchBot curtain going to work with Home Assistant? Let’s find out.
Table of Contents
What is SwitchBot Curtain?
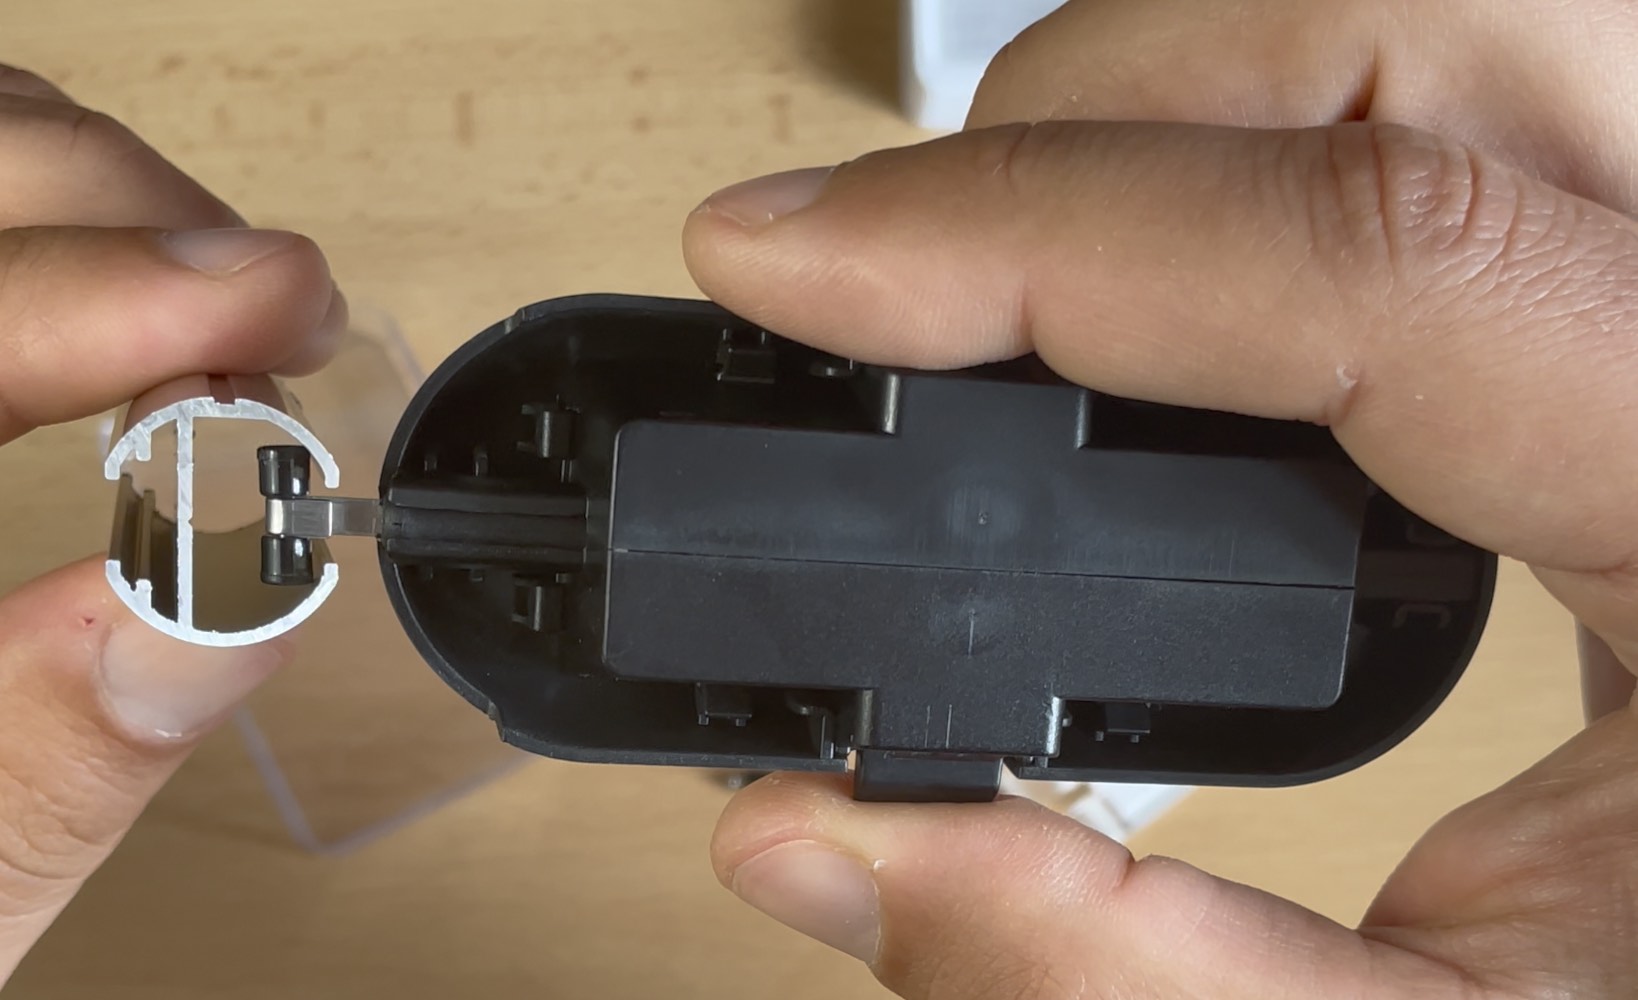
SwitchBot Curtain is a small battery powered device, that can retrofit your curtains no matter your curtain rail type as it can be ordered with Rod, U Rail or I rail hooks.
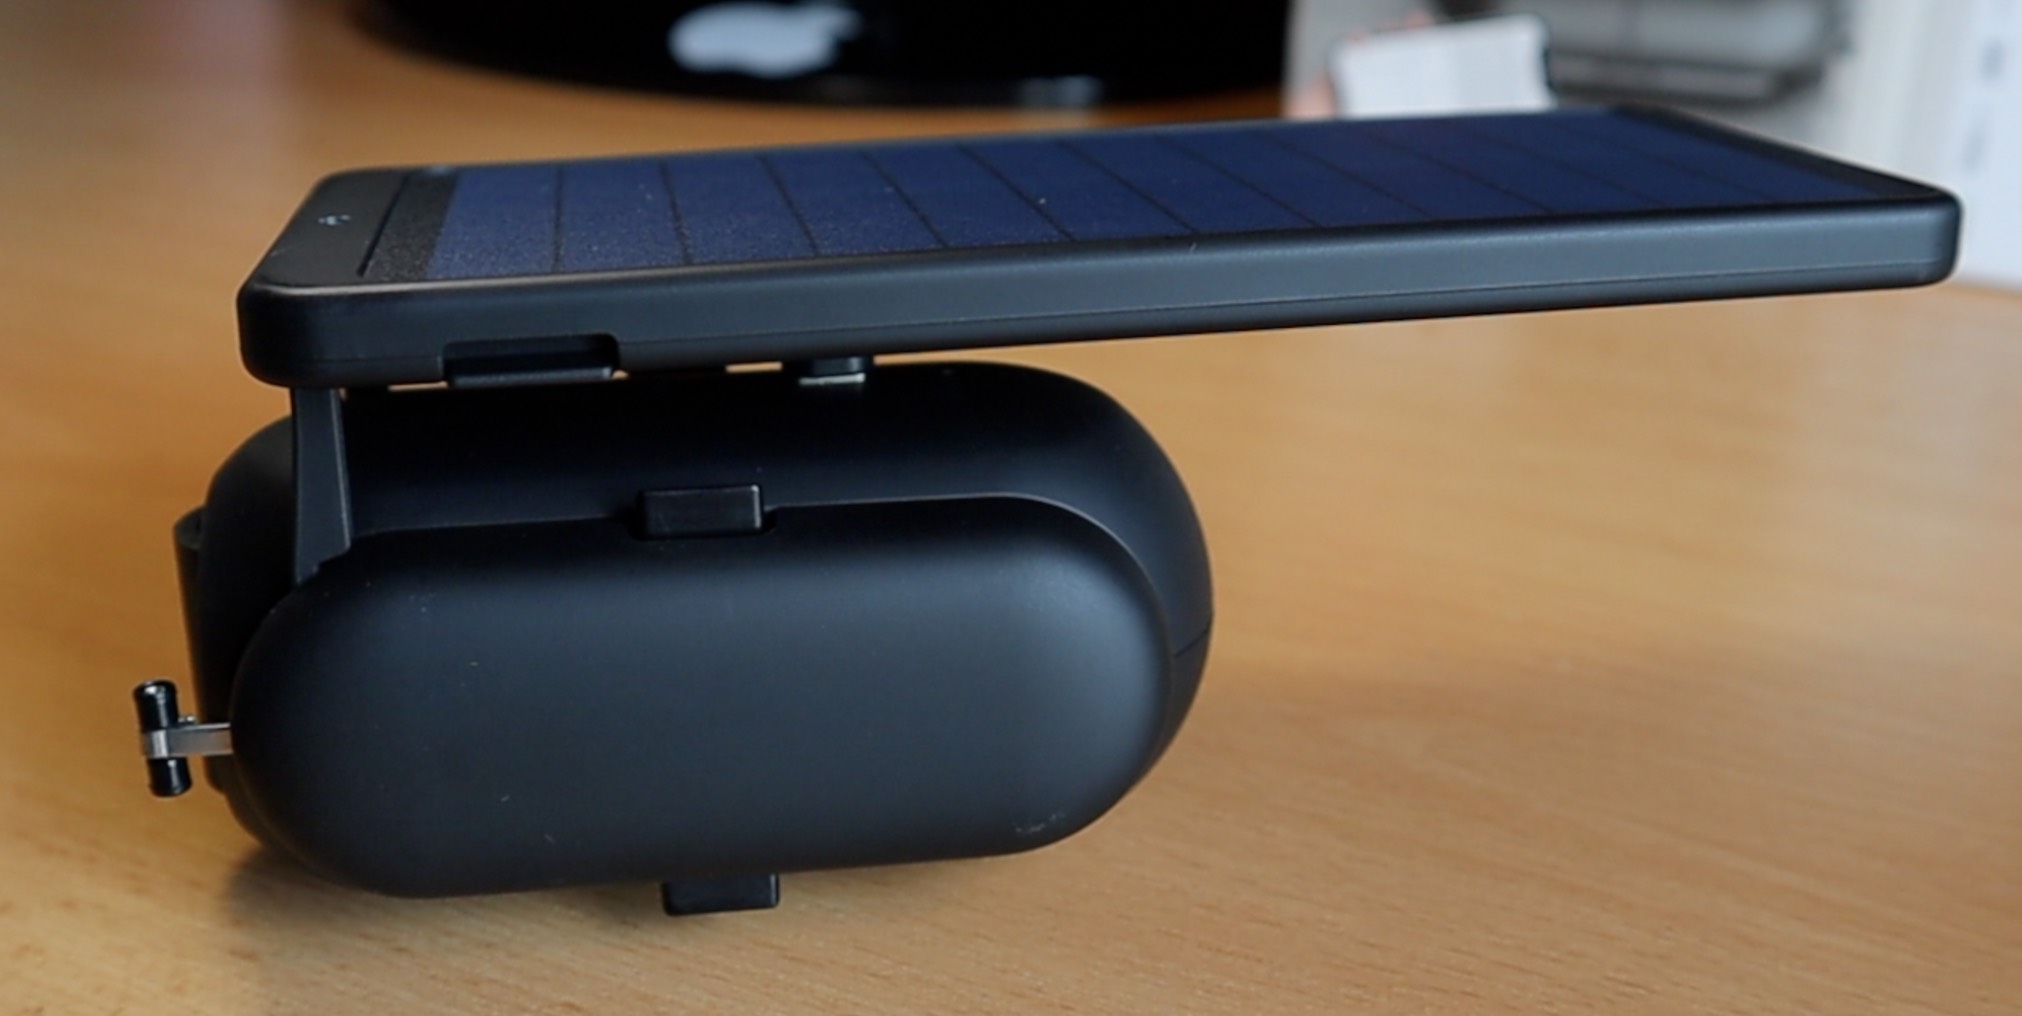
The battery of the device can last around 8 moths and then you just have to recharge it or you can additionally buy and attach a solar panel that will constantly charge the SwitchBot Curtain, so you don’t have to worry about the batteries.
Three ways for Home Assistant SwitchBot Curtain integration
I will talk about more SwitchBot Curtain features later, because now I will focus on Home Assistant and especially on the Home Assistant SwitchBot Curtain integration options.
As of now there are three ways to integrate SwitchBot products in Home Assistant (listed below):
The local Home Assistant SwitchBot Curtain integration
The first method is to try the available SwitchBot integration in Home Assistant, which is working locally over Bluetooth Low Energy (BLE). The whole process is very easy, but it is not very complete!
To try this first Home Assistant SwitchBot Curtain integration method do the following:
- Download and install the SwitchBot mobile app on your phone. The app is available in Apple AppStore and Google Play for free.
- Create an account and add your SwitchBot Curtains inside by following the instructions that the app will provide.
- When you are ready you just have to get the Bluetooth MAC address of your SwitchBot curtain device by tapping on the wheel cog icon (upper right corner) of your Curtain Device and then on the three dots menu (upper right corner).
- Paste the MAC address in your Home Assistant
configuration.yamlfile under a switch section with platform switchbot as shown below.
switch:
  - platform: switchbot
    mac: "F0:11:16:32:2E:54" # USE YOUR MAC ADDRESS HERE
    name: Left Curtain
  - platform: switchbot
    mac: "E9:C9:84:B6:A1:2C" # USE YOUR MAC ADDRESS HERE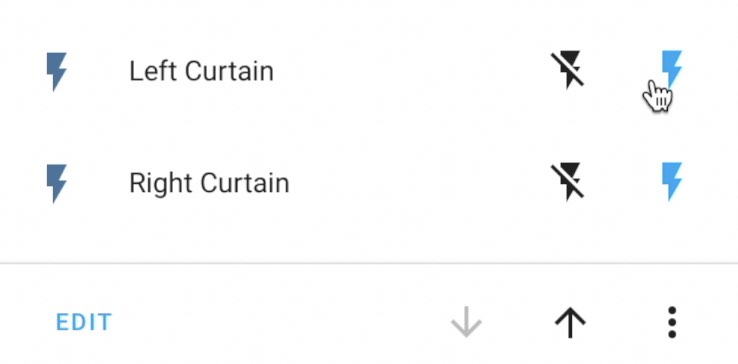
name: Right Curtain- Because I have two devices, one that control the left part of the curtain and one for the right I will add them both.
- Save the changes and reboot your Home Assistant.
As a result you will receive a switch or number of switches that you can add in your Home Assistant Lovelace and that will move the SwitchBot curtain(s) several centimetres on every click of yours.
Of course you can make a Home Assistant script that simulate X number of presses, so you can fully open or fully close the curtains.
The eventual problems with this local Home Assistant SwitchBot integration are:
- You cannot get the current status of the curtains.
- Also, your device where Home Assistant is installed should have Bluetooth capabilities. I’m using Raspberry Pi 4 and everything is working fine, but if your Home Assistant is installed on virtual machine you will have hard time making this work.
At least this integration is entirely local and you can save yourself from the Cloud if that is your goal.
Home Assistant SwitchBot curtain integration using Samsung SmartThings hub
The second method for Home Assistant SwitchBot curtain integration is to use the Samsung SmartThings Hub as middle layer.
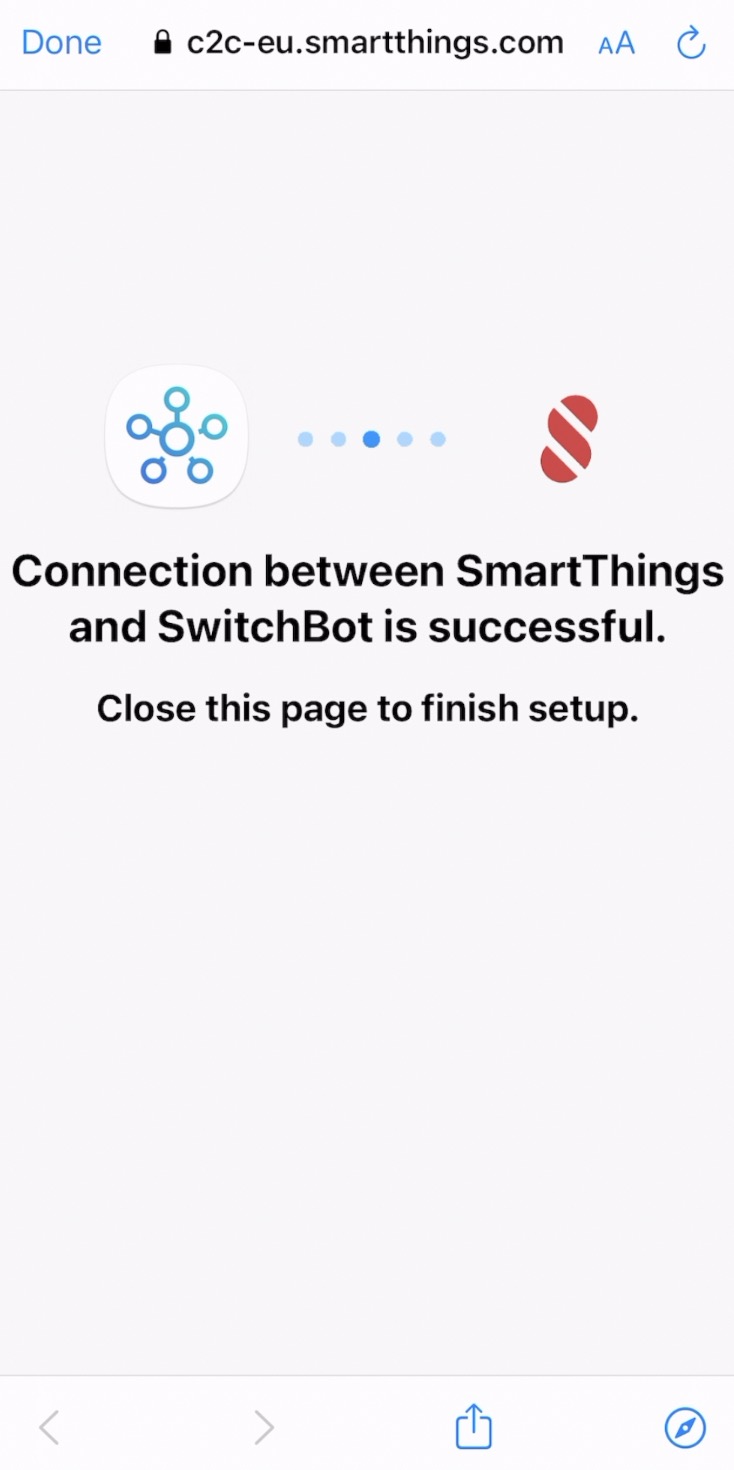
SwitchBot devices can be added naturally in the Samsung SmartThings hub and afterwards you can integrate SmartThings with home assistant using the instructions in this tutorial of mine.
The cons in this approach are:
- You need additional device that is the Samsung SmartThings Hub which will add more to your bill if you don’t already have it. Check the current price of the Samsung SmartThings hub v3 in Amazon – LINK.
- Also, big part of the communication to close or open your curtains is going through the Cloud, if that is something that bothers you.
Home Assistant SwitchBot API integration preparation
The third and final method of Home Assistant SwitchBot Curtain integration that I will show you in details in just a little bit is to use the SwitchBot API and REST commands executed from Home Assistant.
Using this method you can have the current status of the curtains as Home Assistant sensor and everything is working fine. Similarly to the previous method we need an additional hub called SwitchBot Hub Mini (read below for more info). The SwitchBot Hub Mini is cheaper than the SmartThings hub, but we have similar cons here. The communication is also Cloud based and we have a limit of 1000 requests per day which is kind of enough if you have relatively small number of SwitchBot devices and you don’t want near real-time status of your curtains state.
Anyways, let’s see how to set the whole thing up.
Get SwitchBot API Token
First thing you need to do is to enable the Developer mode and to obtain an API token, this is as fun as finding an Easter egg:
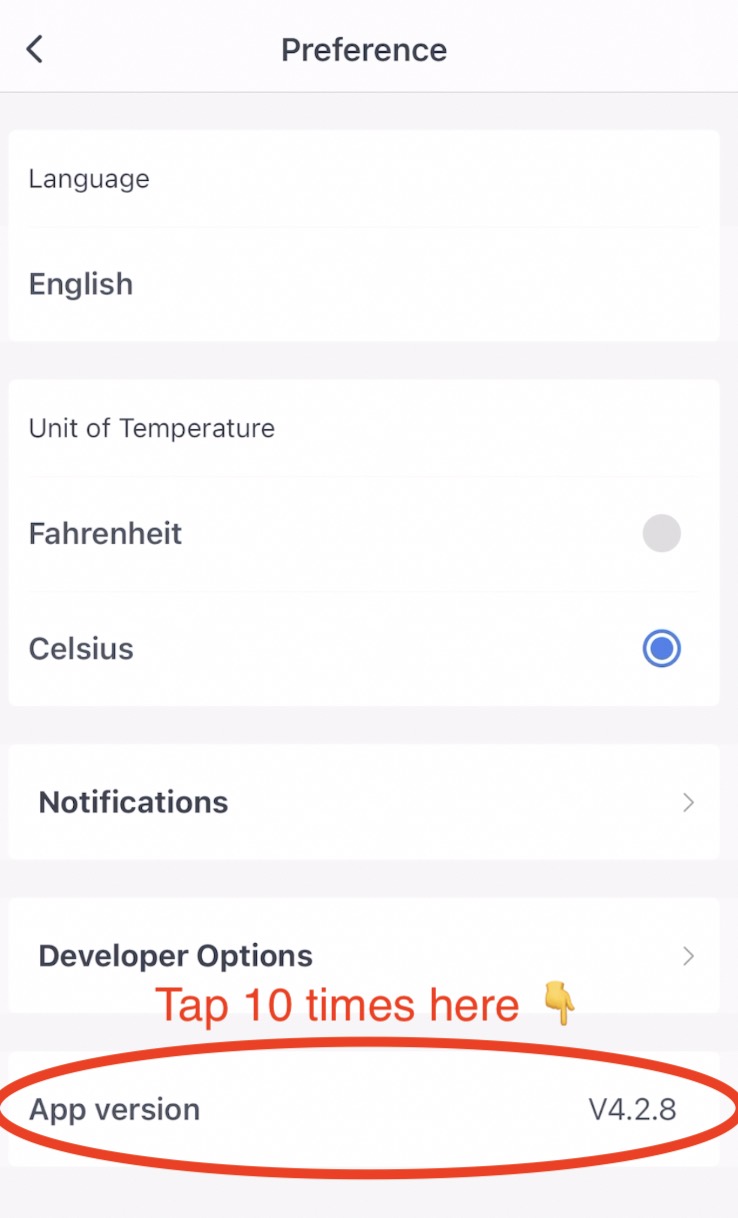
Just open your SwitchBot mobile app and go to Profile > Preference and Tap App Version 10 times. The Developer Options menu will show up, tap on it and you can get your Token.
We will need this API Token for two main reasons:
- To list and get the IDs of the SwitchBot devices.
- To execute REST commands from Home Assistant as you will see later.
Enable SwitchBot Cloud services
Next thing is to enable Cloud services in your SwitchBot Mobile app.
Open SwitchBot mobile app > tap on your SwitchBot Curtain device > More > Cog wheel icon (upper right) > enable the Cloud services switch.
Have in mind that in order to enable the SwitchBot Cloud services you need another device from the SwitchBot family called SwitchBot Hub Mini.
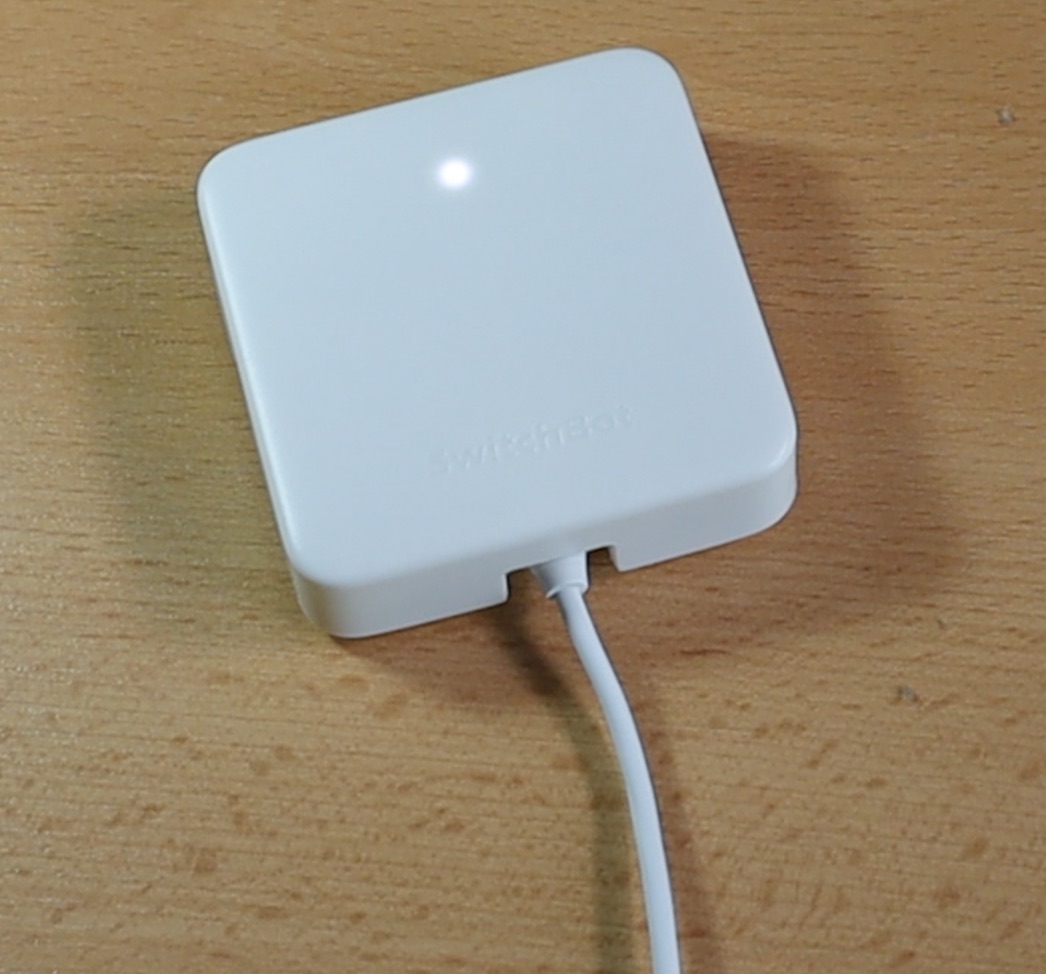
You can add the Hub Mini to your home Wi-Fi and afterwards you will be able to control your SwitchBot devices using Alexa, Google Home & Siri.
On top you can use the SwitchBot Hub Mini as universal remote control for your other appliances like your AC, TVs, etc. There is an enormous database with devices (different brands & models) with predefined remote buttons that can choose from or you can learn custom IR commands easily using the SwitchBot app.
Pairing the device is as easy as walk in the park, so I don’t even bother describing it here. Anyways, if you face any difficulties – let me know in the comments.
The SwitchBot Hub Mini will cost you around $39 dollars, but you can get it cheaper if you buy it as bundle.
Now, let’s get back to Home Assistant SwitchBot Curtain integration using SwitchBot API.
Home Assistant SwitchBot Curtain integration using SwitchBot API
The following procedure and YAML code are not my invention all the credits go to two nice guys (Wout & gdeboos) from Home Assistant community forum. Thanks guys!
Let’s start with listing the SwitchBot device IDs:
- Open a terminal (if you are using Linux/Mac OS) and paste the following command. If you are using Windows, open command prompt, but you need to download curl executable as well.
curl -H "Authorization: API_KEY_HERE" https://api.switch-bot.com/v1.0/devices- Don’t forget to replace the API_KEY_HERE with your API Token that you get from the Get SwitchBot API Token section.
- You will receive a JSON answer and somewhere at the end of the answer you should find your deviceId, just before your deviceName.
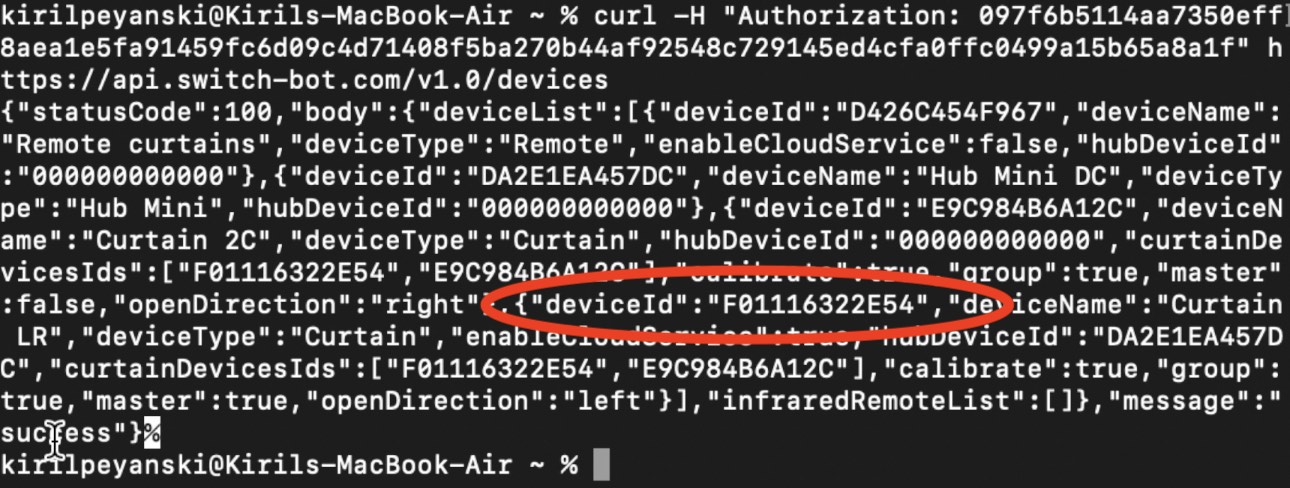
- Copy your deviceId and open your Home Assistant
secrets.yamlfile (using text editor or File editor add-on for example) and paste the following YAML code inside:
switchbot_api: "<YOUR_API_KEY>"
switchbot_bedroom_status_url: "https://api.switch-bot.com/v1.0/devices/<YOUR_DEVICE_ID>/status"
switchbot_bedroom_deviceId: "<YOUR_DEVICE_ID>"- Replace <YOUR_API_KEY> with your API token.
- Replace <YOUR_DEVICE_ID> with your deviceId.
- Save the changes in your
secrets.yamland open yourconfiguration.yamlfile.
#configuraiton.yaml entry
rest_command:
  switchbot_device_command:
    url: 'https://api.switch-bot.com/v1.0/devices/{{ deviceId }}/commands'
    method: post
    content_type: 'application/json'
    headers:
      Authorization: !secret switchbot_api
    payload: '{"command": "{{ command }}","parameter": "{{ parameter }}"}'

sensor:
  - platform: rest
    name: 'Bedroom Curtain Position'
    resource: !secret switchbot_bedroom_status_url
    method: GET
    scan_interval: 600
    headers:
      Authorization: !secret switchbot_api
      Content-Type: 'application/json'
    value_template: '{{ value_json.body.slidePosition }}'
    json_attributes_path: "$.body"
    json_attributes:
      - deviceId
      - deviceType
      - hubDeviceId
      - calibrate
      - group
      - moving
      - slidePosition

cover:
  - platform: template
    covers:
      bedroom_curtains:
        device_class: curtain
        friendly_name: "Bedroom Curtains"
        position_template: "{{ states('sensor.bedroom_curtain_position') }}"
        open_cover:
          service: rest_command.switchbot_device_command
          data:
            deviceId: !secret switchbot_bedroom_deviceId
            command: "turnOn"
        close_cover:
          service: rest_command.switchbot_device_command
          data:
            deviceId: !secret switchbot_bedroom_deviceId
            command: "turnOff"
        stop_cover:
          service: rest_command.switchbot_device_command
          data:
            deviceId: !secret switchbot_bedroom_deviceId
            command: "turnOff"
        set_cover_position:
          service: rest_command.switchbot_device_command
          data:
            deviceId: !secret switchbot_bedroom_deviceId
            command: "setPosition"
parameter: "0,ff,{{position}}"- This will create a REST command to open/close or set position of the curtains, a REST Sensor showing your SwitchBot Curtain current position in digits where 0 is fully opened and 100 is fully closed, and template Cover entity that can be added as Home Assistant Card to open or close the curtains.
- Save the changes in
configuration.yamlfile and reboot your Home Assistant from Configuration > Server Controls > Restart. - Add a new card in Home Assistant (if you don’t know how exactly check my video)
- Enjoy!
Remember, to have this kind of Home Assistant SwitchBot API integration along with the SwitchBot Curtain device you will need the SwitchBot Hub Mini. If you choose this combination as a bonus you can add Alexa, Google and Siri in the game.
SwitchBot Curtain Other worth mentioning features
And putting the cart before the horse intentionally I want to say few words about the SwitchBot Curtain Installation and the device other worth mentioning features.
SwitchBot Curtain Installation
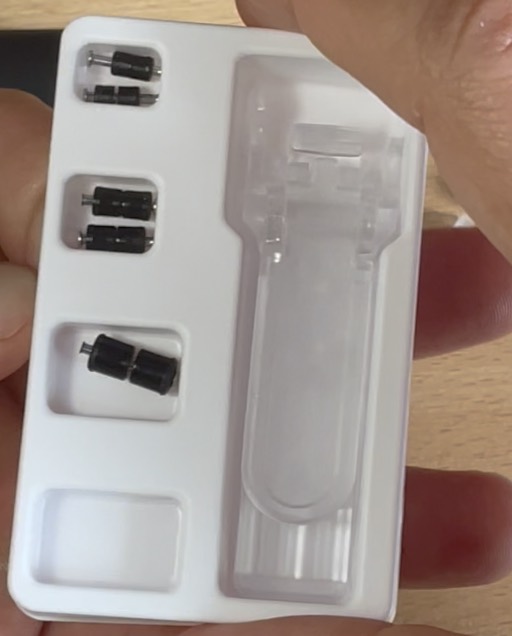
The installation of SwitchBot curtains was indeed very easy, it took me more time to decide which hook wheel to choose exactly for my rail than the actual installation.
SwitchBot Curtain + Solar Panels
I also mounted the Solar panels on my SwitchBot Curtain devices, but it turns out that they are not charging them due to not enough sunlight. Thankfully, SwitchBot have thought about this scenario and they prepared a long cable and hooks as well as a detailed and easy procedure how to move the solar panels, so they can face direct sunlight.

If you want to buy the SwitchBot Solar Panel you can use this link ➡️ LINK
SwitchBot Curtain Alexa integration
I said Alexa several times until now, but luckily she cannot read such articles yet (she only can listen us) Anyways, here is how to Integrate SwitchBot Curtain with Alexa:
- Open your Alexa mobile app > tap on More > Skills & Games > Magnifying glass > search for SwitchBot
- Tap on the result twice and then on Enable to use button.

- It will ask you to log in with your SwitchBot account and when you are ready you will see a message saying that your SwitchBot smart account has been successfully linked.
- Discover new devices by saying “Alexa, discover devices” or by tap on the Discover Devices button in Alexa app.
- You can now command your Alexa by saying “Alexa, open/close YOUR_CURTAIN_NAME”.
SwitchBot Curtain Siri integration
And with Siri which is the Apple assistant the things are even easier:
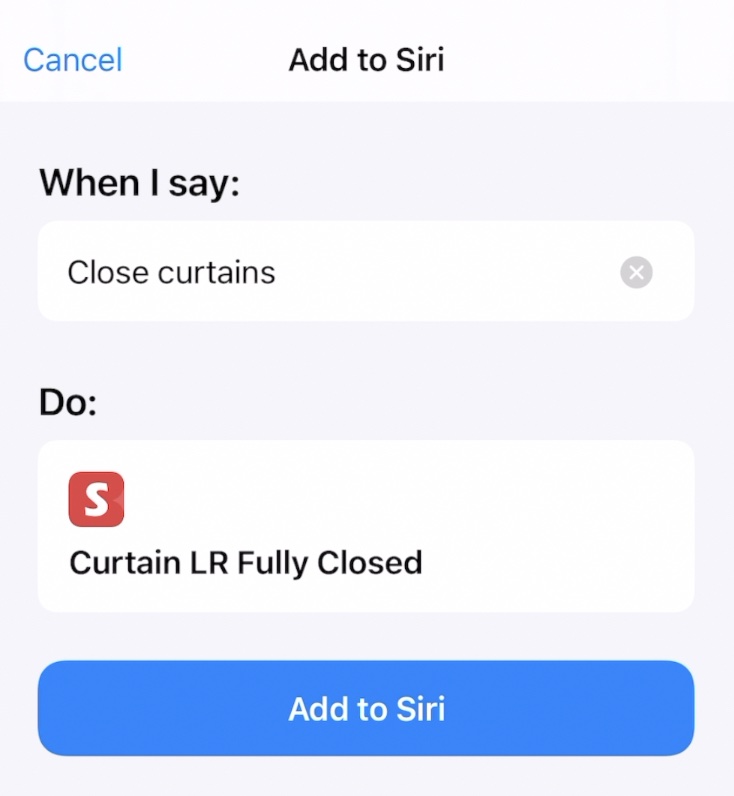
- Open SwitchBot mobile app > tap on your SwitchBot Curtain device > More > Cog wheel icon (upper right) > Cloud services > Siri Shortcuts > choose Turn on or Turn off function > in When I say field enter a respective voice command of your choice (ex. close curtains or open curtains) > tap on Add to Siri button.
- From now on when you activate your Siri and when you say your chosen voice command everything should click.
SwitchBot Curtain + SwitchBot Remote
Additionally you can add the SwitchBot remote to the whole picture which is a little battery powered device with two buttons that can be programmed from the SwitchBot app to open and close the curtains.
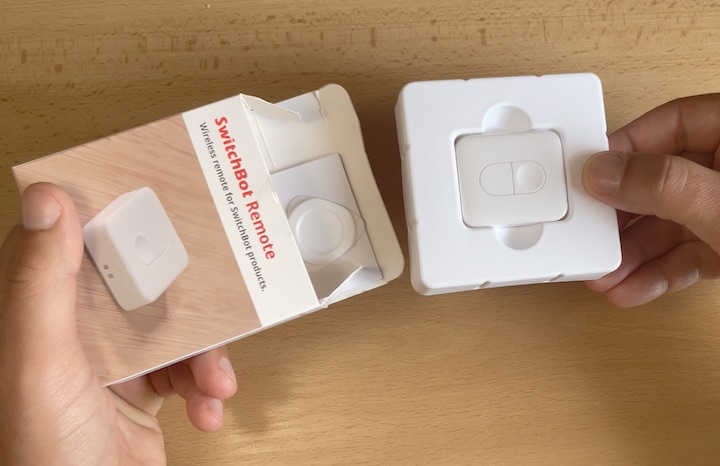
You can easily add the SwitchBot remote to Home Assistant using the first method that I showed you. The one with the local integration and the Bluetooth Low Energy MAC address that have to be added in the configuration.yaml file.
If you wan to buy the SwitchBot Remote you can use this link ➡️ LINK
SwitchBot Curtain Touch & Go
Another feature, that SwitchBot Curtain have is called Touch & Go. That is when you draw the curtains instinctively by hand the device should sense that and it automatically have to move your curtains by 5cm.
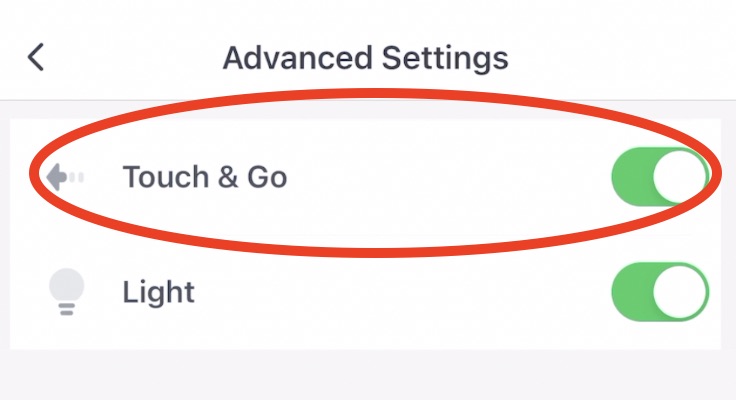
You can enable or disable this feature from the SwitchBot app.
However, this feature didn’t worked for me due to some reason. If you know why – let me know in the comments.
SwitchBot Curtain Light Sensing
Light Sensing is another feature that SwitchBot Curtain have, just have in mind that at the time of writing this article it is still in Beta version, but Beta is good enough for me, so I will try to use it.
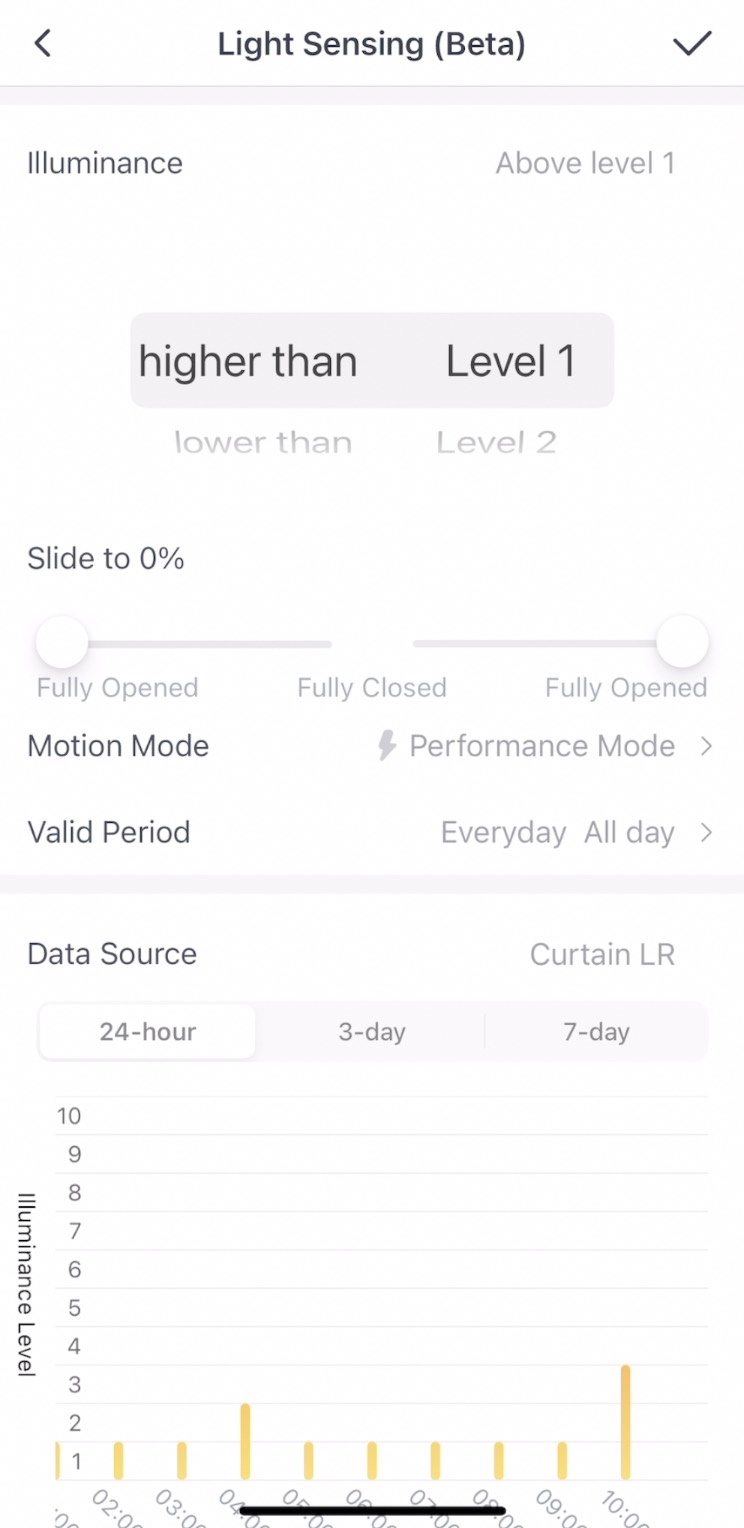
Light Sensing option allows you to create open or close automations based on the illuminance level right in the SwitchBot mobile app.
SwitchBot Curtain Scheduling Options
Of course the standard scheduling options are available for the SwitchBot Curtain, where you can set up to 5 schedules on the device or unlimited schedules if you have the SwitchBot Hub mini.
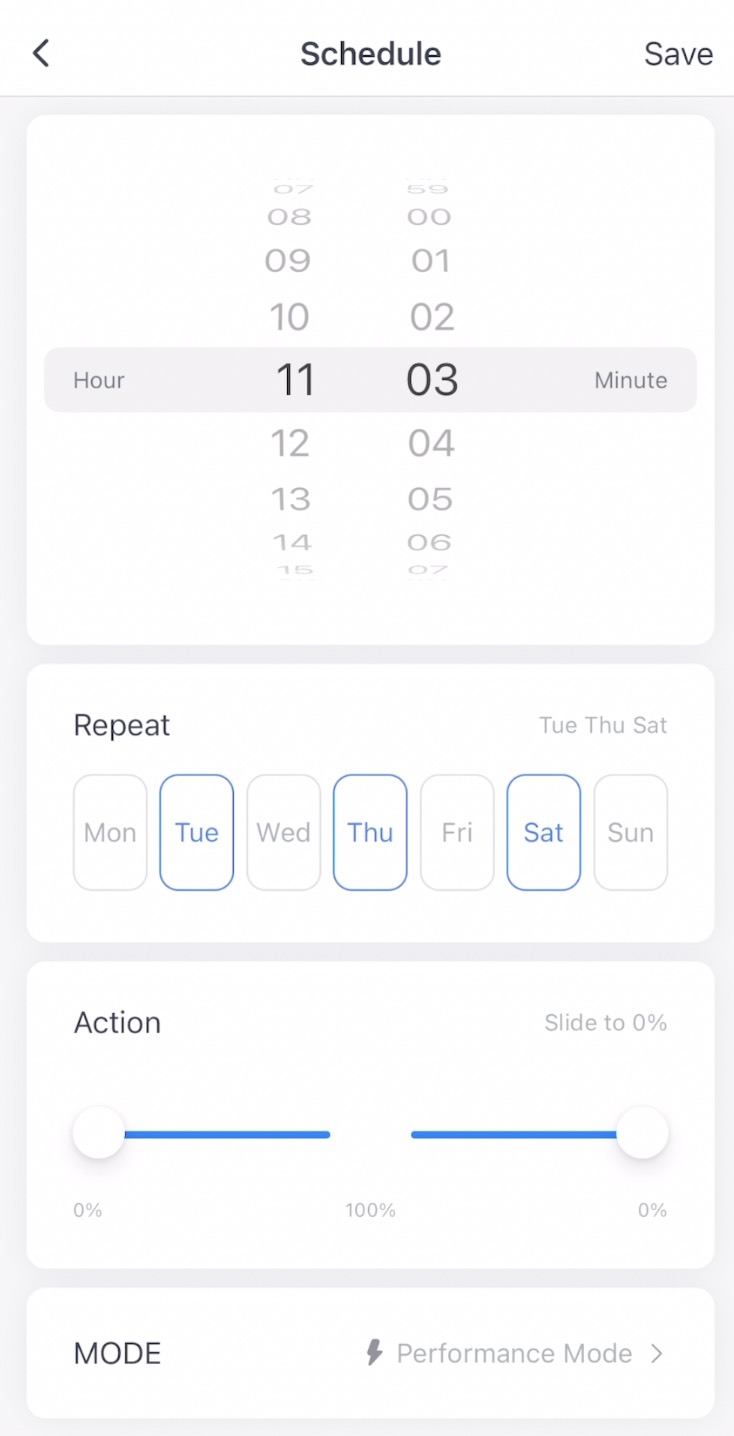
You can play with day, time and percentage options of opening and closing and you can add delays.
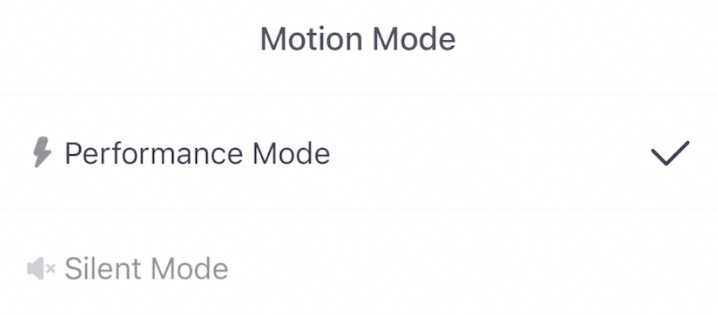
SwitchBot Curtain Motion Modes
There are also two motion modes: Performance mode which is faster and more noisier and Silent mode which is slower, but as the name suggest more quiet.
Where to buy SwitchBot curtain and others?
If you want to buy the SwitchBot Curtain or any of the other accessories or products I can suggest to check the SwitchBot official website and their hot deals section. You can regularly find different promotions and coupons there that can decrease the total price of the SwitchBot products a lot.
Right now (at the time of writing this) they have 25% discount on all combo products.
- SwitchBot flash deals – https://switchbot.vip/3BwF221
- SwitchBot Curtain – https://switchbot.vip/3kDqXsz
- SwitchBot Combo – https://switchbot.vip/38rOyXF
- SwitchBot Solar Panel – https://switchbot.vip/3yAIXJ0
- SwitchBot Hub Mini – https://switchbot.vip/3yqKFNj
- SwitchBot Remote – https://switchbot.vip/3DAFuxM
- Samsung SmartThings v3 hub – https://amzn.to/3zzgcOd
Have in mind that the links above are affiliate links, which means that I will receive small commission of your purchase with no additional cost for you.
Kind of win-win situation.
Outro
If you haven’t already make sure that you subscribe for my YouTube channel and hit the notification bell, so you will be the first to know when my next video will be available and that is usually every Wednesday.
If you like written text more, then you can subscribe for my newsletter.
Follow me on Twitter, come and join in my Discord server dedicated for Smart Home.
Stay safe and don’t forget – Home Smart, but not Hard!
I’m Kiril and I’m done writing (for today).
This is a great tutorial!
Really well done!
I wonder, how can i create an automation in home assistant to where a button click – opens the curtains if they are closed, OR close the curtains if they are already open.
Hi Ziv,
first of all thanks for the compliments they really help! Second, If I have to do it I would integrate the SwitchBot curtain using the local Home Assistant integration, exactly as described in the article. That way you will have a switch that will move the curtains several centimetres on each switch press, then I would calculate how many presses I need to open/close the curtains and then I would create a Home Assistant script which simulates those X number of presses. After that I would invoke that script in the Home Assistant Automation when sunrise/sunset for example… Of course, this is one of the ways to achieve this, and hope that it helps.
First of all, thank you for the good work !
I followed the “Home Assistant SwitchBot Curtain integration using SwitchBot API” instructions.
After restart, I was able to open and close the curtains.
But when I click the stop buttom to try to stop the curtains halfway, I got an error stating “rest_command:
switchbot_command: not found” … I fixed that creating a rest_command switchbot_command: as an exacft copy of the switchbot_device_command:.
Afterwards the previous mentioned error was gone and I was able to click the stop button.
Then I discovered that clicking the stop button had the same result as clicking the close button.
Check the code of the cover entity and you see that both, close_cover: and stop_cover: result in the command: “turnOff”, thus this can never work.
Finally, If I use the “setPosition” function, the first time it works well (e.g. positioning the slider to 25 sets the curtains to 25% open), when I try to use the “setPosition” function, a second time (e.g. positioning the slider to 75) it doesnt open the curtains to 75% but instead closes them to 0%.
Is there a solution for these issues ?
Kind regards from Belgium,
Jan
Thanks for this! i implemented the integration direct with the switchbot mini. However there is an issue that within HA fully opened is 100 and fully closed is 0.
I followed this to get it working correctly:
https://community.home-assistant.io/t/switch-bot-api-integration/270550/53
I found the best integration so far (and I’ve tried a few including the native HA one) is to use the ESP32 SwitchBot-MQTT solution from devWaves. Works perfectly for me and supports all the features offered by the Switchbot curtains including battery levels, percentages etc. You can put the ESP32 anywhere which is good for me since my HA box is far from my curtains. I’ll check out the new BT Proxy in the new HA release, but it will still use the native Switchbot integration and I found it limited compared to the MQTT option devWaves offers.
https://github.com/devWaves/SwitchBot-MQTT-BLE-ESP32
Thanks Duncan, let us know the result after you test the BT Proxy in the new HA release please!
So how do you actually add the Switchbot Remote to HA? I’ve done it the same as the example code in the first method (adding the code to configuration.yaml with the BLE mac address), but it’s not showing in HA after reboot.