
Home Assistant Tasmota integration allows you to control Tasmotized Devices over MQTT without having to add a tone of YAML code. Let’s see this in action
Table of Contents
What is Tasmota?
Tasmota is the best open source firmware for ESP8266 and ESP8285 based IOT devices. Home Assistant is the best open source smart home hub, so let’s integrate them. We have several requirements to meet and we are going to start from scratch with requirement number one.
Installing Mosquitto (MQTT Server)
You need a MQTT server up & running. One of the most popular MQTT server/broker is called Mosquitto and you can you install it standalone or as Home Assistant add-on. I will show you the later in details. Of course if you already have MQTT server installed – you can use it and you can skip to the next section 👉 Add MQTT integration in Home Assistant. Otherwise do the following:
Click on the My Home Assistant link below:

Or In Home Assistant go to Supervisor > Add-on Store > search for Mosquitto > Click on the result and hit Install button.
Next, go to Configuration tab and remove the square brackets if any and add a username: WITH_USERNAME_OF_YOUR_CHOICE and password: WITH_PASSWORD_OF_YOUR_CHOICE. In my case the username is SMASH and the password is THELIKE.
logins:
  - username: SMASH
    password: THELIKE
anonymous: false
customize:
  active: false
  folder: mosquitto
certfile: fullchain.pem
keyfile: privkey.pem
require_certificate: false
PRO TIP: Instead of adding user and password you can use your Home Assistant credentials (user & pass that you use to log in Home Assistant) and you don’t have to change the default configuration at all!
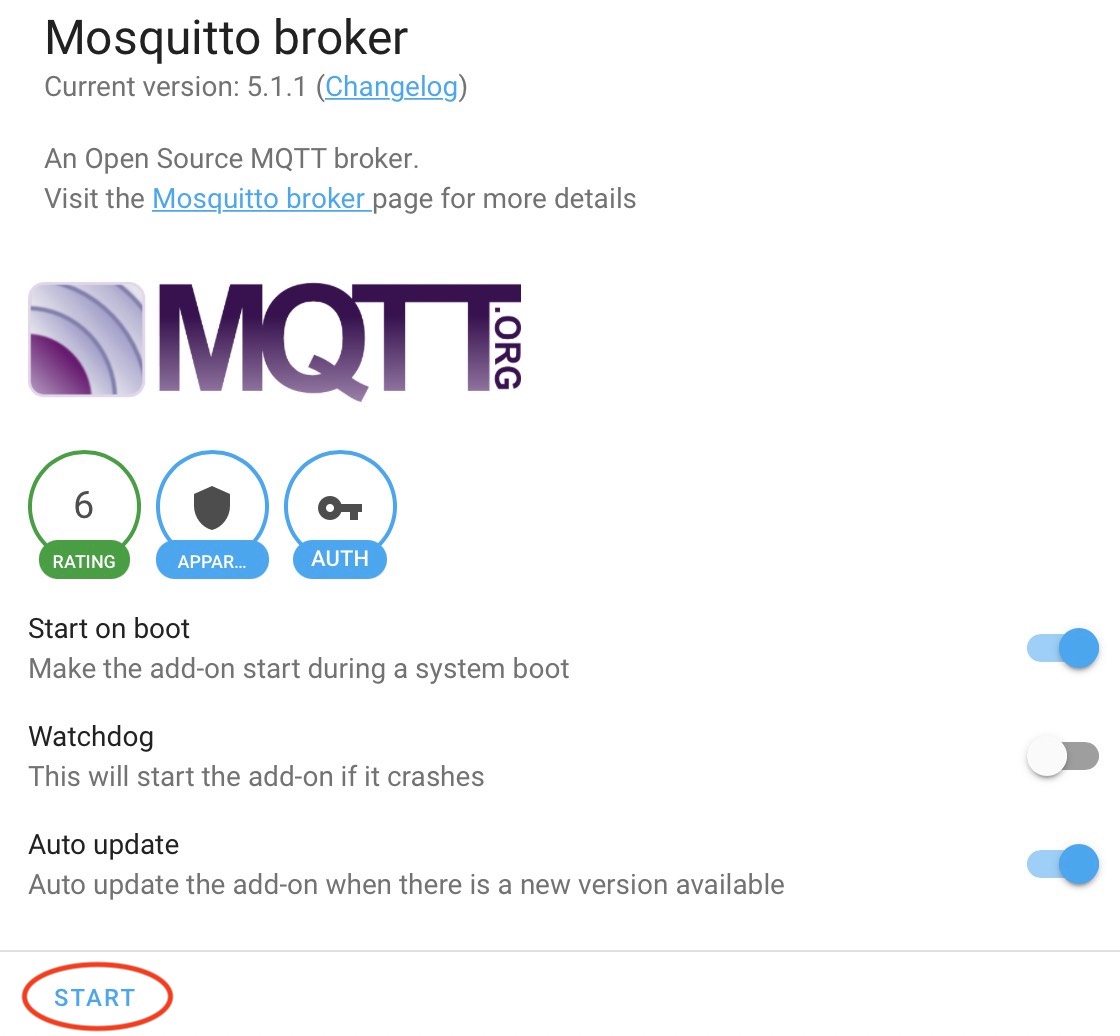
When you are ready – click on Save button, return back to the Info tab and start the Mosquitto Broker.
Add MQTT integration in Home Assistant
Then you have to add the MQTT integration in Home Assistant. This is what you need to do:
Click on the My Home Assistant link below:

Or go to Configuration > Integrations > and search for MQTT
TIP: It is possible Home Assistant to auto discover your MQTT server and to display it as a card with a button to configure it.
No matter what you choose (My Home Assistant Link, Manually search and install MQTT from integrations, or the auto-discovery) from the above the result is the same.
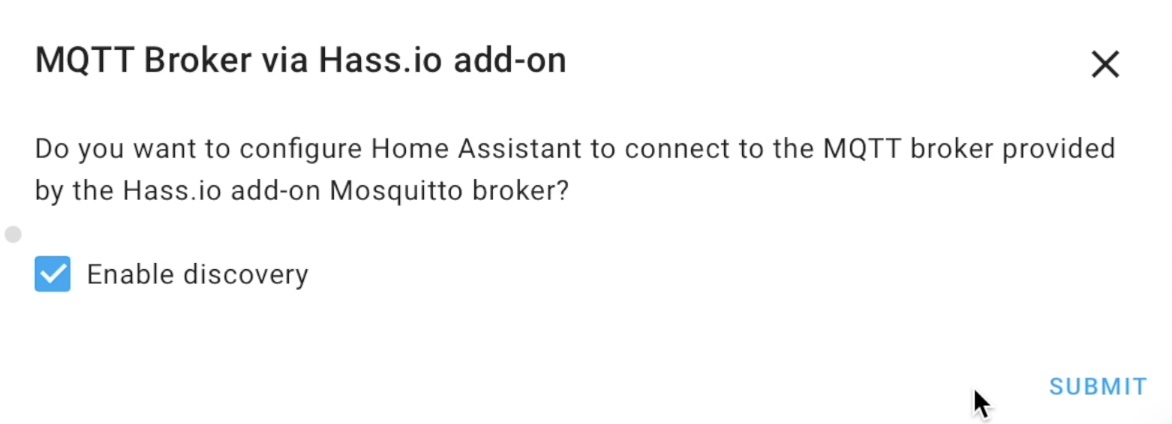
On the dialog make sure that you leave Enable discovery checked and click on Submit button
Tasmota Firmware
The next requirement is to flash your IOT device with Tasmota firmware version 9.2 or higher. You can find more info about the flashing process in this video article of mine 👉 LINK or at the official Tasmota page.
Configure MQTT in Tasmota
The third (or forth depends of how you count them) requirement is to configure your Tasmota device to communicate with the MQTT server. This is how.
- Open your Tasmotized device web interface,
- Click on Configuration button,
- Then click on Configure MQTT,
- Type the Host/IP of your MQTT server, Port (default one is 1883),
- Use the same User & Password from the Installing Mosquitto (MQTT Server) section,
- Change the topic to a word(s) that will mean something to you,
- And click on Save button.
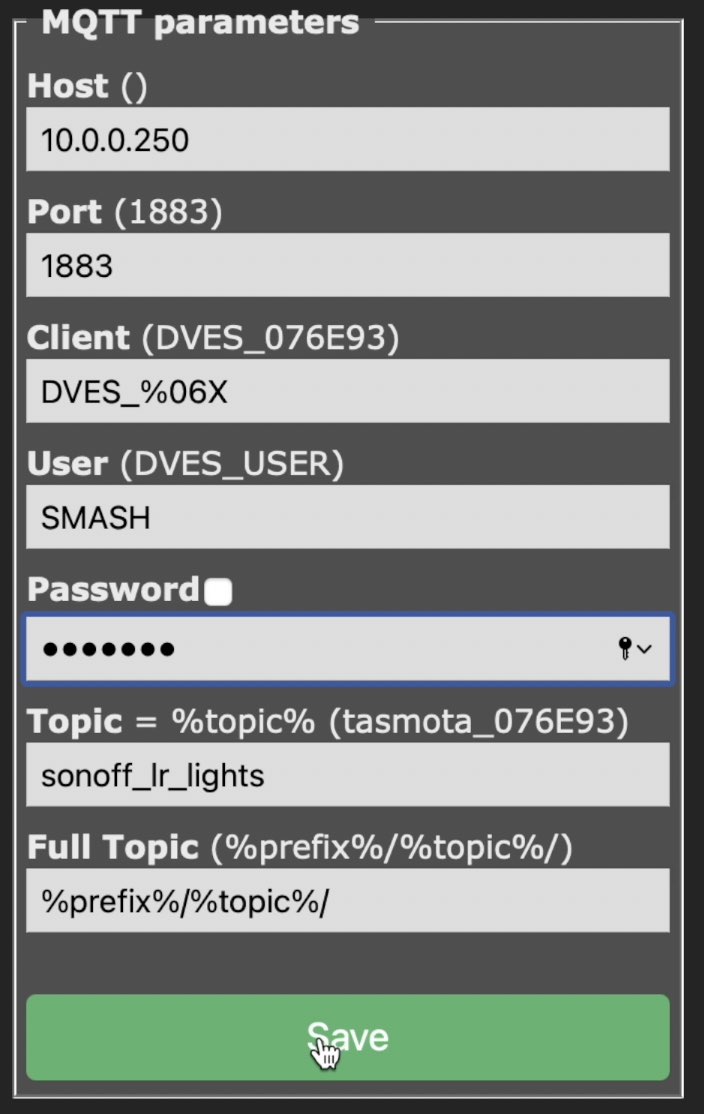
The Tasmotized device will restart, the changes will be applied and you can continue ahead.
Configure native Discovery
The final requirement is to execute one command in your Tasmota console to configure the native discovery.
- Open again the web interface of your Tasmota device,
- Click on the Console button,
- Paste the following command in the text field and press Enter:
SetOption19 0
Home Assistant Tasmota Integration
That was the hardest part, now it’s time for the easiest. Let’s start with one little smash of the little subscribe button for my weekly Newsletter. Just a little bit. After that we can continue with the actual Home Assistant Tasmota integration.
Have in mind that it is possible that the clever Home Assistant to auto discover your Tasmota devices in your local network and when you open your Integrations section to see the Tasmota integration waiting for your attention. If that is not the case do the following:
Click on the My Home Assistant link below.
Or go to Configuration > Integrations > and search for Tasmota.
Set your Tasmota device as switch or as light
Before we go further you may wish to set your Tasmota device as switch or as light in Home Assistant. Execute this command in your Tasmota console.
For switch:
SetOption30 0For light:
SetOption30 1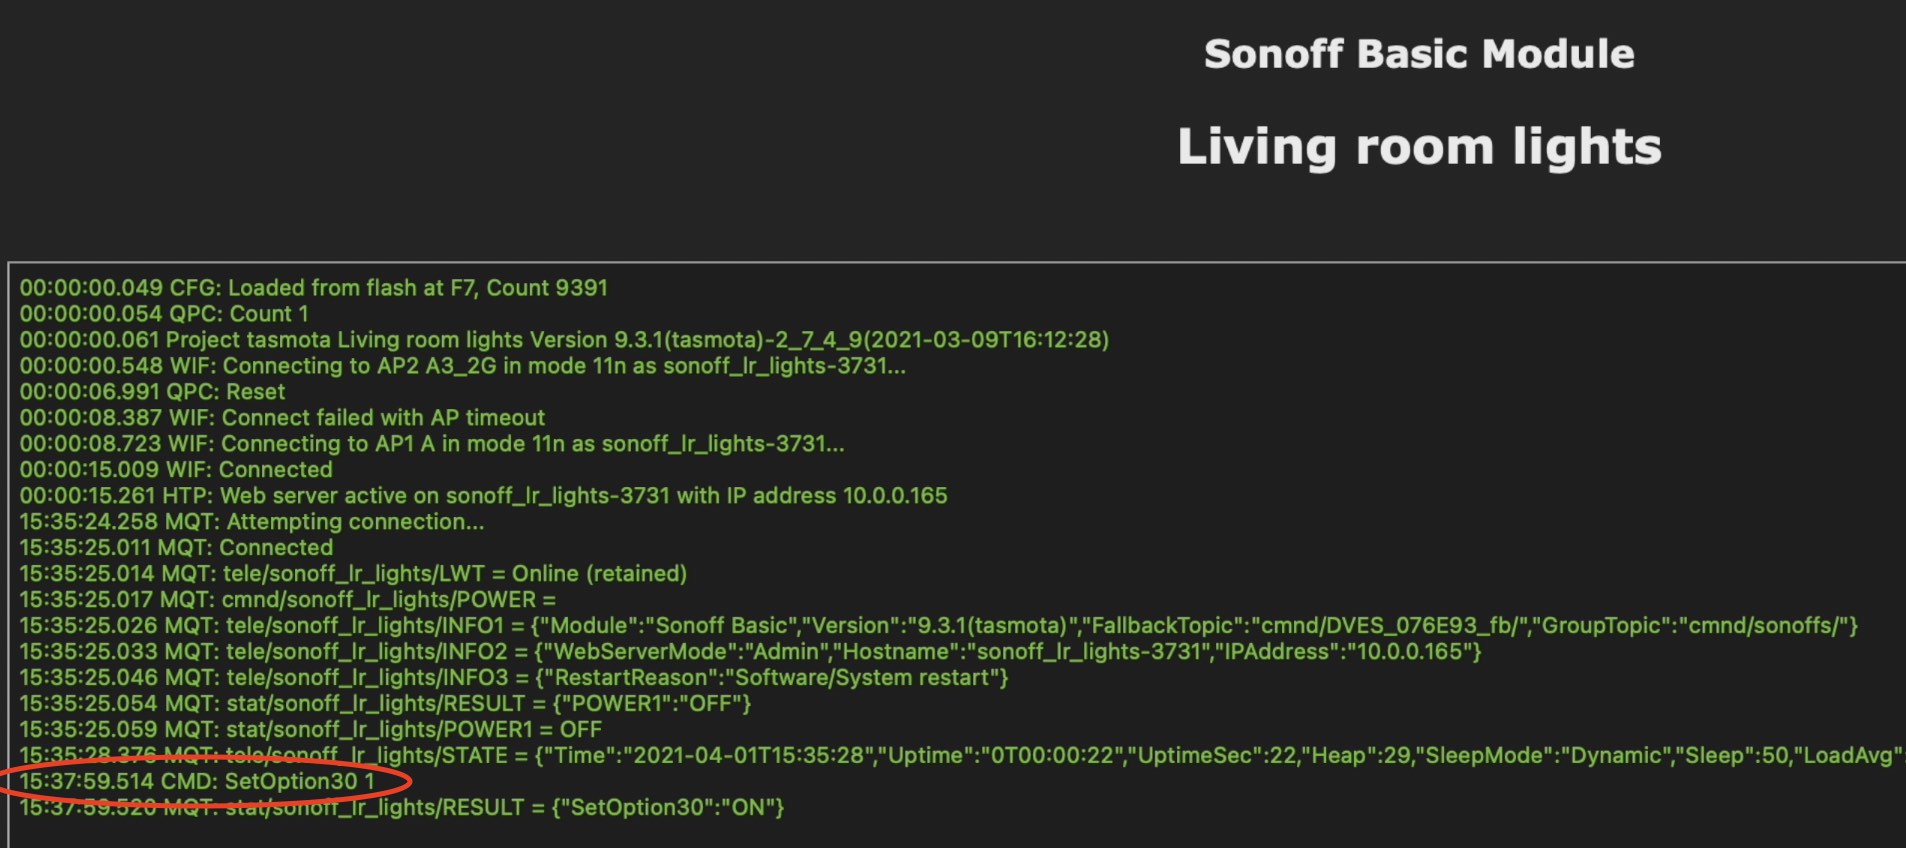
That way the icon of the Tasmota device will be correctly displayed in Home Assistant.
Now, back to Home Assistant Tasmota integration – click on the Tasmota integration (or on the Configure button under the auto discovered Tasmota integraion) and you should see something similar:
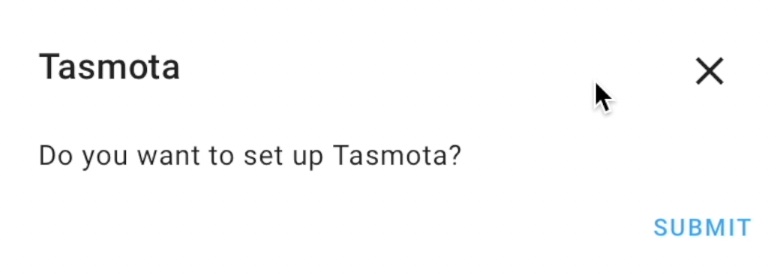
Click Submit button, and you will see another window with Success title and option to add the integration in Home Assistant area. Click on Finish button and your Home Assistant Tasmota integration should be ready to use.
You can click on the device(s) under the Tasmota integration and you can add them your Home Assistant Lovelace or you can try creating useful automations.
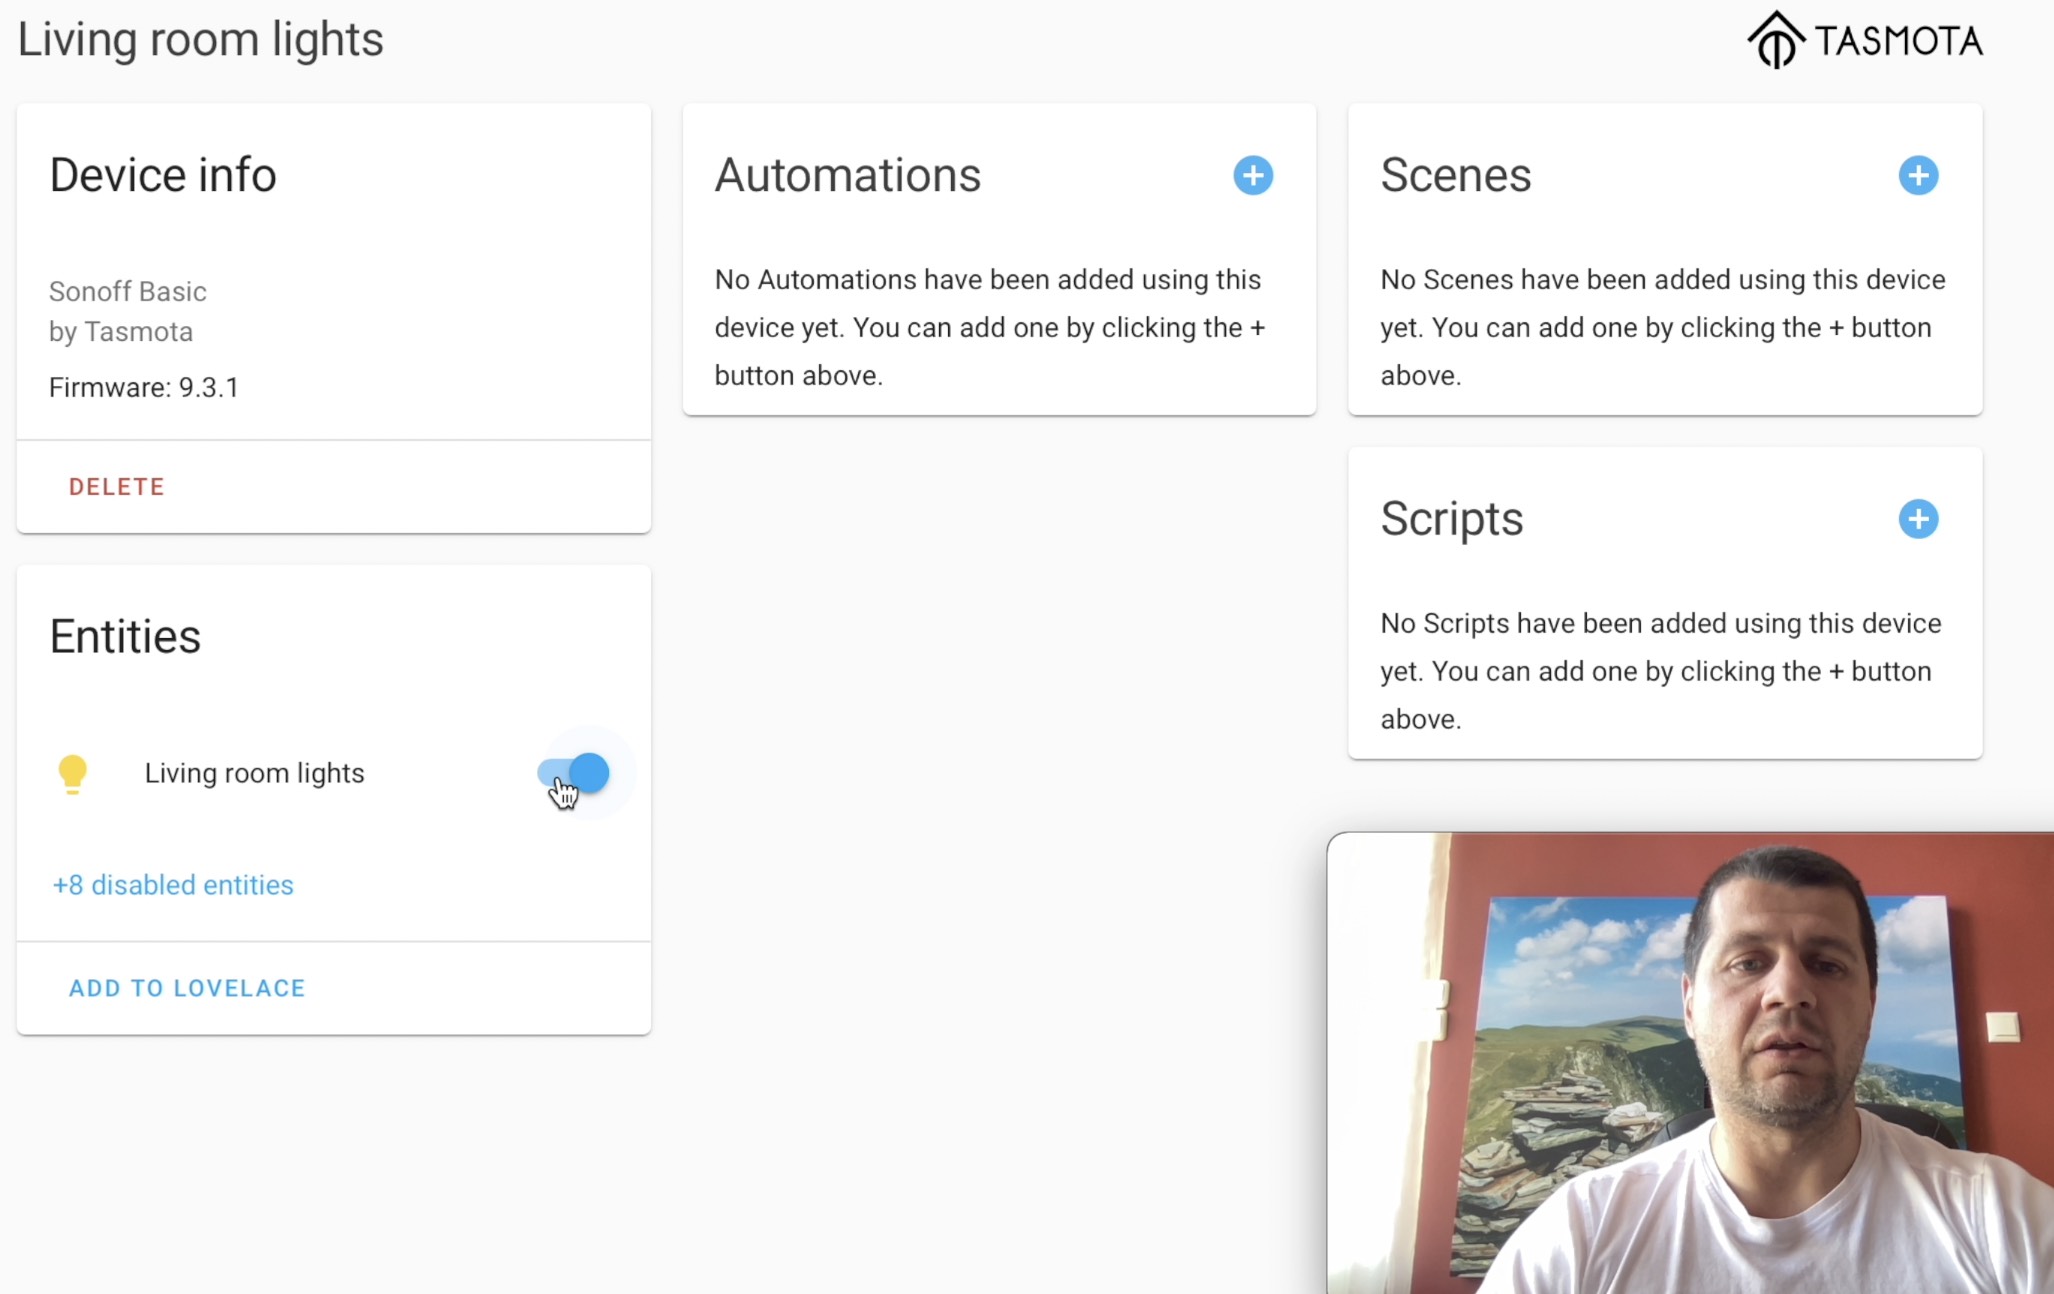
Depending of your Tasmota device you can have up to 8 disabled entities. These are additional sensors that you may wish to have or not. To enable them do the following:

Click on the X disabled entities button and you will see a list of sensors similar to this one.
Click on whatever sensor you wish to enable and turn on the switch next to the Enable entity and then hit the Update button.
Conclusion
And with that being said make sure that you hit the subscribe to my newsletter button if you enjoy this article. That way you won’t miss a beat from my new Smart Home & Home Automations articles that I’m passingly writing.
Feel free to add me on Twitter by searching for @kpeyanski 👉 DIRECT LINK
You can find me on my Discord server as well 👉 INVITE LINK
Stay safe and don’t forget – Home Smart, but not Hard
Thank you for reading and I will see you in my next article.