
I’m thrilled to share with you how I easily managed to track Apple Watch with Home Assistant, so I can make better and more useful home automations.
Same steps can be done to track iPhones and other iOS devices so if you want to do the same no worries here is a step-by-step guide for you.
Table of Contents
Understanding the Technology
Before we start this journey, let’s first talk why Apple Watch and iOS devices are a bit different than the other Bluetooth devices that you can track easily. It is all because of a technology called Resolvable Private Addresses or RPA for short. Think of RPAs as your device’s chameleon cloak.

Instead of revealing a fixed Bluetooth address that could be exploited for tracking by well-intentioned and not so well intentioned people, RPAs continuously shuffle your Device MAC address.
This dynamic feature is a significant step forward in protecting your privacy and vendors like Apple are using it in their devices. For good or for bad this RPA feature prevents tracking your own devices at home with Home Assistant for example. And tracking your devices can be very beneficial as you will be able to make numerous useful home automations and security enhancements like turning on and off lights based on your presence, voice announcements, automatic climate control, arming and disarming alarms, you name it, everything is possible.
Having in mind that we are aways caring our phones or smart watches with us (at least I’m) means tracking these personal devices is a clear indicator are you home or not and even how far away from home are you, but more on that later.
Apple Watch in Home Assistant – Requirements
Now it is time to talk about some requirements that are needed for this project to become reality.
#1 – Apple Device
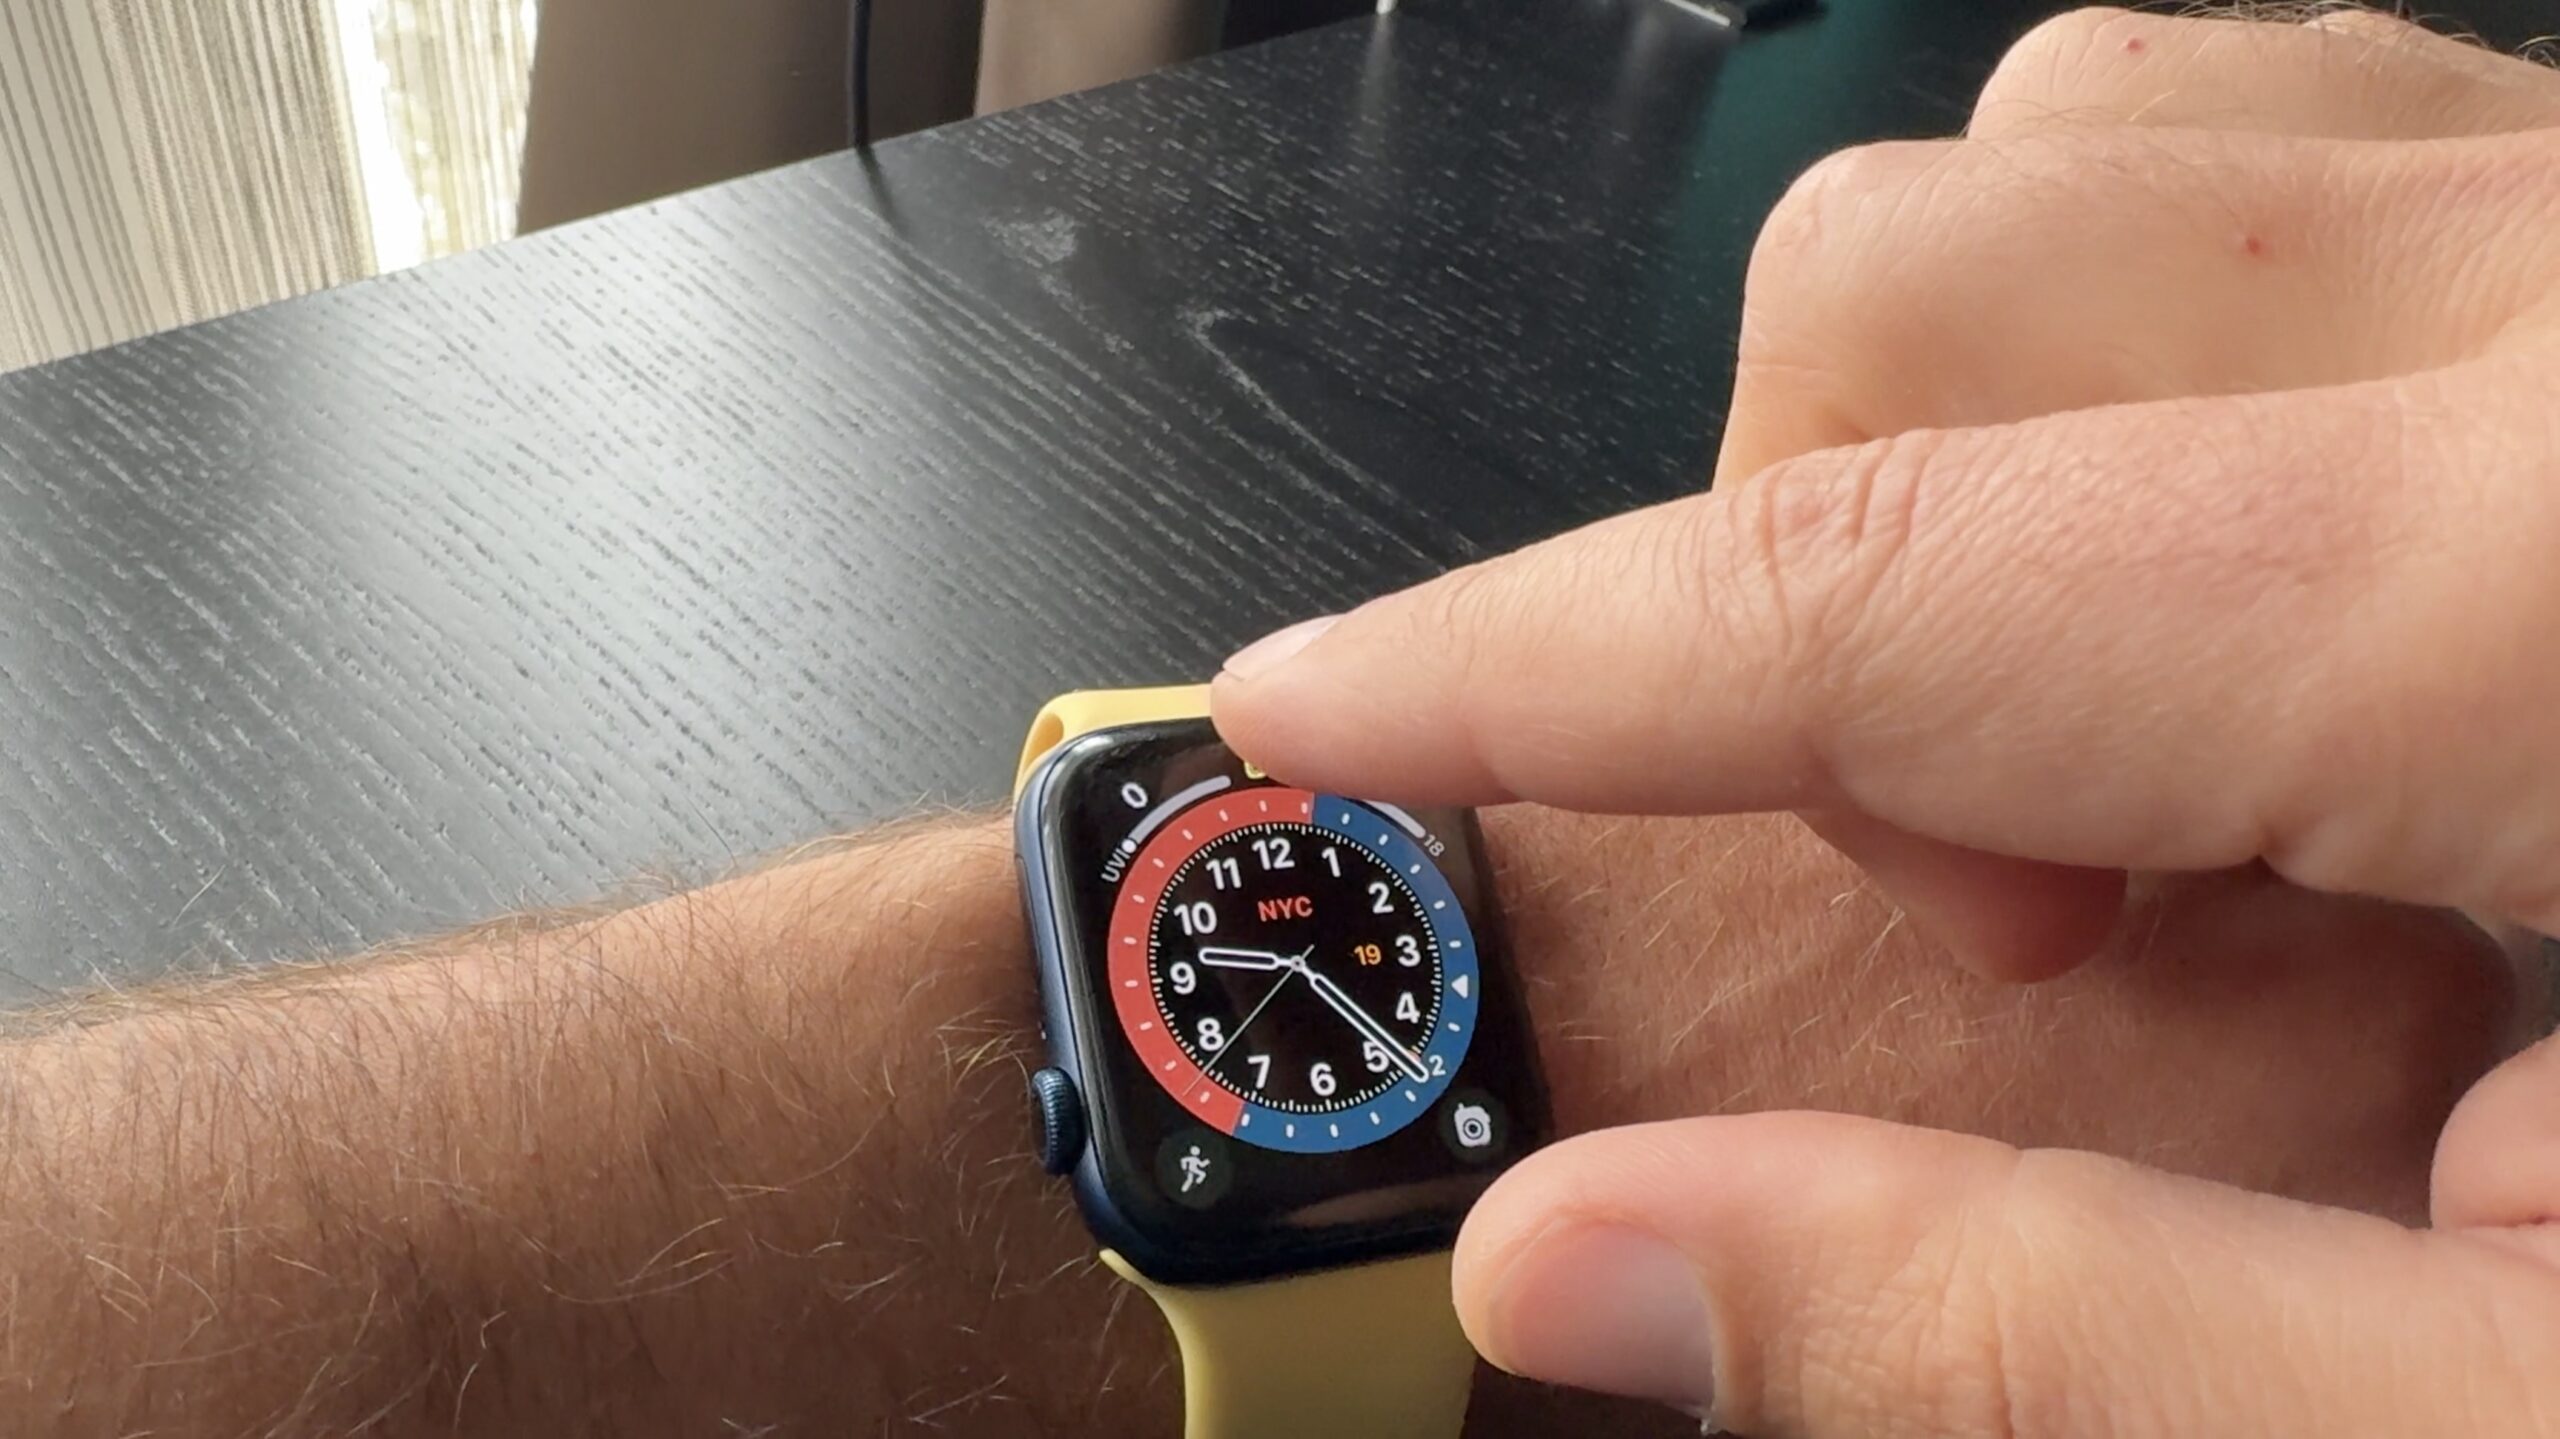
First thing that is needed is an Apple Watch or some other iOS device like iPhone or iPad with bluetooth enabled. I will use my scratched but still working good Apple Watch Series 6 for example.
#2 – Home Assistant
Next thing that is needed is working Home Assistant, if you don’t have Home Assistant yet, what are you still waiting go get one it is free and can save you money and time.
If you need more help with the Home Assistant, then please register for my free Webinar where I will talk about different Home Assistant Installation types, their pros & cons, as well as one super simple way to get started on a PC in under 5 minutes.
And as I said it is all free.
#3 – IRK
Final thing that is needed is to get your device Identity Resolving Key or IRK for short. To get this you need a device running MacOS like MacBook, iMac, Mac mini and so on. I’m not quite sure if getting this Apple device key is possible on Windows, and if you have more info about that please share it in the comments. So here is how I obtained my Apple watch Identity Resolving Key or IRK
I’m using same iCloud account on both my Mac book and my Apple Watch
- Then I opened the Keychain Access application on my Mac.

- and I Selected iCloud from the sidebar.
- After that, I Typed ‘Bluetooth’ into the search bar.
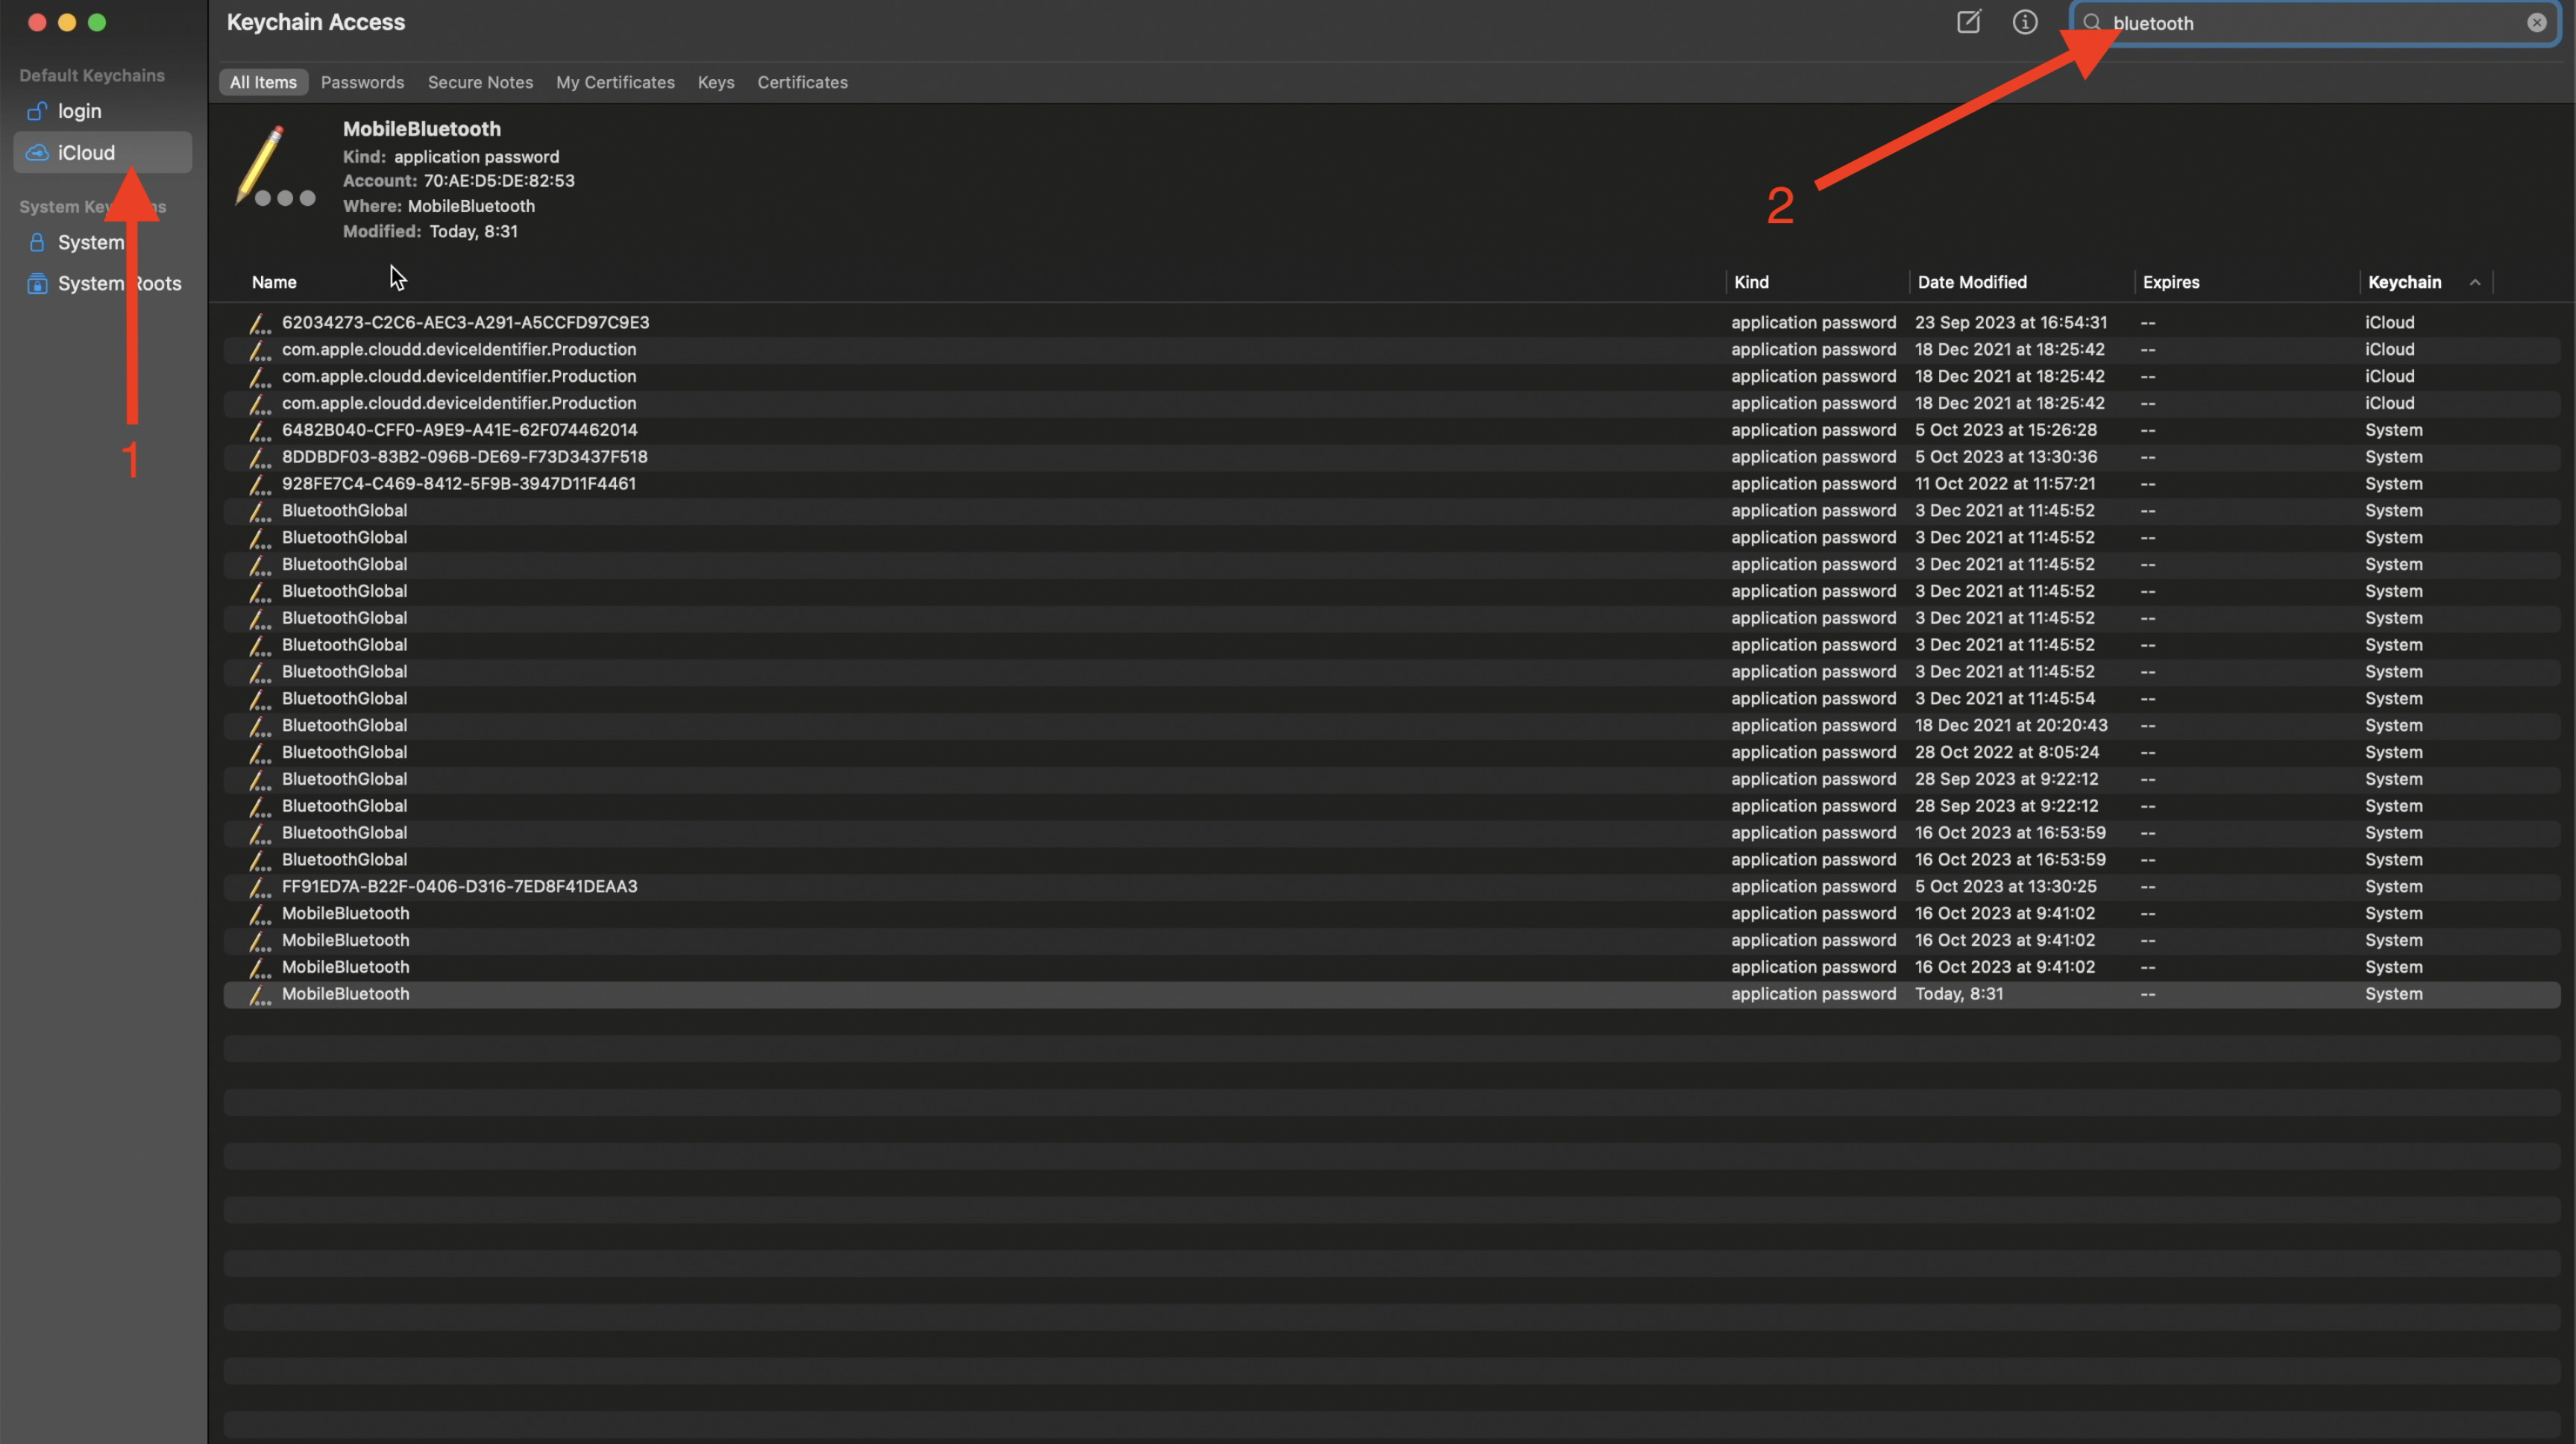
- And I got a list of GUIDs displayed.
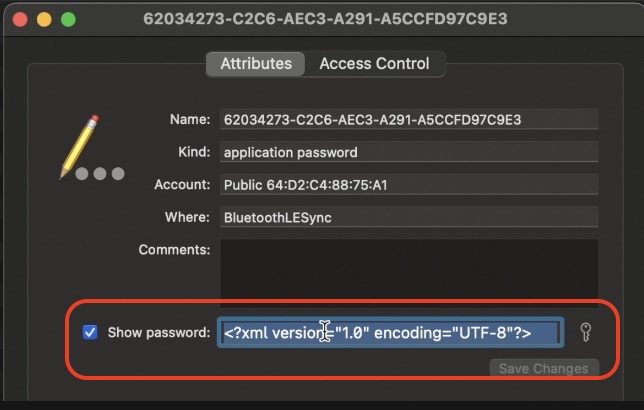
- I Double-clicked on a record, uncovering the public MAC address that matched my Apple Watch device.
- Then I clicked on “Show password” and entered my credentials.
- Finally I Located the “Remote IRK” field in the XML file that the macOS showed, which is revealing a data field containing a base64 encoded version of my Identity Resolving Key.
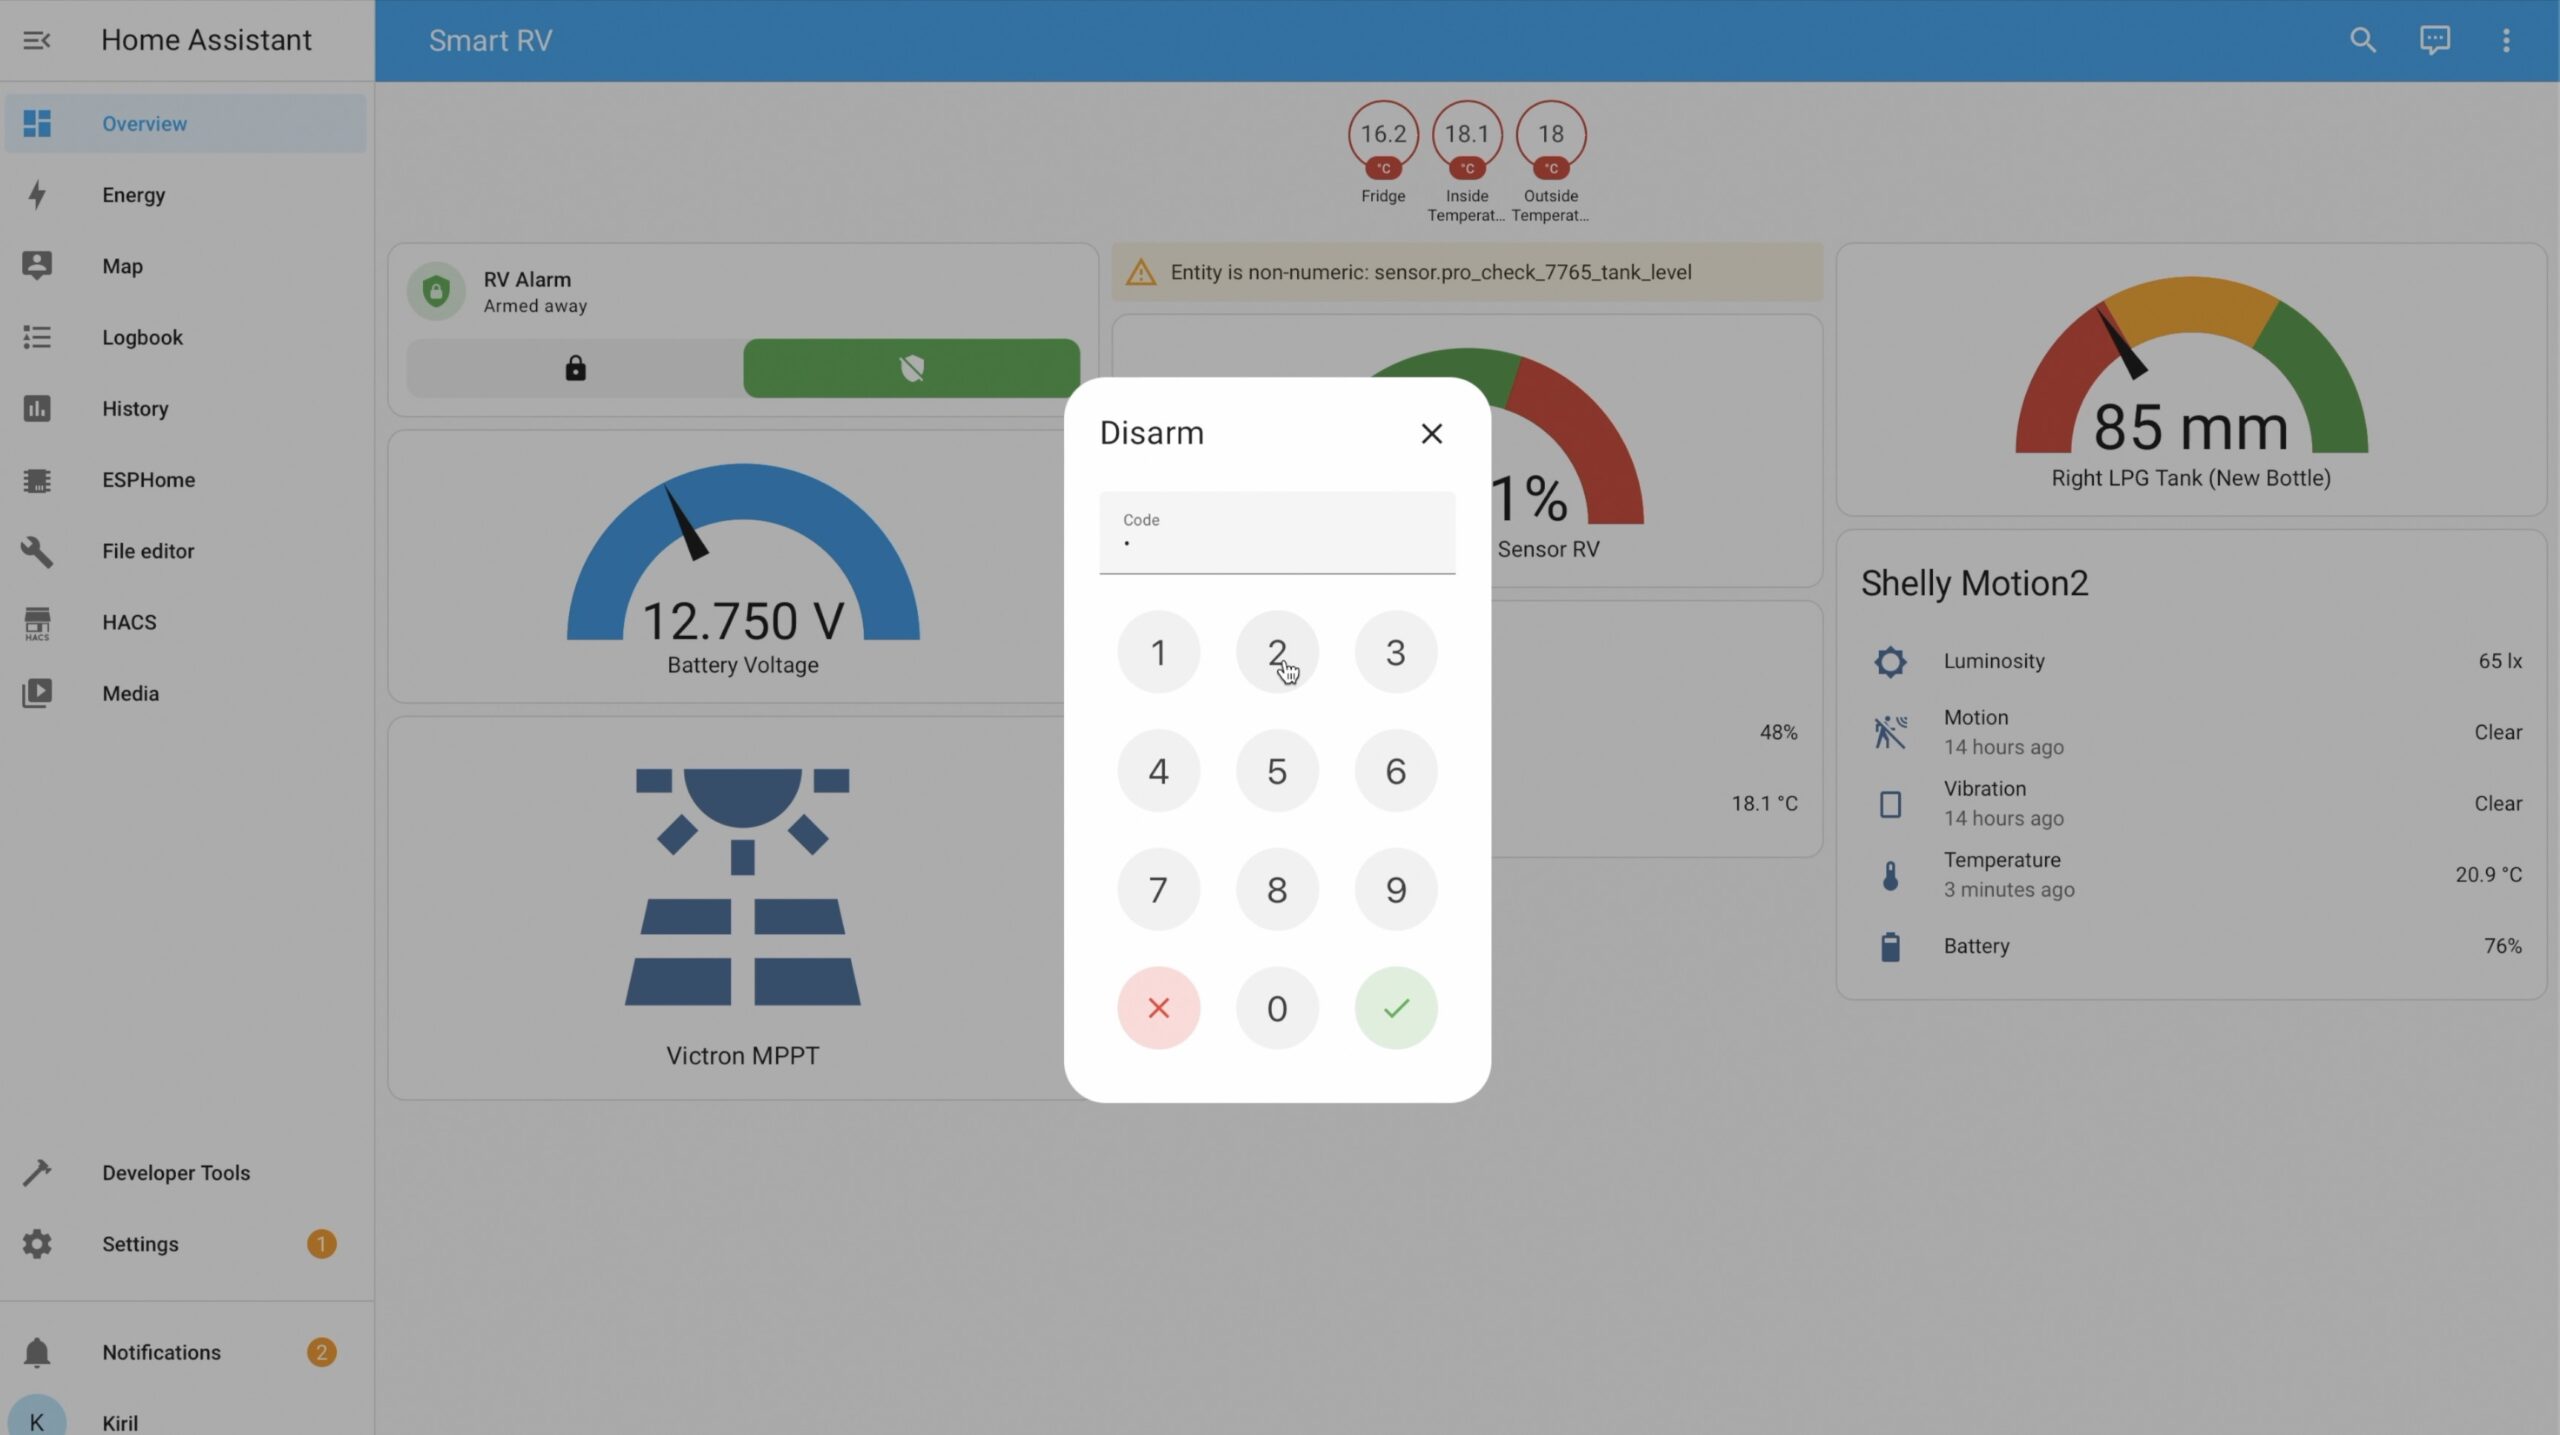
Add & track Apple Watch in Home Assistant !
Once I have the IRK key extracted, adding my Apple Watch inside Home Assistant using the Private BLE Device Integration was a seamless experience.
- Inside Home Assistant, I pressed the “c” button to invoke the command search bar and I typed “Integrations“
- I added a new Private BLE integration
- I pasted the IRK key in the dialog
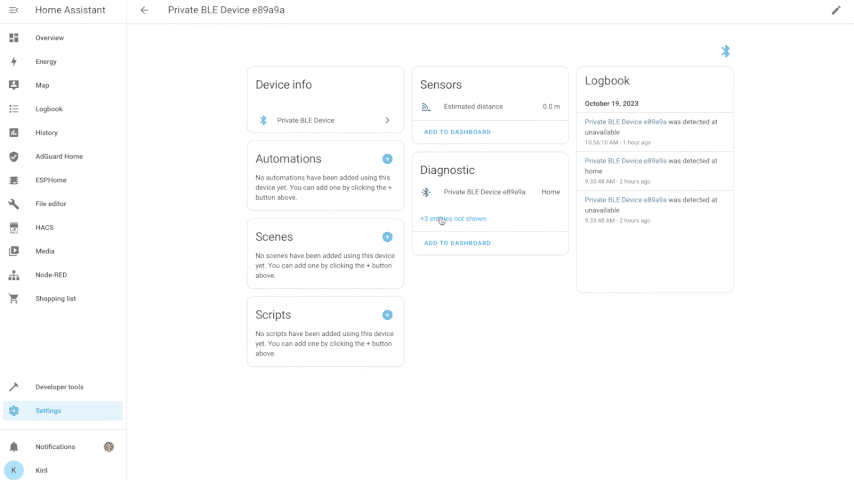
- And I open the new Private BLE device to see what kind of entities I now have.
How to add the Private BLE hidden sensors?
In addition I can show whether my Apple device is within the border of my home or exploring the world outside. Using this method it is possible to see an estimation of the distance between my Apple Watch and the nearest Bluetooth dongle or proxy, along with its signal strength.
To do that I just have to enable the Estimated Broadcast Interval, Power & Signal Strength diagnostic entities.
Track Apple Watch – Conclusion
As summary, after some testing I can say the following: This is not the most reliable and fast method for presence detection as the Estimated Distance sensor is not very accurate and the update interval vary by a lot.
But I’m interested in seeing your results, maybe the things are better on your side. Share your thoughts in the comments.
Check some more articles from me and download my Free Smart Home Glossary
Thanks for reading, I’m Kiril and I will see you in my next article. Bye!
what about Android I hate Apple with vengeance and I was around when Apple II was all the rage.
Brian
If you manage to get the IRK key from the Android device it will work the same!
Does this work with Apple Watch 10? It seems to be configured correctly, it shows broadcast interval and signal strength, but the power and the estimated distance is always 0.
Same here with watch8, but it works, I can track it.