In todays article I’m going to answer the following questions:
- What is MQTT and MQTT Broker?
- How to Install Mosquitto MQTT Broker?
- What is Quality of Service (QoS), Last will (LWT) and Retain messages.
- Also I will demo the MQTT Home Assistant and MQTT Node-RED integration.
Plus some more. Coming up.
Table of Contents
What is MQTT?
MQTT stands for Message Queueing Telemetry Transport and it is a connectivity protocol on top of TCP/IP designed for Internet of Things (IoT) devices. It allows extremely lightweight and simple, yet effective publish/subscribe communication.
What is MQTT Broker?
MQTT broker is a server that receives all messages from the clients and routes these messages to the appropriate destination called MQTT topics.
Installation of Mosquitto MQTT Broker
Okay, we now know the very basics. Let’s install a MQTT Broker called Mosquitto and start playing with it. I will explain more things along the way.
Mosquitto as Home Assistant add-on
If you have Home Assistant OS or HA Supervised – you can install the Mosquitto MQTT broker add-on from the Home Assistant Supervisor menu. That is probably the easiest solution which is working great.
To do this – open your Home Assistant web interface and go to Supervisor > Add-on Store > Search for Mosquitto > Click on it and hit Install.
If you wish to have dedicated/local user for the Mosquitto MQTT Broker – you have to edit the configuration in the Configuration tab. Here is an example:
logins:
  - username: SMASH
    password: THELIKE
anonymous: false
customize:
  active: false
  folder: mosquitto
certfile: fullchain.pem
keyfile: privkey.pem
require_certificate: false
Where SMASH & THELIKE are respectively the username & password that can be later used to authenticate in front of the Mosquitto MQTT Broker..
If you decide to leave the default config – your existing Home Assistant username and password can be used to authenticate yourself.
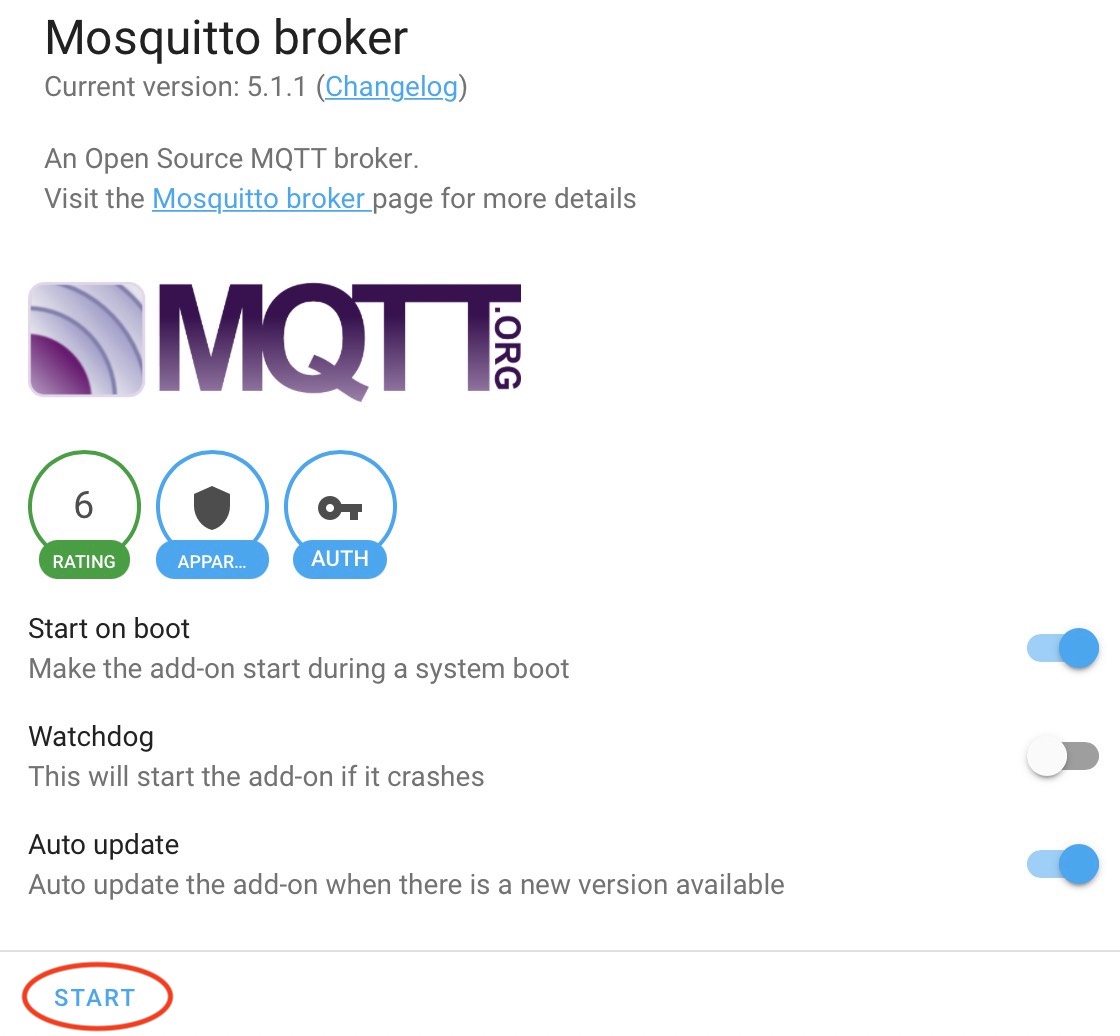
When you are ready – click on Save button, return back to the Info tab and Start the Mosquitto MQTT Broker.
Mosquitto from Docker image
In case you can’t use the Home Assistant Mosquitto Add-on, I will recommend to use the Mosquitto Docker image.
To run the Mosquitto Docker image with the default configuration use this command:
docker run -it -p 1883:1883 -p 9001:9001 -v mosquitto.conf:/mosquitto/config/mosquitto.conf eclipse-mosquittoOf course, you have to have a Docker client before that. To use a custom configuration file you should add & edit the mosquitto.conf file.
Which is easier?
We now have the Mosquitto MQTT Broker up & running. MQTT Home Assistant and MQTT Node-RED integration is very easy, but not as easy as smashing the Subscribe button for my Newsletter.
Just try the Subscribe button smashing, then try the integrations below and tell me in the comments which one is easier.
MQTT Home Assistant integration
The MQTT Home Assistant integration can be done very easy. You either have to click on the My Home Assistant link below:

Or to go to Configuration > Integrations > and search for MQTT
TIP: It is possible Home Assistant to auto discover your MQTT server and to display it as a card with a button to configure it.
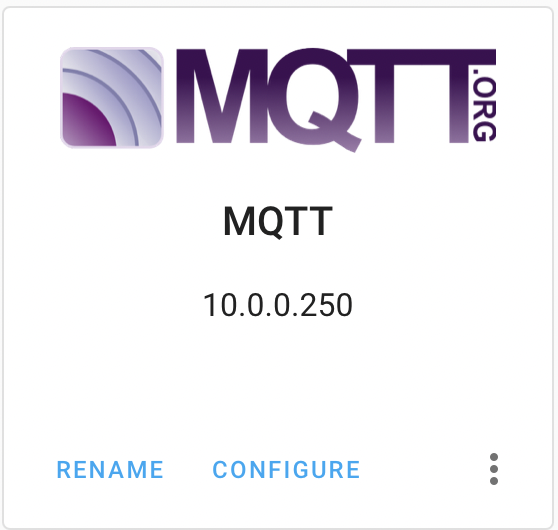
MQTT Home Assistant Integration successfully added in Home Assistant
No matter what you choose (My Home Assistant Link, Manually search and install MQTT from integrations, or the auto-discovery) from the above the result is the same.
And just like that the MQTT Home Assistant integration is done! Stay with me as the MQTT Node-RED demo is ahead and I will try to throw some light on QoS, Retain and Last Will MQTT Messages.
MQTT Node-RED Integration
There is no real MQTT Node-RED integration process. You just have to enter your MQTT Broker host and credentials in any MQTT Node-RED node. These are the quick instructions:
- Drag MQTT in or MQTT out node from the left sidebar in Node-RED to the dashboard and double click on it.
- Click on the Pencil button, located to the right of the Server field
- In the Connection tab – enter a Name of your choice, and the IP where MQTT Broker is installed the port is usually 1883 and you can leave it as it is.
- Click on the Security tab and enter your MQTT Username and Password

The procedure above should be done only once. Afterwards you can simply select the already added MQTT server in every MQTT Node and you are good to go.
What is Quality of Service (QoS)?
Let’s talk about Quality of Service or QoS and not in general, but in MQTT.
The QoS defines how hard the Broker or Client will try to ensure that the message is received. There are three levels of QoS: 0, 1 and 2. Higher level of QoS are more reliable, but involve higher latency and have higher bandwidth requirements. If you are over WiFi or LAN – QoS 2 should be the recommended level.
QoS Demo
Imagine that we are using MQTT communication in the comments section under this article.
QoS 0 will be: I will send one message in the comments and I will not care if anybody will see it or answer it.

Next level, QoS 1 will be the following: I will ask the same question, but I will repeat it until you answer me, then I will stop asking you and I will continue the same process with my other subscribers if there are any.
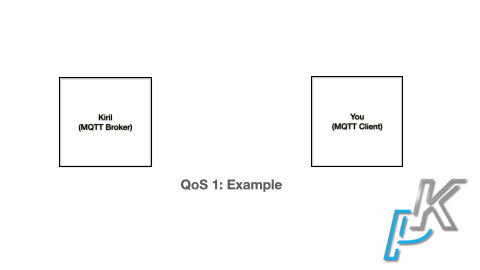
And finally if we use QoS 2 MQTT communication:
- I will ask the question,
- You will answer,
- I will say thanks,
- And you will reply with one more message.
That way both of us will know that we read and receive all of the messages from our communication.

By the way let’s really try the Quality of Service 2 like communication in the comments below to see what will happen.
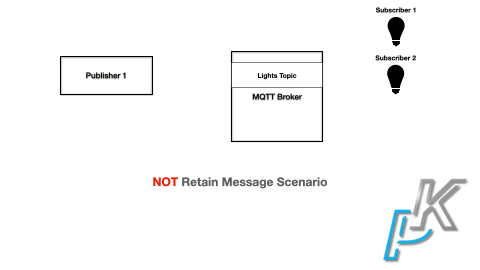
What is a Retain Message?
A Retain message is a normal MQTT message with a retained flag set to true. The Broker will keep the retain message even after sending it to all current subscribers. That makes sense when you want newly-connected subscribers to receive messages immediately.
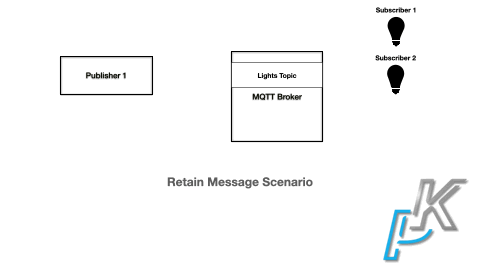
Without retained messages, new subscribers are kept in the dark between publish intervals.
This is where you can change the MQTT retain flag in Node-RED:
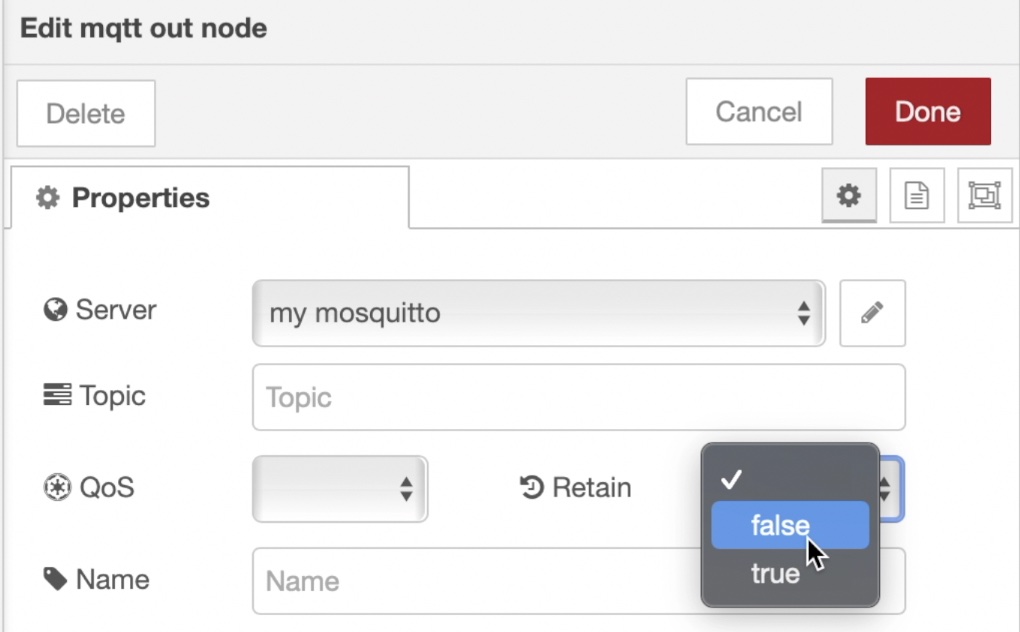
But be careful here if some clients are using retain messages and others not against one and the same MQTT topic you can expect anomalies. Avoid this scenario as hell, but if you are already in it – you have to send an empty message with retain flag to fix everything.
Important Subscribe?
And while we are talking about subscribing to MQTT topics – why don’t you subscribe to my Newsletter?
[sibwp_form id=2]
I will send you beautiful and useful articles like this one every week. I promise!
What is Last Will and Testament (LWT)?
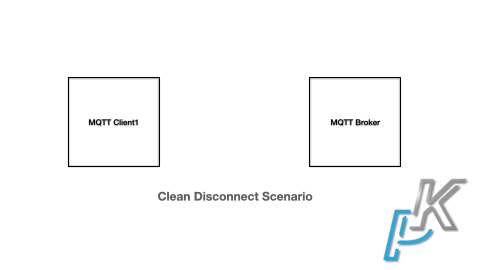
In MQTT you can use the Last Will and Testament (LWT) feature to notify the other clients about an ungracefully disconnected client.
Each client can specify its Last Will (LWT) message when it connects to a broker. The last will message is a normal MQTT message with a topic, retained message flag, QoS, and payload. The broker stores the message until it detects that the client has disconnected ungracefully. In response the broker sends the Last Will message to all subscribed clients.

If the client disconnects gracefully with a correct DISCONNECT message, the broker discards the stored LWT or last will and testament message.
Support my Work!
I really hope that you now know more about MQTT, MQTT Broker, QoS, LWT, Retain messages, MQTT Home Assistant & MQTT Node-RED integration.
If you want to support my work check my support page or at least share this article to everyone that might like it!
With that being said Stay Safe and don’t forget – Home Smart, but not hard!
Thank you for reading and I will see you in my next article.
Do you like this article (QoS 2 enabled) ?
Not sure, I only read it once