
I know almost nothing about 3D printers, nevertheless I’m willing to learn and today I’m going to or at least I will try to assemble an Ender3 V2 3D printer by only looking at the included paper manual, no YouTube tutorials and no Google is allowed, so please join me in this challenge and let’s learn together or just have some fun at my expense and see what will happen.
Table of Contents
Why I choose Ender3 v2 printer?
Like I said, 3D Printers are not my strong side (if I have any strong side at all), but fortunately enough I have one brand new Ender3 v2 3D printer by my side thanks to banggood.com.
Check the printer current price at Banggood.com 👉 AFFILIATE LINK
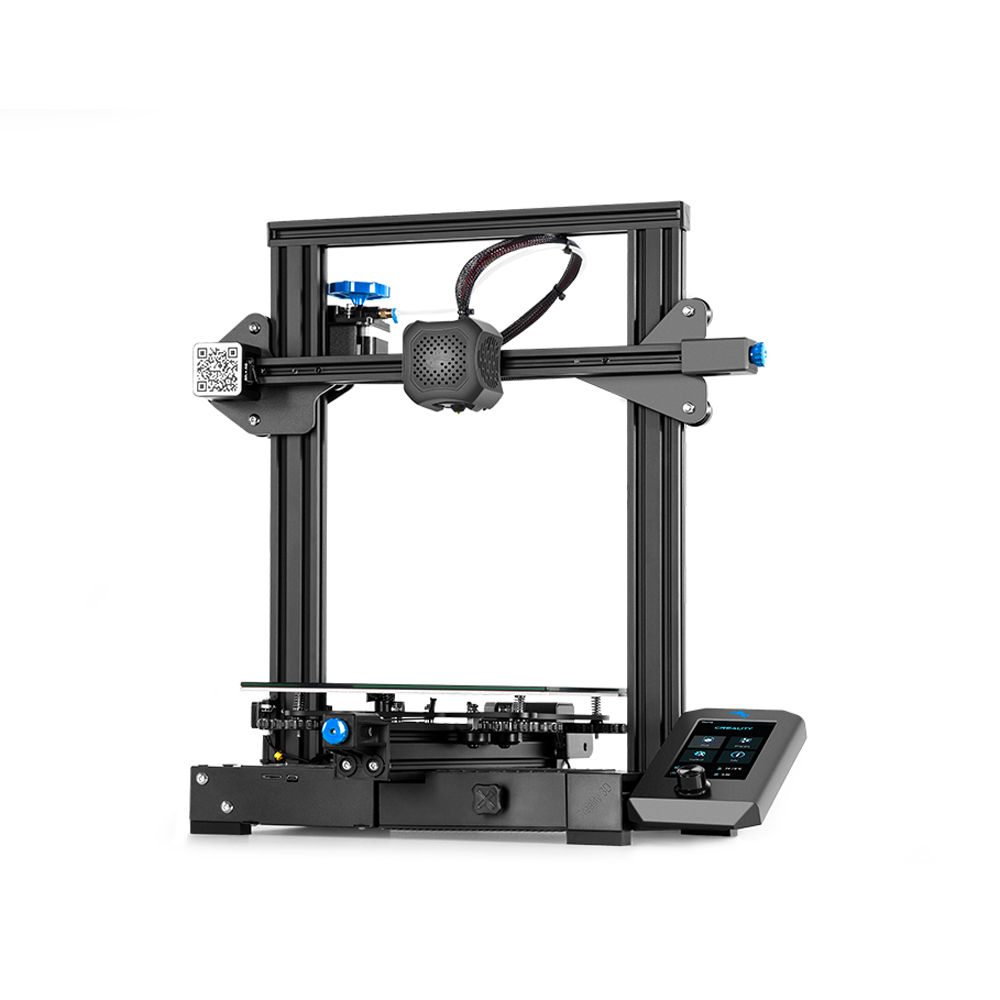
It turns out that this Ender3 v2 is one of the best 3D printers that you can buy under $300. Also, it was recommended to me by my YouTube buddy Mat from the NotEnoughTech, who unlike me owns a 3D Printing black belt.
However, the recommendation is one thing and printer assembly and first 3D print is whole another story. Unlike the regular printers where you just have to plug and print. With the 3D printers you receive this and if you are good with IKEA products assembly you will be ready in no time or maybe not.
So assembling by a Noob of an Ender3 v2 3D printer, here we go!
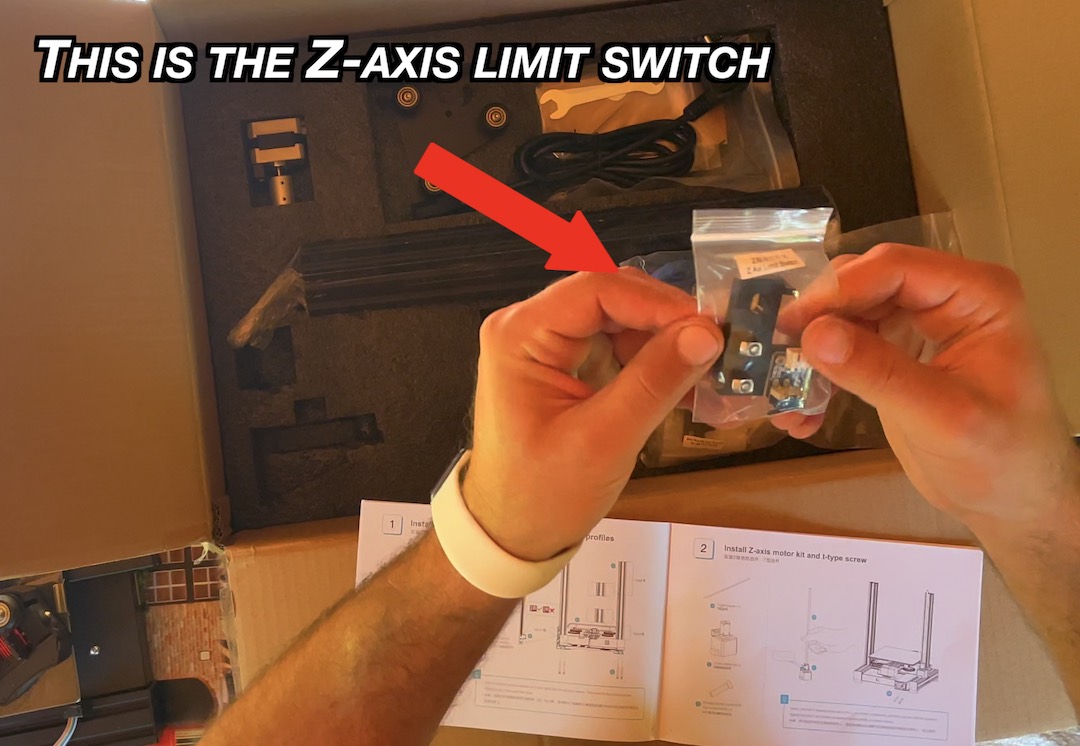
Step 1 Installation of Z-axis limit switch & Z-axis profiles
Believe it or not, the first page of the manual was the most difficult for me.
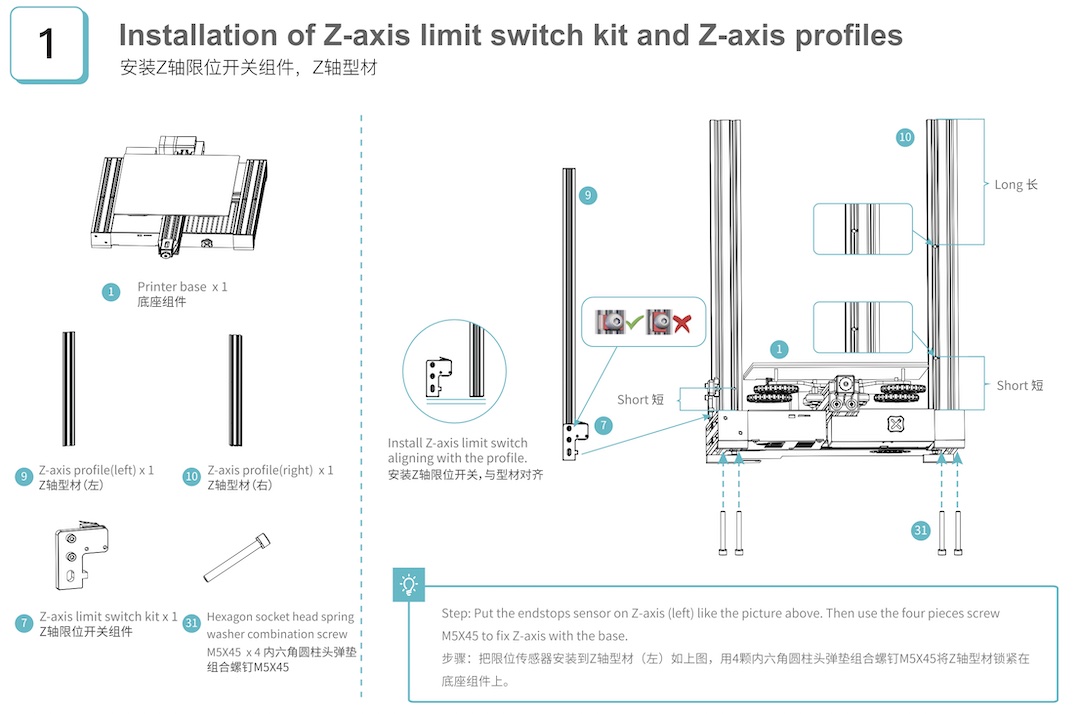
I was not quite sure which exact aluminium profiles I have to use for the Z-Axis. The Ender3 v2 have four very similar profiles that are just different in size. So one big part of my 3D printer assembly journey were spent here on the first page of the manual.
I was very close to just check the YouTube quickly for that. Fortunately, I resist on that temptation and I even choose the right parts, because I remember that the printer is taller than wider and I took the longest aluminium profiles. I even managed to place the Left and Right profile on their correct places thanks to the holes and the manual.
However, It would be soo much easier for the Creality (that is the vendor of the Ender3 v2 printer) to mark the profiles with one little L and R somewhere on them.
After that initial step, everything started happening. It even went smooth until I realised that I mounted everything backwards.
My fault, and not the manual fault, it was my bad! I quickly turn the printer to face me, so I can read the Ender label and the power switch is on the back, I swap the places of the aluminium profiles and everything was fine, for now.
I manage to mount the Z-axis limit switch module, where I just have to loosen the two screws and nuts and to align it with the left Z-axis aluminium profile.
Step 2 Install Z-axis motor kit and t-type screw
The Second step is to mount the Z-axis motor and the T-type screw.
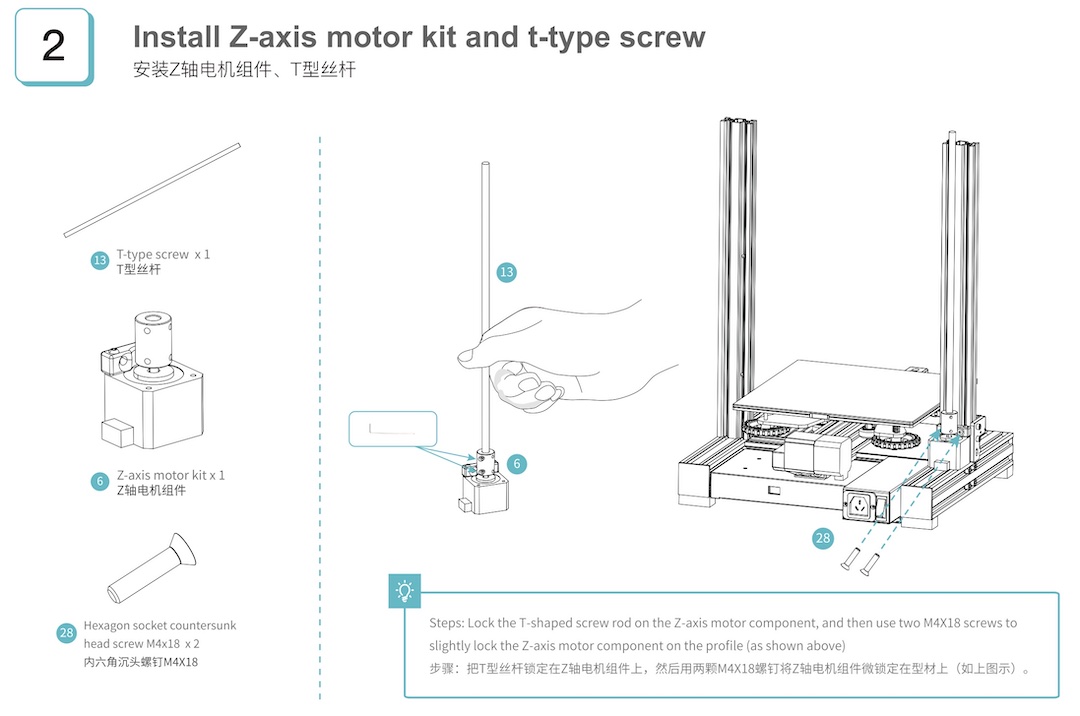
That was easy except that nowhere in the manual it is stated that you have to remove the rubber cover of the T-type screw and I initially though that it must stay as it is.

Step 3 Install pneumatic joint, XE-axis kit & synchronous belt
And step three, was to install the pneumatic joint, XE-axis kit and synchronous belt.
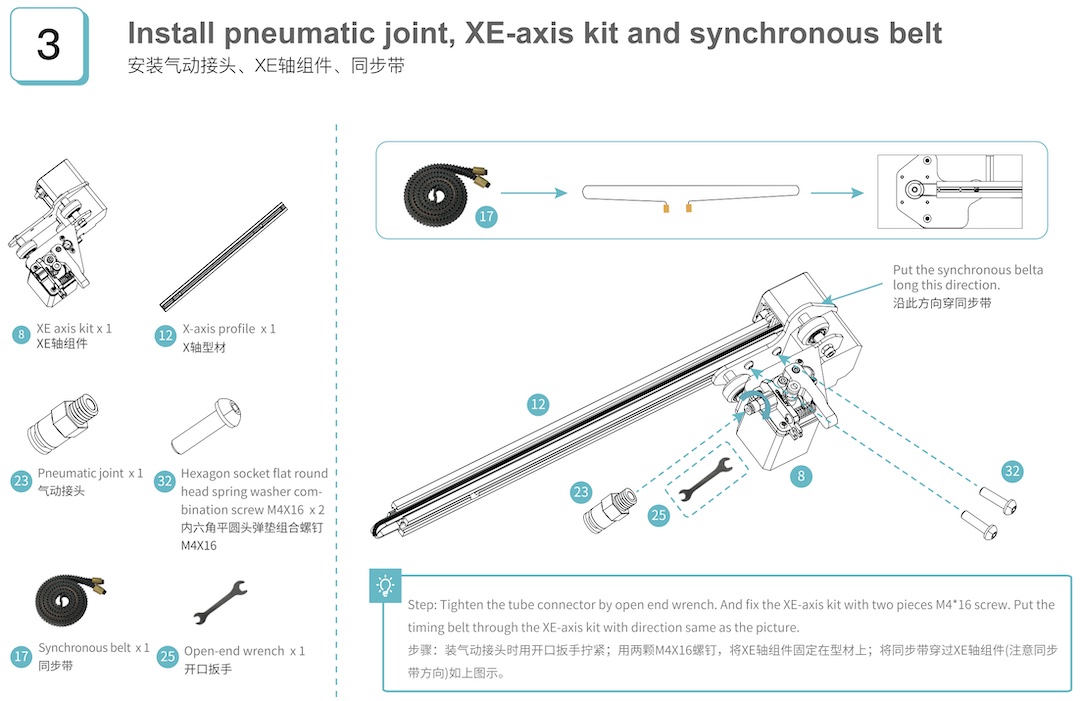
But wait a minute here what is XE-axis as far as I remember only X, Y & Z axis are available. This little question bothered me until the whole Ender3 V2 printer assembly and after I finished I Googled for what the XE-axis is. It turns out it is an X-axis with an Extruder.
Anyway, I had to screw the pneumatic joint to XE-axis kit, to attach the X-axis profile to the XE-axis kit and to put the timing belt through it. Note, that on the X-Axis profile there is a large hole where the screw head can fit.
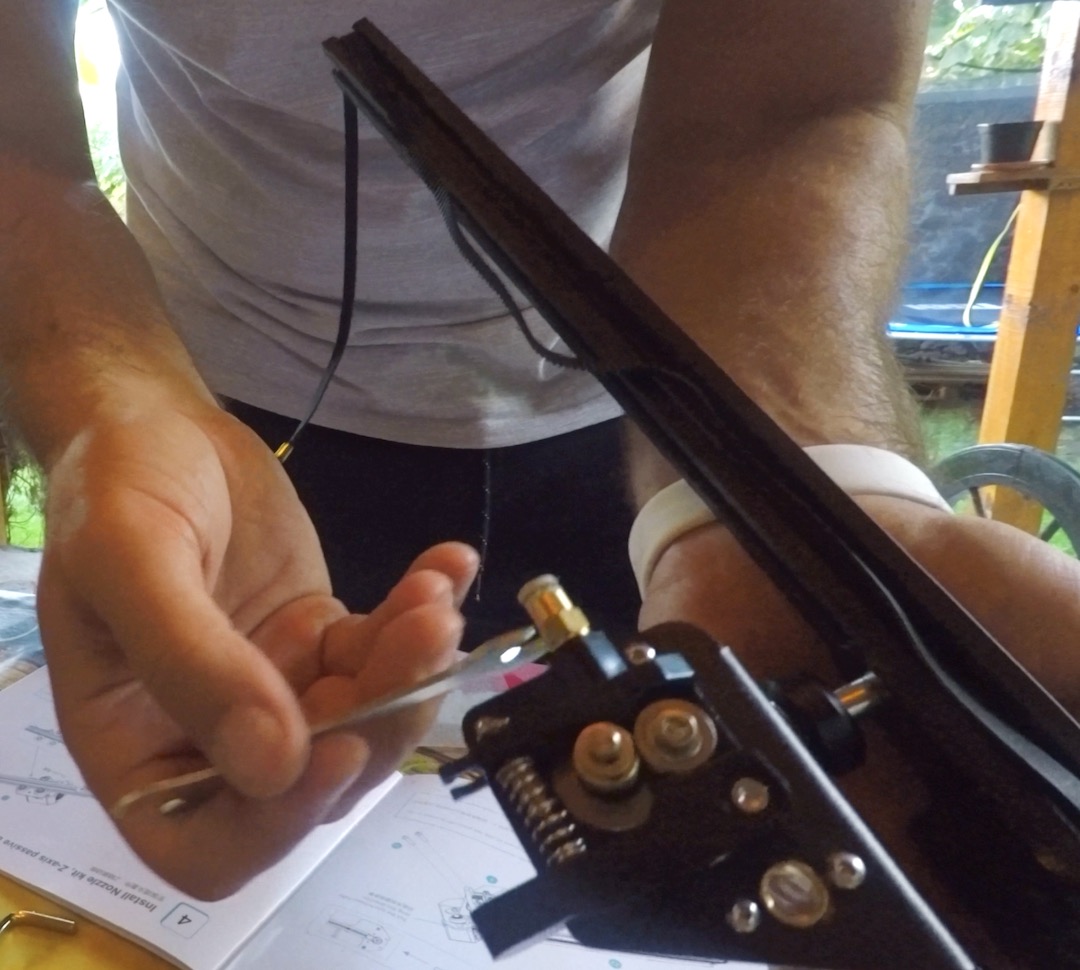
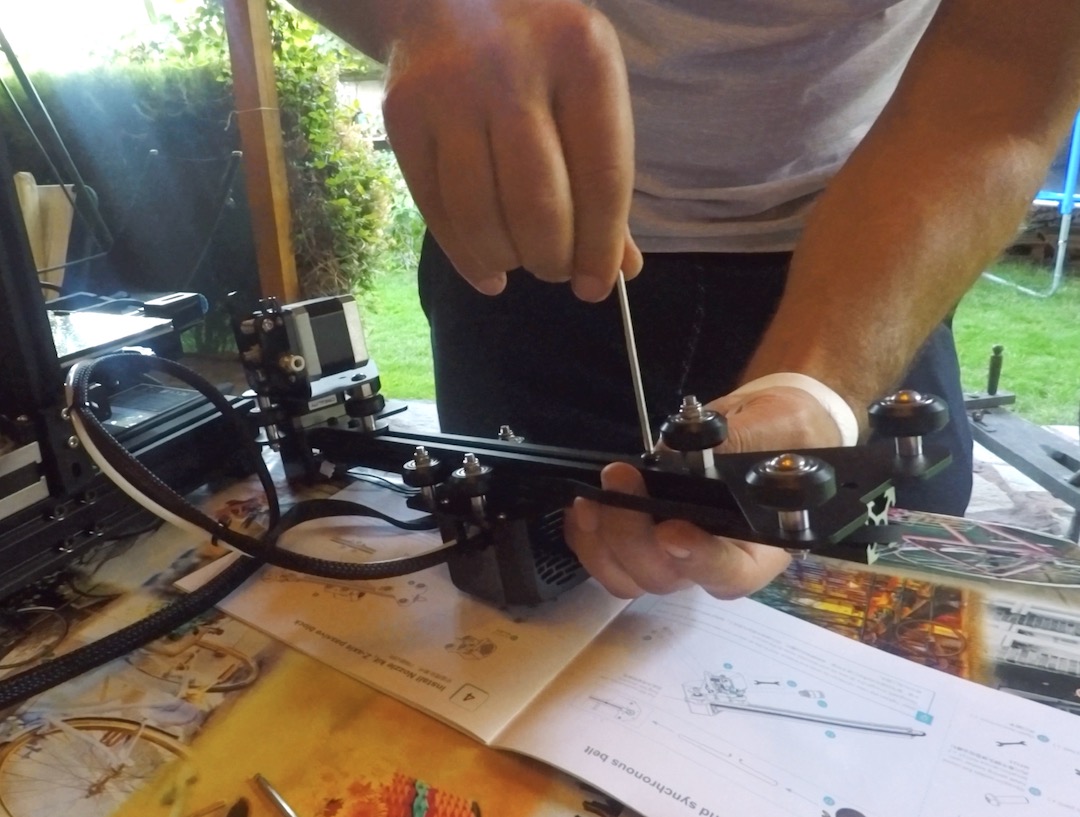
Step 4 Install Nozzle Kit & Z-axis passive block
Step 4 from the manual is a very easy one, Here I have to add the extrusion kit and the Z-axis passive block.
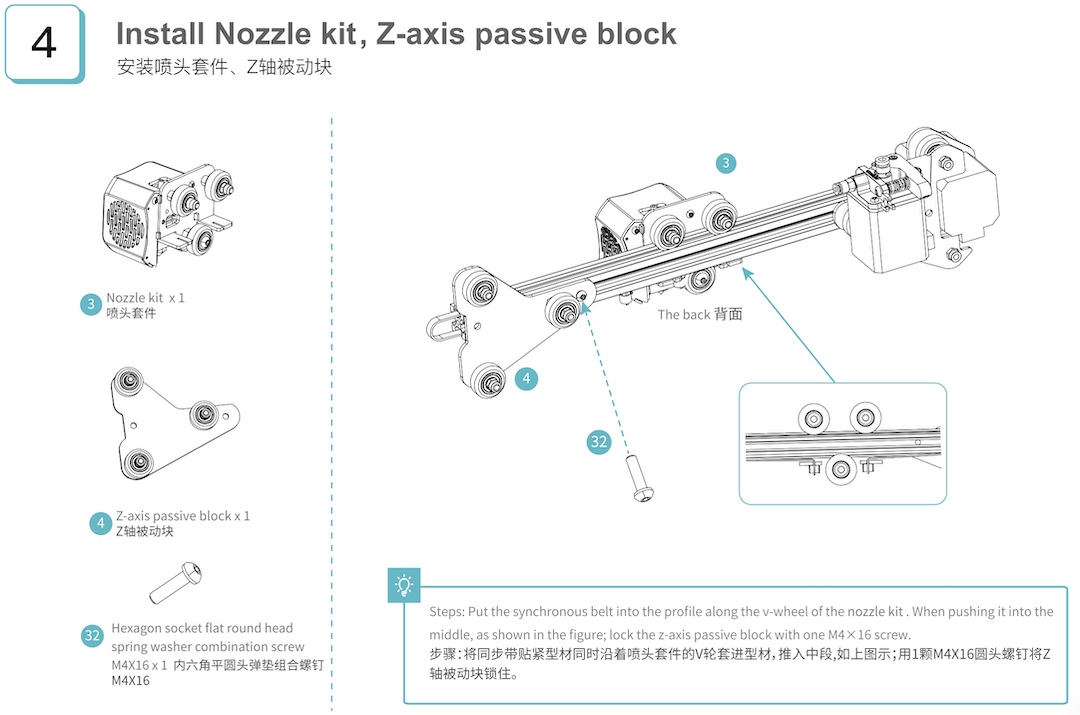
Then I have to Put the synchronous belt into the profile along the V shaped wheels of the extrusion kit. And to lock it with the z-axis passive block with one M4X16 screw.
Step 5 Install X-axis tensioner
And just like that I reach step 5 from the manual, where I have to mount the X-axis tensioner.
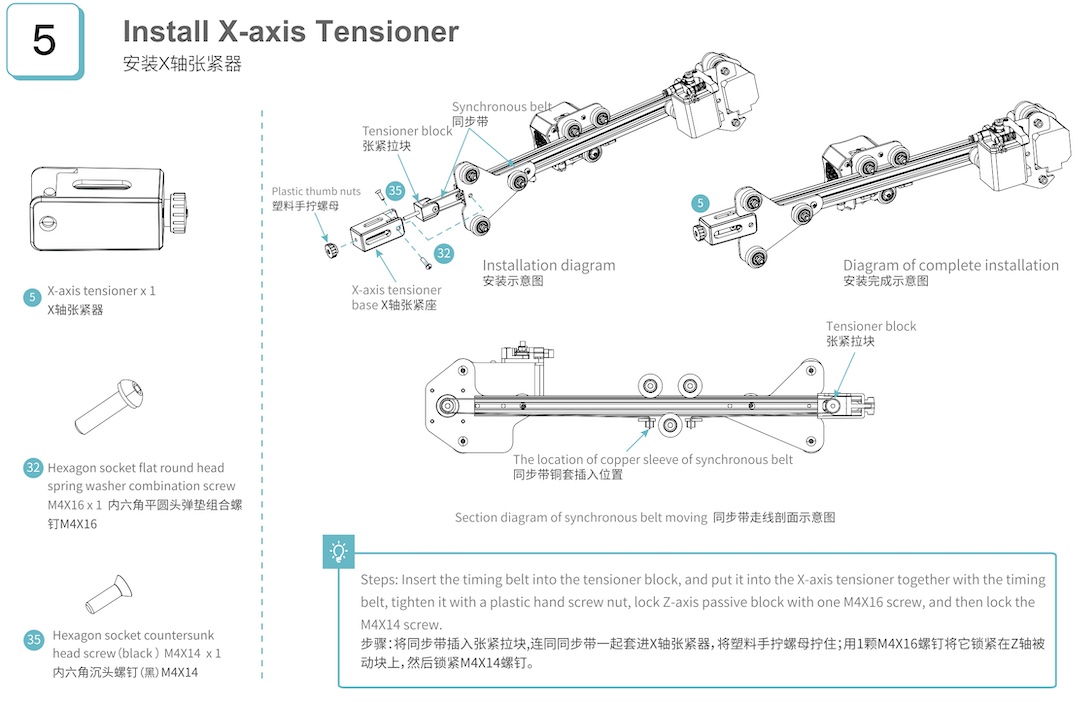
That is the last thing before adding the whole moving kit with everything on it on to the Ender3 v2 3D printer. So, I had to unscrew the plastic thumb nut to take out the Tensioner block, but then I had to unscrew this as well and to remove this wheel inside, because it was not possible for the timing belt to pass through due to the copper sleeve. And these exact copper sleeves located at the both ends of the belt should be attached to the underside of the X carriage. Using the knob on the X-axis tensioner I applied some tension to the X-axis belt.
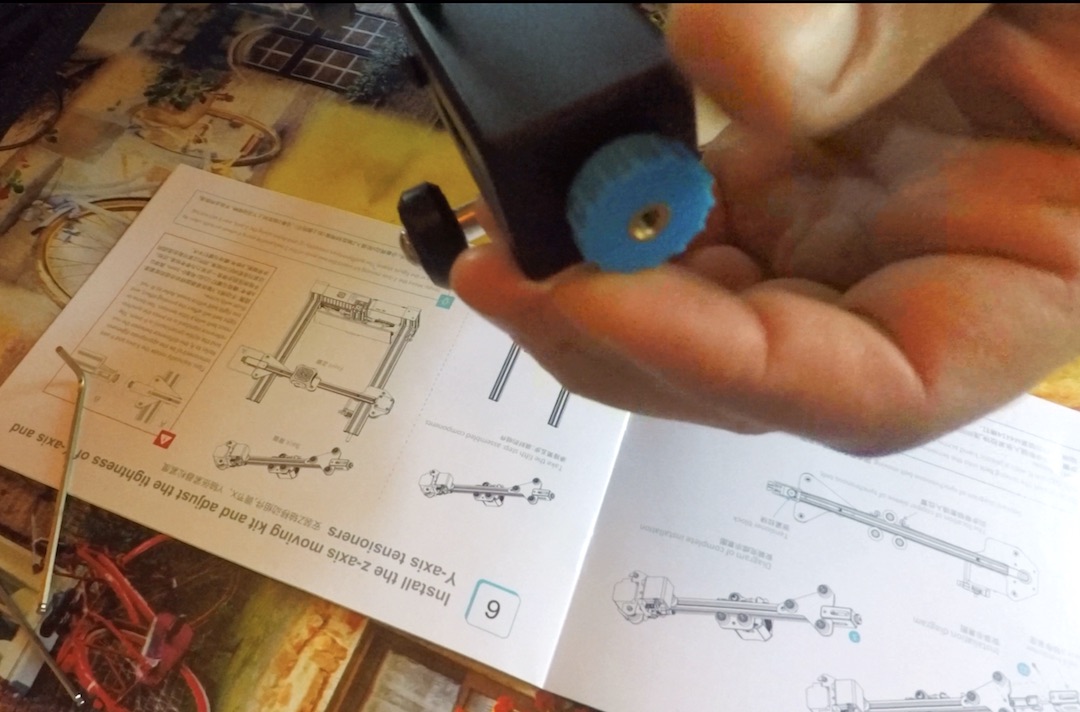
Step 6 Install the Z-axis moving kit
Step 6 was not so bad, I just have to install the Z-axis moving kit, for that I had to insert the two ends of the Z-axis profile along V-wheels on both sides.
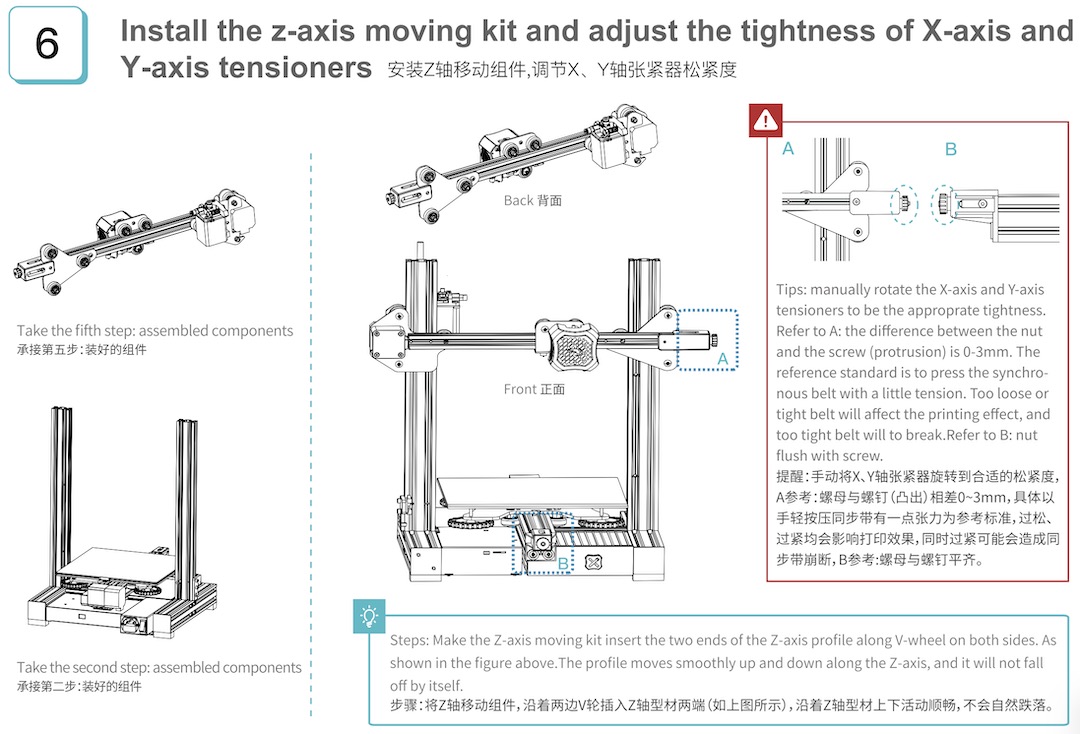
Nothing in the manual is stated about the Z-axis stepper motor and the big screw on it. But I will say it, you have to manually rotate the motor to lower the X axis a bit. And here for the first time I realised that the rubber cover of the T-type screw should be removed. Again nothing in the manual about that.

Step 7 Install the gantry profile & display kit
Step 7 was like a walk in the park, as I only have to install the gantry profile & the display kit, nothing wrong with the manual here.
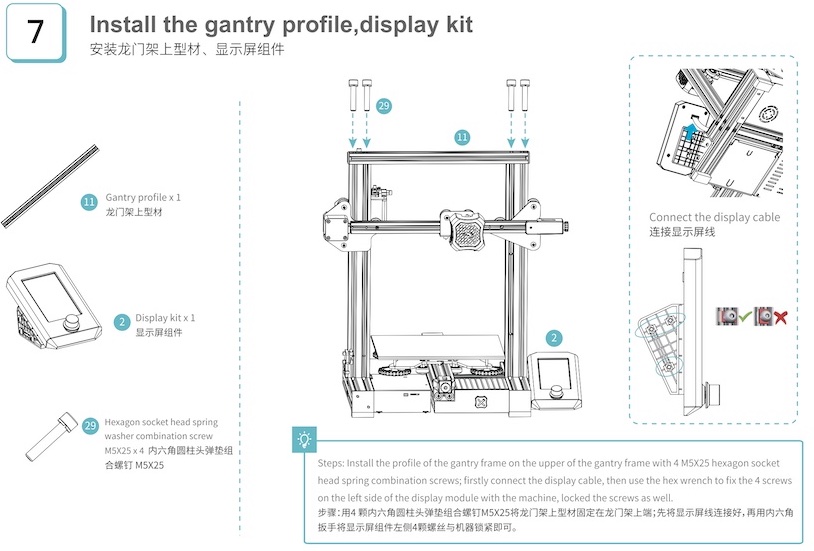
Just to mention that the display should be on the right side of the printer. That means when the Ender label and logo are faced towards you and you are able to read them normally.
Step 8 Install material rack, gantry cover & indication knob
Step 8 is even more trivial, and I only have to install the material rack, gantry cover and indication knob as well as the 2020 profile cover on both sides.
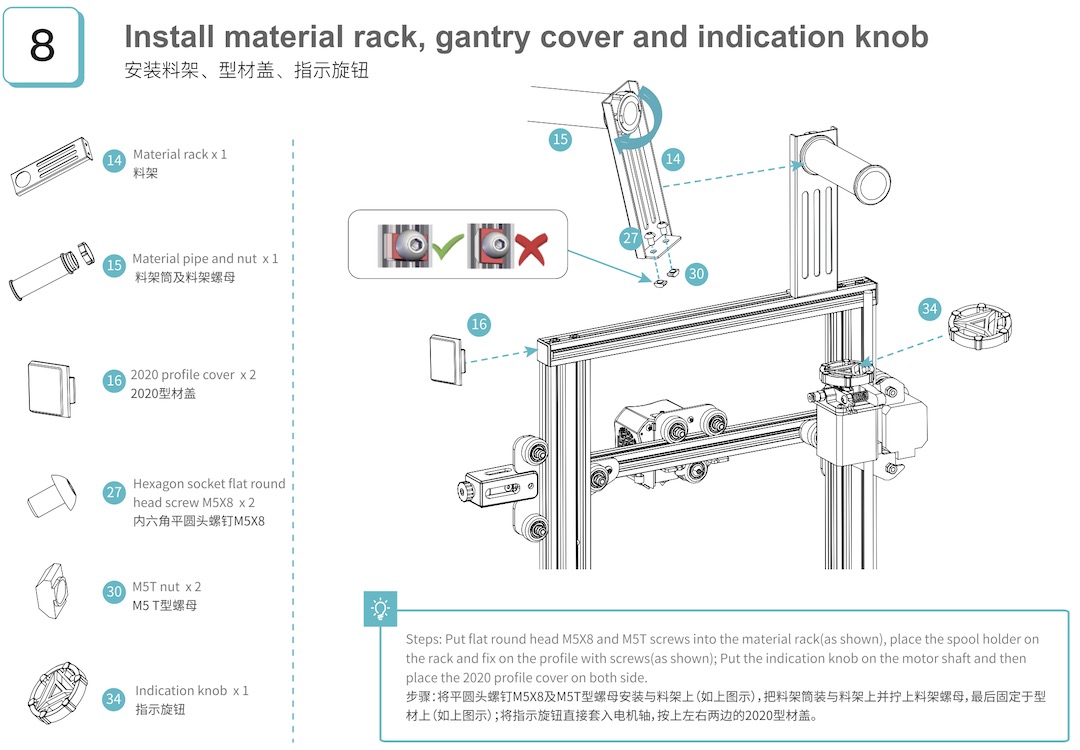
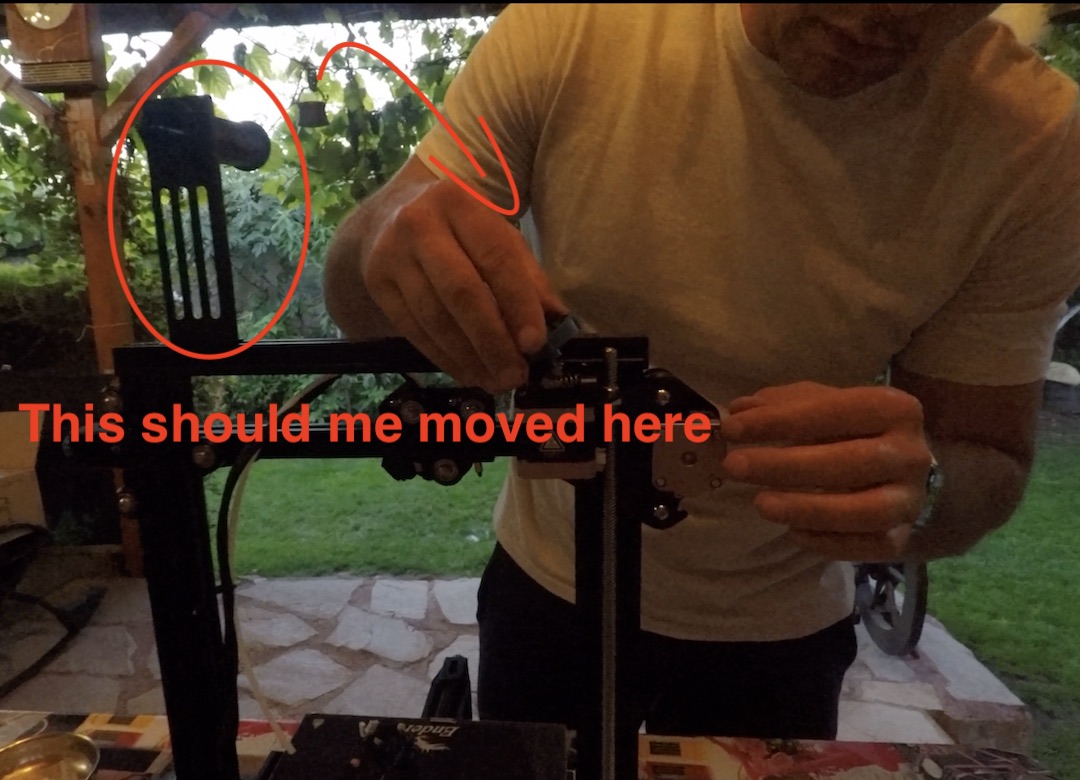
Note that I placed the material rack on the right side, where it should be mounted on the left side, no big deal about that, nothing serious I moved this later.
Step 9 Wire the Ender3 v2 3D printer
Soon after I reach step 9 from the manual where I have to wire everything.
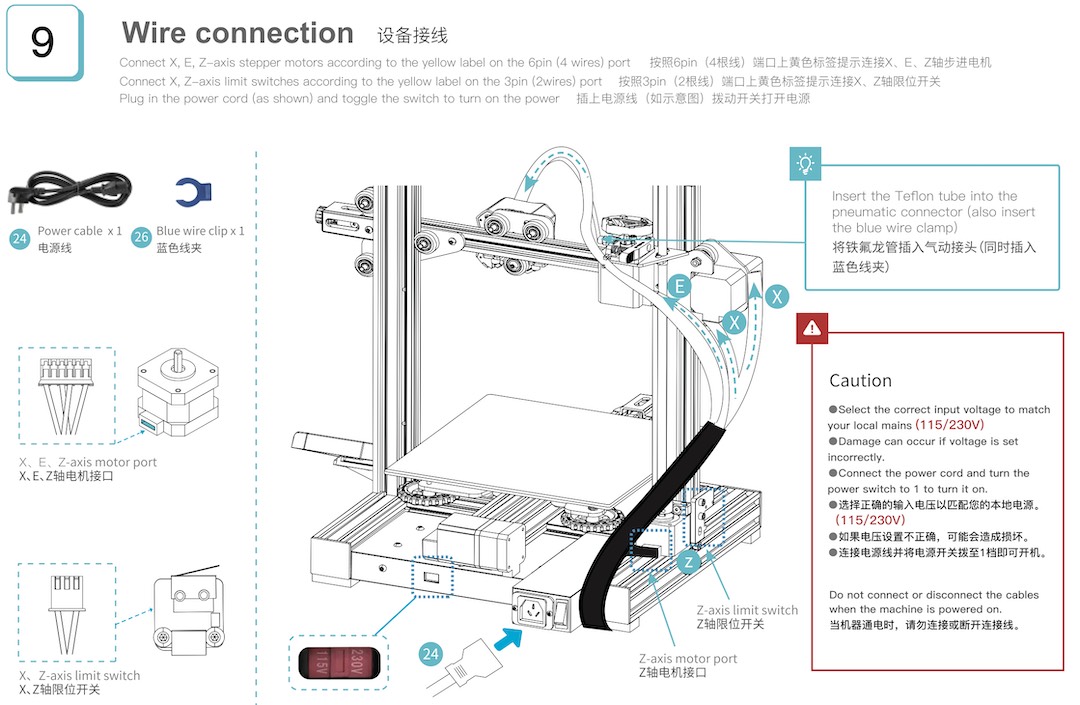
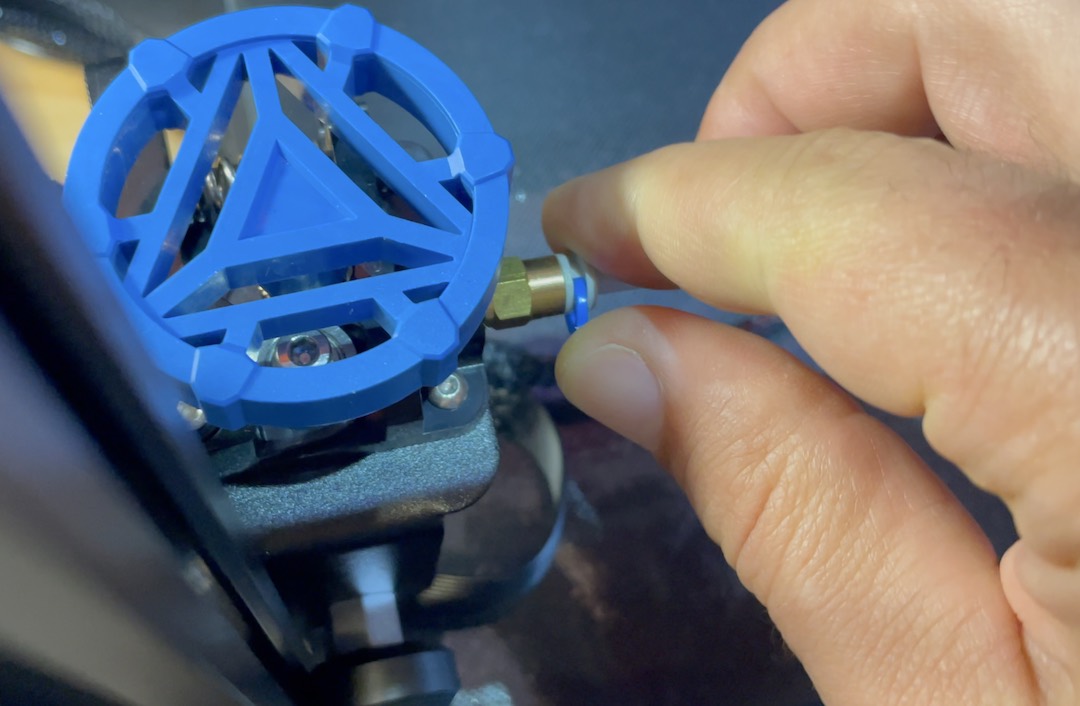
Here, the vendor of the Ender3 V2 printer, Creality did a very good job, every cable have a little clip on it with a letter. So I just have to grab that letter and to check in the manual picture where this letter should be connected. I also have to Insert the teflon tube Into the pneumatic connector and to Insert the blue clamp.
I set the Ender3 v2 input voltage on the back of the printer to match the available power. In Europe it is 230v and in the United States it is usually 115 volts as far as I know.
Power on the Ender3 v2 3D printer for the first time
First major point is reached. Time to power on the Ender3 V2 for the first time. My fingers are crossed and I really hope that the printer will not burst into flames. Fortunate enough, mine Ender3 v3 3D printer boot up without issues!

That is a big success for me as I’m a complete noob that have never ever seen a 3D Printer before in real life, and now I manage to assemble one and even start it.!
I even tried to check the Ender3 v2 printer menu using the included display until I found out that it is not a touchscreen display.
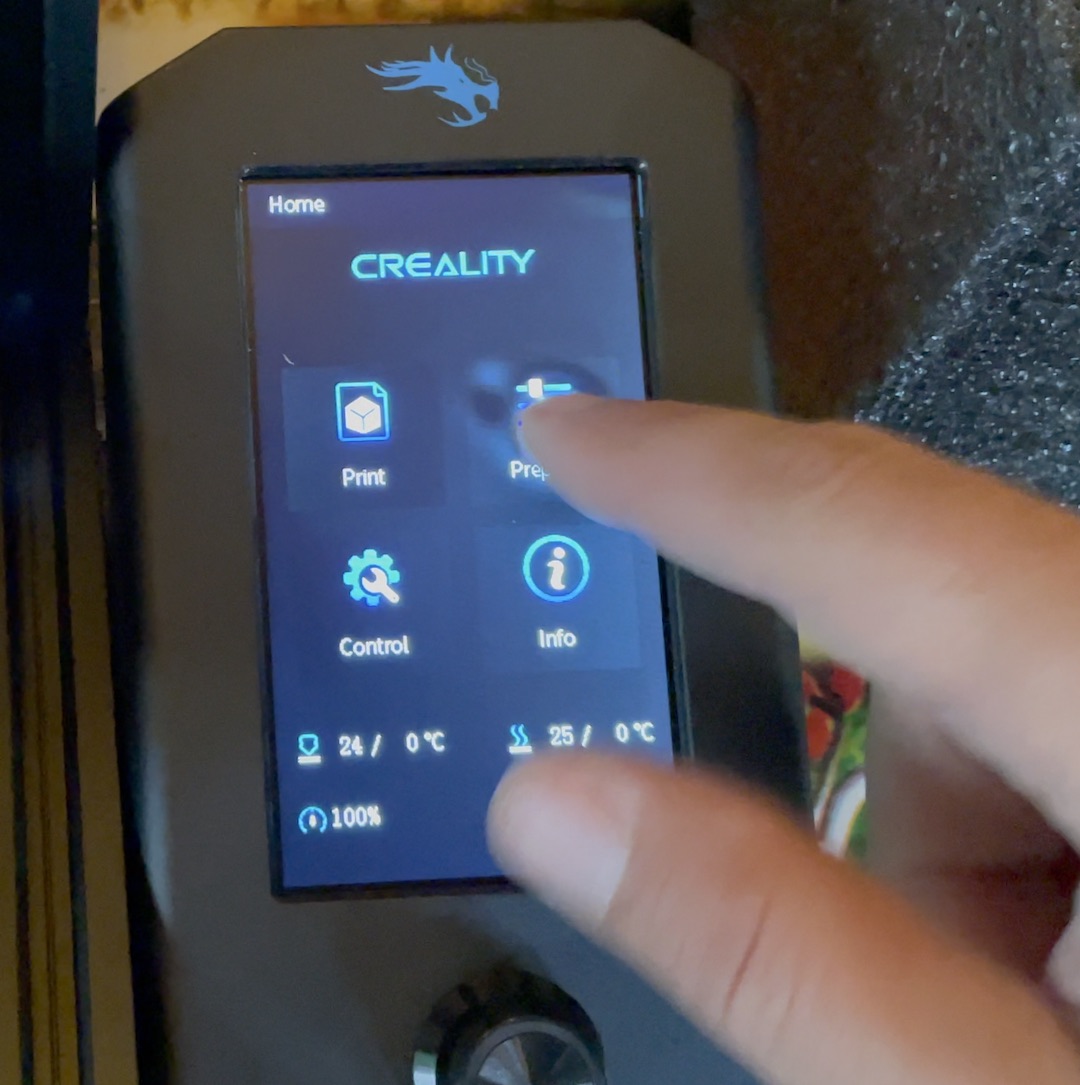
That was kind of relieve, as I immediately thought that I got the cables wrong, but at the same time disappointment because it is somehow more natural to have a touchscreen display. At the end of the day we are talking about a printer that is under $300 and touchscreen is not such a big deal.
Level the printer bed + cheat
And just when I thought that I made it and everything hard was left behind I faced another big, big issue. The Ender3 v2 doesn’t have an assisted leveling function and I have to admit here, because it will burn me from the inside, I cheated… and I failed with the challenge as I used YouTube video tutorials to level the printer.
Everything until now I managed to do only from the included paper manual, but then I was so scared that I will mess up the levelling and I will break the printer so bad that I will never be able to use it again. On top the levelling was not well described in the paper manual for the first time users.
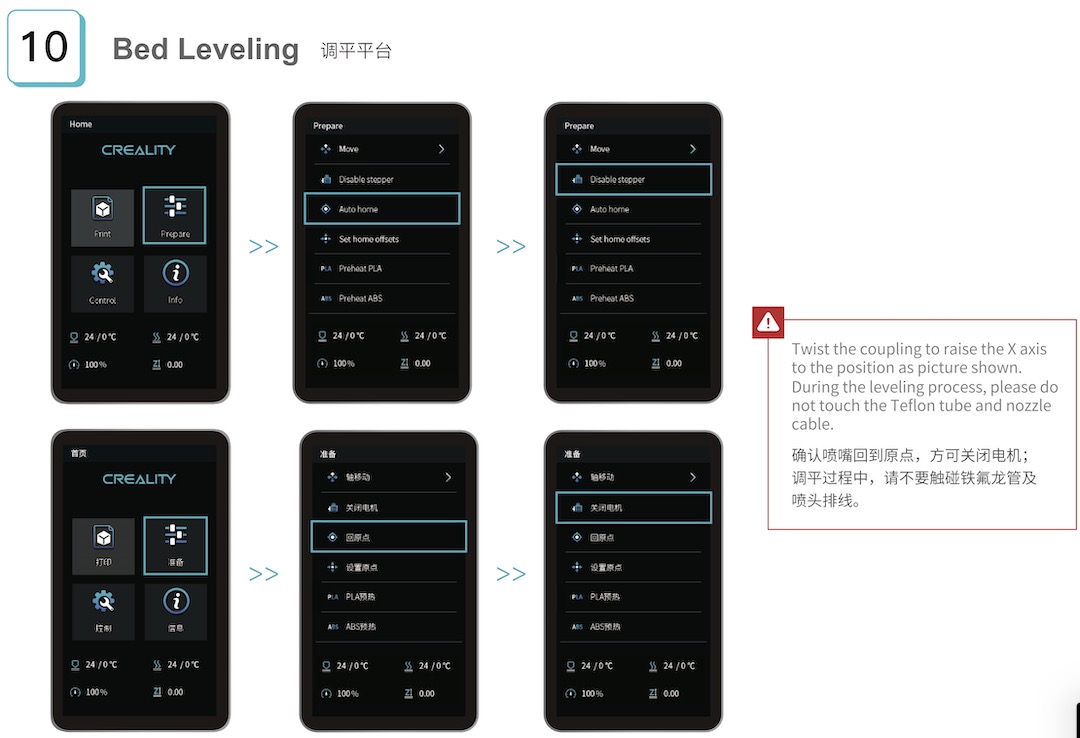
Step 10 bed levelling 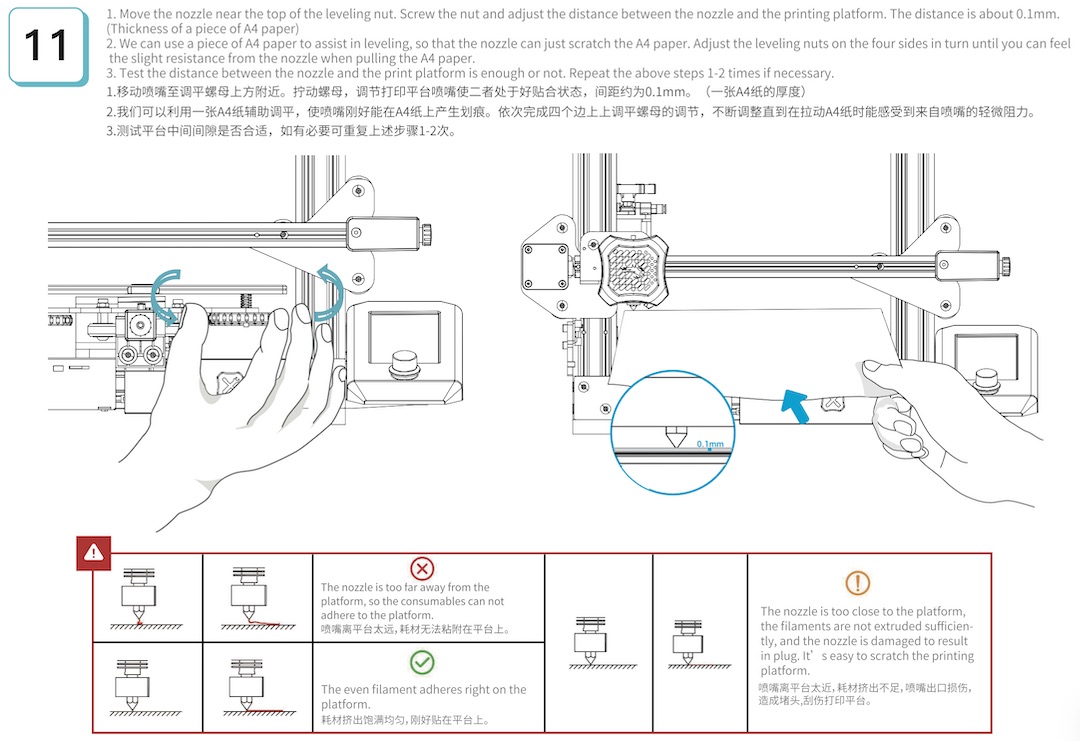
Step 11 bed levelling
Hello Creality, fix your Ender3 V2 manual so a noob like me will be able to level the printer. Anyway, my cheating consist of exploring the Creality website where I found some YouTube videos that I used.
Using gcode files to level the bed
First, I adjusted the Z-axis limit switch by loosen the two screws so I can move the switch then I turned the Z-axis stepper motor manually until the nozzle is about millimetre away from the bed. I did that for the all four corners of the bed.
I even downloaded some gcode files that I placed on the SD card. I set the bed temperature to 60 degrees and I start printing the gcode which actually is not printing anything, but just instructed the printer to position the nozzle over each adjustment knob.

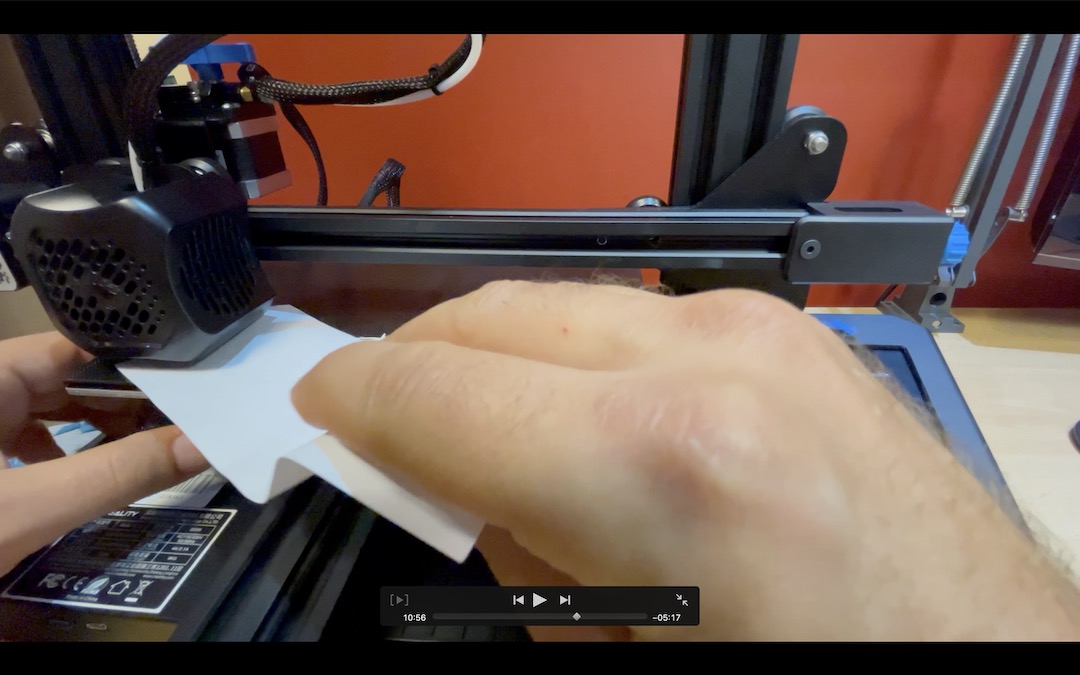
In theory the only thing that I had to do is to use a sheet of paper and the adjustment knob to level the printer. What I have to do is to get the nozzle closer enough to the bed that I can feel resistance when sliding the paper, but I don’t want the nozzle so close to the bed that I can’t move the paper at all and I don’t want the nozzle so far from the bed that I can’t feel any resistance when moving the paper.
Scratching my printer bed using a gcode
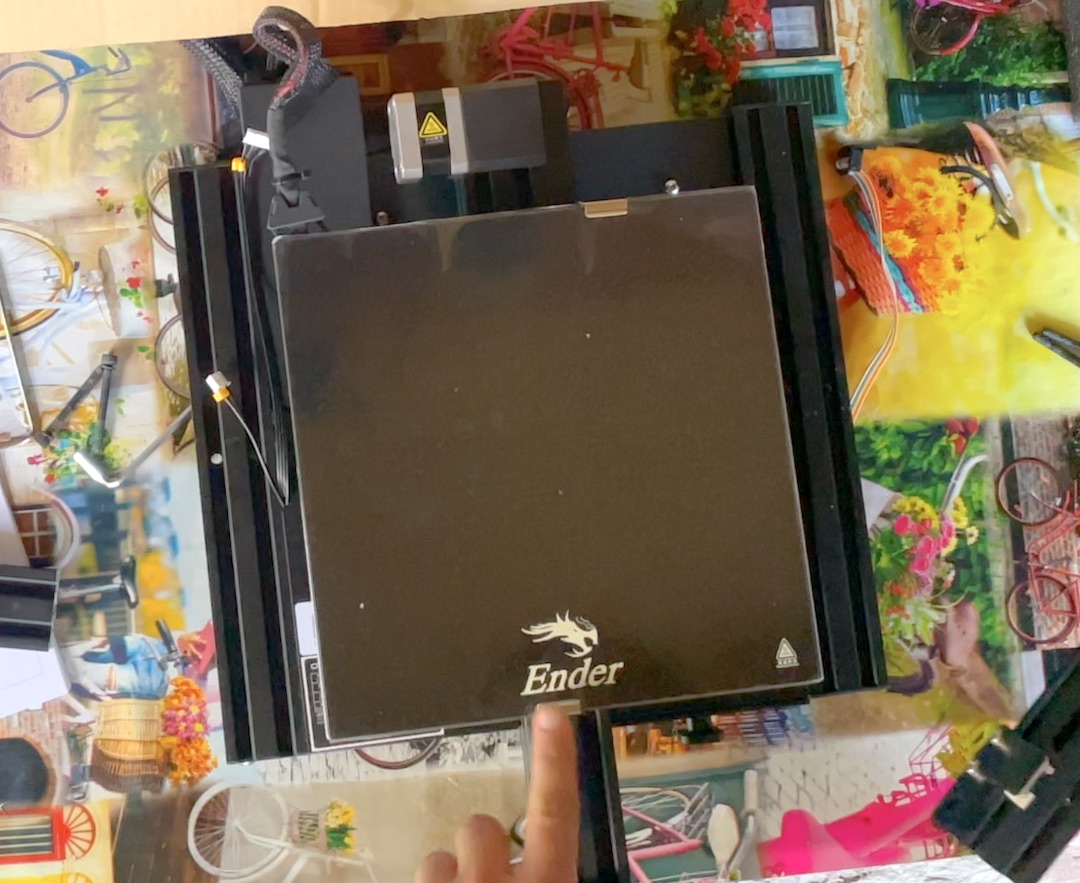
So I started the gcode levelling and then it happens I scratched my bed during the gcode levelling run.
I had a problem that, but I didn’t know what it is exactly and I have no idea where to start. I initially thought that my Z-axis limit switch adjustment was not ok, so I did that again, but everything seems fine there.
Then I blamed the gcode file, so I searched for another one that is exactly for the Ender3 v2 firmware 1.0.2, which is my printer firmware. That one was better because it not moves the nozzle forward until you press the printer main button.
My Ender3 v2 first print – unsuccessful
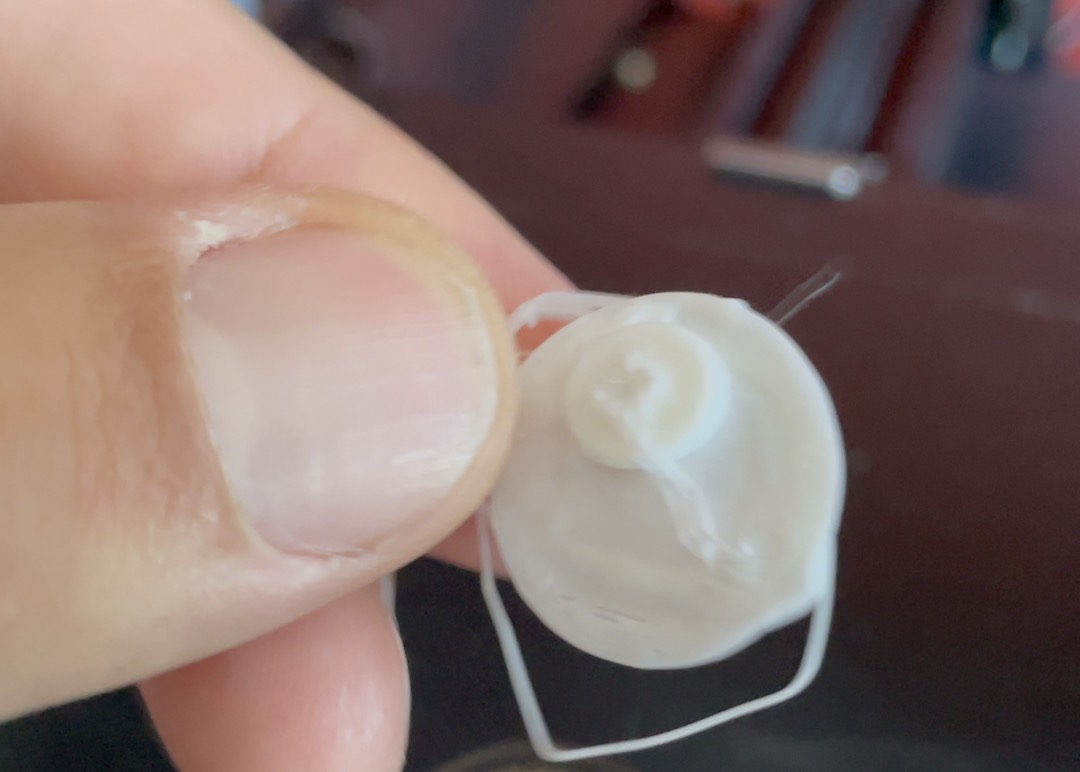
I level the printer one more time using the gcode file from above, (this time without scratching my bed 😮💨) and I thought I’m ready to print. So, I loaded the included in the printer filament, by heating the nozzle up to 200 degrees and then pushed the filaments through the hole until I see some filaments fibres coming out of the nozzle.

I found a simple 3D model online again a Gcode file, I placed it on the SD card, I did the PLA preheat from the printer’s menu and start the printing. The end result was this.
Burn of my Ender3 v2 bed
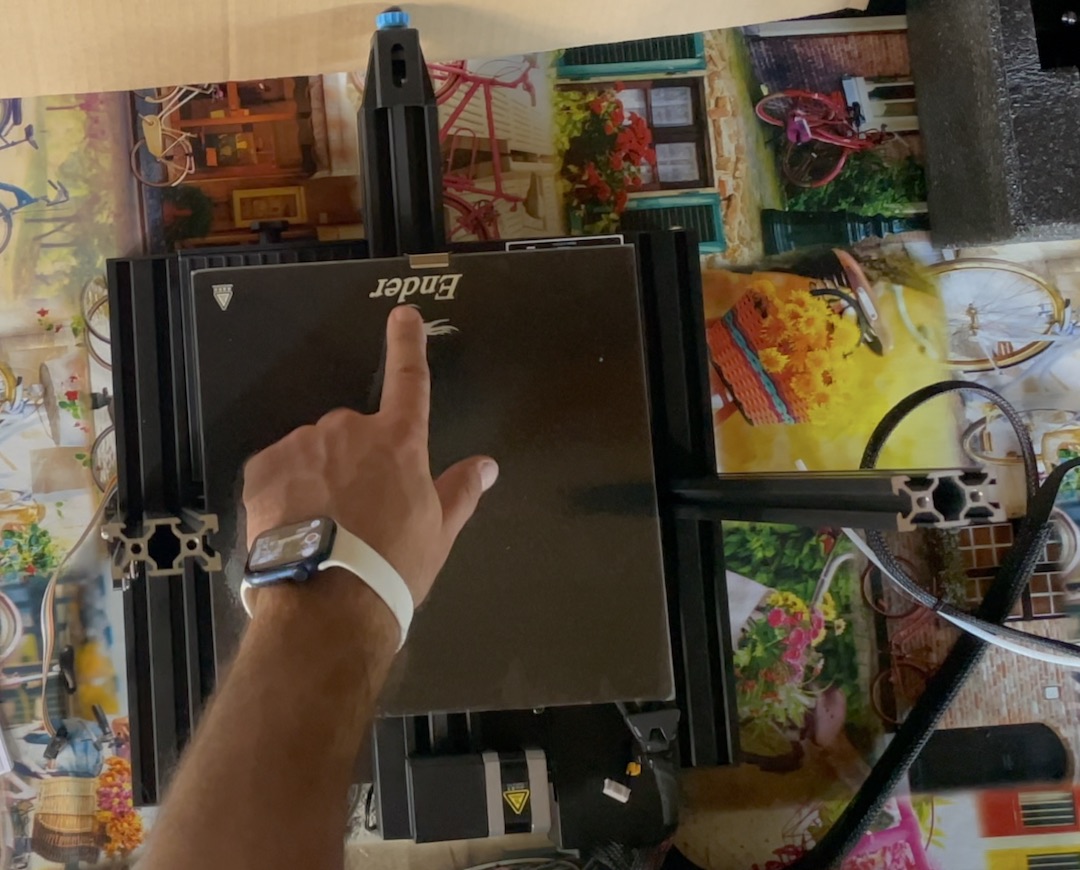
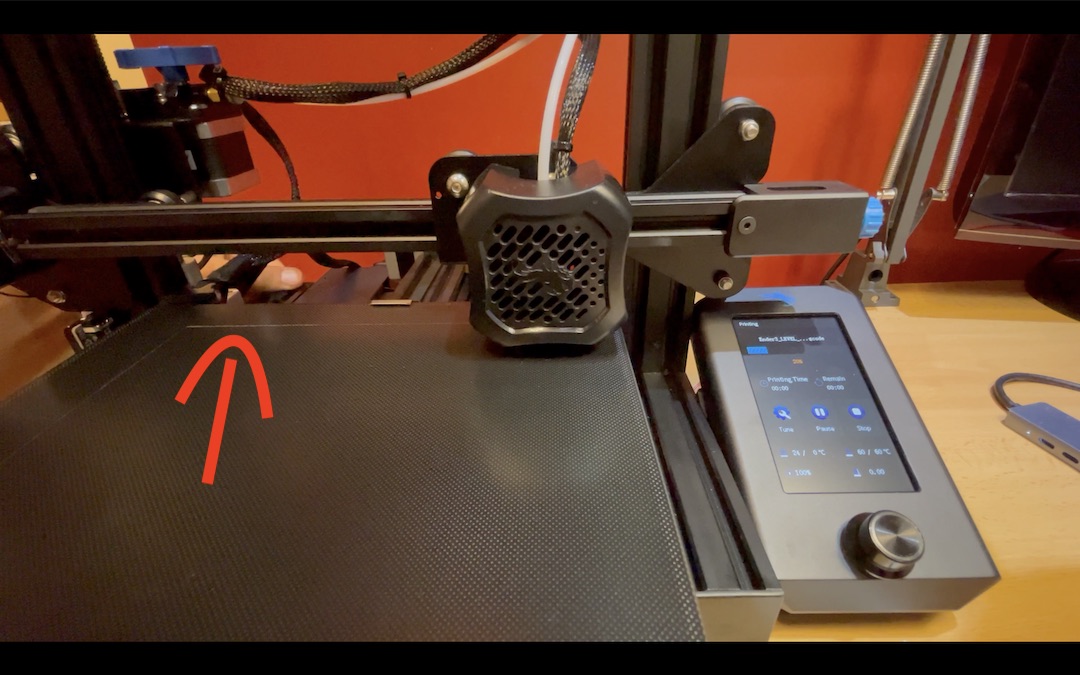
So back to school, in first grade, I checked everything once again, I level everything once more and start another print hoping that this time everything will be fine, but it was not it was very far from fine.
This time something other happened, the filament was not going out of the nozzle, the indication knob was cracking strangely and It seems that I somehow burned my bed, it is not scratched, but on the places where the nozzle was the bed is with different color now.

Finding the main problem?
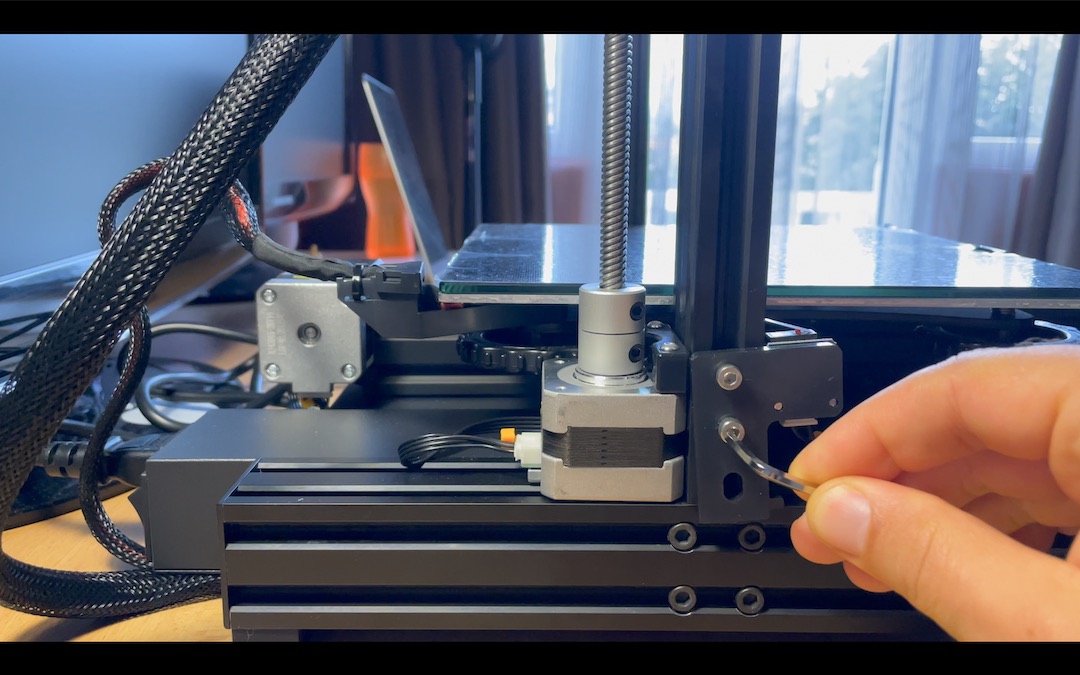
I was totally desperate and I didn’t know what to do. I heat the nozzle to 200 degrees and double checked if filament is going out of the nozzle. Then I noticed that when I command the printer to auto home something strange is happening. The X and Y axis where moving smoothly, but the Z axis was not. It was either moved only once down and stuck or it didn’t move at all.
So I loosen the screws of the Z-axis stepper motor just a little bit and start auto home again. This time everything was smooth and fast. For the first time I saw that the printer is going a bit up on the Z-axis during тhe auto home.
So I tightened the screws to fix the Z-axis level switch in that position.

It seems that this was my main problem from the beginning – there was some tension on the Z-axis and the printer was not able to go up, that is why I scratched and burned my bed and my first print failed.
My first successful 3D print with Ender3 v2 printer
I check the levels quickly once again, I started a preheat PLA procedure and then I start the 3D printing. This time everything went fine. The result is this one.
I don’t know is it OK or not as I don’t have anything to compare it to you can tell me in the comments. Here are some more 3D prints from my Creality Ender3 V2 printer that I manage to do afterwards.
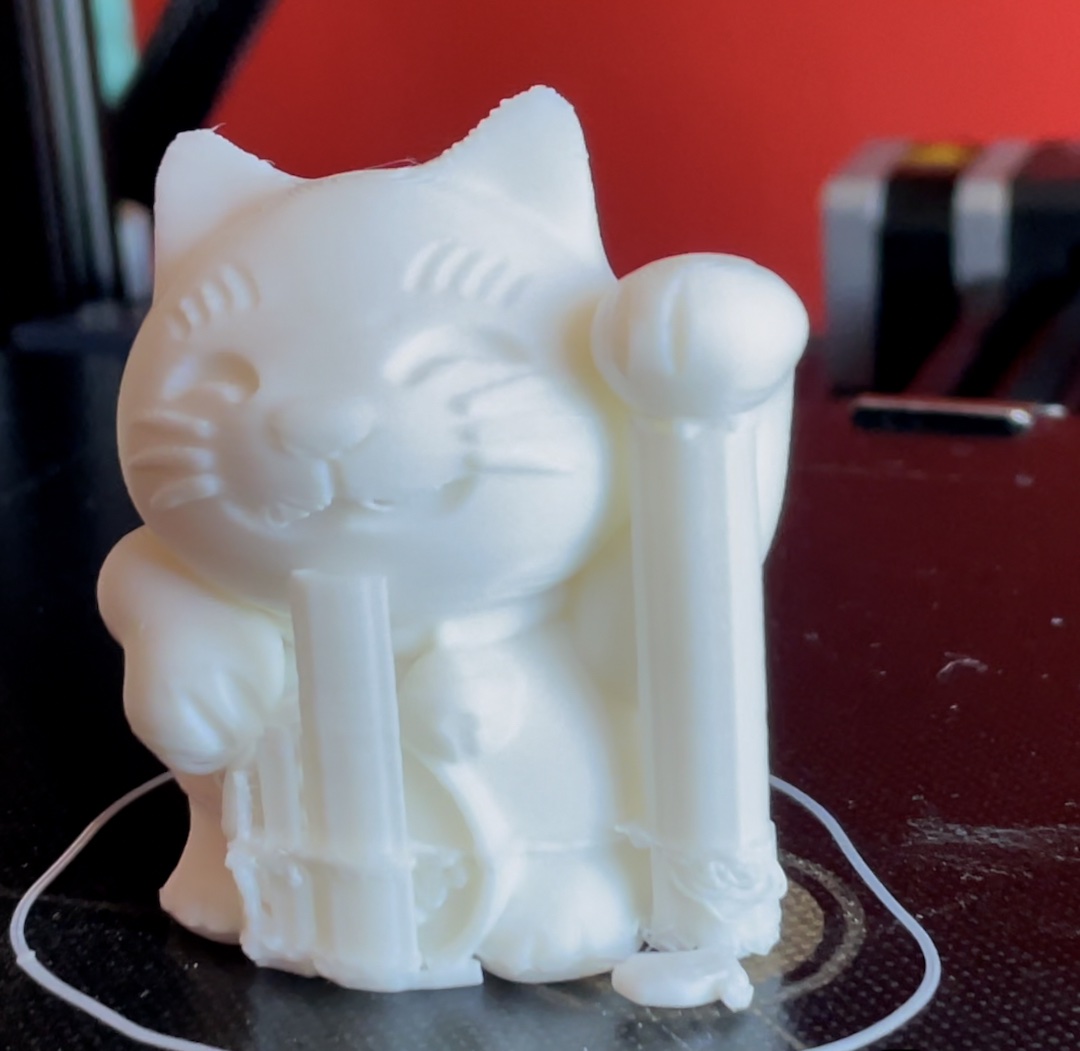
The Ender3 v2 printed Cat 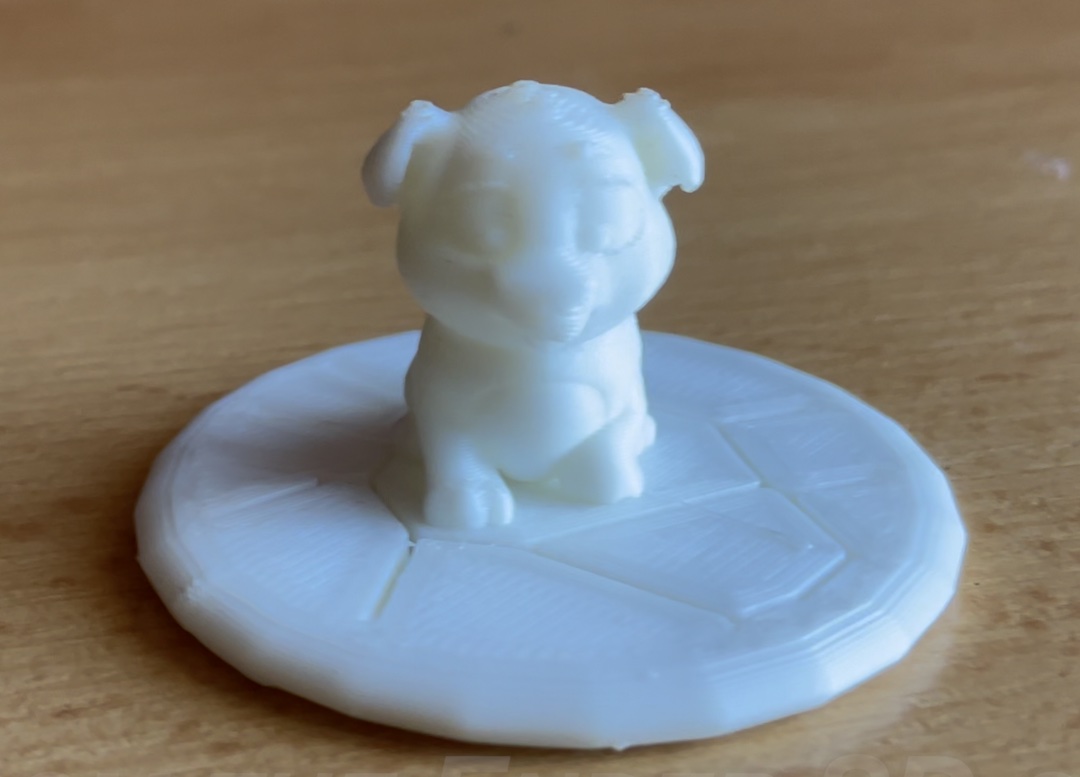
The Ender3 v2 printed Dog 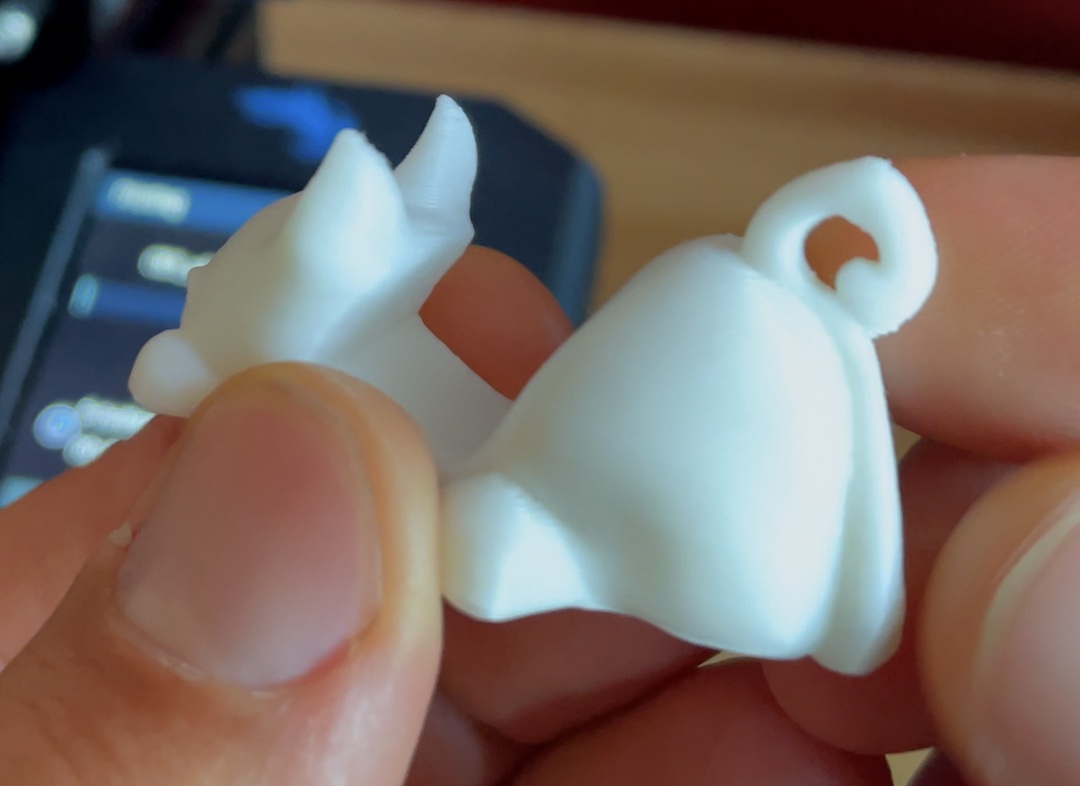
The Ender3 v2 printed phone holder 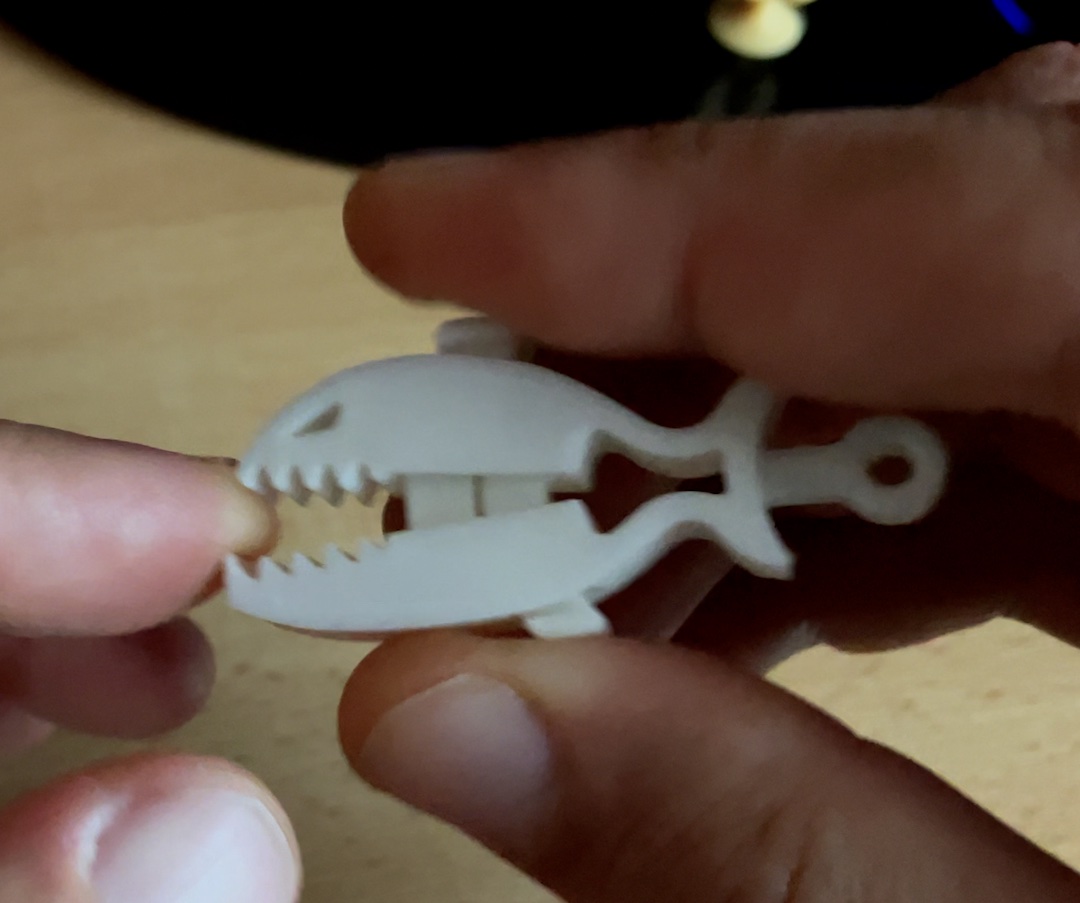
The Ender3 v2 printed biting piranha
Outro
So I managed to assemble the 3D printer Ender3 v2 using only the paper manual, but I failed with the levelling and I used YouTube videos for that part.
The printer assembly issues I had due to only using the paper manual was nothing compared to the levelling process and first 3D print. Nevertheless, I’m happy with the end result In fact this whole this thing was very useful to me, because I learned a lot and now I even know the names of most of the parts of the printer and their roles, and that is until I totally forget them!
That is one of the reasons to make a video and this written article, so I can easy remember them if needed and to help as far as I can to someone else that is going through the same process.
Now is the best time to thank the guys from Banggood who sent me this printer for test and review. If you want to buy the same printer you can find a Banggood affiliate link here 👉 LINK
If you decide to buy from the above link I will receive a small commission from your purchase with no additional cost for you!
I will appreciate a lot if you leave a like and subscribe to my channel with the notification bell 👉 My YouTube Channel.
Please subscribe for my Newsletter, follow me on Twitter and join my Discord server and remember – Home Smart, but Not Hard!
I’m Kiril and I’m done writing!