
Official Raspberry Pi 4 USB boot – finally! That means you can use SSD or HDD drives instead of SD card in your Raspberry.
Table of Contents
What you will see in this article?
In today’s article I will show you how you can do the above step by step and you don’t even have to attach a monitor to your Raspberry Pi 4.
SD cards can cause issues and are much slower than SSDs. Since I have a Raspberry Pi 4, my SD card got corrupted several times. So I had to remove it, format it, install OS again and restore all of my configurations that I had.
Doing this can be really frustrating, so I waited for the official Raspberry Pi 4 USB boot as a kid for its birthday.
When I saw the news I immediately bought an SSD drive and decided to give this a try.
Just a quick warning here – at the time of writing this article the official bootloader supporting USB boot on a Raspberry Pi 4 is in beta state and not all SSD or HDD drives will be compatible for USB booting. Although this will probably remain the same even after beta
Compatible USB drives
I can confirm that the external HP P600 SSD is working without any issues and I will try to gather more models reported by the users to be working and I will put them right here in the table below:
| Model | Link |
|---|---|
| SSD HP P600, 250GB, USB 3.1 | https://amzn.to/2B7qIDi |
| Samsung 860 EVO 500GB 2.5 Inch SATA III Internal SSD | https://amzn.to/37o2hNS |
| ELUTENG USB3 SATA Adapter 2.5 Inch SATA to USB 3.0 | https://amzn.to/2MWfd49 |
| SanDisk SSD PLUS 240 GB Sata III 2.5 Inch | https://amzn.to/37AG27e |
| Samsung BAR Plus 64 GB Type-A 200 MB/s USB 3.1 | https://amzn.to/3fqJSCO |
| SanDisk Ultra 32 GB USB Flash Drive USB 3.0 | https://amzn.to/3frXg9J |
| Samsung MZ-MTD1280 (128GB mSATA) & Element14 Pi Desktop (rev 3) HAT | Reported by Steve Kowalski in the comments |
| Sandisk x110 128GB | Reported by Con Ben in my YouTube Channel |
| SanDisk 256GB Extreme PRO USB 3.1 Solid State Flash Drive | https://amzn.to/2NtLyQc |
| Crucial MX500 250GB 3D NAND SATA 2.5 Inch Internal SSD (needs SATA adapter) | https://amzn.to/2YvVAq7 |
| Samsung 860 QVO 1TB Solid State Drive (needs SATA adapter) | https://amzn.to/2YAyGhz |
| CanaKit Raspberry Pi 4 4GB Starter Kit – 4GB RAM | https://amzn.to/3eyGi9S |
| Kingspec Z3 Type C USB 3.1 External SSD (Reported by CraftSense in my YouTube) | Banggood link |
| Geekworm X825 2.5 inch SATA HDD/SSD Expansion Board (Reported by Jay in peyanski.com) | https://amzn.to/2QML60Q |
| Kingston A400 120G Internal SSD M.2 SA400M8 (Reported by Luiz Barreto in peyanski.com) | https://amzn.to/32kRR0k |
Now let’s go
Creating a SD card with Raspberry Pi Imager
Go to the download section of https://raspberrypi.org and get the Raspberry Pi Imager for your operating system.
Start it, insert a SD card in your computer or SD card reader.
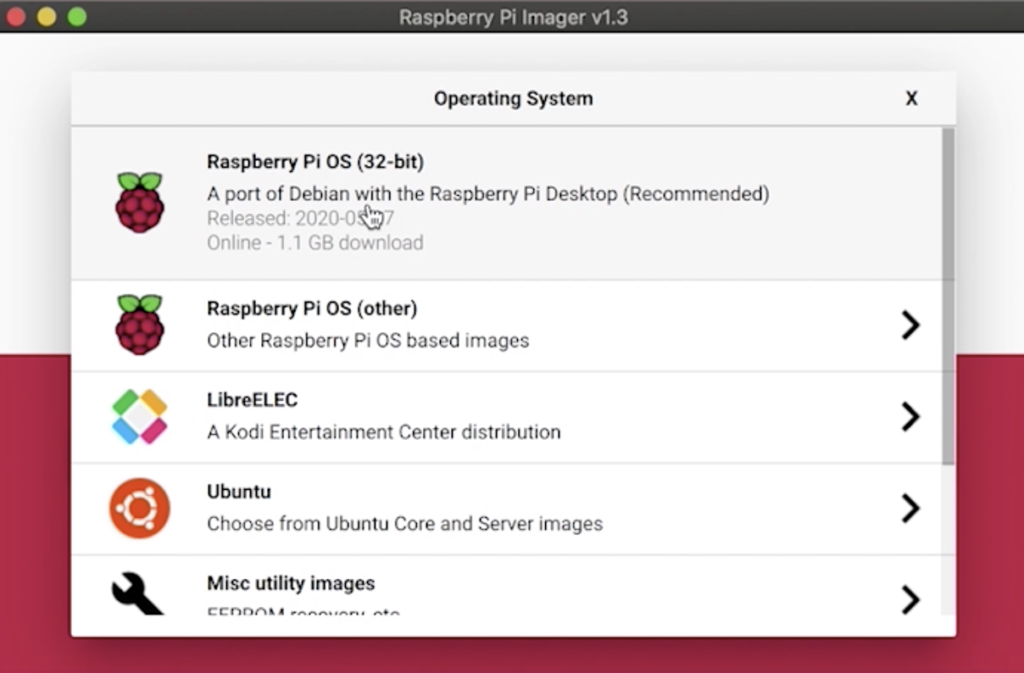
And burn the Raspberry Pi OS image on the card.
Don’t worry we will need the SD card only for a while then we will remove it completely.
When Raspberry Pi Imager finish it will unmount the SD card automatically. Remove the SD card and insert it again to access its contents and to create a file ssh inside it.
Create a ssh file in the SD card
When you create an empty file called ssh inside the boot partition of your SD card – you will be able to connect to your Raspberry over the network without even attaching a monitor to it, using the SSH server.
On MacOS you can execute the following command in the terminal:
touch /Volumes/boot/ssh
For Linux/Windows you can use any text editor or you can copy/paste and rename one of the existing text files inside the boot partition of the SD card.
When you are ready, insert the SD card in your Raspberry and plug it in the electricity.
Getting ready and updating the Raspberry OS
After a minute or two check your router for the IP address assigned to your raspberry and connect to it using the following command on MacOS or Linux:
ssh pi@YOUR_RPI_IP
You will be asked for a password and the default one is “raspberry” without the quotes.
For Windows you can use Putty client for the SSH connection. Just Google for it if you don’t know how to use it.
When you log in successfully, execute the following commands to update your Raspberry Pi 4.
sudo apt-get update
sudo apt-get upgrade -y
sudo rpi-update
sudo reboot
This will reboot your Raspberry Pi when all finish.
Login again and we now need to install a package that will allow us to update the bootloader to enable the Raspberry Pi 4 usb boot.
Execute the following:
sudo apt install rpi-eeprom -y
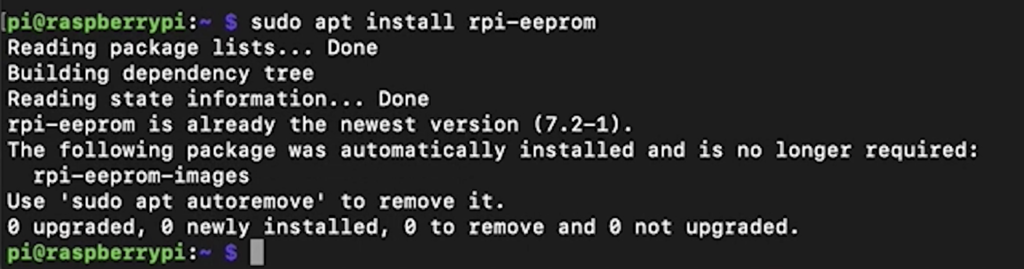
Don’t be surprised if the tool is already installed, that is quite normal.
Then run this command to tell the Raspberry Pi to use beta firmware releases. This “one liner” will replace the word critical with beta in the /etc/default/rpi-eeprom-update file.
sudo sed -i 's/critical/beta/g' /etc/default/rpi-eeprom-update
Of course you can use any text editor for that with the same success.
Updating the bootloader
Now it is time to install the new bootloader to enable the Raspberry Pi 4 usb boot. Just run the following…
sudo rpi-eeprom-update -d -f /lib/firmware/raspberrypi/bootloader/beta/pieeprom-2020-06-03.bin
It is good idea to replace 2020-06-03 with the latest .bin file in the above folder, so the most appropriate command for you when you read that in the future will be:
sudo rpi-eeprom-update -d -f /lib/firmware/raspberrypi/bootloader/beta/pieeprom-YYYY-MM-DD.bin
If you receive a similar answer to this one below you will be one step closer to the Raspberry Pi 4 USB boot

And as written in last sentence – please reboot using the following command.
sudo reboot
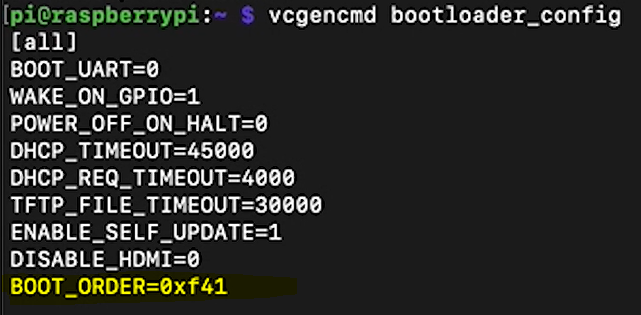
Login again and execute these two commands:
vcgencmd bootloader_version
vcgencmd bootloader_config
The first one will show you the bootloader version. Just search for the date in my case it was Jun 3 2020, but yours may be different (the one that you use in the rpi-eeprom-update command)

And the second command will show you the boot order.
You should look for the last row of the result which should be BOOT_ORDER=0xf41. If you see this that means your Raspberry Pi 4 will first look for SD card and if there isn’t any it will try to boot from a drive connected to the USB ports of the Raspberry.
Burning the Raspberry OS on the SSD
We need to burn the image of the Raspberry Pi OS one more time, but this time on the SSD. The process is exactly the same as with the SD card. Just choose the SSD (USB drive) as a destination.
And don’t forget to create again an empty ssh file in the boot partition of the USB drive to activate the remote SSH login to the Raspberry.
You can skip this step If you have a monitor, keyboard and a mouse attached to your raspberry.
Copy some files from SD to SSD
Burning the raspberry OS on the SSD drive is ready and I will now show you how to mount the drive to copy some files from the SD card. Let’s do it it’s easy.
Plug the SSD/USB to your Raspberry Pi 4 and execute the following commands to mount the SSD/USB disk to your Raspi.
sudo mkdir /mnt/mydisk
sudo mount /dev/sda1 /mnt/mydisk
Then copy the needed files from SD card to SSD/USB disk with the following two commands:
sudo cp /boot/*.elf /mnt/mydisk
sudo cp /boot/*.dat /mnt/mydisk
Raspberry Pi 4 USB boot
Now is the time where you can throw away your SD card!
I actually don’t recommend to throw anything especially your SD card, just remove it from your Raspberry Pi 4 and use it for something else.
But if you feel like you want to throw something after all why don’t you try throwing your mouse click against the Subscribe button below?
[sibwp_form id=2]
I will truly appreciate that. Thank you.
And as I said remove the SD card, leave the USB drive connected and reboot your Raspberry. If everything is OK you should very soon enjoy your Raspberry Pi 4 USB boot with faster speeds and increased reliability.
The speed increase in my case from moving from SD card to SSD is over 10 times as you can see on the following screen.

Question for You!
I didn’t have the time to check how you can upgrade your firmware when you are already on SSD.
In other words how to easily upgrade when there is a newer beta firmware or even official not beta release without having to go through the same procedure with the SD card again.
If you know how to do that let me know in the comments below all the credits in video description and in my website will go to you.
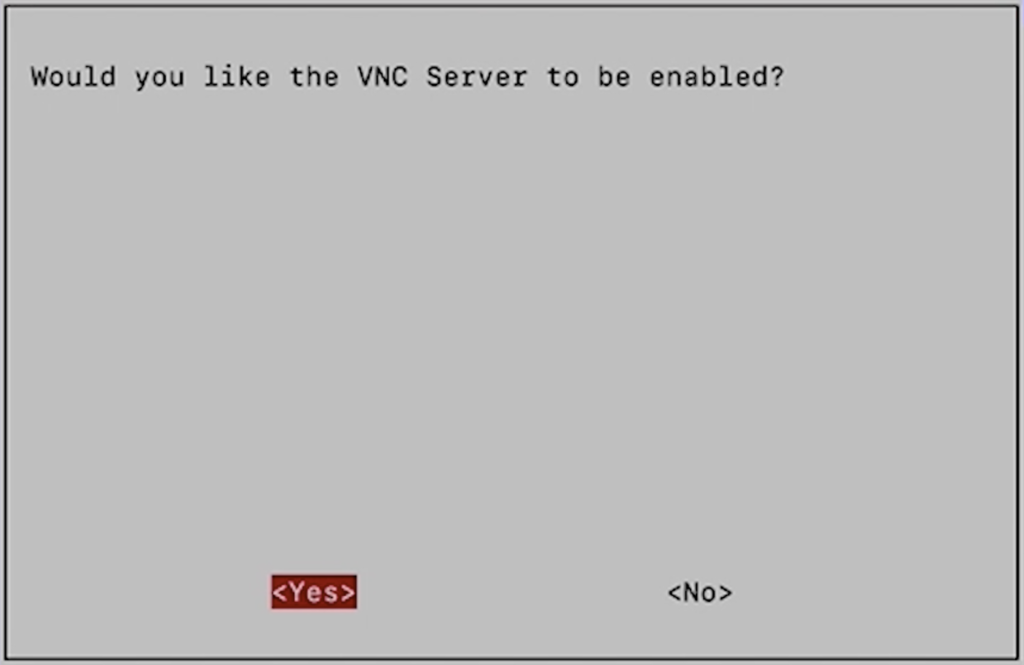
Enable VNC server for remote GUI connection
Let’s enable the VNC server now in order to allow connecting to the graphical interface of the Raspberry.
Login to your Raspberry and execute:
sudo raspi-config
Then go to Interfacing Options > VNC and enable it by selecting Yes.
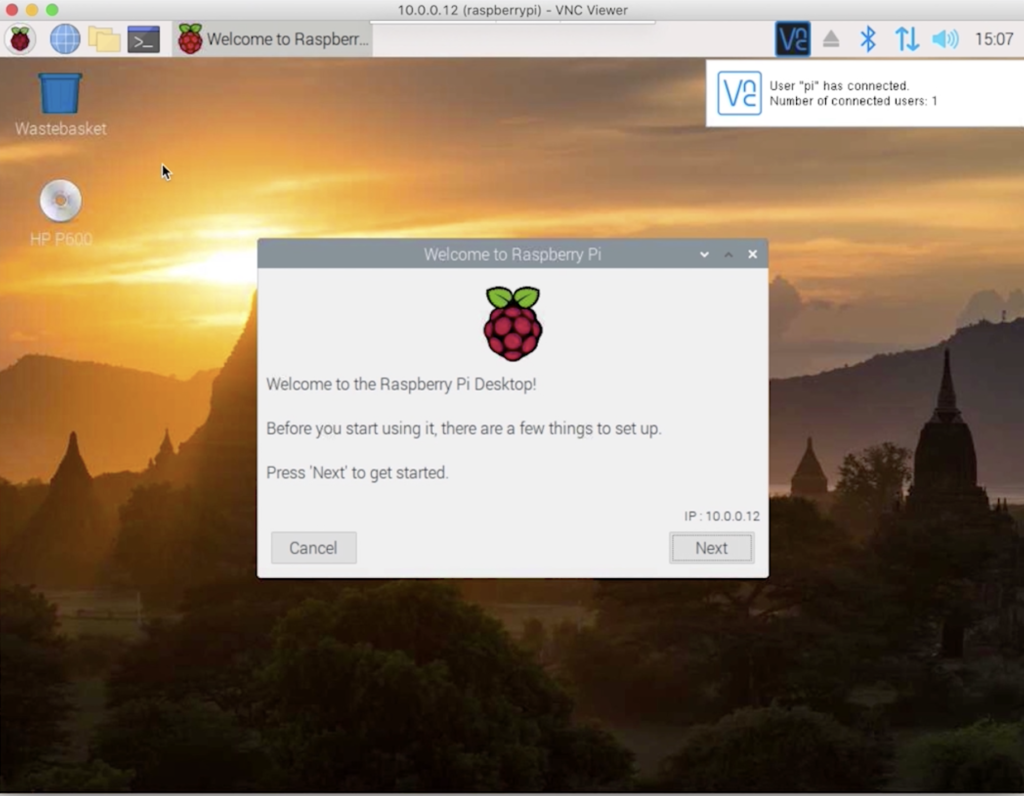
Reboot and try to connect to your Raspberry Pi with a VNC client like VNC Viewer for example. You should use your username and password from the SSH.
Quick Fix if you have issues connecting with VNC
I will show you a quick fix If you face similar error as shown below and you cannot connect with your VNC client to the Raspberry.

Execute:
sudo raspi-config
And this time go to Advanced Options > Resolution
And choose an appropriate resolution for you, then reboot and try again.
You should now see the Raspberry Pi 4 desktop.
Support my Work
Any sort of engagement on this site and my YouTube channel does really help out a lot with the YouTube and Google algorithms, so make sure you hit the subscribe, as well as the Like and Bell buttons If you enjoy this article/video.
Also feel free to add me on Twitter by searching for @KPeyanski. You can find me on my Discord server as well.
I really hope that you find this information useful and you now know how to enable Raspberry Pi 4 USB boot using SSD drives and remove your SD card forever.
Thank you for reading, stay safe and don’t forget Home Smart, but Not Hard!
See you next time.
Excellent write-up. It took me a couple of tries, mainly getting Raspberry Pi installed correctly per your instructions, but I’m happy to report that I now have the following configuration running perfectly:
· Raspberry Pi 4 (4GB)
· Element14 Pi Desktop (rev 3) HAT
· Samsung MZ-MTD1280 (128GB mSATA)
I just purchased the Pi4, so this was perfect timing. I’ve been eager to move on from the SDcard boot.
Now I’m interested to see when this comes out of beta…
Thanks for a great guide!
Thanks for sharing that Steve Kowalski, I’ve added it in the compatible drive section. Can you tell me a little bit more about the Element14 Pi Desktop (rev 3) HAT? How you connect your mSATA drive to your raspberry using this Element14 Pi ?
The documentation for the Pi Desktop can be found here:
https://github.com/hoopsurfer/pidesktop
There are pictures & diagrams in the documentation within that repo:
https://github.com/hoopsurfer/pidesktop/blob/master/documents/Installation-Manual/um.md
I purchased this a few years ago to gain the convenience of an on/off button for shutting the Pi down, as well as the ability to boot into OS installed on the mSATA drive. Note that the Pi Desktop is a USB2 device.
I ran the benchmark from https://storage.jamesachambers.com/ and I’m getting a score of 1804. I’m not sure I have a slow SSD, or if it’s getting throttled by the USB2 interface.
That is the perfect answer. I will check it out. Thanks for that.
Hi, I would like to know if there is already a stable version and where can I look for it. Thank you!
yes, the beta bootloader from 15th of June was promoted to Stable.
works like a dream 😀 thanks Kiril
Working great with the Eluteng adapter and a Teamgroup ssd, many thanks for the article.
Thanks for letting me know. I’m glad that it helped. Also stay tuned for more in 20:15 UTC+3 I will post a part 2 of this article for the stable bootloader.
Thanks Kiril Peyanski. I installed Rasp Os. Now I have a 256 Mb partition and another from 232 Mb . If I want to install Home Assistant do I have to extend into a single partition?
Great write up; got it to work first try on Netac 500GB Portable SSD, USB3.2 Gen2 10Gbps, Type-C PSSD
But it failed get it to boot from: SanDisk 500GB Extreme Portable External SSD.
Tested both on 2GB and 4GB rPi4’s; both boot from then Netac USB SSD, but both hang at “4 raspberries” when trying to boot from SanDisk.
Initially each set up with your procedures. After failing to boot SanDisk I used rPi SD imager to copy Netac image to SanDisk… Still failed to boot. So I guess it’s still somewhat hardware dependent.
both done with 2020-06-15 eeprom bootloader.
Great job.
Is it works with Raspberry PI Full OS ?
Thanks.
Great job, thank you for this. I used this tutorial back in late june and I am happy to say my rpi is still working great off my usb boot. If anyone is wondering I used the geekwork/suptronics x828 hat/board. This was a great, straightforward tutorial and I am very happy with the result!
That is great Brandon, very happy to hear it and thanks for sharing the used hardware If I find a good link to it I will add it in the table of the working devices. Have a great day!
How to from Ubuntu 20.04 Desktop ???
Maybe I will make a video and article about it soon.
Hi,
It seems the new way to update the eeprom is using sudo rpi-eeprom-update -a.
I also have Ubuntu but Server 20.10, when run command vcgencmd bootloader_config display the following.
BOOT_UART=0
WAKE_ON_GPIO=1
POWER_OFF_ON_HALT=0
Could you please help with that?
I have Sandisk 500 gb ssd extreme – Whenever I plug it in the pi 4(4gb) stop working.
Yes, you can now use rpi-eeprom-update. If you try the same with Raspberry Pi OS is it working correctly?
Sabrent Rocket Q 1TB NVMe PCIe M.2 2280 Internal SSD High Performance Solid State Drive R/W 3200/2000MB/s (SB-RKTQ-1TB) via usb3
Cannot partition when using the sd card copier.
Thank for your comment Rick. Did you manage to fix that?
Hi Kiril, thanks for your videos and how to. I really appreciate and learn from what you do. With regard to this video I struggle with the copy to the SSD but finally managed to make it work taking into account these 3 majors (at least I think) points :
– plug your ssd between the following instruction
sudo mkdir /mnt/mydisk and
sudo mount /dev/sda1 /mnt/mydisk
if you do it before it did not work for me
– double check that USB will start first through the raspi config. it was not the case for me when I launched vcgencmd bootloader_config
– for the reboot, I got the message
@@@@@@@@@@@@
@ WARNING: REMOTE HOST IDENTIFICATION HAS CHANGED! @
@@@@@@@@@@@@@@@@@@@@@@@@@@@@@@@@@@@@@@@@@@@@@@@
so I have to type first :
ssh-keygen -R your.ip.address
and then follow the instructions (yes..).
Great I can start from my flash card 🙂
Now I am updating & upgrading it.
The next step will be to reinstall Home Assistant.
Not sure how I will do it, but I guess that I will reinstall home assistant first and the do a restore …
One more time thanks a lot for what you do – Philippe
Hey Philippe, thanks for the tips and I’m glad that there is happy end for you. You can install Home Assistant using this tutorial of mine and I can recommend you the supervised method – https://peyanski.com/home-assistant-supervised-and-container-how-to You can also use the snapshot functionality to migrate your Home Assistant configuration – I’ve described the procedure here https://peyanski.com/home-assistant-on-windows-using-virtualbox/ Hope that helps, wish you good luck!