
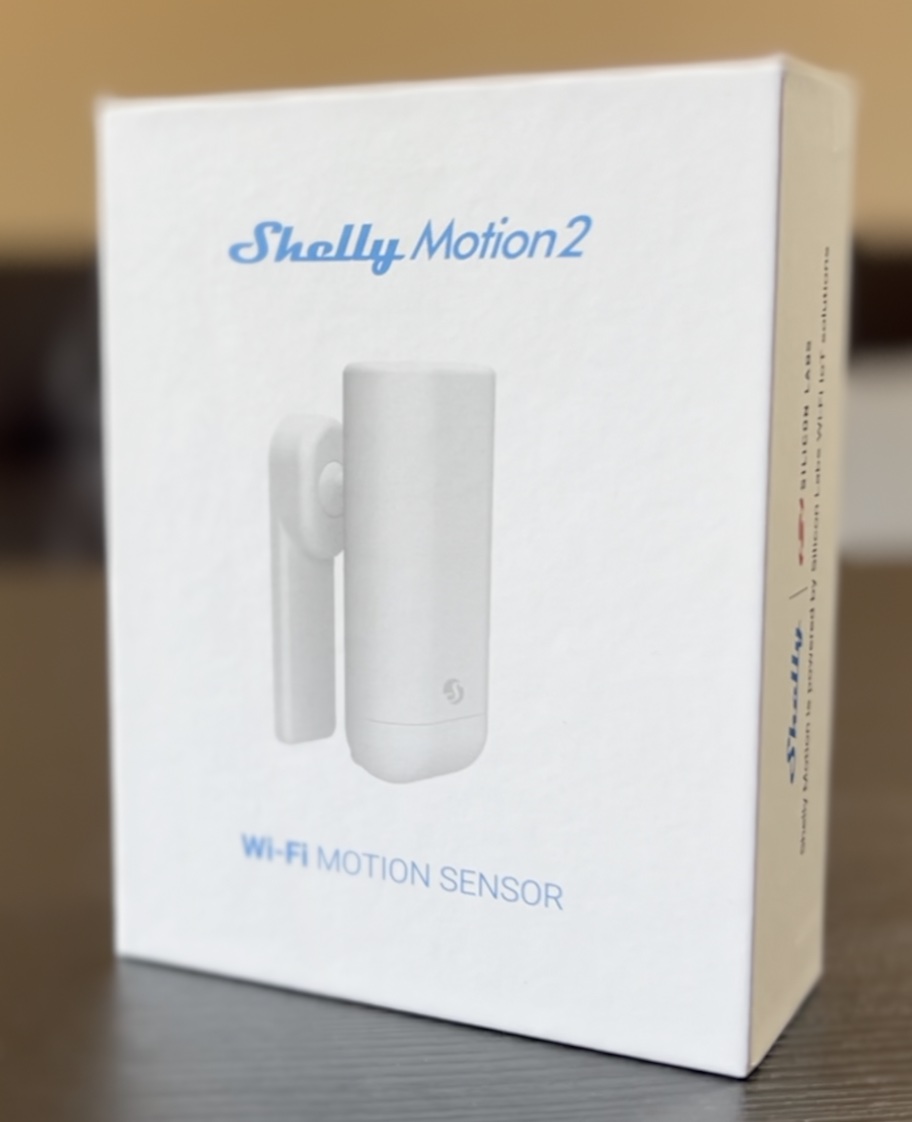
Shelly Motion 2 was just released, but what is good and what is bad about it? I will try to show you everything and as usual, I will add Shelly Motion 2 in Home Assistant and I will create some demo automation.
GIVEAWAY ALERT ! I just contacted Alterco Robotics, this is the the actual company behind the Shelly products and I asked them are you up for a quick giveaway and they said YES. So, read this article till the end and you will find out how you can win a free Shelly Motion 2 delivered to your door, very easily! More info later in the article.
Now back to Shelly Motion 2 review.
Table of Contents
What is Shelly Motion 2 and is it better than Motion 1?
First, what actually is Shelly Motion 2 and is it better than its predecessor?
Shelly Motion 2 is a motion sensor with high sensitivity and very low power consumption which also features light metering and integrated accelerometer for tamper protection and vibration alerts.
But the old Shelly Motion 1 can do that as well.
Also, both Shelly Motion 1 & 2 devices share the same Silicon Labs chip and Philips battery inside and Shelly Motion 2 is actually a Shelly Gen 1 device exactly as its predecessor. So, you may ask what is the difference then between the Shelly Motion 1 & Shelly Motion 2?
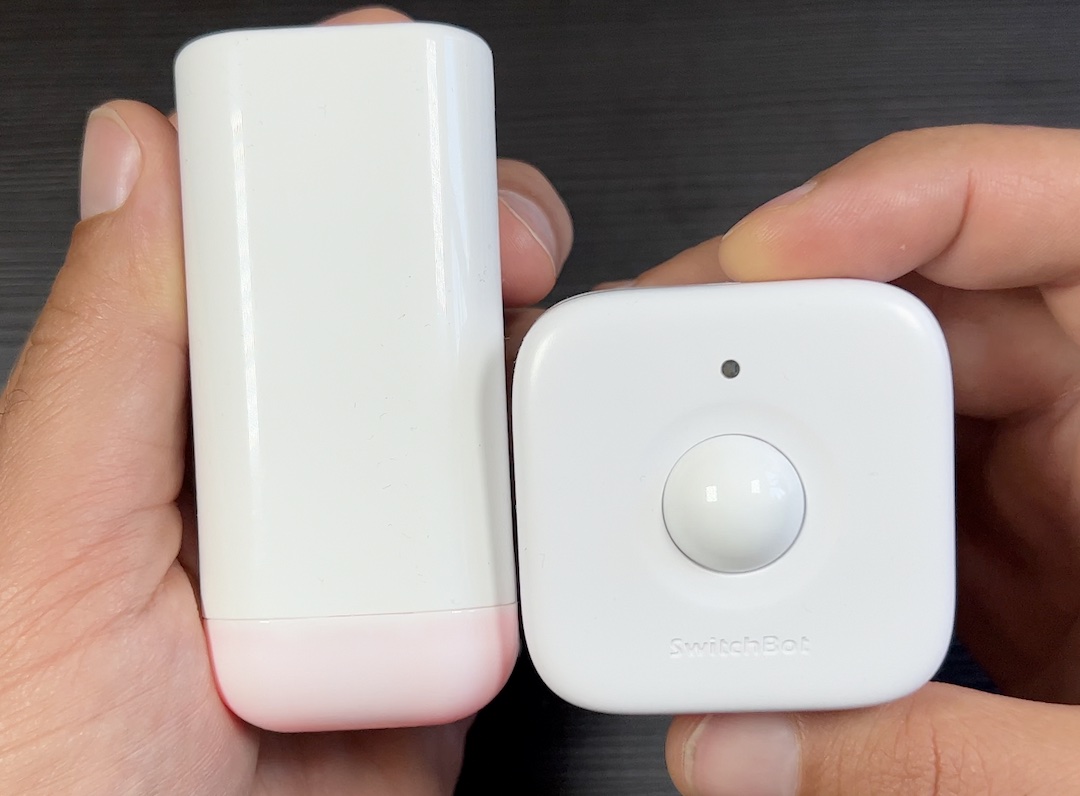
The first, obvious difference is the form factor. When I review the old Shelly Motion 1, I received a lot of comments from you guys saying:
“This thing is huge…”,
“it so big compared to motion sensor X…”
And all of the above is very true.
The new Shelly Motion 2 is now smaller and it have a much better and contemporary design in my opinion, but again it is still bigger than most of the other smart motion sensors that I know.
All of that is probably due to the big 6500 mAh rechargeable battery that the Shelly Motion 2 is having. This battery can last up to 3 years in standby mode and up to 1 year and a half with 6 hours usage per day.
And when the battery is exhausted you just have to recharge it using an USB-C cable which is also something new compared to the Shelly Motion 1 that offers Micro USB port for charing.
But neither the battery nor the new design is the most impressive new thing here. At least for me the most impressive new feature in Shelly Motion 2 is the embedded temperature sensor that immediately provides more opportunities for home automations. So, if you buy the Shelly Motion 2 Sensor you actually getting 4 useful sensors. Which are:
- Motion sensor,
- Light sensor,
- Accelerometer sensor,
- Temperature sensor.
All of that, in one battery powered smart device that can work using the Cloud or only locally and can be integrated seamlessly with Home Assistant which is one of biggest flex of all Shelly devices.
Free Home Assistant Webinar
And while we are talking about Home Assistant it might be the case you don’t have one installed yet. Don’t worry just go to my webinar available on my other website – https://automatelike.pro/webinar
In the Webinar I’m explaining all of the 4 official methods to get Home Assistant + 1 not very popular, but surprisingly fast method to start experimenting in Home Assistant in under 5 minutes.
The webinar is completely free and it will take you only 45 minutes of your time.
So, I will wait you inside.
Adding Shelly Motion 2 in Home Assistant Prerequisites
Now, let’s see how I can add Shelly Motion 2 in Home Assistant. As a prerequisite you first have to add the Shelly Motion 2 to your Wi-Fi either using the Shelly Mobile App (App Store Link, Google Play Link) or the embedded Web Interface of the Shelly Motion 2.
I will not talk about that part in details as it is very easy and intuitive. However, if you face some difficulties pairing the device with your WiFi I can suggest to check you manual or to contact the Shelly Support.
So, I already added my Shelly Motion 2 to my local wireless network and now I will add it in the Home Assistant. After that I will make some demo automations and I will share my final pros and cons of the device.
Stick around and you will have the chance to hear my near genius question for you so you can leave your answer in the comments.
Now let’s go.
How to find the Shelly Motion 2 IP?
The first thing here is to enable CoAP or COIOT. This is needed for the Home Assistant to find the Shelly Motion 2 device. To enable CoAP/COIOT option you either have to use the Shelly Mobile app or you can connect to the Shelly Motion 2 web interface. To open the web interface you just have to type the Motion 2 IP in a web browser.
To find the IP of the Shelly you either have to login to your router and see it there or you can use a quick little program called Shelly Finder. This program is available for Windows & Mac OS on the official shelly website – https://shelly.cloud/knowledge-base/
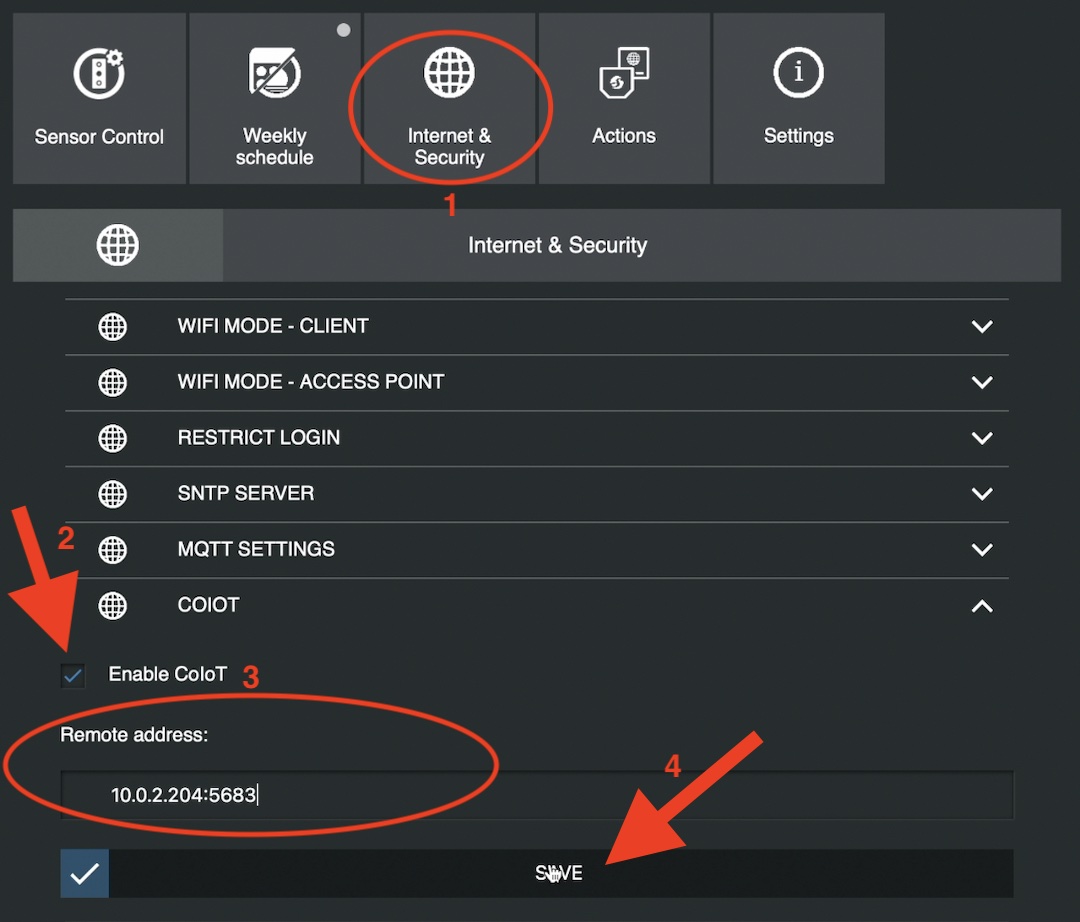
Enabling CoAP/CoIoT in Shelly Web Interface
After you find your Motion 2 IP using any of the methods described above, you have to go to Internet & Security Menu > COIOT > Enable CoIoT > Enter YOUR_HOME_ASSISTANT_IP:5683 and finally to click Save button. Of course, you have to replace YOUR_HOME_ASSISTANT_IP with your real Home Assistant IP.
How to add Shelly Motion 2 in Home Assistant?
Inside Home Assistant press the “c” button on your keyboard to invoke this search bar and start typing integrations, select navigate integrations. There is a chance your Shelly device to be auto discovered by Home Assistant. In such a case you just have to click on Configure button. Otherwise, click on Add Integration button (lower right corner), type: shelly and click on the result, then type the IP address of your Shelly device and click Submit.
If everything is fine, you should see a success dialog where you can add your device to an Area or you can just click Finish.
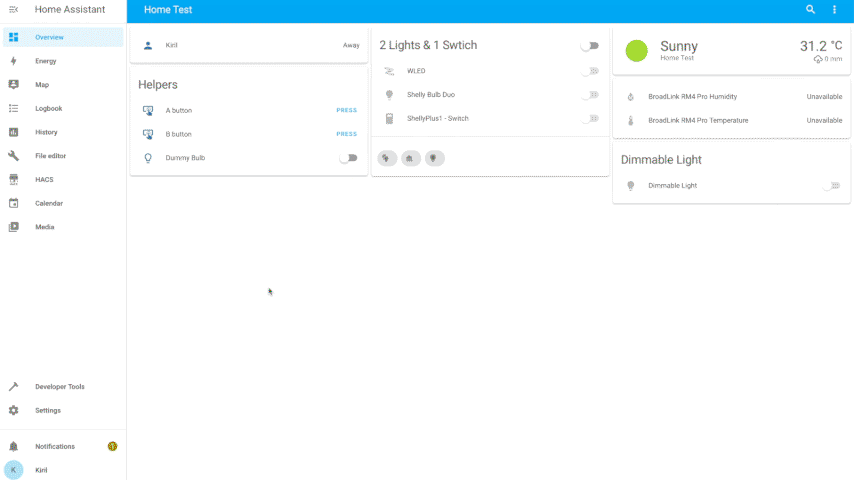
If you now open your Shelly Motion 2 device inside Home Assistant you will see the luminosity sensor, the motion sensor, the vibration sensor, the battery and the temperature sensor.
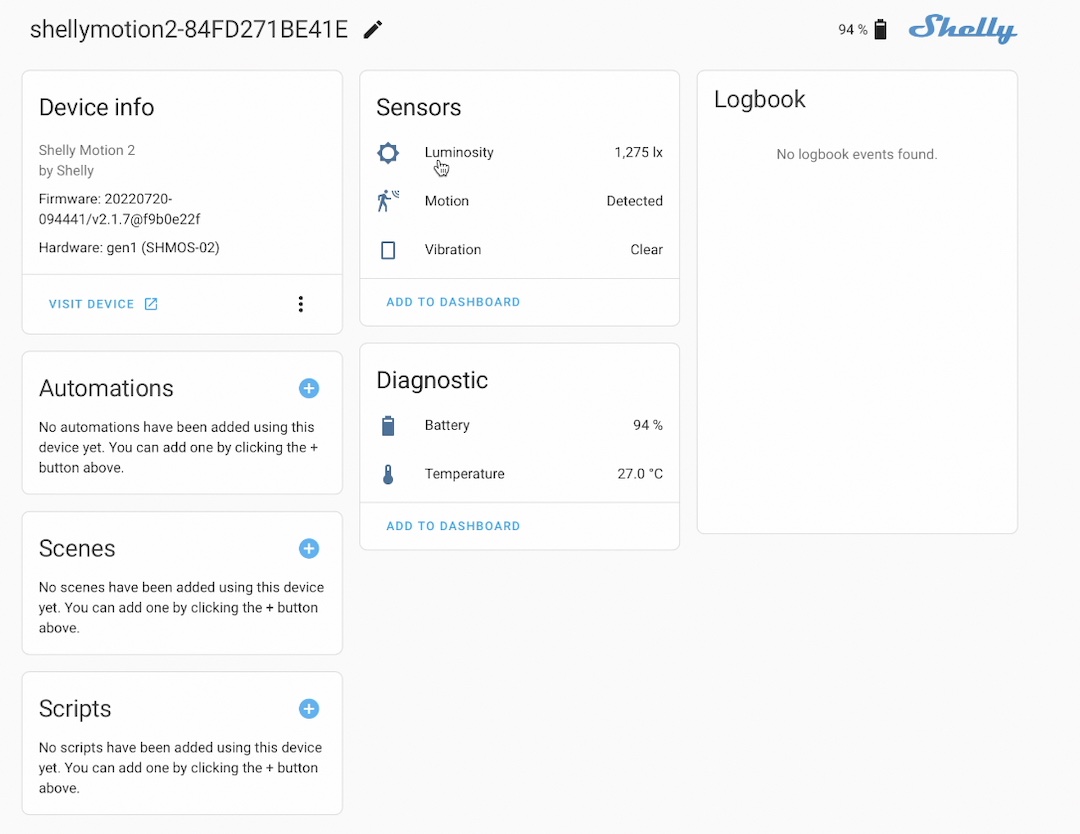
Everything is here and it is working out of the box inside Home Assistant
Shelly Motion 2 Home Assistant Automation demo
Time to see a Home Assistant Shelly Motion 2 automation in action. I will make something simple but yet useful. Namely, when the light is low and when motion is detected turn on the lights. If you want to see the full step-by-step creation process, just check my video – https://youtu.be/YGvvRn2GYB4
Otherwise, just import the following YAML code below and adapt it to your needs.
alias: Shelly Motion 2 detected movement in the dark
description: ''
trigger:
  - type: motion
    platform: device
    device_id: 4e3fc7dcacf59e4e644641469e781f50 # change this to yours
    entity_id: binary_sensor.shellymotion2_84fd271be41e_motion # change this to yours
    domain: binary_sensor
condition:
  - condition: numeric_state
    entity_id: sensor.shellymotion2_84fd271be41e_luminosity # change this to yours
    below: '1000' # change this to your preference
action:
  - service: input_boolean.turn_on
    data: {}
    target:
      entity_id: input_boolean.dummy_bulb # change this to yours
mode: single
Near Genius question for You!
I promised to ask you a question and my near genius question for you is the following. Do you have any Shelly devices in your home?
You can say simple yes or no in the comments and you will receive some bonus points if you say what exactly is your Shelly device?
On top, leave a comment under my video and subscribe for my YouTube channel and you will automatically enter in my Giveaway in which you can win a Shelly Motion 2 device delivered to your address for free.
The winner will be announced next Wednesday in my new video. So, the deadline to leave a comment & to subscribe if haven’t done that already will be next Tuesday end of day. That means you have just several days to join in the giveaway. Do not miss that opportunity to get a free Shelly Motion 2. Again leave a comment under my Shelly Motion 2 video & subscribe for my YT channel that is all.
Shelly Motion 2 Cons
Now let’s talk about some Shelly Motion 2 cons.
- Despite the redesign and the smaller form factor the Shelly Motion 2 is still bigger than most of its rivals.
- Also the Shelly Motion 2 is not a Gen2 device. This means there is no Bluetooth support and there is no Range Extender capabilities. For now this is not a big issue, but in the future it would be possible to use Gen2 Shelly devices as gateways to other bluetooth sensors or as a WIFI network extenders and these things can be a really huge benefit.
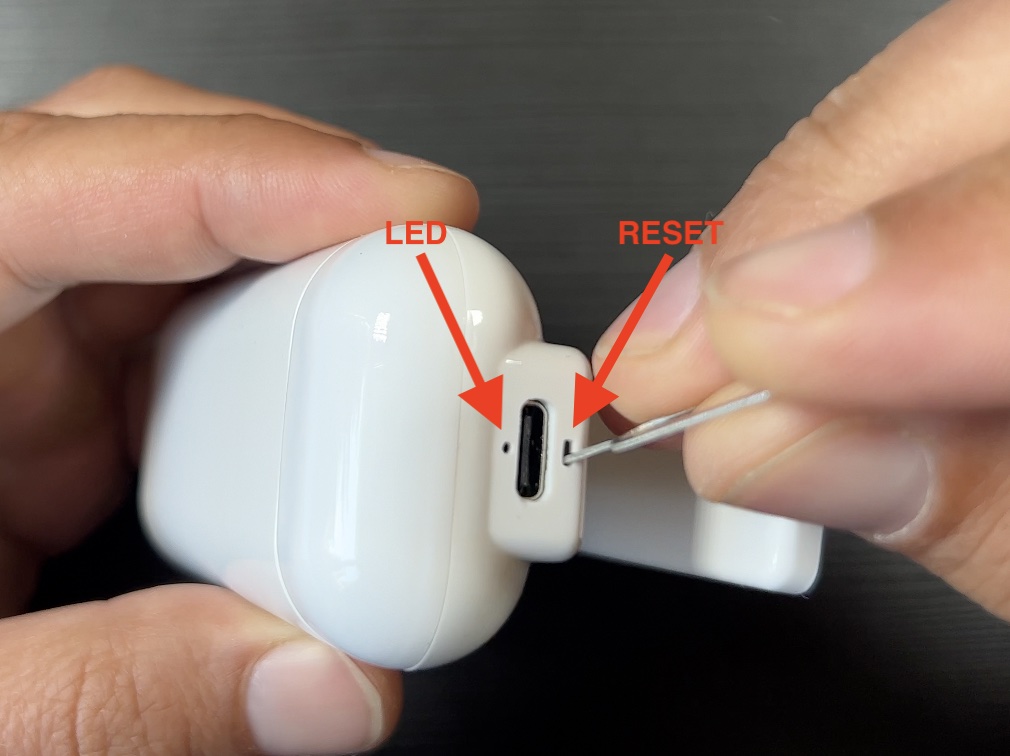
- And last cons for me is that you can still put the reset pin in the wrong hole and eventually to damage your device. Remember you have to use the oblong hole to reset or wake your device the other hole is actually the charging LED.
Shelly Motion 2 Pros
Above were my cons, and the pros are the following:
- Shelly Motion 2 have wider range detection than its predecessor.
- It has a faster charging time due to the USB-C port
- As I already said the new embedded temperature sensor is opening many doors for more home automations.
My General Recommendation
As general recommendation I can say the following:
- If you already have Shelly Motion 1, don’t bother buying Shelly Motion 2, unless you need the temperature sensor.
- If you don’t have any smart motion sensor yet and if the price is right for you, I can recommend the Shelly Motion 2 as it is kind of plug and play device, no additional hub is required, it can work with Cloud or locally and it can be integrated flawlessly with Home Assistant.
I will leave some affiliate links below if you want to check the current price and eventually to buy the Shelly Motion 2 if you happen to like it.
- Shelly Amazon Store – https://amzn.to/34d88VR
Subscribe for my Newsletter if you don’t want to miss an upload.
I’m Kiril and I’m done writing. Bye!
Great, that worked for me! THX!
My device is not being discovered by HA. What can I be doing wrong if I have followed every step in your instructions?
Navigate to the local IP address of your Shelly device, Networks >> Outbound websocket and check the box Enable, under server enter the following address:
ws:// + Home_Assistant_local_ip_address:Port + /api/shelly/ws (for example: ws://192.168.1.100:8123/api/shelly/ws), click Apply to save the settings
How do I do that, cannot connect motion 2.