
The latest product coming from Shelly and Silicone Labs is called Shelly Motion and it have a built-in battery that can last over a year. Shelly Motion sensor will directly connect to your Wi-FI and no additional HUB is required. What about Accelerometer and Brightness sensors?
Shelly Motion claims to have it all.
Let’s see it.
Table of Contents
What is Shelly Motion sensor?
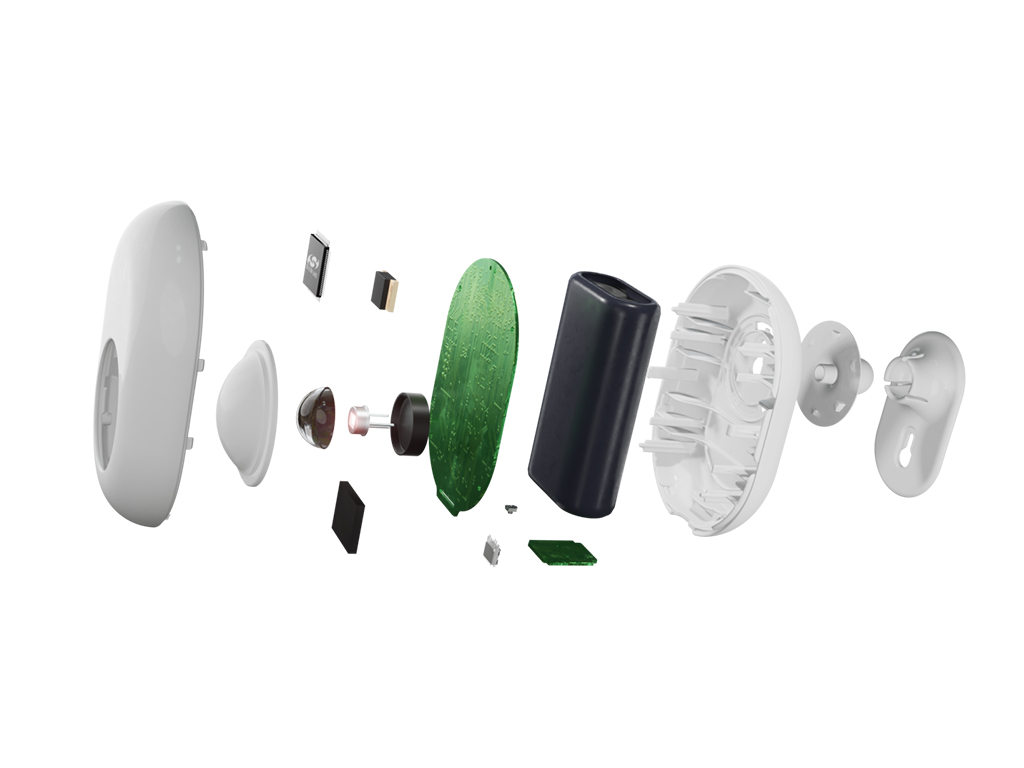
Shelly Motion Sensor is a universal Wi-Fi multi-sensor. Along with detecting motion and light intensity. The sensor has a built-in accelerometer to detect any tampering of the device. Shelly Motion Sensor is battery powered device and designed to be installed quickly and easily on any surface. The LED indicator signals motion, network status and user actions. Shelly Motion support fast charging, you can recharege it through battery or solar panel.
Also Shelly Motion Sensor Looks like this.

It is build by Shelly and it have a silicone heart coming right from Silicone Labs with their Cortex M3 CPU. Which results in faster near real time below 200ms responses and very low power consumption.
The ad is saying it can last over a year with regular usage daily and over 3 years if the sensor is only staying connected to the WiFi. That sounds pretty impressive to me, but they don’t stop here:
- The Shelly Motion have built-in accelerometer as well, which servers as protection if someone tries to remove or move the device from the place you put it.
- After an upcoming firmware update the device can even detect earthquakes.
- There is also built-in light sensor which gives additional opportunities for automations in your Smart Home.
UPDATE: Shelly Motion was discontinued and replaced by Shelly Motion 2 which is almost the same but a bit better and at the same price!
Here is a link to Shelly Store where you can buy the Shelly Motion 2 sensor – LINK
But enough sweet talks, let’s unbox the Shelly Motion sensor and see it in action afterwards.
Charging of the Sensor
Before first use of the Shelly motion sensor it is recommended to fully charge it. It is ready when that little red light located next to the USB port is turned off.

You will need a standard micro USB cable and adapter to charge it.
Adding Shelly Motion to the WiFi
After the sensor is fully charged you can add the device to your WiFi. To do so Shelly Motion must be turned on. Use a paper clip or SIM card tool to press the button next to the USB connector.

The shelly Motion must start glowing in blue.
Quick Interruption
Just a quick interruption here if you press the Like button under my video it will also start glowing in blue.
Coincidence?
I don’t think so!
Factory reset Shelly Motion
If the Shelly Motion is not glowing in blue use the pin again and press and hold the same button, but this time for 10 seconds. This will factory reset the Shelly Motion Sensor and it will put it in Inclusion mode.
The Shelly Cloud Mobile App
As with every other Shelly Product you can use the free Shelly Cloud Mobile to setup the device. The app is available in App Store, Google Play and even Huaweii’s AppGallery.
Download that app on your mobile device and start it.
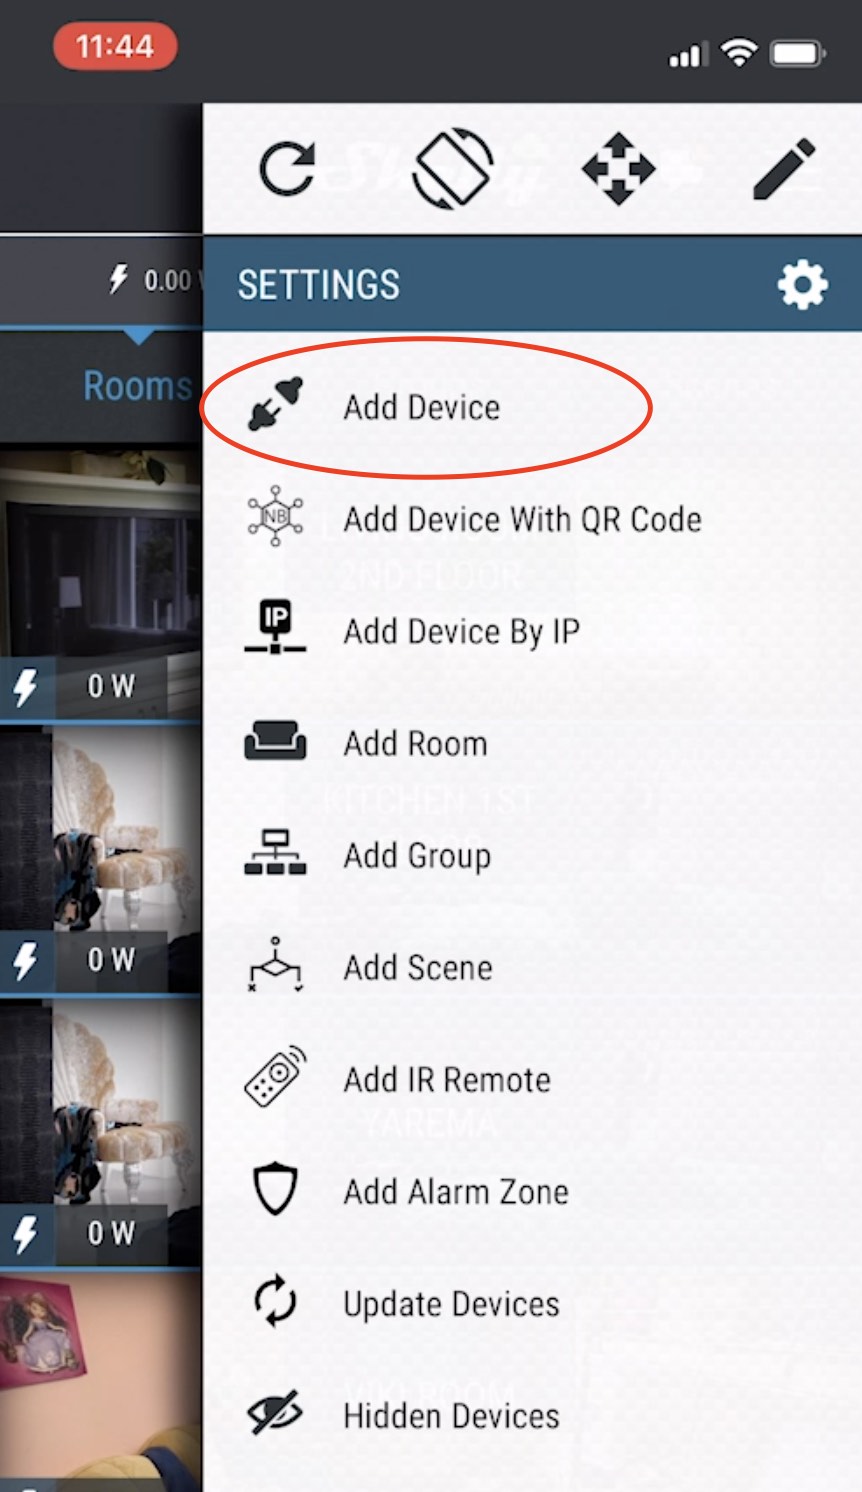
Create a room if you still don’t have any and choose Add Device from the menu. Just follow the instructions after that.
Add Shelly Motion to your WiFi manually
If you don’t want to use any additional apps you can add Shelly Motion to your WiFi manually.
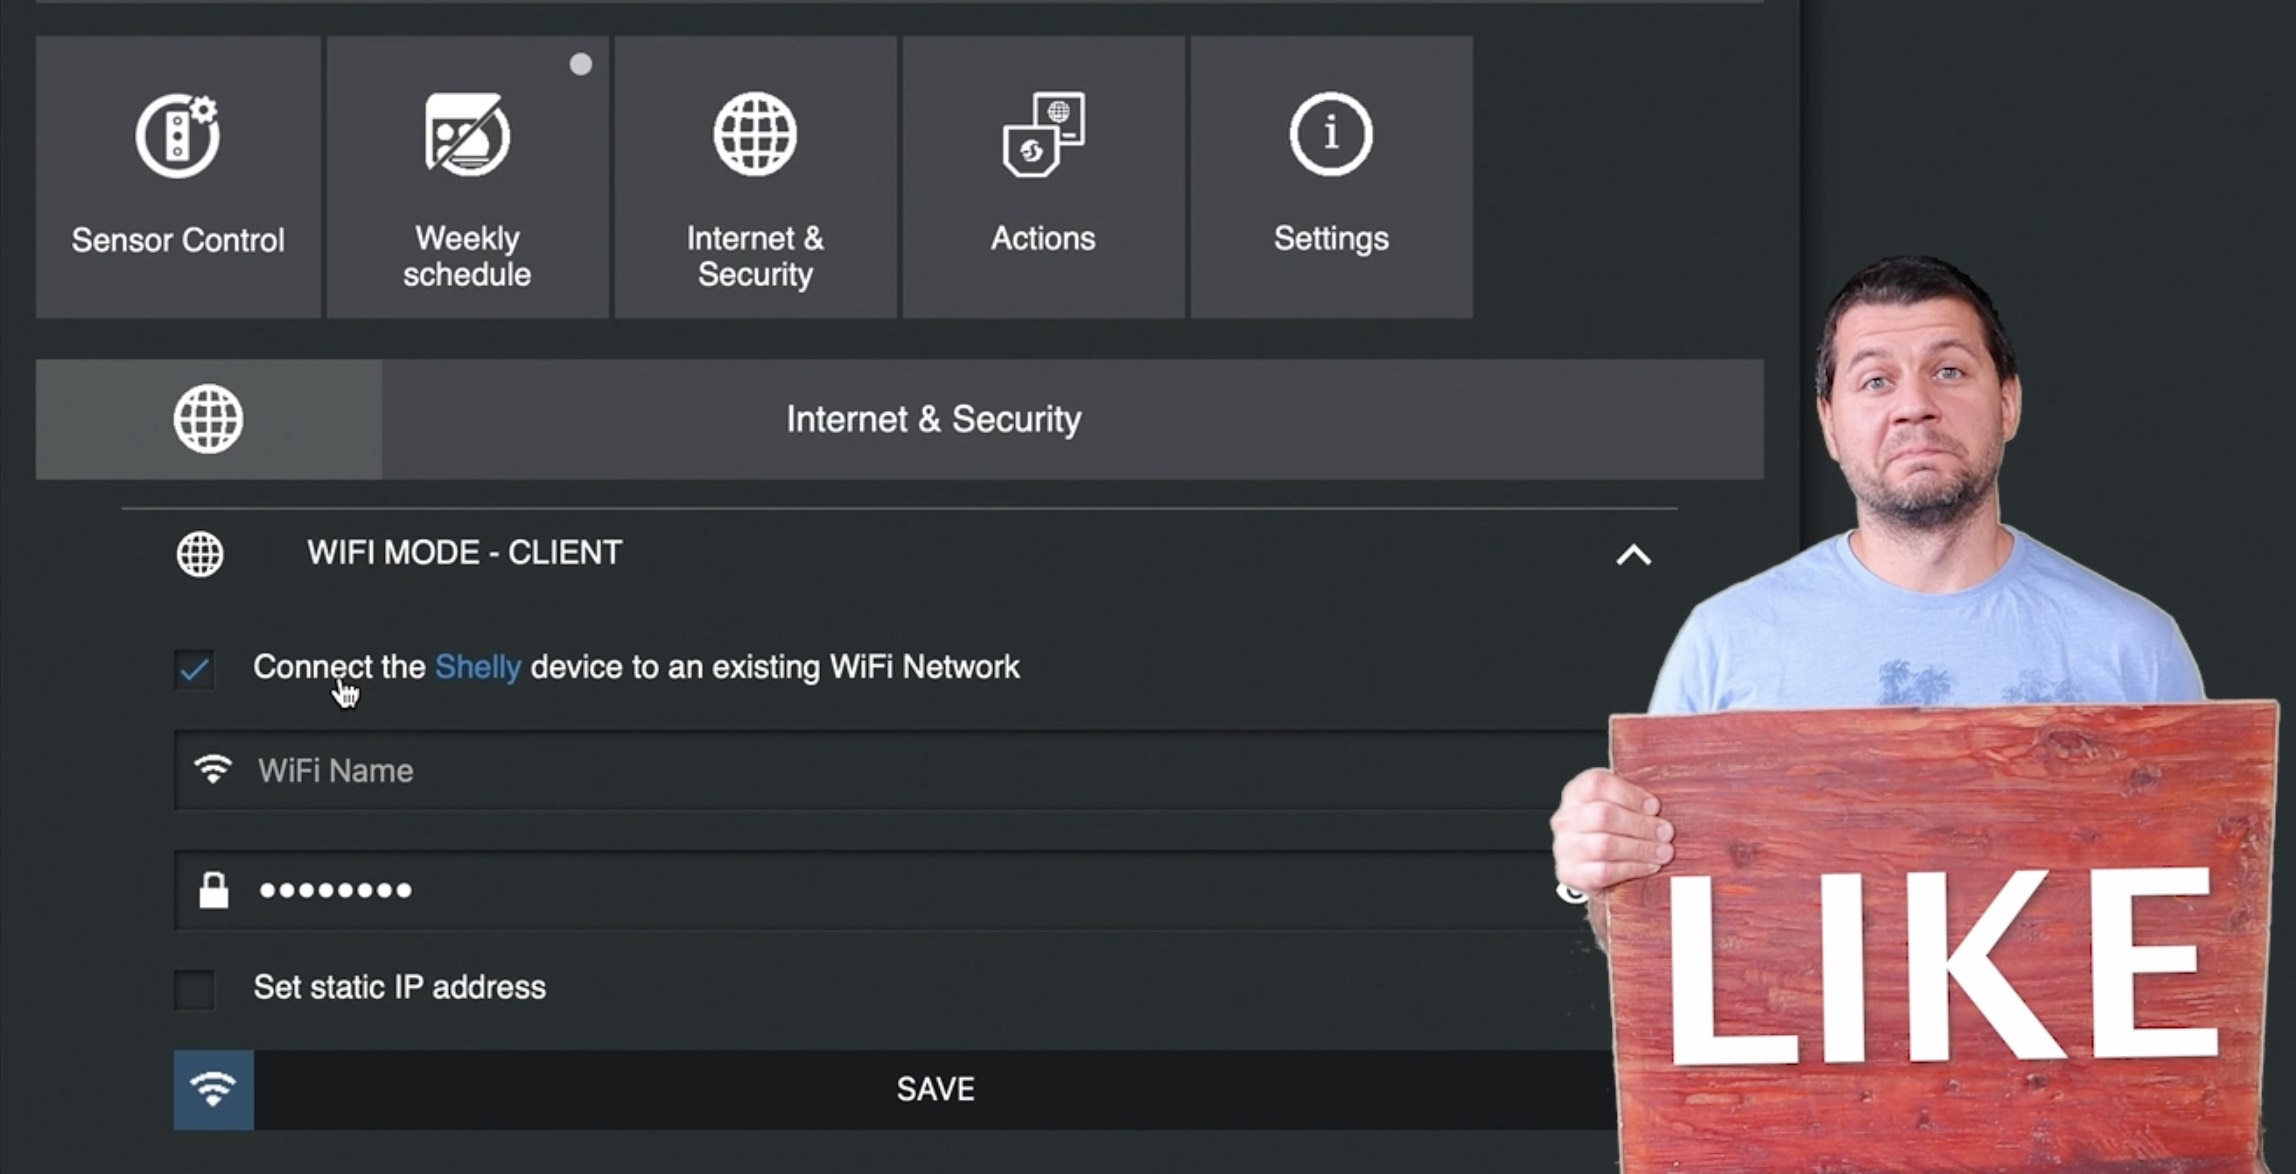
To do this search for WiFi network named shellymotionsensor-something. Connect to it and open 192.168.33.1 in a new browser or tab.
From the opened page go to Internet and Security menu, enable the WiFi mode – Client and enter your WiFI credentials.
Most Interesting Shelly Motion Settings
I will quickly show you the most interesting and useful options in my option from the Shelly Motion Web interface. The rest of the options I will leave to you or you can watch my video where I go through all of them.
Firmware update
I can recommend upgrading the firmware to be the first thing to do when you join the device to your WiFi. It is easy and OTA (over the air)
Open Settings > Firmware Update
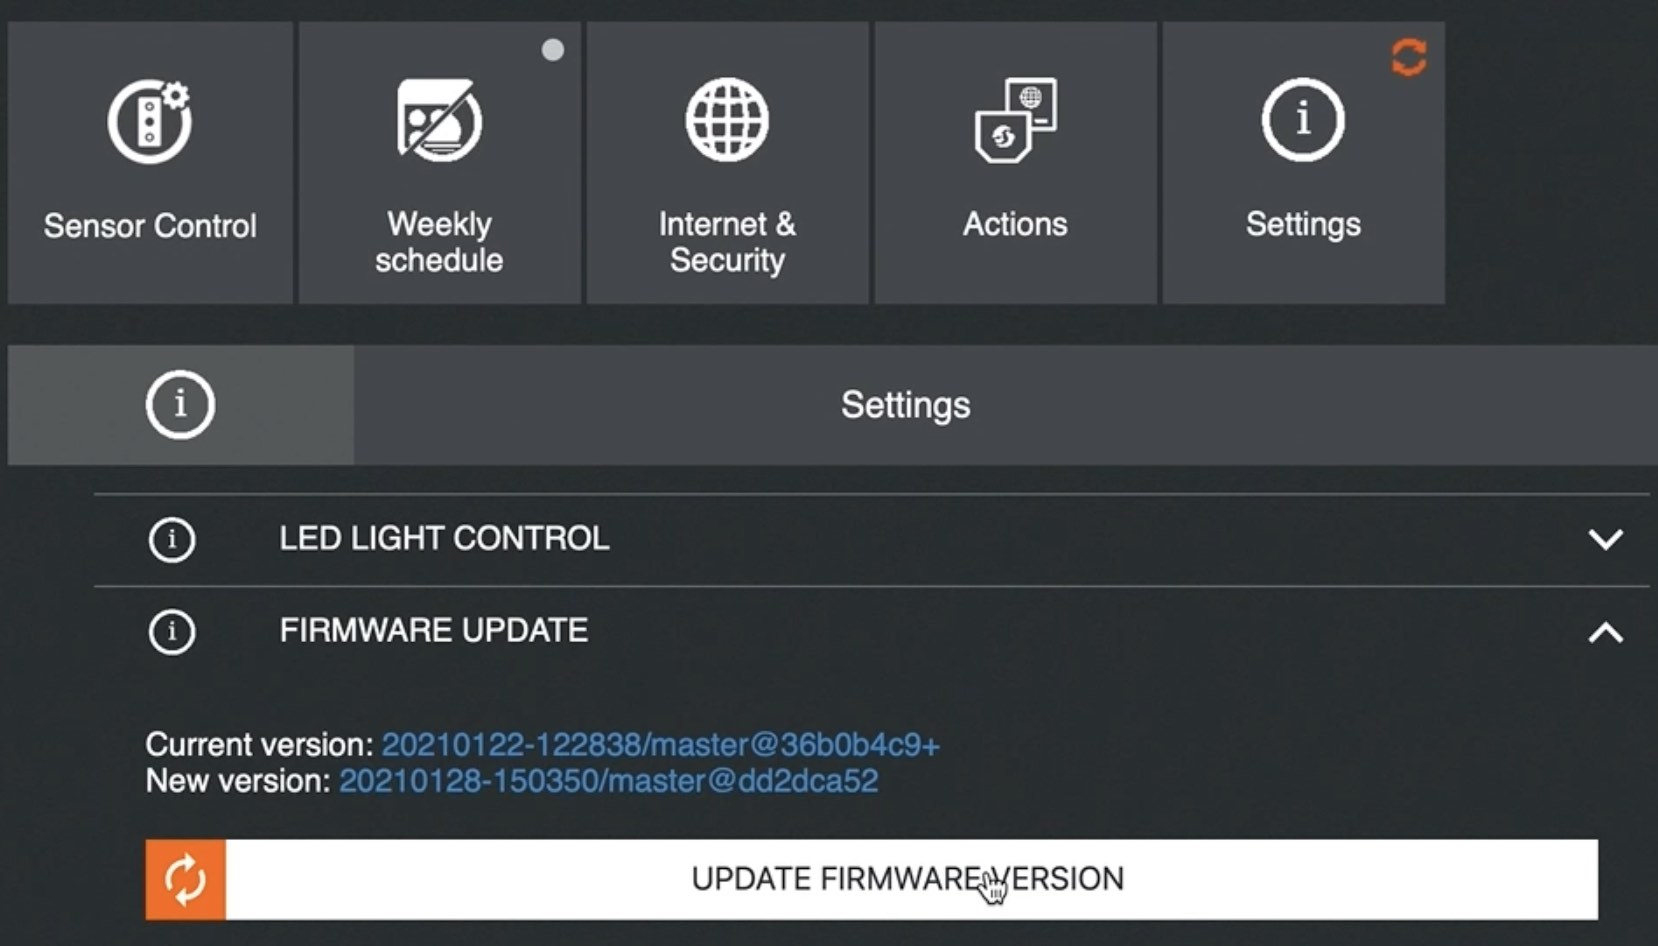
If there is an update – go for it. The new features (like earthquake detection) and fixes will be applied after the update and you will get the most of your purchase.
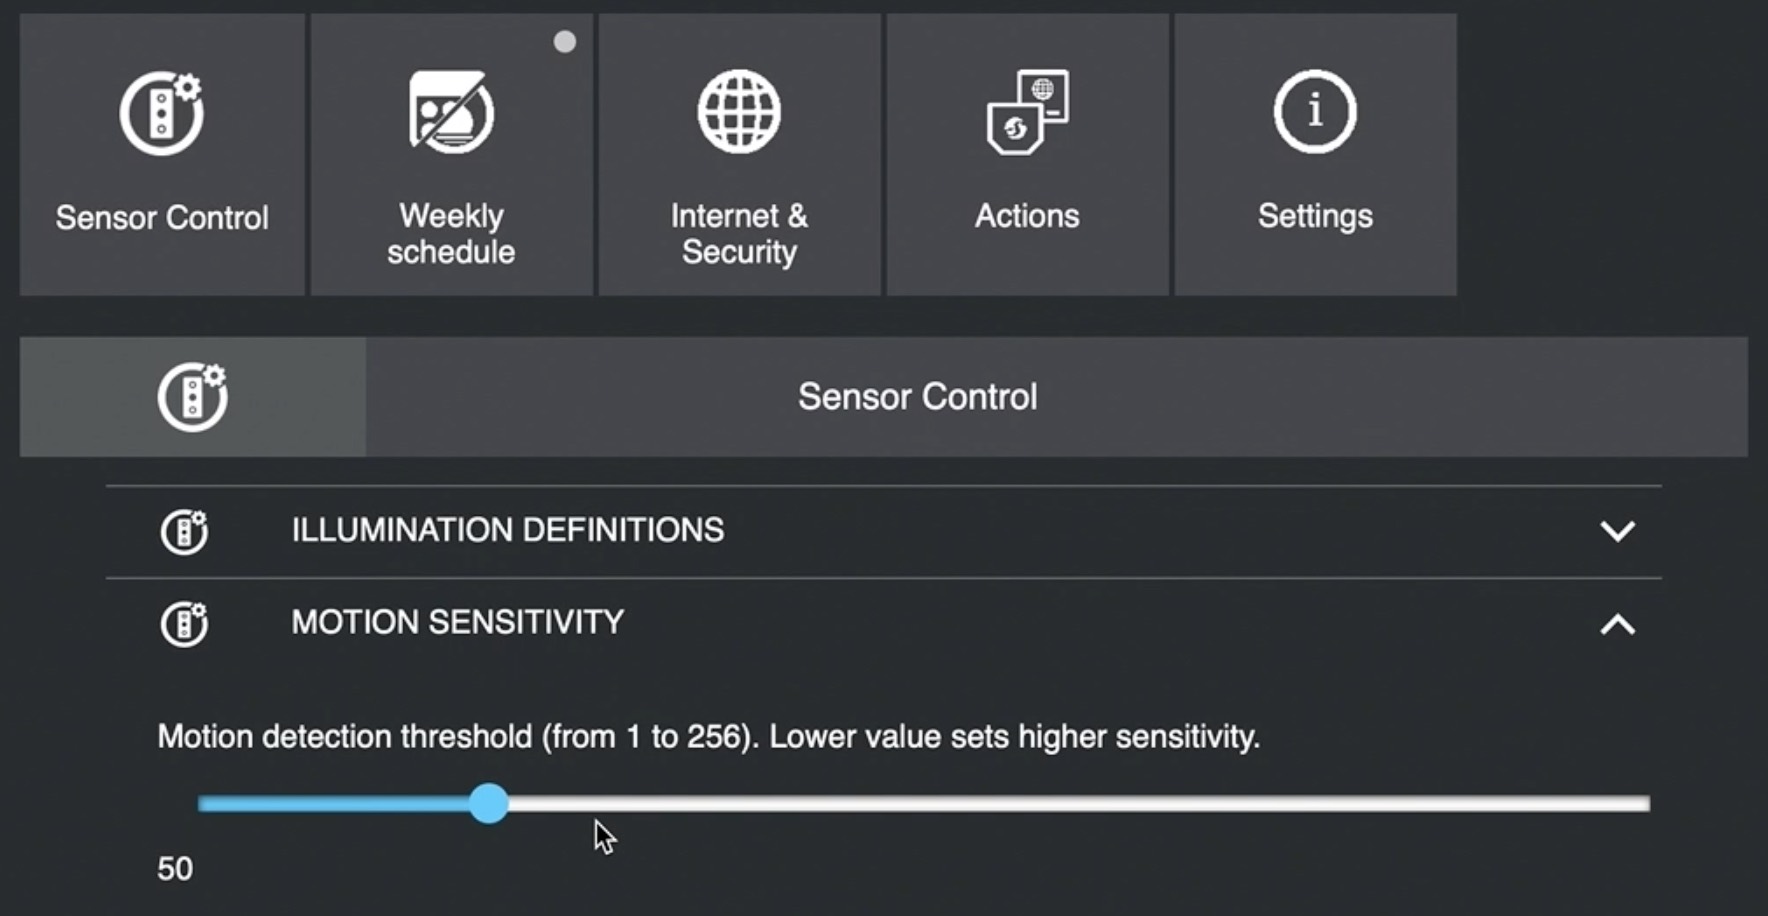
Motion Sensitivity
If you have pets this is the place where you can adjust the sensitivity of the sensor in order not to be activated by every move of your sweety. Or just the opposite if you want to know about every little movement this is it.
Go to Sensor Controls > Motion Sensitivity and play with the slider.
MQTT settings
If you want to activate MQTT settings in your Shelly Motion Sensor – head over to Internet & Security > MQTT Settings > Enable action execution via MQTT
After that, you have to enter your MQTT Broker IP and your MQTT credentials.

If you enable the MQTT you will instantly get several MQTT topics where all sensor updates will be populated and you can consume them with any tool that supports MQTT.
In other words by enabling MQTT you can integrate the Motion Sensor with Home Assistant, Node-RED, etc. very easily.
Cloud
Cloud connection – some hate it and some love it! The good thing with all Shelly products including this Motion Sensor is that you can enable or disable the Cloud connection depending of your needs.
If you want to enable it, Go to Internet & Security > Cloud > Enable Cloud
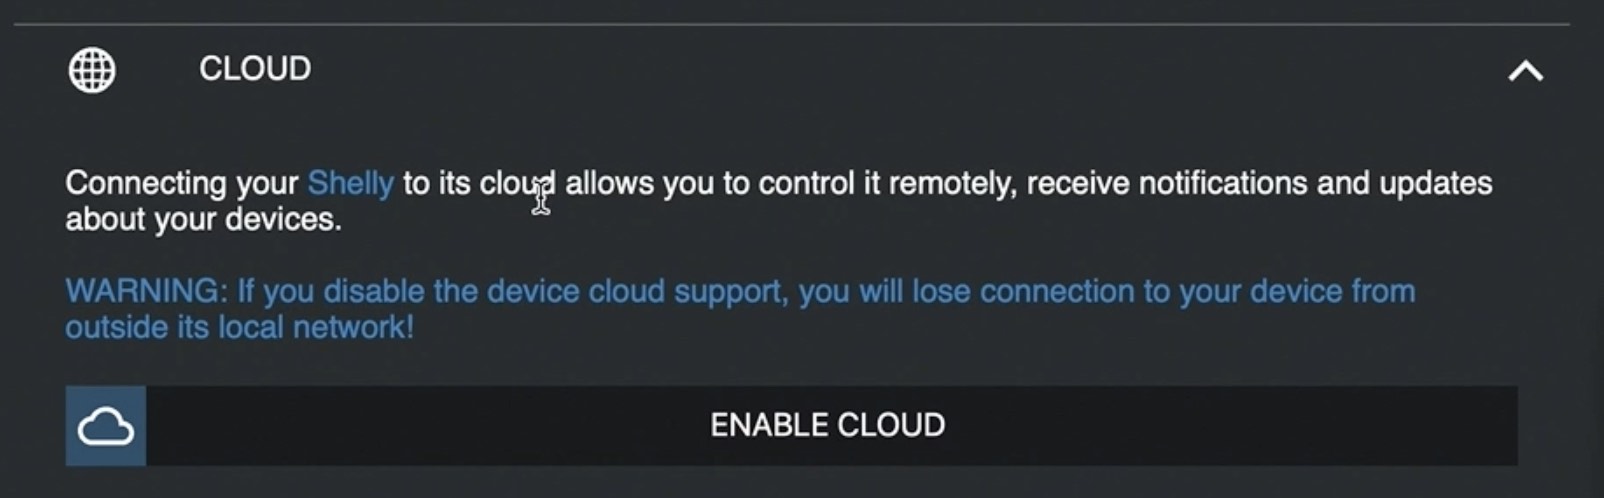
When the Cloud connection is enabled you can see the status and change the settings of the device from anywhere in the world using the Shelly Cloud mobile app.
Motion Detected Action
Enable this Motion Detected action and when movement is detected by the sensor it will send a command to the URL that you specify.
The menu is located at Actions > Motion Detected
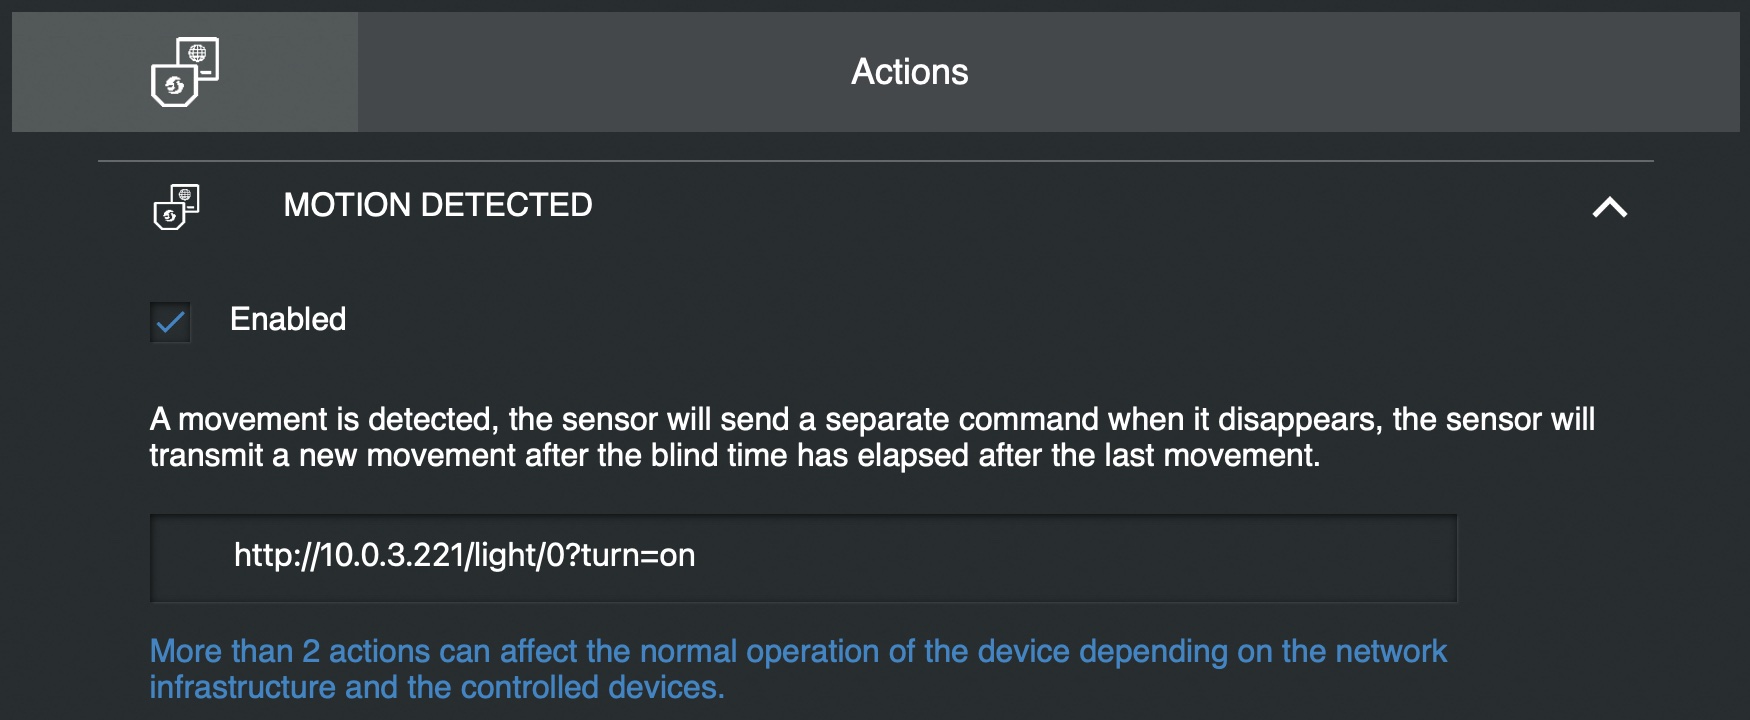
In the example from the picture above – the Shelly Motion will try to turn on the device with IP 10.0.3.221. In my case this is a Shelly Duo Smart Bulb.
I need your HELP
Hey,
I need your help here with your valuable to me opinion!
I can make a follow up video and article where I can try to integrate Shelly Motion Sensor with Home Assistant.
Last time I did that with Shelly Flood sensor using the MQTT protocol which worked perfectly. Shelly Motion also support MQTT and there is an official Shelly integration in Home Assistant that could also help.
Anyways, let me know in the comments below do you want such video/article?
If we get decent amount of such comments combined from YouTube and here – I promise to make a Home Assistant and Shelly Motion Sensor integration tutorial.
You decide this time.
Transparent with you
As aways I want to be as transparent as possible with you guys, so I must say that the Shelly send me their Motion sensor for free to test and review their product without any additional expectations.
So everything you see here is my real and honest opinion and experience.
Shelly Motion Final Thoughts
Shelly Motion Sensor seems very good product to me at least for now, but I guess the time will tell if it will continue to be that way. For now, I will happily mount the Sensor somewhere inside and continue testing it. If it behave decently I will probably buy some more in the future as I always wanted to put motion sensors on all major entry points in my home.
If the sensor is not behaving as expected – I promise to post updates here and in my YouTube video description.
As of now the only drawback for me is that I cannot mount the Shelly Motion sensor outside as it is not rated for such use.
Guys from Shelly, if you are reading this please make an outdoor version of the Shelly Motion I will be the first to buy it!
Where to buy Shelly Motion?
If you want to buy Shelly Motion, you can use the Shelly official store and my affiliate link below, doing so I will earn some small commission from your purchases with no additional cost for you:
UPDATE: Shelly Motion was discontinued and replaced by Shelly Motion 2 which is almost the same but a bit better and at the same price!
- Shelly Amazon Store – https://amzn.to/34d88VR
Support My Work!
If you like what you just saw here and you want to continue to receive such articles on a weekly basis, you can subscribe to my Newsletter – LINK
My Newsletter subscribers are increasing everyday and it seems that soon I have to pay to send the newsletter to all of you. Which is kind of good thing… I guess.
With that being said Stay safe and don’t forget Home Smart, But Not Hard!
Thank you for watching, and I will see you in my next article.