
Do you have a way to inform yourself immediately if there is flooding at your home? If your answer is No, then Home Assistant and Shelly Flood Sensor will help.
I will show you how to use Home Assistant and Shelly Flood Sensor to detect any leakages at your home immediately. We will use some Home Assistant automations and MQTT protocol.
Table of Contents
Why flood detection is important?
Very recently I had a small leakage, drop by drop from the pipes under my kitchen sink and I found out about it after a day, but the damage to my kitchen cabinets was already done.
Accidental flooding at your home from defective valves, pipes or connections can be very expensive if you don’t catch the leakage immediately. Fail to do so and you will have to fix the flooring, change furniture, paint or all of these things at once.
Now I’m determined to put as many flood sensors as needed to catch eventual leakages on time. To accomplish that I will integrate Home Assistant and Shelly Flood Sensor. I will use a MQTT server to help me with this integration. After that I will be able to trigger all sort of notifications like calls, messages, mails and so not using Home Assistant automations.
I will show you the whole process step by step, but first let’s smash the subscribe button for my weekly newsletter together, to scare all floods and leakages and then to see how the Shelly Flood Sensor looks like.
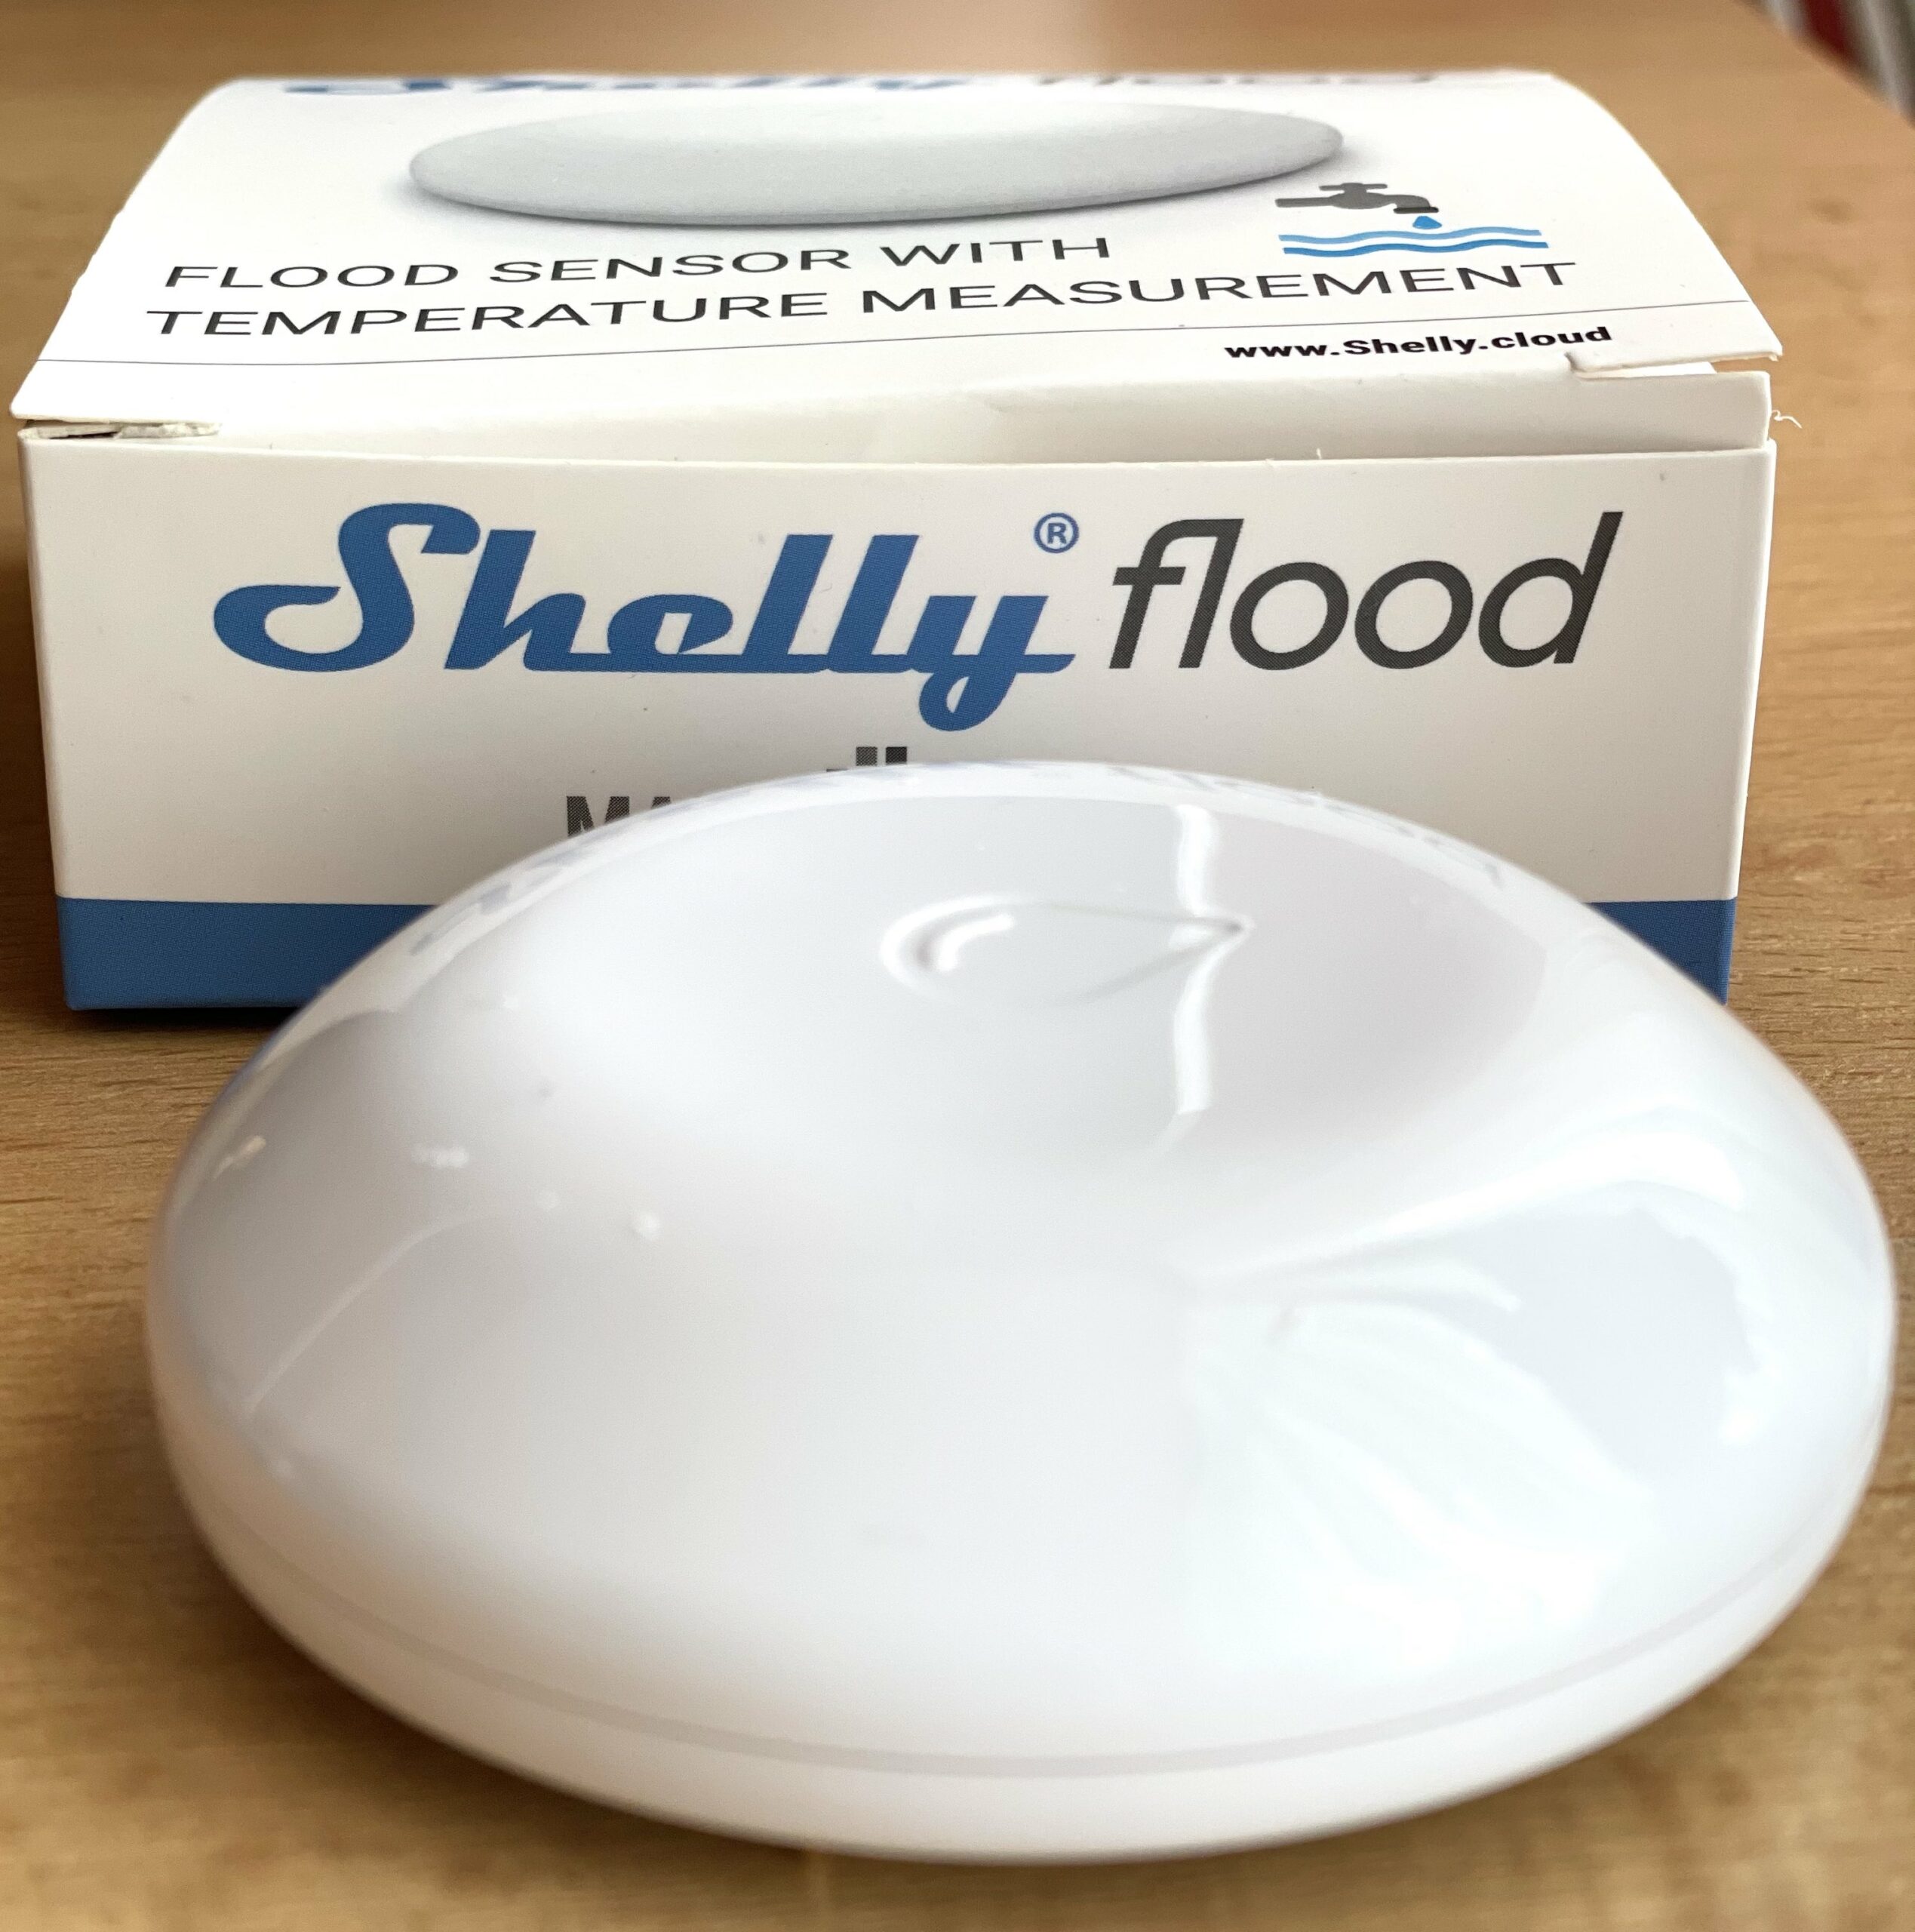
What is Shelly Flood Sensor?
Shelly Flood is a battery powered sensor, that allows you to receive an instant notification if there is water or liquid leakage detected. You can also monitor the temperature of your home. And because Shelly Flood is wire free you can place the sensor anywhere at your home where unpleasant events may occur. Only WiFi coverage is required.
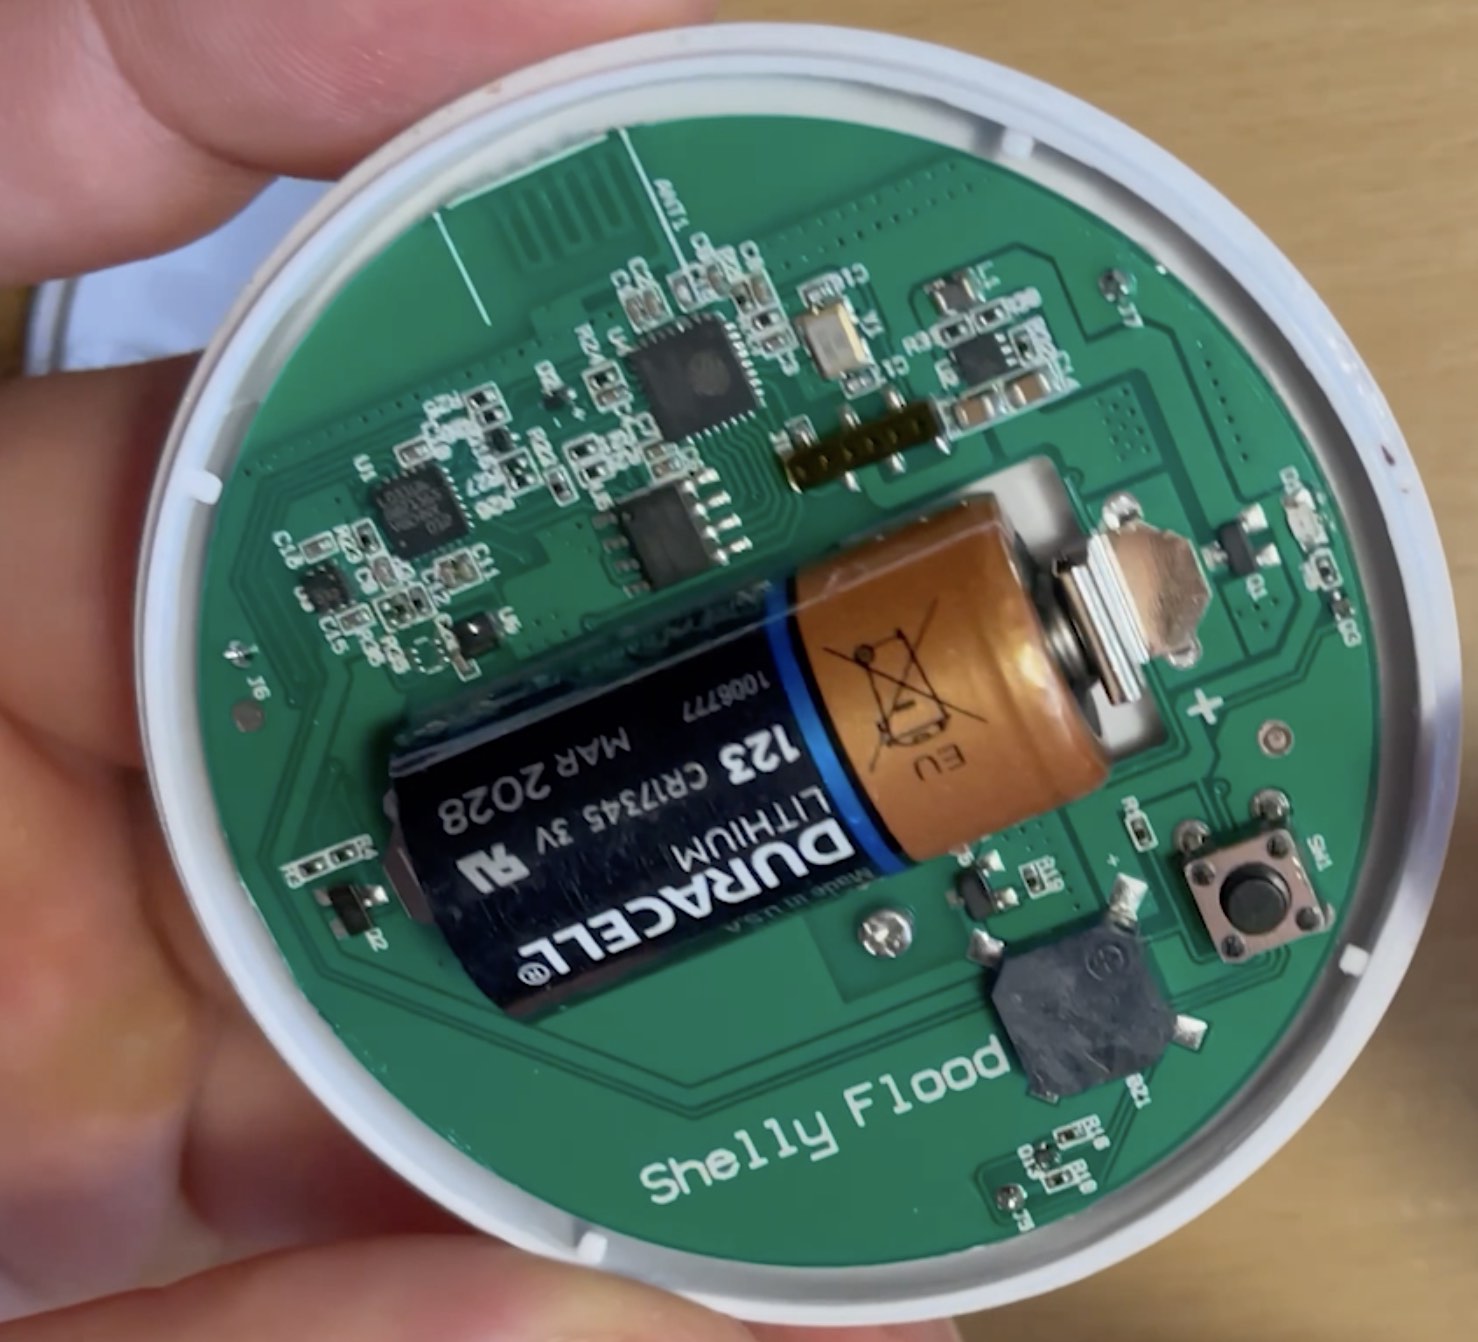
The needed battery for the Shelly Flood sensor is (Amazon affiliate link follows) CR123A. It is stated in the manual that the Shelly Flood can last from 12 to 18 months with one battery. To add the battery you have to twist a bit both parts of the Shelly Flood Sensor to open it.
The other parameters of Shelly Flood that worth mentioning are:
- Operational range: up to 15m indoors and up to 30m outdoors.
- Working temperature: -40C to +60C
- Size: 70x19x19mm
- WiFi 802.11 b/g/n/ 2.4 GHz
- Sound Alarm
- Embedded WEB Server
To Cloud or not to Cloud?
Any of the Shelly products that I reviewed till now can be added to the Shelly mobile App and Shelly Flood is no exception.
Of course you can decide how to control or monitor your device. And you have several options:
- Using the Shelly Cloud – that will allow you to monitor and receive notifications from anywhere.
- Using the device only locally – that will allow you to monitor the device only in your local network and you have to manually take care for the notifications part.
- Hybrid of the two options above – Cloud + local MQTT and Home Assistant integration. Which I’m using at the moment and we are going to do exactly that down below.
The choice is entirely yours.
Initial Shelly Flood Setup
First you need to connect Shelly Flood device to your WiFi. That is very easy and well described in the Shelly Flood user guide. In simple words do the following:
- Put Shelly Flood in pairing mode (the LED should flash slowly). This is done automatically by putting the battery for the first time. You can also force it by press and hold the Reset button for 10secs.
- Use the Shelly Mobile App for iOS or Android and click on Add device from the menu.
- Enter your WiFi name and password that you wish the Shelly Flood to join.
- Then choose Shelly Flood picture from the devices list.
- The app will ask you to join in shellyflood-XXXXXX WiFi network afterwards.
- Then the app will guide you through the adding the device to a room and to give it a name.
- And you are ready.
Home Assistant Shelly Flood integration
Let’s now integrate Home Assistant and Shelly Flood Sensor. Doing that is piece of cake easy, unfortunately is not enough at least for now. Read till the end of this section to find out why.
Go to Home Assistant > Configuration > Integrations and search for Shelly and click on the result.
- Wake up your Shelly Flood Sensor by single press of the reset button, located next to the battery.
- Enter the Shelly Flood IP (you can get it from your router) in the Home Assistant dialog and click SUBMIT.
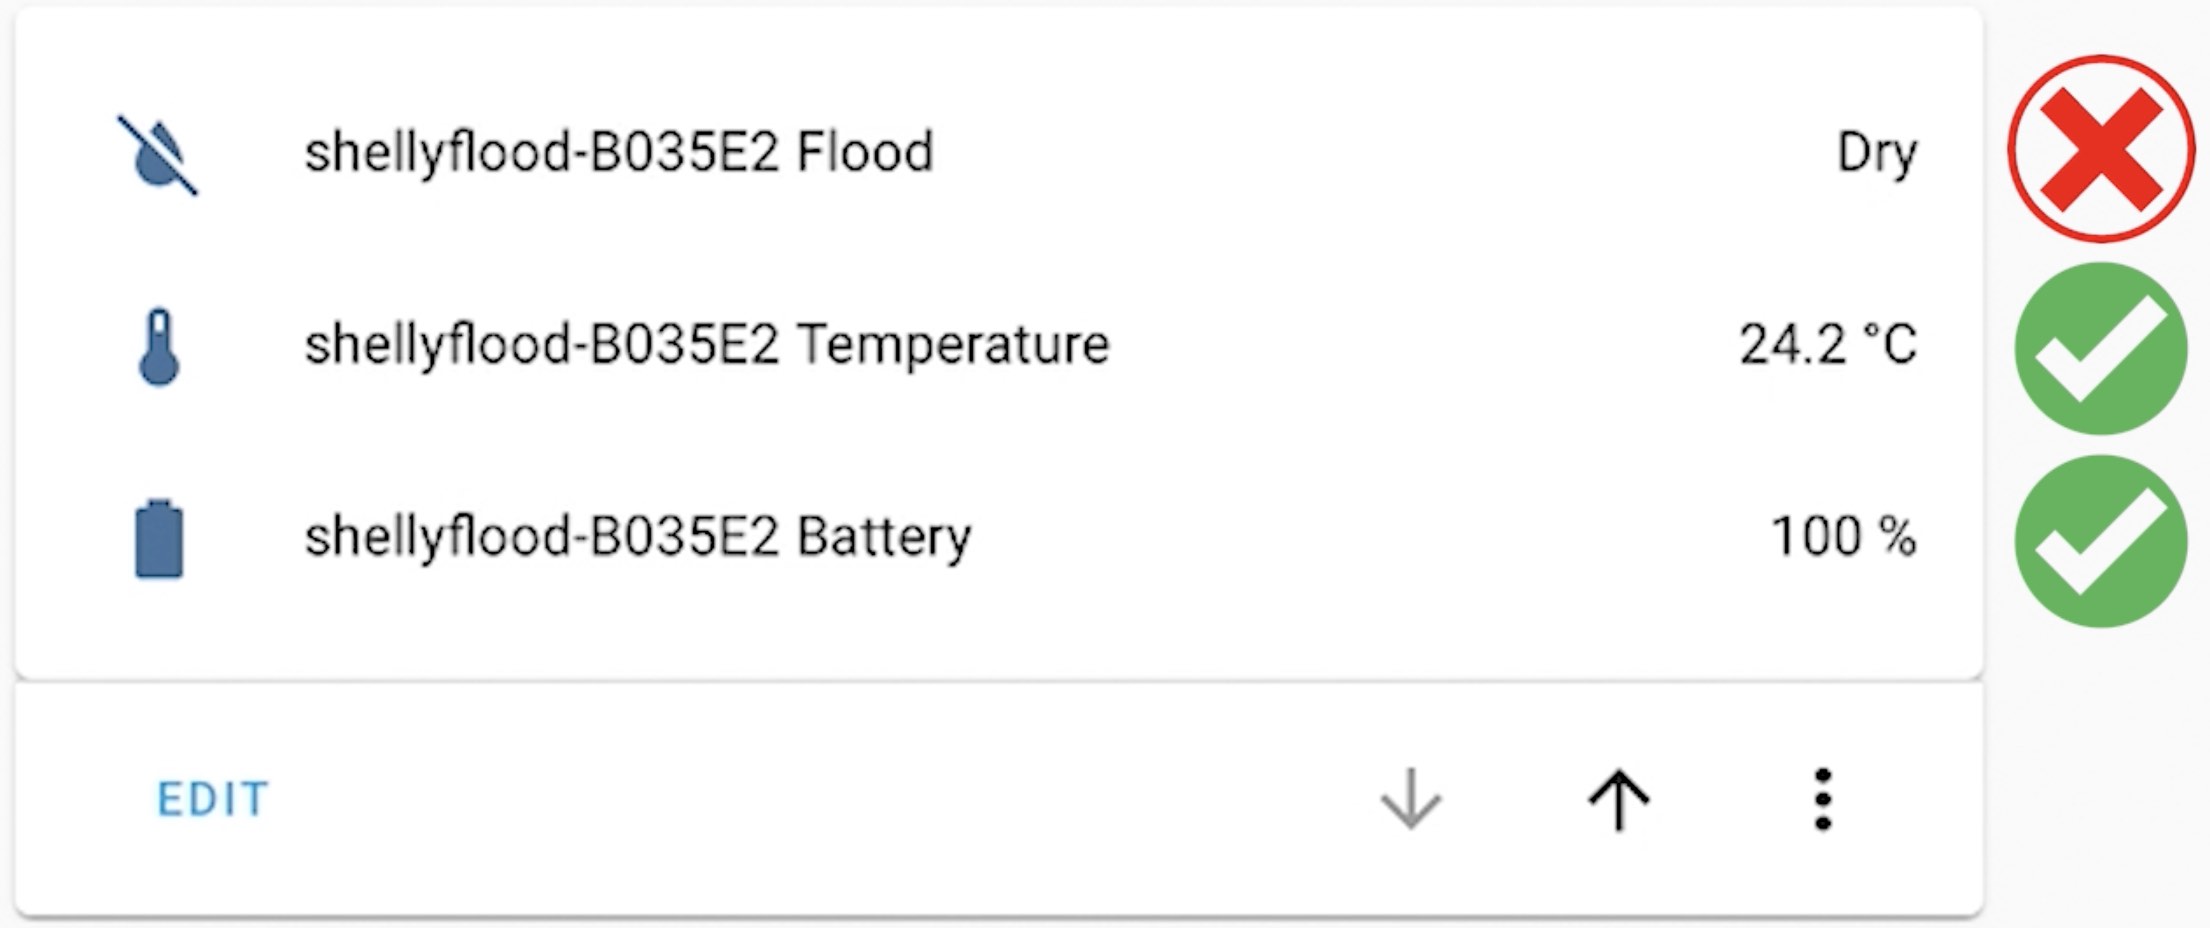
- Click FINISH on the Success dialog and you should see your Shelly Integration with one device and three entities detected.

The temperature and battery level sensors seems to work Out of The Box in Home Assistant, but unfortunately the binary flooding sensor is like in a freezer and it won’t move whatever I try.
I tried multiple times and different methods to change it’s state automatically to anything other than Dry, but It did not work.
This is because Home Assistant support for battery-powered Shelly devices is limited. This mens that the Home Assistant and Shelly Flood integration is not yet polished and it needs some bug fixing.
I believe that the Home Assistant and Shelly integration for battery powered devices will be fixed sooner than later.
Meanwhile we are not going to just sit and wait. On the contrary we are going to use MQTT protocol to detect leakages and to start Home Assistant automations.
Here is what needs to be done.
Home Assistant + MQTT + Shelly Flood
To make Home Assistant and Shelly Flood to work as they should – we will use the MQTT protocol. To do that we must have a MQTT broker/server up and running. One of the most popular ones is called Mosquitto.
You can install Mosquitto as standalone server or as Home Assistant Add-on from the Supervisor > Add On Store > search & install for Mosquitto.
When you install & start your MQTT broker you have to add It to your Home Assistant. Here is how.
Add MQTT Server to Home Assistant
Go to Home Assistant > Configuration > Integrations and search for MQTT and click on the result.
- Enter the IP of your MQTT server in the Broker field.
- Enter your MQTT username and password and click SUBMIT.
- Click FINISH on the Success dialog and you should see your MQTT Integration in Home Assistant.

How to enable MQTT on Shelly Flood?
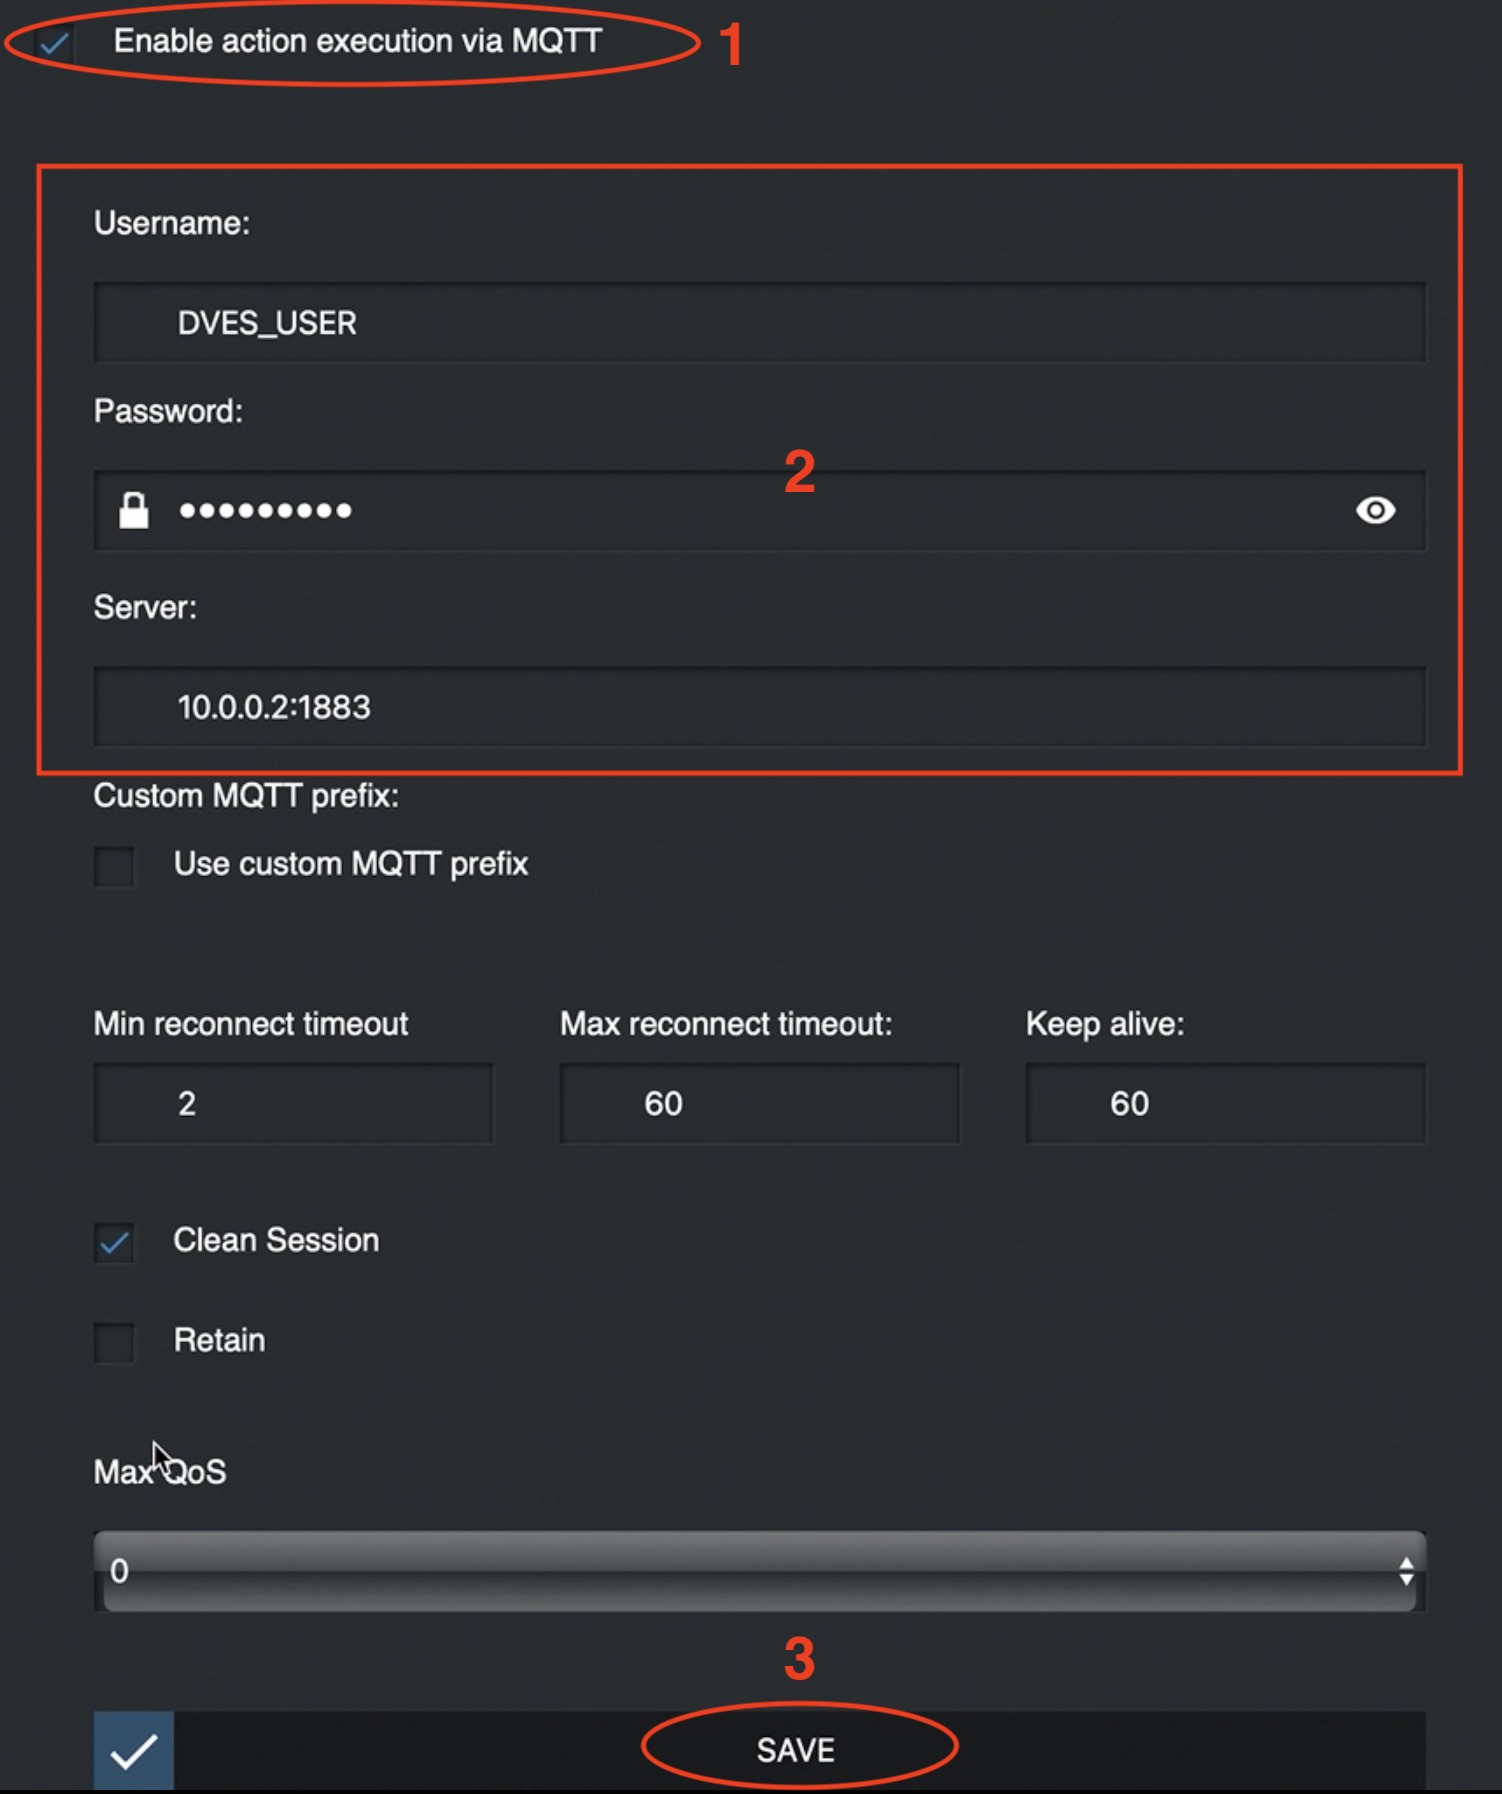
To enable MQTT on Shelly Flood Sensor open your Shelly Flood Web interface in a browser and go to: Internet & Security > Advanced – Developer Settings > Enable action execution via MQTT.
As username and password you should enter your MQTT credentials and as server you should enter the IP where MQTT server is installed. Finally click on the SAVE button.
Home Assistant Automation for Shelly Flood
Now when we have a MQTT server running, MQTT added to Home Assistant and our Shelly Flood connected to MQTT we can create a Home Assistant automation. This automation will monitor the Shelly Flood MQTT topic for changes and will inform us if there is any. This is how you can create such Home Assistant automation.
You could use the Home Assistant graphical interface for automation creation as I’m showing in my YT video or you could edit the automations.yaml file in your Home Assistant configuration folder. Here I will show you the latter.
Open automations.yaml file in your favorite editor or add-on and paste the following YAML code:
alias: MQTT flood detection
description: ''
trigger:
  - platform: mqtt
    topic: shellies/shellyflood-B035E2/sensor/flood
    payload: 'true'
condition: []
action:
  - service: persistent_notification.create
    data:
      message: flood is detected thanks to MQTT and the subscribe button
mode: single
In the code above, you may wish to change the topic: to your real Shelly Flood topic. If you want to double check the exact MQTT topics you can use the free tool MQTT explorer available for all major Operating Systems.
The other thing that you may wish to change is the action part of the automation. If you leave the action as it is, then a Persistent notification will be created when the MQTT topic becomes true (when flood is detected). This is fine, but for testing purposes and not for production as this will not wake you up in the middle of the night. And I guess you wish to know ASAP if there are any leakages.
I personally want to get the max of this Home Assistant and Shelly Flood integration and I will change the above action to Twilio call and Telegram message when I finish with the testing. Also I want to be on the safe side and to catch at least one of the notifications even when I’m sleeping.
The other notification ideas that you could use are Home Assistant Companion app for iOS, Android, macOS, or notify.events. All of these notifications services above are great and two hands recommended by myself.
Test Home Assistant and Shelly Flood Automation
Time to test everything and to subscribe for my Newsletter if you haven’t done that already or at least leave a comment below or at very, very least just read the rest of the article.
Grab your Shelly Flood Sensor and put it in а shallow plate filled with water or you can just put it on any even metal surface, so the Shelly Flood Sensor legs are short-circuited.

You should hear a sound alarm from the Shelly Flood Sensor and you should receive a persistent notification in Home Assistant.

If you have the Shelly Cloud enabled you will also receive an e-mail and Shelly Mobile Application push notification.
Where to buy Shelly Flood?
If you want to buy Shelly Flood, you can use the Shelly official store and my affiliate link below, doing so I will earn some small commission from your purchases with no additional cost for you:
- Shelly Amazon Store – https://amzn.to/34d88VR
Summary
I really hope that you find this information useful and you now know how to detect floods and leakages using Home Assistant and Shelly Flood Sensor.
If you want to secure this blog existence you can become one of my supporters. You can see exactly how in this section of my site.
I can’t thank enough to all wonderful guys that are supporting my work already, you are amazing!
Any other sort of engagement on this site and my YouTube channel does really help out a lot with the Google & YouTube algorithms, so make sure you hit the subscribe, as well as the Like and Bell buttons.
Also feel free to add me on Twitter by searching for @KPeyanski. You can find me on my Discord server as well.
Stay safe and don’t forget – Home Smart, But Not Hard!
You can use https://github.com/bieniu/ha-shellies-discovery to automatically configure Shelly battery powered devices via MQTT.
Thanks for the link
I enjoy your YT channel and new to IOT devices, having trouble with shelly Floods battery life
Can you explain the MQTT QOS setting. Surely setting at 0 (in your screen shot above) you have no guarantee that the message will arrive? Do you know if setting to level 1 or 2 is more battery used?
Its a leading question I have 2 Unifi AP with dedicated 2.4 SSID set up that do not overlap.
1 AP downstairs SSID say IOT24DS and one upstairs say SSID is IOT24US. both use different channels.
I am sure that all downstairs IOT project connect to downstairs only and upstairs connect to upstairs. So all Shelly Flood get a good strong signal. The only reason a purchased another AP. My phone and laptop was fine going from upstairs to down, but the shelly flood could not find the upstairs AP when i only had one.
Static IP have been set, even tested one outside of the DHCP setting.
My shelly flood batteries only last around three months. Not sure what else to try. But thinking a bigger external regulated 3V battery pack and where possible USB 3V charge all option are not ideal.
Do you have any thoughts
Hi Andy,
I’ve played with QoS before (with tasmotized devices) and I didn’t found much difference at the end. So I leave everything to their default settings since. Regarding the battery life, there is something wrong with yours. Mine shelly floods are also working from 3months or so and the batteries are over 95%, but I don’t poke them at all (I didn’t open the web interface, check status, etc) Try to get a good batteries mine are Varta and they are more expensive than the other brands, but their life seems to be longer.
Thanks for the guide
Instead of MQTT, I enabled the CoIoT peer setting in the Shelly Flood and pointed it to Home Assistant on port 5683.
Then when the flood sensor was setup I got the notification and state change straight away.
There maybe no need for MQTT?
Yes, thanks for sharing this Peter. The approach that you are describing is the native way of integrating shelly device nowadays, I guess I have to add it to the article when I find some time.
Thanks once again.