The brand new Home Assistant companion for macOS was just released as part of what the heck month in the Home Assistant community.
I will show you how to install it, what new sensors are added after installation and how these sensors can be used in automations.
Table of Contents
What is Home Assistant companion for macOS?
Home Assistant companion for macOS is a native application specially designed for Mac Operating System. You can use it to connect to and control your Home Assistant installation. The biggest benefit of using Home Assistant companion for macOS over the standard web interface is that it adds several binary and state sensors reported in real time and you can receive notifications including actionable notification right on the macOS.
Home Assistant companion for macOS installation
Home Assistant companion for macOS (beta) is here and it supports almost everything that mobile companion app can do as well as actionable notifications.
Even more It adds several sensors for the Mac where Home Assistant companion app is installed. The new sensors can tell: is the Mac active at the moment, are mic or camera currently in use, battery level and state and several others.
You can use these sensors to create many useful automations. And this is what we are going to do right now, but let’s first start with the Home Assistant companion app for macOS installation and smashing the subscribe button for my Newsletter.
Go to the official GitHub page of the app and download the latest home-assistant-mac.zip file.
Usually the file will go to your Downloads folder inside your username home folder and it will be automatically uncompressed.
/users/YOUR_USERNAME/Downloads/
You can optionally move it to your Applications folder or if you have any issues starting it you can try to move it to your Desktop.
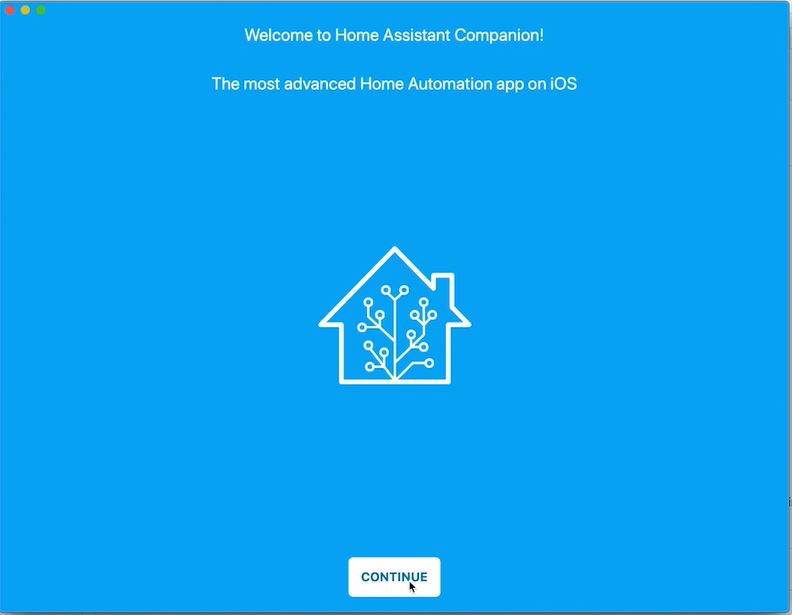
After you start it you should see the initial Home Assistant wizard that will guide you to through the initialisation process.
Windows and Linux users?
If you are using windows the recommended tool for you is called IOTLink, I never try it before. but maybe I will some day.
Regarding companion app for Linux I don’t know what can I recommend, maybe you can tell me in the comments below.
What new sensors are available?
The Home Assistant companion app for macOS is installed – let’s see what new sensors are added.
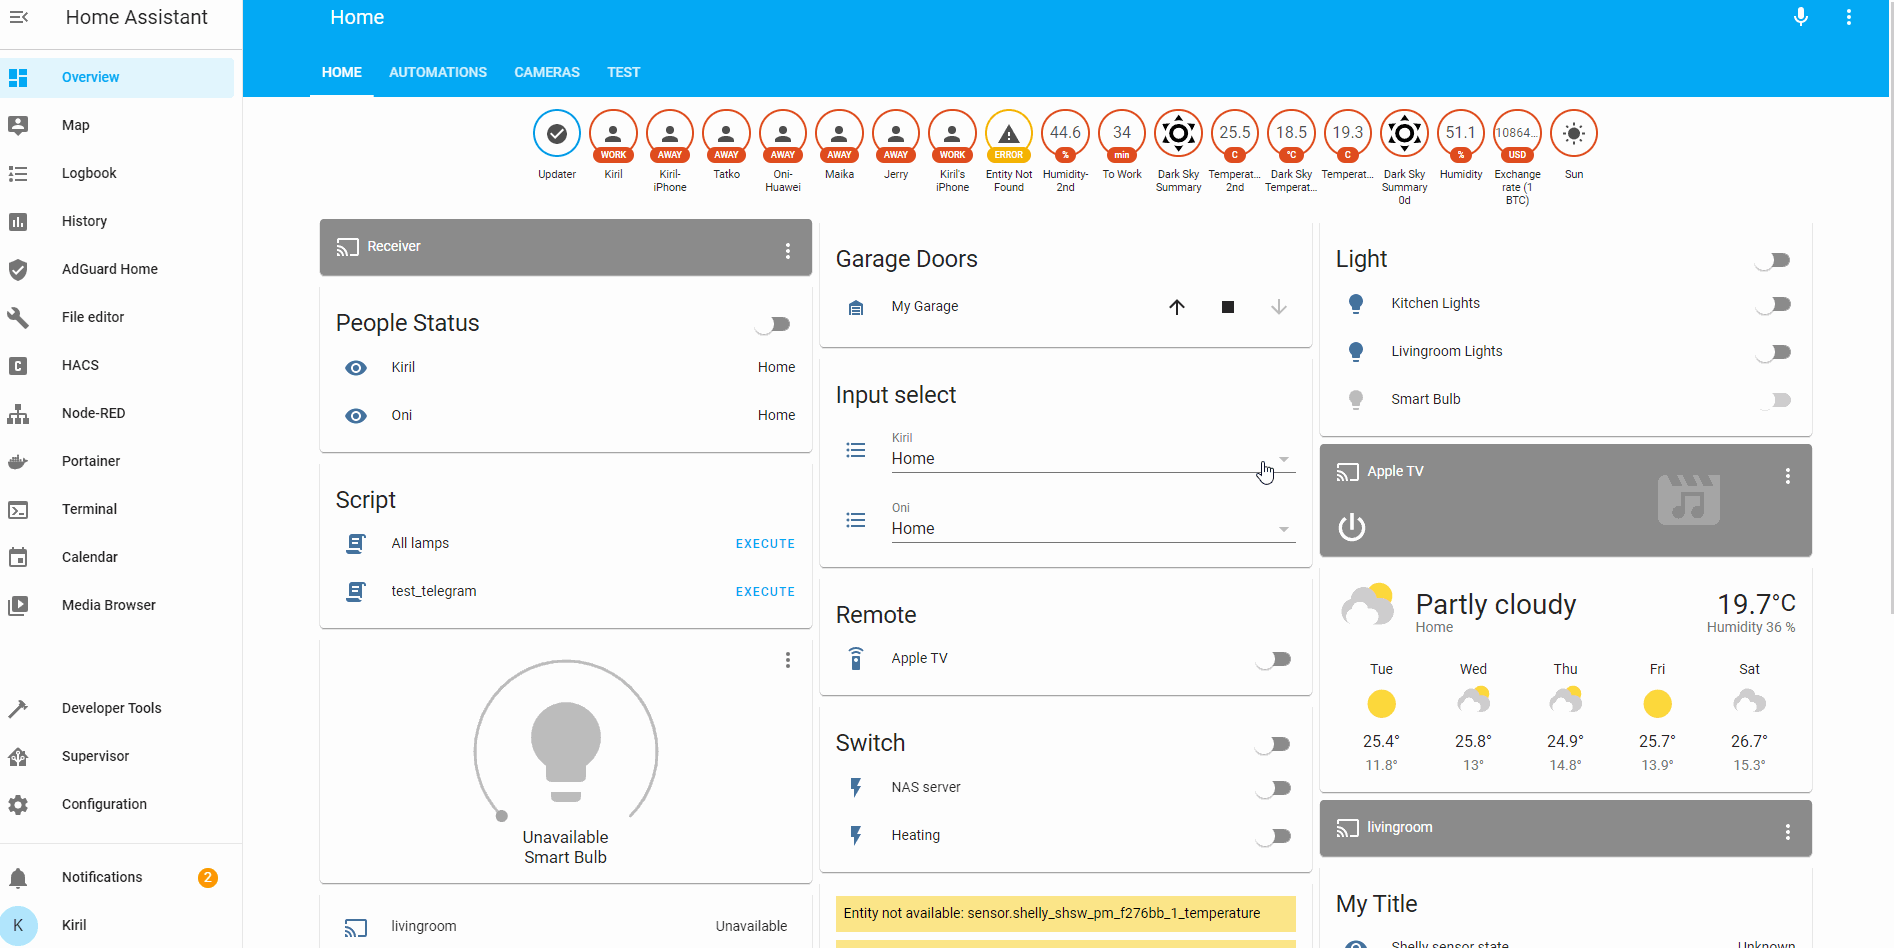
The easiest way doing this is to add an Entities card in Home Assistant and to select there all of the newly added sensors.
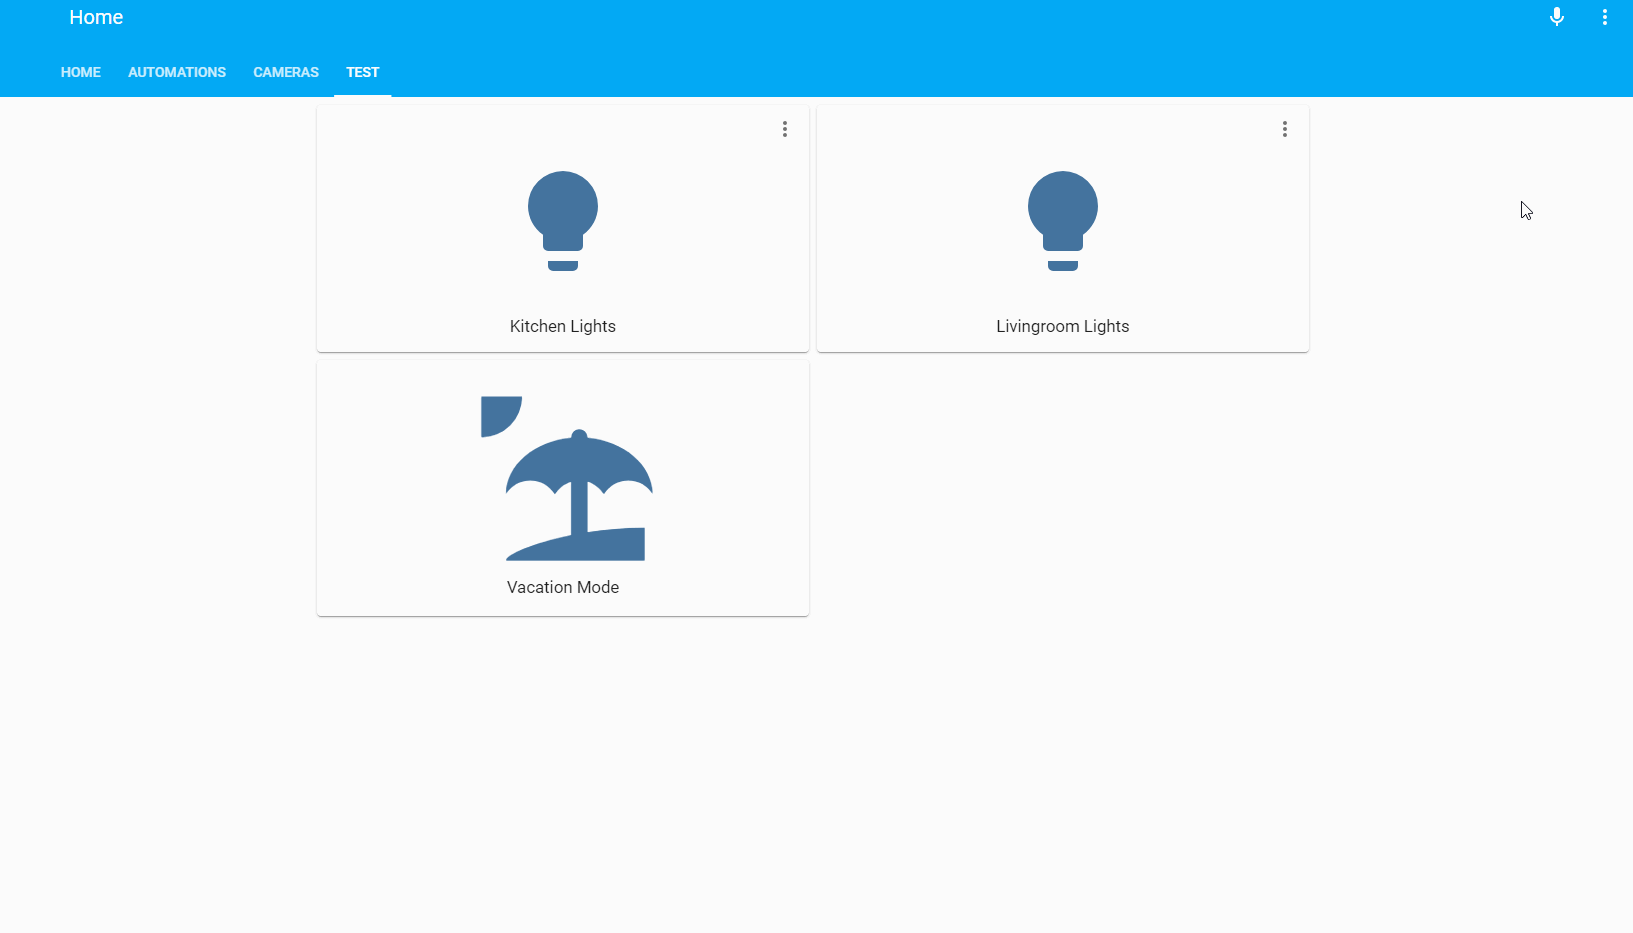
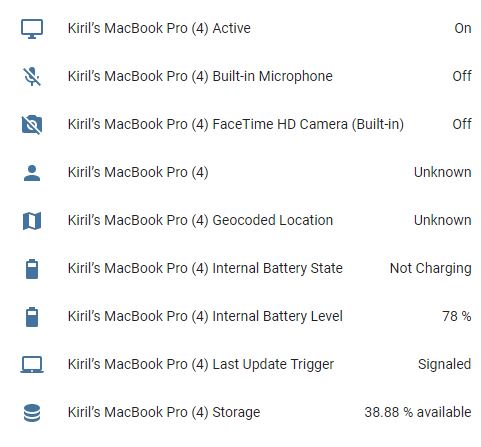
At the end we will have a full list of the new sensors and their current state. Here is a brief description of every sensor and what it is for:
| Sensor | Description |
|---|---|
| binary_sensor.YOUR_MAC_NAME_active | That is the current state of the Mac. State can be on or off. Additionally you can use the following attributes also available here: Fast User Switched: true/false Idle: true/false Locked: true/false Screen Off: true/false Screensaver: true/false Sleeping: true/false |
| binary_sensor.YOUR_MAC_NAME_built_in_microphone | Simply is your built in microphone in use at the moment |
| binary_sensor.YOUR_MAC_NAME_facetime_hd_camera_built_in | Simply is your built in camera in use at the moment |
| device_tracker.YOUR_MAC_NAME | to track your device just like the mobile companion app. |
| sensor.YOUR_MAC_NAME_geocoded_location | As the name suggest the geocoded location of the device |
| sensor.YOUR_MAC_NAME_internal_battery_level | The state of this sensor represent the current battery charge in percentage. There are a lot of available attributes here like: BatteryHealth, Battery State, Is Charging and many more. |
| sensor.YOUR_MAC_NAME_internal_battery_state | State can be: Not Charging and Charging |
| sensor.YOUR_MAC_NAME_last_update_trigger | My state is always Signaled and I’m not sure what other states can be. |
| sensor.YOUR_MAC_NAME_storage | State is the percentage of the available storage on your Mac. You can also get the total and the available storage in Gigabytes from the attributes. |
At the end when successfully add the Entities card you should see something similar in your Home Assistant.
Create an automation with these sensors
Now let’s create some automations using these sensors. For example to send a notification to the Mac when the available storage is below 20%.
You can add this YAML code to your automations.yaml file and reload your automations.
- id: '1600598205143'
  alias: If Mac storage is below %20
  description: ''
  trigger:
  - platform: numeric_state
    entity_id: sensor.YOUR_MAC_NAME_storage
    below: '20'
  condition: []
  action:
  - service: notify.mobile_app_YOUR_MAC_NAME
    data:
      message: Free up some space! Your storage is below 20%
  mode: single
Or you can use the embedded automations graphical editor to do the same:
Adding choosers to the automation
We can add some choosers in our automation to make it even more useful. That way the notifications will only go to the Mac if it’s active, otherwise a Telegram message will be sent.
This is the YAML code that you can paste in your automations.yaml file and you have to reload your automations after that.
- id: '1600598205143'
  alias: If mac storage below %20
  description: ''
  trigger:
  - platform: numeric_state
    entity_id: sensor.YOUR_MAC_NAME_storage
    below: '20'
  condition: []
  action:
    - choose:
      - conditions:
        - condition: state
          entity_id: binary_sensor.YOUR_MAC_NAME_active
          state: 'on'
        sequence:
        - service: notify.mobile_app_YOUR_MAC_NAME
          data:
            message: Free up some space! Your storage is below 20%
      - conditions:
        - condition: state
          entity_id: binary_sensor.YOUR_MAC_NAME_4_active
          state: 'off'
        sequence:
        - service: notify.telegram
          data:
            message: Free up some space! Your storage is below 20%
      default:
      - service: notify.persistent
        data:
          message: default scenario
  mode: single
Quick Question for You!
What is the most useful feature released in the latest Home Assistant for you? Let me know in the comments bellow.
I love reading the comments and chatting with you so go ahead and write something there I’m waiting.
Actionable Notifications in Home Assistant companion for macOS
Let’s see the actionable notifications in action! And if action is not enough you can rise it to another level by hit the Subscribe button to my Newsletter. You will start receiving actionable notifications weekly.
[sibwp_form id=2]
Now let’s continue…
I will use a slightly modified example from my Home Assistant Actionable Notifications article.
What I want to achieve is an actionable notification that contain dynamic attachment (one of my camera stream) and several buttons underneath that I can immediately press to respond.
Adding category identifiers
Exactly as described in details in my actionable notifications article. First you have to add the following entry in your configurations.yaml file. That is needed to create category identifiers. Later we will use these identifiers in the automations.
# configuration.yaml entry
ios:
  push:
    categories:
      - name: Camera With Actions
        identifier: 'camera'
        actions:
          - identifier: 'TURN_ON_LIGHTS'
            title: 'Turn On Lights'
            activationMode: 'background'
            authenticationRequired: false
            destructive: no
          - identifier: 'SOUND_ALARM'
            title: 'Sound Alarm'
            activationMode: 'background'
            authenticationRequired: true
            destructive: false
          - identifier: 'DISMISS'
            title: 'DISMISS'
            activationMode: 'background'
            authenticationRequired: false
            destructive: true
Creating the Actionable Notifications Automations
We will need two automations. Open your automations.yaml file and paste them inside:
The first one will send an actionable notification with several buttons.
# automations.yaml entry
- alias: Notify when Kiril goes to work using Actionable Notification Mobile app
  trigger:
  - platform: state
    entity_id: device_tracker.kiril_s_iphone
    to: 'work'
  action:
    service: notify.mobile_app_kirils_macbook_pro_4
    data:
      title: "Yard camera!"
      message: "Here is what is happening!"
      data:
        push:
          category: camera
        entity_id: camera.reolink410w_1_front_door
The second automation will listen for the events that are coming from the pressed buttons.
# automations.yaml entry
- alias: Turn on the lights from actionable notification.
  trigger:
    platform: event
    event_type: ios.notification_action_fired
    event_data:
      actionName: TURN_ON_LIGHTS
  action:
  - data:
      entity_id: light.kitchen_lights
    service: light.turn_on
What will actually happen with these two automations is the following:
When the entity device_tracker.kiril_s_iphone change its state to ‘work’ (that means my phone goes to the predefined by my work zone) send an actionable notification that contains my yard camera stream and a button that will turn on my kitchen lights if pressed.
To test these automations in your Home Assistant you should replace some of the things with yours. Namely all of the entity_id: and service: notify.mobile_app_kiril_s_iphone with your device name as well as notify.mobile_app_kirils_macbook_pro_4.
Then you have to reload your automations from the Home Assistant Configuration menu.
To test the Home Assistant companion for macOS actionable notifications with the automations above I will use the Home Assistant Developer Tools to change the state of the device_tracker.kiril_s_iphone entity to ‘work’
If everything is OK you should receive similar Home Assistant Actionable Notifications:
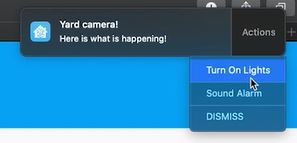
If everything is OK you should receive similar Home Assistant Actionable Notifications:
Support my Work!
If you want to secure this blog existence you can become one of my supporters you can see exactly how in this section of my site.
Any other sort of engagement on this site and my YouTube channel does really help out a lot with the Google & YouTube algorithms, so make sure you hit the subscribe, as well as the Like and Bell buttons.
You can also buy my Smart Home Getting Started Actionable Guide right here -> LINK
Also feel free to add me on Twitter by searching for @KPeyanski. You can find me on my Discord server as well.
I really hope that you find this information useful and you now know how to install the Home Assistant companion for macOS and how to use the newly added sensors in automations.
Stay safe and don’t forget – Home Smart, But Not Hard!
Thank you for reading, I will see you in the next article.