
You can make your perfect rare, medium or well done steak using Smart Home Gadgets? In todays article I will show you such a Smart Gadget called Meater. Did you get it? It is a combination from Meat & Thermometer. I will also integrate that Meater with Home Assistant so advanced automations and notifications will be possible.
Table of Contents
Not sponsored article!
I must say that this is not a sponsored article, as usual. I bought this product with my own money (as usual) and what you’ll read next is my own opinion and experience.
You can be the sponsor though, by clicking the subscribe button on my Newsletter. That way you will receive news about my new content directly to you mail I will not spam and you can unsubscribe anytime.
Enough chit chat, let’s see what Meater is and what you can do with it.
Why I bought Meater?
I always wanted to control the doneness of steaks and other type of meat when I have a barbecue party, as most of my family members like the meals well done, but I prefer to experiment with medium or rare.

I saw the Meater product around the Home Assistant 2022.5 release as it was one of the featured integration. The name Meater immediately grabbed my attention, as I was looking for such smart thermometer for meat from a long time and this one looked promising. On top, it can work with Home Assistant which was a deal maker for me and I decided to buy one for a test.
What is MEATER?
MEATER is a wireless smart meat thermometer and along with the MEATER app or Home Assistant, it will help you cook the juiciest steak, chicken, turkey, fish or other meat perfectly every time.
There are three different flavours of Meater products:
- The Original Meater which have up to 10m wireless range
- The Meater+ that can go up to 50m, because it has a built-in Bluetooth repeater,
- And the Meater Block which is basically 2 or 4 Meater probes in one charging station.
I won’t go into details about the Meater specifications, you can check them in Amazon or in the official Meater website.
I will just say that the Original Meater costs around $70 US dollars, the Meater+ is around $100 and the Meater Block is around $300 dollars.
If you are interested to buy a Meater I can suggest to check the current prices in the official Amazon store – (Amazon affiliate link – https://amzn.to/3MlPwH5)
Which Meater I bought?
For myself, I bought the Meater+ version, only because I found it with free shipping, which makes the price difference between the Original Meater & the Meater Plus negligibly small.
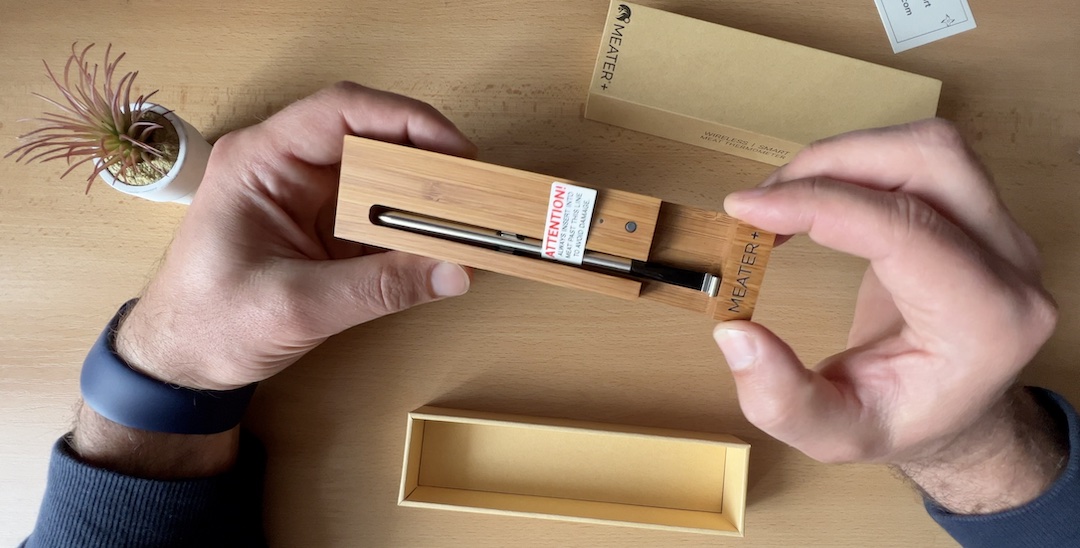
How to use Meater?
Using Meater is very easy, as there are no wires and no hassle, you just have to pair the device with your Phone using the Meater app.
- Apple App Store Meater app – https://apps.apple.com/us/app/meater-smart-meat-thermometer/id1157416022
- Google Play Meater app – https://play.google.com/store/apps/details?id=com.apptionlabs.meater_app&hl=en&gl=US
For the Meater app you will need to create an user, and this same user will be used later for the Home Assistant integration. In the app you will find all of the needed instructions for the pairing process.
When you are ready with the pairing you can set up your cook by:
- Choosing it from an enormous Digital Meat Catalogue.
- Set the stage of doneness.
- Finally, you can insert the Meater probe into your meal and you can start cooking as usual.

The Meater app will report the internal meat temperature as well as the ambient temperature. It will estimate the cooking time and it can even consider the resting after the meal is ready to achieve the best results.
Home Assistant Webinar
A quick side note before we continue to the Home Assistant Meater integration, I want to invite you on my Home Assistant Webinar, where I’ll talk about the different official Home Assistant Installation types + 1 secret & stupid easy way to get Home Assistant up & running.
Check this Webinar on my other website https://automatelike.pro/webinar it is completely free and it will take you only 45minutes to understand almost everything about the Home Assistant installation types.
Home Assistant Meater Integration
The Meater Home Assistant integration unfortunately is not local and it uses the Meater Cloud. I’m perfectly fine with that, but just mentioning it, because I know that some of you wants to use only local integrations and smart gadgets.
Anyways, to integrate the Meater with Home Assistant you’ll need the Meater app credentials and you should have completed at least one cook while you was connected to the Meater Cloud (or you can fake one by just choose something from the app). The whole Home Assistant Meater integration is very easy. Here is what you have to do.
- In Home Assistant press “c” button on your keyboard and type "integration" then choose navigate integrations > and select Add Integration.
- Search for Meater integration and select it.
- The other option is to use the My Home Assistant link below:

- Enter your Meater App credentials & click Submit.
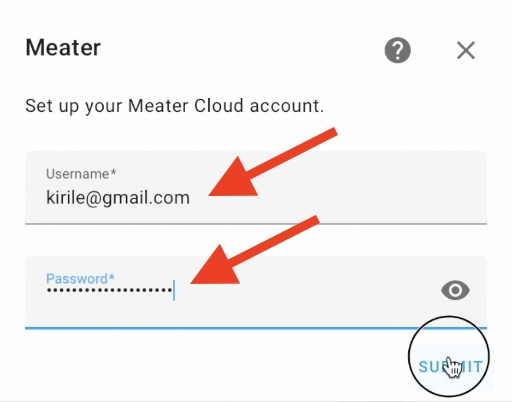
- You should see a Success window, as well as the Meater integration within your integrations list in Home Assistant.
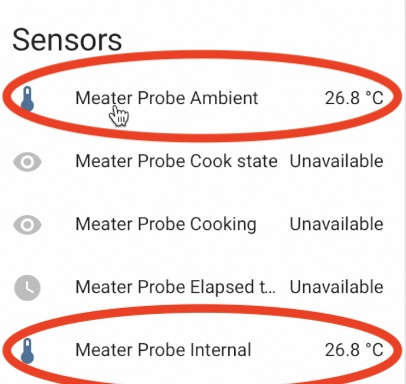
- If you remove the Meater Probe from the Charger you should see the Meater Probe Ambient & Meater Probe Internal readings in Home Assistant.
- If you start a new cook from the app you should see all the readings in Home Assistant.
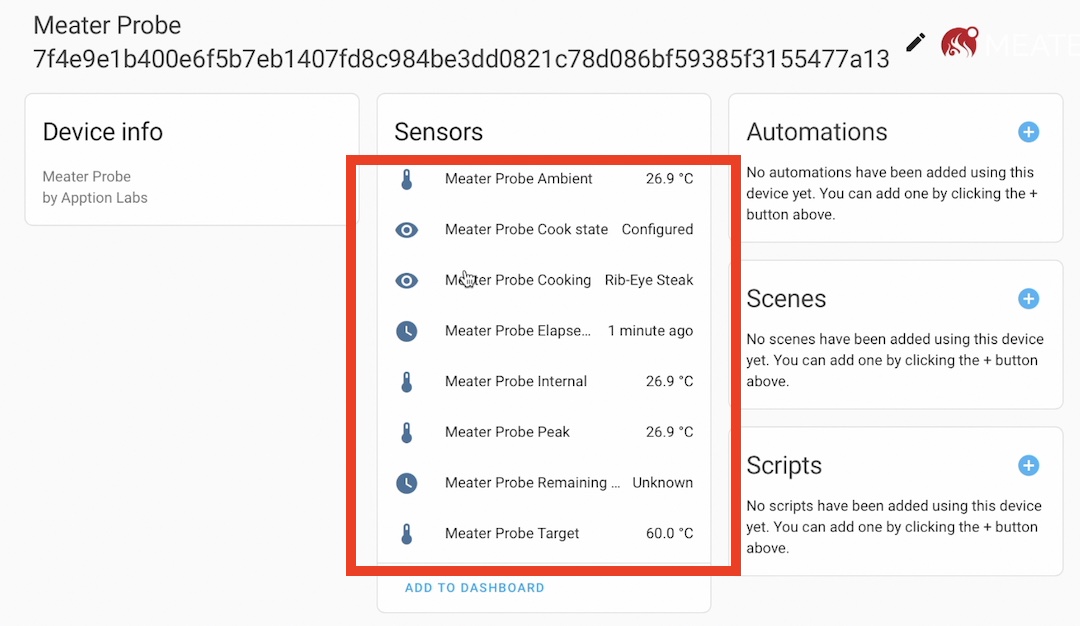
We have the Meater added in Home Assistant and we have all the readings. The whole point of doing this is that you can now create a ton of useful automations, that can sound the alarm, send you notifications or even call you when your meal is ready or the temperature is not right. And because Home Assistant can use a lot of services & integrations the choice what to use exactly is entirely yours.
Outro
If you like that Meater gadget and you want to buy one for yourself you can use the links in this article. As Amazon affiliate I will receive a small commission from your purchase with no additional cost for you.
Thank you for reading. I’m Kiril and I’m done writing. Bye!