In this article & video, we are going on a journey to explore various official Home Assistant add-ons, testing them on a Raspberry Pi 5 with 8GB of RAM and 64GB of SD card storage. The aim is to provide information about every Official Home Assistant Add-On as well as its CPU, memory, and storage usage. Through this, you can make informed decisions about which add-ons to install without overwhelming your testing machine.
Table of Contents
Additional Resource: Video Guide
If you prefer visual demonstrations or want a more visual experience, I’ve got you covered! I’ve created a comprehensive video on the same topic, detailing the installation and testing of Home Assistant add-ons on a Raspberry Pi 5.
In the video, you’ll find step-by-step instructions, real-time demonstrations, and insightful commentary as we explore each add-on’s functionality and resource usage. It’s a great way to follow along visually and grasp the concepts more effectively.
So, if you’re tired of reading or simply prefer a different format, feel free to check out the video guide. Simply click the link below and sit back, relax, and let me guide you through the process. Happy exploring!
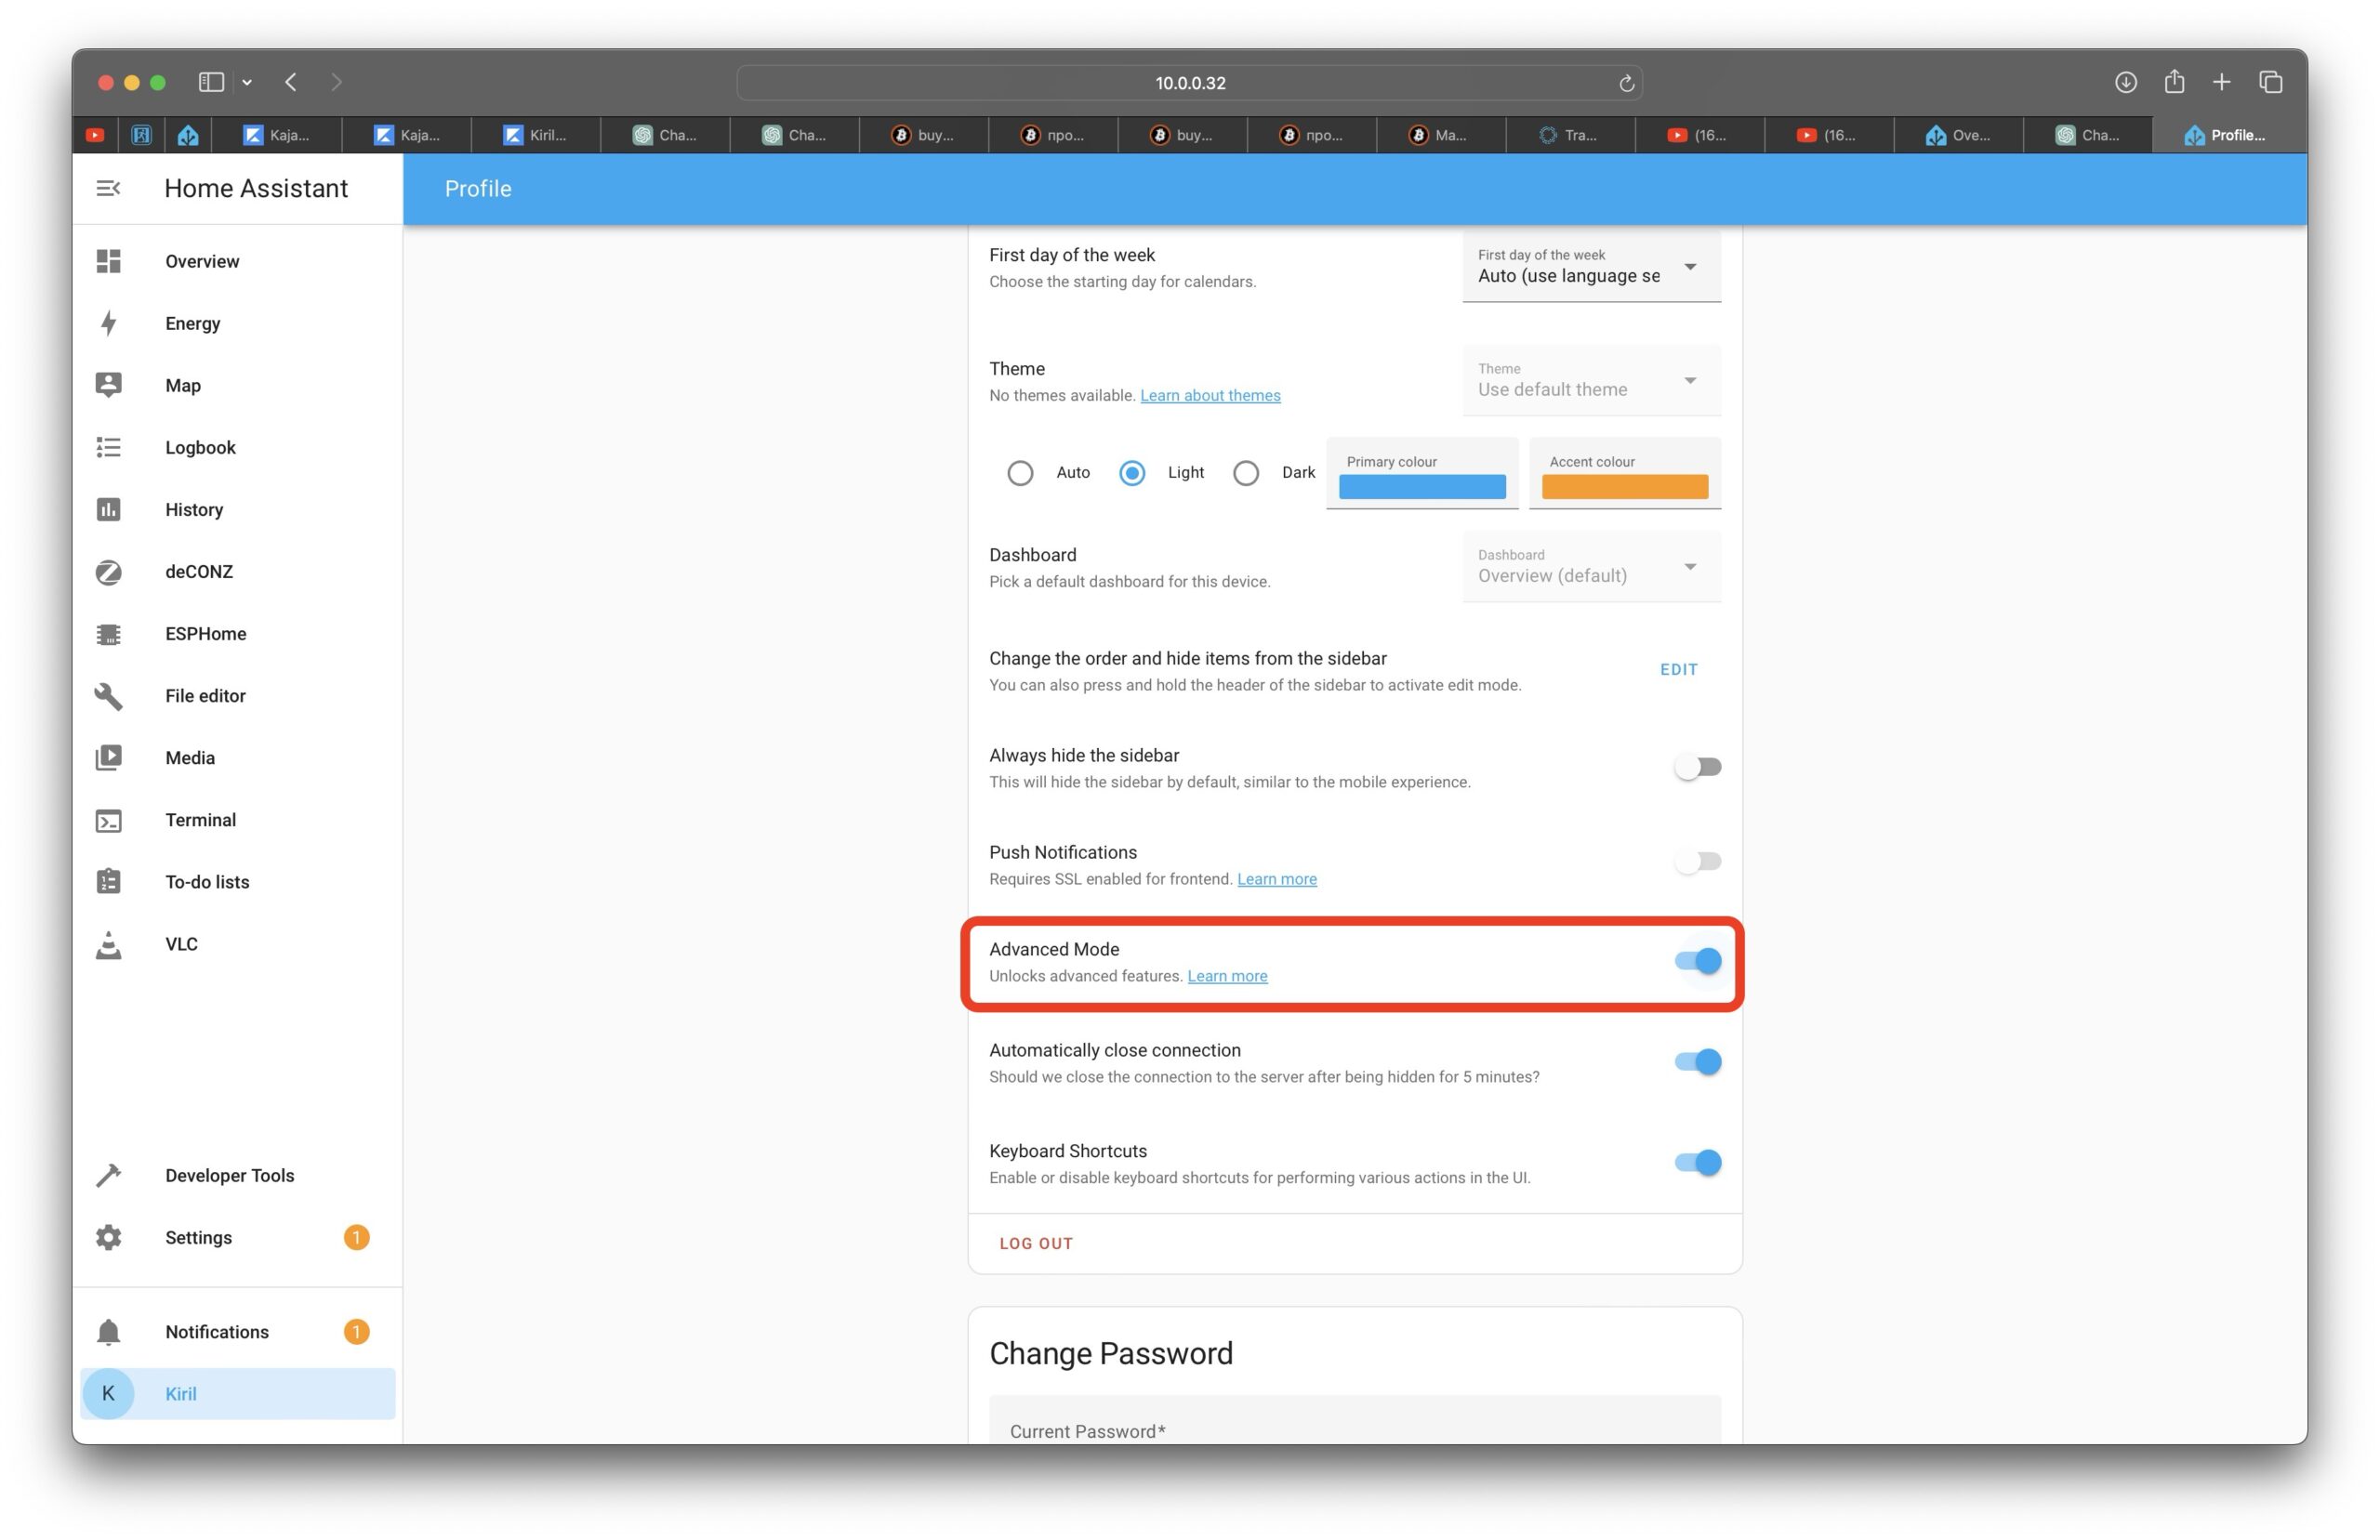
Enabling Advanced Mode
Before diving into add-ons, it’s essential to enable the advanced mode in Home Assistant. This mode unlocks additional add-ons in the store. To do this, navigate to your Home Assistant username, scroll down to find the advanced mode switch, and toggle it on.
Join My Free Home Assistant Webinar!
I’m excited to invite you to my upcoming free Home Assistant webinar, where we’ll delve into different installation types and uncover the easiest way to get started with Home Assistant on your PC in under 5 minutes.
In this webinar, you’ll learn:
- The pros and cons of different Home Assistant installation methods.
- Step-by-step guidance on setting up Home Assistant on your PC quickly and effortlessly.
- Tips and tricks for optimizing your Home Assistant experience based on your unique needs and preferences.
Don’t miss out on this opportunity to level up your Home Assistant knowledge and streamline your smart home setup! Secure your spot now by registering for the free webinar: https://automatelike.pro/webinar
Let’s start this journey together towards a smarter, more connected home environment!
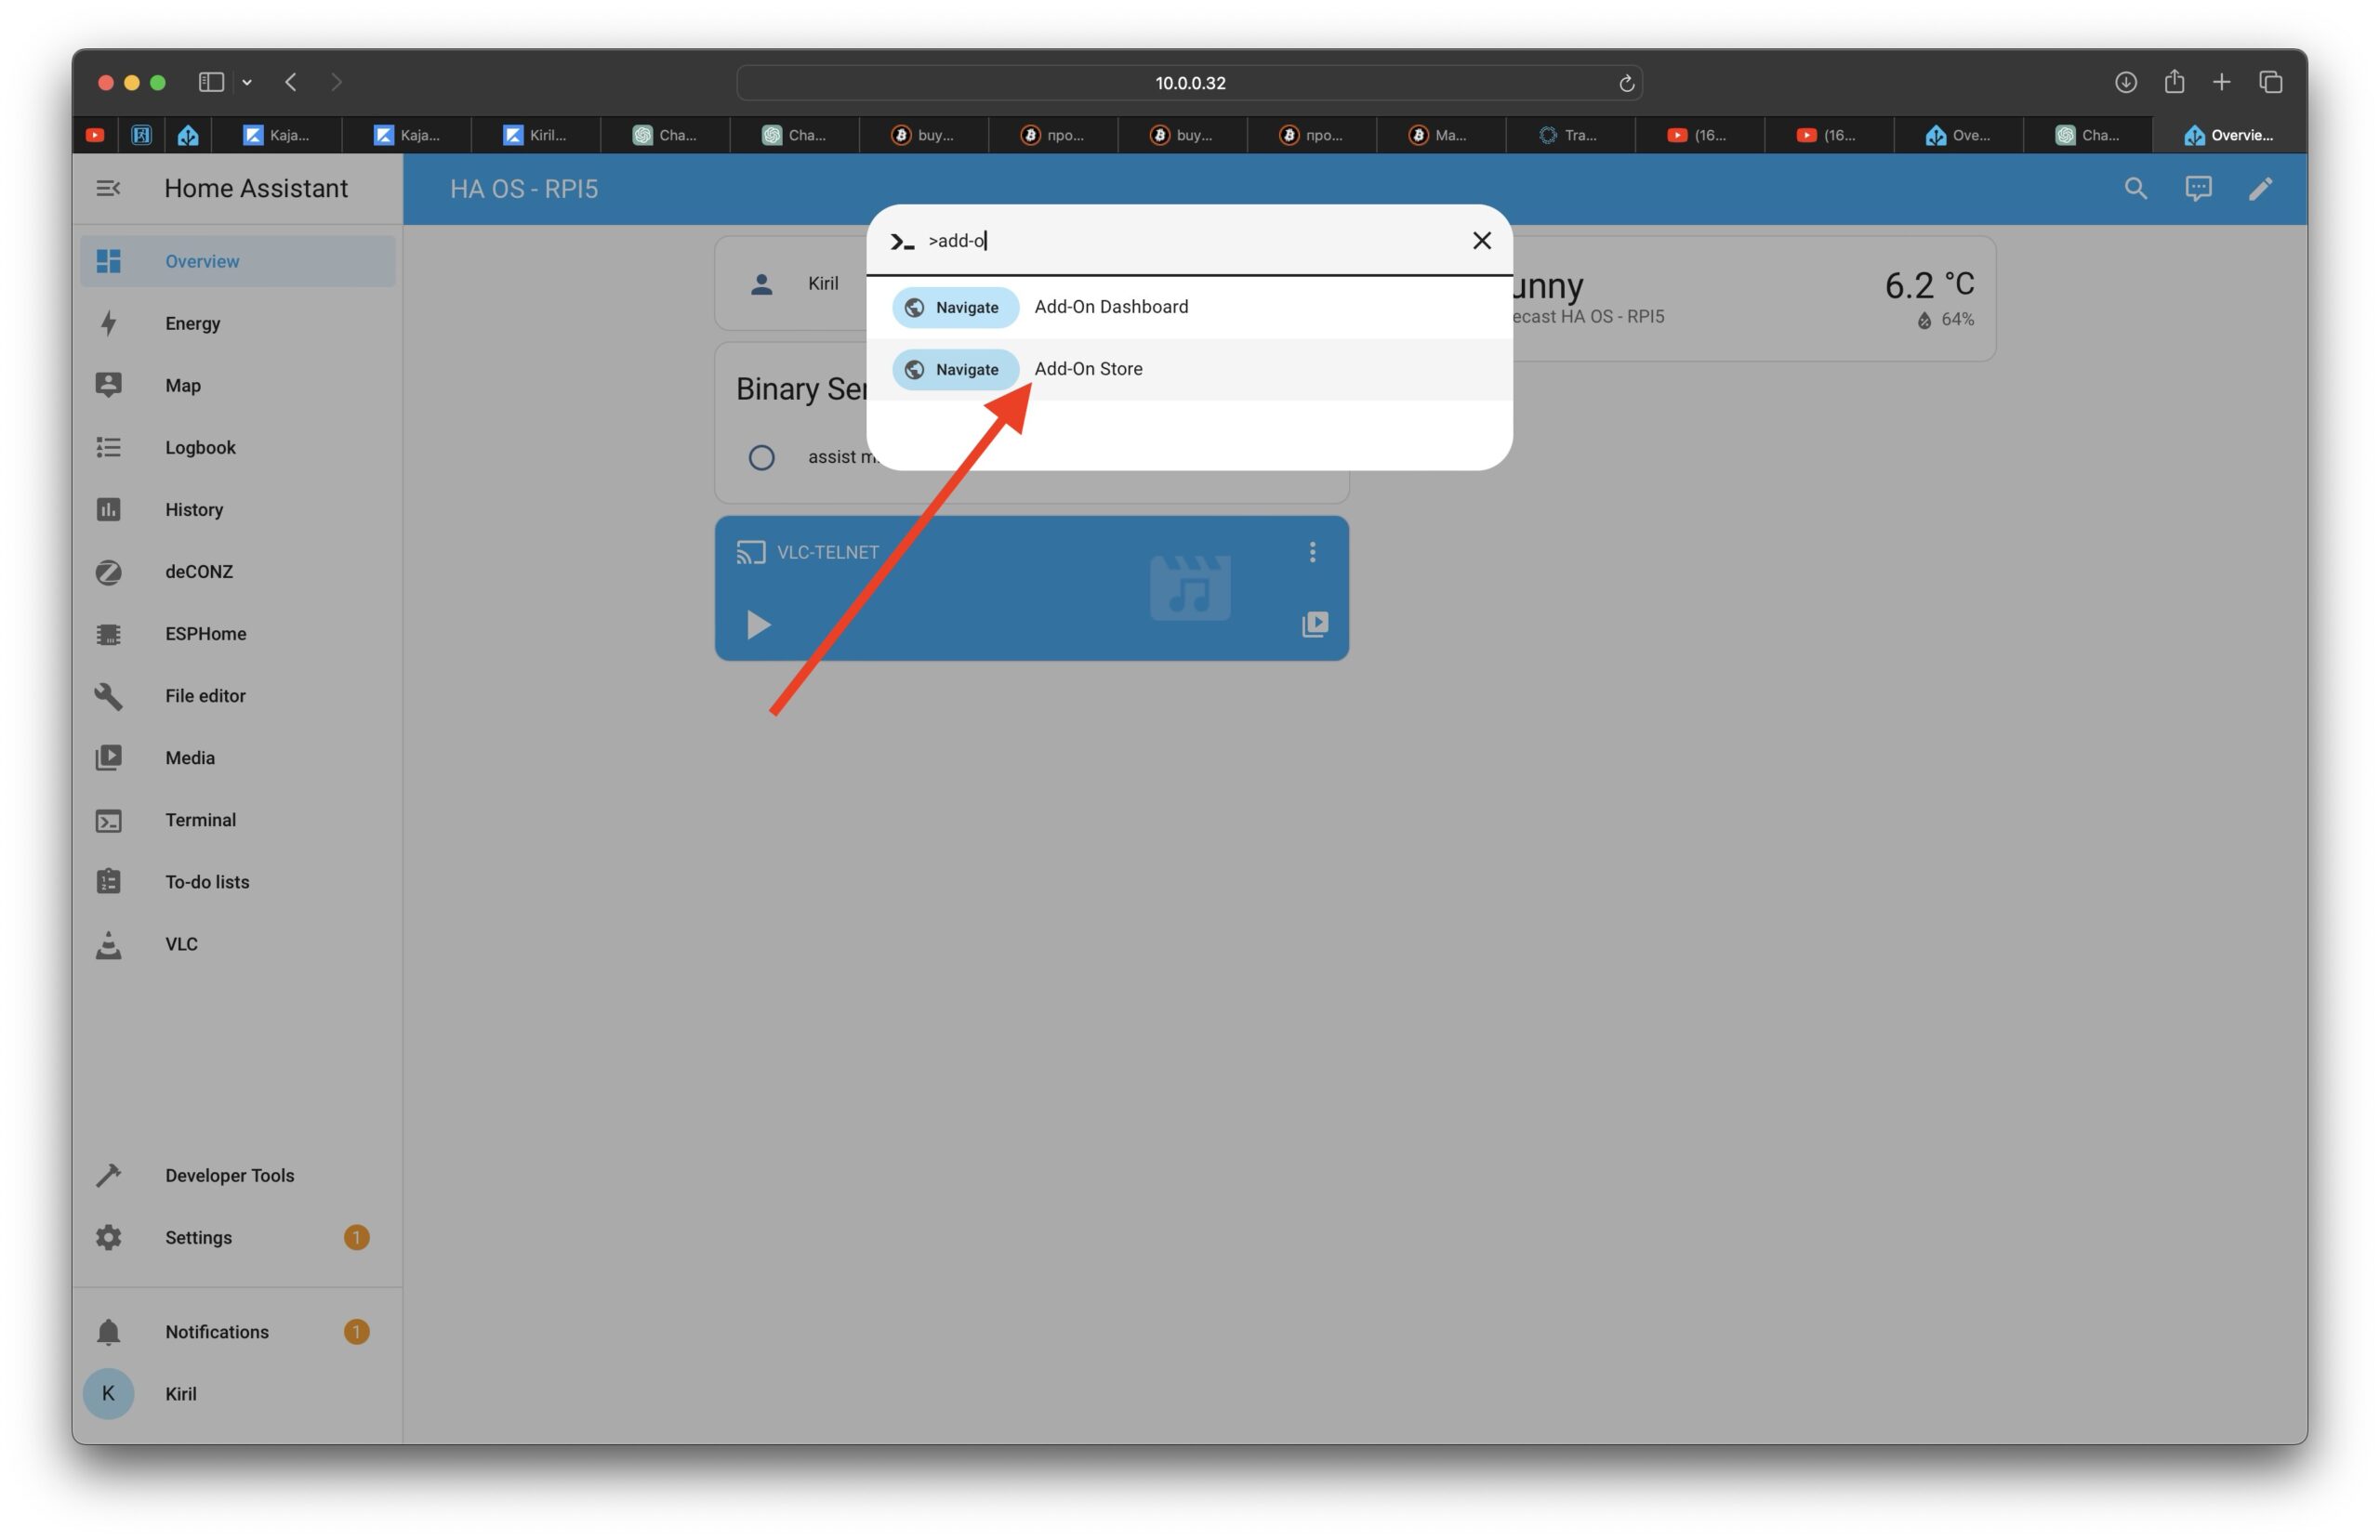
Accessing the Add-On Store:
Head to the add-on store by pressing the “c” button on your keyboard and selecting “Navigate Add-On Store.” Of course, you can go to the same menu using the Home Assistant settings.
Understanding the official Home Assistant Add-Ons Settings
Most add-ons come with settings options like enabling “Start on boot“, “Watchdog” for monitoring crashes, and “Auto update“. These settings ensure smooth operation and convenience. I recommend enabling these options.
Some add-ons have a fourth option “Show in sidebar” if enabled, a link for quick access to this add-on will appear in the left part (sidebar) of your Home Assistant.
Installing & Starting the First Add-On
Click on an Add-on of your choice and then hit the “Install” button. After the installation is completed:
- Check the “Documentation” tab where you can find more info about the add-on.
- You can also configure the add-on as per your preferences. If any configuration is needed you can add it in the “Configuration” tab of the add-on.
- After installation & configuration (which is sometimes optional), check if the add-on starts successfully by clicking on the “START” button on the Add-on.
Analyzing Resource Usage
It is a good idea to keep an eye on your system’s CPU, memory, and storage usage. You can find this information in the Settings > System > Storage & Settings > System > Hardware menus of Home Assistant. Monitor your system’s resource usage after each add-on installation. This includes CPU, memory, and storage. Ideally, you want to ensure that resource consumption remains manageable.
Smart Home Glossary: Expand Your Knowledge
Are you new to the world of smart home technology? Or perhaps you’re looking to brush up on your smart home terminology? Either way, I’ve got just the resource for you!
Download my Smart Home Glossary, a handy reference tool that provides clear and concise explanations of commonly used terms in the smart home ecosystem. Whether you’re curious about terms like “Z-Wave,” “IFTTT,” or “IoT,” this glossary has you covered.
By expanding your knowledge of smart home terminology, you’ll be better equipped to navigate discussions, troubleshoot issues, and make informed decisions about your smart home setup.
Click the link to download your free copy of the Smart Home Glossary today.
Conclusion
By systematically installing and testing Home Assistant add-ons, we gain valuable insights into their resource usage and functionality. This allows us to make informed decisions about add-on selection without overburdening their systems. Stay tuned for more insights and recommendations on optimizing your Home Assistant setup by signing up to my newsletter.