We are going to DYI TV Ambient Lighting with Raspberry Pi, Hyperion software and some LED Strips. Meaning there will be colors behind you TV that will be in sync to the currently displayed image, bringing watching TV experience to whole another level.
Table of Contents
Available TV Ambient Lighting options?
In general there are three options to achieve TV ambient lighting:
- To buy a TV that have this feature by default,
- To buy a kit that could be both expensive and not good,
- Or to do it yourself (DIY).
I will guide you step-by-step to Do It Yourself and I will start with the list of what is needed for this project.
What is needed to DIY TV Ambient Light?
These are the products with affiliate links to AliExpress and/or Amazon.
Of course you can buy these stuff from anywhere you wish, but if you do it from the links below you will support my work with no additional cost for you. On top I will be forever thankful!
Raspberry Pi & microSD card
A Raspberry Pi and microSD card (at least 4 gigabytes microSD card) are one of the main components here.
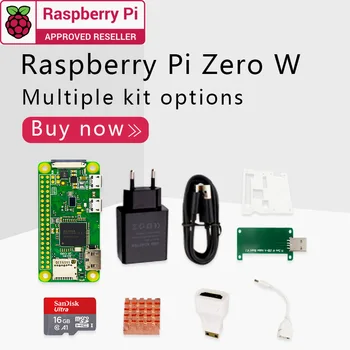
I’m using Raspberry PI Zero W as it is the cheapest & smallest Raspberry with Wi-Fi and it is perfect for running the Hyperion software for this TV Ambient Lighting DYI project. I also want to dedicate the RPI Zero W only for that and I will not use it for anything else.
You can buy a Raspberry Pi Zero W by click on the image below or by choose one of these links:
- Raspberry Pi Zero W kit 2 (AliExpress affiliate) 👉 LINK
- Raspberry Pi Zero W Official Starter Kit (Amazon affiliate) 👉 LINK
You could also use Raspberry pi 3 or 4 with the same success. These are more powerful devices and you could use them for more than just TV Ambient Lighting.
- Raspberry Pi 4 4GB Starter Kit with 32GB Micro SD Card (Amazon affiliate) 👉 https://amzn.to/3qaI5qN
Make sure that you get a good microSD card as it will be pity to setup everything and suddenly everything to die, because of SD card corruption. Not that this is not possible with good SD card, but the chances are smaller. Here are few examples:
- Kingston 16GB microSDHC Canvas Select Plus 100MB/s – https://amzn.to/397OgoW
- SanDisk 16GB Ultra microSDHC UHS-I Memory Card with Adapter – https://amzn.to/3hHg1IL
LED Strip
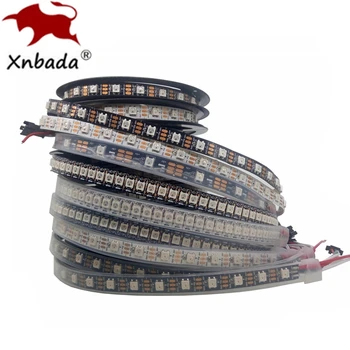
You will need LED strips. I’m using and I’m recommending the 5V WS2812 LED strips. Five meters of these should suffice. After I finish the installation on my 47” TV I have around 1.5 meters left, so this should be enough for bigger screen sizes as well.
I had only IP67 version of the LED Strip which was very hard to tape with double-sided adhesive tape and I used insulating tape (ugly, but effective). Thus I will recommend the 5m IP30 with 30 or 60 LEDs per meter as it will be easier to mount behind the TV, it is cheaper, and you don’t need any water proofing after all (I hope you didn’t mount your TV outdoors without any cover).
You can buy the LED Strip by click on the image below or by choose one of these links:
- LED Strip WS2812B Individually Addressable Smart RGB (AliExpress Affiliate) 👉 LINK
- Addressable LED Strip WS2812B RGB (Amazon Affiliate) 👉 LINK
Power Supply (PSU)
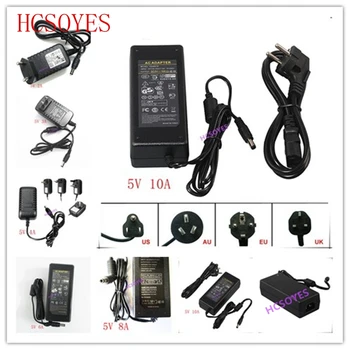
You will also need a power supply unit (PSU). I’m using a 5v 10A PSU which will be more than enough to power both the Raspberry Pi and the LED strip.
You can buy the Power Supply by click on the image below or by choose one of these links:
- LED Power Supply Adapter DC5V 10A US/EU/UK/AU PLUG (AliExpress Affiliate) 👉 LINK
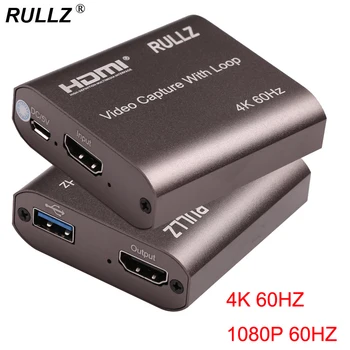
HDMI video capture device with loop
Next thing on the list is the HDMI video capture device with loop. This device is also very important for the whole project. Without it your LEDs will not be in sync with the image displayed on your TV. Or in other words you will be only able to make your LEDs to glow in static colors or in predefined effects. That will not be true TV ambient lighting that we want to achieve. So you better buy this.
You can buy the HDMI video capture device with Loop by click on the image below or by choose one of these links:
4K 60Hz HDMI Video Capture Card TV Loop 1080P, Color: USB 2.0 Loop (AliExpress Affiliate) 👉 LINK
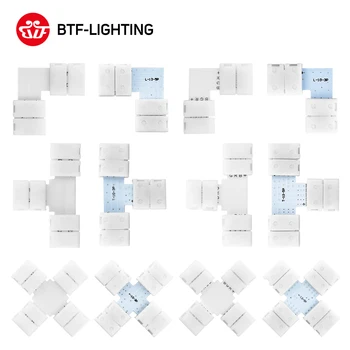
L-shaped connectors (optional)
The L-shaped connectors are useful, but optional. You can buy them or you can cut & solder the corners of your LED strip or just twist gently the angles as I finally did – the choice is yours.
These are the links if you want to buy them anyway:
3pin 10mm Width L Shape Solder-less Connector WS2812b 👉 LINK
Few minor things more
A microUSB cable that you are ready to cut is also needed. This is going to power the Raspberry Pi.
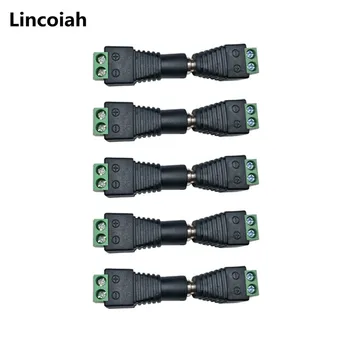
One of these Female DC connectors is needed as well.
10pcs Female DC connector 2.1*5.5mm (AliExpress affiliate) 👉 LINK
1 or 2 HDMI cables are also needed.
What is Hyperion?
We need a software that can be configured with several parameters that are specific for every TV Ambient Lighting installation (as number of LEDs that are used, LED strip type, etc). A software that will understand what commands to sent to your LED strip to match the TV image. This is where Hyperion jumps in as the brain of our operation.
In simple words Hyperion is an open source ambient light software primarily used on a Raspberry Pi.
With that being said let’s catch one Hyperion and make it work!
Burn HyperBian (Hyperion) on microSD card
It is time to begin. Let’s start with burning the HyperBian to a microSD card. And HyperBian is just a Raspberry Pi OS lite with Hyperion software preinstalled exactly what we need for our TV Ambient Light with Raspberry Pi project.
Instructions:
- Download and Install the Balena Etcher tool – LINK
- Download and extract the HyperBian image – LINK
- Put your microSD card in card reader and plug in to your computer,
- Select image (this is the HyperBian image from the second bullet), Select Drive (that is your microSD card) and Flash!
- Wait for the Balena Etcher to finish.

- Unplug/Plug again your microSD card and create one file named wpa_supplicant.conf in the root of your SD card,
The wpa_supplicant.conf file should have the following content:
ctrl_interface=DIR=/var/run/wpa_supplicant GROUP=netdev
update_config=1
country=GB

  network={
    ssid="YOUR_SSID"
    psk="YOUR_PASSWORD"
    key_mgmt=WPA-PSK
}- Replace GB with your Country Code (use the 2 digits iso),
- Replace YOUR_SSID with the WiFi name that you wish your Raspberry Pi to connect to,
- Replace YOUR_PASSWORD with the password of your WiFi,
- Save the file and eject the microSD card and plug it in the Raspberry Pi
How to configure Hyperion?
We need to configure the Hyperion software a bit before attaching the HDMI capturing device and move everything to the TV for our TV Ambient Lighting on Raspberry Pi project.
Instructions:
- Power the Raspberry Pi with the SD card that contain the HyperBian image inside,
- After several minutes open the http://YOUR_RASPBERRY_IP:8090 in a new browser or tab. Where YOUR_RASPBERRY_IP can be found in your router web interface,
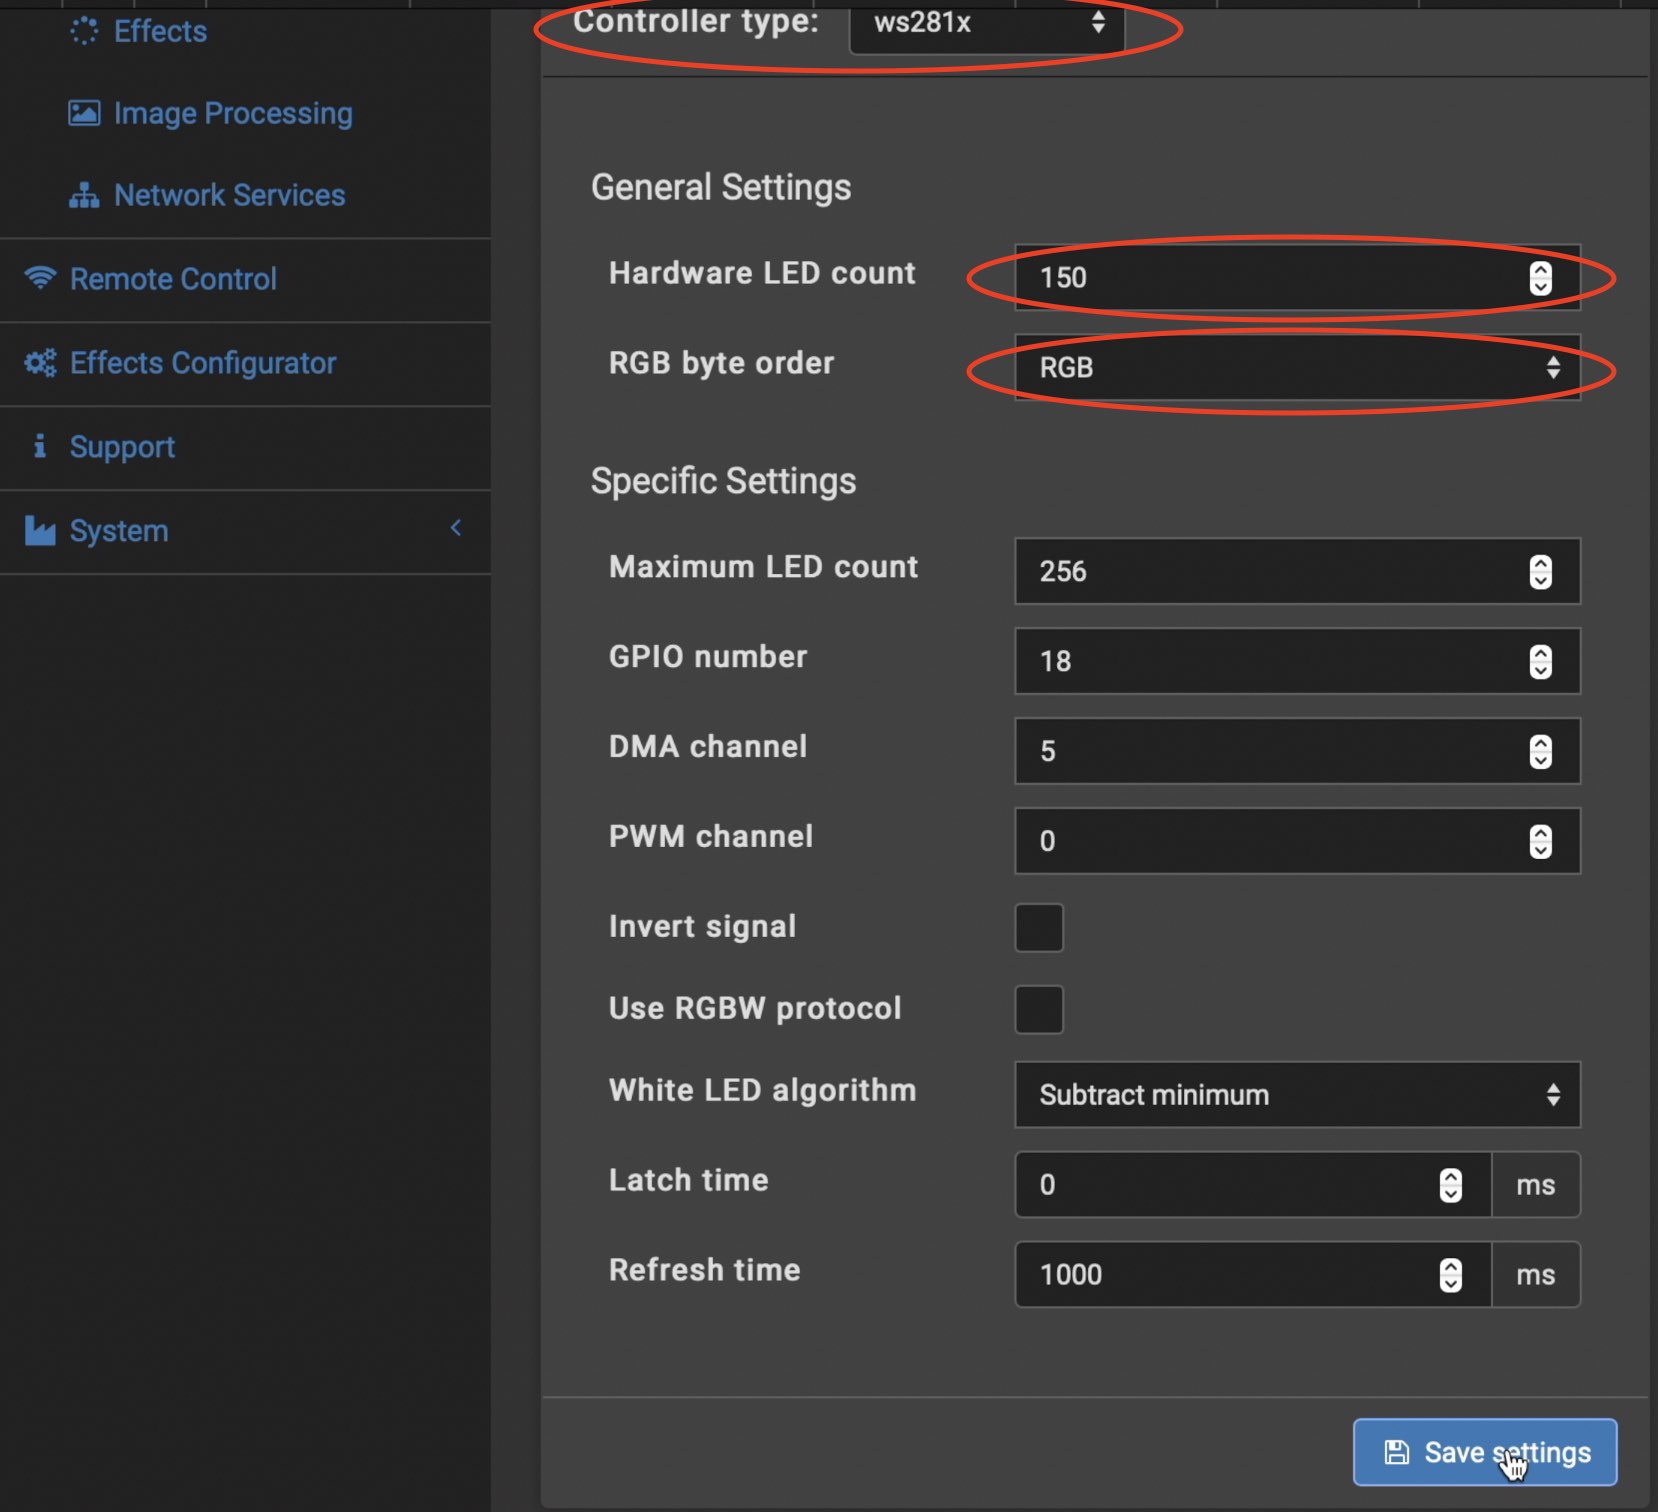
- In Hyperion Dashboard go to Configuration > LED Hardware > Choose ws281x as Controller Type,
- Change the Hardware LED count to the total number of LEDs that you will install on your TV,
- If you have the same LED strips as mine (you bought it from my links), select GRB as RGB byte order. Different LED strips have different byte order, so you have to find the right one for yours, otherwise the colors will not match. For example when there is red image on your TV will see green color on the LED strip.
- Save the changes.
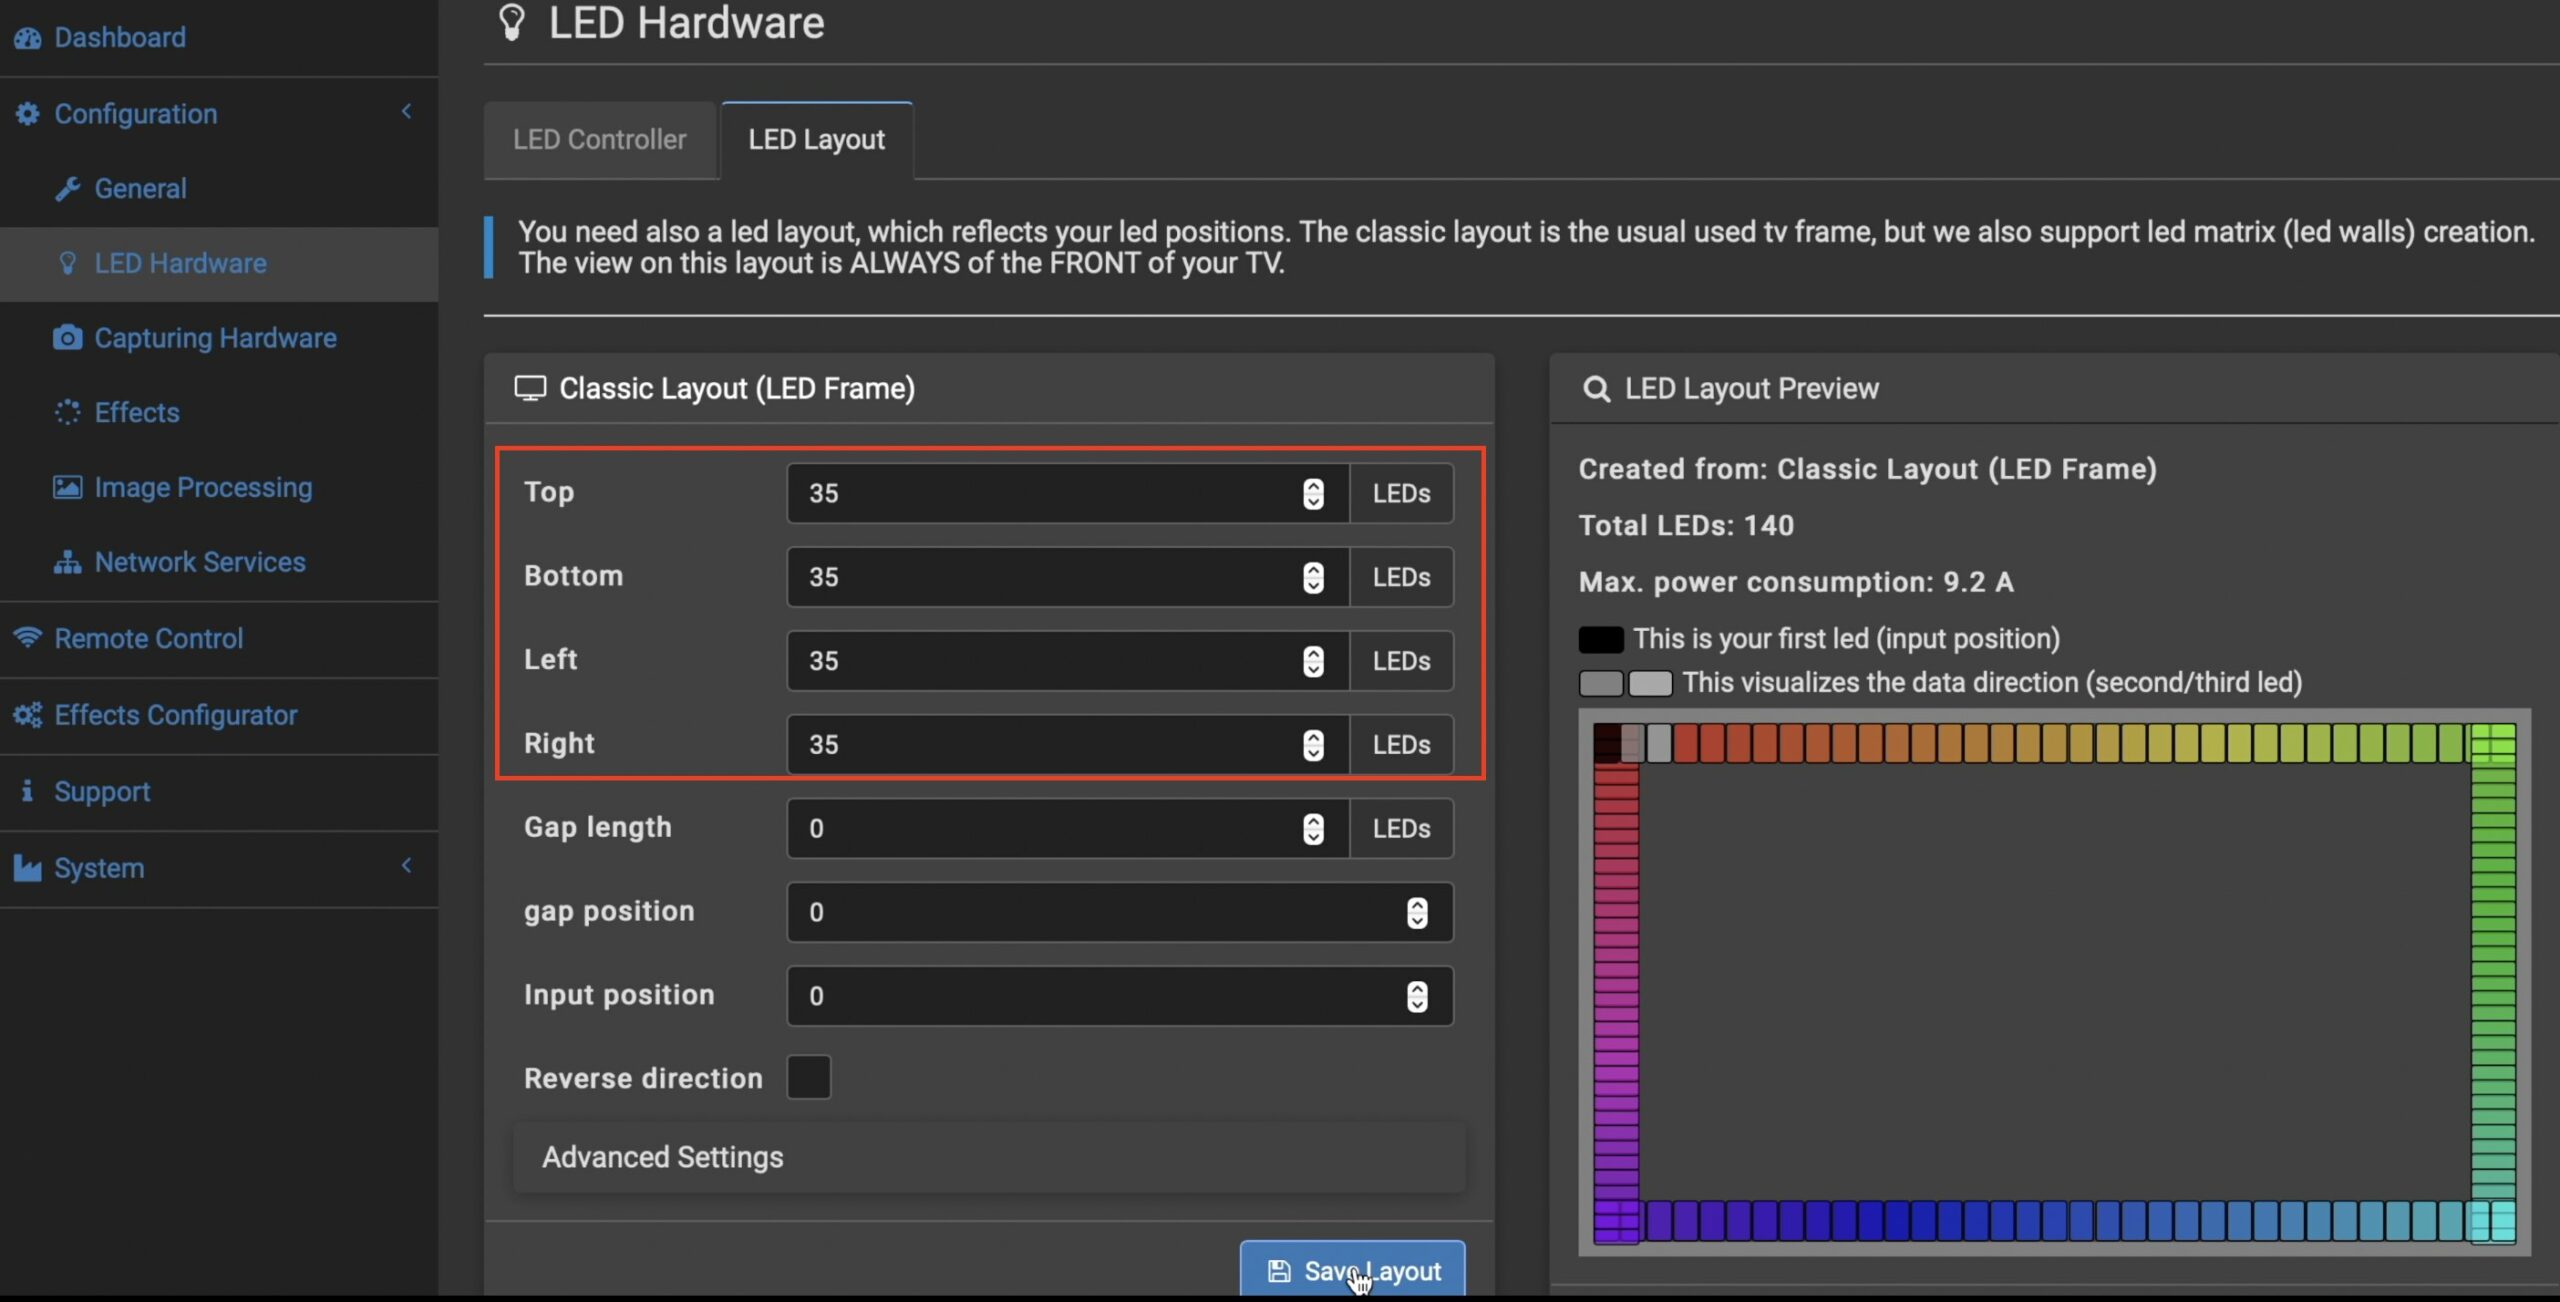
- At the same place but on the next tab LED layout – enter the number of Top, Bottom, Left and Right LEDs that you are going to install. As example: for my 47″ TV I used 31 for the top, 33 for the bottom and 18 for the left & right sides. Don’t forget to save the changes.
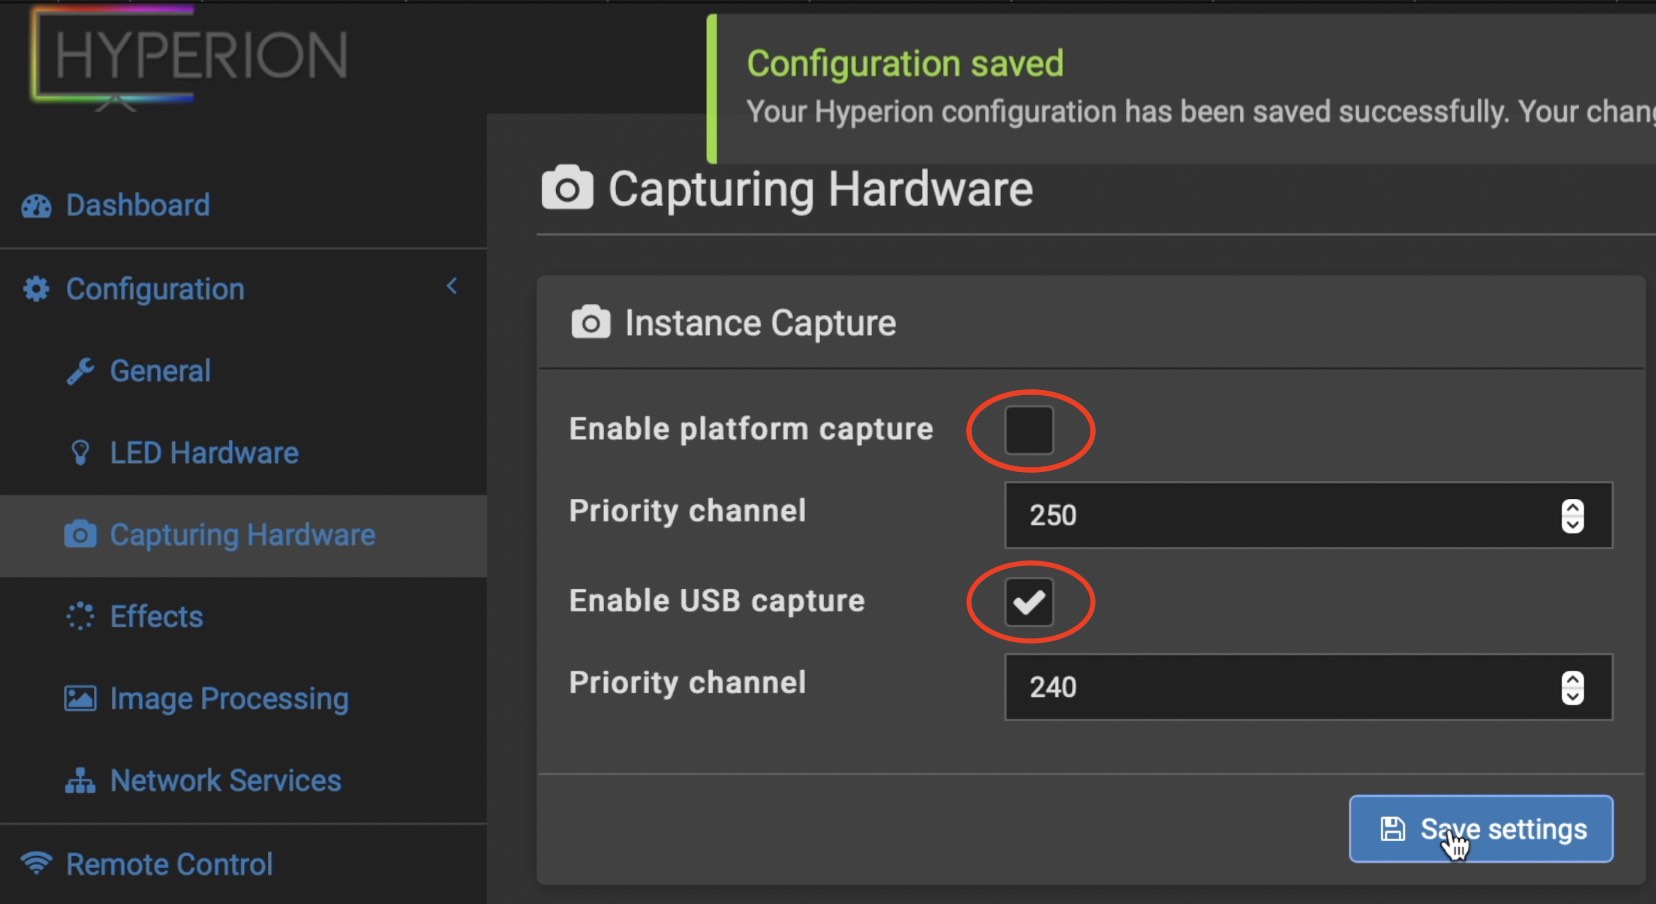
- Go to Configuration > Capturing Hardware – select Enable USB capture and deselect Enable platform capture option if it is deselected and save the changes.
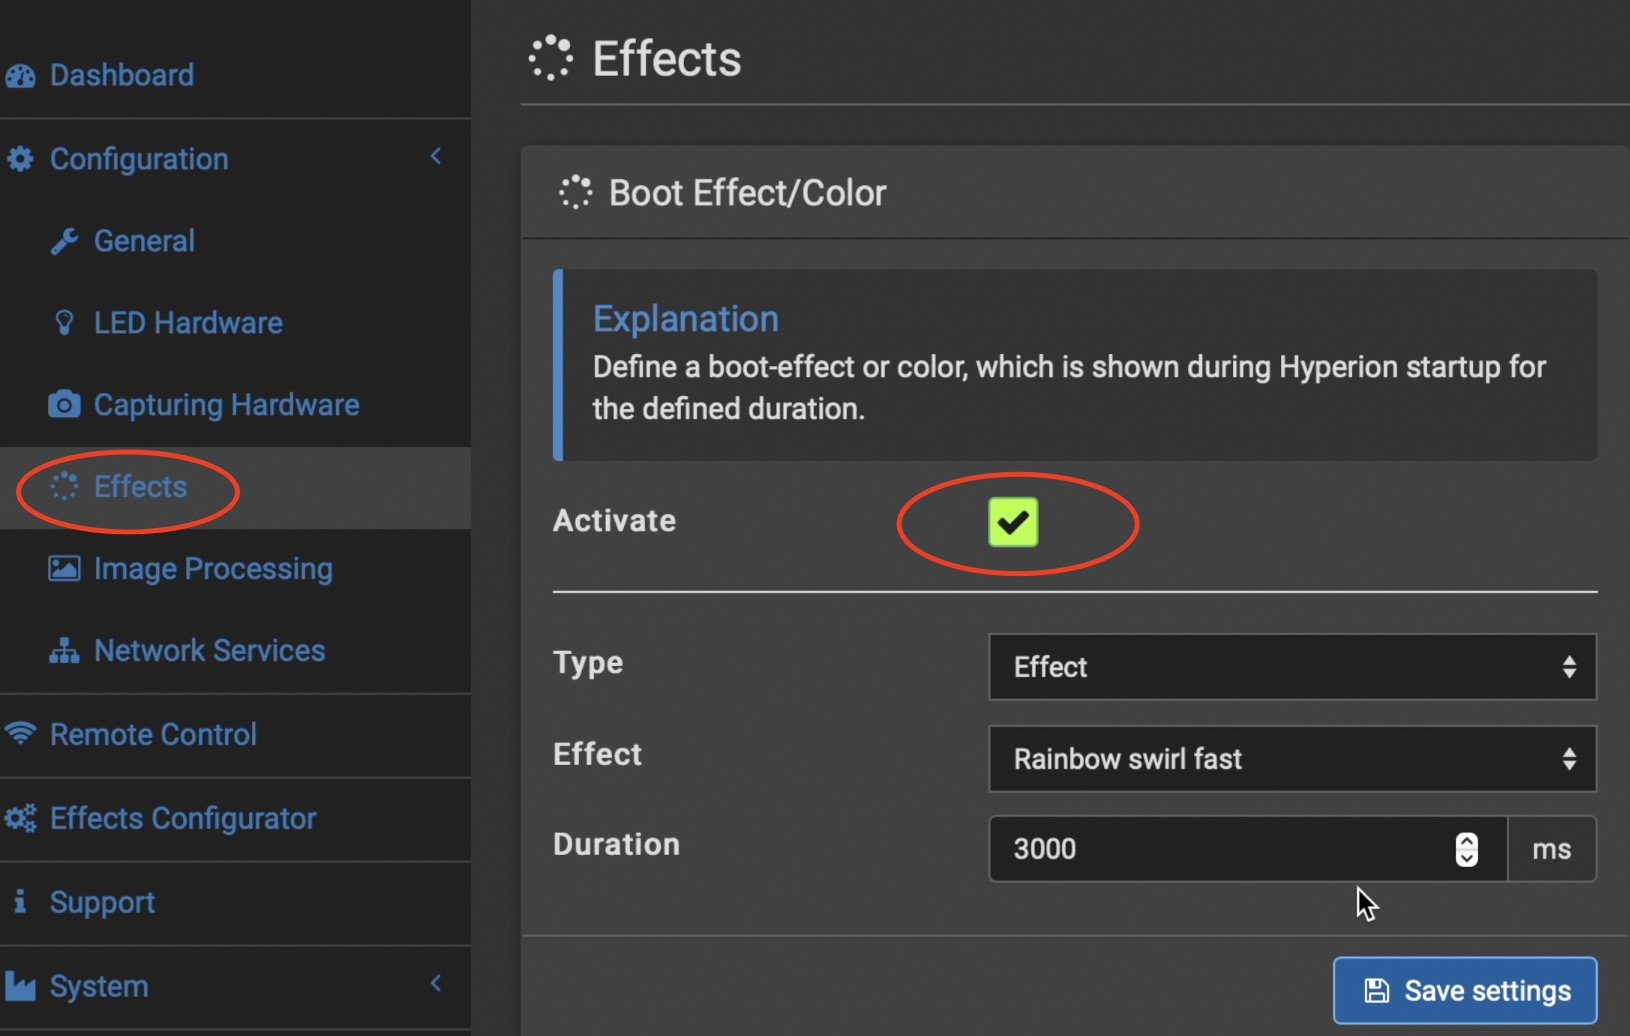
- Under Configuration > Effects menu activate any boot effect/color that you wish and set a reasonable duration in order the effect to be clearly visible when Hyperion start. The goal here is to use the boot effect to check that the LEDs are working correctly when we test the connections in the next section.
How to connect the Raspberry Pi & LED to the power?
Now let’s connect the Raspberry Pi and the LED strip to the power supply and power it up. Just to check that everything is fine.
Instructions:
- Cut the microUSB cable, so it is no more than 20-30cm long.

- Usually there will be 4 wires, but you only need the black (ground) and red (power) wires, so cut the rest.
- Grab the LED strip and be careful here! The LED strip have two ends (exactly as the Bavarian sausage). One is input and the other is output – you need the input. The input is usually located at the outer end of the LED roll (easier to reach) and it has a male connector.
- Connect the red cable from the microUSB cable to the red cable coming from the LED strip.
- Connect the black cable from the microUSB cable to the white(or black) cable coming from the LED strip.
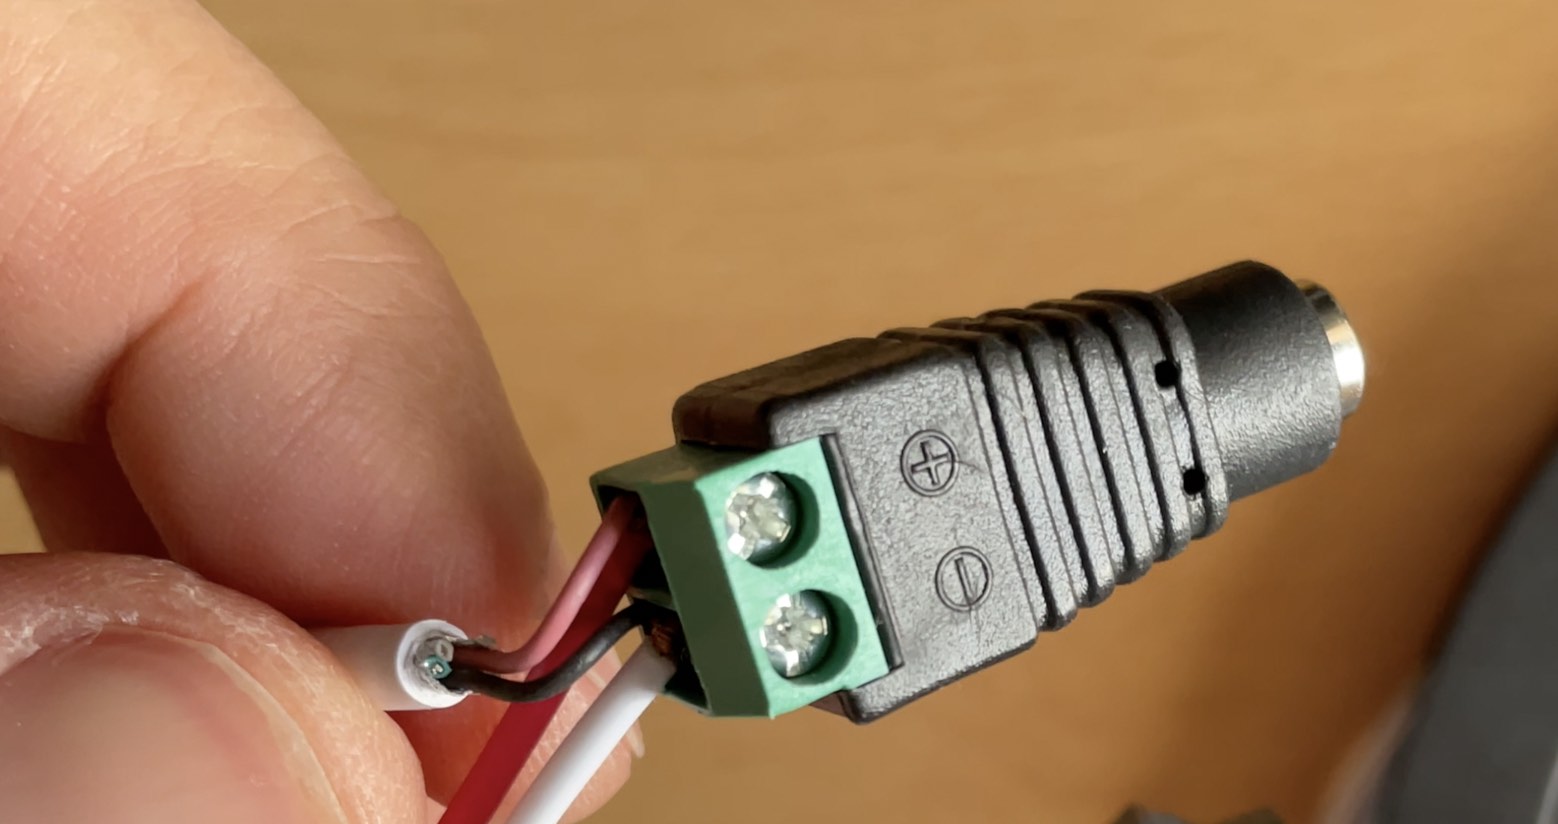
- Connect everything (4 wires in total) to the Female DC connector. Be careful here as well on top of the DC connector you can see little + and – signs. Connect the red wires form Raspberry Pi and LED strip to the + and the other wires to the –
- Grab one male to female jumper/dupont wire (or use whatever wire you have) and connect the green cable (data) that is coming from the LED strip input to the GPIO 18 on the Raspberry Pi.
- Plug the Female DC connector to the power supply and plug the socket in the power outlet to power everything. If you connect everything correctly – nothing will explode 💣(don’t worry nothing is so dangerous here) and you should see the startup effect after Hyperion start (it can take a minute or two).
Attach the LED strip on the TV
If you reached this point and everything until now is working (you saw the boot effect when Hyperion start) – congratulations 👏. You are just a few minor steps away from your perfect TV Ambient Lighting on Raspberry PI.
As a motivating gift I will give you the subscribe link to my newsletter. You will receive articles like this one on a weekly basis and you can opt-out anytime if you don’t like it.
Now back to work!
Now is the best time to attach the LED strip on the back of your TV, use the L-shaped connectors or cut & solder or twist the angles (as I did).

Attach everything & Test the TV Ambient Lighting
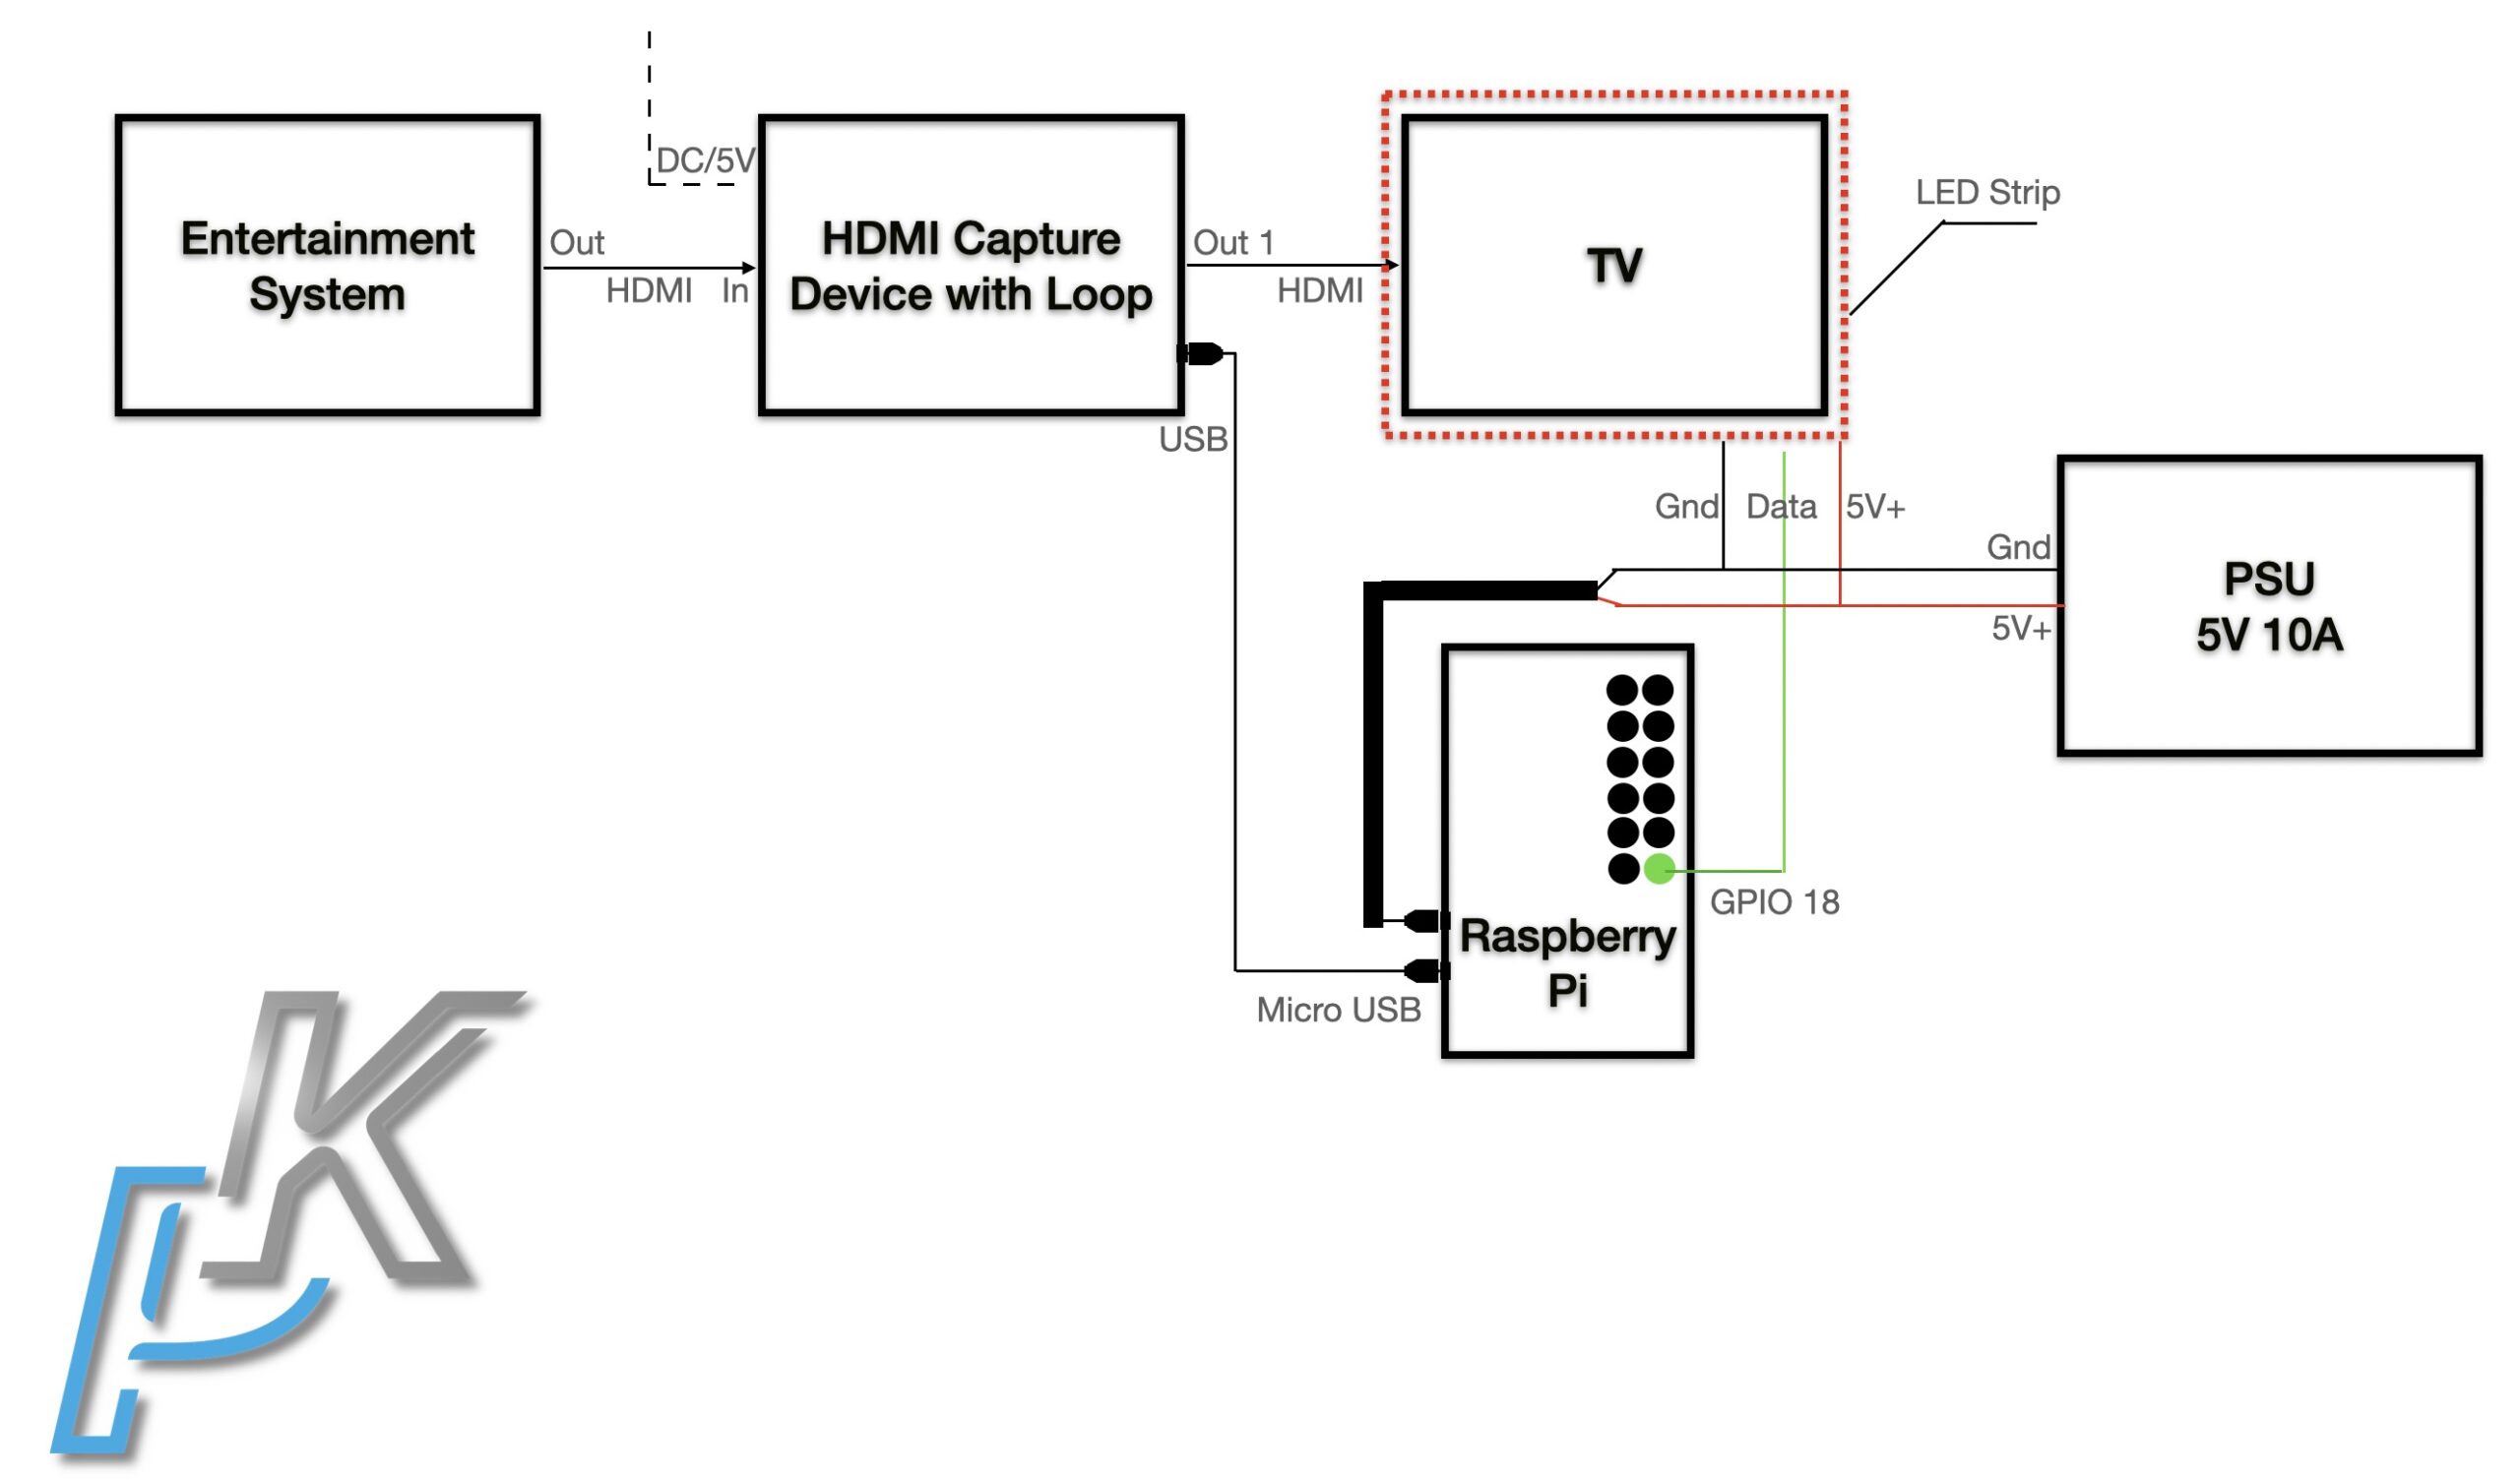
You can now attach everything and check if it is working. This is what you need to do.
- Attach the output of your Entertainment system (Apple TV, Playstation, Xbox, Chromecast, AVR, etc) to the HDMI Capture device with loop input using HDMI cable.
- Optionally power the HDMI capture device with loop with 5V DC (in my case this was not needed) It seems that it get power from elsewhere, go figure.
- Connect the HDMI output of the HDMI capture device to your TV input using HDMI cable,
- Connect the USB (Type A) of the HDMI capture device to the USB (micro USB) of the Raspberry Pi Zero W
- Connect the Data cable that is coming from the LED strip to the GPIO 18 of the Raspberry Pi (this is the 6th PIN counted from the top). Exactly as described in How to connect the Raspberry Pi & LED to the power? section
- Connect the PSU to the LED strip and Raspberry Pi exactly as described in How to connect the Raspberry Pi & LED to the power? section
- Power everything and you should have the best TV ambient lighting that you have ever seen coming from a Raspberry Pi, some LED strips, HDMI capture device, Hyperion software and smashed like button for the Youtube algorithm.
This is the next and final checkpoint 🤣 If you are here, you will receive another reward 🎁 An invite link for my Discord server.
Join there and shout out in the #general channel -> Hyperion Owned!

What if it is not working?
I received several reports here as well as in my YT channel and in my Discord. That this whole setup stopped working after a software update of Hyperion. The main reason for this is that you have to run Hyperion as root now. I guess this affect the new installations as well.
Anyways here is a (untested by me) solution coming from Hyperion forum, lightning-guy77 and Paul from the comments below – https://hyperion-project.org/forum/index.php?thread/12195-hyperbian-not-working-after-upgrade-to-alpha-10/&postID=41740#post41740
Kindly let me know if it is working!
Enjoy.
Hi,
Great guide! you make it seem so easy i am going to try it. I have a piehole already but it is away from the tv so i’ll buy 1 more for this.
My wife is wondering if this set-up allows for the usual use of the led stripe (for example just blue, just red or off) or it is only for the ambient mode. Thank you!
Hi Paris, it is not hard at all – you will do it without problems. Tell your wife that everything is possible! You can use ambient mode, you can use predefined effects and you can create your own effects with any of the LEDs any color you wish. Good luck with the project and let me know the result.
Awesome guide and I’m waiting on a part to finish it.
Question is, I’ve got a Pi 3 with just one micro USB port for power. There’s not another for connecting the HDMI capture device. The capture device with loop came with a USB A-A cable as well. Am I correct in assuming this will still work if I use the A-A cable to connect to one of the Pi’s regular USB ports?
I tried that….. the lights just freak out. Never stable.
Does this work with HDR content?
I’m not sure as I don’t have HDR TV to test. I can suggest to check the Hyperion forum or just test by yourself. Either way it would be great if you share the result 🙂
Do you know what level hdmi that supports? HDMI 2 or 2.1 so 4K and ps5 support.
4K at 30Hz is supported by the model I’m using (black color). There is slightly more expensive version that (coffee color) that supports 4K at 60Hz
Awesome guide man. I’m just waiting for a few final parts to arrive.
The only thing you didn’t list is the cable that connects the green data cable to the Pi.
Is that just a male-female connector cable?
I’m struggling to track one down.
Thanks again for the guide.
Yes, male to female cable. These cables are also called dupont or jumper wires. They are available in AliExpress and other similar stores in bundles of 40-12pcs, but you need only one of them and you can buy such bundle for future use (bacuse they are cheap) or you can use any other cable the you have and solder it. Good luck.
hey, i bought the recommended hdmi capture loop from the affiliate link. it works when i use my computer as input. but when i change to devices like my apple tv, the am i light doesn’t seem to work. i am using 5v 10A power supply and only about 3m of 60LED/m strip which should be more than enough. got any advice?
I’m not sure what could be the reason. I’m using Apple TV 4 and it works flawlessly. Try with some 3rd device (not your PC nor your Apple TV) to see what will happen. Good luck
Hello Kiril, thanks for your verry detailed instruction! Easy to follow. But I have the same problem as Jon-Taylor. The HDMI Video capture is not recognised on the Raspberry Pi Zero W. When I use the command slush in a SSH terminal it does no show. The device works on a MacBook Pro.
What can be wrong. The Pi is fully updated, and I see that my version Hyperion is different from yours.
What could be wrong, something to do with driver in Buster?
Thanks!
Hello,
the same problem: The HDMI Video capture is not recognised on the Raspberry Pi Zero!
Are there any solutions?
Most probably, your problem is the HDMI video capture. Some of them just don’t work as expected try to order the one linked in the article.
Nice guide…..haven’t been able to get it to work…… I used a totally different guide on my big screen and 2 years later still working great. Not sure why your flavor isn’t working but it’s not.
What you are saying is strange, as mine are working perfectly fine as well as many more…
Hey Kiril.
I used your guide a while ago and it’s fantastic so thanks.
I’ve been through five sets of LEDs now and I thought they were burning out or faulty, or there was an issue with my setup.
As it happens, Hyperbian have updated the software and now the lights won’t work unless you run Hyperion as Root user.
This means anyone using your guide now will find it doesn’t work.
The solution is straightforward enough and listed here – https://hyperion-project.org/forum/index.php?thread/12195-hyperbian-not-working-after-upgrade-to-alpha-10/
I know a lot of people use your guide so thought you might want to add this in to it to avoid the frustration and cost that I’ve had.
Keep up the good work.
Thank you very much Paul, I will try to update the article these days. Cheers
Hi, lightning-guy77 and Paul’s fix works. However, I’m now stuck because I cannot activate the USB capture, because Hyperion is not discovering the HDMI splitter. I “activate” the USB capture but on “Device discovered” it says “No capture device discovered”.
Any advice?
Hello Kiril, thank you very much for your tutorial. I would like to install this ambilight.
The issue is that my GPIO are already used by an enocean pi card = do you know how I can make the set-up without using GPIO ?
I thank you in advance for your help
Can you confirm the Rullz HDMI capture device works with HDCP content?
The none of commands listed here are working for me: https://hyperion-project.org/forum/index.php?thread/12195-hyperbian-not-working-after-upgrade-to-alpha-10/
Command: sudo systemctl disable –now hyperion(d)@pi
Result: -bash: syntax error near unexpected token `(‘
Command: sudo systemctl enable –now hyperion(d)@root
Result: -bash: syntax error near unexpected token `(‘
Command: sudo systemctl enable –now hyperion@root
Result: sudo: unable to resolve host HyperBian.hsd1.tx.comcast.net: Name or service not known
Command: sudo nano /etc/systemd/system/[email protected]
Result: sudo: unable to resolve host HyperBian.hsd1.tx.comcast.net: Name or service not known
Hyperion Server:
– Build: (HEAD detached at 2.0.14) (LordGrey-c9a1c88/b109703-1669566414)
– Build time: Nov 27 2022 18:59:24
– Git Remote: https://github.com/hyperion-project/hyperion.ng
– Version: 2.0.14
– UI Lang: en (BrowserLang: en-US)
– UI Access: advanced
– Avail Screen Cap.: dispmanx,framebuffer,qt
– Avail Video Cap.: v4l2
– Avail Services: boblight,cec,effectengine,forwarder,flatbuffer,protobuffer,mDNS,SSDP,borderdetection
– Config path: /root/.hyperion
– Database: read/write
Hyperion Server OS:
– Distribution: HyperBian GNU/Linux 11 (bullseye)
– Architecture: arm
– CPU Model: ARMv6-compatible processor rev 7 (v6l)
– CPU Type: Raspberry Pi Zero W Rev 1.1
– CPU Revision: 9000c1
– CPU Hardware: BCM2835
– Kernel: linux (5.15.76+ (WS: 32))
– Root/Admin: true
– Qt Version: 5.15.2
– Python Version: 3.9.2
– Browser: Mozilla/5.0 (X11; Linux x86_64) AppleWebKit/537.36 (KHTML, like Gecko) Chrome/107.0.0.0 Safari/537.36
Is CEC passing through this video capture with loop adapter?