
RoomSense IQ have a lot of similarities with Aqara FP2. It lacks zones support and it is not that pretty looking, but it have more embedded sensors and respectively provides more options for automations.
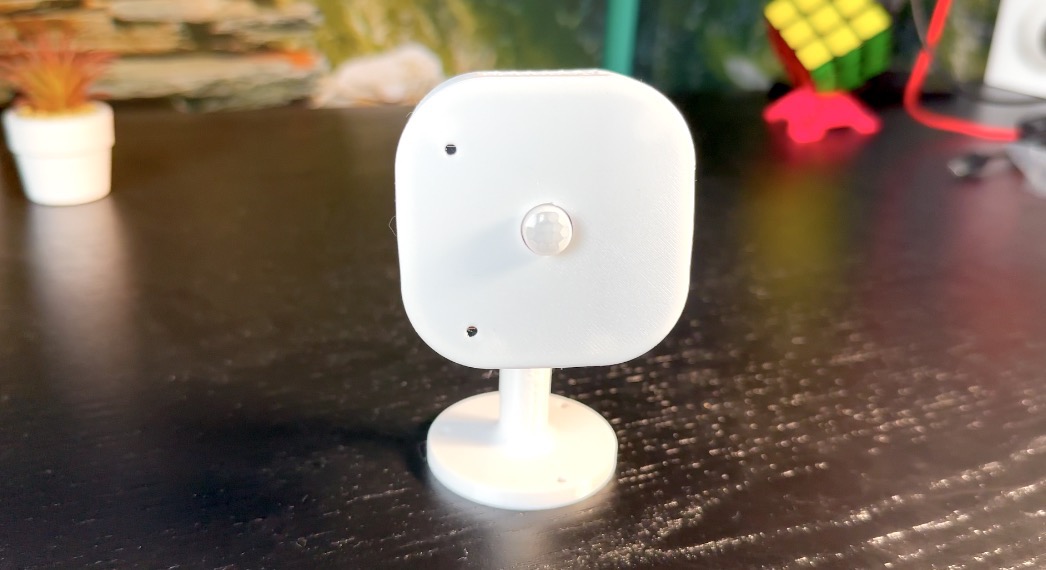
Here is how the RoomSense IQ sensor is looking on my desk, but not the appearance is the important here, let me explain.
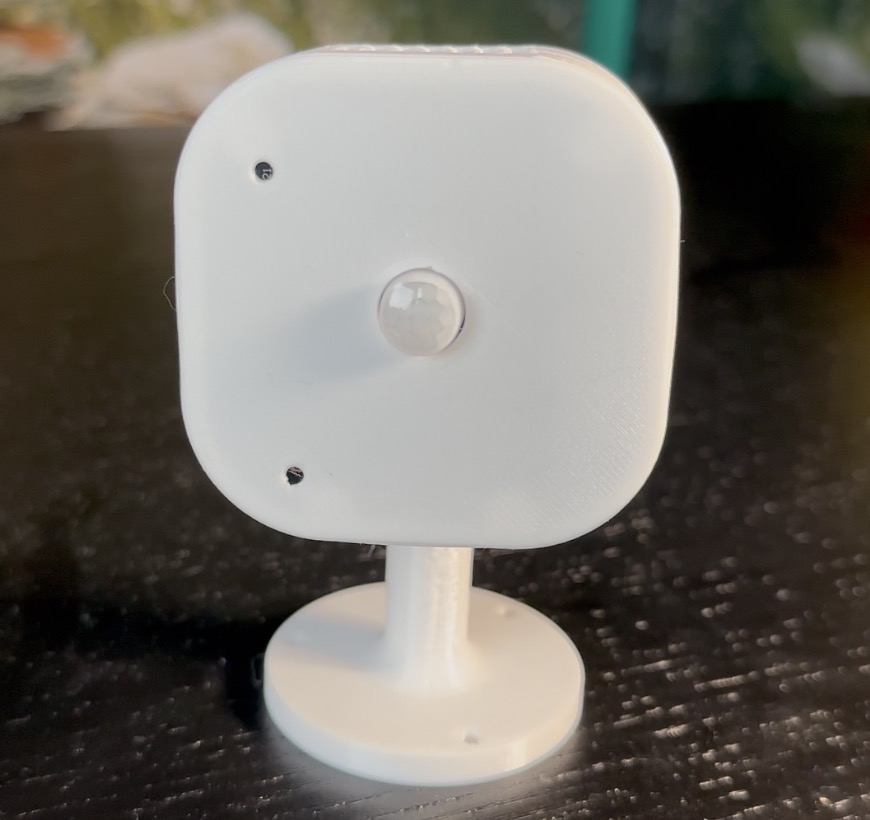
Table of Contents
RoomSense IQ – Release Date
Another similarity between RoomSense IQ and Aqara FP2 (My FP2 article – Should You Buy Aqara FP2?) is that both devices are currently unavailable.
I’m not quite sure why is that for the Aqara FP2, but for the RoomSense IQ the reason is simple – the device is not publicly released yet.
The RoomSense IQ release date is just around the corner and if you want to be informed you must sign up for the updates from the official website – https://www.roomsenselabs.com and you will not miss the big Launch-Day-Only Special Deal.
Is it worth it?
But is RoomSense IQ device worth it?
I will say that the pre-sale RoomSense IQ unit that I got have some bad packaging, actually it had no package at all and it’s case feels like it is printed on a very cheap not leveled 3D printer by a kid in 4th grade who just get started with 3D printing. Most probably, all of that is because I got an early prototype.
It is far from the sleek Aqara FP2 design for example, but I hope it will be also far from it in terms of the price.
What is inside?
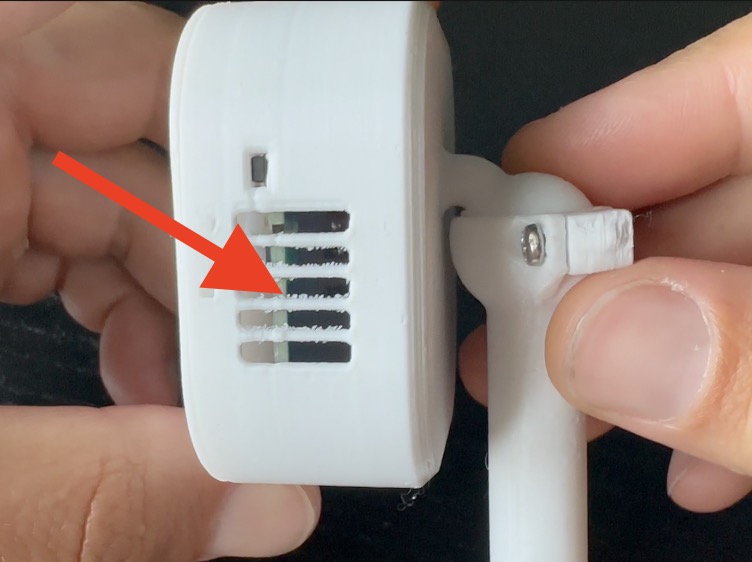
Anyways, I ignored the case in hope that the diamond is just not polished yet and I dug into what is inside. And here the things looked promising:
This RoomSense IQ device is like a wet dream of the Smart Home enthusiast as it contains 5 different sensors into one. These sensors are:
- mmWave Radar coming from the well known LD2410 module,
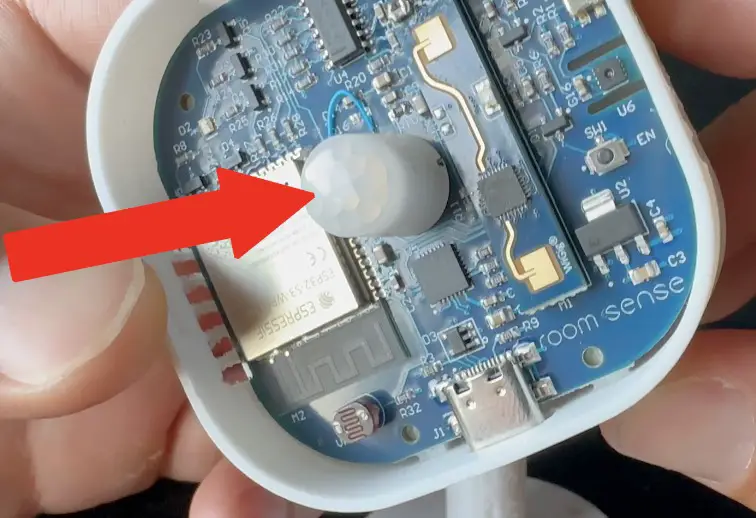
- Also muRata PIR Sensor that can be used to filter out non-human activities and reduce false alarms,
- Next is 3 and 4, because this sensor combine Temperature & Humidity readings provided by SHT30 sensor and attention here they isolated the temperature sensor to mitigate any interference.
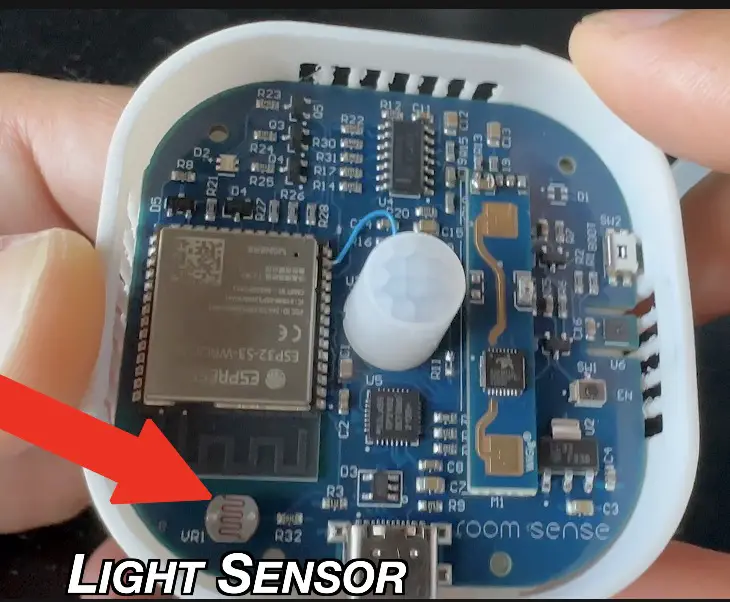
- Finally, a light sensor.
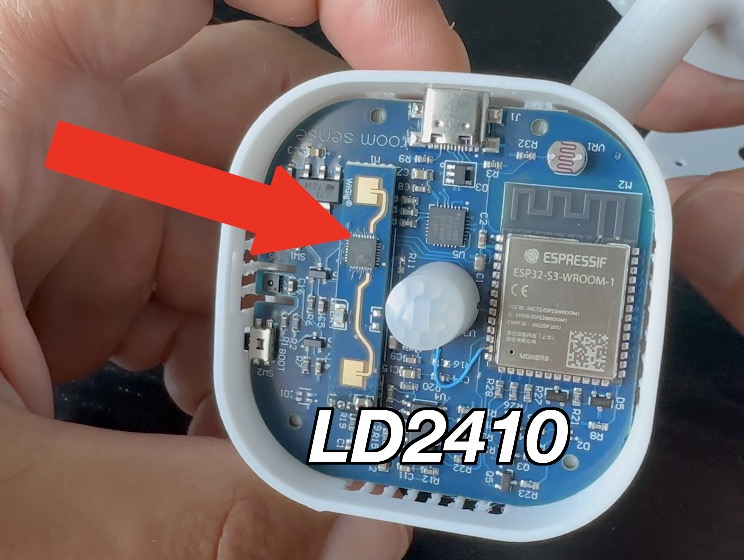

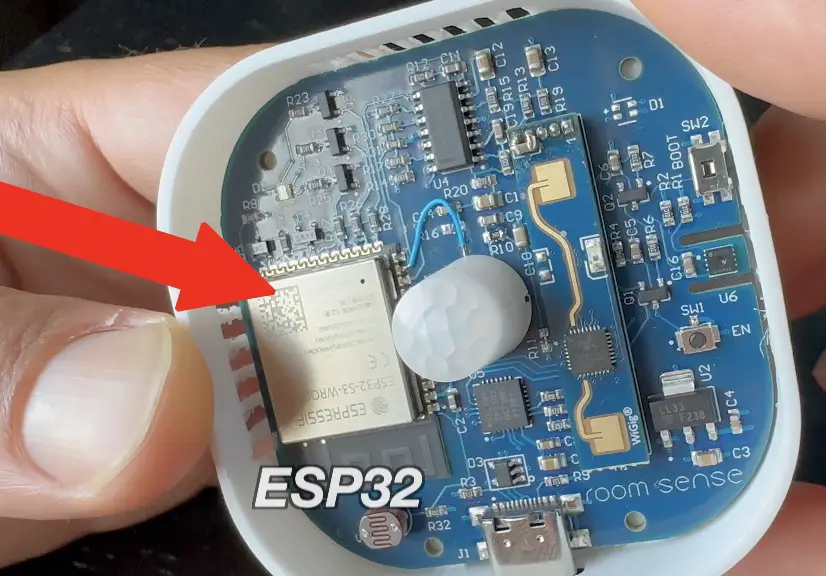
RoomSense IQ is powered by an ESP32 S3 MCU, with built-in Bluetooth & WiFi connectivity.
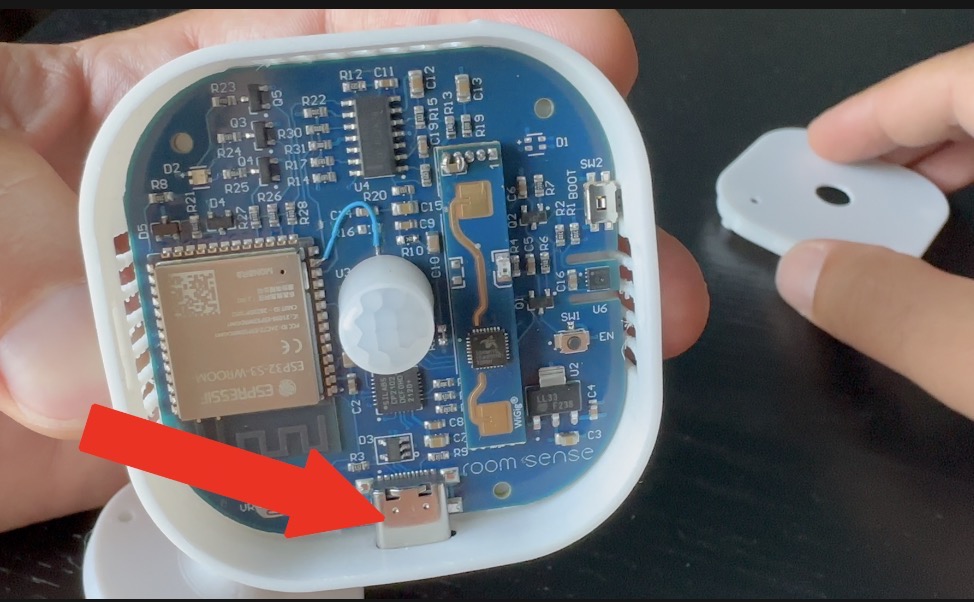
And the device also includes an USB-C port for power and serial communications.
The best part is that it all works with Home Assistant, so you can do endless useful home automations just by having this one device.
RoomSense IQ and Home Assistant – is it possible?
Having said the above, I decided to do an initial Home Assistant integration testing. I just powered the device using the included USB-C cable and I opened my Home Assistant integrations page in hope the device will be auto-discovered. And voila I had RoomSense IQ working with every sensor represented as a separate Home Assistant entity and with values that are updating live…
No, no, no this is too much even for a wet dream!
Actually not everything was working right away. So I had two choices in front of me:
- First, to try the ready to use pre flashed Raspberry Pi 4 image that they send me which have Home Assistant installed and everything pre-configured for the RoomSense IQ
- Second, to manually add everything to my Home Assistant environment.
I decided to use the latter and here I’m still trying to figure it out. Kidding of course, if you have some basic Home Assistant experience the installation is not difficult at all.
RoomSense IQ communicate with Home Assistant over MQTT protocol, so you need to have MQTT Broker installed. The easiest way is to use the Mosquito Broker add-on that is available as one-click install in the Home Assistant add-on store.
You can use this My Home Assistant link below to install the Mosquito


What if you don’t have Add-on Store
A quick side note here If you don’t have add-on store on your Home Assistant at all, then please register for my upcoming Home Assistant webinar and you will figure it all out.
On top it is free – https://automatelike.pro/webinar
RoomSense IQ and Home Assistant – actual integration
These are the steps that I did to actually integrate RoomSense IQ with Home Assistant:
- After I have the MQTT Broker up & running I have to power the RoomSense IQ.
- Then I had to join to the WiFi network that the device automatically creates.
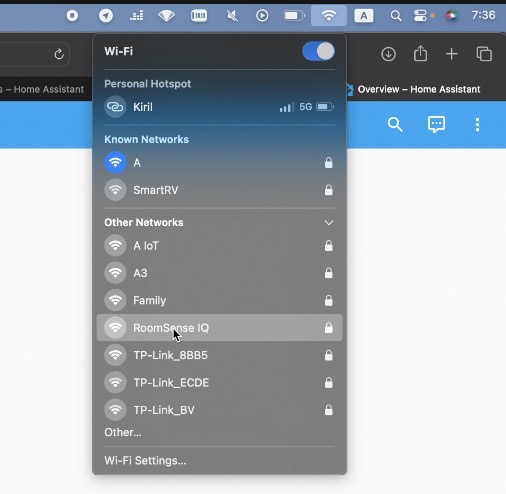
- The WiFI network name is RoomSense IQ and the default password is password.
- After that I opened the 192.168.255.1 address in my browser, so I can configure the device.
- Inside the provided web interface, I had to do only two things:
- To enter my home WiFi credentials.
- To enter my MQTT Broker credentials.
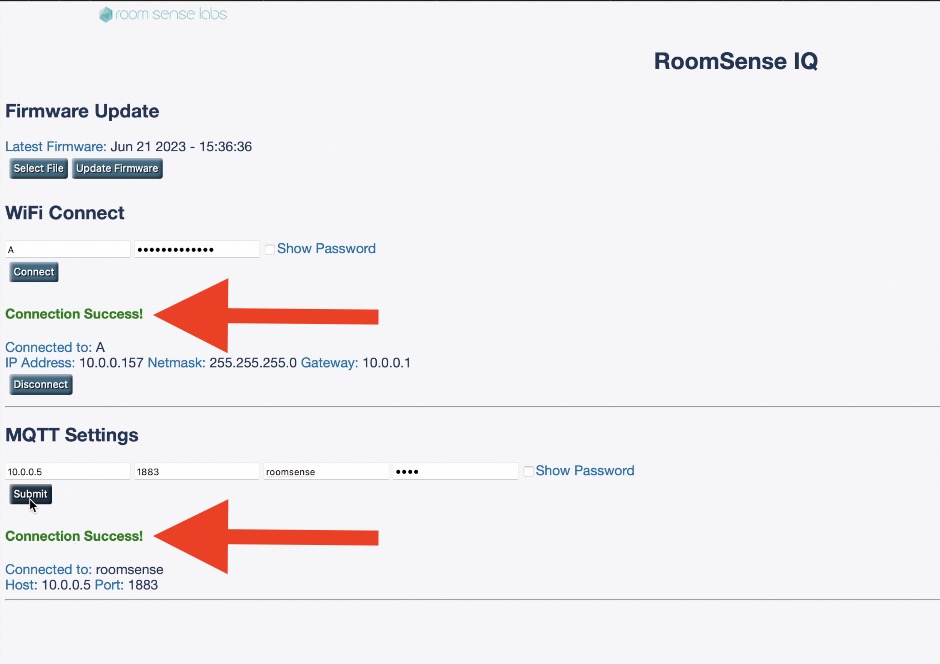
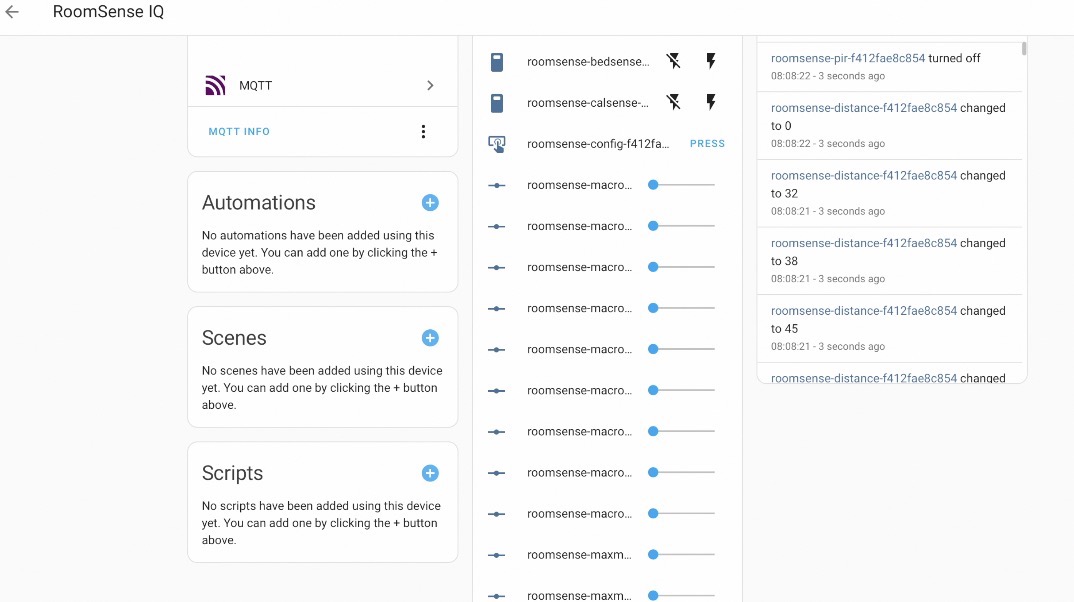
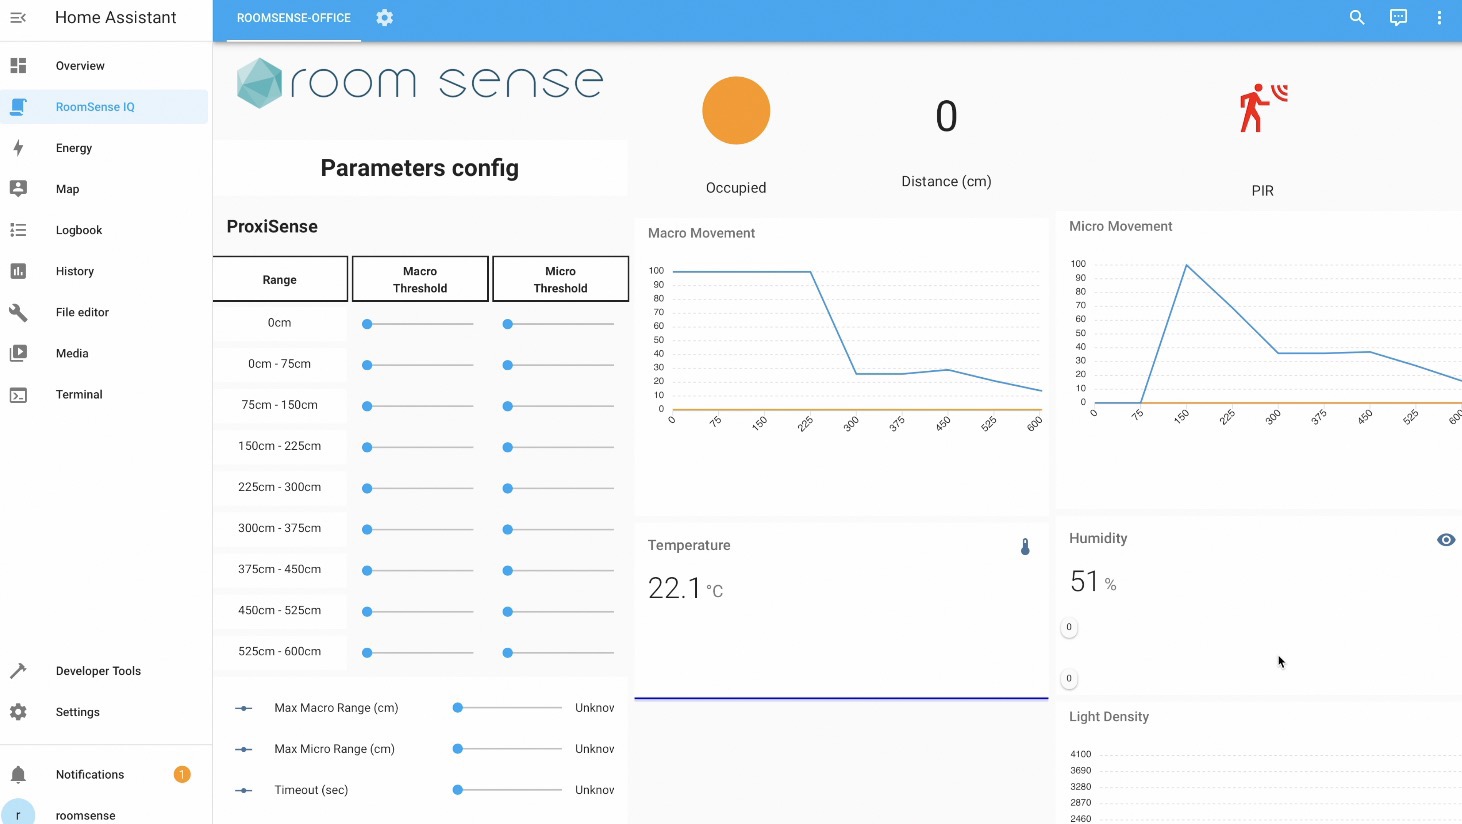
Once the device is connected to both my home wireless network and to my MQTT broker I can go to the Home Assistant integrations section and this time I can see that I have 50 different entities.
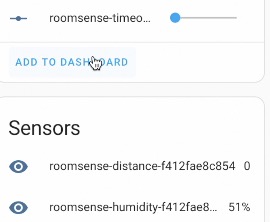
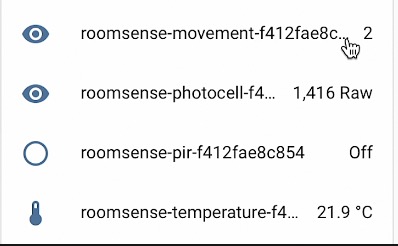
- I can check them all and they are now really updating live. I can add them to my Home Assistant dashboard and I can start making home automations based on the changes in the occupancy, temperature, humidity, and light density in the room where RoomSense IQ is located.
Along with the sensors there are some controls represented as sliders in Home Assistant that helps you fine tune your device.
And if all of this is looking kind of boring or too crowded for you, you can try the open source project in GitHub created specially for this. It is a Home Assistant dashboard that have all you need in a more ordered way.
RoomSense IQ and Home Assistant Dashboard
To get that, you need to execute 8 steps well described the in GitHub repo – https://github.com/roomsense/homeassistant-dashboard
In general:
- From terminal add-on you have to copy & paste some commands,
- To add some YAML code in your Home Assistant configuration.yaml file,
- To enable advanced mode,
- To add some resources,
- and to restart your Home Assistant.
Afterwards the RoomSense IQ Home Assistant Dashboard will be visible and ready to be used.
Will it Fly?
Overall, despite the bad packaging and low quality case of the RoomSense IQ I actually enjoyed the device and I think it have a potential.
In my humble opinion the success or failure of this product entirely depends of the initial sale price that its creators will put. If the price is right, it will fly. Otherwise, it will sink and the people will prefer Aqara FP2 or some other DIY alternatives.
Honestly, I don’t know the RoomSense IQ price yet, and I guess we all have to subscribe for their list, so we can be among the first that will know it.
Until then, download my Smart Home Glossary for free from my other website and tell me what do you think about RoomSense IQ?
Will you get it or will you skip it? Let me know in the comments below.
Thanks for reading I’m Kiril and I will see you in the next one. Bye
Its not possible to sign up for the launch at the roomsense site. They messed up their certificate (ERR_SSL_VERSION_OR_CIPHER_MISMATCH)
Hmm, I will write them with the error. Thanks Ronald
Hi Ronald, thanks for the feedback. I reached out to our web host provider and they have assured me that the problem has been solved, and it should not occur again. Please go ahead and try again, and kindly inform me how it goes. Thank you.
Overall, the device works really well for presence detection. The case didn’t get any better with the production release, seems like a crappy 3d print. The other major annoyance from my perspective is that you can’t disable the devices wifi network, so… if you have 4 of these, they are all broadcasting and causing interference with your existing wifi. Not ideal.