Table of Contents
Amazon Rekognition in Home Assistant
I’m going to add Amazon Rekognition in Home Assistant. This will enable my Smart Home with powerful visual analysis service that can detects objects in images and videos.
At the end of this article you will be able to send images from your cameras added in Home Assistant to the Amazon Rekognition service.
As a result you will receive back information what exactly is detected on these images.
Then you can use Home Assistant automation to send emails or telegram messages or any other notification service that you might have – if the camera image contains persons for example.
And It doesn’t matter what brand or model your camera is. You can use it as long as the camera is already working with your Home Assistant.
Good and Bad news
I also have some good and bad news for you:
- The bad news is that using Amazon Rekognition in Home Assistant can cost you around $1 per 1000 processed images.
- But the good news is that you can get started at no cost. The Free Tier lasts 12 months and allows you to analyze 5,000 images per month.
Now, let’s go.
Installing the Amazon Rekognition in Home Assistant
We will use Home Assistant Community Store (HACS) again, if you still don’t have it, you can follow this video article first and then come back here.
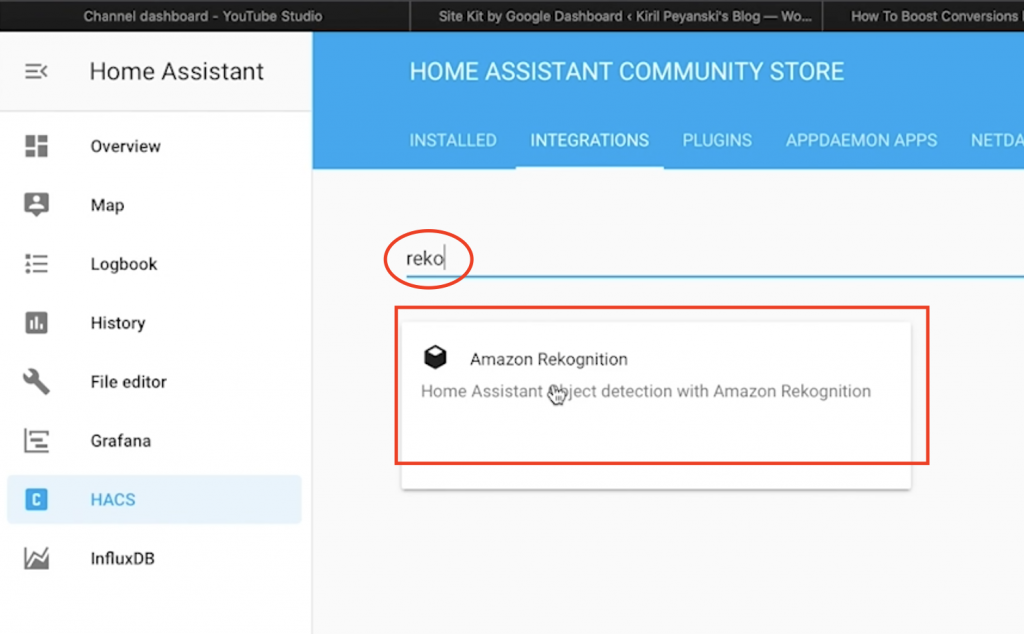
Go to your Home Assistant Community Store also known as HACS and search for “Rekognition“
Click on the result and then click “INSTALL” button.
While you are waiting the installation of Amazon Rekognition integration to finish you can sign up for an AWS free tier account, as this is required for our mini Home Assistant project.
Sign up for AWS account
To sign up for the AWS account that includes 12 months free access:
Open the https://portal.aws.amazon.com and fill all of the fields (email, password, account name).
On the next dialog enter your address and phone number.
Then Amazon will ask you for your Credit/Debit card and they will charge you with 1 USD/EUR, but they will return it back after 3-5 days.
This is for verification purposes only. They claim that no other charge will be applied for the next 12 months and if you stay below the AWS Free Tier limits.
You must verify your Phone after that and they will contact you with verification code for that, that you have to enter in the next dialog.

After successful verification don’t forget to choose the Basic Free Plan, unless your need the services provided by the paid plans.
Create an Amazon Rekognition User
Services in AWS, such as Amazon Rekognition, require that you provide credentials to access them. I’m going to Use AWS Identity and Access Management (IAM) to create a user.
Login with your AWS user that you just create and search for “Identity and Access Management” dashboard. You should be greeted by similar screen.
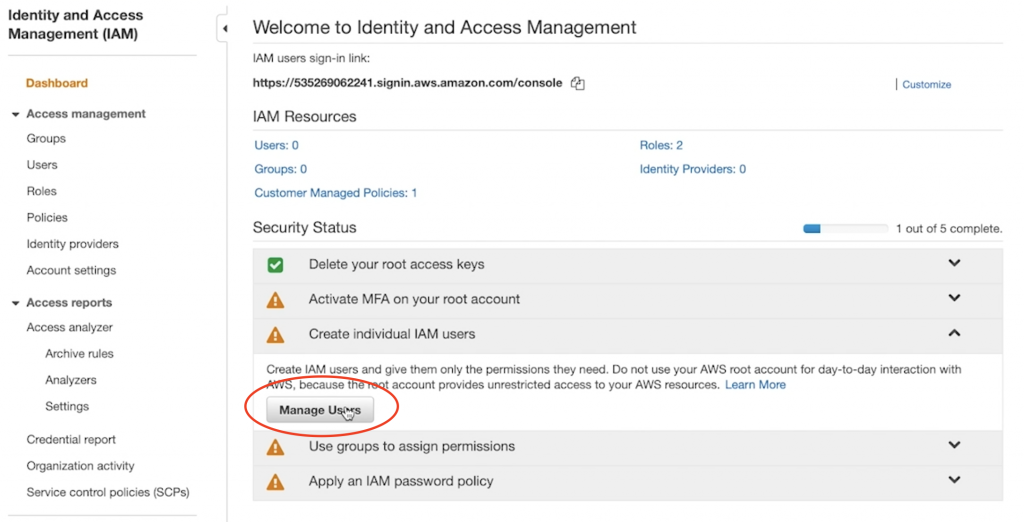
Just click “Manage Users” button under “Create individual IAM users” category.
IMPORTANT NOTE: It is good idea to activate your MFA (Multi Factor Authentication) now for additional security.
On the next screen click on the “Add user” button, type a Username and select AWS access type:

Select “Programmatic Access” and click “Next”
On the next screen you have to add the needed access rights to your new user. Click on the “Attach existing policy directly” then in the “Filter policies” field search for “Rekognition”
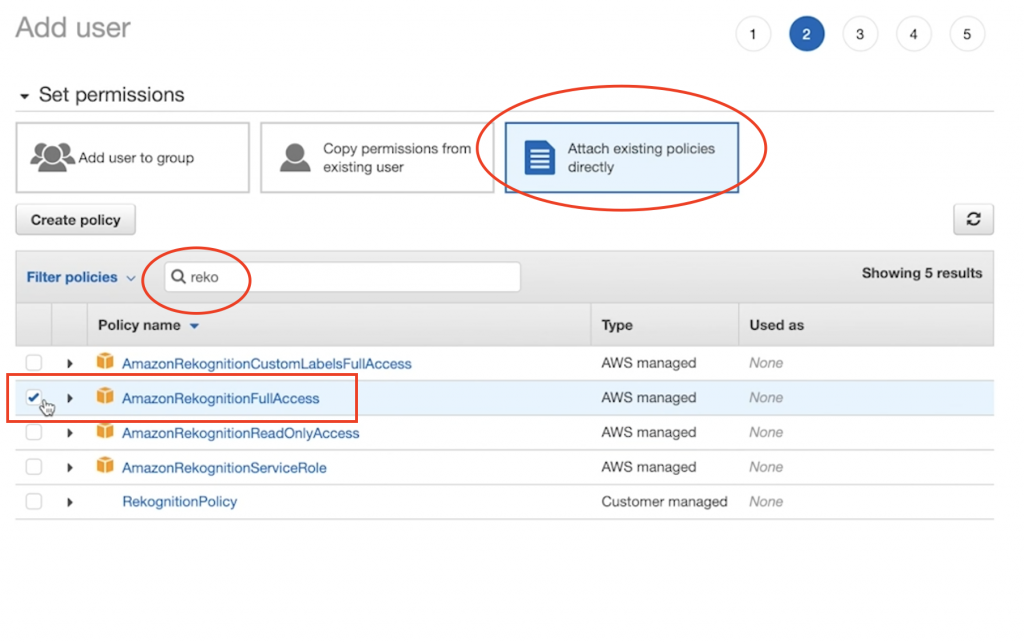
And select “AmazonRekognitionFullAccess” Policy
Next screen is for adding Tags and you can freely skip this.
And the final Screen is a Review check the summary quickly and if everything seems OK, just click the “Create User” button.
You will see something similar at the end.
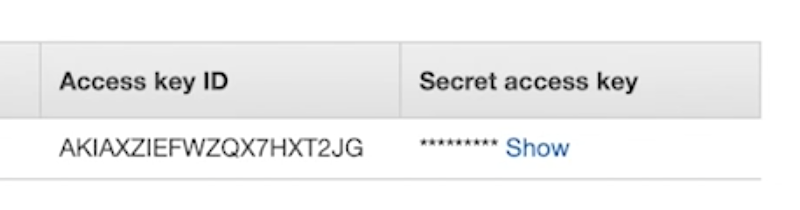
Just copy the Access key ID and Secret Access key we will need this in Home Assistant.
OK, that was easy. We have everything we need from Amazon. Now let’s put these credentials in Home Assistant configuration.
Add Amazon Rekognition in Home Assistant config
We have to edit our Home Assistant configuration a bit in order to activate the Amazon Rekognition integration.
The easiest method to do that by far is to use the “File editor” available for installation in Home Assistant Add-On store.
If you can’t install “File editor” for some reason (like you are using Home Assistant core) you have to find configuration.yaml file on the host where your Home Assistant is installed.
So open your configuration.yaml file and paste the following config lines:
#Amazon Rekognition
image_processing:
  - platform: amazon_rekognition
    aws_access_key_id: !secret aws_access_key
    aws_secret_access_key: !secret aws_secret_access_key
    region_name: eu-west-1 # This is in Ireland, default is us-east-1
    save_file_folder: /tmp/ # Optional, image storage location
    confidence: 90 # Optional, default is 80. Only used for bounding boxes atm
#    target: Car # Optional target object, default Person
    source:
      - entity_id: ADD_YOUR_CAMERA_ENTITY_ID_HERE
save the file, check your config and restart your Home Assistant.
To check if the Amazon Rekognition integration is added successfully open “SERVICES” under Development tools menu in Home Assistant.
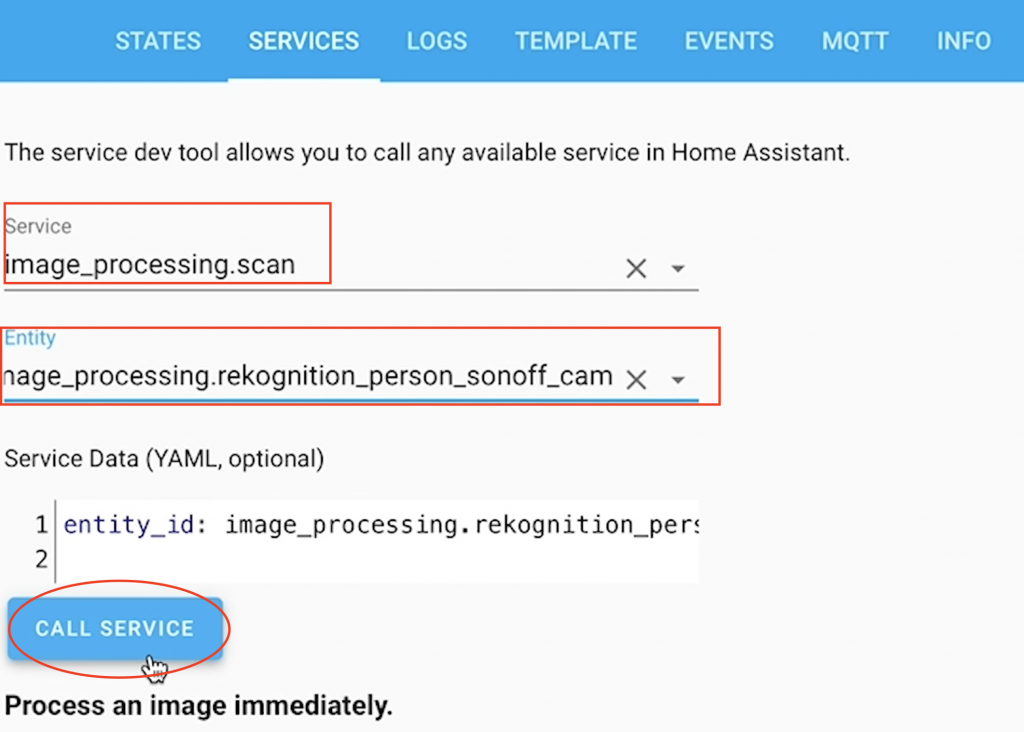
Select “image_processing.scan” as a service, select your Entity and click “CALL SERVICE”
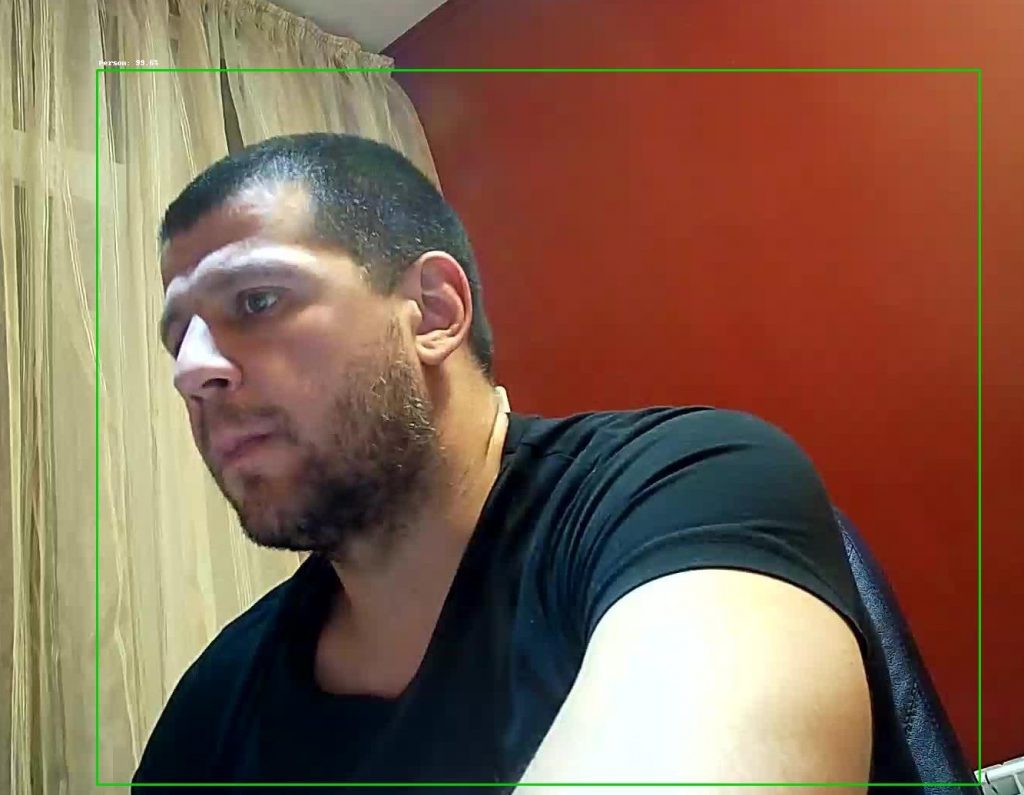
You can check the result of the service call in the “STATES” tab. Find your entity there and you should see the details of the processed image.
The state of the sensor is the number of detected target objects in the image. The default target is Person, but you can change that in configuration.yaml to “Car” for example if there is such need.
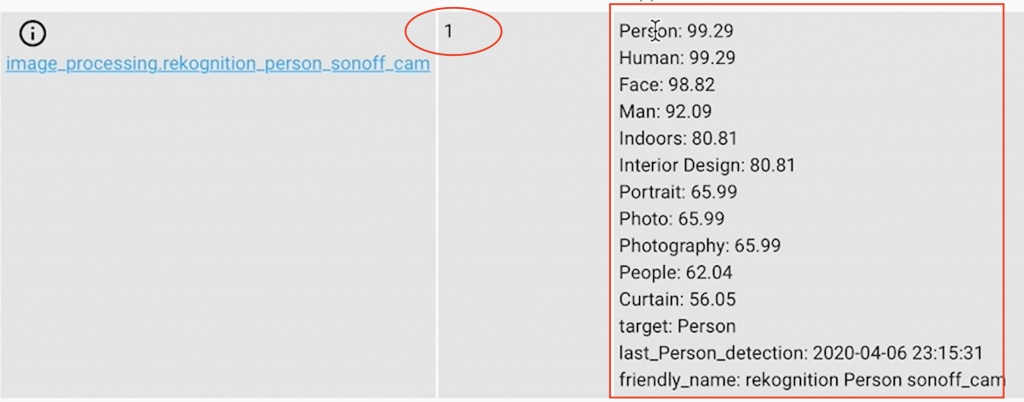
All objects on the image should be detected and the state of entity will show if person is detected.
If for whatever reason you didn’t find any entities under “image_processing.scan” in “SERVICES” tab, then you have some errors in the configuration and you should double check everything you did until now.
But I know that you are a wise guy and everything will pop up perfectly, so you can continue further.
Let’s try to create an automation using Amazon Rekognition in Home Assistant now.
Question
I have a quick question: Is it OK for you to send pictures to Amazon Rekognition service or this violates your privacy and you prefer not to do it? Let me know what do you think in the comments section below.
Create Automation using Amazon Rekognition in Home Assistant
I will create an automation now, no I will actually create Two automations.
You on the other hand can share this to your Two best smart home buddies. Thanks 😊
You can reuse my automations by adding them to your automations.yaml file. Of course you should adapt it to your needs. If you don’t know how just come and ask me and my online friends at my Discord server
The first automation will be triggered by a change in a switch (best scenario will be motion sensor, but I don’t have such at the moment). So when the switch goes to “ON” state, then execute “image_processing.scan” to start the object detection from the available cameras in your Home Assistant.
# Add this to your automations.yaml
- id: '323235559913'
  alias: Scan camera images when kitchen lights is turned on :)
  trigger:
    - platform: state
      entity_id: ADD_YOUR_SENSOR_OR_SWITCH_HERE
      to: 'on'
  action:
    - service: image_processing.scan
      data:
        entity_id: image_processing.rekognition_person_CHANGE_THIS_TO_YOUR_ENTITY
The second automation will be:
Send notification with a photo attached (in my case using Telegram service) only if the state of the image_processing entity is above 0. That means 1 or more persons are detected after image processing of the Amazon Rekognition.
- id: '323235559914'
  alias: send notification if one or more persons is detected
  trigger:
    - platform: numeric_state
      entity_id: image_processing.rekognition_person_CHANGE_THIS_TO_YOUR_ENTITY
      above: 0
  action:
    - data:
        message: 'Hey, there! Person is detected'
        title: Send an images
        data:
          photo:
          - file: /tmp/rekognition_person_CHANGE_THIS_TO_YOUR_IMAGE.jpg
          caption: Security Camera Image
      service: notify.telegram
Add both automations to your automations.yaml file, save it and “RELOAD AUTOMATIONS” under Server Controls in your Home Assistant.
To test if everything work as expected, just set the state of your sensor/entity to ‘ON’. And you have to receive an image on your Telegram if there is a person detected on your Camera image.
Support my work:
Any sort of engagement on this site does really help out a lot with the Google algorithm, so make sure you hit the subscribe, and I will send you a Smart Home Bonus document available only after subscibtion.
Also feel free to add me on Twitter by searching for @KPeyanski.
I really hope that you find this information useful and you now know how to add Amazon Rekognition in Home Assistant to perform image recognition and analysis.
Thank you for watching, stay safe and see you next time.
This is GREAT! I love it. Thanks for the clear write up.. I’m adding this to my TODO list on GitHub.
Thank you Carlo, you have your TODO list in GitHub? Nice idea is it a normal text file or it is some software?
Hi Kiril, thanks for more one very nice instruction. I have a question. is possível to apply it in a raspberry pi 3?
Yes, of course. You should have no issues.
Hi, your tutorial is top !. I will use Amazon rekognition to my chicken cole connectée. I havé à question : i need count every day eggs number. Can you explain me hol recovering this information ? Regards
My service is firing fine and detecting but no pictures are saved in the folder for me to see?!
Any input on this?!Thank you
I’m also running into this. The image processing is occurring. But it never saves an image file afterwards.
I like it. Thank you so much!! Can use for amazon recognition detection text?
https://docs.aws.amazon.com/rekognition/latest/dg/text-detection.html?pg=ln&sec=ft
I’m also running into this. The image processing is occurring. But it never saves an image file afterwards.