Nowadays, DIY temperature sensor for Home Assistant can be very easy and cheap – especially, if you have a complete guide like this one that will show you all the steps.
I will try my best to show you everything needed for the DIY Temperature sensor for Home Assistant:
- What parts are needed?
- How much they cost?
- From where to buy them?
- How to connect them?
- How to configure them?
- How to install ESPHome?
- And finally, how to add your smart DIY Temperature & Humidity sensor to Home Assistant?
On top, if you have access to a 3D printer I will also show some enclosures that can make the sensor looks better.
So, buckle your belts as we are starting with the needed parts for this DIY Temperature & Humidity sensor.
Table of Contents
What parts are needed?
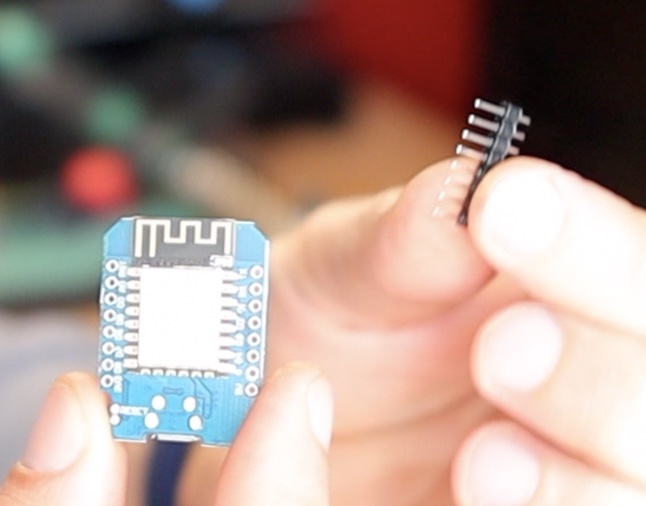
Wemos D1 Mini
The first thing that you will need Is an ESP8266 device, and I’m going to use a Wemos D1 Mini.
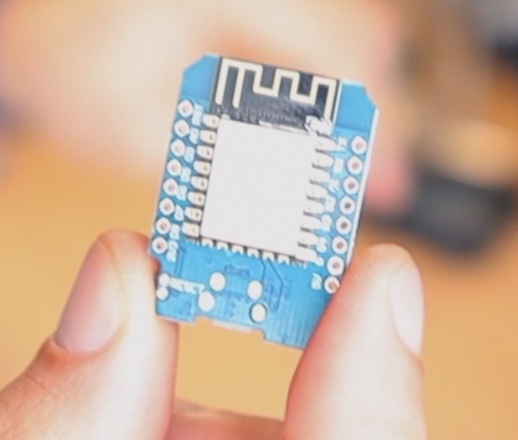
Later, on the D1 Mini I will install the ESPHome software.
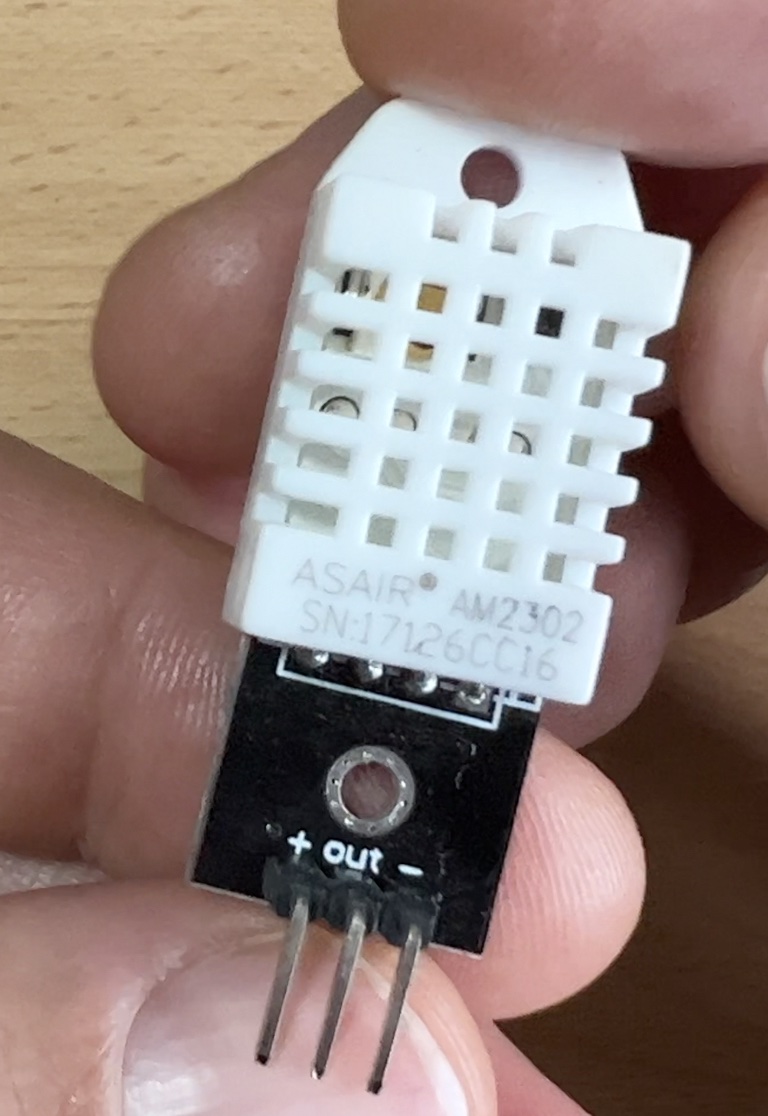
DHT22 – Temperature and Humidity Sensor
Also, on the D1 Mini I will attach the Temperature & Humidity sensor. The exact model of the sensor that I’m going to use is AM2302 DHT22 and it is looking like this:
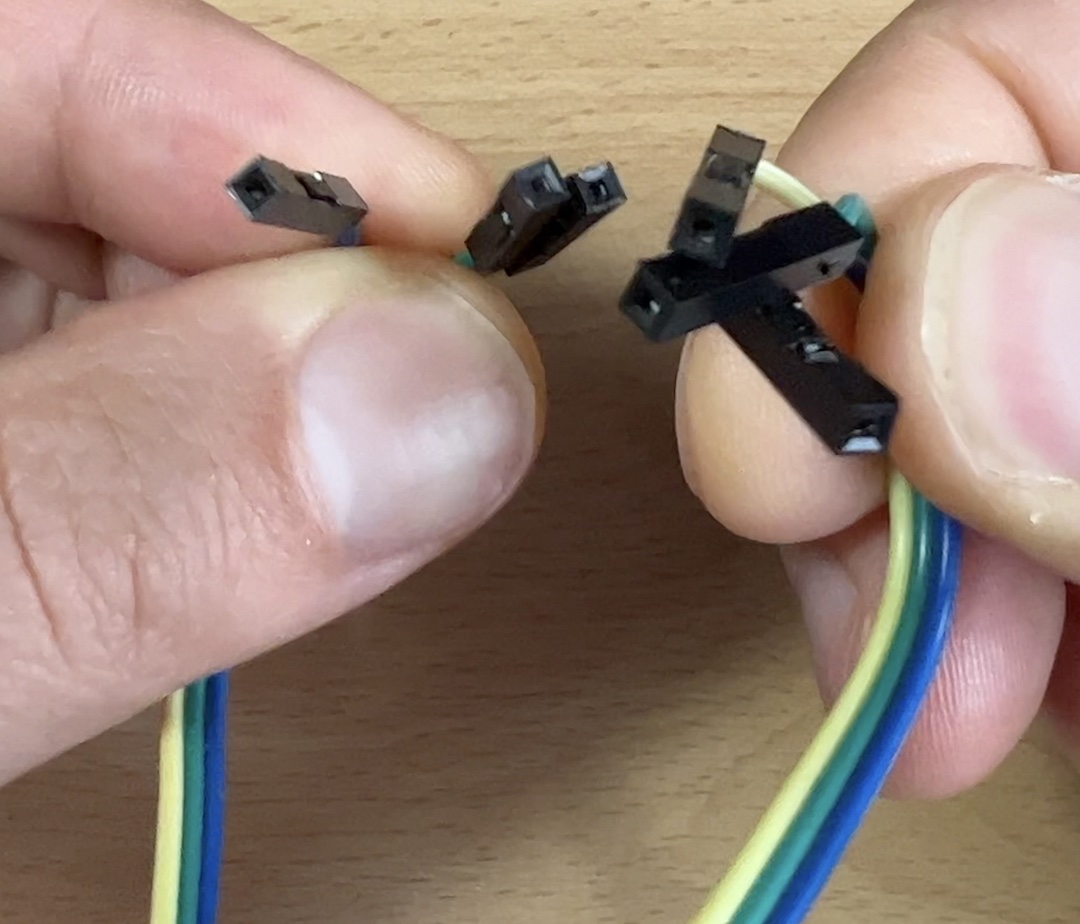
Jumper Wires
I will also need 3 female-to-female jumper wires, also known as Dupont wires. Of course, if you have other suitable cables you can use them instead.
USB Cable & optionally USB Adapter
The final things that are needed are micro USB cable and optionally an USB adapter (if you have plans to plug this Cheap & Smart Temperature & Humidity sensor in the power socket).
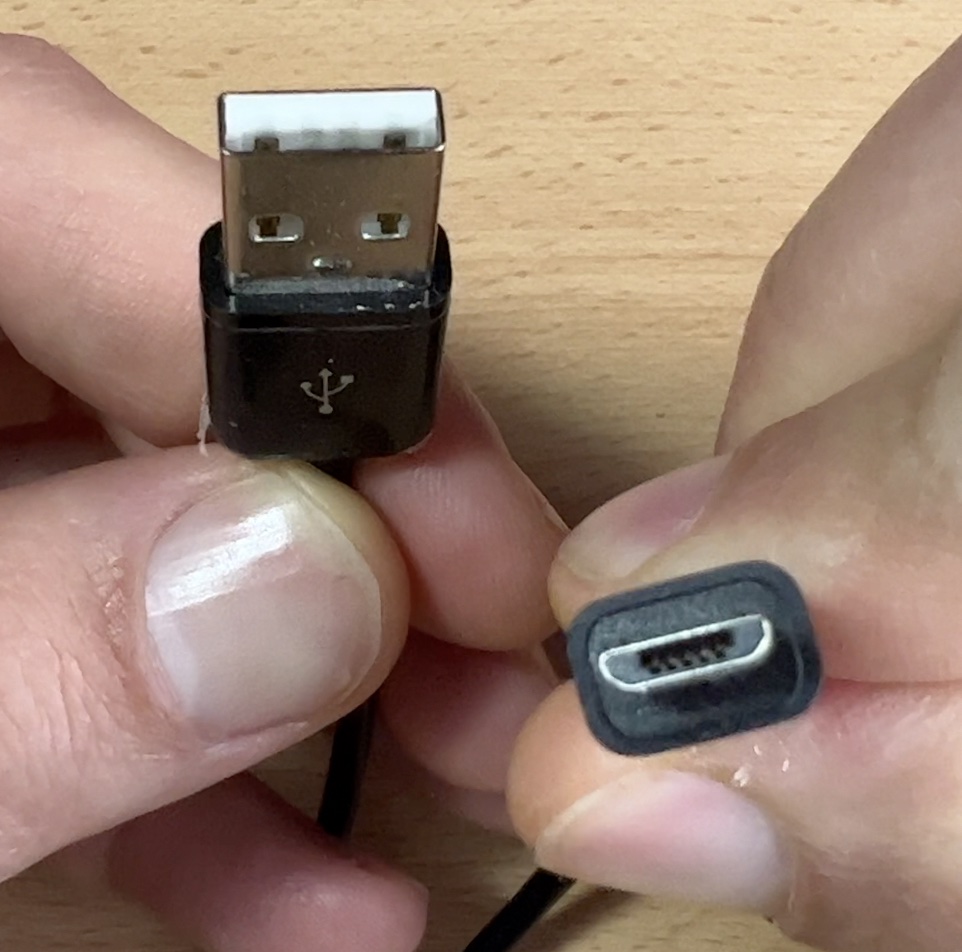
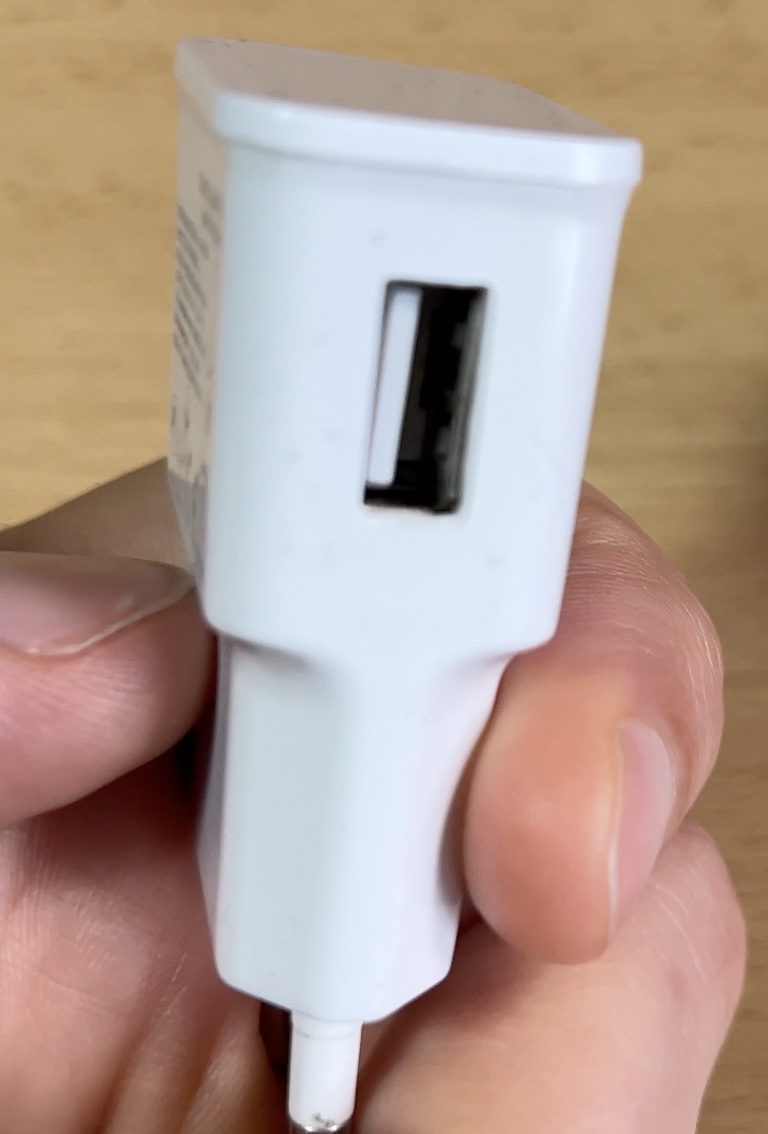
As I said this USB adapter is optional as you can just plug the sensor in any USB port that you have available.
How much does it all cost?
All components will cost you around $5 to $6 US Dollars (if you already have microUSB cable) and you can buy them using the AliExpress affiliate links below:
- D1 Mini – https://s.click.aliexpress.com/e/_AFgAIp
- D1 Mini in Amazon – https://amzn.to/3A5jNoc
- DHT22 T&H sensor & Jumper wires – https://s.click.aliexpress.com/e/_As7y5k
- DHT22 T&H sensor in Amazon (3pcs) – https://amzn.to/3qzcORi
- Jumper (Dupont) wires – https://s.click.aliexpress.com/e/_A3YiR3
- Micro USB cable – https://s.click.aliexpress.com/e/_AnrsGw
- USB adapter EU US UK – https://s.click.aliexpress.com/e/_Ataxcq
At the end of the day, it is not so important from where you will get the needed parts, but how you will connect them and how you will configure them. So, moving to the next step, which is how to connect the D1 Mini and DHT22 sensor together.
How to connect D1 Mini and DHT22 sensor?
D1 Mini comes with these pins and these pins are not soldered so I recommend to solder them as later on, plugging the Jumper wires will be pretty easy.
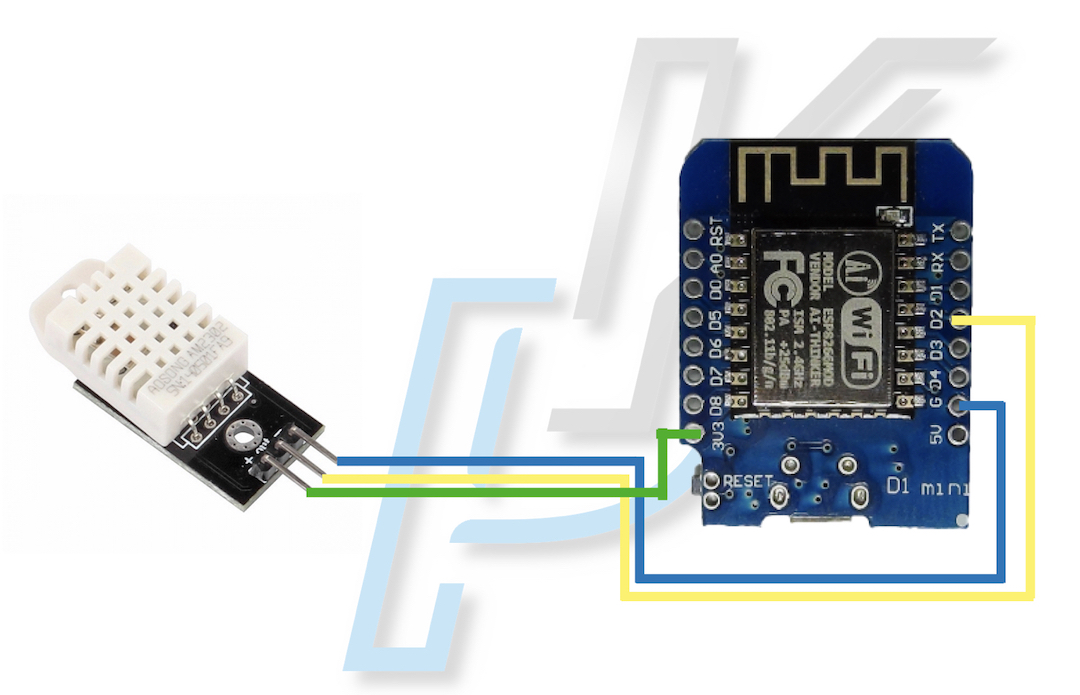
Here are the steps to connect D1 Mini and DHT22 Sensor:
- Connect the
+(plus) output on the DHT22 to the3V3pin on the D1 mini. - Then connect the middle output of the DHT22 labeled
Outto theD2pin on the D1 Mini - Finally, connect the
-(minus) on the DHT22 to theG(Ground) pin on the D1 mini.
This is how everything looks like at the end:
How to install ESPHome on the D1 Mini
Next step is to upload ESPHome software on the D1 Mini device. There are multiple ways doing this, but I will use one of the easiest, which is to install ESPHome add-on in the Home Assistant. If you don’t have Home Assistant yet, check this article of mine where I’m explaining what are your options 👉 LINK.
Let’s see how to install the ESPHome add-on.
- Add the official ESPHome add-on repository by click on this link.
- While in Home Assistant, press the “c” button on your keyboard and start typing Add-on, then select Navigate Add-on store.
- Next, search for ESPHome, click on the result and then click on the Install button.
- When the installation is finished the Install button will be replaced with Start button – click on it to start the ESPHome add-on.
- Wait few seconds for the ESPHome to start and then click on the Open Web UI button.

- You should see similar screen as above. And you should click on the New Device button.
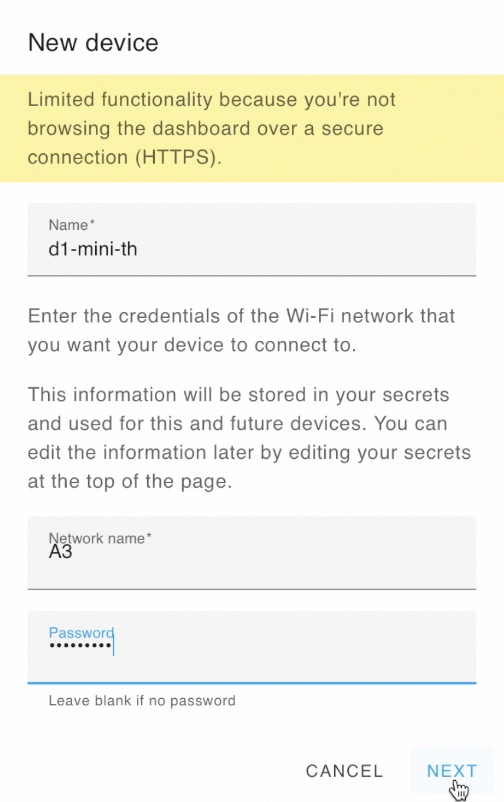
New device dialog will appear on which you should enter a device name of your choice as well as you WiFi name and password. I named my device: d1-mini-th.
When you are ready click on Next button.
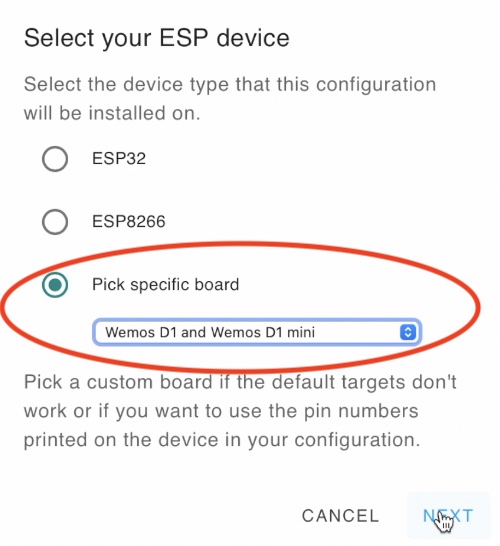
- From the next dialog, click no Pick specific Board radio button and select the Wemos D1 and Wemos D1 mini. Of course, if your ESP board is different – either find it from the list or select the more generic ESP32 or ESP8266 options depending of your board type. Finally, click Next button.
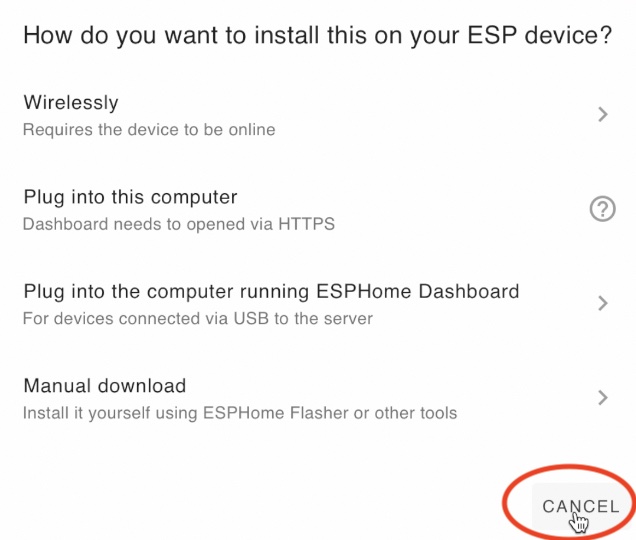
- On the next dialog click on Install button, and when possible installation options appear, click on Cancel button. That is needed, because we have to add some YAML configuration before we actually install ESPHome.
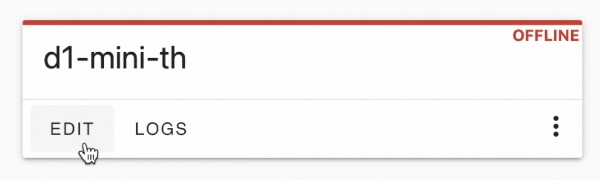
- Click on the Edit button under your device name (the future T&H sensor) in the ESPHome dashboard.
- Paste the following lines at the very bottom of the configuration:
sensor:
  - platform: dht
    pin: D2
    temperature:
      name: "Living Room Temperature"
    humidity:
      name: "Living Room Humidity"
    update_interval: 20s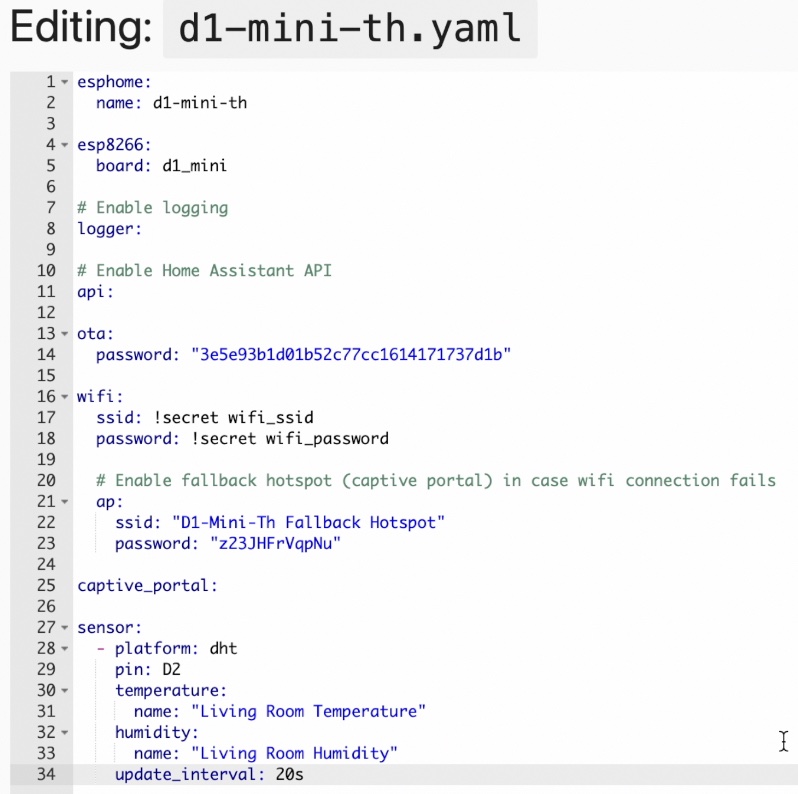
Here is how my whole D1 Mini and DHT22 configuration looks like at the end:
- You may wish to change both names (Living Room Temperature & Living Room Humidity) to whatever is suitable for you. When you are ready, click on the Save button and then on Install button.
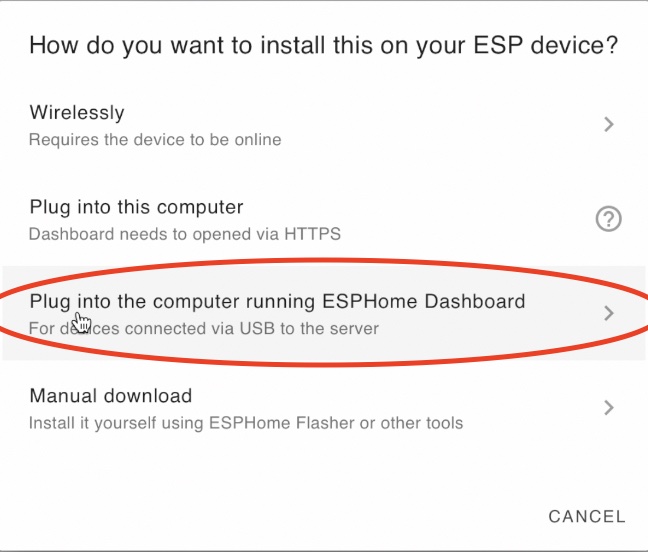
- You will see the same “How do you want to install this on your ESP device?” dialog.
- Plug the D1 Mini in one of the USB ports on the device where Home Assistant and ESPHome are installed and select “Plug into the computer running ESPHome Dashboard” option from the list.
- The USB port where your device is connected will be auto detected and you should only click on it, example: /dev/ttyUSB0.
- If everything is fine, a terminal will appear with a lot of text and multiple text based progress bars. Wait until you see some temperature and humidity readings or something like this below:

Challenge for You!
I have a quick challenge for you! If you reach this point and you managed to install ESPHome on your future Smart Temperature & Humidity sensor – let me know in the comments by just type – #THowned
Where TH stands for Temperature and Humidity. I will be very happy to see such hashtags there!
Now, let’s finish this by adding the D1 mini and DHT22 based smart Temperature & Humidity sensor in Home Assistant.
Adding D1 Mini and DHT22 to Home Assistant
Before you continue further it is a good idea to check in the ESPHome dashboard if your DIY Temperature Sensor for Home Assistant is actually online.
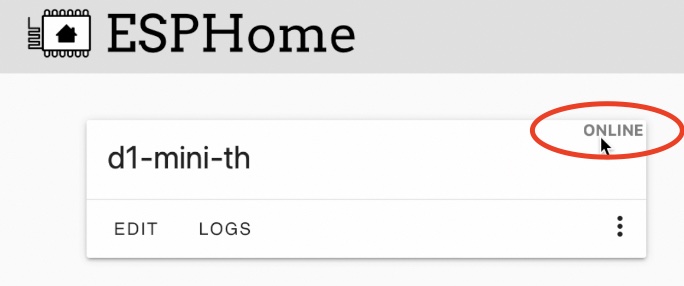
If the D1 Mini and DHT22 are online, then you are almost ready and you just have to add your ready to use T&H sensor in your Home Assistant. Here is how:
In Home Assistant go to:
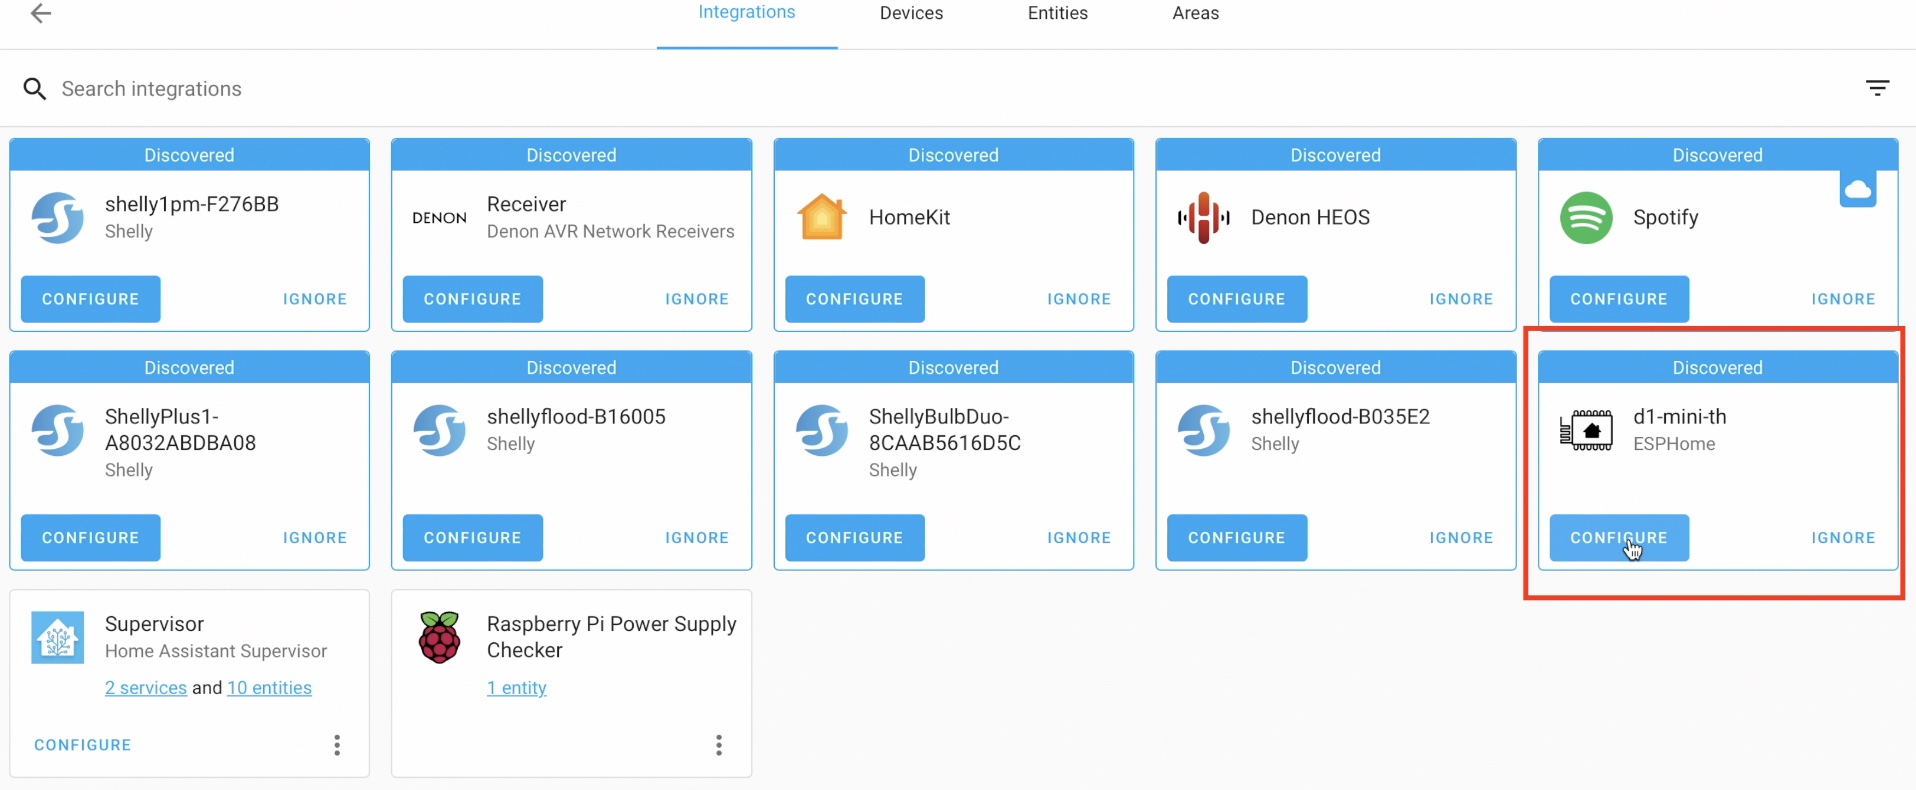
- Press the “c” button on your keyboard and start typing integrations, then select Navigate Integrations.

- Search for ESPHome integration within the list with discovered integrations and click on the Configure, then Submit and finally Finish buttons.
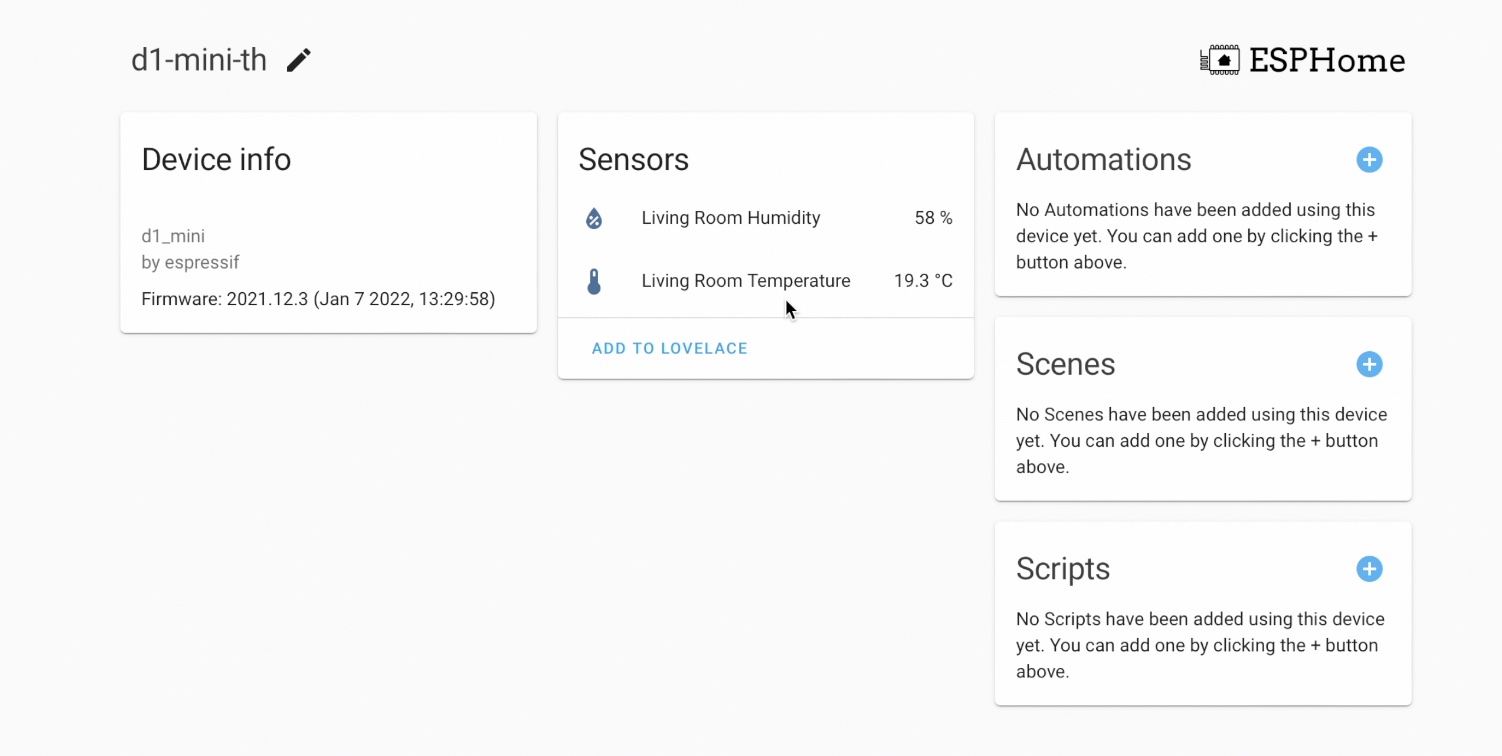
As a result, 1 device with 2 entities will be added in your Home Assistant integrations page. Click on the 1 device link.

- On the next screen you can see your Temperature and Humidity readings and you can add this as a card in your Home Assistant Dashboard by just clicking on the Add to Lovelace button. From the same place you can start creating Home Assistant Automations, Scenes & Scripts.
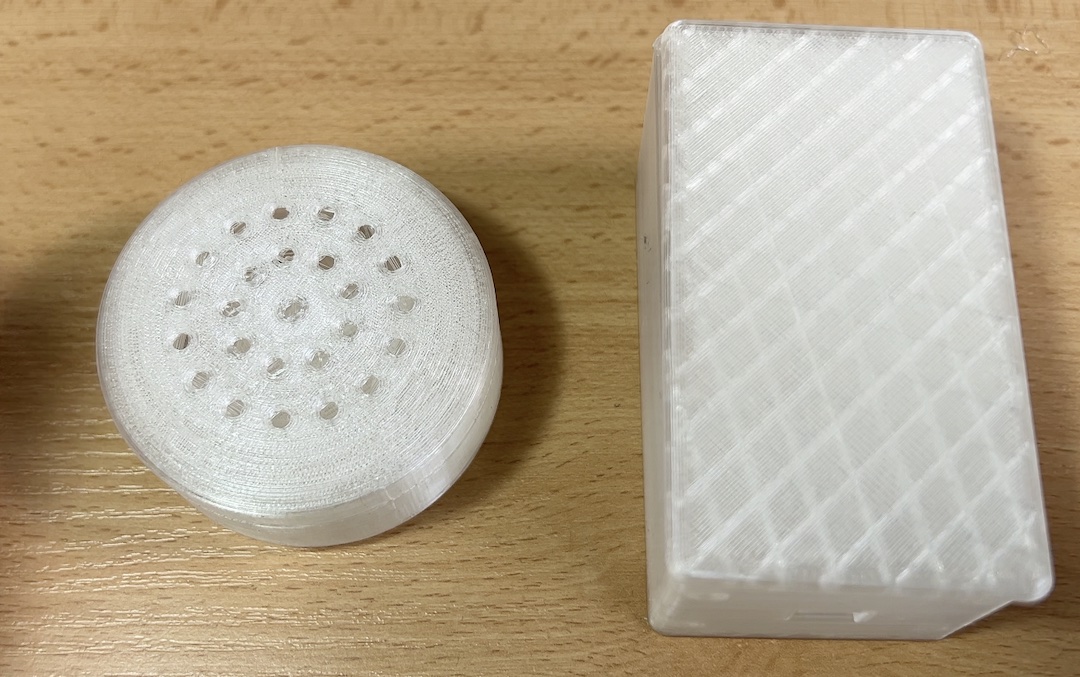
3D Printed enclosure/box
The only thing that is missing is a 3D printed enclosure. And here is what I managed to find and print on my Ender 3 v2 3D printer (my article about the printer):
Links to the 3D Models:
- DHT-22 / DHT22 Wall box with ESP8266 – https://www.thingiverse.com/thing:2610694/files
- “Öl Broker” Wemos D1 Mini mit Sr04 & AM2301 mqtt – https://www.thingiverse.com/thing:5142671/files
If you manage to find other good ones, please share them in the comments section below.
Summary
For around $5 to $6 US dollars and several minutes I managed to DIY temperature sensor for Home Assistant and with that to make my Home even Smarter. Try it out and you can do the same.
Feel free to secure this channel existence by using any of the supported methods in my Website support section.
Follow me on Twitter and join my Discord server.
Stay safe and don’t forget – Home Smart, but not hard!
I’m Kiril and I’m done writing. Bye!
#THowned
I use mine to measure the temp on the exhaust pipe on my electric dryer. When the dryer completes a cycle, it shuts off & the temperature at the vent cools down enough for me to trigger a notification to my phone & my wife’s computer to remind us to take the clothes out.
Wow, so clever 🙂 That is why I love all of these stuff. Thanks and enjoy!
Awesome, I’m gonna try ir
Great to hear that! Let us know the result 🙂
Hello,
I am just wondering, would this work with a dt11 sensor as well?
Also, Is this suitable to leave outside?
Thanks for a great guide. I am going to make it soon!
Yes, DHT11 should work as well, but I’m not sure how well it be. The operating temperature of the DHT22 is from -40 to +125 degrees Celsius so in theory it should be fine outside if you waterproof it well.
Excellent tutorial. Thank you! #THowned
That is really, really great! I want to thank you as well, because of sharing this!
#’THPowned 🙂
According to your excellent tutorial I installed a BME280 Sensor (temperature, humidity, pressure) on a supervised installation on a RPI4, also following your advice. Thank you so much!
That is great Christoph! Welcome to the club! DIY some useful smart sensors is pretty addictive, don’t you think?
That’s right! Still experimenting. 😉
I think you need to update the install procedure for ESP Home. This now looks totally different in the latest version of Home Assistant. ESP Home is not in the Configuration section anymore. I found it in the Integration section… after which it looks also different.
Hey all,
Wanted to share my enclosure. It is made for an Apple USB A brick, and it leaves the DHT22 out of the enclosure because the heat from the chip tends to skew the readings. Files are here https://www.thingiverse.com/thing:5403775
That’s very nice and useful tutorial, actually really similar to https://www.pieterbrinkman.com/2021/02/03/build-a-cheap-air-quality-meter-using-esphome-home-assistant-and-a-particulate-matter-sensor/
But my only concern is that it has to run on a socket, that’s really not convenient.
Is there a way to actually run something like this on batteries? Most of small temp / humidity sensors you’d find on the market run on batteries (CR2032 or CR123A), so this should be doable.
Any idea?
Thanks and best regards.
Alexandre
Hi Kiril, I’m looking at making one of these, but want to put it to deepsleep, and am struggling with the yaml to do this, can you help please? Basically I’m going to try using it on battery power with a battery shield, and want it to wake up every 15 mins to send the data. Thanks
#THowned
Thanks for the excellent tutorial!
I encountered a couple of minor issues that others might experience.
1) The api section contains an encryption key, and the UI asks for it before it lets you add a device. Copy it while you have the yaml open so you can paste it in.
2) I found that the temperature and humidity values were correct while the device was connected to the host via USB, but when subsequently connected via WiFi, the readings were incorrect. For example, the temp changed from 78 F to 12 F, so not a matter of the wrong units. I discovered that running the “update all” command on the WSPHome web UI fixes it.
3) I discovered that the sensor works fine directly connected to the D1Mini without the little carrier board that it is soldered to. Just connect Vdd, Data, and Ground (pin 4) as per this diagram: https://cdn-shop.adafruit.com/datasheets/Digital+humidity+and+temperature+sensor+AM2302.pdf
I’m very happy that you did it. Thanks for the good words and tips. Enjoy and welcome to the club!
Ad 2:
I have the same experience. In my case the device will show -10 degrees centigrade instead of +21 degrees.
However, I have to execute “Update all” every time i power the device. Could there be some init value missing after a cold boot?
Ad 3:
I use rhe sensor too without any inbetween board.
For the rest the tutorial is excellent!
When the ESP8266 reboots from a power cycle, it does not recognize the DHT22 on powerup and gives you wrong readings. But when you “update all” or “install” new code, it does not power down completely. I found that manually adding the sensor model: AM2302 into the YAML config guarantees to work on power reboots.
sensor:
– platform: dht
model: AM2302
pin: D2
temperature:
name: “Temperature”
humidity:
name: “Humidity”
update_interval: 20s
Many thanks for this comment Benji. You rock
Thank you Benji! I found I could only get accurate readings if I added “model: AM2302” as you suggested even after a update.
I started building this with a DHT11 Sensor and it worked fine. I would like to switch to a DHT22. Program keeps detecting DHT11 even though DHT22 is in place. How can I change the script?
Are these aliexpress links dead for anybody else or is it just me?
Where are you living? It seems that they don’t work for some regions…