
I will share with your 7 Home Assistant tips and tricks that you may or you may not know. These tips are very quick and easy to implement, but they can be quite useful, as they will save you time and will improve your experience using Home Assistant.
I must say that one of the tricks listed here is very hidden (something like Easter egg) and I had no clue about it until very recently. Read the entire article to see which one it is!
Table of Contents
Challenge for you!
I also have a little challenge for you: If you already know 1 of these Home Assistant Tips & Tricks that I’m about to show you – leave a #1tip comment in the comment section below. If you already know two tips for example – leave a #2tips and so on. It will be fun discussing this in the comment section.
Now without further ado let’s start with Home Assistant Tip number 7!
Home Assistant Tip #7
Do you know how much time every Home Assistant integration is taking to boot up? This information can be very handy If your Home Assistant start slowly or for example, you just want to quickly check that everything with your Home Assistant integrations is fine. No problem, just go to:
Home Assistant > Configuration > Info and scroll down until you see the Integrations section.
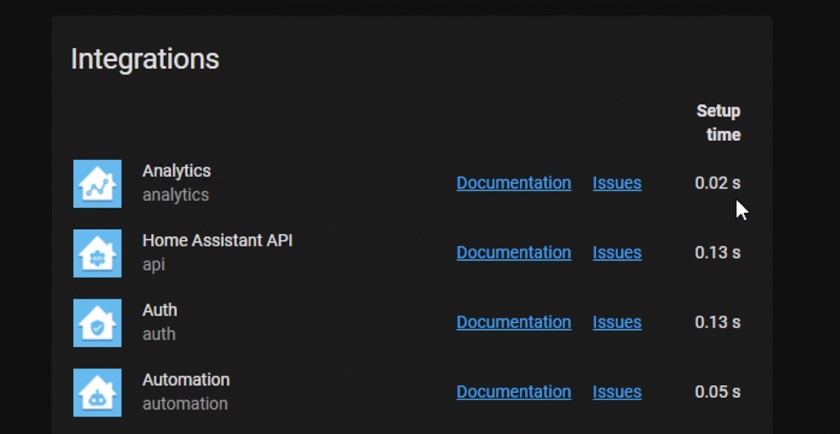
In this list you can see all of your integrations and their setup time. If you find an integration that takes too many seconds you may wish to further investigate the reason by going to the logs, integration Documentation or to the GitHub open Issues of the project.
It may turns out that you have to update your integration, to tweak a bit the configuration or that there is some nasty bug that is already opened and waiting to be fixed. Don’t panic if some integrations take for example 10 or 20 seconds to start as this may be normal.
Home Assistant Tip #6
That was Home Assistant Tip number 7. Tip number 6 is lightning fast and more or less depends of your router and its configuration.
Open a new browser or tab and type: homeassistant.local:8123 then hit Enter. If everything is fine you will see your Home Assistant web interface.
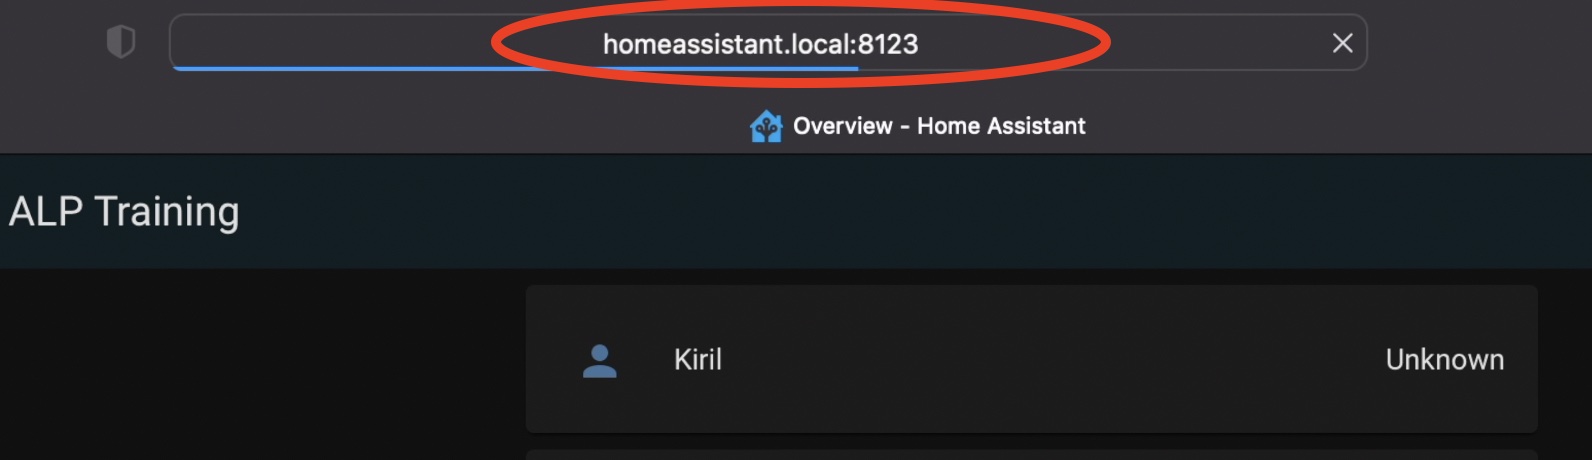
You can use that local address instead of remembering your local IP or if you have a fresh installation of Home Assistant and you have no idea what is the newly assigned IP.
Here is another challenge, if this trick worked for you leave the thumbs up in the comments, otherwise leave thumbs down, either way subscribe for my Newsletter where you will receive e-mail every-time when I release a new article.
Home Assistant Tip #5
Going to Home Assistant tip or trick number five, which is a security based one and it is a must have, especially if you have opened your Home Assistant to the outside world. For example, while using Nabu Casa or Home Assistant Remote Access with DuckDns as I’m describing in this article of mine.
So, tip number 5 Is a Multi Factor authentication (a.k.a 2 Factor authentication). That means along with your Home Assistant username and password you will have to enter a dynamic token or code that is generated by a separate program like Google Authenticator (App Store link and Google Play link) or Authy (App Store link and Google Play link).
Enabling this hardens the security of your Home Assistant installation by a lot.
To enable Multi Factor Authentication (MFA) do the following:
- Go to your user profile in Home Assistant, scroll down until you see the Multi-factor Authentication Modules section and hit Enable.
- Download and open Google Authenticator app or Authy app from your mobile phone store.
- Scan the QR code using the downloaded application.
- Enter the generated 6 digits code in the Home Assistant dialog below the QR code and click SUBMIT
From now on, on every 30 seconds a new code will be generated in the mobile app and to log in to your Home Assistant from a new device you have to enter that code as well. Making your Home Assistant installation unhackable!
Home Assistant Tip #4
During my tutorials here and in my YouTube channel, I often ask you the following:
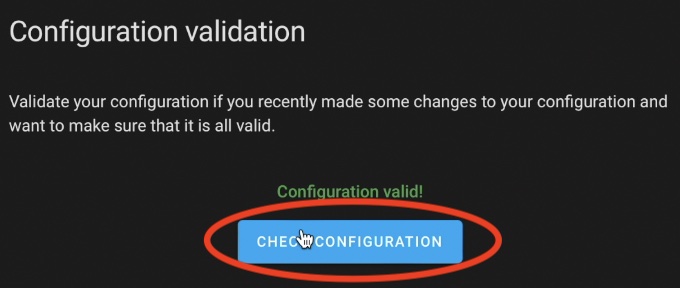
- To check the Home Assistant configuration after some changes and before restart.
- To install the Terminal & SSH or SSH & Web Terminal add-ons.
Some of you are keep telling me: “Kiril, stop joking! I have no such buttons in my Home Assistant or I cannot find any Terminal & SSH add-on in my add-on store!”
Relax, we all have this stuff! You just have to enable Advanced mode from your Home Assistant username profile.
That is all! From now on, you are officially an advanced Home Assistant user and officially that was Home Assistant Tip or Trick number 4 from todays article of mine.
Home Assistant Tip #3
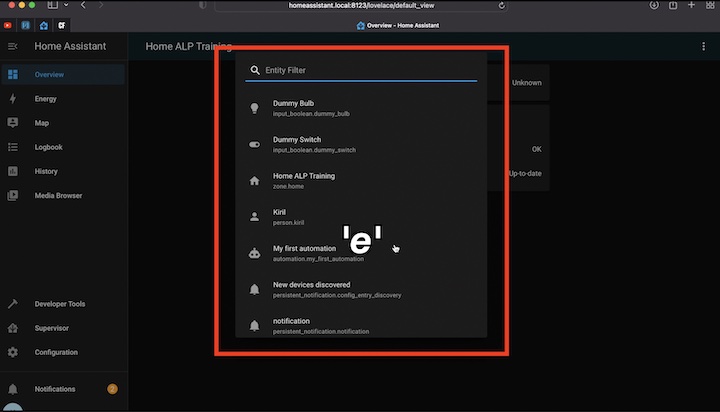
Here is a shortcut to Tip number 3 which is Home Assistant shortcuts. If you press “e” key on your keyboard while Home Assistant is opened – a search bar for your entities will appear.
If you hit “c” key while in Home Assistant then a commands search bar with autocomplete function will be shown.
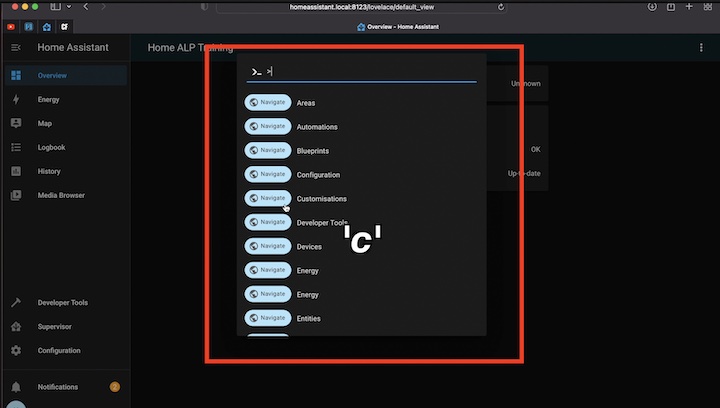
Using these shortcuts you can access most of the Home Assistant goodies in no time.
I have to admit here that I’m not using the Home Assistant Shortcuts very often. Maybe, because on my macOS I have to click on the big Home Assistant frame first and then to press the “e” or “c” keys to invoke the quick bars. If my focus is on the left side bar for example, the shortcuts didn’t work as expected.
But that is me! I’m wondering are you using shortcuts? Let me know in the comments section. However, If your shortcuts didn’t work at all make sure that you enable them from your Home Assistant Profile.

Home Assistant Tip #2
Moving to tip number 2, which is an add-on called File Editor. I personally, cannot function well without this add-on. To install it you have to go to:
Supervisor > Add-on store and to search for File Editor and then to install it.
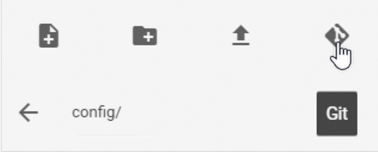
Before you start the File Editor add-on you may wish to change the enforce_basepath: to false if you want to have access not only to the Home Assistant config folder, but also to be able to check the backup folder for example.
Using this File Editor add-on you can easily edit files as the name suggest, you can upload and download files and you can even use Git right from the add-on to manage your files history.
Just a quick remark here, if you don’t have a Supervisor menu at all then probably you are using Home Assistant Container or Core installation, which lacks this functionality. If you want to know more about different types of Home Assistant installations – check this article of mine where I’m explaining everything 👉 LINK
Home Assistant Tip #1
My Home Assistant Tip number 1 is quick and somehow hidden. That is the Easter egg that I told you about in the beginning. Don’t blink as you might miss it.
Did you saw it?
If you left moue click next to Home Assistant label in the upper left corner, then hold and drag you will be able to edit the Home Assistant sidebar!
You can do that in both directions. Clicking on the left side of the Home Assistant label and dragging to the right or click on the right side of the label and dragging the mouse to the left. Try it out and let me know if that worked for you.
Outro
And now, do not wonder what to read next and just click on my Home Assistant Categories section here on my website, where I’m having various of articles that you can have fun with.
Don’t forget to subscribe for my Newsletter, if you haven’t done that already.
Follow me on Twitter, join my Discord server, stay safe and remember – Home Smart, But Not Hard!
I’m Kiril and I’m done writing. Bye!
“did you saw it” who the hell approved this garbage?
I approve it, why? I can’t understand your point! What is the actual problem and why such negativism?
#4tips and I’m not a pro.
Good job, Chris! I must say that no-one is a pro (including the authors of HA) cause we all have what to learn more and that is the beauty – in the journey!