
Starting from last week installing software on ESP32 & ESP8266 microcontrollers become ridiculously easy because of introducing the ESP Web Tools and Improv open standard. That will help the Home Automation guys like we all are a lot. Let’s see how.
Later in the article I will announce the giveaway winners, but now let’s talk about two new very interesting things announced by the Home Assistant, ESPHome and WLED guys.
- ESP Web Tools
- Improv
During the announcement there was also a suggestion to stop using terms like “upload firmware”, “flash firmware” and so on and to simply replace them with the word “install”. Te reason is to avoid complexity. I will agree with these suggestions with one condition! We also have to replace the grey LIKE button with blue one! To replace it you just have to click on the like button under my YouTube VIDEO.
When you are ready with that important task we can start talking about what are ESP32 & ESP8266 devices, then we will continue with what is ESP Web Tools and what is Improv.
Table of Contents
What are ESP32 & ESP8266 devices?
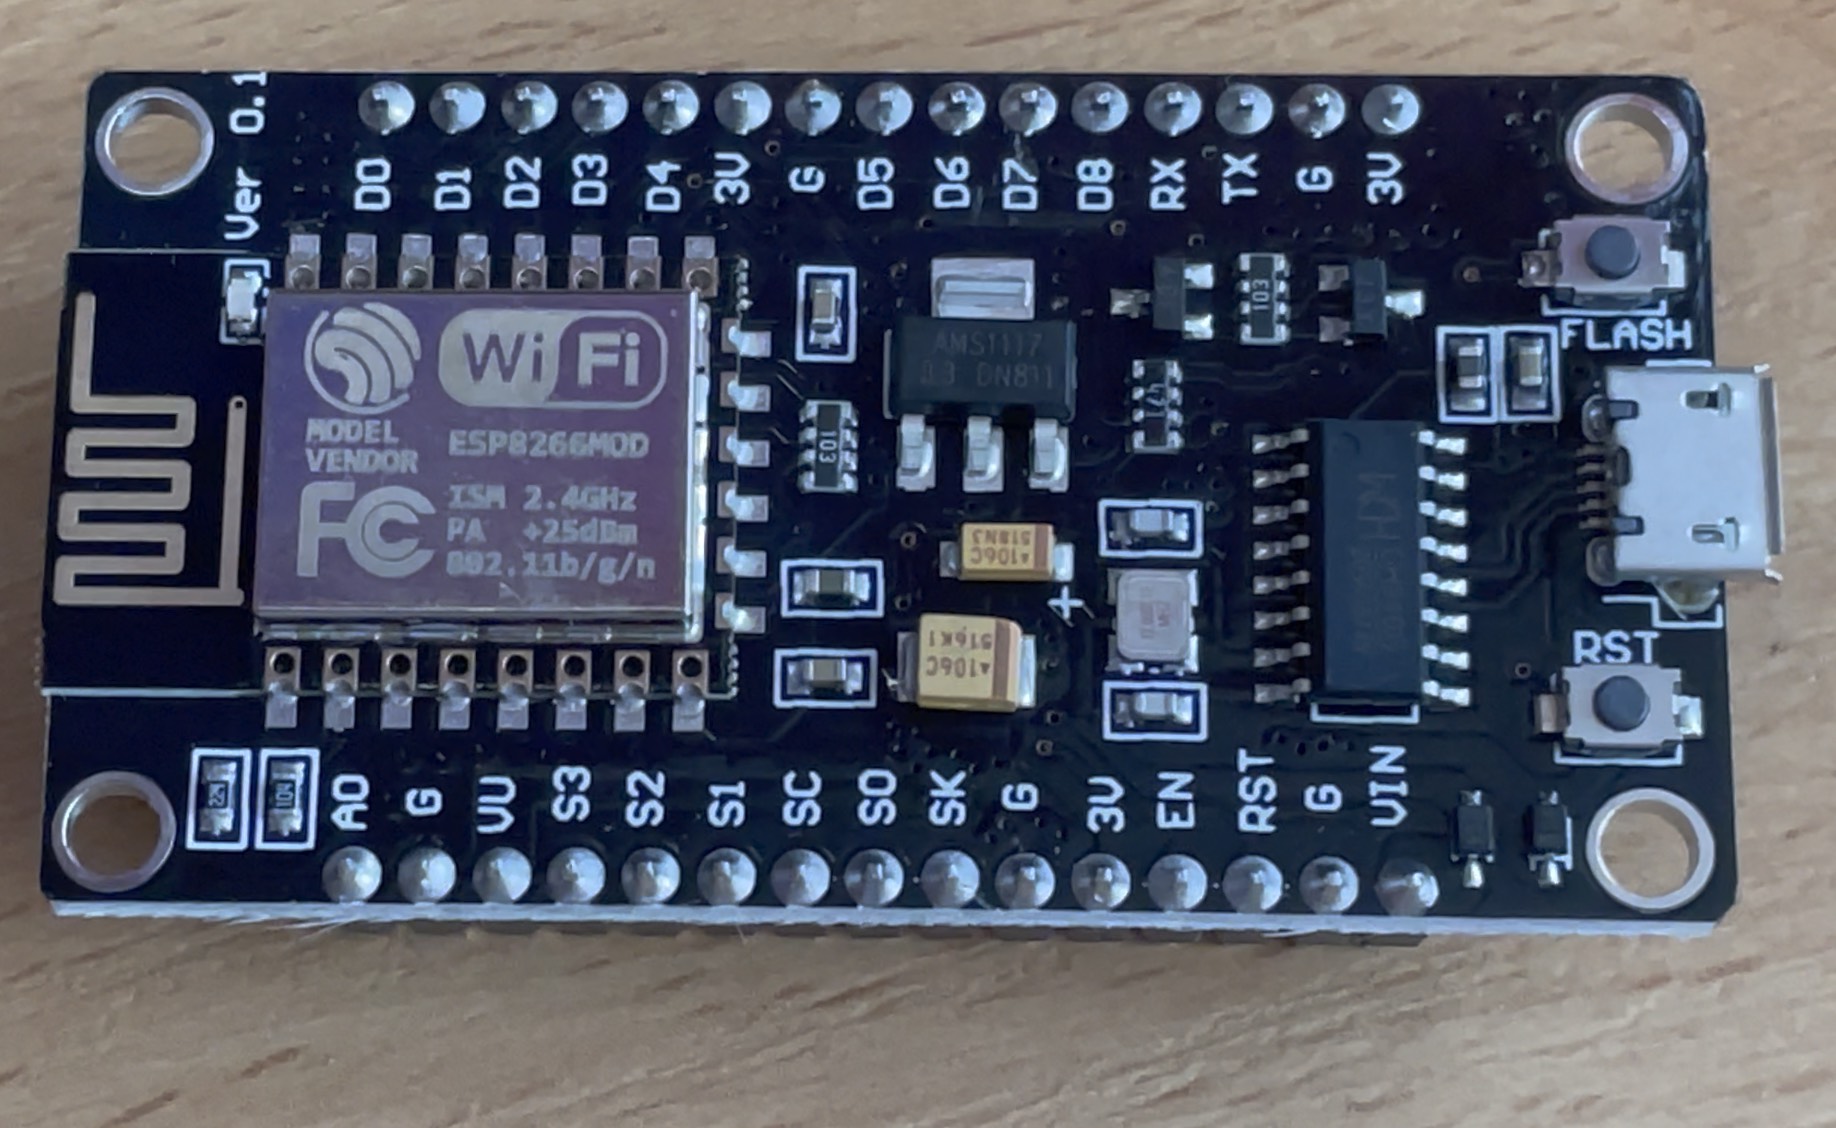
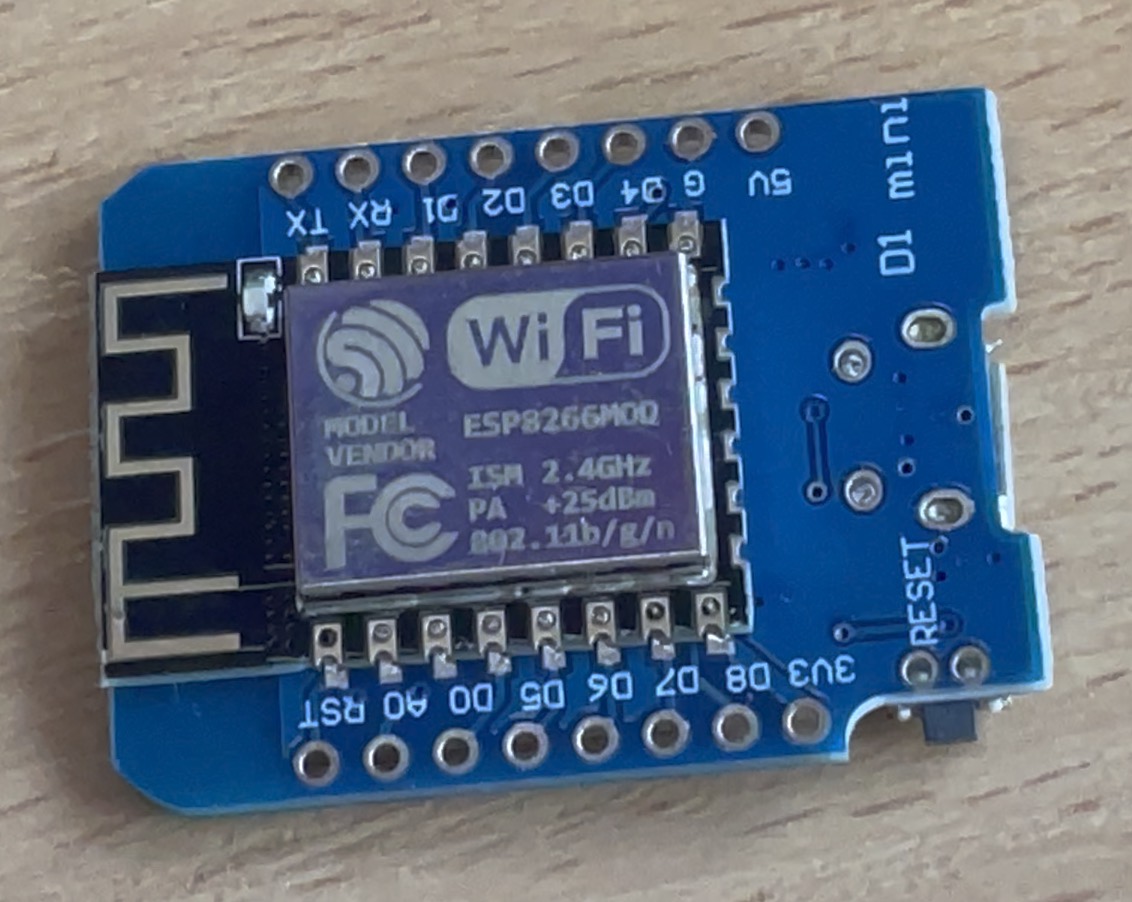
The ESP32 and ESP8266 are cheap Wi-Fi modules perfectly suited for DIY projects in the Internet of Things (IoT) and Home Automation fields.
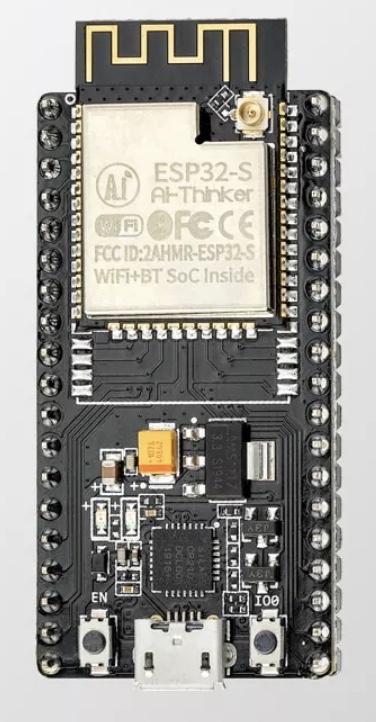
The ESP32 is the ESP8266 successor. It adds an extra CPU core, faster Wi-Fi, Bluetooth and Bluetooth Low Energy support and some other features.
Both boards are cheap, but the ESP32 cost slightly more around $6 to $12, where the ESP8266 can cost from $4 to $6. Of course it all depends on where you get them and what model you’re buying. You can find some of these boards in the links below.
| One of the Most Popular ESP32 & ESP8266 devices | Link AliExpress |
|---|---|
| NodeMCU v3 (ESP8266) | Link |
| Wemos D1 Mini V3 (ESP8266) | Link |
| NodeMCU-32 (ESP32) | Link |
What is ESP Web Tools?
What is ESP Web Tools? Simply said using ESP Web Tools – you can install software like ESPHome, ESPEasy or WLED on your ESP32 or ESP8266 devices with a click of button right from you browser. The only requirement for now is to use a Chrome or Edge browser. That is it, but let’s see it in action!
- Connect your ESP8266 or ESP32 device to your computer via USB cable (or use the board pins if there is no USB).
- Open the following page in Google Chrome or Microsoft Edge browser – https://esphome.github.io/esp-web-tools/
- Select any of the available software on the ESP Web Tools demo page (ESPHome, WLED, ESPEasy).
- Click on Install button under the software of your choice.
- In the dialog window select the USB port where your board is connected and click on Connect button.
- Wait until the installation process is complete.
TIP! It is suggested not to leave the tab during the installation process as it may slow down or even break the process!
And it automatically install the right firmware for the connected chip! How cool is that? Let me know in the comments what do you think about it! I will be happy to chat with you there.
When the above installation process is complete you can try to connect to the Access Point that device usually create and to finish the onboarding process.
ESP Web Tools Drawbacks?
You may think are they any drawbacks of using the ESP Web Tools? Yes, there are, but not major ones:
- As I said in the beginning it supports only two browsers at the moment, probably some more will be added to the list in the future, but for now you have to stick with Chrome or Microsoft Edge otherwise you will see this message:

- Also using command line tools to flash a firmware is currently faster than using ESP Web Tools, but I believe that will be improved in the future.
When we are talking about improve – ESP Web tools has support of the Improv and that is not a drawback, but what actually is improv? Let’s find out!
What is Improv?
Improv is an open standard for setting up Wi-Fi via Bluetooth LE. It basically let you connect your IoT device to you Wi-Fi easier than the current widely adopted process.
Current Wi-Fi connection process (without Improv)?
Until now after you flash a new device, I’m sorry when you install a software – the device usually creates a new Wi-Fi access point and you have to disconnect from you current Wi-Fi and to connect to the new one to finish the setup. Then you have to return back to your previous Wi-Fi to see if the device managed to provision successfully. Often times this whole process can cause issues, especially if you have multiple Wi-Fi networks.
The Improv way?
The new open standard Improv is trying to improve the process described in the above section by making everything easier & faster.
Improv require Bluetooth LE to work, and because I only have ESP8266 devices at the moment and not a single ESP32 device which have the Bluetooth LE support. I will let Paulus (@balloob) the Home Assistant founder to demo the Improv for you.

- Click on Connect device to Wi-Fi button.
- Select your device from the dialog window.
- Click on Pair button.
- Enter your Wi-Fi SSID (Name) and Wi-Fi password.
- Click Save button.
- Wait for the provisioning process to finish.
What do you think is it going to work? Are we going to see Improv in Shelly and Sonoff devices in the future for example? Let me know in the comments below?
TIP! Demo site can be found here – https://www.improv-wifi.com
Giveaway winners are?
Last week I told you if you leave a comment under my AirTag Automation video you will have a chance to win a gold sticker with my logo and my slogan on it. All of this because we reach 10,000 subscribers in YouTube. And now the winners are … let’s see how I choose the winners.
I used this Node-RED flow to randomly select the winners – GitHub Link
And they are:
Chris, Martin, Jesse, Mathieu, Harun, Knax, MEtfan, Hamad, DJAX, Dave
As well as @mantaalex from my Discord server who is the most active member there so far.
Congratulations
If someone of the winners is reading this contact me via email or by searching for @KPeyanski in Twitter, Instagram or TikTok.
Outro
Feel free to join my Discord server and to follow me on Twitter!
You can also secure this channel existence using the methods listed in my website support section or you can buy my SMART HOME Getting Started Actionable Guide
SMART HOME Getting Started Actionable Guide
28 unique printable pages in a Smart Home Getting Started Actionable Guide designed to help you make the best decisions and your Home Smart right away!
With that being said – stay safe and don’t forget Home Smart, but not hard!
Thank you for reading and I will see you next Wednesday!