
I will show you how Home Assistant Bitcoin monitoring can be achieved using several different ways. Also how to create automations that will notify you when the Bitcoin price goes up or down. Same approach can be used for other Crypto Currencies. Coming up.
Table of Contents
What is the end goal of this article?
We are going to talk about Home Assistant and Crypto Currencies today. The end goal is to add some sensors that can show the current price of any crypto currency inside Home Assistant, so we can easily monitor these sensors and to create Home Assistant automations.
The main focus is Home Assistant Bitcoin monitoring using the integrations that are available at the moment. But if you are an Altcoin guy don’t go away just yet, as we are going to touch this topic as well.
First, I want to show you the latest breaking tweet from Elon Musk who reminds you to smash the subscribe button for my newsletter! And It is not photoshopped!
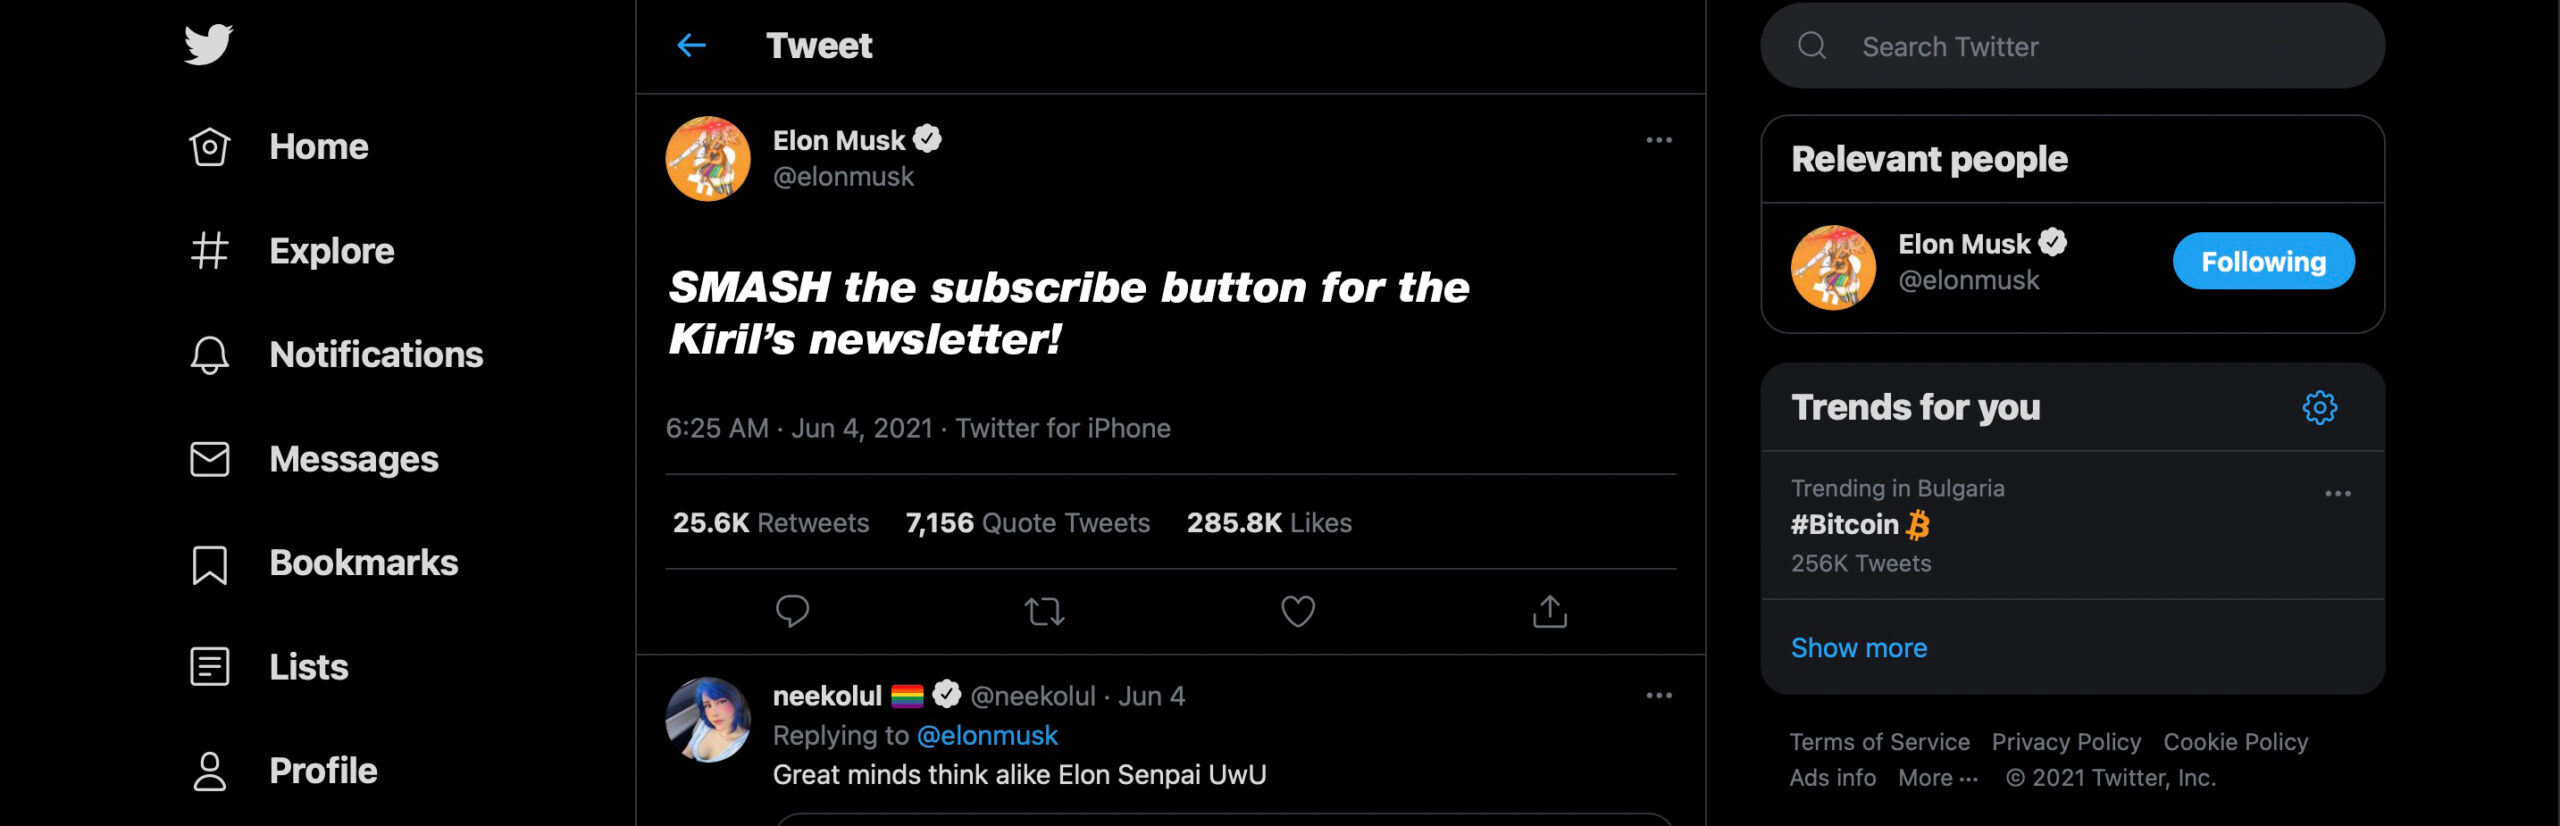
Okay it is photoshopped, but if you hit the subscribe button below anyway we will stay in touch and you’re not going to skip an article from now on. On top it is totally free and easy to do.
[sibwp_form id=2]
With that said let’s begin.
Native Home Assistant Bitcoin integration (not recommended)
TIP! This method is not working well for me and you can freely skip it and go to the next sections. However, If you still want to try it, then continue reading this part.
There is a native Home Assistant Bitcoin integration that you can easily use, by adding the platform bitcoin as sensor in your Home Assistant configuration.yaml file.
# Example configuration.yaml entry
sensor:
  - platform: bitcoin
    display_options:
      - exchangerate
      - trade_volume_btc
As I said above, I cannot recommend this method! From my experience this sensor/integration is not very reliable. Sometimes, it is just not working and it is showing no data. Also no other crypto currency (altcoins) can be added this way.
Three other methods for Home Assistant Bitcoin monitoring
Because the native sensor Home Assistant Bitcoin integration is not so good. I will show you not one, but 3 other methods to get any crypto currency in your Home Assistant Lovelace! These methods will be sorted from easiest to the hardest as well as from the most boring to the most fun one. Starting right now:
Home Assistant Kraken Integration
Let’s start with the first method, which is Home Assistant Kraken integration.
Kraken is one of the most respected Crypto Currency exchange. You don’t need an account in Kraken for the Home Assistant integration, but if you decide to open an account there you can use this link 👉 LINK
To add the Home Assistant Kraken integration – you can use the My Home Assistant link below.

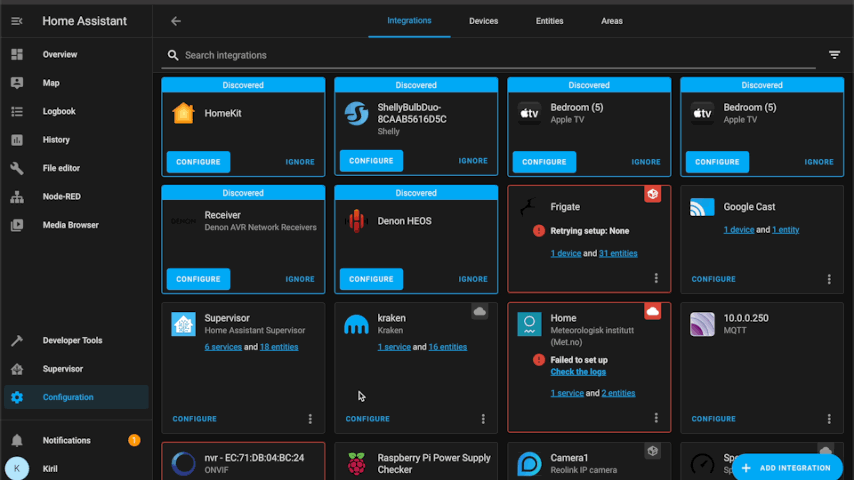
Or you can manually add it by go to Home Assistant > Configuration > Integrations > Add integration > Search & Install Kraken.
By default only XBT USD pair is added, where XBT is the Bitcoin symbol in Kraken Cryptocurrency exchange and of course USD is US dollars.
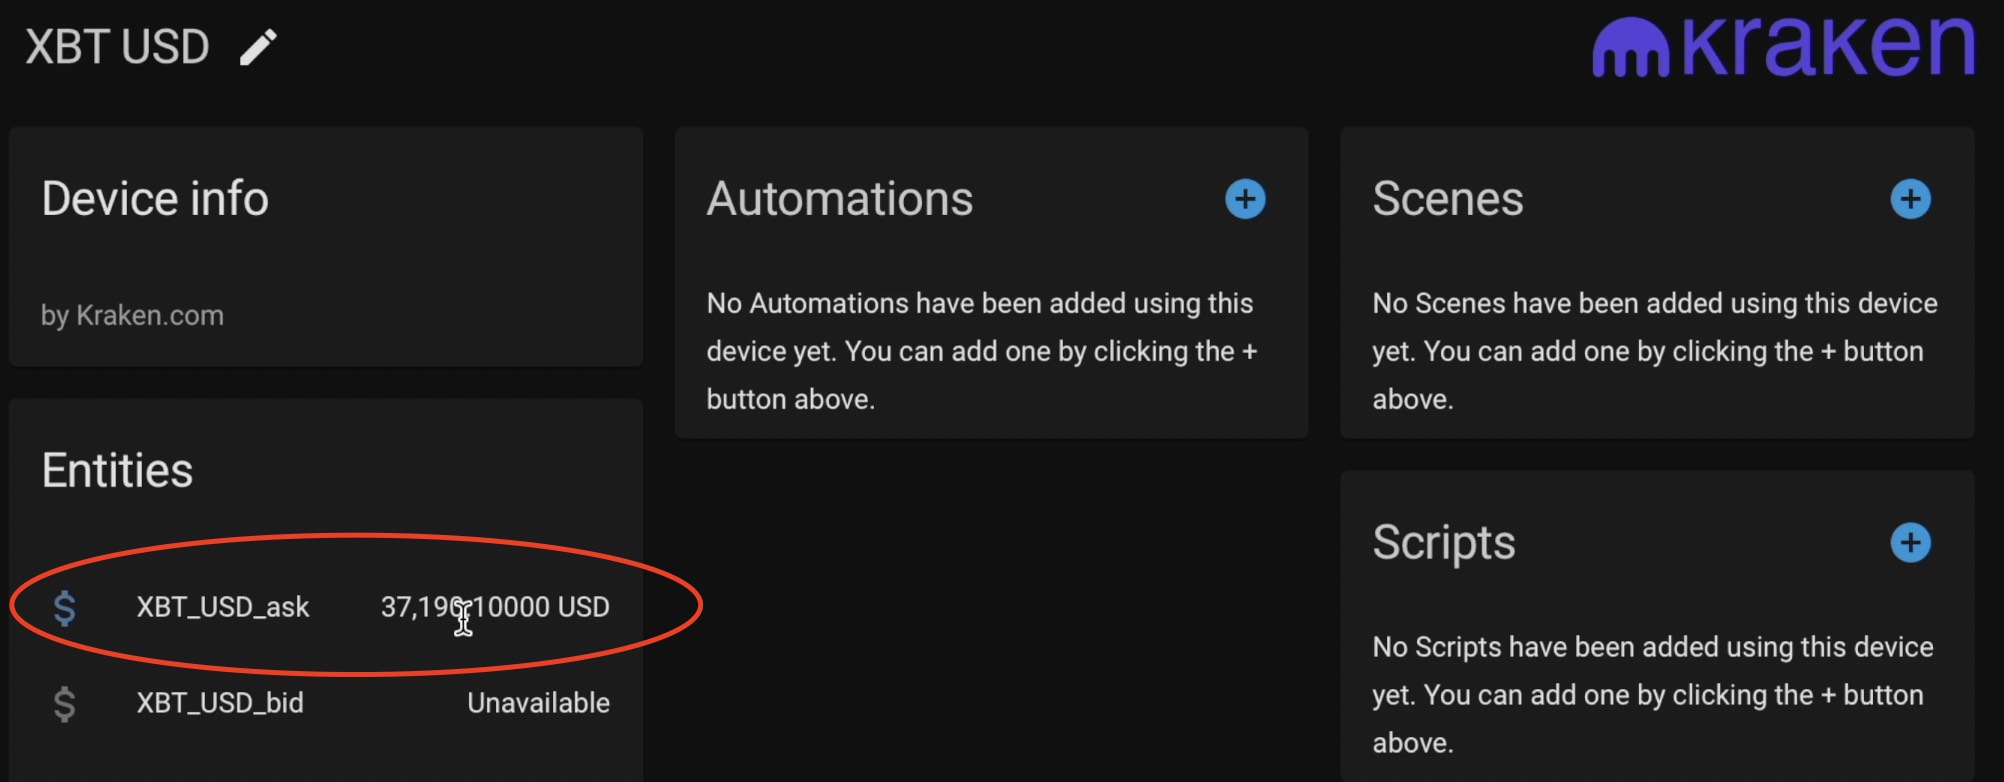
So, you can add the current Bitcoin US dollars exchange rate in your Home Assistant Lovelace or/and you can start making automations right away. But what if you want to add an alternative coin (altcoin) to the list like Ethereum? Here is what you need to do:
- Go back to Configuration > Integrations.
- Find the already installed Kraken integration and click on the Configure button.
- From the dropdown list select the pair that you want to monitor like ETH/USD (where ETH is Ethereum symbol)
- Click on Submit and then Finish.
Home Assistant Coinbase Integration
Now let’s talk about Home Assistant Coinbase integration. Coinbase is probably the biggest Crypto currency exchange.

Even Tesla and Elon Musk used Coinbase to buy Bitcoin for 1.5billion dollars.
You will need a Coinbase account to get the API keys needed for the Home Assistant integration. If you still don’t have an account in Coinbase you can use my affiliate link below. We will both get 10 dollars in Bitcoin when you buy or sell $100 or more from Coinbase.
Register a free Coinbase account here 👉 LINK
Now let’s see how to add Coinbase to Home Assistant.
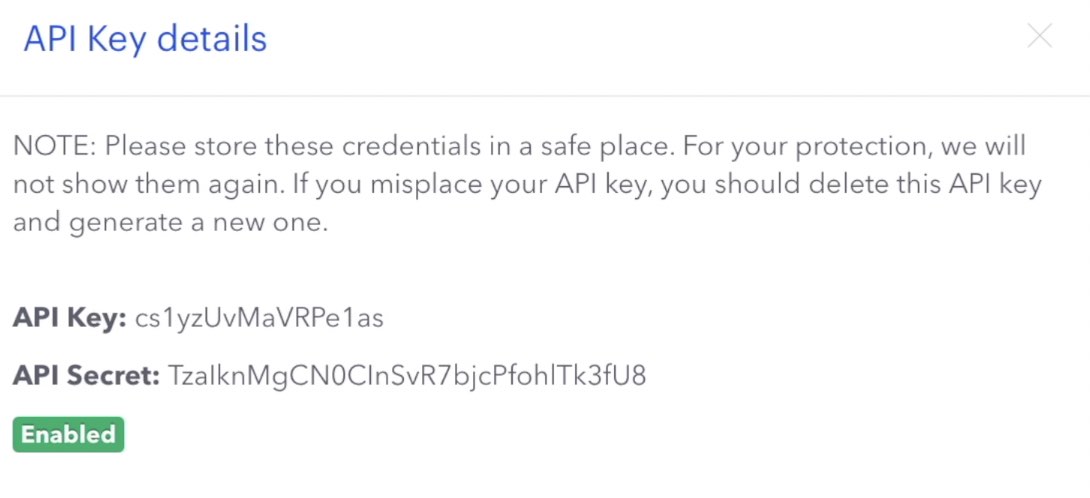
- Obtain an API key from Coinbase’s developer site 👉 LINK
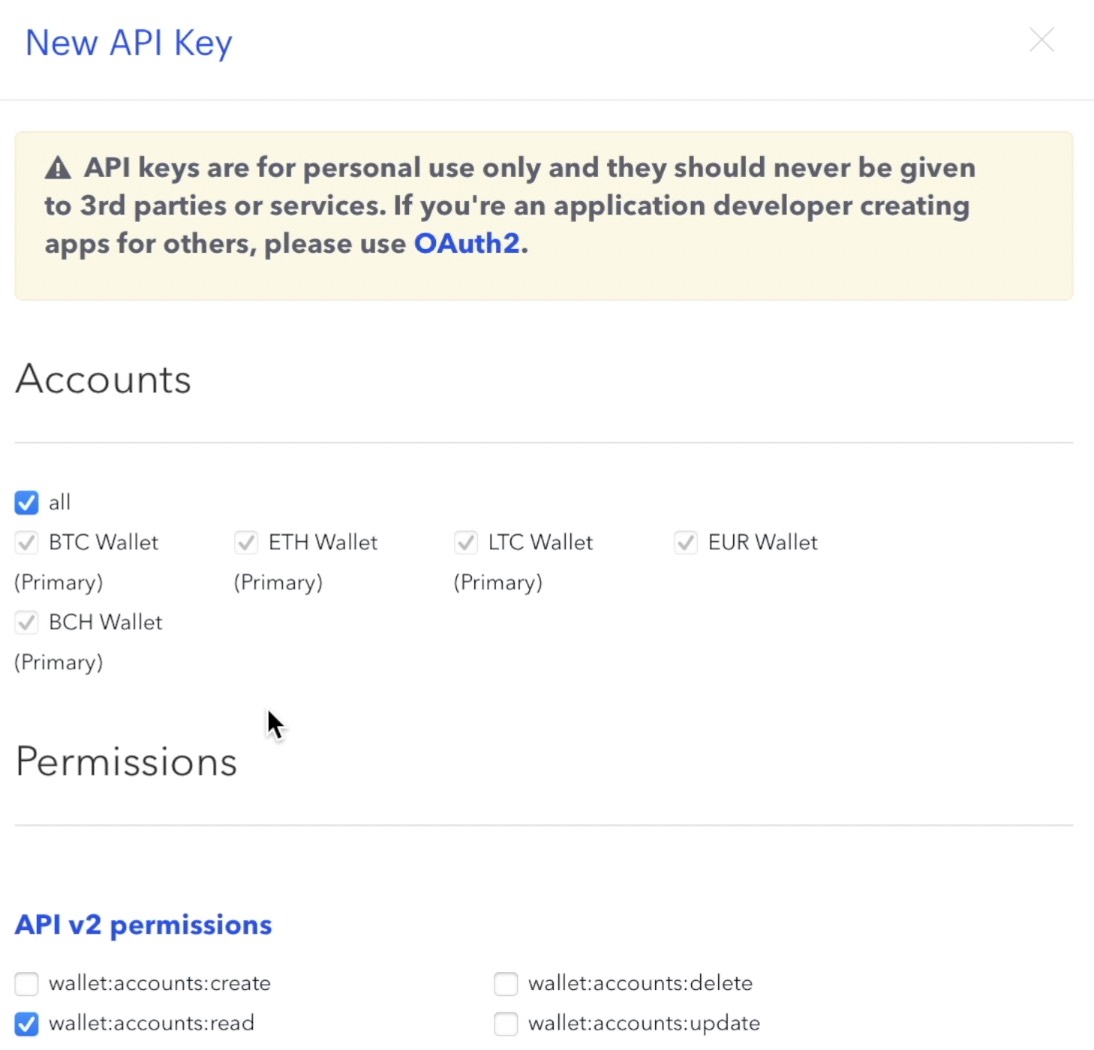
When you select permissions for your API key make sure that you select all under Accounts and wallets:accounts:read under API v2 permissions.
- Store your API Key and API Secret somewhere safe and don’t share them.
Open your configuration.yaml file and paste the following YAML
# Example configuration.yaml entry
coinbase:
  api_key: YOUR_API_KEY
  api_secret: YOUR_API_SECRET
  account_balance_currencies:
    - EUR
    - BTC
  exchange_rate_currencies:
    - BTC
- ETH- Don’t forget to replace your Coinbase API key and secret in the YAML code.
- Customize the above however you wish. All of the currencies that Coinbase support can be added in your Home Assistant by just type their symbols.
- You can also check your Coinbase account balance if you leave the account_balance_currencies: section.
- Save the configuration.yaml file and restart your Home Assistant.
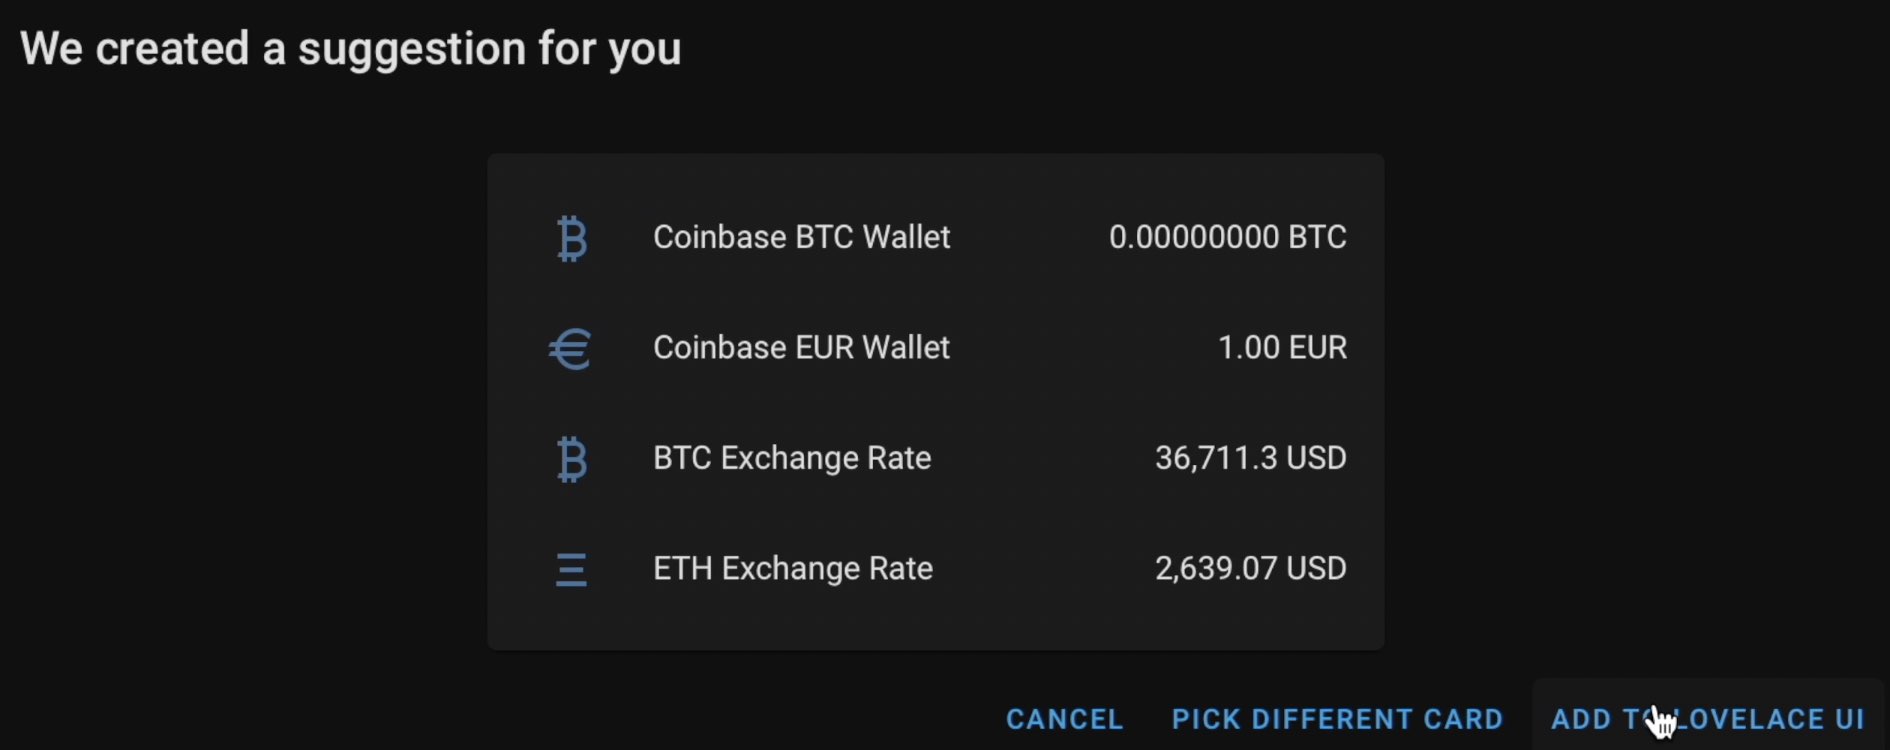
Adding Coinbase sensors in Home Assistant UI
Okay, we have the Coinbase API and it is now added in our Home Assistant configuration. Time to add the new Coinbase sensors in Home Assistant as entities card. Here is how.
Go to Home Assistant > Overview > Three dots menu > Edit Dashboard > Add Card > By Entity tab > search and select all of the Coinbase sensors that you add in the above section > click on Add to Lovelace UI.
Home Assistant Coinmarketcap Integration
Last, but not least we are going to use Coinmarketcap APIs as well as Home Assistant command line platform, to get the current price of any crypto available out there. After that we will make a Home Assistant Bitcoin automation as I promised.
- You will need to obtain a CoinMarketCap API key 👉 LINK
- Select the Basic plan which is free, but limited with up to 333 credits (API invokes) per day. That is more than enough for our needs as we will set the sensor to be updated every 5 minutes. That will lead to 288 credits daily.
- Open your configuration.yaml file and paste the following YAML.
# Configuration.yaml entry
sensor:
  - platform: command_line
    name: coinmarketcap_curl
    command: 'curl -X GET -H "X-CMC_PRO_API_KEY: YOUR_API_KEY_HERE" -H "Accept: application/json" -d "symbol=BTC,ETH,BNB&convert=USD" -G "https://pro-api.coinmarketcap.com/v1/cryptocurrency/quotes/latest"'
    value_template: '{{ value_json.value }}'
    scan_interval: 300 #5 mins refresh (this rate will use 288 credits per day out of the allocated 333 credits)
    json_attributes:
    - data
  - platform: template
    sensors:
      btc_price:
        friendly_name: 'Bitcoin Price'
        unit_of_measurement: 'USD'
        value_template: '{{ ((states.sensor.coinmarketcap_curl.attributes.data.BTC.quote.USD.price) | float) | round(2) }}'
      eth_price:
        friendly_name: 'Ethereum Price'
        unit_of_measurement: 'USD'
        value_template: '{{ ((states.sensor.coinmarketcap_curl.attributes.data.ETH.quote.USD.price) | float) | round(2) }}'
      bnb_price:
        friendly_name: 'BinanceCoin Price'
        unit_of_measurement: 'USD'
value_template: '{{ ((states.sensor.coinmarketcap_curl.attributes.data.BNB.quote.USD.price) | float) | round(2) }}'- If you already have a sensor section – remove the sensor: keyword and paste the rest of the code under your existing sensor: section.
- Replace YOUR_API_KEY_HERE with your CoinMarketCap key.
- You can leave everything else as it is and skip the next points or you can further customize as described below.
- Edit the symbols BTC,ETH,BNB and USD in the following text “symbol=BTC,ETH,BNB&convert=USD” if you want to add remove other crypto currencies and to convert to something other than USD. Where BTC = Bitcoin, ETH = Ethereum, BNB = Binance Coin 👉 LINK.
- You can find the other symbols on the CoinMarketCap website 👉 LINK.
- If you decide to add more Coins you will need to add new sensors sections for every new Crypto currency that you wish to add.
- Save the changes and restart your Home Assistant.
After Home Assistant has started I can now add the Coinmarketcap sensors as Home Assistant card exactly the same way as I did during the Home Assistant Coinbase integration demo.
Go to Home Assistant > Overview > Three dots menu > Edit Dashboard > Add Card > By Entity tab > search and select all of the CoinMarketCap sensors that you describe in the above section > click on Add to Lovelace UI.

Create Home Assistant Bitcoin Automation
Time to make a Home Assistant Bitcoin automation that is going to be the following:
- When Bitcoin surpass 1 million dollars per coin (Trigger)
- Home Assistant will automatically call a Lamborghini store with a text to speech message saying: “I want to buy a Lambo. Do you accept Bitcoin payments?” (Action)
For the calling part I will use the Home Assistant Twilio integration. Read/watch this article/video if you want to enable Twilio calls in your Home Assistant as well 👉 LINK
Now let’s create the automation.
Open your automations.yaml file and paste the following YAML code:
# automations.yaml entry
- alias: Bitcoin value exceeds $1M of value
  description: ’Bitcoin to the Moon'
  trigger:
    - platform: numeric_state
      entity_id: sensor.btc_price
      above: '1000000.00'
  condition: []
  action:
    - data:
        message: I want to buy a Lambo. Do you accept Bitcoin payments?
        target:
        - !secret my_phone_number
      service: notify.twilio_calls
  mode: single
Because the current Bitcoin price is far below 1 million dollars – I changed the threshold to 35000 and the mobile number to mine and not to be the Lamborghini’s. That is to better demonstrate you the automation, but I promise to change the parameters back, just in case that Bitcoin really hit 1 million dollars.
TIP: The automation above is based on the BTC sensor from CoinMarketCap, but any other Crypto Coin sensor (From Kraken, Coinbase or Native integration) can also be used with very little modification.
I’m accepting Bitcoin
I’m not sure about the Lamborghini’s store, but I’m accepting Bitcoin payments on my website and you can buy my Smart Home Getting Started Actionable Guide with Bitcoin.
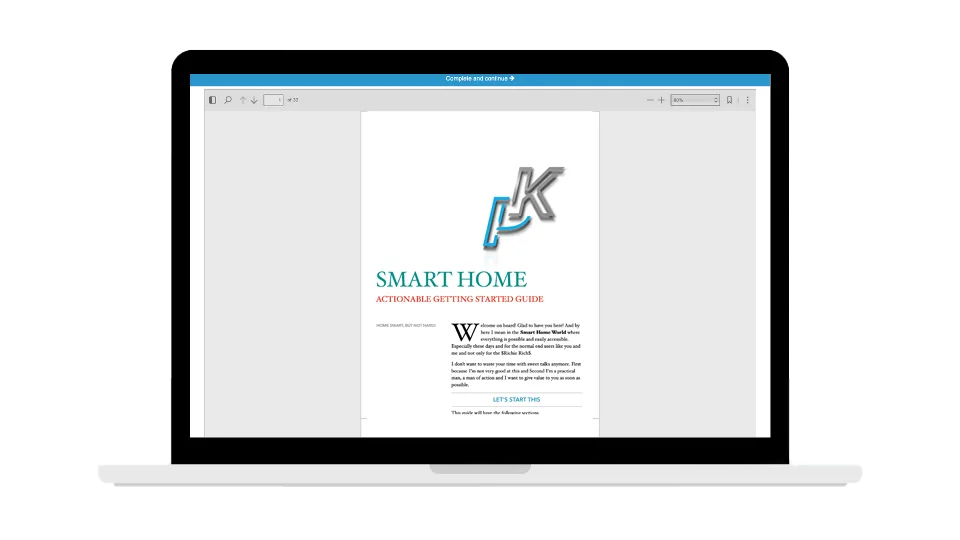
SMART HOME Getting Started Actionable Guide
28 unique printable pages in a Smart Home Getting Started Actionable Guide designed to help you make the best decisions and your Home Smart right away!
Until now nobody used Bitcoin to buy it. Every-time it is either Credit Card or PayPal, not that I complain about that, but I’m just saying that I’m still waiting for my first Bitcoin order.
I also want to invite you to my Discord server, where we talk a lot about Smart Home & Home Automation, but we have a #crypto-currencies channel as well 👉 INVITE LINK
With that being said stay safe and don’t forget – Home Smart, but not Hard.
Thank you for reading and I will see you next Wednesday.
Hello,
Just a message to say thank you !
Easy and instructive, i used the kraken method because it is quick and i use it.
Anyway, a big thanks for this very interesting post !!
Glad you like it, check my other tutorials as well