
I installed Home Assistant on Raspberry Pi 5 vs Raspberry Pi 4 just to see if there is any difference in terms of the performance. I just wanted to see if Raspberry Pi 5 is much faster and better device for running Home Assistant than its predecessor.
At the moment of writing this article, there is only one official Home Assistant installation method that I can use on both devices. Namely, Home Assistant Core method which is basically Home Assistant running inside Python virtual environment.
Table of Contents
What Hardware I Used?
These are the things that I used from the hardware part:
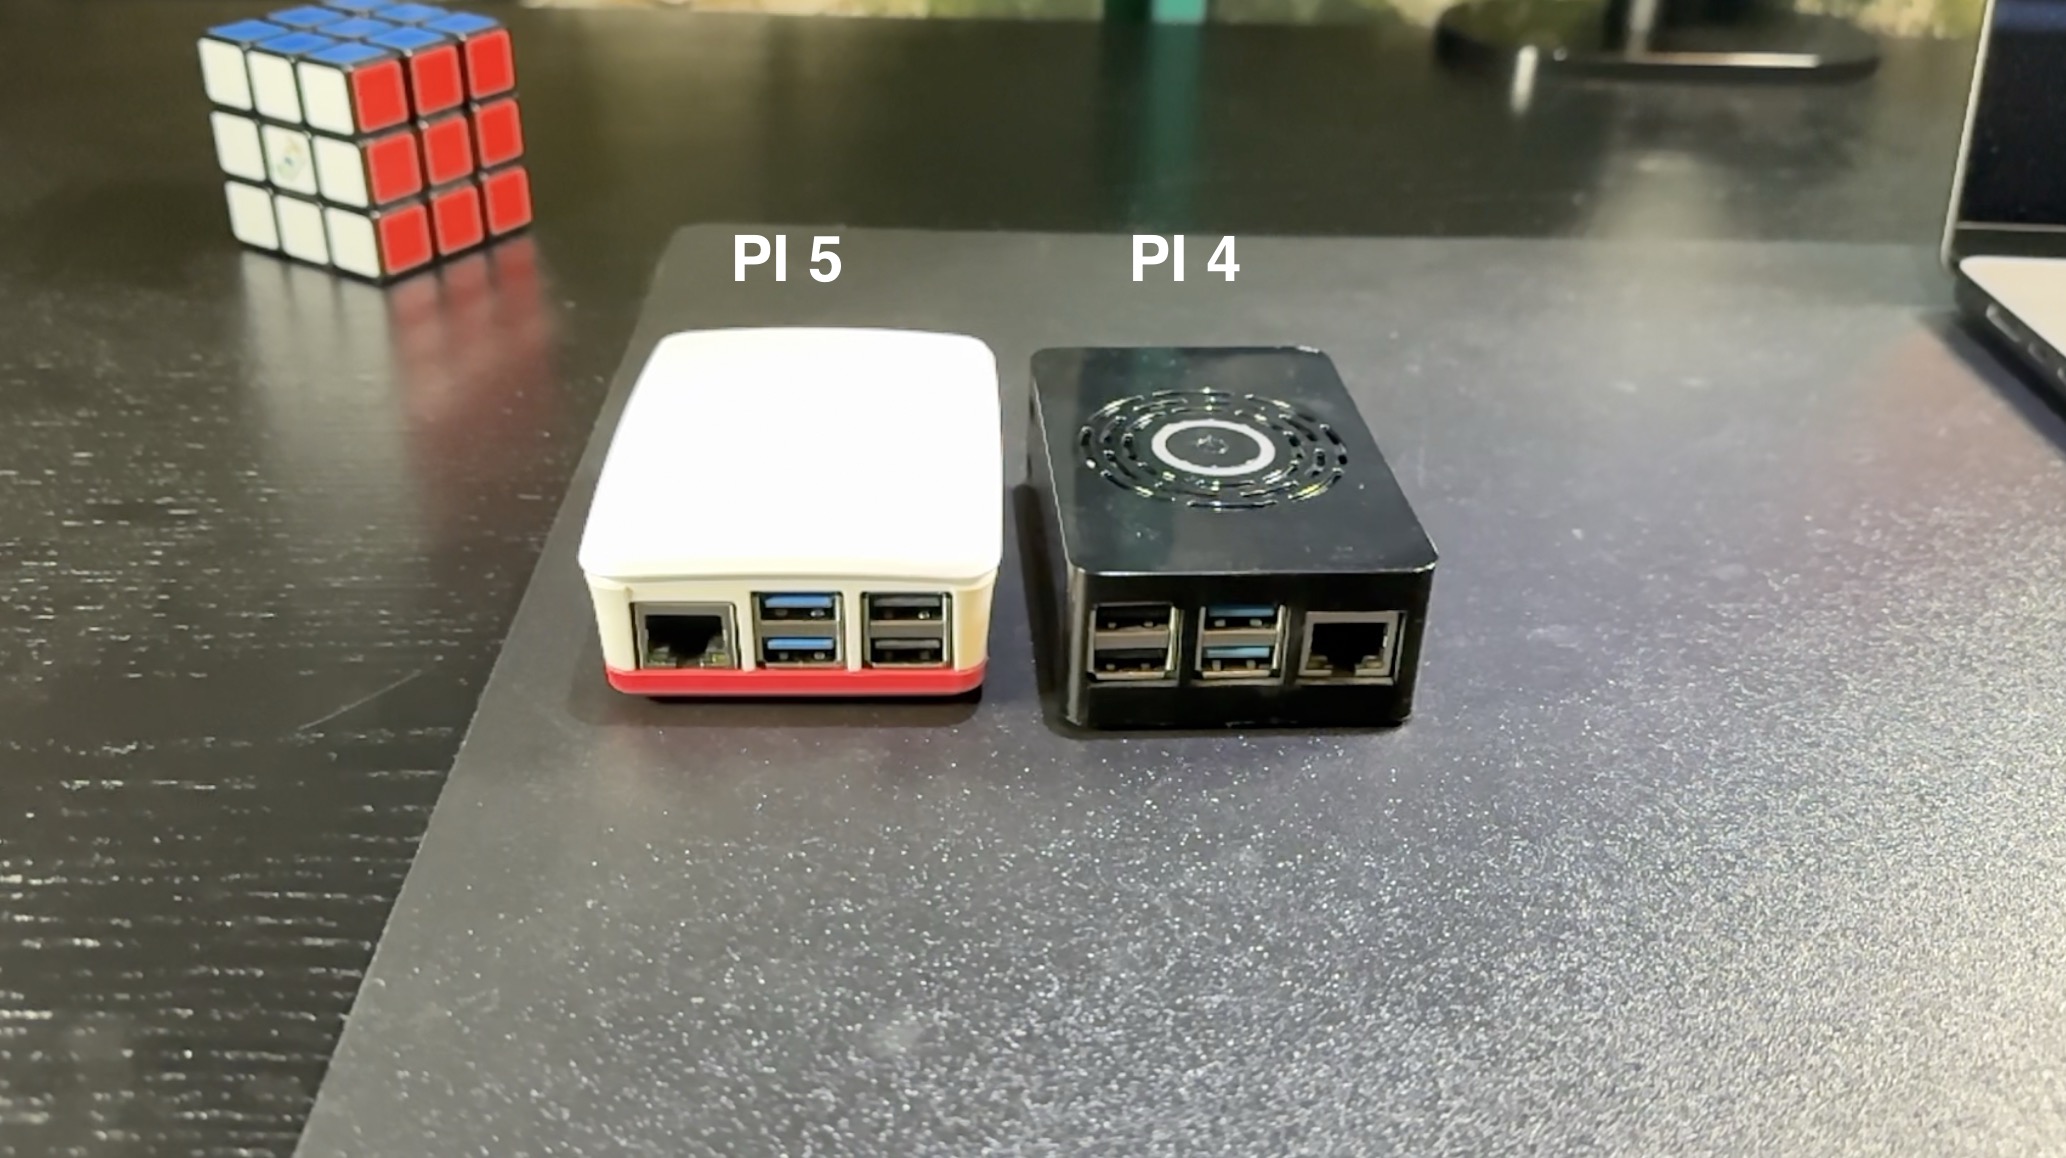
- I used Raspberry Pi 5 8G version with the official case with active cooling.
- And the Raspberry Pi 4 8G version with some case without any cooling.
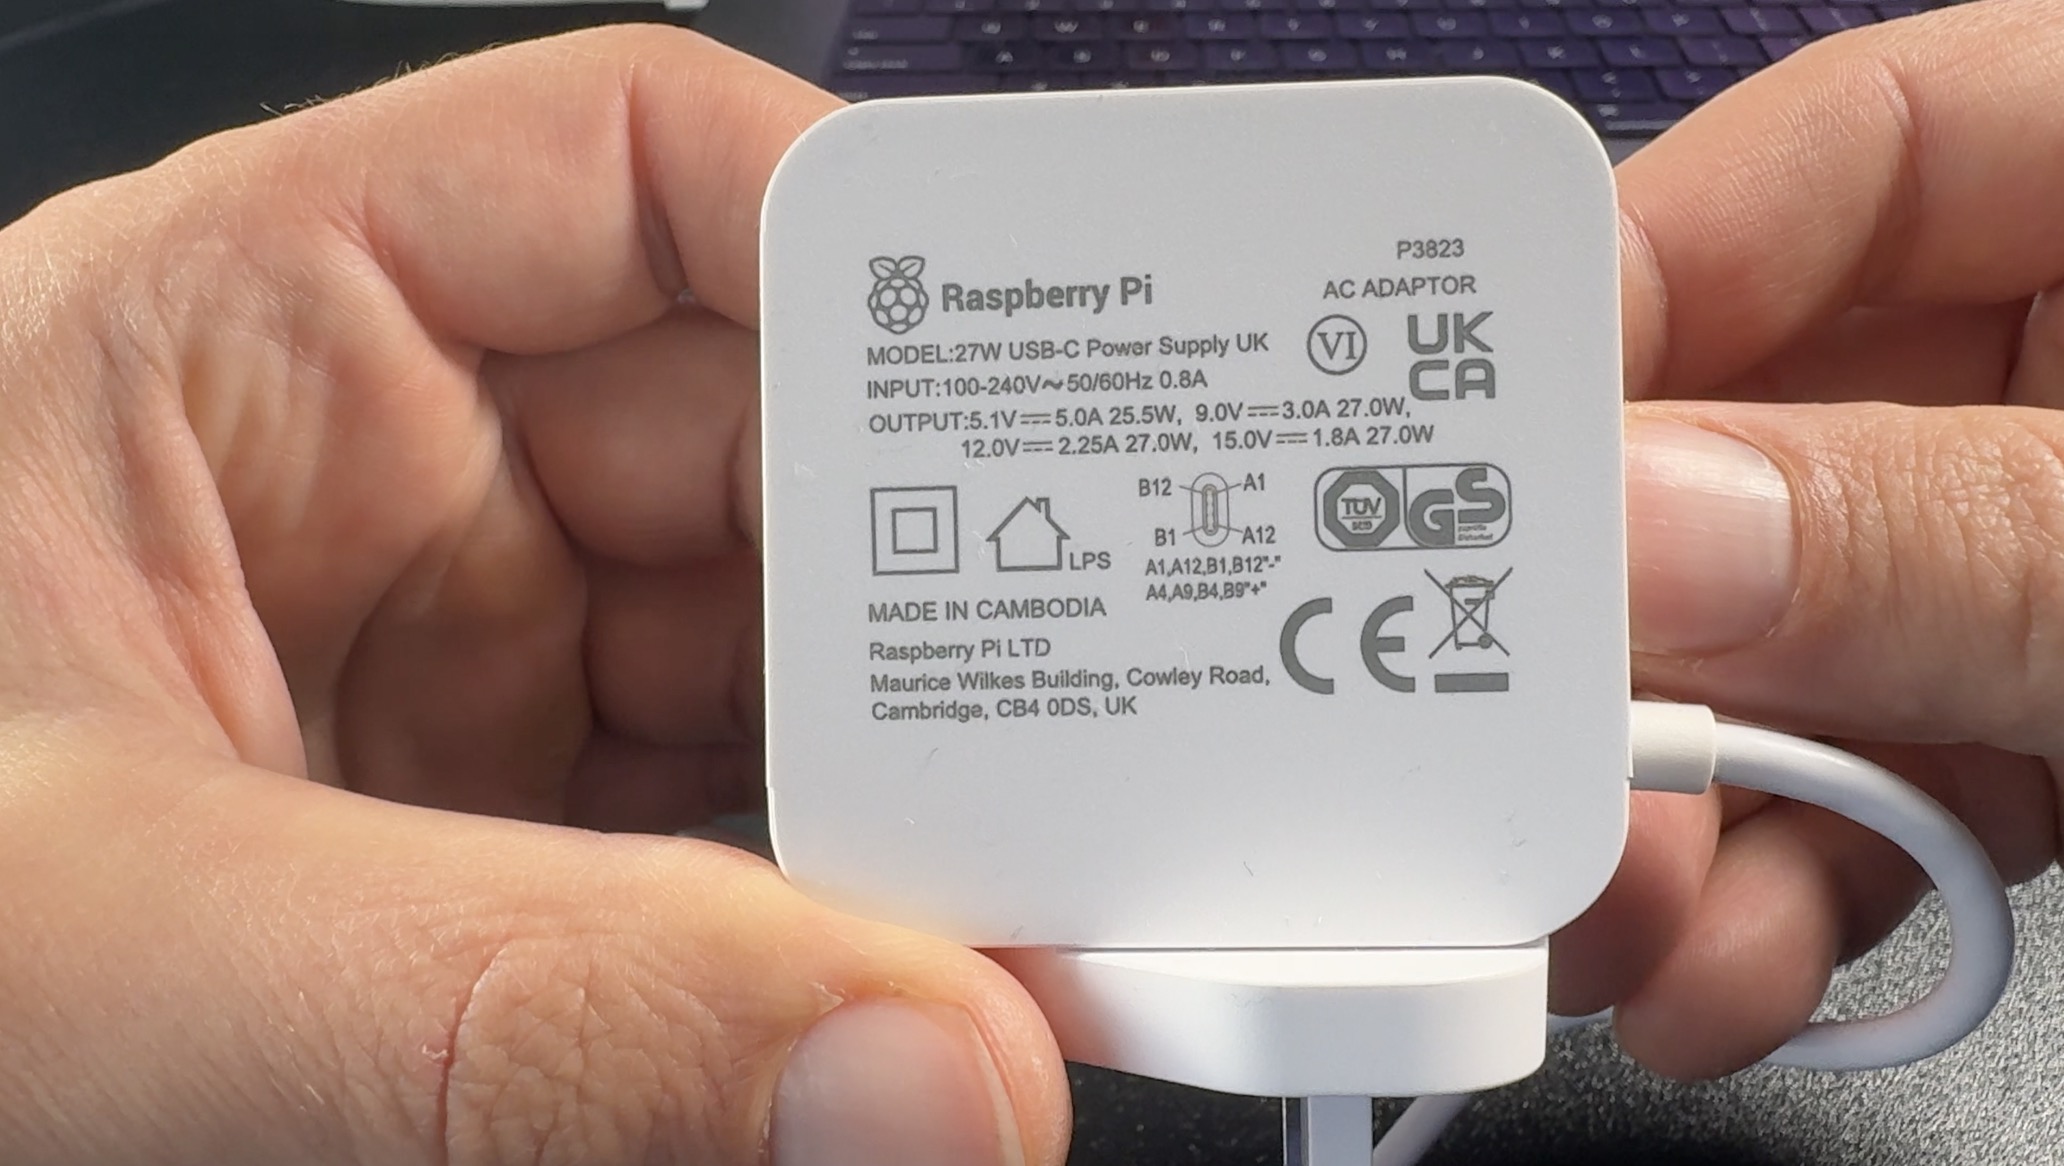
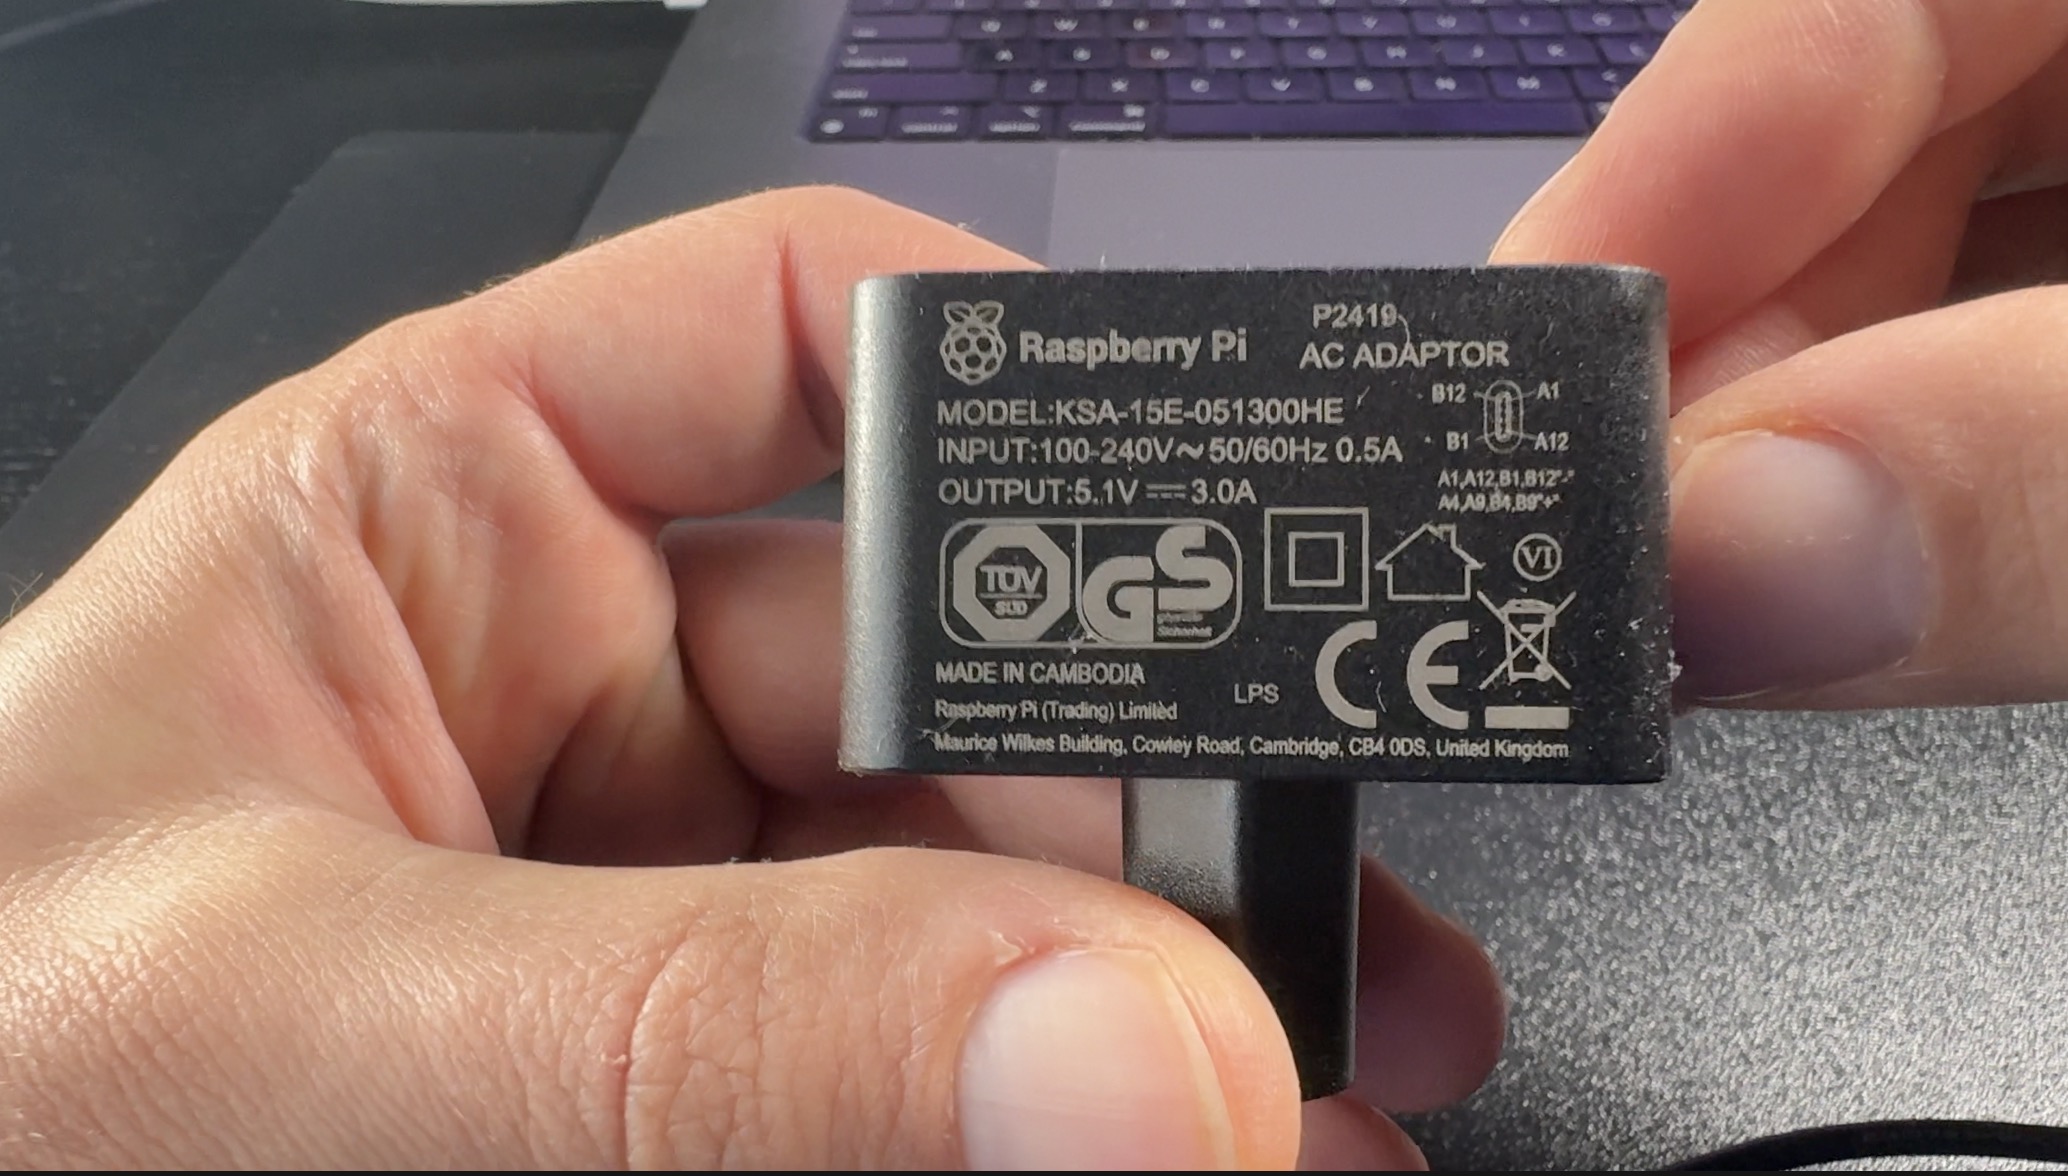
Both devices are powered by the official Raspberry Pi adapters. 27W for the Raspberry Pi 5 and 15W for the Raspberry Pi 4.
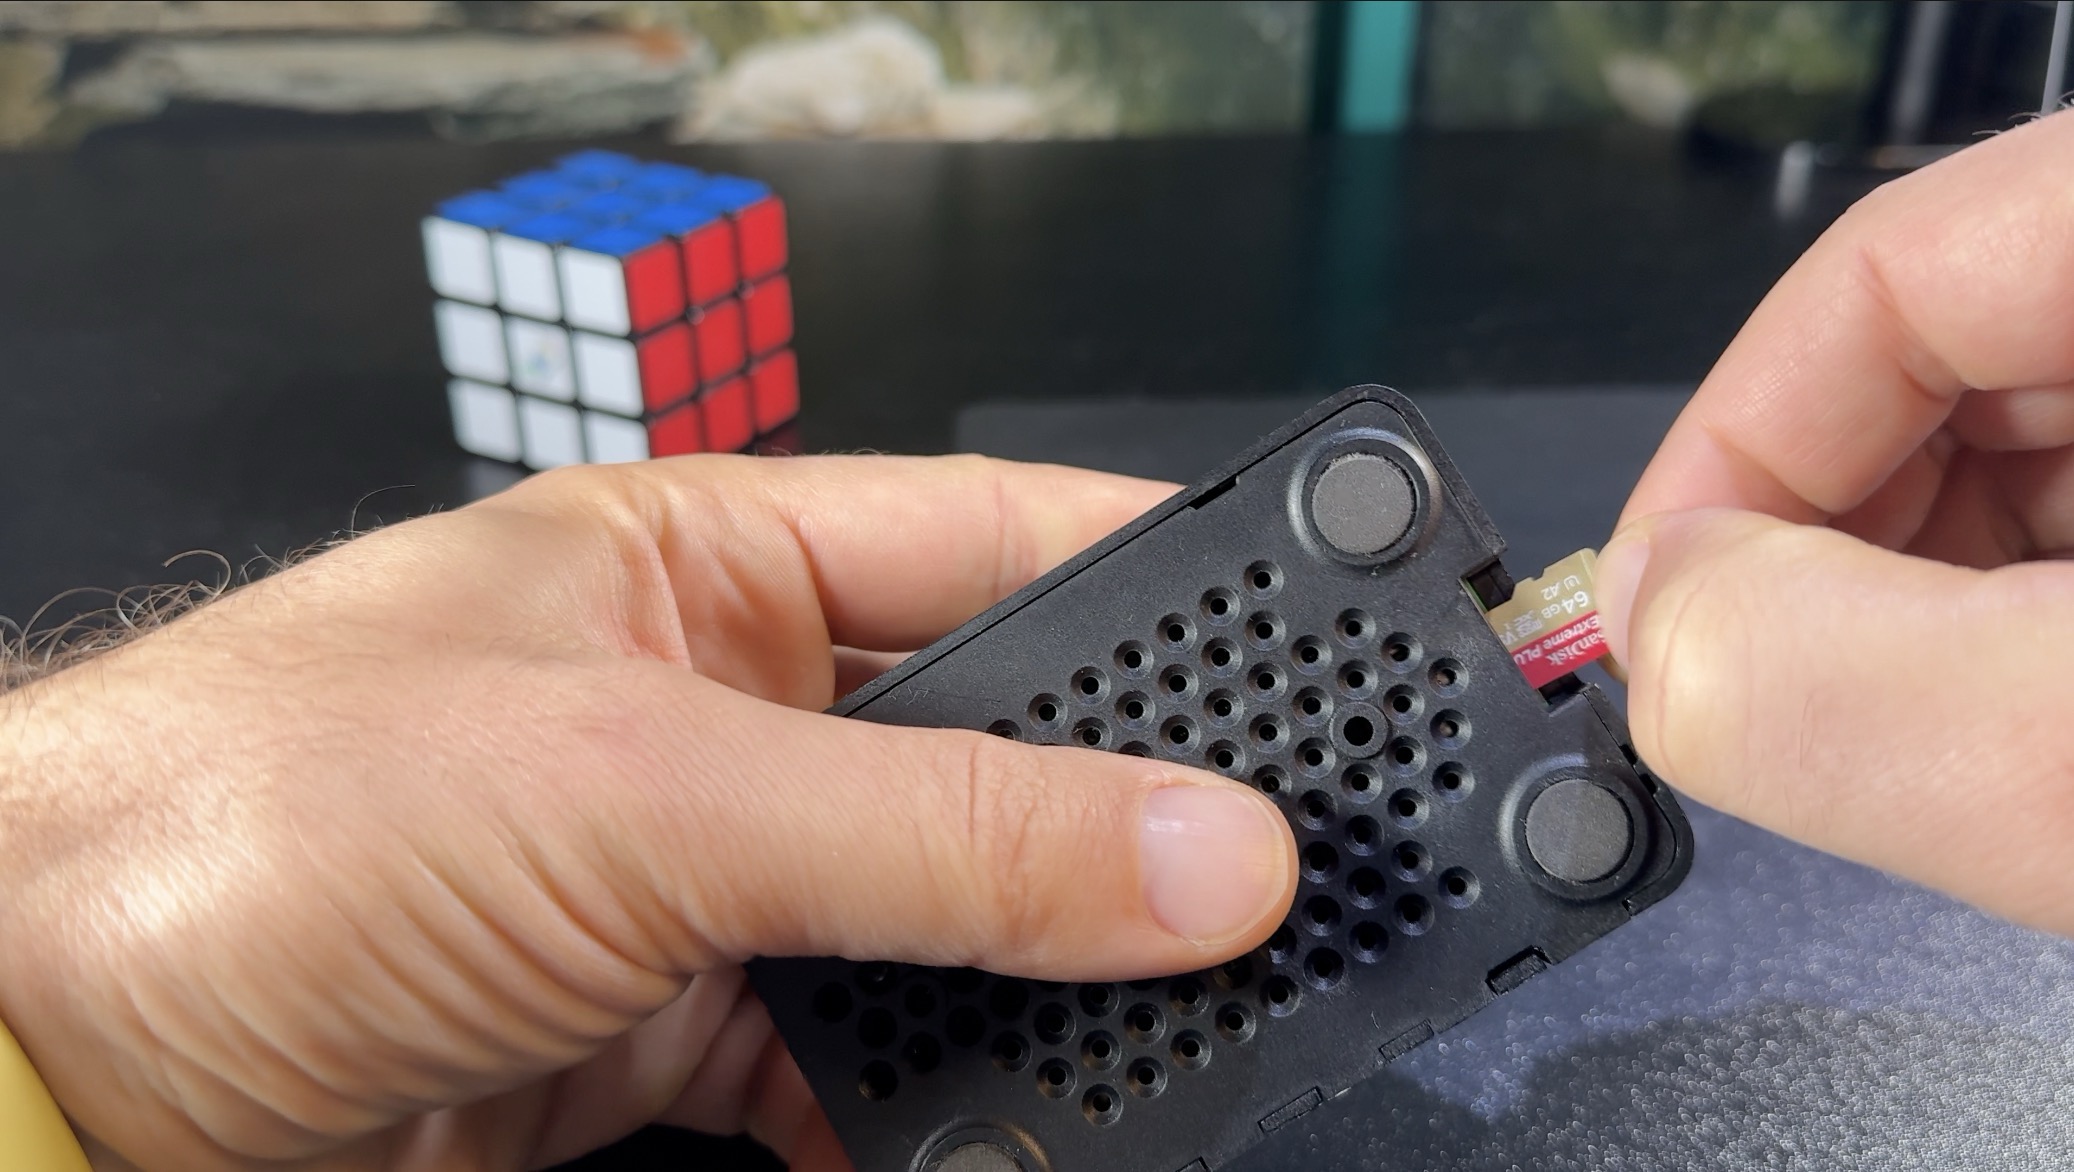
Next thing that I used is the SanDisk Extreme Plus 64 GB microSDXC Memory Card, which is not the fastest on the market, but it is also far from the slowest.
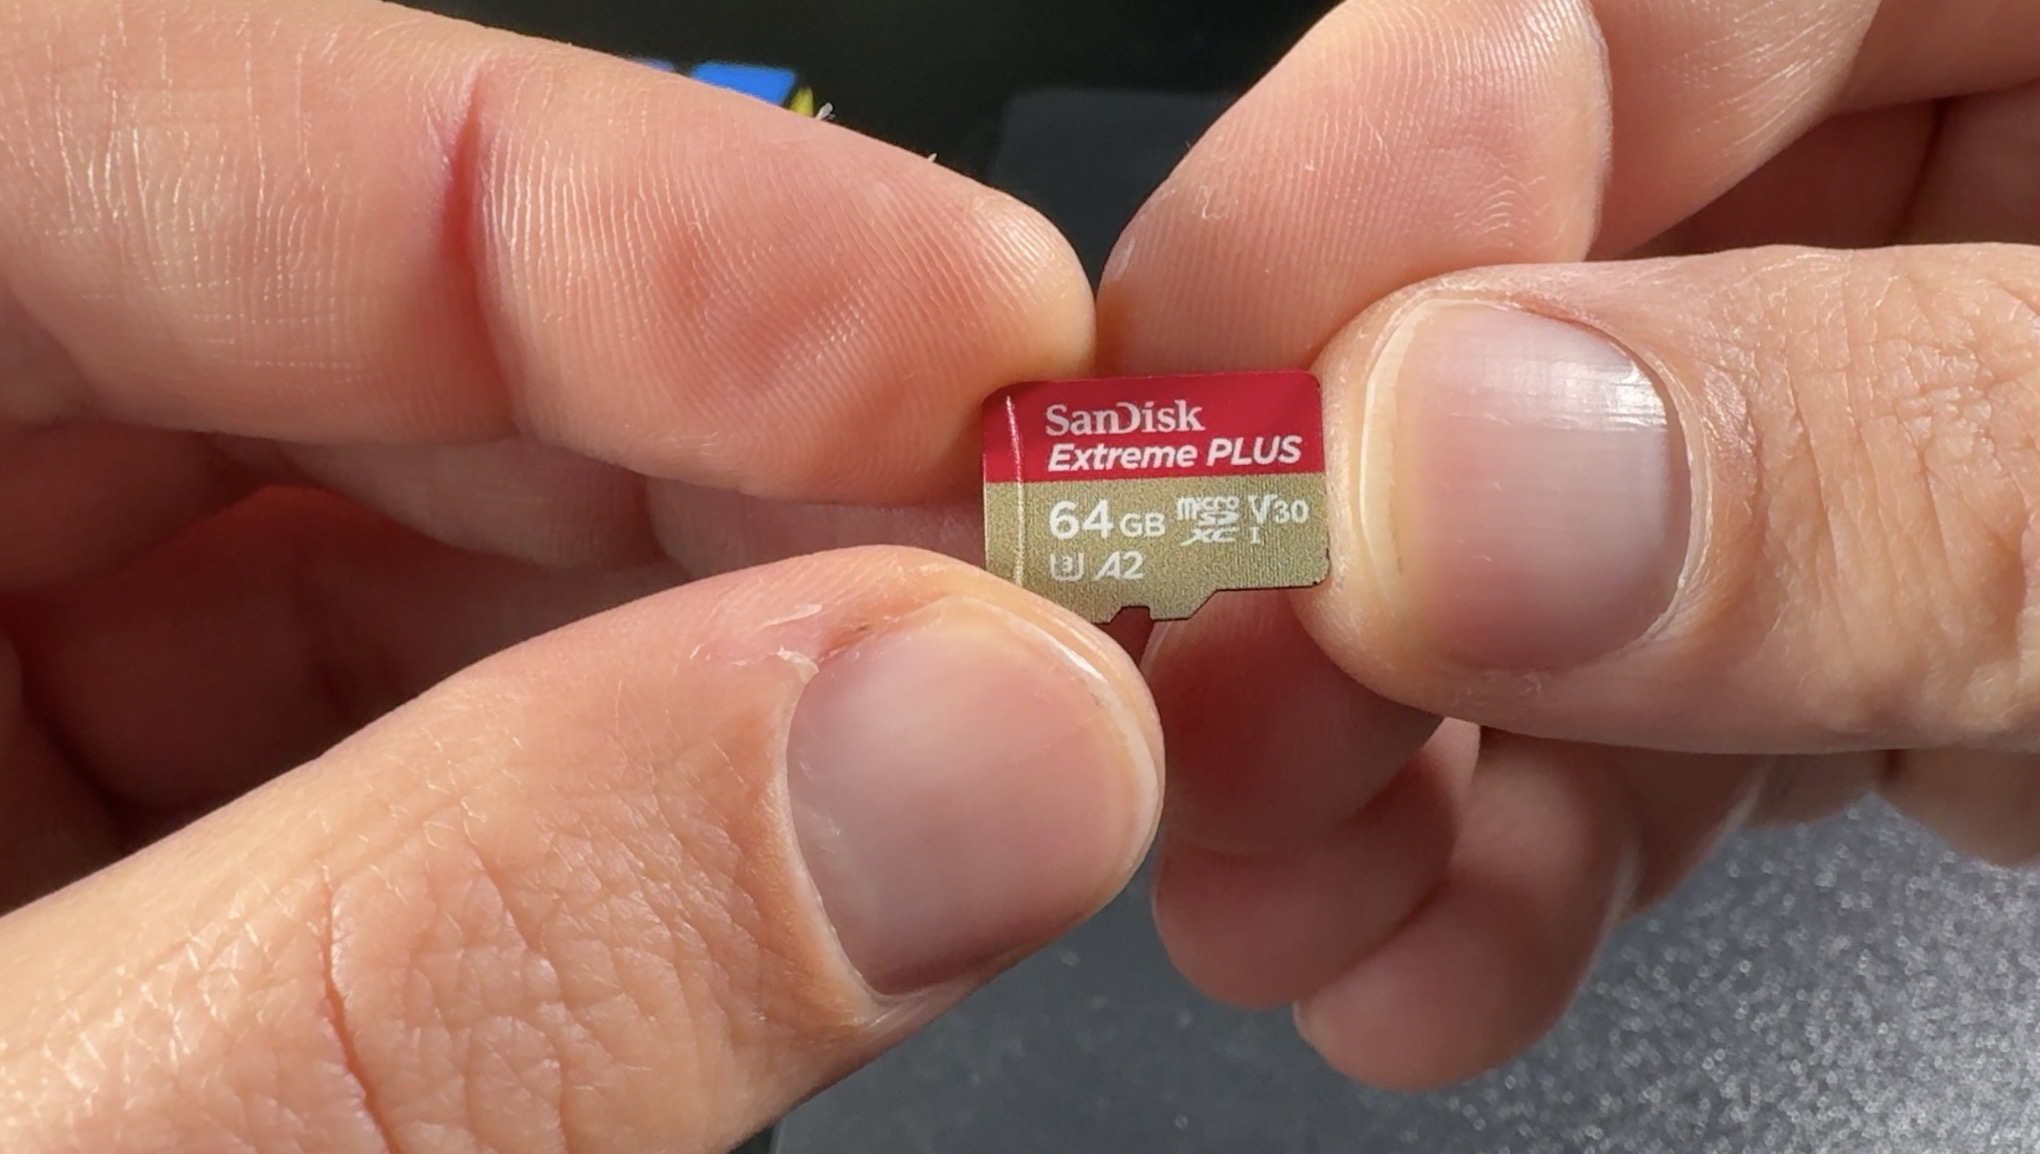
It is more like in the upper segment in terms of reading and writing speed. I will use the same SD card for both devices, so the storage speed comparison to be fair.
If you want to check the current prices of these parts you can find some affiliate links below:
- Raspberry Pi 5 8GB (Amazon) – https://amzn.to/49b6m77
- CanaKit Raspberry Pi 5 Starter Kit PRO (Amazon) – https://amzn.to/3I3cEty
- Raspberry Pi 5 8GB Starter Kit (Amazon) – https://amzn.to/4bFjL9b
- Raspberry Pi 4 4GB (Amazon) – https://amzn.to/3Rgg4x9
- Raspberry Pi 4 8GB Starter Kit (Amazon) – https://amzn.to/46TYDs0
- CanaKit Raspberry Pi 4 8GB Starter Kit (Amazon) – https://amzn.to/3tbebKk
- SanDisk Extreme Plus 64 GB microSDXC Memory Card – https://amzn.to/47OCCMx
- Raspberry Pi 5 Official Selling Page – https://www.raspberrypi.com/products/raspberry-pi-5/
I don’t want to read
If you are a visual person and you want to watch instead of reading – no problems – check my video about this topic.
What Software I Used?
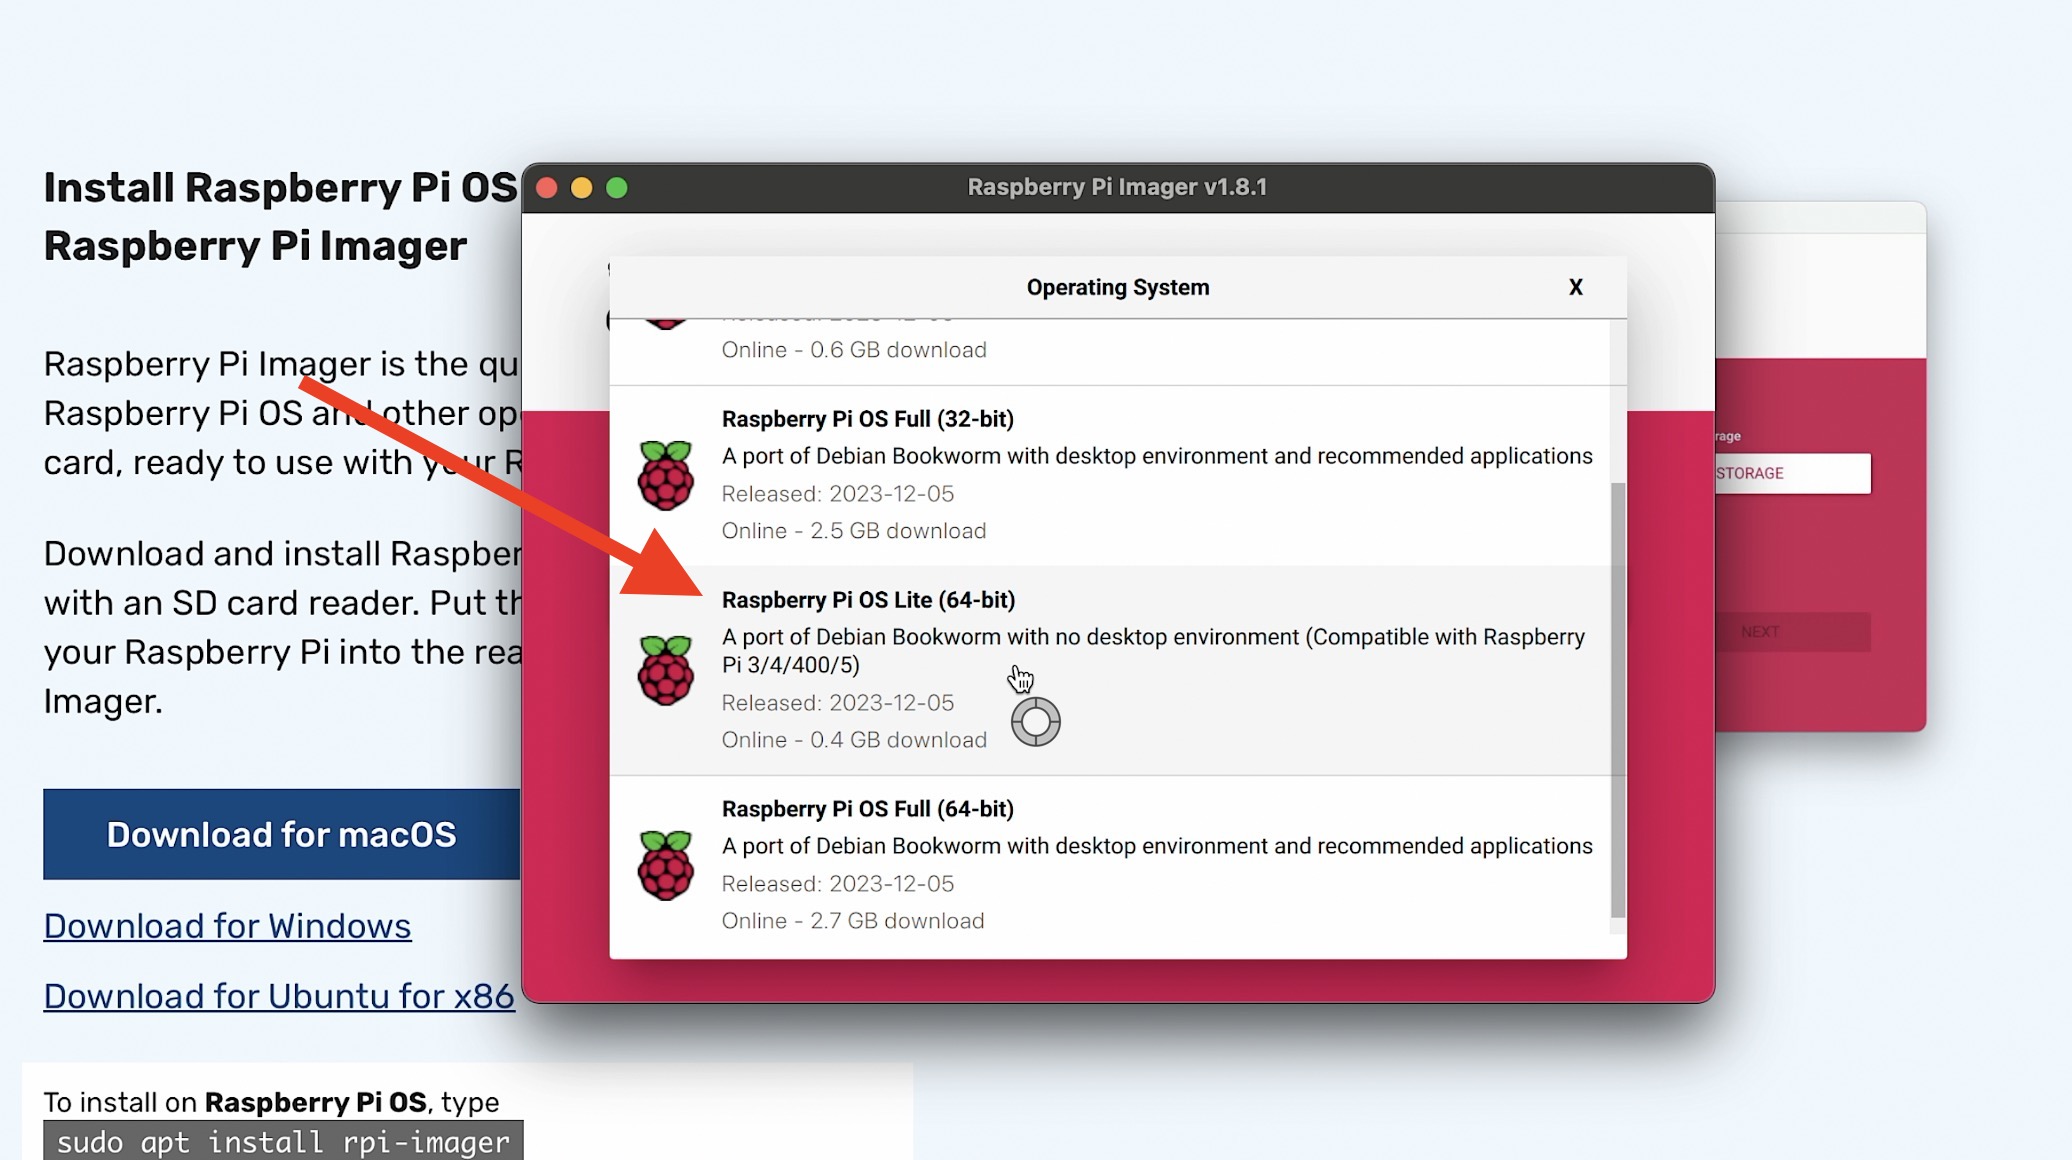
From the software part, first thing that I used is the Raspberry Pi Imager – download link
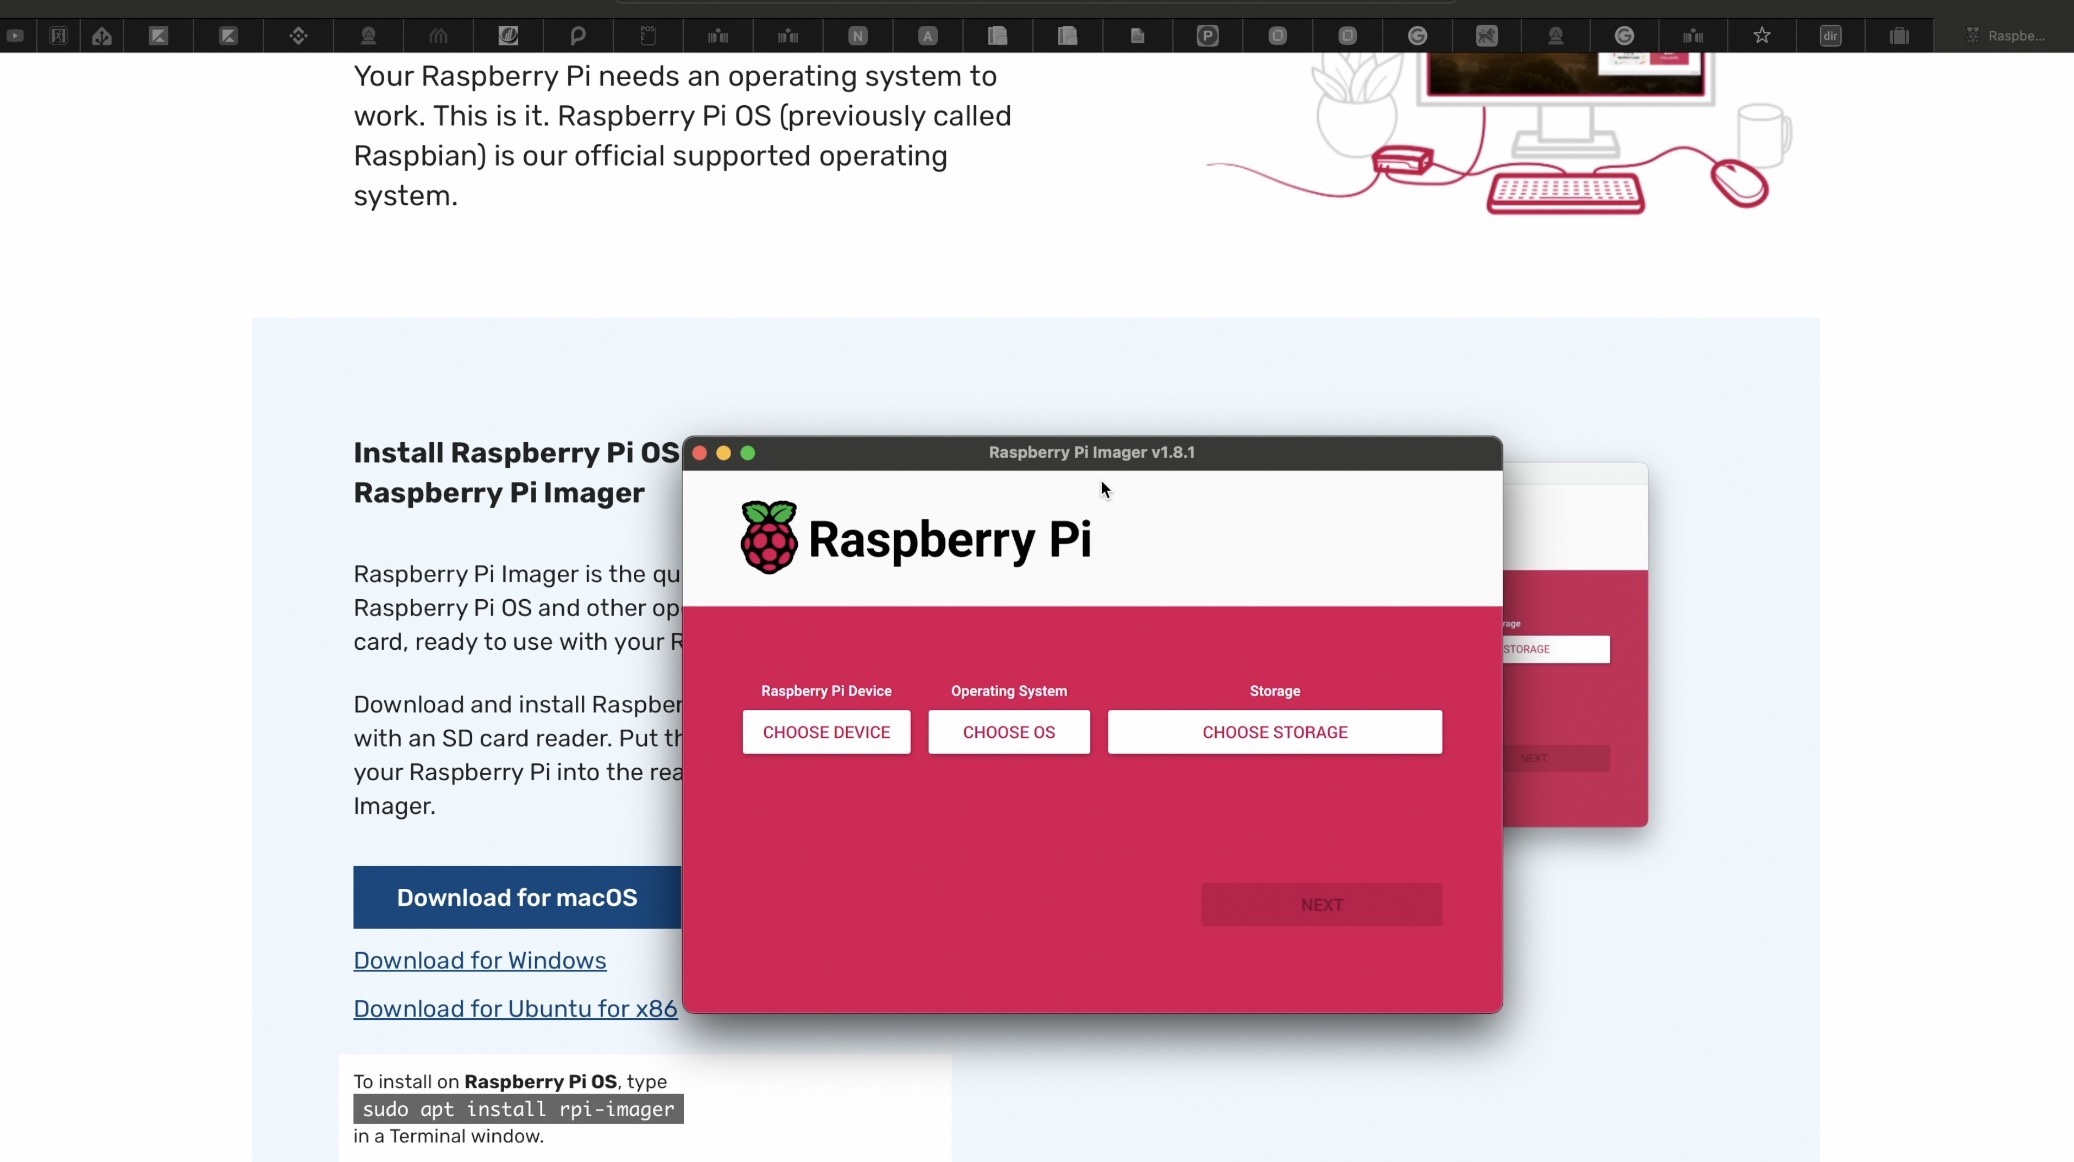
With the Raspberry Pi Imager I installed the Raspberry Pi OS lite 64-bit on the SD card. And here Lite version means there will be no Graphical interface of the Raspberry Pi Operating System which is just perfect as I don’t want other programs and processes apart from Home Assistant to take the CPU and Memory of the devices.
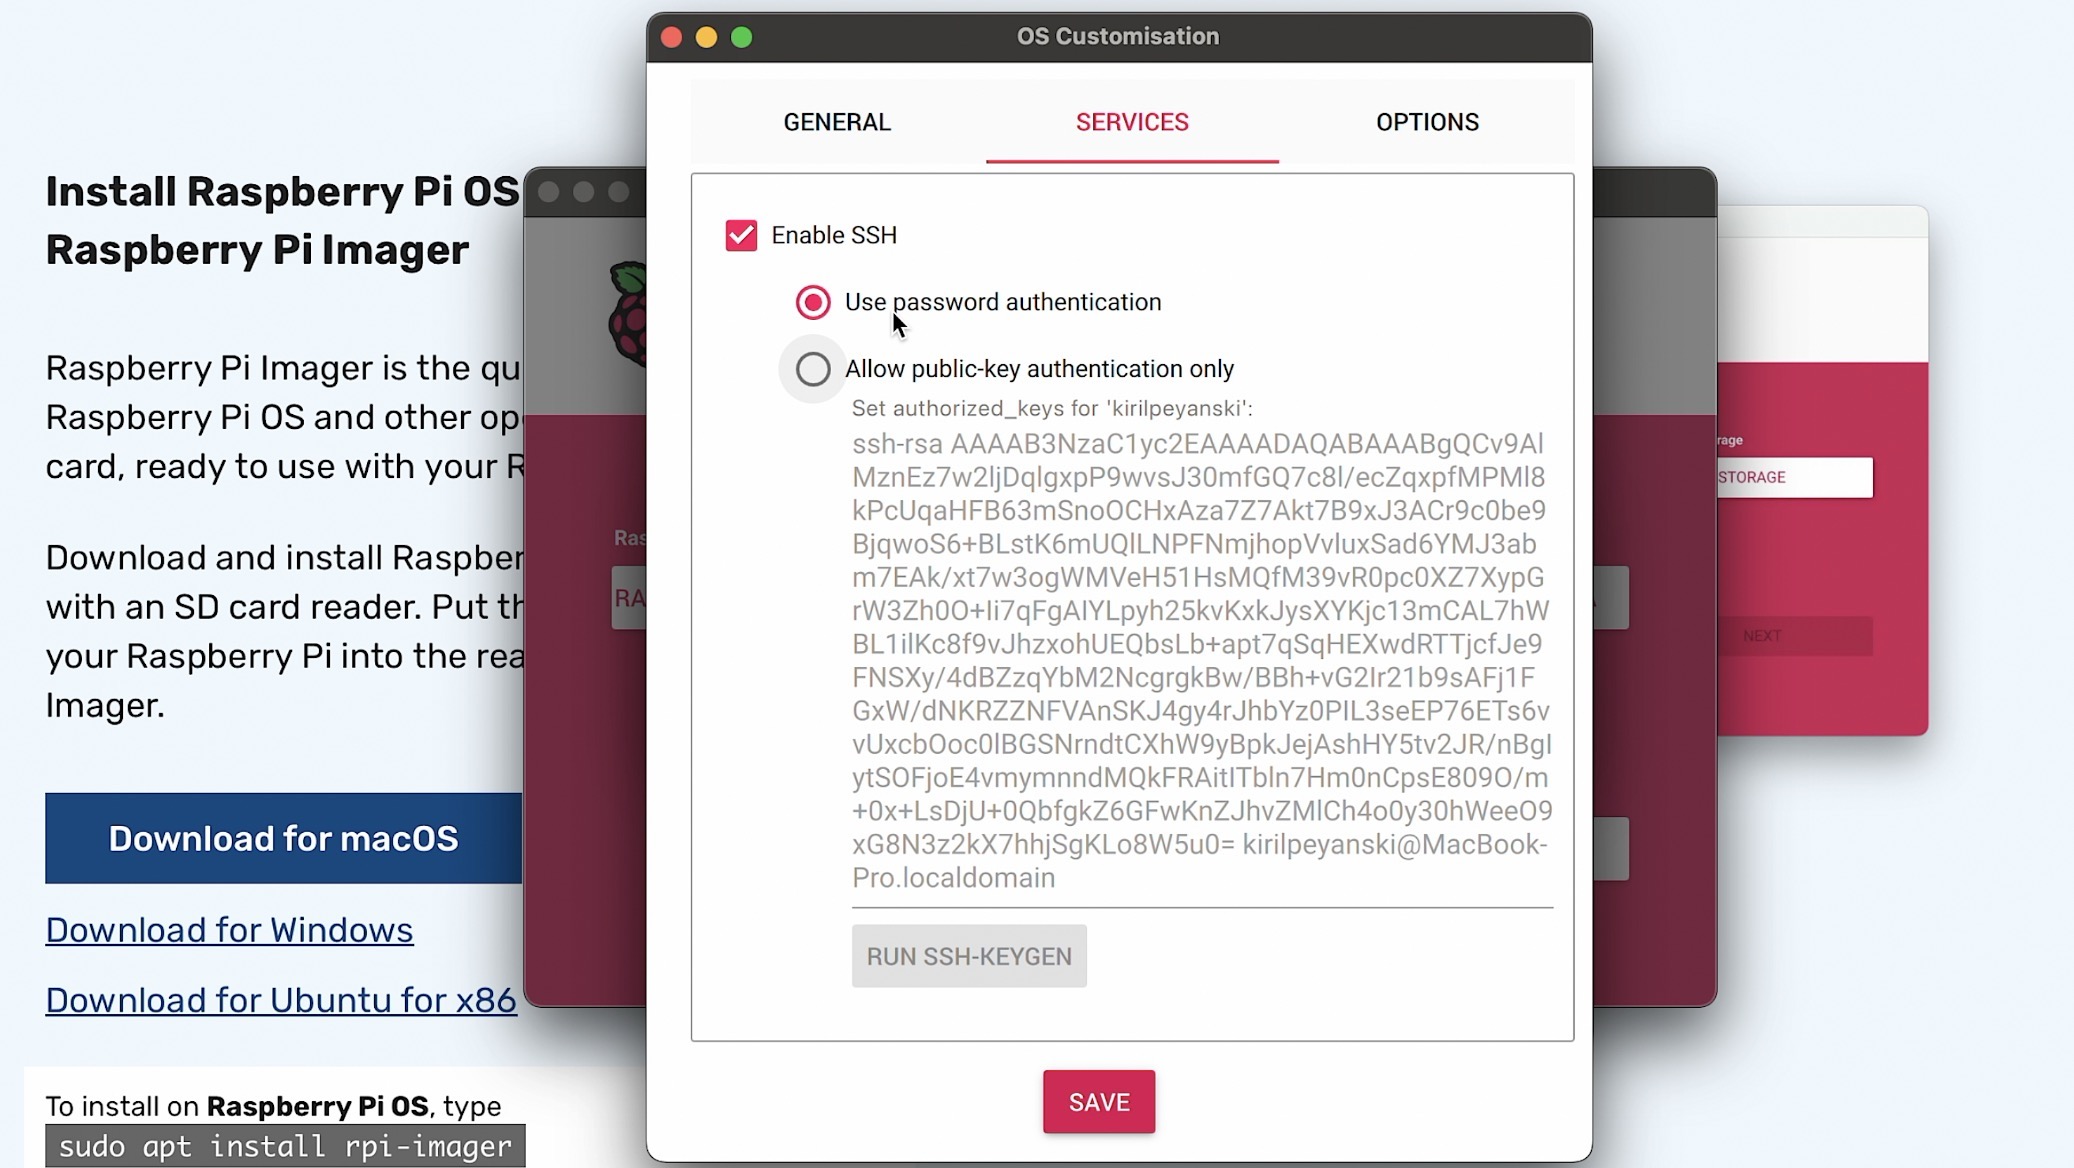
I enabled the SSH, that way I will be able to connect to the raspberries over the network using only my laptop and I don’t have to use any additional Monitors, keyboards or mouses.
Once I finished with the card I inserted it in the Raspberry Pi 5 SD card slot, I connected it to my home network with a LAN cable and I started it. I looked in my router for the assigned IP and then I used the following command to connect to my Raspberry Pi 5. I’m using the username & password that I set in the Raspberry Pi Imager while enabling the SSH option.
ssh user@raspberrypi_IP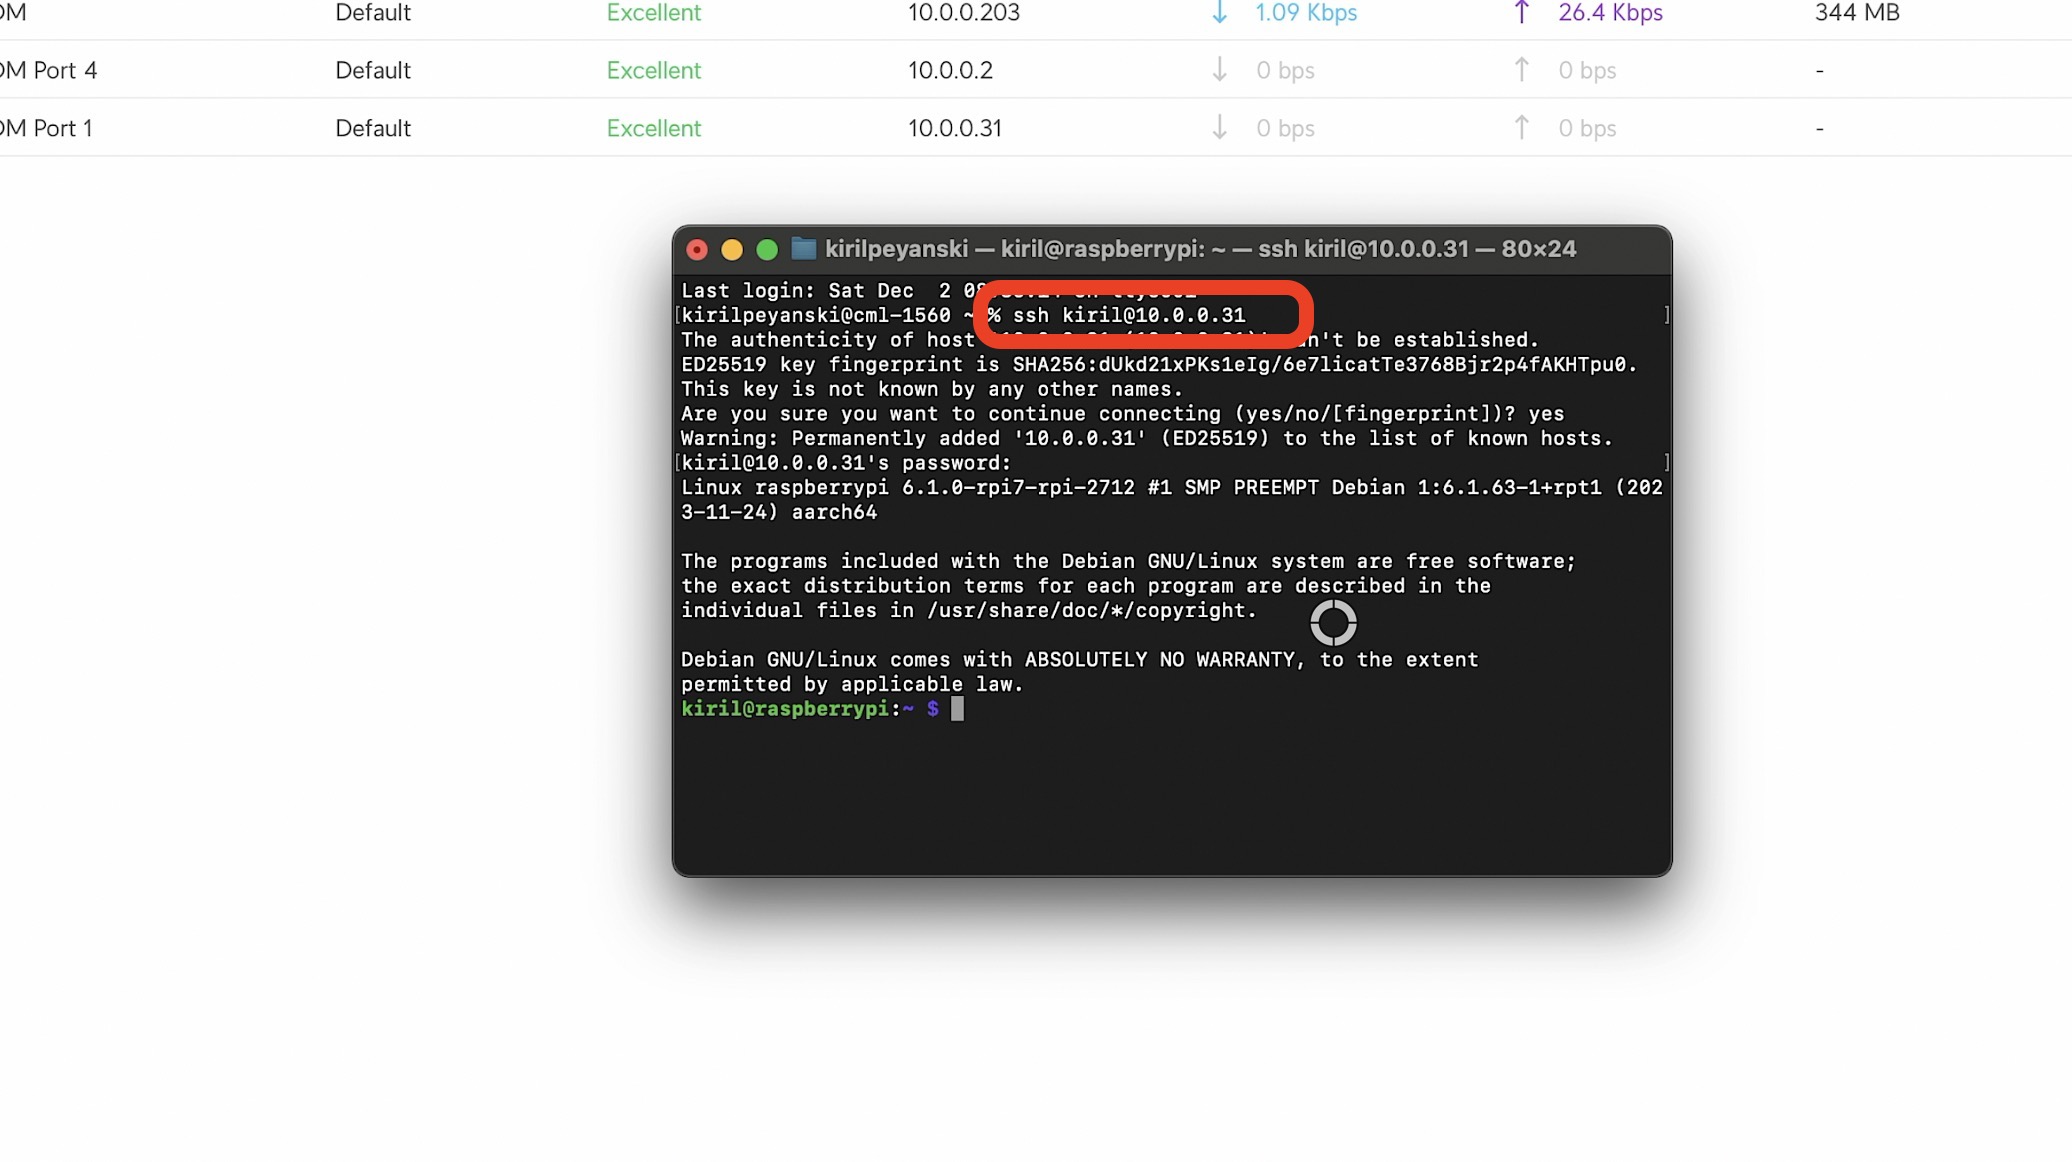
Once connected I installed Home Assistant using the instructions on official web page. I simply copied the commands and I pasted them in my terminal just like a robot, zero brain usage involving task. If you want to do the same you can get the full commands below:
sudo apt-get update
sudo apt-get upgrade -y
sudo apt-get install -y python3 python3-dev python3-venv python3-pip bluez libffi-dev libssl-dev libjpeg-dev zlib1g-dev autoconf build-essential libopenjp2-7 libtiff6 libturbojpeg0-dev tzdata ffmpeg liblapack3 liblapack-dev libatlas-base-dev
sudo useradd -rm homeassistant -G dialout,gpio,i2c
sudo mkdir /srv/homeassistant
sudo chown homeassistant:homeassistant /srv/homeassistant
sudo -u homeassistant -H -s
cd /srv/homeassistant
python3 -m venv .
source bin/activate
python3 -m pip install wheel
# change 2023.12.1 below with the current/latest version of Home Assistant
pip3 install homeassistant==2023.12.1
hass
Do you need a little help?
Just to mention, everything is official here just like my Home Assistant Webinar which is officially free and you can register on my website https://automatelike.pro/webinar
Inside the webinar I will talk about the pros and cons of all of the official Home Assistant installation types + 1 secret way to get started on a PC in under 5 minutes.
Testing Home Assistant on Raspberry Pi 5
After I finished with the Home Assistant installation above I tried to open in my browser the IP of my Raspberry Pi followed by colon 8123 as the port. Example: 10.0.0.31:8123
I waited few minutes more for the installation to complete and then I had to go through the Home Assistant onboarding process which is super easy and intuitive and I won’t go into details as nothing can go wrong here.
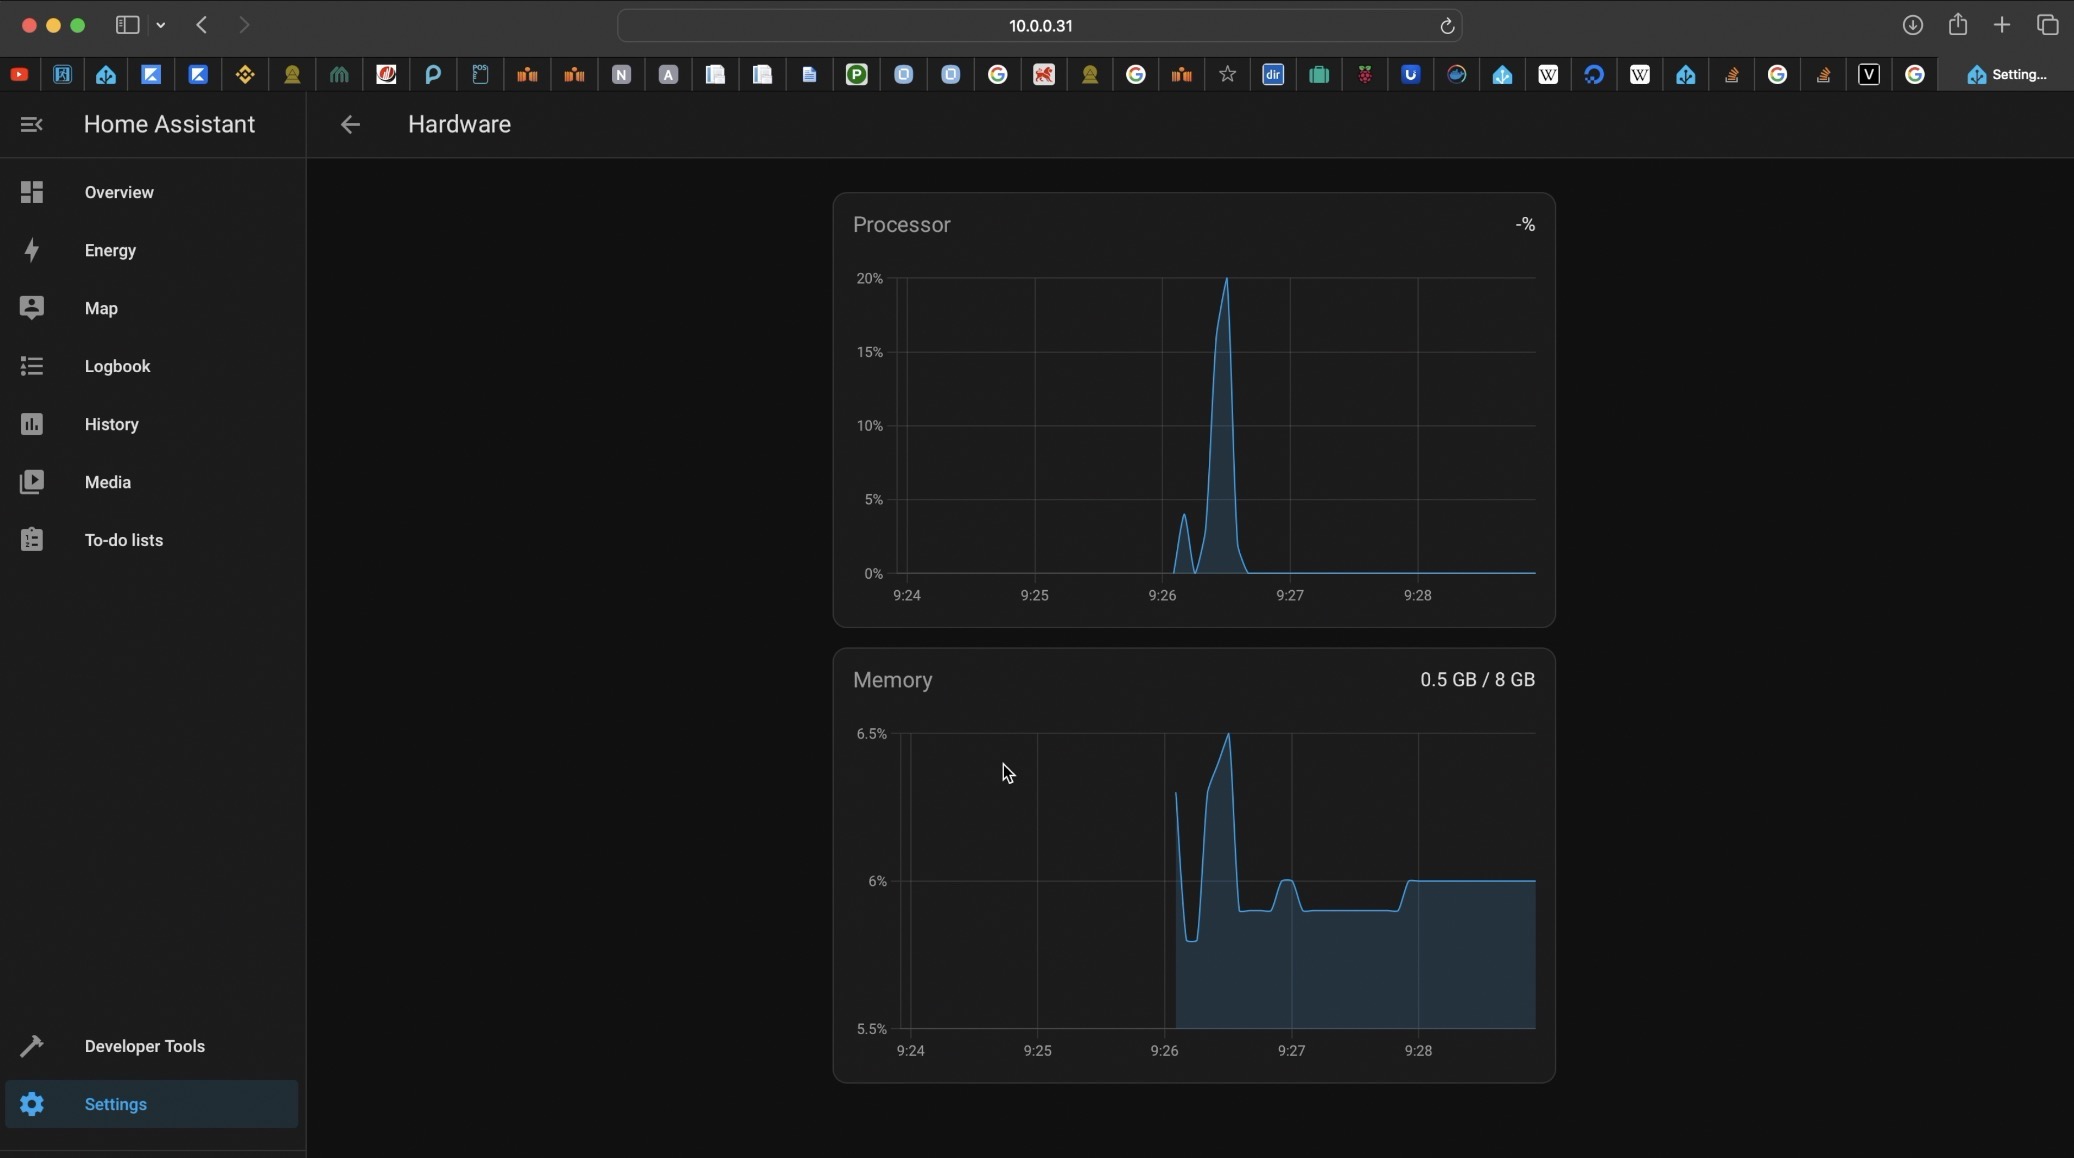
I also went to the settings and I saw the current load of the system which is super negligible. But have in mind that this is a brand new installation and nothing is loading the system.
Stress Test Raspberry Pi 5 while running Home Assistant
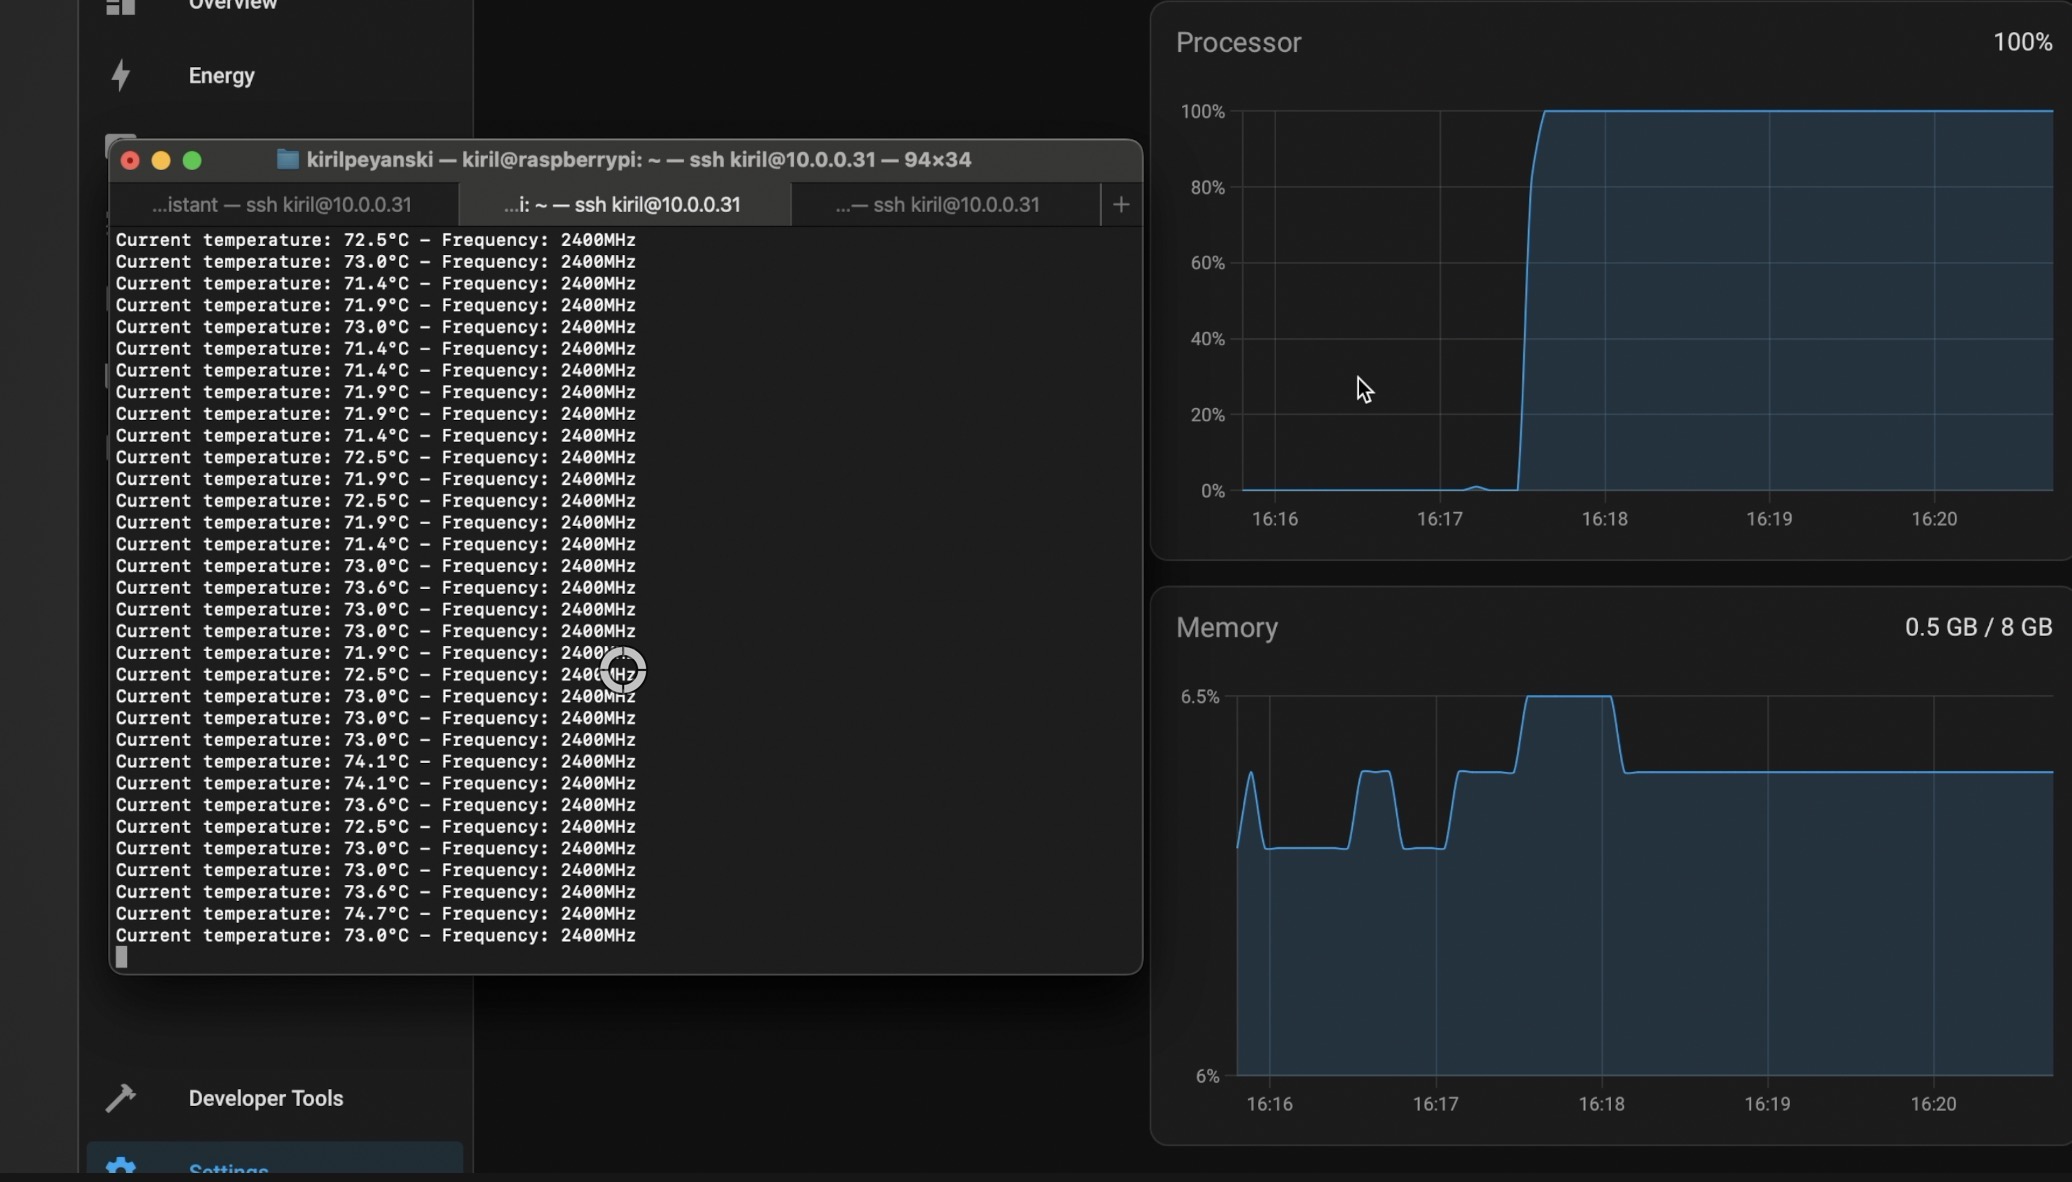
Then I opened the Raspberry Pi console again and I executed the following commands to stress test my Raspberry Pi 5.
I used little command-line tool called stressberry which measures the core temperature and I let it run for around 10 minutes. During that time the CPU was at 100% usage and up to 2400MHz frequency and the temperature didn’t go above 75 degrees also Home Assistant was quite usable during this extreme tests.
Testing the Raspberry Pi 5 Storage speed
Then I used another tool called hdparm to test the SD card speed and Raspberry Pi 5 storage throughput.
sudo apt-get install hdparm
sudo hdparm -tT /dev/mmcblk0  /dev/mmcblk0:
sudo hdparm -tT /dev/mmcblk0  /dev/mmcblk0: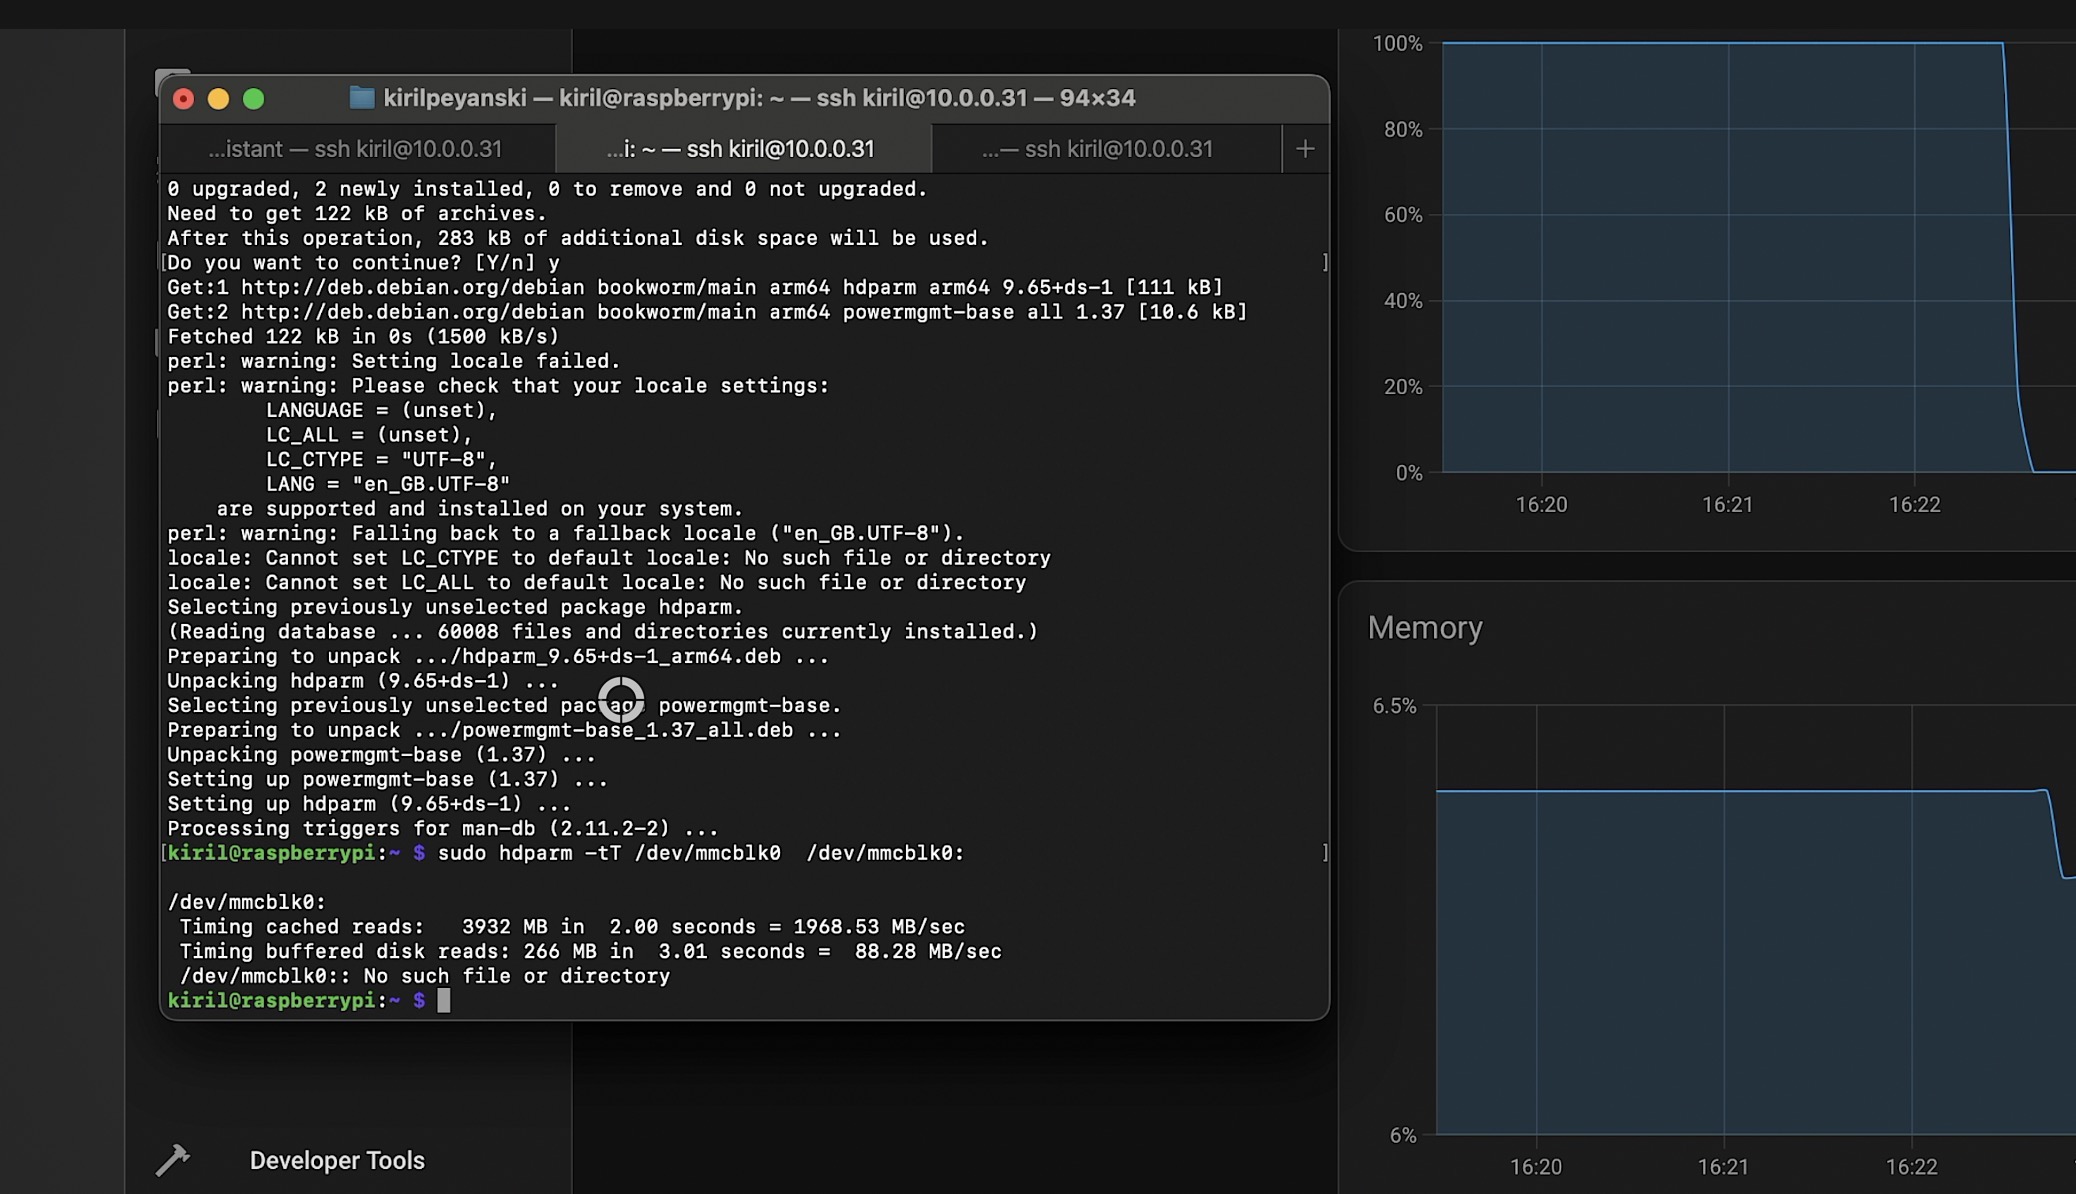
The first result tells us how fast the Raspberry Pi 5 works, including the processor, memory, and storage. The second result shows how quickly the device is reading data from the SD card in a row. I run this command twice to see the effect of the caching.
Testing the Raspberry Pi 5 and Home Assistant booting time
I also restarted the Raspberry Pi 5 and I measured the starting time with my watch, it is not super scientific, but it works.

Testing Home Assistant on Raspberry Pi 4
I wrote everything down and I moved the same SD card to the Raspberry Pi 4 and I did the same things and tests.
- I started the Home Assistant on the Raspberry Pi 4,
- I started the stressberry tool to stress test the device the temperature didn’t go above 65 degrees Celsius but the CPU frequency stayed at 600Mhz for unknown to me reasons.
- Then I executed the hdparm command twice to check the SD card speed.
- I restarted the Raspberry Pi 4 and I measured the starting time.
Home Assistant on Raspberry Pi 5 vs Raspberry Pi 4 – Results
Here are the comparisons. Where Raspberry Pi 5 is on the right.
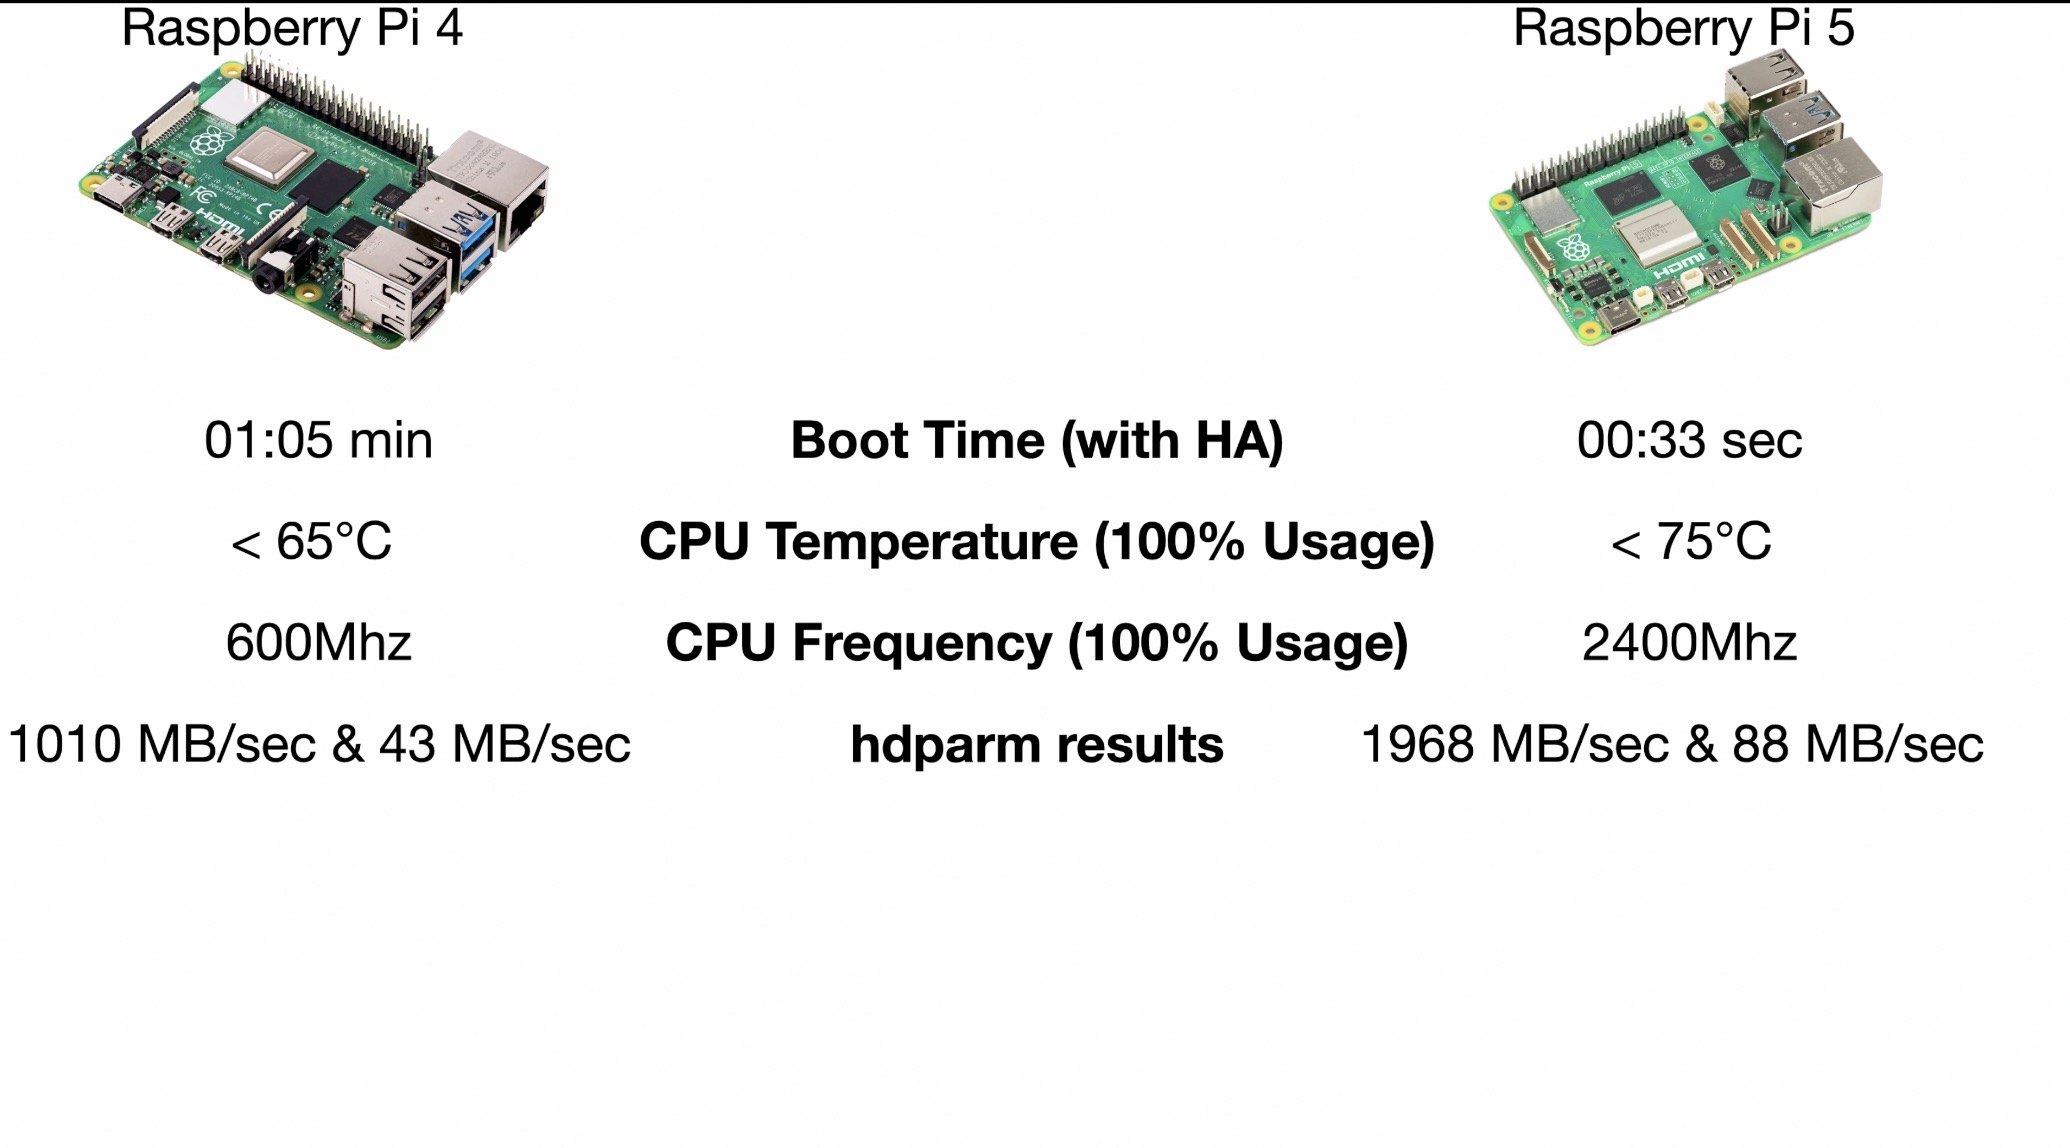
It turns out that the raspberry Pi 5 is almost twice faster in terms of SD card reading and system rebooting and Home Assistant starting. Also, the CPU frequency used on the Raspberry Pi 5 was much higher as well as the CPU temperature despite the active cooling.
Home Assistant on Raspberry Pi 5 vs Raspberry Pi 4 – Final Thoughts
These simple tests are showing that Raspberry Pi 5 is the faster device, no doubts about that, but not multiple times faster in terms of running Home Assistant.
I’m dying for the Home Assistant OS release for Raspberry Pi 5 so I can test the speed of local speech recognition. But that may be another article. Until then, I can baldly say that both Raspberry Pi 4 and 5 are fully capable of running Home Assistant smoothly.
What to Buy?
If you find a Raspberry Pi 5 for just $5 more than the price of the Pi 4 (these are the official price differences between both devices). Get one fast.
On the other hand, if you find a Raspberry Pi 4 for cheap as there are such offers now even used one is OK don’t hesitate to get one as well. It will serve you perfectly for many more years running Home Assistant flawlessly.
- Raspberry Pi 5 8GB (Amazon) – https://amzn.to/49b6m77
- CanaKit Raspberry Pi 5 Starter Kit PRO (Amazon) – https://amzn.to/3I3cEty
- Raspberry Pi 5 8GB Starter Kit (Amazon) – https://amzn.to/4bFjL9b
- Raspberry Pi 4 4GB (Amazon) – https://amzn.to/3Rgg4x9
- Raspberry Pi 4 8GB Starter Kit (Amazon) – https://amzn.to/46TYDs0
- CanaKit Raspberry Pi 4 8GB Starter Kit (Amazon) – https://amzn.to/3tbebKk
- SanDisk Extreme Plus 64 GB microSDXC Memory Card – https://amzn.to/47OCCMx
- Raspberry Pi 5 Official Selling Page – https://www.raspberrypi.com/products/raspberry-pi-5/
If some of the terms that I’m using are not so clear for you, then download my Smart Home Glossary for free from my other website – https://automatelike.pro/glossary
You can also read this article of mine where I’m showing 5 Raspberry Pi Tips & Tricks
I’m Kiril see you next week. Bye!
Thanks Kiril,
Good article.
Looks like I need to get a RasPi 5 to play with.
I like the faster boot speed & processor speed.
I’ll probably get the same one you got.
Another good article on comparison between the 4 & 5:
https://pimylifeup.com/raspberry-pi-5-vs-4/
Thanks for all your great work.
Joe