The new official Home Assistant Tuya integration is here and it is here to stay. It is developed to control Powered by Tuya (PBT) devices using the officially maintained Tuya Open API. Let’s see how to install it and how to use it.
Table of Contents
What is Tuya?
What’s Tuya you may ask? Simply said – this is one of the biggest IoT platforms that enables brands and manufacturers to make their products smart. In other words if you see on a product that is Tuya compatible or Powered by Tuya, that means you will be able to control that product with your phone for example or from now on officially with Home Assistant.
Is the new Tuya Home Assistant Cloud or Local?
The Home Assistant Tuya integration is done via the Cloud push and it requires an active Internet connection. That means if you have Internet – Home Assistant will be notified as soon as a new state of your Tuya devices is available. I really hope local access will be also possible in the near future, as the Tuya developers are saying that they are working on it. However, there is no ETA yet.
Let’s see what we need to make it work!
Home Assistant Tuya Integration requirements
- First, You will need a working Home Assistant. I have several tutorials that can guide you if you wish to install HA.
- Second, you will need at least one Tuya compatible device. I will use one Tuya downlight for example. But don’t worry too much if you still don’t have any Tuya device. You can create a virtual one in the Tuya IoT Platform if you just want to test the things upfront before you commit to buy some Powered by Tuya stuff.
- Third and final, you need the TuyaSmart App as well as to create a project in the Tuya IoT Platform. Let’s do this together.
Download and install TuyaSmart App
Download and install the free TuyaSmart app on your phone from Apple App Store or Google Play. There is another app called Smart Life (App Store & Google Play) that is virtually the same and you can use it as well.
QUESTION: Why the apps are are two? I’m not sure about that, but If you happen to know, let me know in the comments below.
Anyway, create a free account in either of the apps and login. If you have a Tuya device – now it is the best time to add it in the mobile app. Just follow the pairing procedure described in your product user manual.
Login to the Tuya IoT Platform
Next, log in to the Tuya IoT Platform. You can use this link 👉 LINK
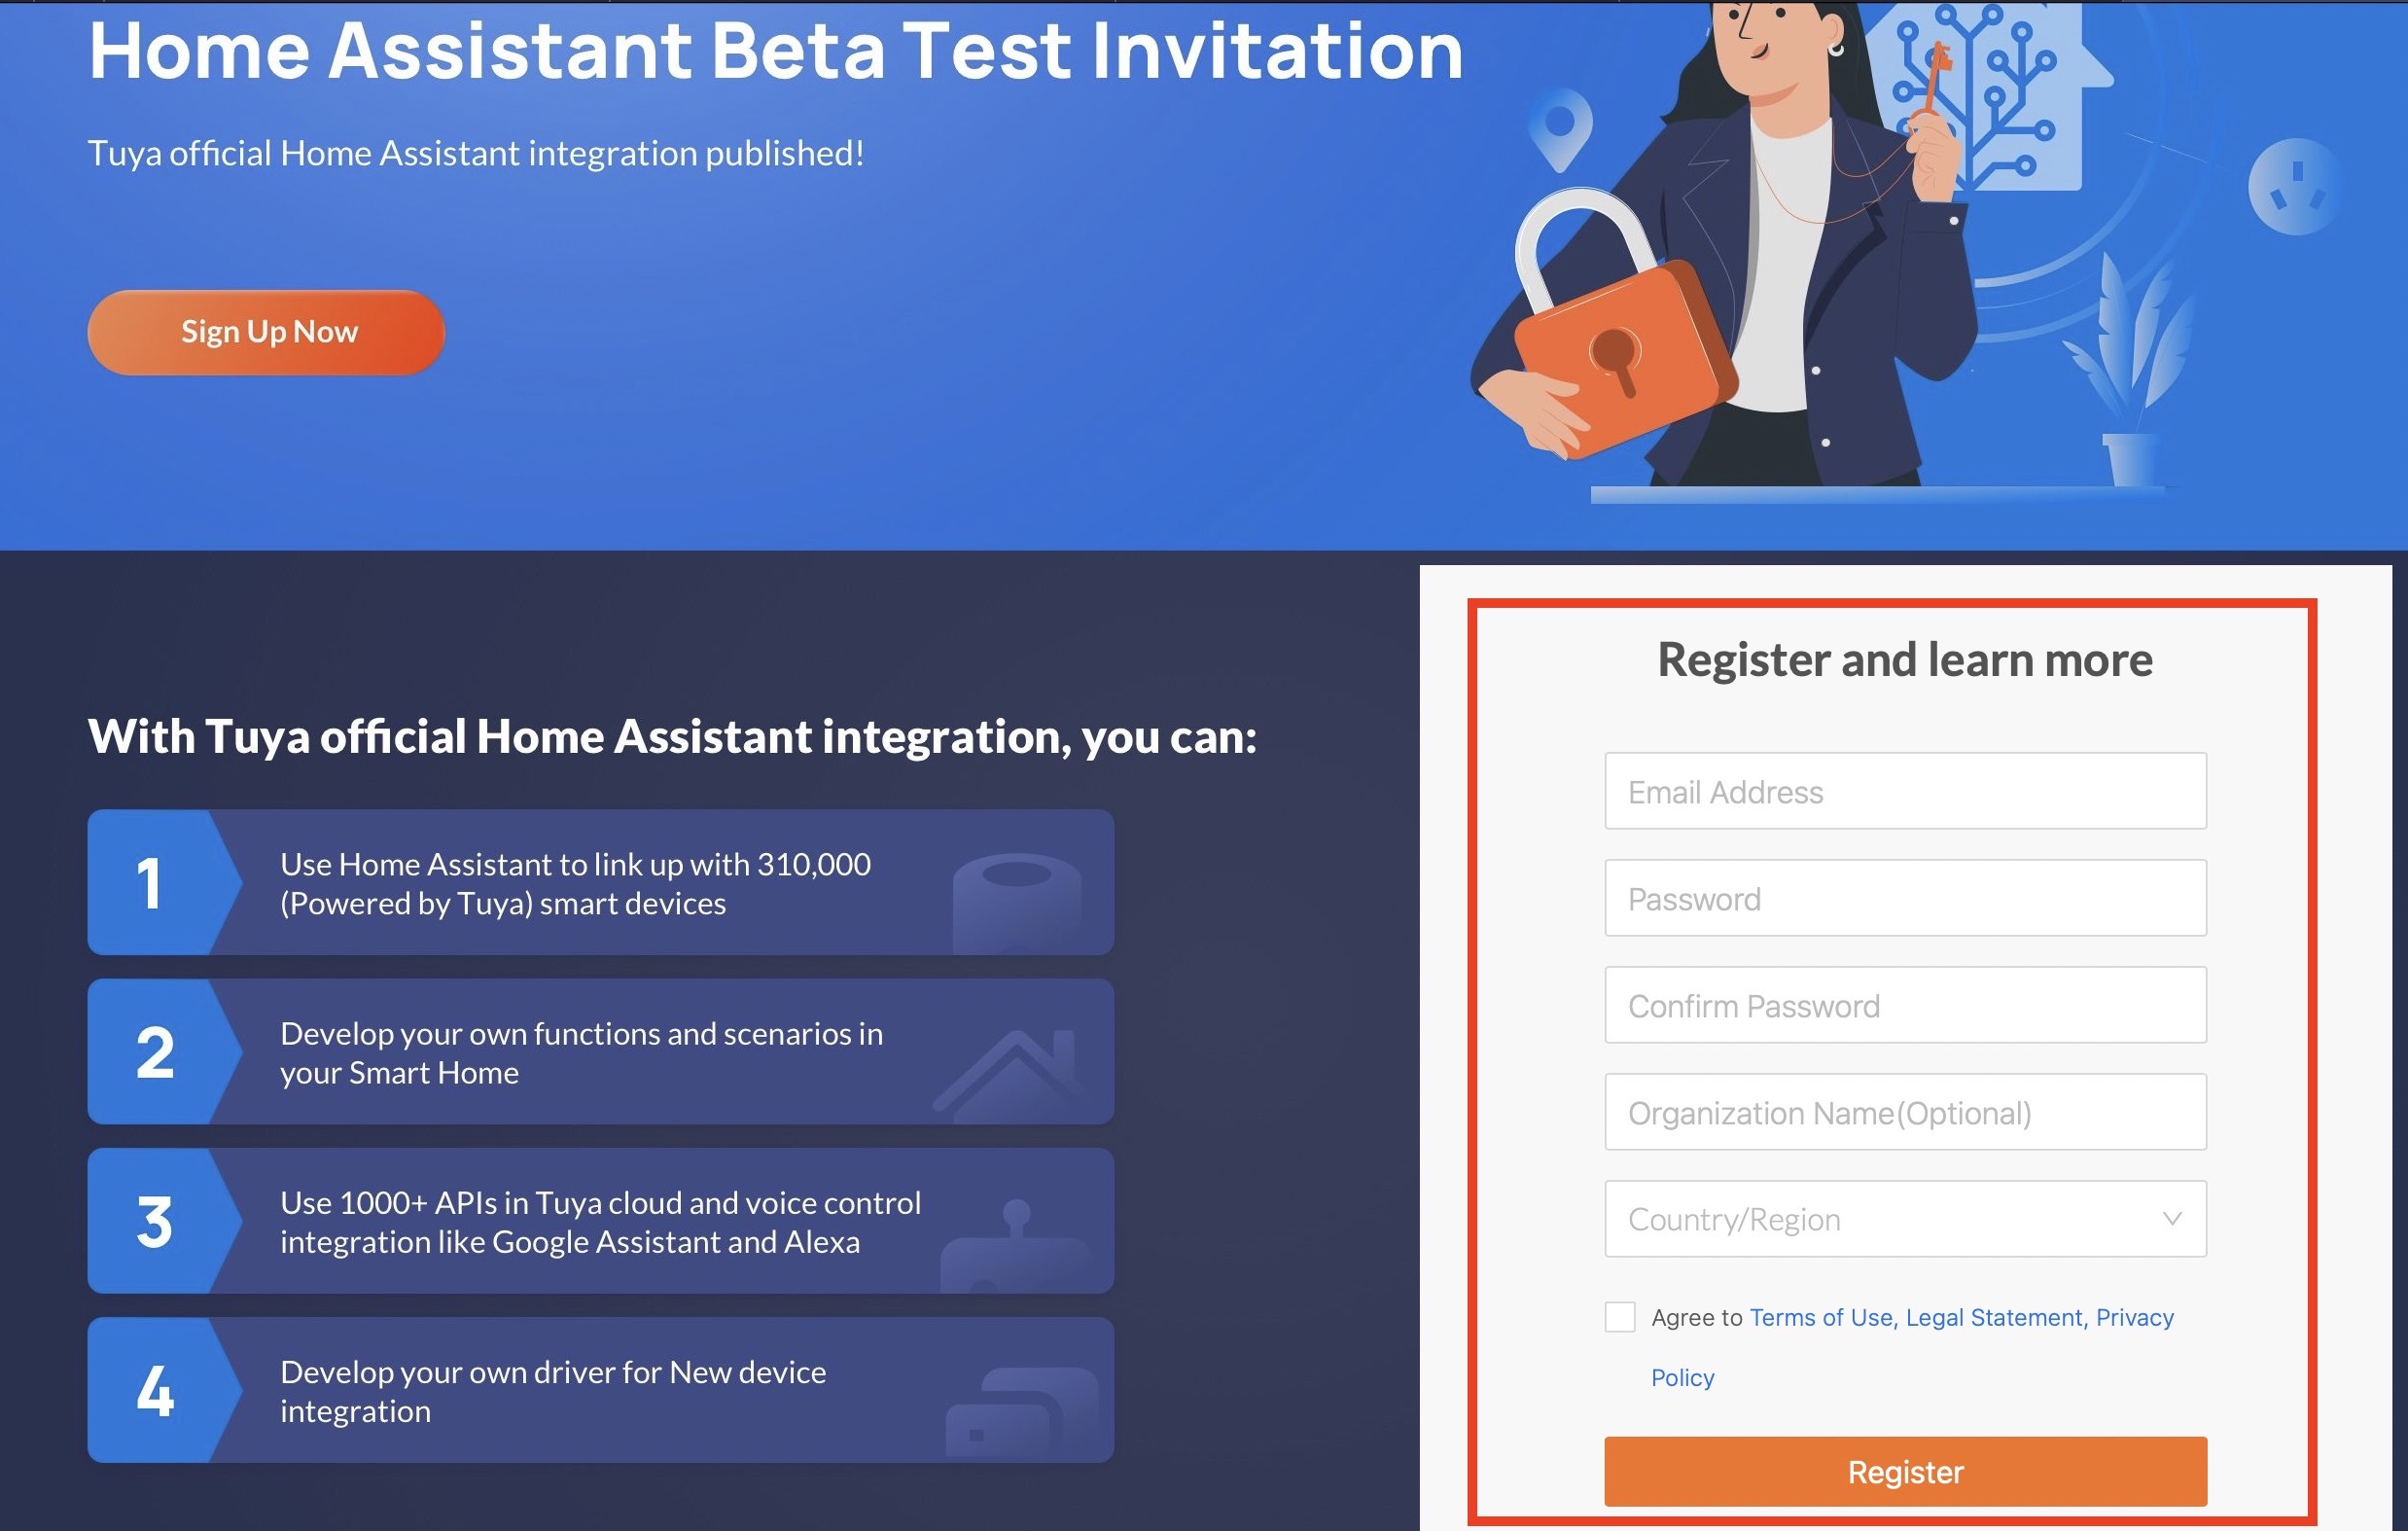
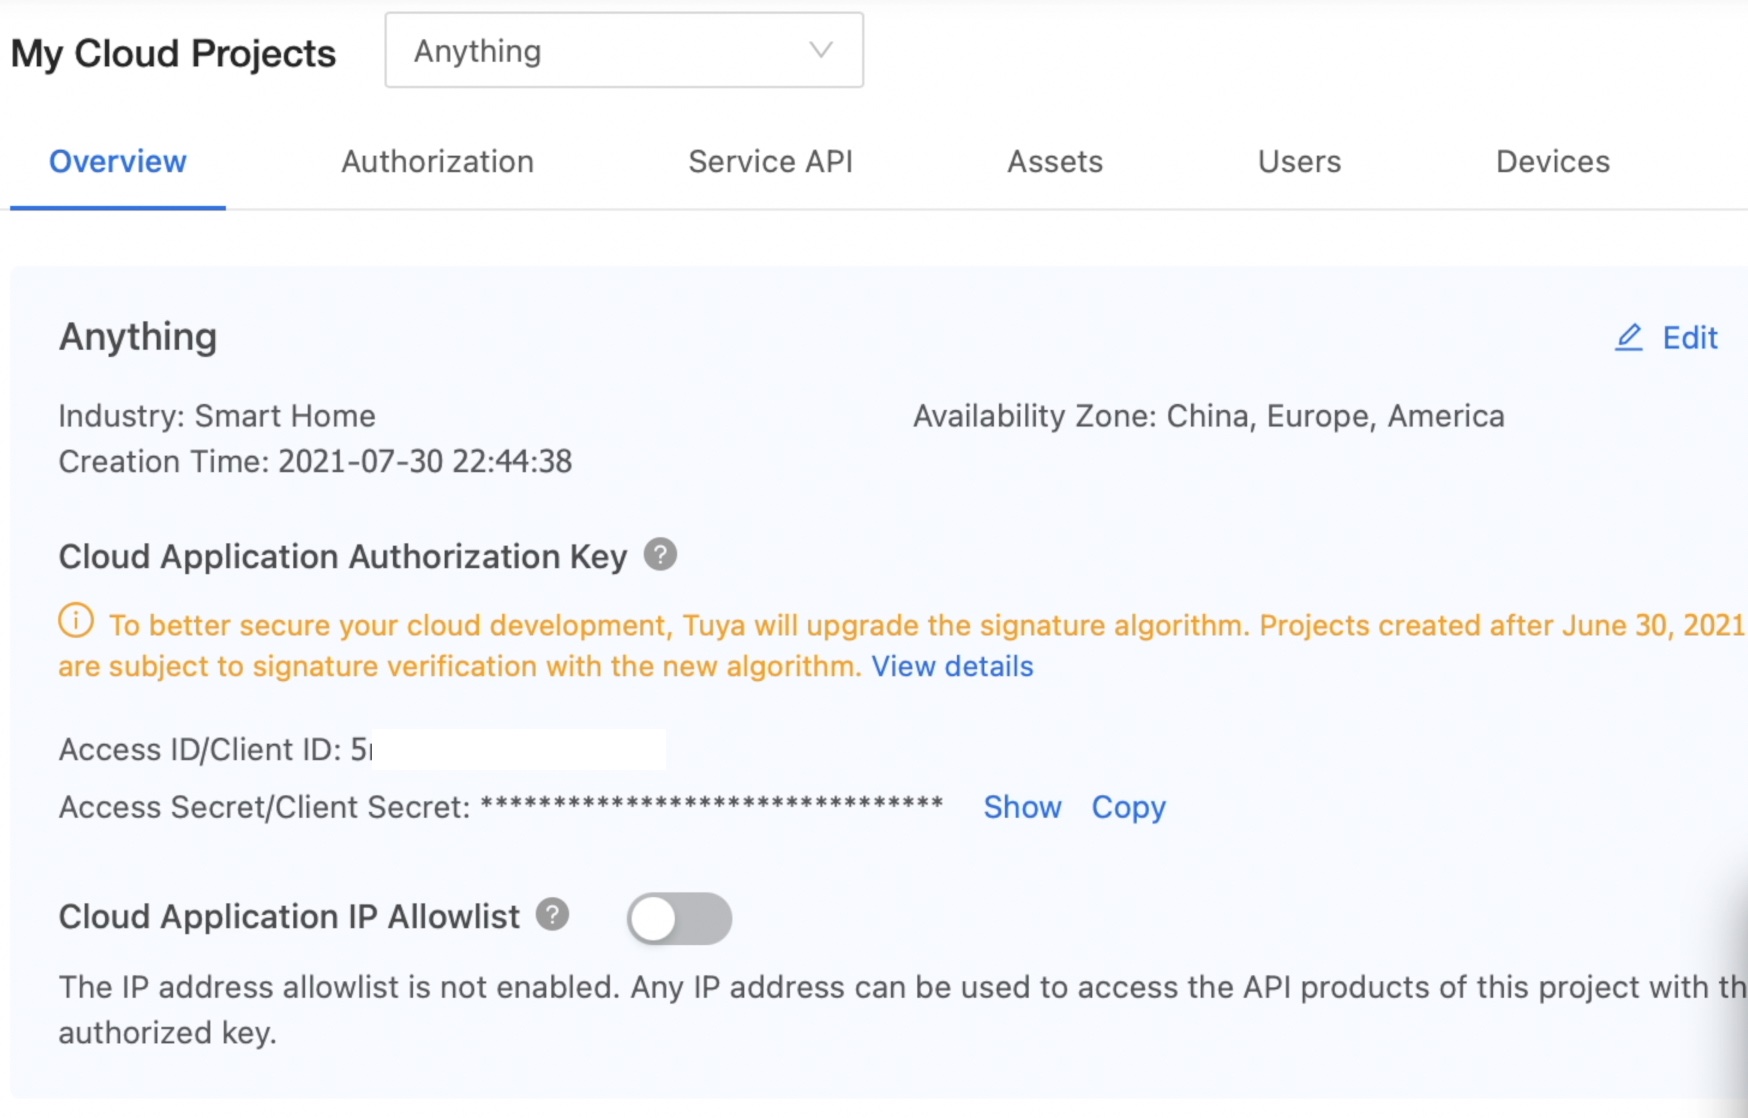
The main idea of this whole exercise is to get an Authorisation key or Access ID & Access secret. Later we are going to use them in Home Assistant to make API requests. Here is how to get them.
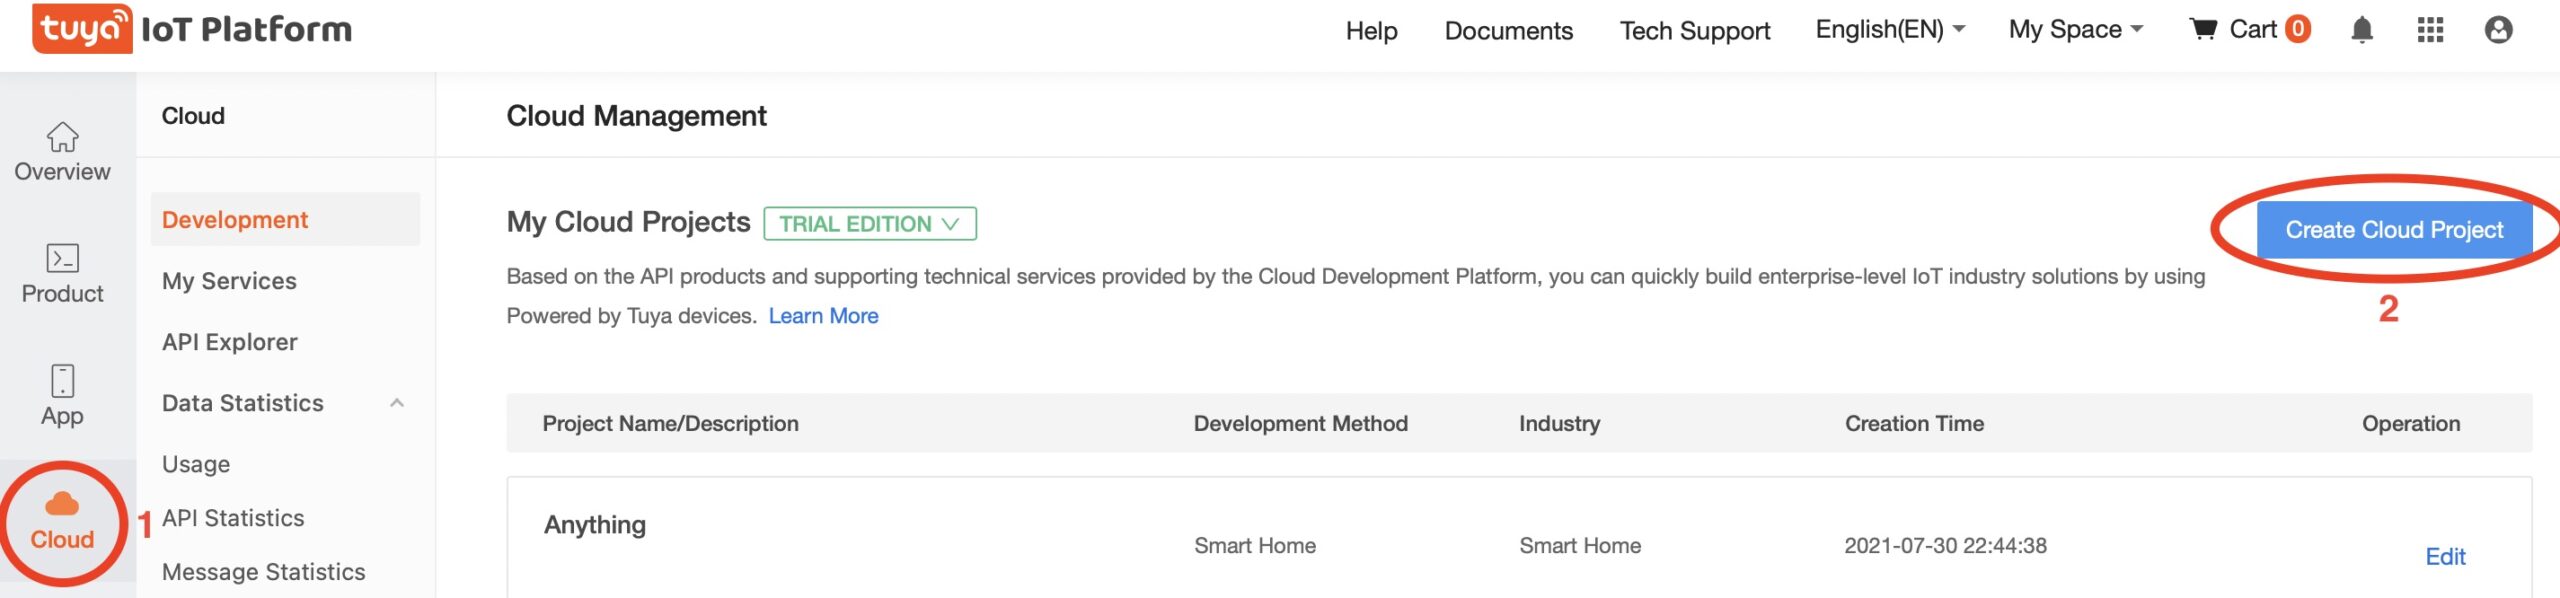
When you log in the Tuya IoT Platform go to Cloud > Create Cloud Project.
On the next dialog enter a the following:
- Project Name – It is a good idea to be something meaningful for you, but can be anything.
- As Industry – select Smart Home.
- As Development Method – also select Smart Home.
- To set the Data Center you have to open the Tuya Smart or Smart Life app. Tap Me > Setting icon in the top right corner of the page > Account and Security > Region. Get the info from there and use the same in the Data Center field. My registration/region was China for some reason (although I’m in Europe), but I also added Europe and America.
- When you are ready with everything click on Create button.

In the Configuration Wizard (next dialog) you have to add the Device status notification setting to the Selected API Products and to click Authorize button.
On the next screen you will see your Authorisation Key that consist of Access ID and Access Secret. We are going to use these Access ID & Access Secret later, so do not close this window.
Link TuyaSmart App devices and Tuya IoT Platform
Time to link the devices available in TuyaSmart app to your newly created Cloud project in Tuya IoT Platform. That way the Home Assistant will be able to interact with those devices as we are going to see later.
Go to Devices > Link Tuya App Account > Add App Account.
When you see the QR Code use your TuyaSmart app (or Smart Life app) on your mobile device to scan it.
That is everything needed and we can proceed to the actual installation of the official Tuya Home Assistant integration.
Installation of the official Home Assistant Tuya integration
We are ready to Install the officially maintained by Tuya developers Home Assistant Tuya integration!
That is as easy as smashing the subscribe button for my newsletter 👉 LINK
Actually, all that is needed is to “smash” another button which will directly open the Tuya integration dialog in Home Assistant. So, either click on the link below:

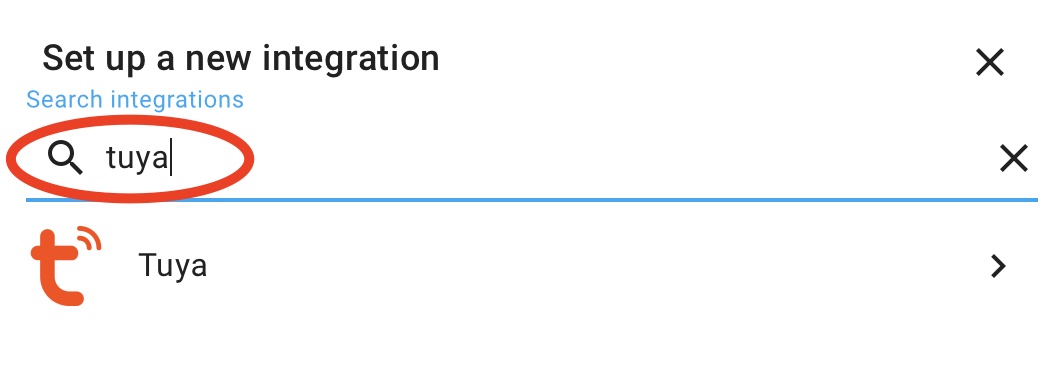
or add the Tuya integration manually by going to:
Home Assistant > Configuration > Integrations > Add Integration > and search for Tuya > select the Tuya integration
On the next window enter the following:
- Country – Choose the country you picked when signing up.
- Tuya IoT Access ID – Your Access ID & Access Secret (the ones that we have during the cloud project creation).
- Tuya IoT Access Secret – Your Access Secret (the ones that we have during the cloud project creation).
- As Account and Password – enter your Mobile App credentials (from your Tuya Smart or Smart Life app).
- Click Submit when you are ready.

After you successfully authorize yourself, the new Tuya integration will be added in your list with Home Assistant Integrations. Ready to be used!
Add Tuya Device to Home Assistant Dashboard
To add your Tuya device(s) in the Home Assistant Dashboard and to control it from there do the following:
- Under the new Tuya Integration (available in Home Assistant > Configuration > Integrations) click on the device that you wish to add.
- Under Entities section click on Add to Lovelace and then again Add to Lovelace UI.
Is Tuya Home Assistant integration free of charge?
You may wonder is the Home Assistant Tuya integration can be used for free? Yes, It can. The Trial Edition allows you to use all free API products but adds some quotas of the API calls and number of Tuya devices (up to 50 Tuya devices). See the limits here 👉 LINK
Of course there are also paid tiers with bigger limits if the Trail edition is not enough for you.
Most Interesting part about the Tuya integration
The most interesting part to me about the new Home Assistant Tuya integration is that the initiative is coming right from the Tuya itself. On top the project is open sourced and everyone can contribute to make the official Home Assistant Tuya integration even better and with wider device support.
That makes the new official Tuya Home Assistant integration a very, very good example that I hope to become a trend. A trend in which every big vendor out there is going to develop an official open-sourced and fully supported integration for Home Assistant. That will be beneficial for the vendors, for the Home Assistant, and of course to us – the Home Assistant community and end users.
Home Assistant Tuya Integration Outro
Make sure that you subscribe to my YouTube channel and hit that notification bell. It is quick, easy and free and I will be thankful forever.
Follow me on Twitter and join my Discord server, stay safe and don’t forget – Home Smart, but not Hard!
To secure this blog existence support my work by using either of the channels listed here 👉 LINK
or buy my Smart Home Guide!
SMART HOME Getting Started Actionable Guide
28 unique printable pages in a Smart Home Getting Started Actionable Guide designed to help you make the best decisions and your Home Smart right away!
Thank you for reading and I will see you next Wednesday.
that’s very detailed and helpful!
Thank you very much Doria! Check my other tutorials as well 🙂
Hi there ,
I am having issues getting this to work . I have Homeassistant on my Synology NAS installed via hassio and docker . I can do all items above but when trying to log in I get the authentication error . I also got the same error on the old version of tuya . I suspect my issue is local to me and not tuya .
only thing that appears an anomaly – my region on the Smartlife app says isleofman/united kingdom – I don’t know if this would be an issue . is there ay way an I can check logs and see if the request is getting to tuya . I did at one stage get it to work . but when I trey to connect i get the blue spinning wheel for a very long period … any one else got it going in this environment please let me know …
this is out of data, i have completely different tuyav2 interface, while trying to add integration ;/
also trying add tuya v1 getting error Config flow could not be loaded.
sorry my fault .. all works! thanks
Great user guide for the new Tuya integration.
Very good.
Waaaaay more steps than the original Tuya integration, but seems to work quite a lot better too.
Many thanks for this.
*Very* much appreciated!
Thanks for the good words and I’m really glad that it was helpful!