Hello, this will be a Home Assistant Xiaomi Vacuum Cleaner integration tutorial. The same method can be applied for several other Xiaomi products like:
- Xiaomi Gateways,
- Xiaomi Air Purifiers,
- Xiaomi IR Remotes,
- Xiaomi WiFi repeaters,
- Xiaomi Smart plugs and more.
For dessert we will create some Home Assistant automations and scripts to control our Xiaomi Robot Vacuum Cleaner locally.
Let’s start…
Table of Contents
What this article is about?
This article will not be a Xiaomi Robot Vacuum cleaner review. Instead we will focus on Home Assistant Xiaomi integration by extracting the Xiaomi Access Token that is is needed by Home Assistant to control the Xiaomi Robot Vacuum Cleaner and other devices stated above.
We will also make some Home Assistant automations just as a hint of what is possible when we finish that integration.
What I’m going to use?
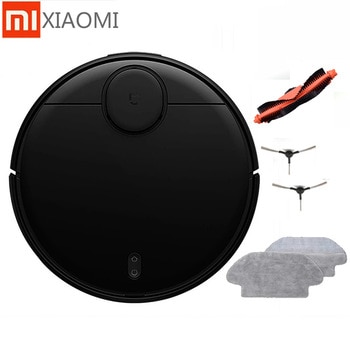
As example I’m going to use Xiaomi Mi Robot Vacuum-Mop Pro, which looks like this.
I’m kidding it is this one.
Here are few affiliate links where you can check the best price and shipping for your region if you want to buy the same:
- Xiaomi Robot Vacuum Mop Pro (AliExpress Affiliate 1) 👉 LINK
- Xiaomi Robot Vacuum Mop Pro (AliExpress Affiliate 2) 👉 LINK
- Xiaomi Robot Vacuum Mop Pro (AliExpress Affiliate 3) 👉 LINK
- Xiaomi Robot Vacuum Mop Pro (AliExpress Affiliate 4) 👉 LINK
- Xiaomi Robot Vacuum Mop Pro (Amazon UK Affiliate) 👉 LINK
As I said in the beginning of the article there are a lot of Xiaomi Products that can be integrated almost the same way. Here is the full list:
- Supported Xiaomi Gateway Models – LINK
- Supported Xiaomi Air Purifiers and Humidifiers – LINK
- Supported Xiaomi Philips Light – LINK
- Supported Xiaomi Smart WiFi Socket and Smart Power Strip – LINK
Mi Home mobile App
To complete this tutorial you will need an Access Token and Mi Home mobile app. Now is the best time to add your Xiaomi device to the Mi Home mobile app.
This is easy and straightforward task:
- Download the Mi Home app on your mobile device:
- Start it!
- Follow the instructions there for the initial device setup.
Xiaomi Access Token
There are several ways to get your Xiaomi Access Token. I will show you some of these methods and the whole idea here is to choose a method that suits you best.
When you get your token by either of the ways you can go directly to the Home Assistant Integration part 👉 LINK
Quick Hint
Some people are saying that if you smash my Newsletter Subscribe button so hard that you receive a confirmation mail, and you actually click on the confirmation link after that – you will get your Xiaomi access token in no time.
Just kidding here, but please consider seriously about subscribing for my newsletter – I won’t spam.
Let’s see the first method of Xiaomi access token extraction.
Extract Xiaomi Access Token – 1st method
You will need pip3 (python package manager) for this method. To check if you already have pip3 – open a Terminal if you are running Linux/macOS or command prompt in Windows and type:
pip3- If you see an error – Google how to install pip3 on your Operating System.
- If you see the pip3 help screen you can continue forward.
Next step is to get all dependencies by executing:
pip3 install pycryptodome pybase64 requestsYou will also need a git client or you can download the Project as ZIP from the GitHub repo and extract the archive on your computer. The result is the same.
This is how you can get the needed files using git client and git clone command:
git clone https://github.com/PiotrMachowski/Xiaomi-cloud-tokens-extractor.gitEnter inside the downloaded/cloned folder:
cd Xiaomi-cloud-tokens-extractorStart the tool with python:
python3 token_extractor.pyAlternatively you can start the tool using Docker, but you have to have up & running Docker client for that:
docker run --rm -it $(docker build -q .)After you start the tool either by using Python or Docker you have to enter your Mi Home App credentials.
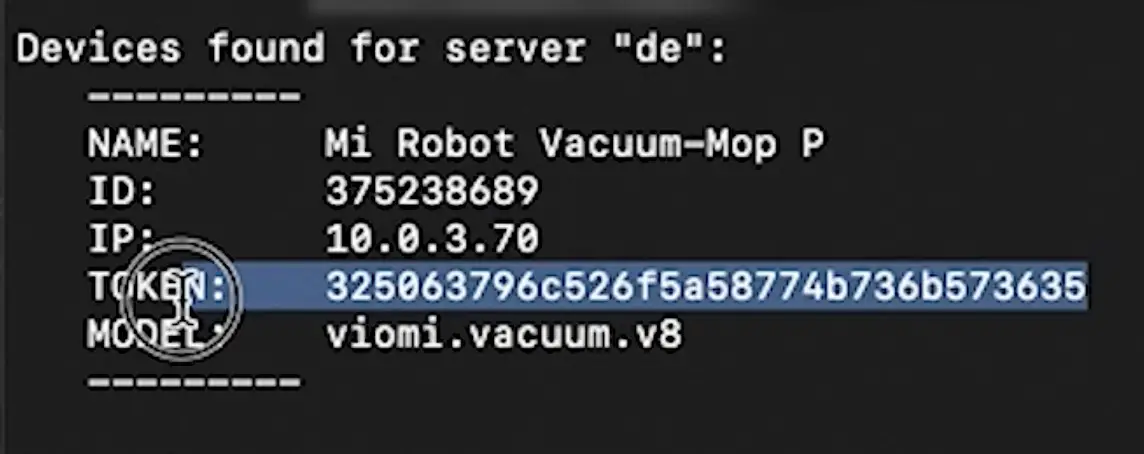
When the script ask you to choose a server – just Hit Enter and the tool will auto check all Xiaomi servers. At the end you should see all of your Xiaomi devices, their IP’s, models, and most importantly their Tokens. Which is exactly what we need.
Extract Xiaomi Access Token – 2nd method
The second method for Xiaomi Access Token extraction is even easier than the first one, but it’s only working on Windows and macOS.
- Go to https://github.com/Maxmudjon/Get_MiHome_devices_token/releases
- Download and start the Get Mi Home Devices Token App (it is the zip archive)
- Start the App
- Log in with your Mi Home e-mail and password and click Sign in button
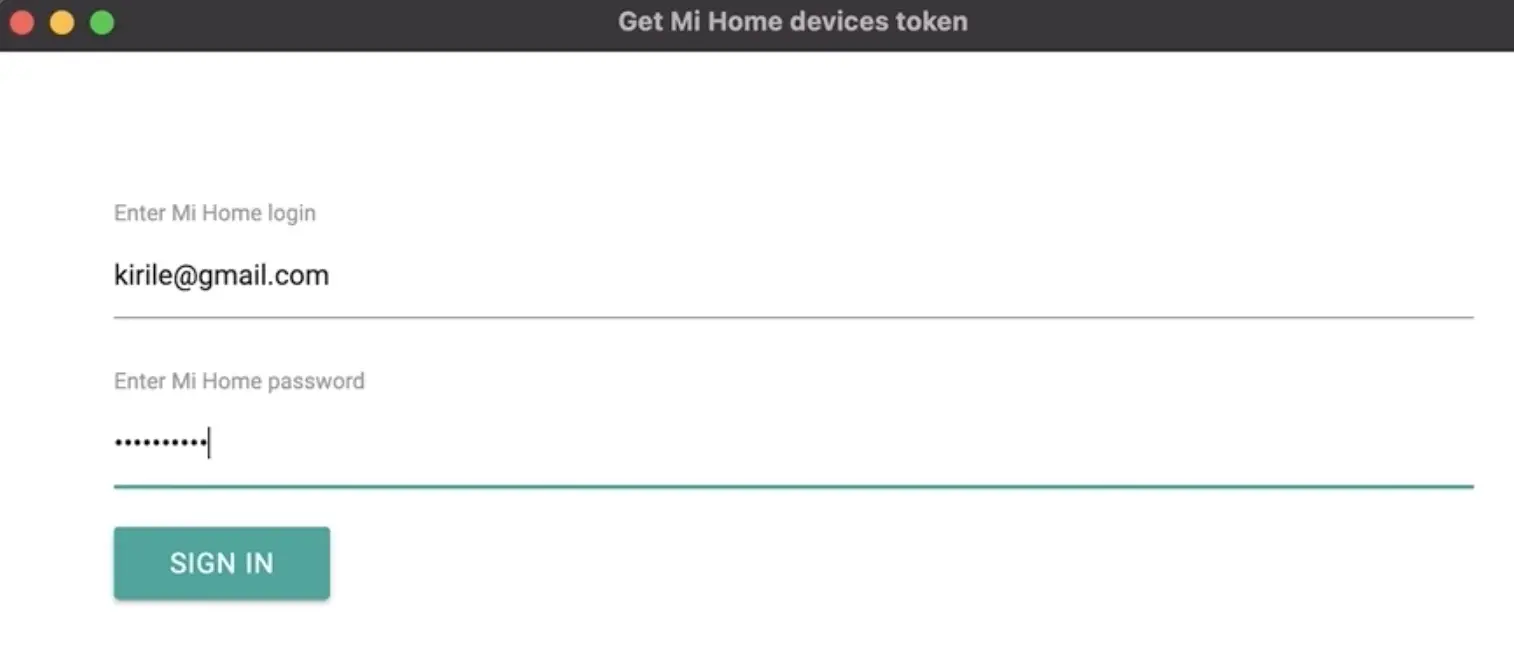
You will see a compete list of your Xiaomi Devices and their tokens 🤩
Home Assistant Xiaomi Vacuum integration
We have the Xiaomi Access Token! Now let’s finish this Home Assistant Xiaomi Vacuum Mop Pro integration.
Again we have two methods for the Home Assistant Xiaomi Vacuum integration:
- Using the xiaomi_miio platform which is embedded in Home Assistant – LINK
- Using a custom component 👉 LINK
The first method is preferred, as there is better chance if it worked once to work for a long time without issues. It all depends of your Xiaomi Device and model here.
Unfortunately, the first method didn’t worked for me (Xiaomi Robot Vacuum Mop P/Pro) and I have to use the second method, which turns out to work flawlessly at least for now.
MY RECOMMENDATION: Start with the first method and only if it is not working for you – go for the second method.
After we finish (regardless of the method) we will be able to give commands to our device like: start, stop, pause, return to base, locate, clean spot, set fan speed and more.
Home Assistant Xiaomi Vacuum integration – 1st method
Open your configuration.yaml file in your Home Assistant config folder and paste the following YAML code inside:
# configuration.yaml entry
vacuum:
  - platform: xiaomi_miio
    host: 192.168.1.2
    token: YOUR_TOKEN
Replace the 192.168.1.2 with your Xiaomi device IP, and YOUR_TOKEN with your real token that you get from the above steps. Save the file and restart the Home Assistant.
After Home Assistant Starts, go to Developer Tools > Services and try to invoke vacuum.start service with your new Xiaomi Entity as shown in the picture below:

If your Xiaomi Robot Vacuum start cleaning, then everything is fine and you can skip method 2 and you can go directly to the Home Assistant Xiaomi vacuum automation part.
Home Assistant Xiaomi Vacuum integration – 2nd method
Do this part only if the Home Assistant Xiaomi Vacuum integration – 1st method didn’t worked for you.
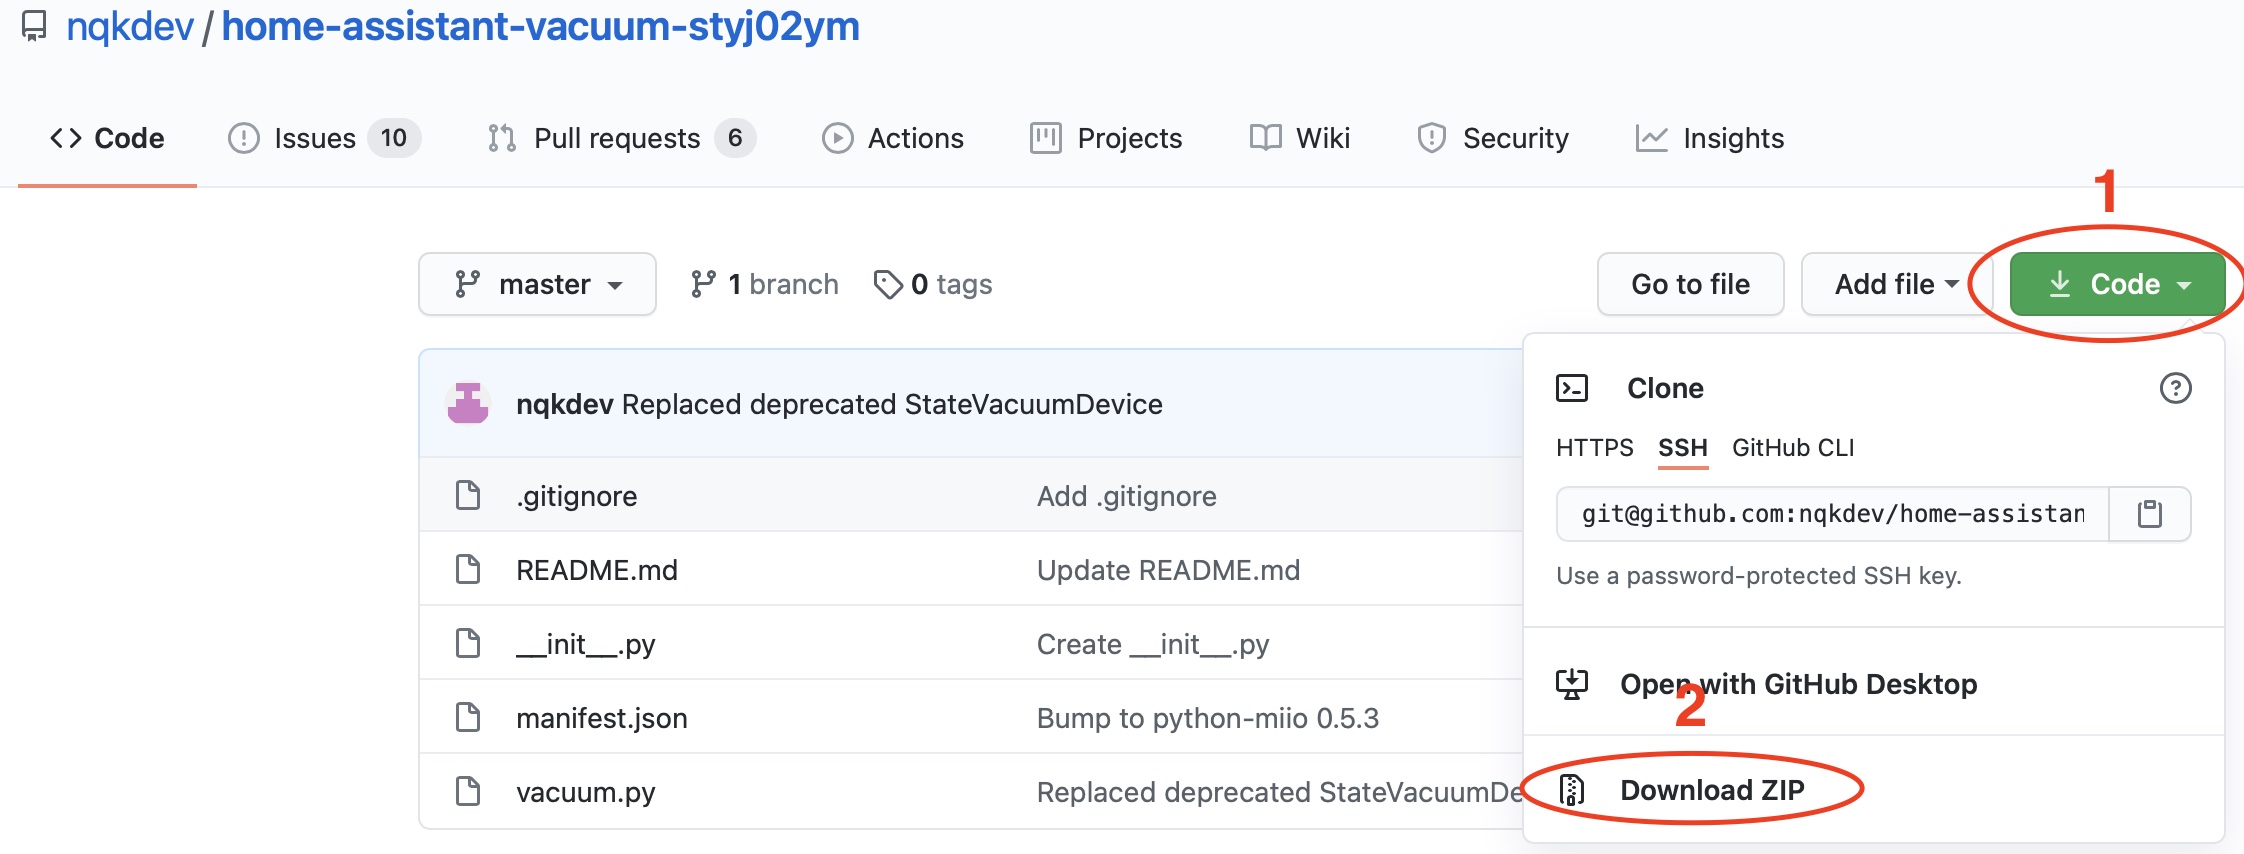
Go to https://github.com/nqkdev/home-assistant-vacuum-styj02ym and download the project as ZIP
Extract the files and copy them under /custom_components/miio2 folder inside your Home Assistant configuration folder. If you don’t have such folders – create them
Then open your configuration.yaml file, remove the vacuum section from the first method if it is still there and and paste the following:
# configuration.yaml entry
vacuum:
  - platform: miio2
    host: 192.168.1.2
    token: YOUR_TOKEN
    name: Mi hihi
Replace the 192.168.1.2 with your Xiaomi device IP, and YOUR_TOKEN with your real token that you have from the above steps. Save the file and restart the Home Assistant.
Go to Developer Tools > Services and try to invoke vacuum.start service with your new Xiaomi Entity. If everything is fine, then Xiaomi Robot Vacuum will start cleaning.
Good job 👍
Create a Home Assistant Xiaomi Automation
Let’s create a Home Assistant automation that will start the Xiaomi Robot Vacuum Cleaner when Elvis has left the building.

I’m kidding when a person leave the house.
And as always you can use the Home Assistant Graphical Automations Editor as I’m showing in my video or you can edit the automations.yaml file as I will show here.
Open the automations.yaml file and paste the following YAML lines:
- id: '1613942351983'
  alias: Start vacuum when I leave home
  description: ''
  trigger:
  - platform: state
    entity_id: person.kiril
    from: home
    to: not_home
  condition: []
  action:
  - service: vacuum.start
    data: {}
    entity_id: vacuum.mi_hihi
  mode: single
Replace person.kiril with your entity_id that you want to track and vacuum.mi_hihi with your vacuum cleaner entity.
Save the file and reload the automations. Now when person.kiril goes from home to not_home the Xiaomi Robot Vacuum Cleaner will start cleaning automatically.
You can of course add conditions and complications to this automation to make it really useful for your needs.
Reset Xiaomi maintenance hours with Home Assistant
You can reset maintenance hours of the Xiaomi Robot Vacuum Mop Pro using Home Assistant scripts.
This is the link to Home Assistant documentation about how you can do that 👉 LINK
Home Assistant Xiaomi vacuum card
You also can create a card to your Home Assistant Lovelace for your robot vacuum. The author of the card claims that it supports the following brands/models: Xiaomi, Roomba, Neato, Robovac, Valetudo, Ecovacs, Deebot.
And here is the GitHub page and instructions about how you can do that 👉 LINK
Question for You!
My question for you is very simple. Do you have any Xiaomi devices at your home and if yes what exactly?
Let me know in the comments below.
Except the Xiaomi Robot Vacuum Mop Pro I also have 3 Xiaomi Xiaofanng cameras which I mounted at my parents work place and they work just fine.
Support My Work!
If you want to secure this blog existence you can become one of my supporters. You can see exactly how in this section of my site.
I can’t thank enough to all wonderful guys that are supporting my work already – you are amazing!
Any other sort of engagement on this site and my YouTube channel does really help out a lot with the Google & YouTube algorithms, so make sure you:
- Hit the subscribe for my weekly newsletter 🗞
- As well as the Like and Bell buttons 👍🔔
If you are just entering the Smart Home world you could also buy my digital product called: Smart Home – Getting Started Actionable Guide 👉 LINK
Also feel free to add me on Twitter by searching for @KPeyanski. You can find me on my Discord server as well.
Stay safe and don’t forget – Home Smart, But Not Hard!
Awesome guide, thanks! I wonder why our vacuum model is not supported in the UI, and what would it takes to include the “hacky” solution you posted…
One thing, though: the testing method #2 has a caveat. You need to restart twice: first to enable the miio2 integration, and the second to include it in the configuration.yaml – if we do as you suggested, restart fails complaining “miio2 integration wasn’t found”.
Thanks for the good words and for the tips 🙂 I don’t know about why our model is not UI supported. I guess that is some kind of a nasty “curse” for most of my belongings 🙂
I have two both Roborock’s an S7 auto empty dock for my main floor and a S6 MaxV on my second floor
I have bought a Viomi Alpha 2 Pro vacuum with homebase.
the original xiaomi_miio integration does not support this vacuum so I tried this implementation.
Sadly I get this
“This entity (‘vacuum.viomi_alpha_2_pro’) does not have a unique ID, therefore its settings cannot be managed from the UI”
I can not get my head arround if and how to create an unique Id.
I am not so experienced in HomeAssistant, yust trying what it takes to leave Domoticz as support get less and less.
Does those methods still work ?
I have a Mi mop pro where the integration does not recognize anymore .
The manual method did not work as well due to lack of entity ID.
any solution ?
Hello,
Love you vacuum xiaomi card, but how to make the entity?
entity: vacuum.xiaomi_vacuum_cleaner
As a newby, please step by step what to do.
Looked at your video and could follow and install all. I see all the vacuum services, but i don’t see the entity. So how should i make that?