
In this article we will see what are the up to date options to install Tasmota on an ESP device. We will go through the Tasmota prerequisites, ESP board preparation, flashing tools and what to do next after you are ready with everything.
Table of Contents
What is Tasmota?
If you are wondering what actually is Tasmota here is quick explanation:
Tasmota is an alternative open source firmware that allows you to locally control ESP8266 or ESP32 based devices using MQTT, HTTP, Web Interface and Serial.
For what Tasmota can be used?
The whole idea with Tasmota is simple, imagine the following scenarios:
You are buying an IoT device, which usually is ESP based. That means the main chip inside is either ESP8266 or the newer one ESP32.
- Scenario 1: This IoT device can be either without any software on it, as example: D1 mini, NodeMCU and many others.
- Scenario 2: The IoT device can be pre installed with software from the vendor that is selling it. For example: Sonoff, Shelly, Tuya and many, many more.
In both of the above mentioned scenarios you can upload Tasmota firmware and replace what was on that device before, gaining full local control over the device.
You can then add the device to your favourite Smart Home Hub (e.g. Home Assistant, Node-RED, etc) and you can connect it to MQTT Broker if you wish. That way you can add one more trustworthy soldier to your Smart Home army that will serve you for the years to come.
What are the Tasmota Prerequisites?
There are some prerequisites that needs to be met to successfully install Tasmota on an ESP device.
The most important requirement is that you have to connect the ESP device to your computer somehow. This usually can be done in the following ways:
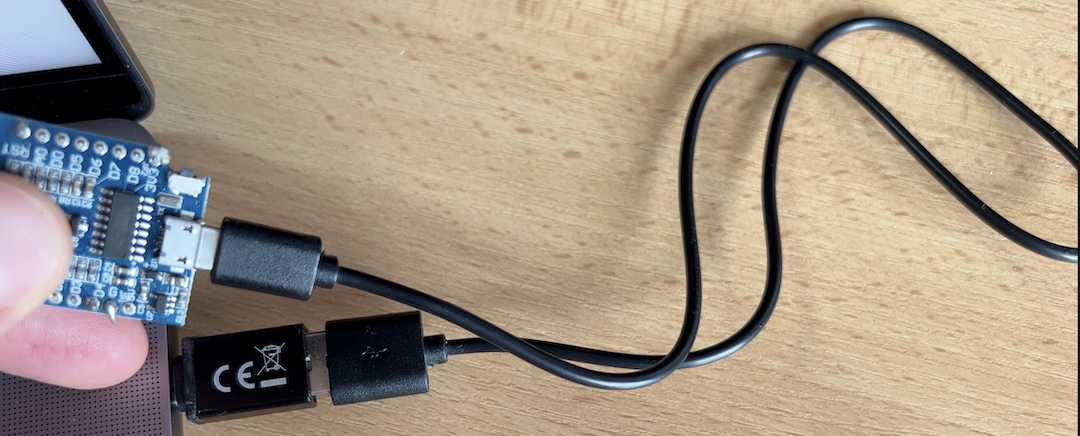
- Using a micro USB cable if the ESP device of interest have such port on it.
- Using a Serial-to-USB adapter like FTDI or CH340G adapters. These adapters are available in AliExpress for around 1 or 2 US dollars.
- FTDI FT232RL USB to TTL Serial Adapter – https://s.click.aliexpress.com/e/_ACWZaG
- USB To RS232 TTL Converter Adapter CH340G – https://s.click.aliexpress.com/e/_ASTgu8
How to properly connect an ESP device for Tasmota install?
If your ESP device have a micro USB port you just have to connect it to your PC and you are ready to upload Tasmota.
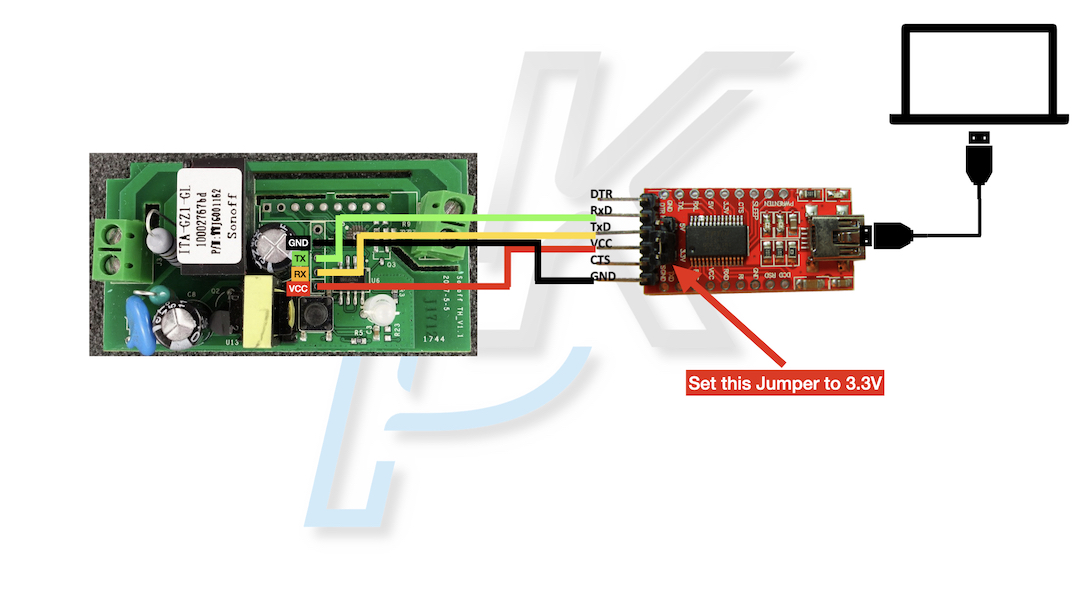
Otherwise, you have to connect a Serial-To-USB adapter to your computer and then you have to connect your Serial-To-USB adapter to the ESP device as follows:
- VCC on the Serial-to-USB adapter to VCC on the ESP device
- GND on the Serial-to-USB adapter to GND on the ESP device.
- RX on the Serial-to-USB adapter to TX on the ESP device
- TX on the Serial-to-USB adapter to RX on the ESP device
How to put an ESP device in Programming/Flashing mode?
Depending of the ESP device that you have, you may have to hold down the board button or to connect GPIO0 to GND with a wire while the device is booting to put it in Programming or Flash mode.
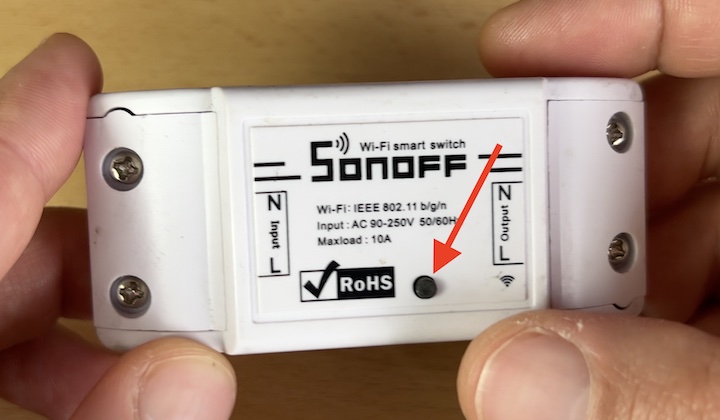
Sonoff Basic Board Button 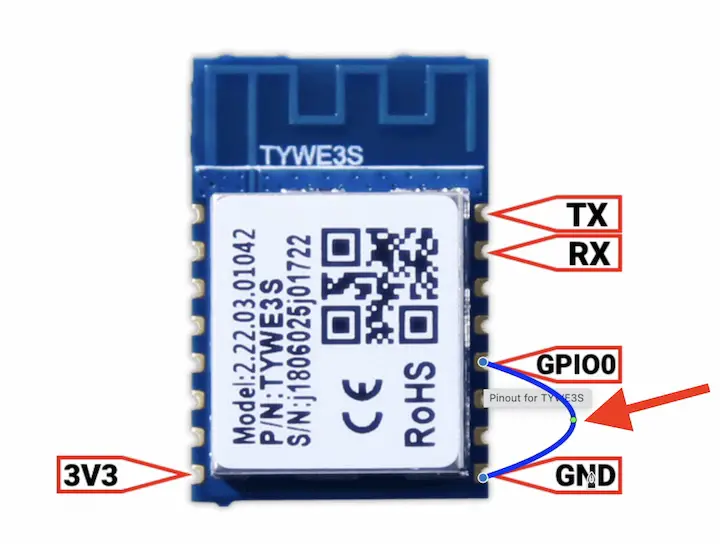
Connect GPIO0 with GND on a ESP device with wire
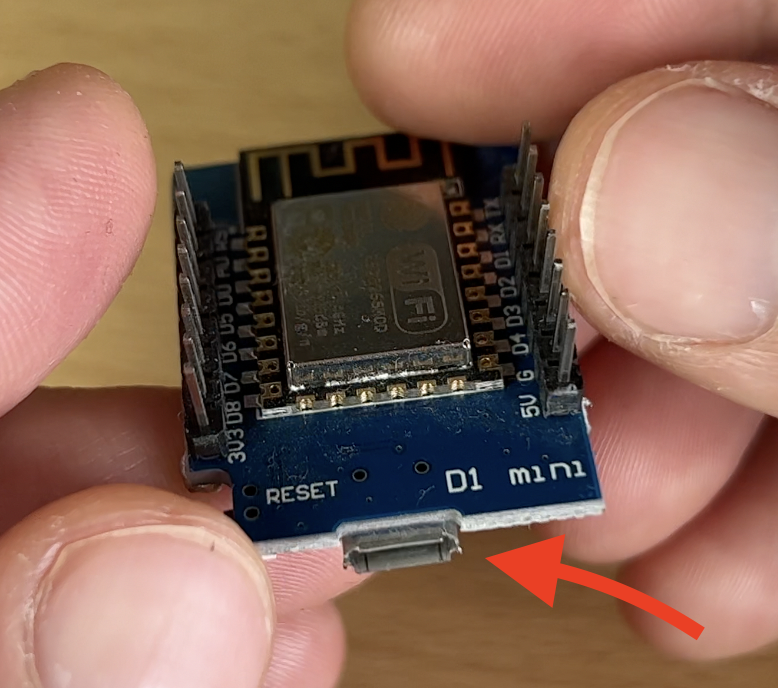
For some devices like the D1 Mini, NodeMCU, etc you don’t have to do anything special to put them in Programming mode as they are in constant mood for changes & updates, if you know what I mean.
What are the recommended software tools to install Tasmota?
After you put your ESP device in Programming/Flash mode you just have to do two things:
- To download Tasmota firmware (kind of optional as the software tools can do that for you).
- To start a software tool that will help you to install Tasmota.
I will guide you through all of the steps later in the article, but for now, let’s first focus on the recommended software tools for Tasmota installation.
Tasmota Web Installer
I can two hands recommend to use Tasmota Web Installer which is basically a simple web page with one big button on it. I’m going to demo exactly this tool in details in just few minutes, because it is fun, fast and way easier than anything else.
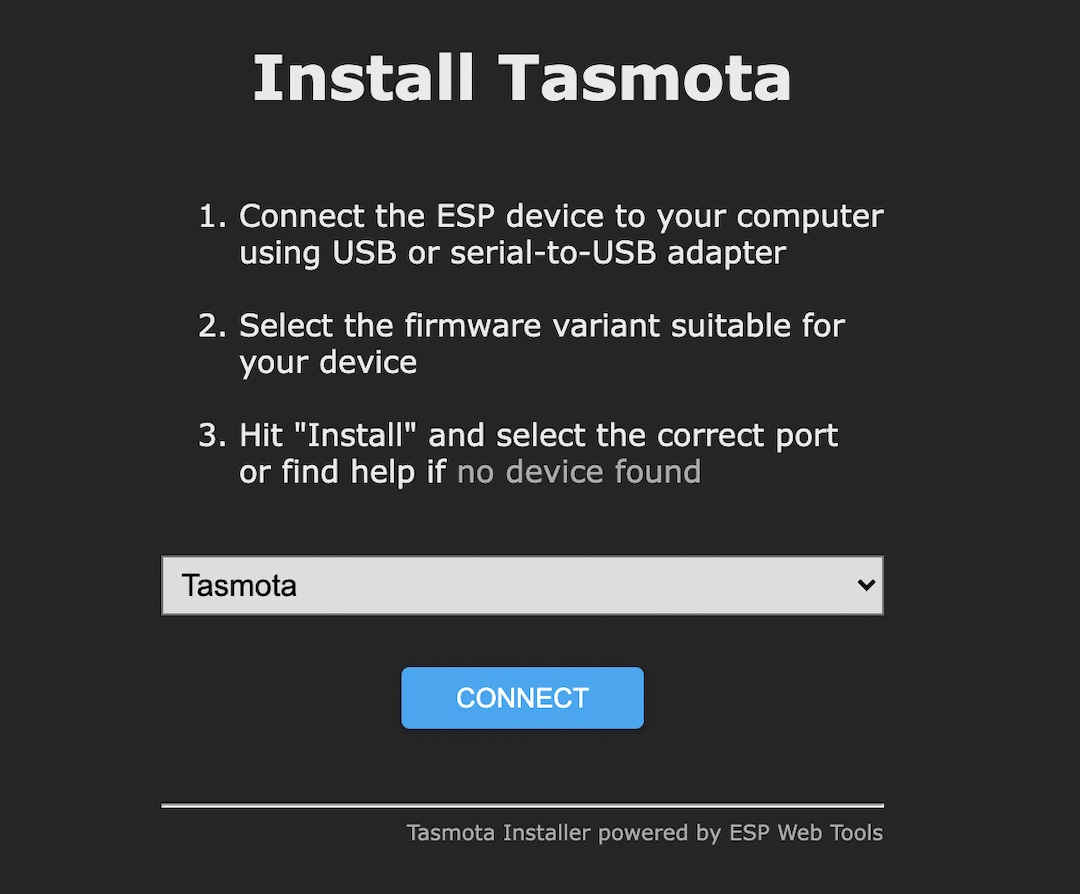
The only requirement to run this tool is to use either Google Chrome or Microsoft Edge browsers. Here is the official page of the tool if you want to visit it – https://tasmota.github.io/install/
Tasmotizer
if you don’t have Chrome or MS Edge browsers – the other not bad at all alternative is to use a tool called Tasmotizer, which is available for Windows, Linux & Mac – https://github.com/tasmota/tasmotizer.
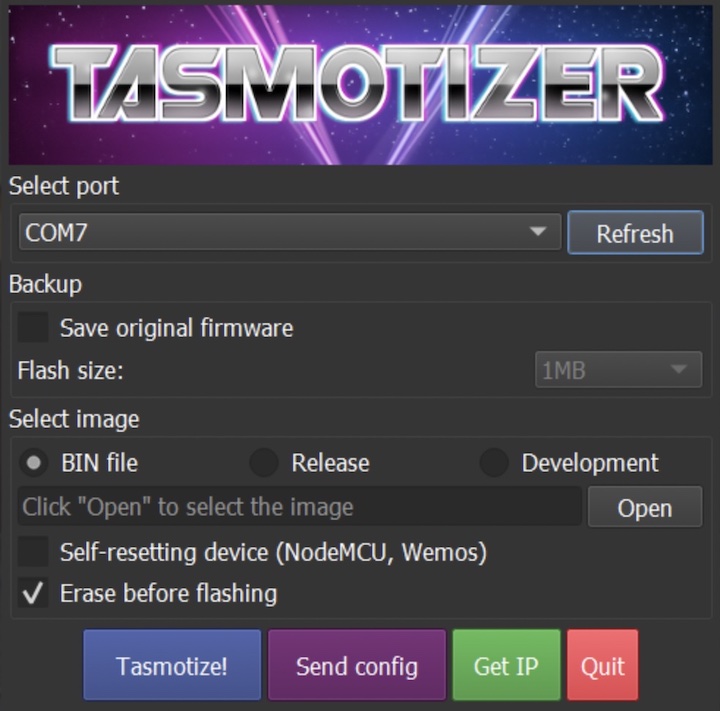
Tasmotizer main screen 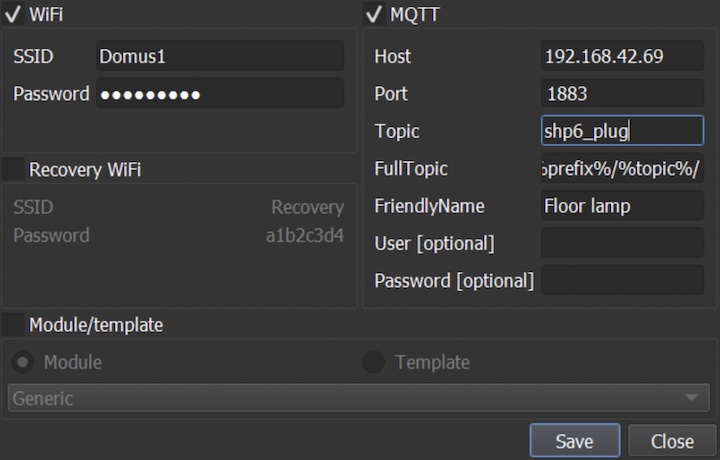
Tasmotizer send configuration to an ESP device
The bonus with Tasmotizer is that you can set your WiFi and even MQTT credentials in advance before uploading the Tasmota firmware. That way the device will automatically connect and will be ready to be used after the Tasmota installation process is finished.
If you do not set your WiFi credentials in advance from Tasmotizer or if you used the Tasmota Web Installer – you have to go through the Tasmota Initial Configuration which is very easy.
How to install Tasmota on an ESP device?
Time to see an actual Tasmota install demo because as I like to say one picture means thousand words and one demo means thousand pictures, imagine how many words the following demo is worth.
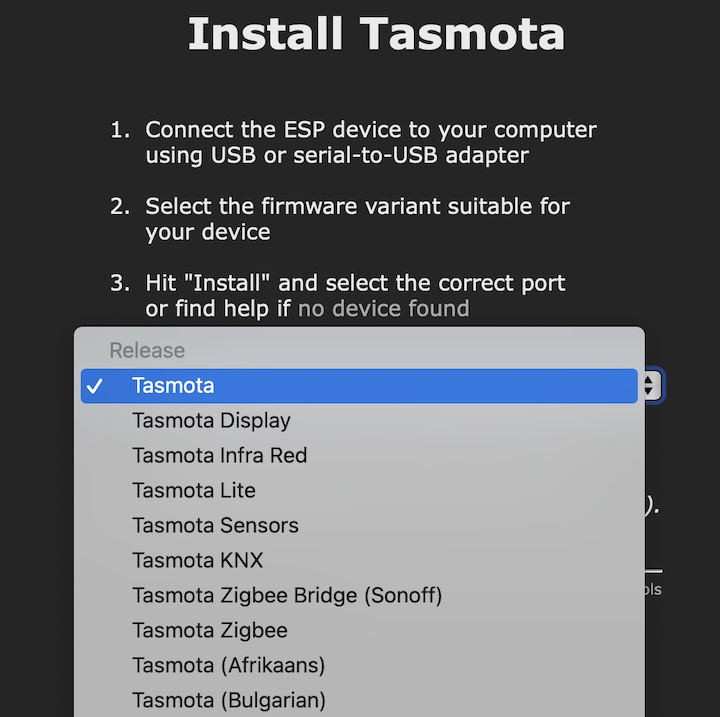
- Start a Google Chrome or Microsoft Edge browser and open the Tasmota Web Installer page – https://tasmota.github.io/install/
- Connect your ESP device to your computer, either with a USB cable or with Serial-To-USB adapter (as shown in the sections above).
- Put your device in Programming / Flash Mode if that is necessary (as shown in the sections above).
- Optionally, from the dropdown list you can select a specialised Tasmota version like a localised one or Sensors version or ZigBee version or something else. if you are not sure what to choose here, leave the default option (Tasmota only).
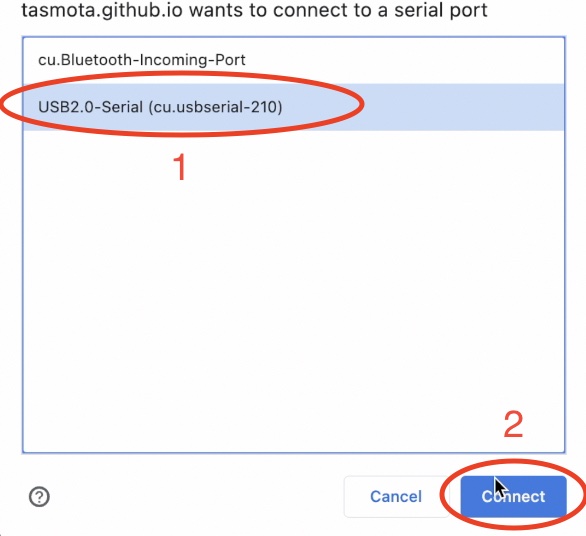
- Click on the Connect button and select the correct port on which your ESP device is connected, then click on the Connect button again.
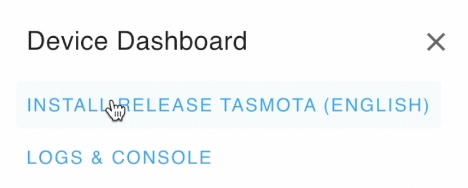
- Another dialog may appear where you have to select Install release Tasmota ...
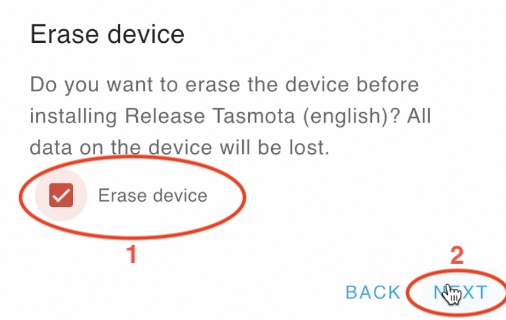
- On the next dialog, tick Erase device and click Next button and then Install button.
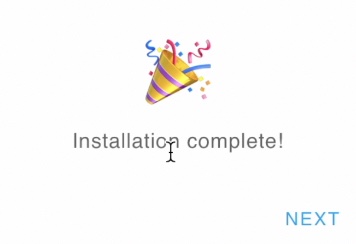
- Now you just have to wait a minute or two for the Tasmota installation to finish. It is important not to close the browser and even not to minimize it until all is done. Just leave it like that and enjoy the silence (Depeche Mode). When you see the installation complete dialog, click Next button and then you can close that page.
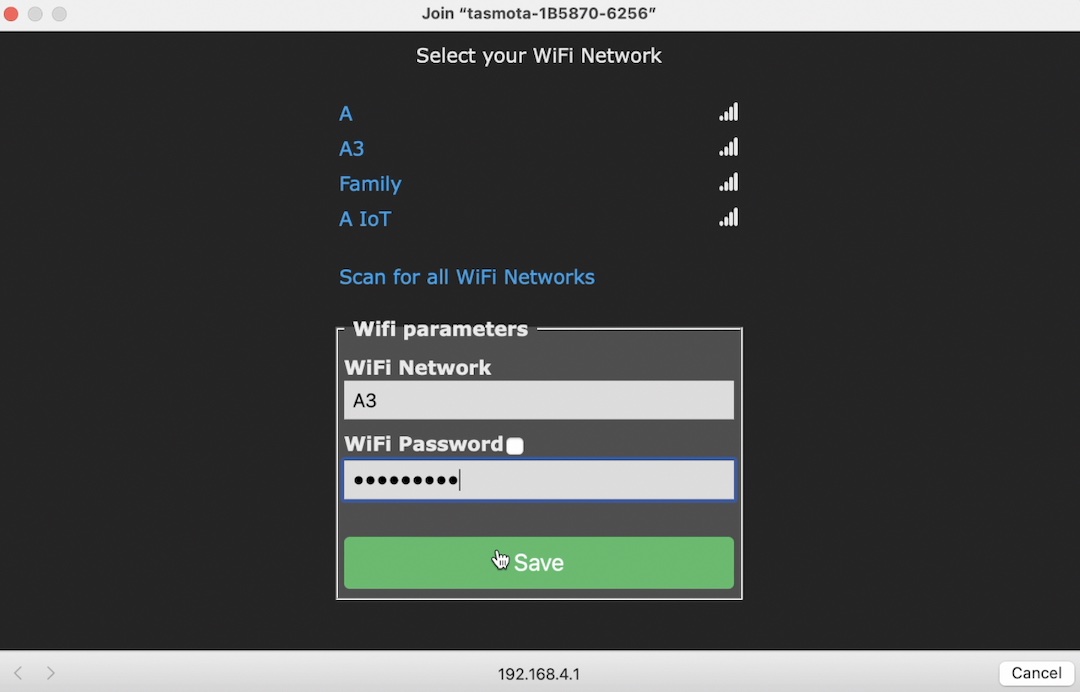
- Your device is now Tasmotized and it should create an open WiFi network named
Tasmota-XXX-XXX(where XXX are some digits). Please connect to that WiFi network and wait for a pop-up to appear. - Inside the pop-up select your WiFi network, type your WiFI password and click Save button.
- The ESP device will restart and will connect to your WIFI. It will be even possible to see the assigned IP address of your new Tasmota device.
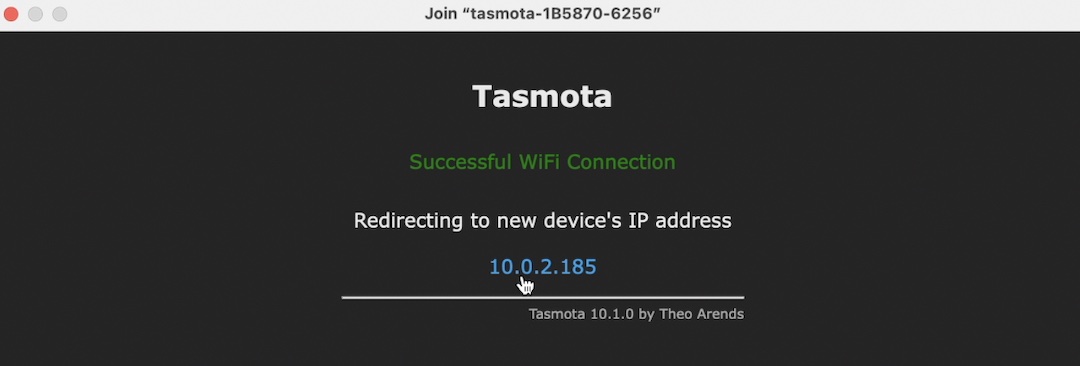
- Join your usual WiFi network again, click on the assigned IP or type it in a new browser or tab to open the Tasmota web interface.
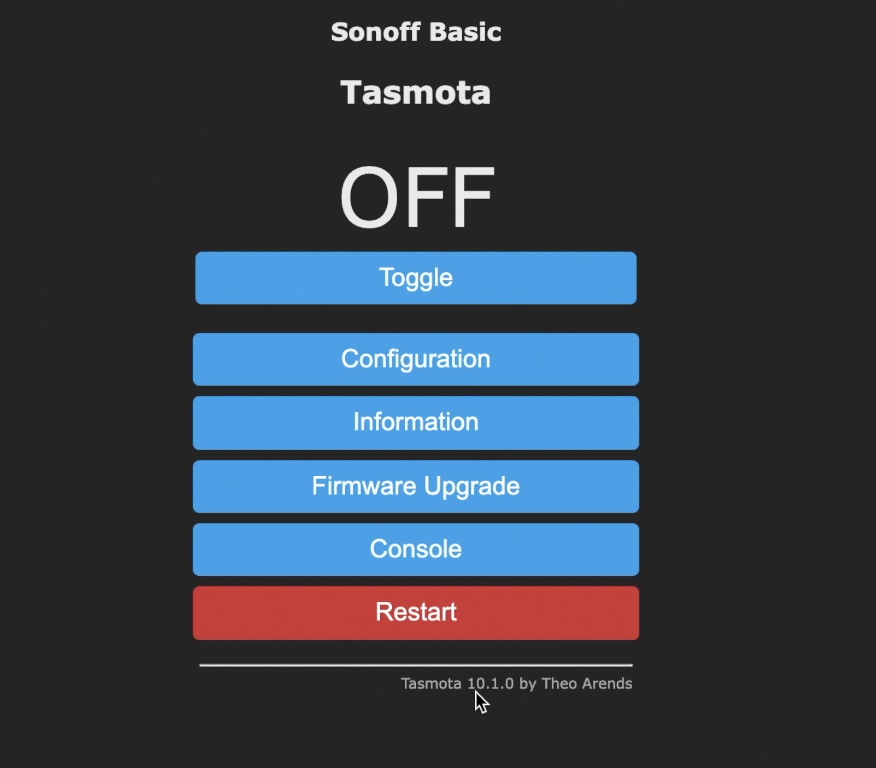
Congratulations, you made it! 🎉🥳 Your device is having a Tasmota firmware on it.
You can now browse the Tasmota menus and further configure your new Tasmota device as you wish.
I have Tasmota! What to do next?
Maybe, you want to integrate your Tasmota device with Home Assistant or you want to install a MQTT server and to connect your Tasmota device there. Check this article of mine, where I’m describing everything in details 👇.
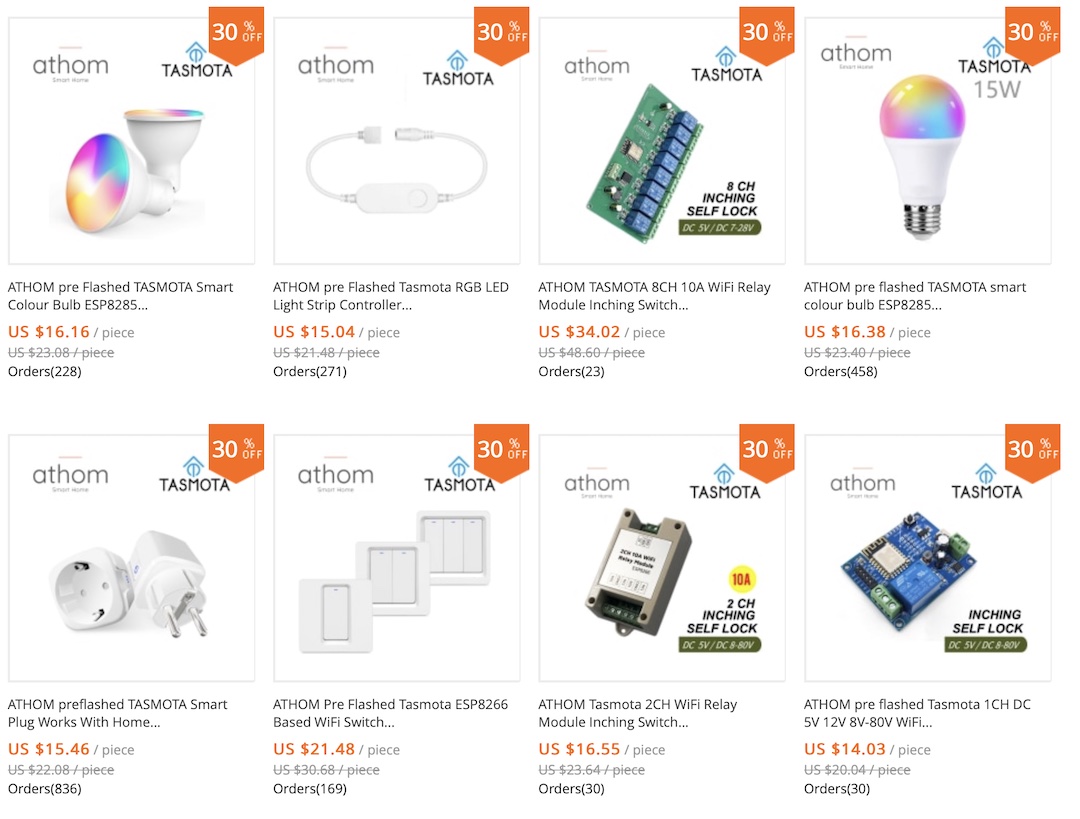
I don’t want to flash, but I want a Tasmota device!
If the Tasmota installation process is not for you, but you want to use Tasmota firmware anyways – you can buy pre flashed with Tasmota and ready to use devices that are available in AliExpress from a vendor called Athom 👇 https://s.click.aliexpress.com/e/_9gnkvI
Outro
If you want to secure this website existence do one of the following or even better – all of them 😉
- Support my work using any of the listed methods here 👉 https://peyanski.com/support
- Subscribe for my YouTube channel with the notification bell 👉 https://youtube.com/kpeyanski
- Follow me on Twitter 👉 https://twitter.com/kpeyanski
- Join my Discord server 👉 https://invite.gg/kpeyanski
I’m Kiril and I’m done writing. Bye!