
We will install the official Tuya Homebridge plugin, so it will be possible to control Tuya smart devices using Apple HomeKit. That means if you have Apple device and powered by Tuya devices you can make them work together natively using the iOS Home app! I will show you how.
Table of Contents
What is Tuya Homebridge Plugin?
One of the main characters in today’s article is the Tuya Homebridge custom plugin which will help us to control Powered by Tuya (PBT) devices using Apple HomeKit. Tuya Homebridge plugin is based on Tuya Open API (If you need more info about it – check the official Tuya page) and it is officially maintained by the Tuya Developer Team.
In other words if you follow this tutorial and make this work once you will able to enjoy it and control your Tuya devices from your iPhone, iPad & Mac for a very long time. Which is good don’t you think?
What is Homebridge?
But wait a minute here, let’s make a step back – we are talking about Tuya Homebridge custom plugin, but what actually is Homebridge?
Homebridge is a lightweight NodeJS server you can run on your home network and it will start emulating the iOS HomeKit API. Homebridge supports Plugins and fortunately enough Tuya officially made their own Homebridge plugin and this is exactly what we are going to use in a moment. But first let’s install the Homebridge.
I have a Newsletter and you are invited!
Before we continue further I just want to to quickly encourage you to subscribe for my weekly Newsletter! Here is the whole process in short:
- When you sign up, you will receive a confirmation mail where you have to confirm your subscription.
- After that, you will start receiving my new articles a few minutes after I publish them (that is usually every Wednesday.) directly to your e-mail.
- If for some reason you don’t like what you get, you can always unsubscribe from the link located at the bottom of every mail that you will get from me.
So, why don’t you give it a try 👉 My Newsletter Page
Homebridge installation options
You can install Homebridge on Windows, Linux & Mac. There is also an official Homebridge Raspberry Pi image with everything preinstalled and ready to use.
- Install Homebridge on Red Hat, CentOS or Fedora Linux – https://github.com/homebridge/homebridge/wiki/Install-Homebridge-on-Red-Hat%2C-CentOS-or-Fedora-Linux
- Install Homebridge on macOS – https://github.com/homebridge/homebridge/wiki/Install-Homebridge-on-macOS
- Install Homebridge on Windows 10 – https://github.com/homebridge/homebridge/wiki/Install-Homebridge-on-Windows-10
- Official Homebridge Raspberry Pi Image – https://github.com/homebridge/homebridge-raspbian-image/wiki/Getting-Started
Install Homebridge on Raspberry Pi with Raspberry PI OS
For the sake of this tutorial I decided to install Homebridge on a Raspberry Pi running the standard Raspberry OS as the steps that you will see in a minute are very similar to the other ways of installing Homebridge and it will be easier for you to get some hints no matter what is your target Operating System. So let’s install the Homebridge on Raspberry OS linux.
Install NodeJS needed for Homebridge
The first thing is to install NodeJS because as we already know Homebridge is using it:
- Connect to your Raspberry Pi using SSH or open a new Terminal if you are using the Raspberry PI GUI.
- Type the next command to setup the NodeJS repository on your system
curl -sL https://deb.nodesource.com/setup_14.x | sudo bash -- Use the following command to install the NodeJS and its dependencies:
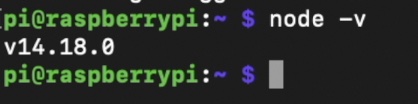
sudo apt install -y nodejs gcc g++ make python net-tools- When above finished, try executing the following command to see if NodeJS is installed:
node -v- You should receive something similar as answer:
Homebridge Installation
When we have NodeJS installed we can continue with the Homebridge installation. Here is how:
sudo npm install -g --unsafe-perm homebridge homebridge-config-ui-xOkay, Homebridge is installed and ready to be used and to be customised with plugins, like the Tuya plugin, but that is for later.
Create a cloud project in Tuya IoT Platform
Now, the next step is to create a Cloud project in the Tuya IoT Platform, and to add at least one Tuya device there. If you haven’t signed up for the Tuya IoT Platform yet do it first from this link 👉 https://iot.tuya.com
Then do the following:
- Login with your username & pass into https://iot.tuya.com and choose Cloud from the left sidebar.
- In the upper right corner click on the Create Cloud Project button.
- In the dialog set Project Name & Description to whatever you wish, as Industry & Development Method choose Smart Home from the drop-down list.
- To enter the correct Data Center for you. Open the Tuya Smart or Smart Life mobile app. Tap Me > Settings (icon in the top right corner of the page) > Account and Security. The Region field is what needs to be entered in the Data Center. If that is too hard try select most of the data centers as I did during the video.
- Click Create to complete project creation.
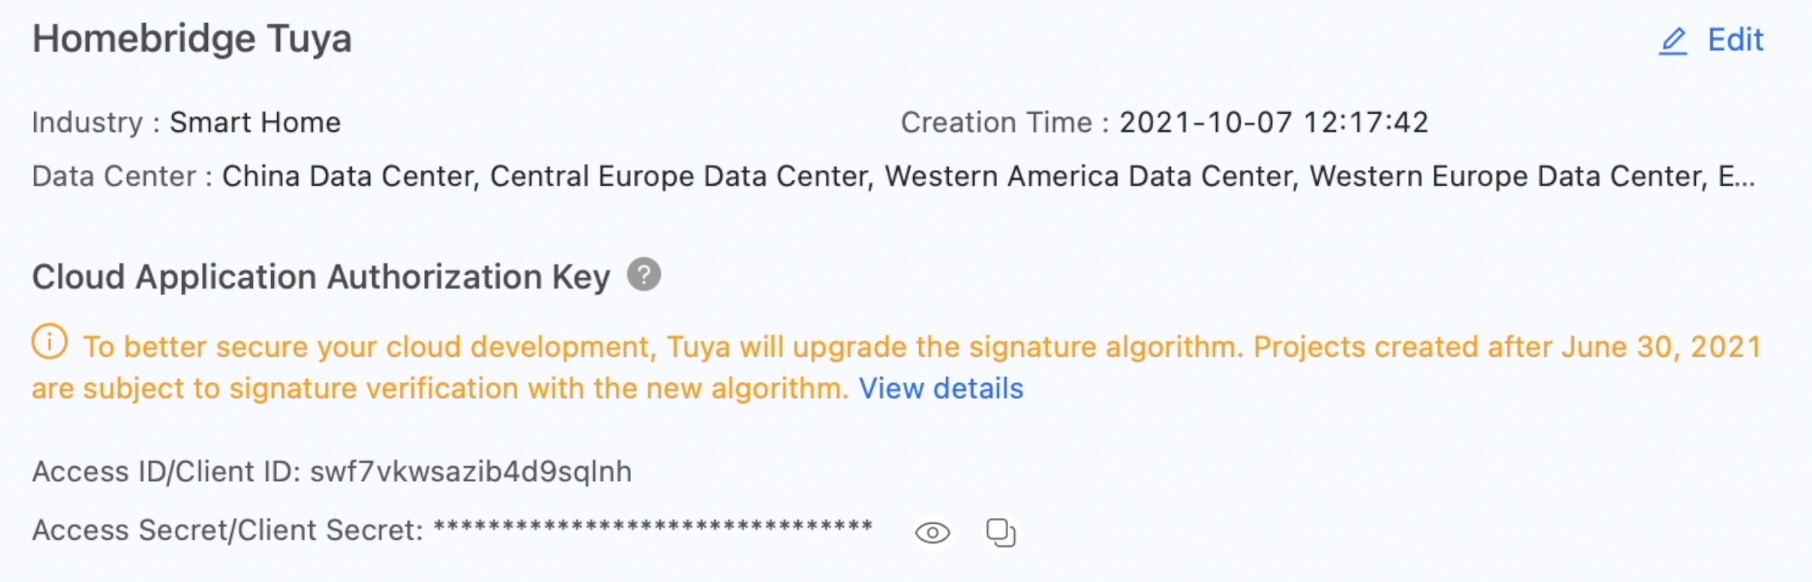
- On the Authorize API Products page, Several APIs have been selected as default we only need to add the Device status notification. To do that find the Device status notification in the left column and move it to the right. Finally click Authorize button.
After all the steps above are completed you should be able to get your Authorization Key, that consist of Access ID/Client ID & Access Secret/Client Secret. We will need these credentials later when we start configuring the Tuya Homebridge plugin.
Link Tuya devices by Mobile app account
For this step you will need either Tuya Smart App (Apple App Store or Google Play) or Smart Life App (App Store & Google Play) downloaded and installed on a mobile device and at least one Tuya device paired with one of these apps. After you are ready with that part do the following:
- While you are still logged in the https://iot.tuya.com go to Devices section.
- Choose Link Tuya App Account > Add App Account.
- Scan the QR code displayed on your screen with the Tuya Smart app or Smart Life app. Open one of these app and go to: Me > Scan
- Click Confirm login on the Tuya Smart app or Smart Life app.
- Click the All Devices tab. You can see the devices linked with your Tuya Smart app or Smart Life app account.
Is Tuya IoT Platform free?
There is 1-year free trial for the above Tuya IoT service, but don’t worry after trial expiration you can renew your subscription for free. The free tier will be good for you if you have up to 50 Tuya devices. If you have more than 50 Tuya devices you must choose one of the available paid subscriptions.
Let me know in the comments how many Tuya devices do you have at the moment?
Install Tuya Homebridge Plugin
I can’t wait to install the Tuya Homebridge plugin and to configure and start it for the first time, so let’s do this
To Install Tuya Homebridge plugin execute the following commands on your device where we installed NodeJS, & Homebridge (in my case it was a Raspberry Pi 400. If you want to know more about that device check this article of mine 👉 LINK)
npm install homebridge-tuya-platformWait for the installation to finish and then continue with the Tuya Homebridge Plugin configuration.
Edit the Tuya Homebridge Plugin configuration
Before we start the Tuya Homebridge plugin we have to edit the configuration of the plugin just a little bit.
- Navigate to the directory
homebridge-tuya-platform/config.
cd ./node_modules/homebridge-tuya-platform/config- Edit the
config.jsonfile. Instead of nano you can use vi, vim or your favourite text editor.
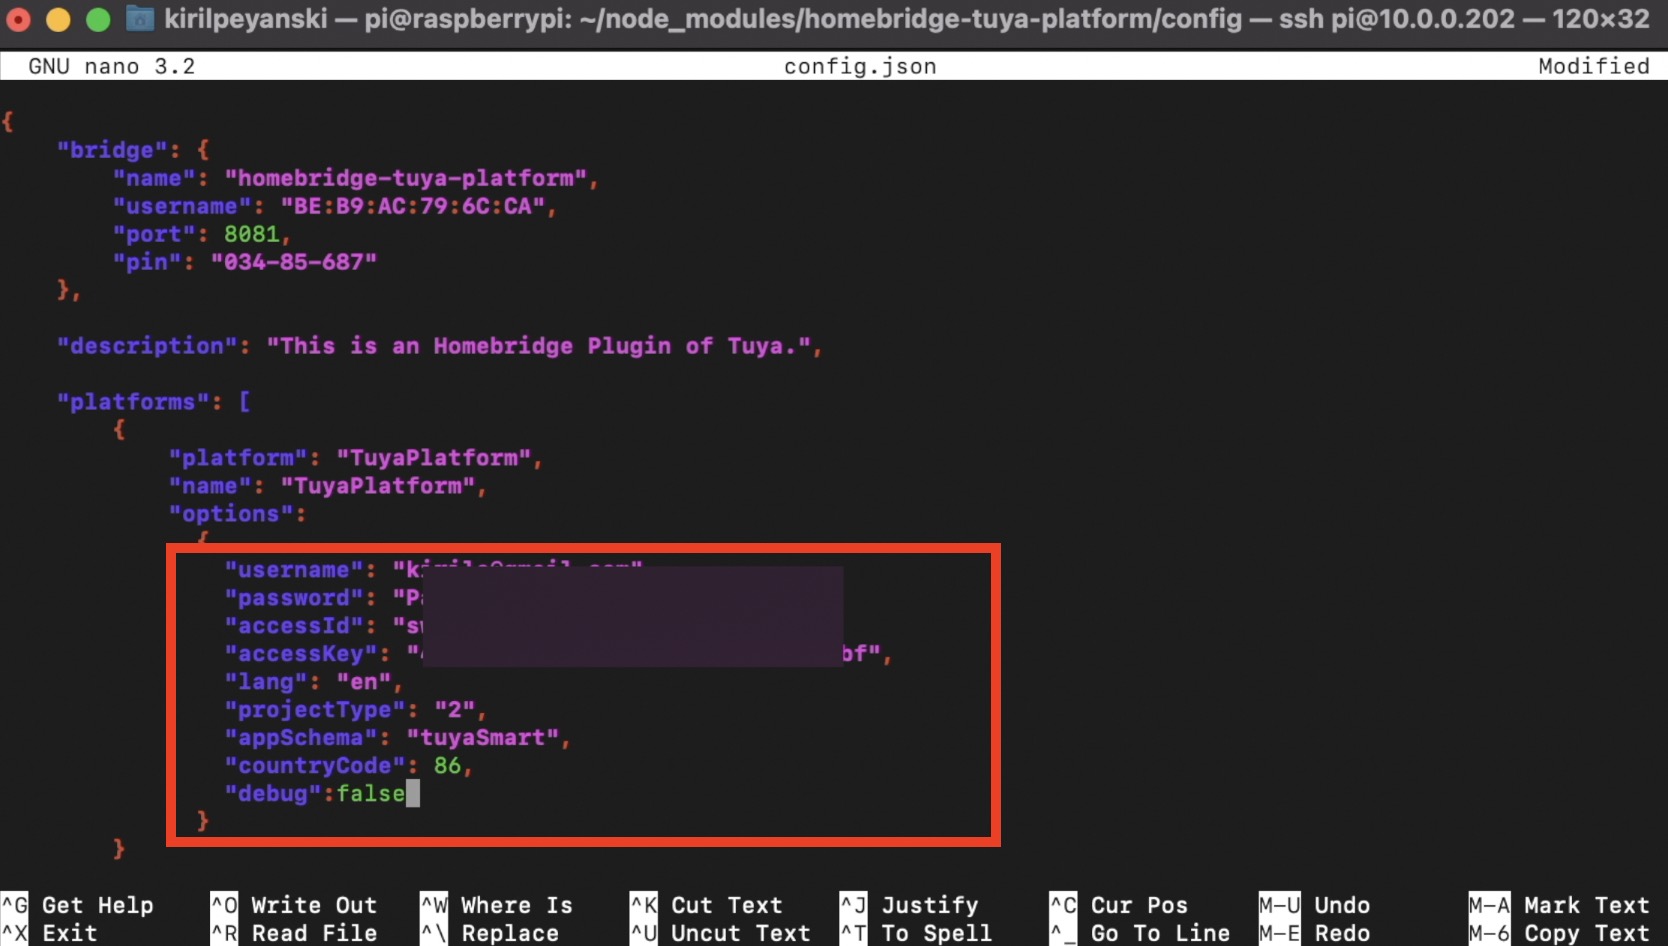
nano config.jsonInside the config.json file we have to enter some values, as follows:
- For the “username“: enter your Tuya Smart App or Smart Lift app username.
- For the “password“: enter your Tuya Smart App or Smart Lift app password.
- For the “accessId“: & “accessKey“: enter the Access ID and Access Secret of your Cloud project that we generated during the Create a cloud project in Tuya IoT Platform step above.
- For the “projectType“: enter 2, which means Smart Home PaaS according to the documentation.
- The “appSchema“: can be either tuyaSmart or smartLife depending of your mobile application that you are using.
- And “countryCode”: is the code of the country you select on logging in to the Tuya Smart or Smart Life app. To check the exact country code digits use the https://countrycode.org/ website.
At the end you should have something similar entered in your config.json file.
Start the Tuya Homebridge plugin
The final step of starting the Homebridge with Tuya Homebridge plugin, installed on a Raspberry Pi running Raspberry Pi OS is here. So let’s walk this step together.
Go to homebridge-tuya-platform folder by executing the following command.
cd..Then start the Tuya Homebridge plugin:
homebridge -D -U ./config/ -P ./If everything is fine, and Tuya Homebridge plugin is started correctly you should have a QR code at the end.

Scan the Tuya Homebridge QR code with iOS Device
It is the easiest part that follows. Namely, we have to use our iOS device and Home app to scan the QR code that Tuya Homebridge produced.
Just open the Home App on your iOS device tap on the Plus button in the upper right corner > Add accessory > scan the QR code that Tuya Homebridge plugin is generated > click on Add Anyways button on the Uncertified Accessory dialog > Select Bridge location and Name > Press continue 1000 times more and you will be ready!
After you finish all of these steps, you will be able to control your Tuya device from your Home app. Enjoy 🥂
Supported Tuya Device Types by Tuya Homebridge plugin
Just to mention that these are the supported Tuya Device Types that you can control with your apple device after the Tuya Homebridge plugin is up and running. All of that using the native Apple Home app for free.
Supported Tuya Device Types 👉 LINK
Outro
Make sure that you subscribe to my YouTube channel and hit that notification bell. It is quick, easy and free and I will be thankful forever.
Follow me on Twitter and join my Discord server, stay safe and remember – Home Smart, but not Hard!
To secure this blog existence – support my work by using either of the channels listed here 👉 LINK
Bye!
Currently the only IOT free plan I see at Tuya is for one month and cannot be renewed, or at least cannot be renewed before it expires? Either way it does not look like there is a one-year free plan, and the paid options are absurdly high for my use case.
Otherwise the guide was very good and helped a lot not getting lost in this, thanks!
Great tutorial, thanks!
Did anyone succeed in adding the accessories? Going through all these steps, I only manage to get a Tuya bridge working on the home app , but the actual accessories are not visible? I checked many websites, a lot of people have this issue but so far no solution. Any helps is much appreciated!
Chris