
I recently successfully installed Home Assistant Supervised on Debian Linux, and the experience has been flawless. Home Assistant Supervised is one of the officially supported ways to run Home Assistant, providing access to the Home Assistant Add-on Store. In this article, I’ll walk you through the step-by-step process I followed to set up Home Assistant Supervised on my ZimaBoard computer that is running Debian 12 Linux.
Table of Contents
Hardware Requirements
To get started, all you need is a computer capable of running Debian 12 Linux and a 16GB USB Flash drive. It’s crucial to note that Home Assistant Supervised specifically requires Debian (Debian derivatives, such as Ubuntu, Raspberry Pi OS and bunch of others are not OK). You can use whatever hardware you have (laptop, desktop, raspberry pi, NUC, etc.). I personally used the ZimaBoard, a low-cost single-board computer designed for makers.

ZimaBoard comes equipped with a fast eMMC storage, an Intel Processor with virtualization support, making it an ideal choice for Home Assistant Supervised, but more about it later in the article
Tired of reading?
If you don’t want to read anymore, no problems just check the video tutorial below:
Software Requirements
The first step is installing Debian Linux on your chosen hardware. At the time of writing this article the latest version is Debian 12 (Bookworm). The process involved:
- downloading the Debian image from https://get.debian.org
- creating a bootable USB stick using tools like Raspberry Pi Imager or Balena Etcher
- configuring the BIOS to boot from the USB drive.
- standard Debian installation procedures were followed, ensuring the root and regular user credentials were well remembered.
Once I got inside Debian, I switched to root user with the command below and my root password
su -I updated and upgraded the system using standard apt commands.
apt update && apt upgradeFollowing the Home Assistant instructions, I installed necessary software dependencies:
apt install \
apparmor \
cifs-utils \
curl \
dbus \
jq \
libglib2.0-bin \
lsb-release \
network-manager \
nfs-common \
systemd-journal-remote \
systemd-resolved \
udisks2 \
wget -y
Then I installed Docker-CE with the single-line command below
curl -fsSL get.docker.com | shThe latest OS Agent was downloaded from the Home Assistant OS Agent GitHub repository . Please, change X.X.X in the command below with the latest OS Agent version.
wget https://github.com/home-assistant/os-agent/releases/download/X.X.X/os-agent_X.X.X_linux_x86_64.deband installed using the dpkg command. Please, change X.X.X in the command bellow with the latest OS Agent version.
dpkg -i os-agent_X.X.X_linux_x86_64.debThe installation success was confirmed with the command below where no errors were seen.
gdbus introspect --system --dest io.hass.os --object-path /io/hass/osNext, the Home Assistant Supervised installer tool was initiated with the following commands:
wget -O homeassistant-supervised.deb https://github.com/home-assistant/supervised-installer/releases/latest/download/homeassistant-supervised.deb
apt install ./homeassistant-supervised.deb
An optional step in the last step above is selecting the machine type during installation. In my case, with a ZimaBoard computer I was not asked, but if I was, I would choose the generic-x86-64 option.
About ZimaBoard (the computer I used)
Before delving into the final steps of Home Assistant Supervised installation, let me share some insights about the ZimaBoard. This crowd-funded single-board computer offers impressive features, including support for various operating systems such as Linux and Windows, software router OS, media servers, and even Android.
This single board computer beast comes in three modifications ZimaBoard 232, ZimaBoard 432 & ZimaBoard 832 with 2,4 and 8Gigs of RAM. Also the last two models have a better CPU with two more cores. All devices are having 32GB of fast eMMC storage and 2 SATA ports for additional HDD/SSD drives.
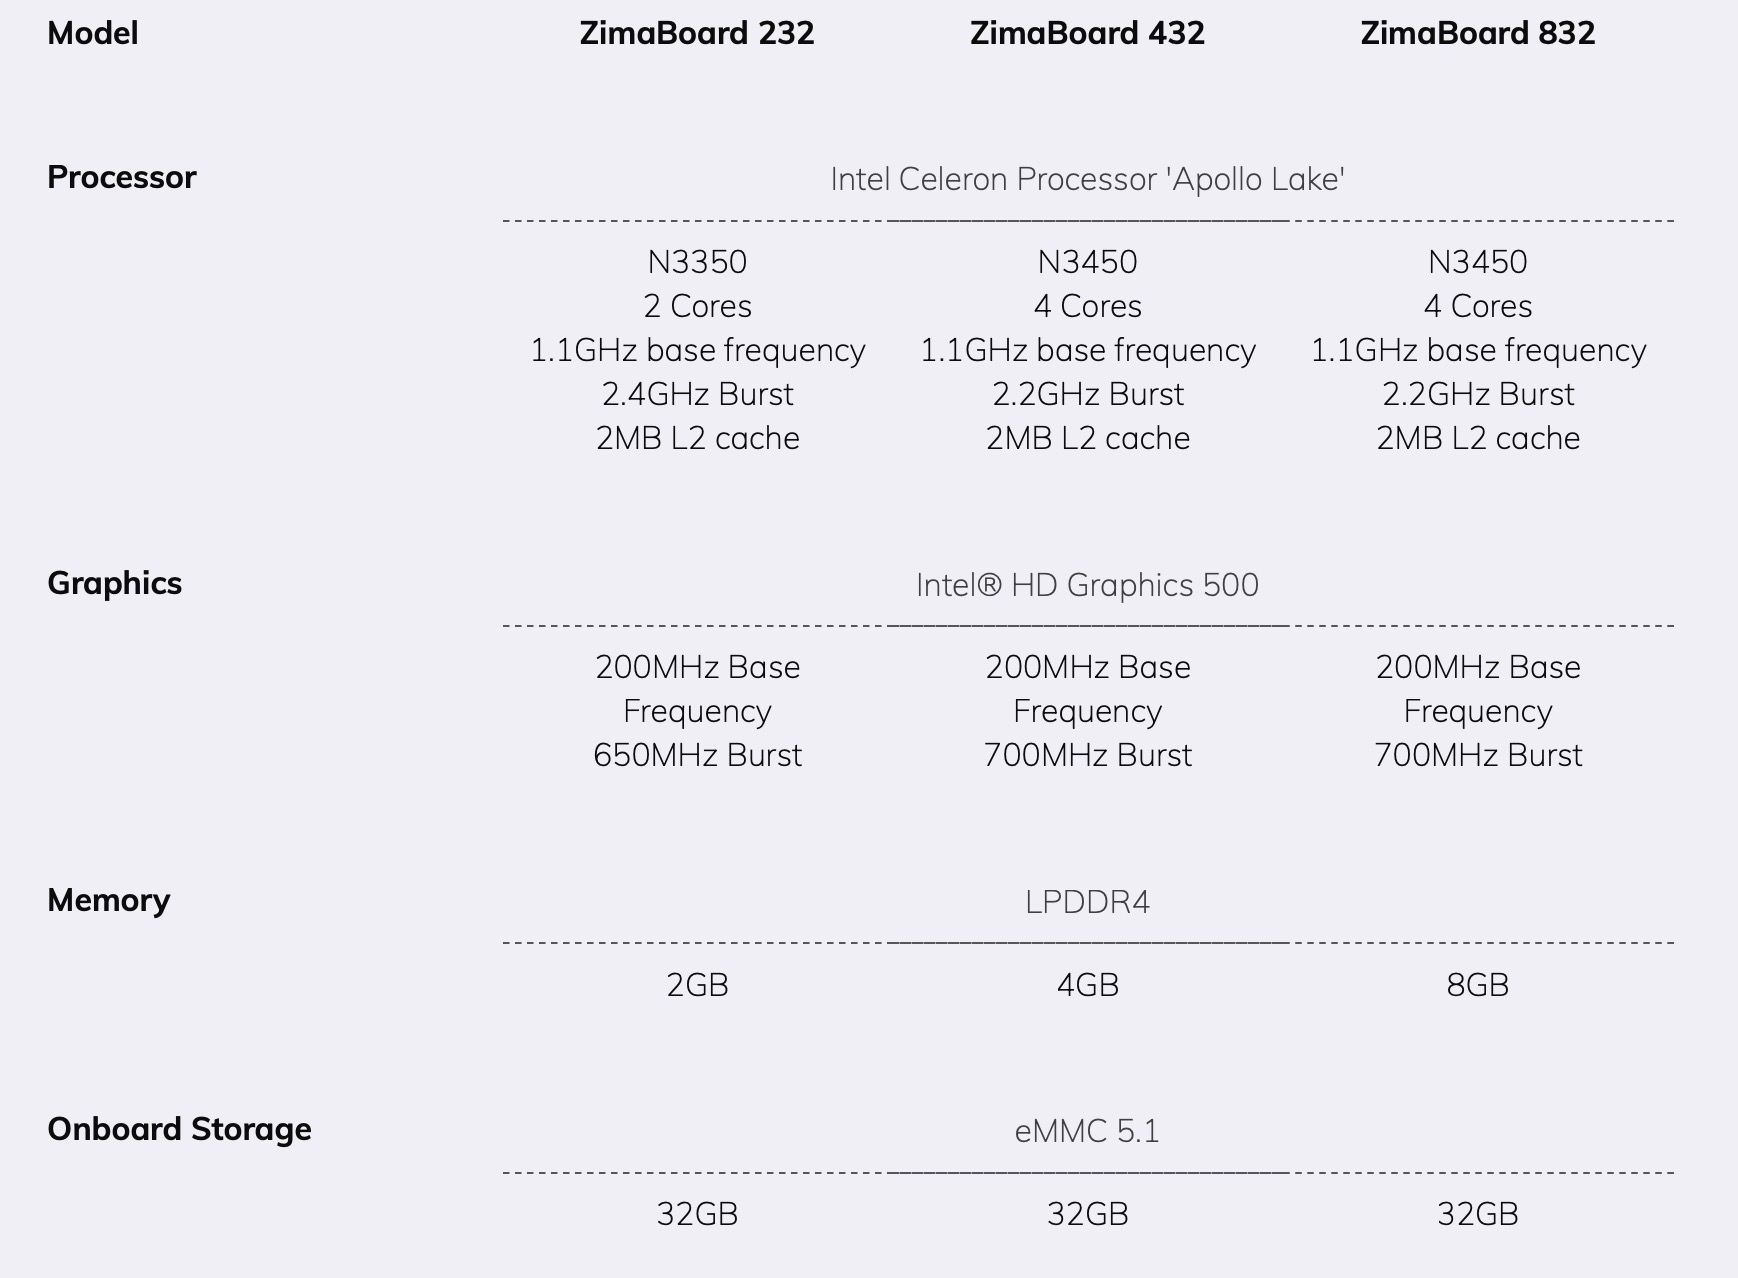
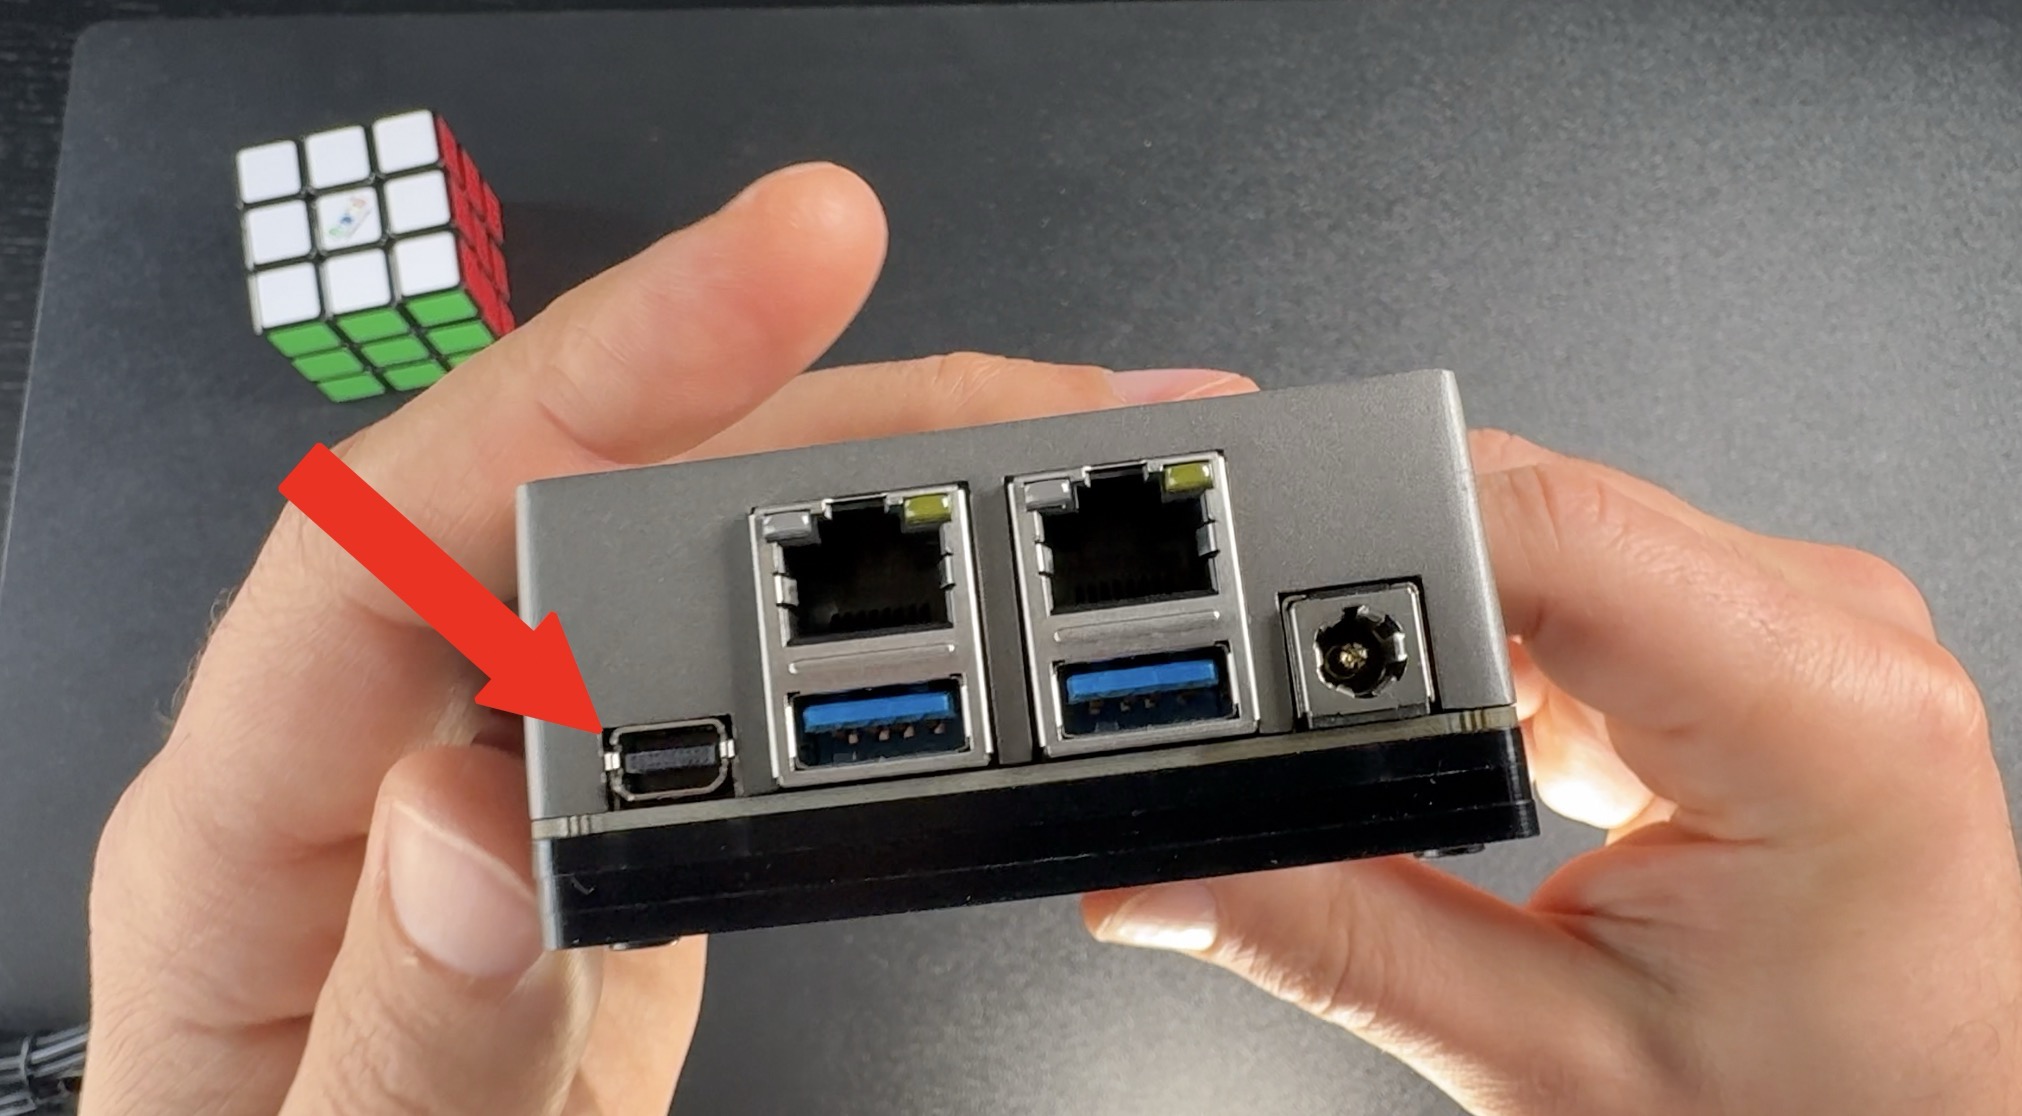
One very attractive to me ZimaBoard feature is that it has 2 LAN ports for all kinds of network redundancy. In other words you can connect this device to two separate networks and if one goes down the other will keep the device online. That is something that even the entry level servers don’t have and you can get it from a device that fits in your palm.

ZimaBoard have 2 USB 3.0 ports and unfortunately a Mini DisplayPort, which I honestly don’t like much cause I had to buy an HDMI adapter and that cost me a whole 5 euros more.
But the next thing that ZimaBoard have blew my mind as I haven’t seen such thing in a Single Board Computer so far. It is a PCIe slot on which for example I can insert a Google Coral TPU, so I can run Frigate software and I can upgrade my Home Security Cameras to the next level.
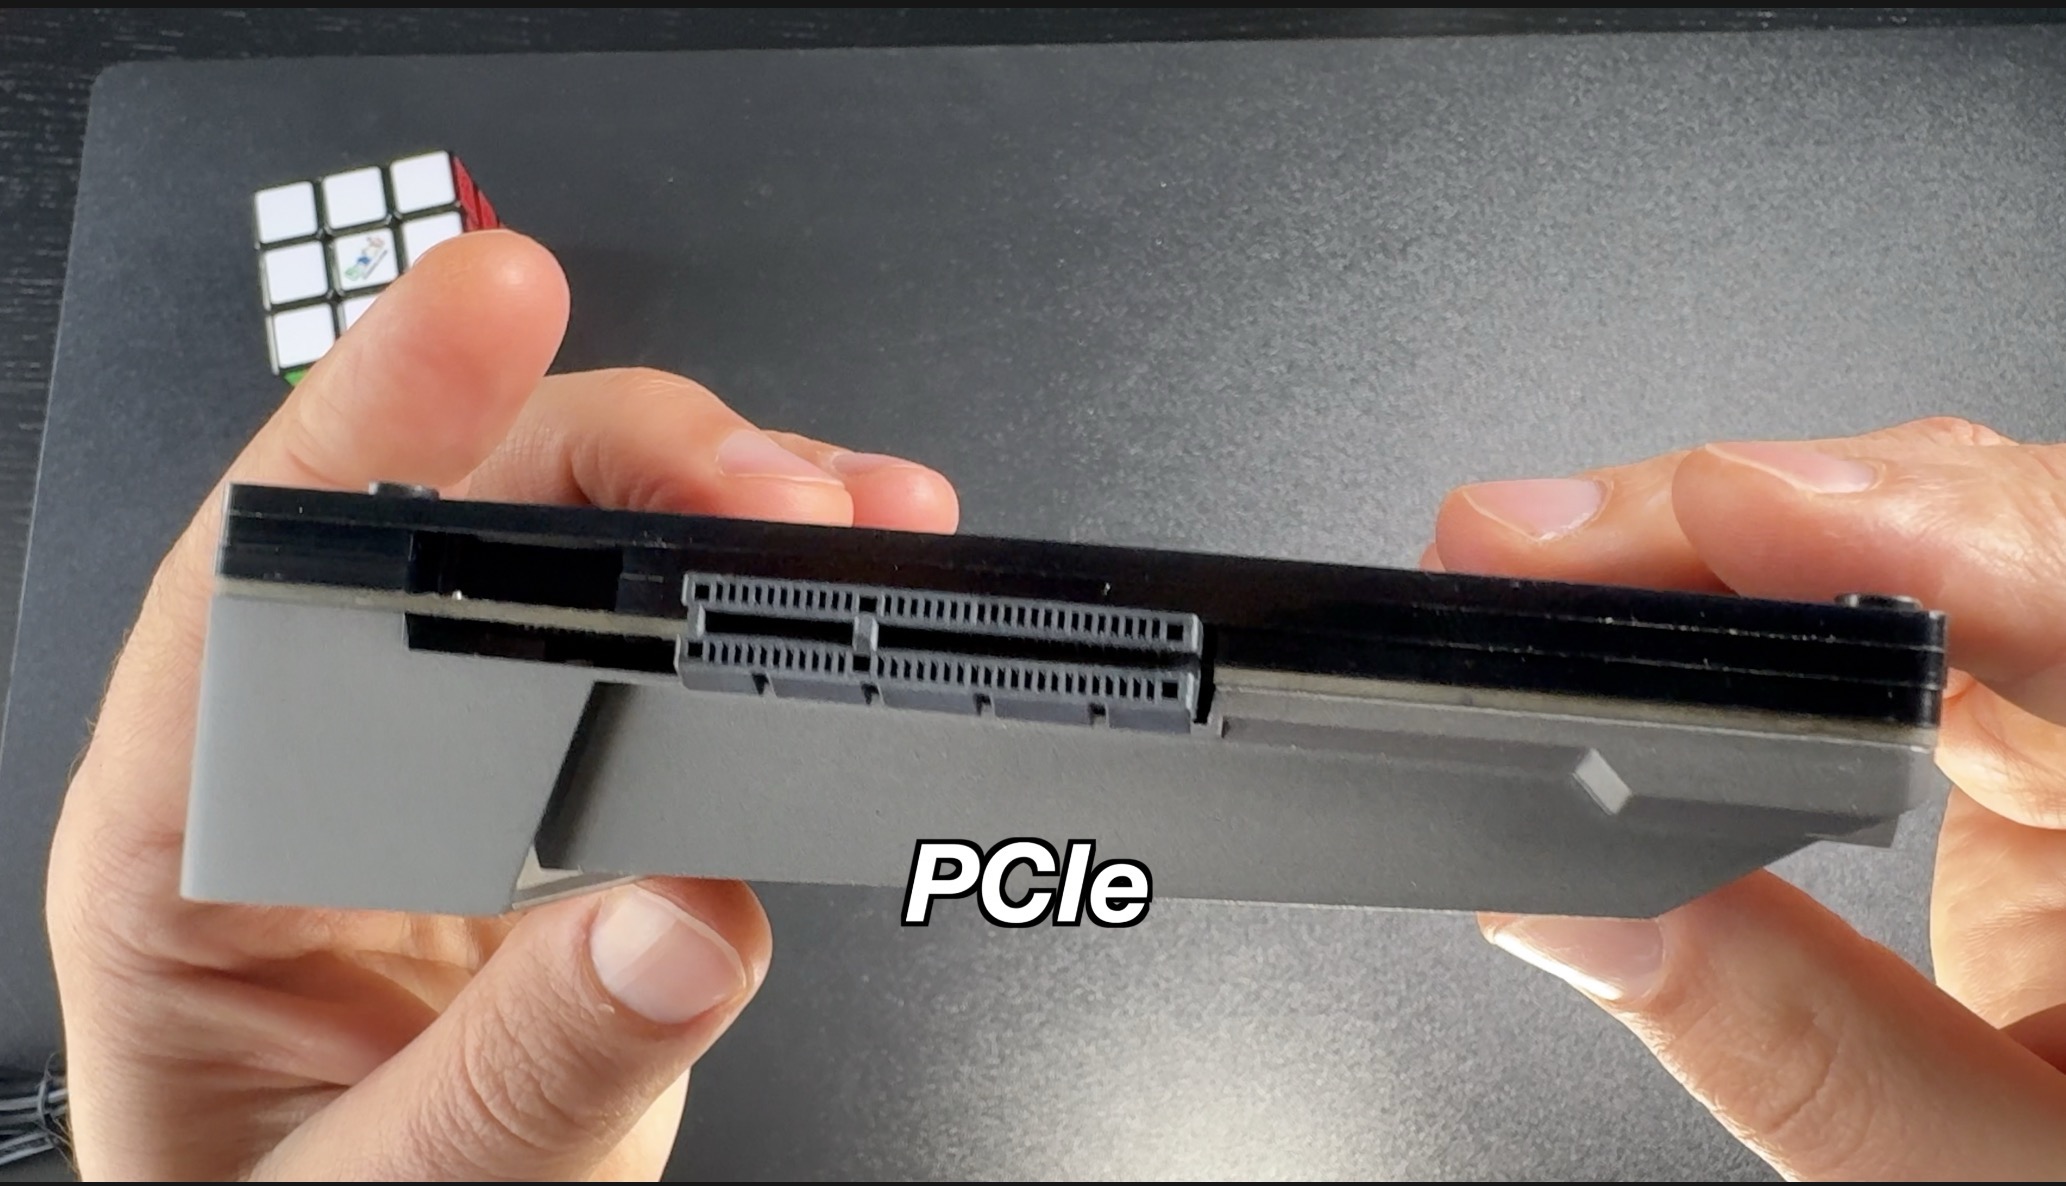
And of course not only that is possible but many more things as the PCIe slot opens up a lot of gates and possibilities.
The ZimaBoard is having a passive cooling, which means the device is completely silent. It weights only 278 grams and attention here it is powered by 12V DC. That means it is a great choice for Camper, Caravans, RVs and Boat owners as well.


Of course, you can use the device as a Desktop computer as it is powerful enough for everyday tasks and it even comes with pre-installed CasaOS, which is another Debian Based linux distribution.
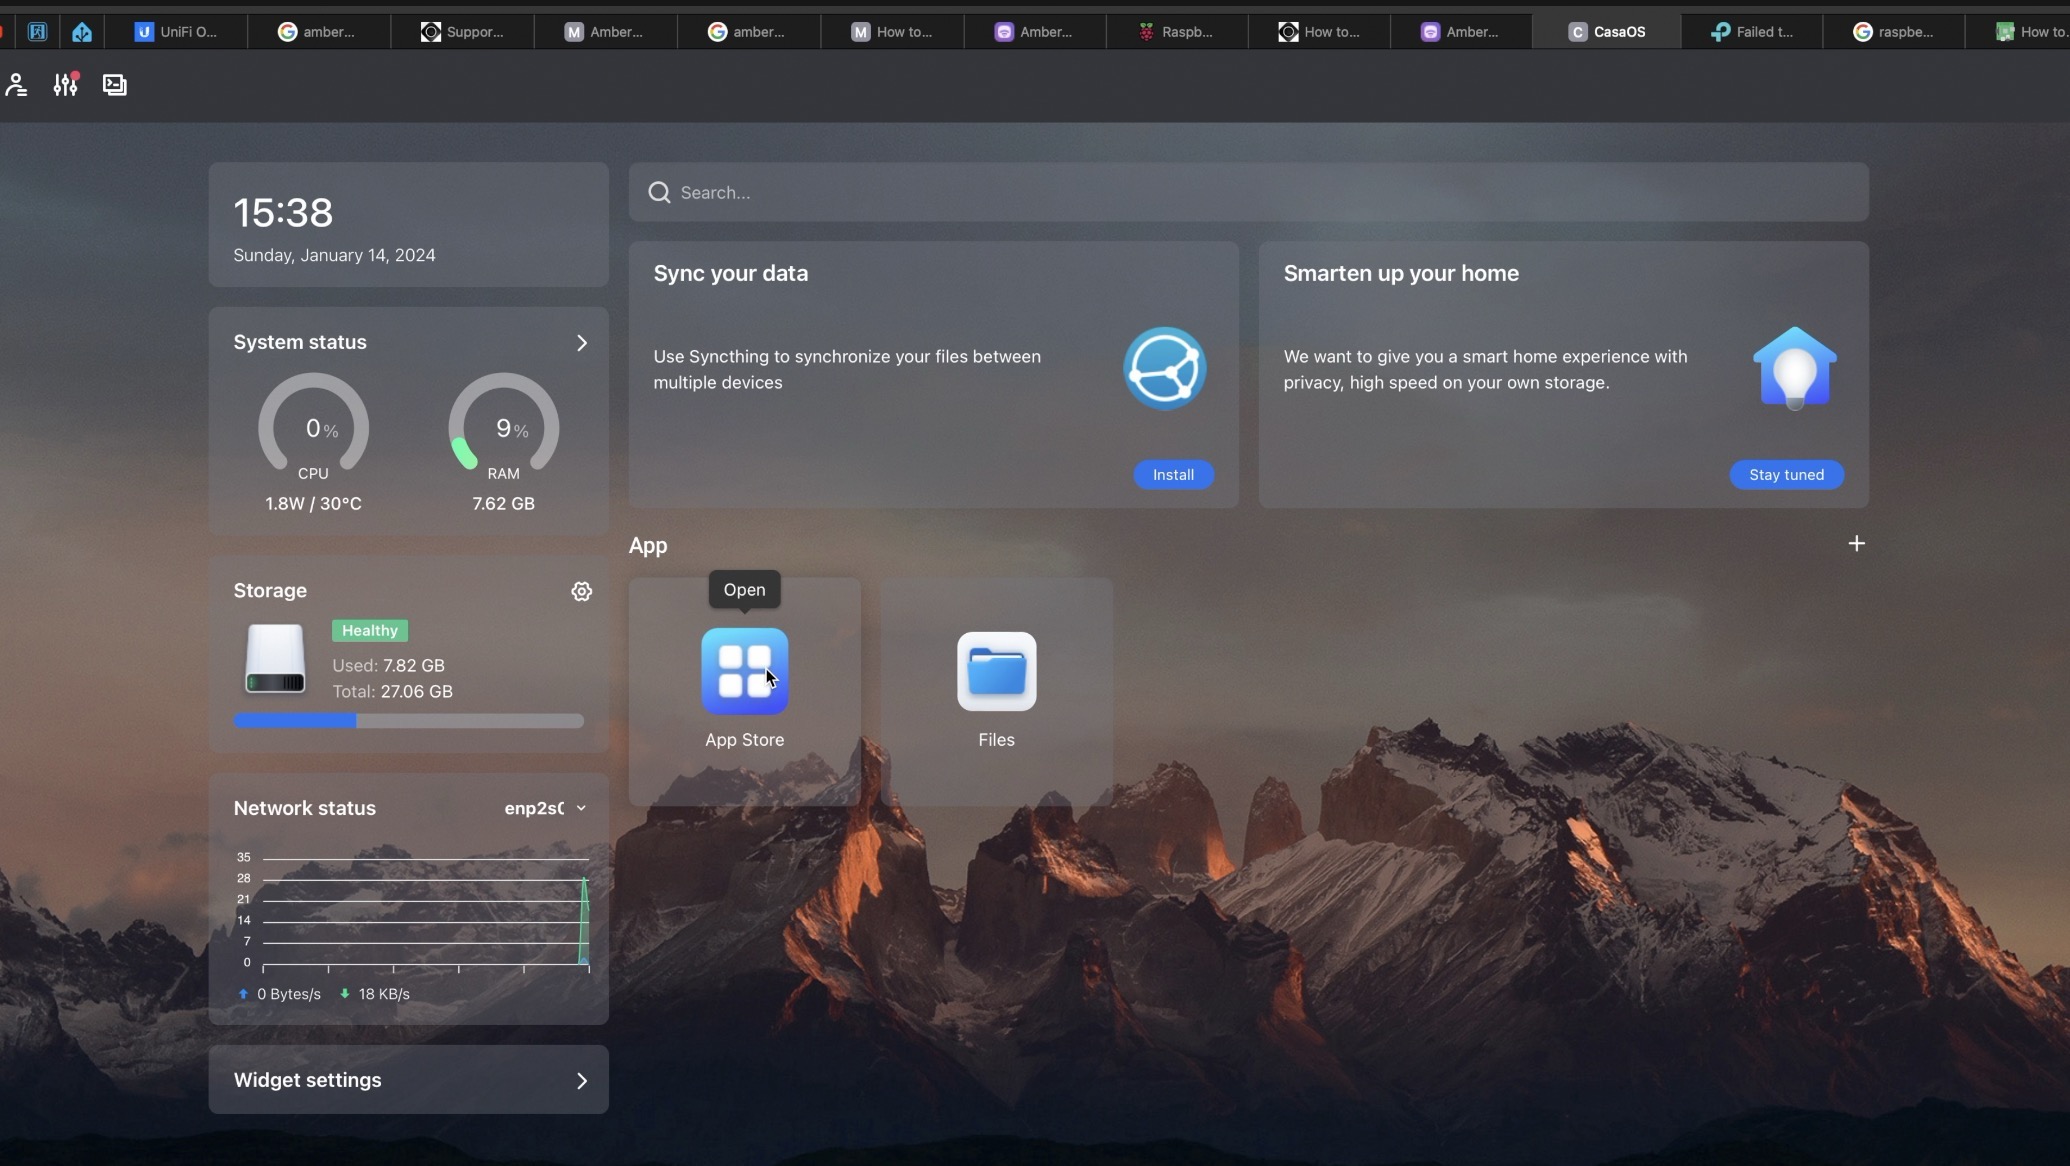
CasaOS allows one-click installation of multiple ready to use applications including Home Assistant, but that is the container version which doesn’t have Home Assistant Add-on store.
If you want to join the owners club of this fun, yet powerful mini computer you can check the current prices of all three ZimaBoard models from the links below:
- ZimaBoard 832 – https://amzn.to/3SgXZ2x
- ZimaBoard Amazon – https://amzn.to/3w1ZY3e
- ZimaBoard Amazon Shop – https://amzn.to/3HCmMJp
- ZimaBoard Official Shop – https://bit.ly/3NNO9E9
Home Assistant Supervised Final Steps
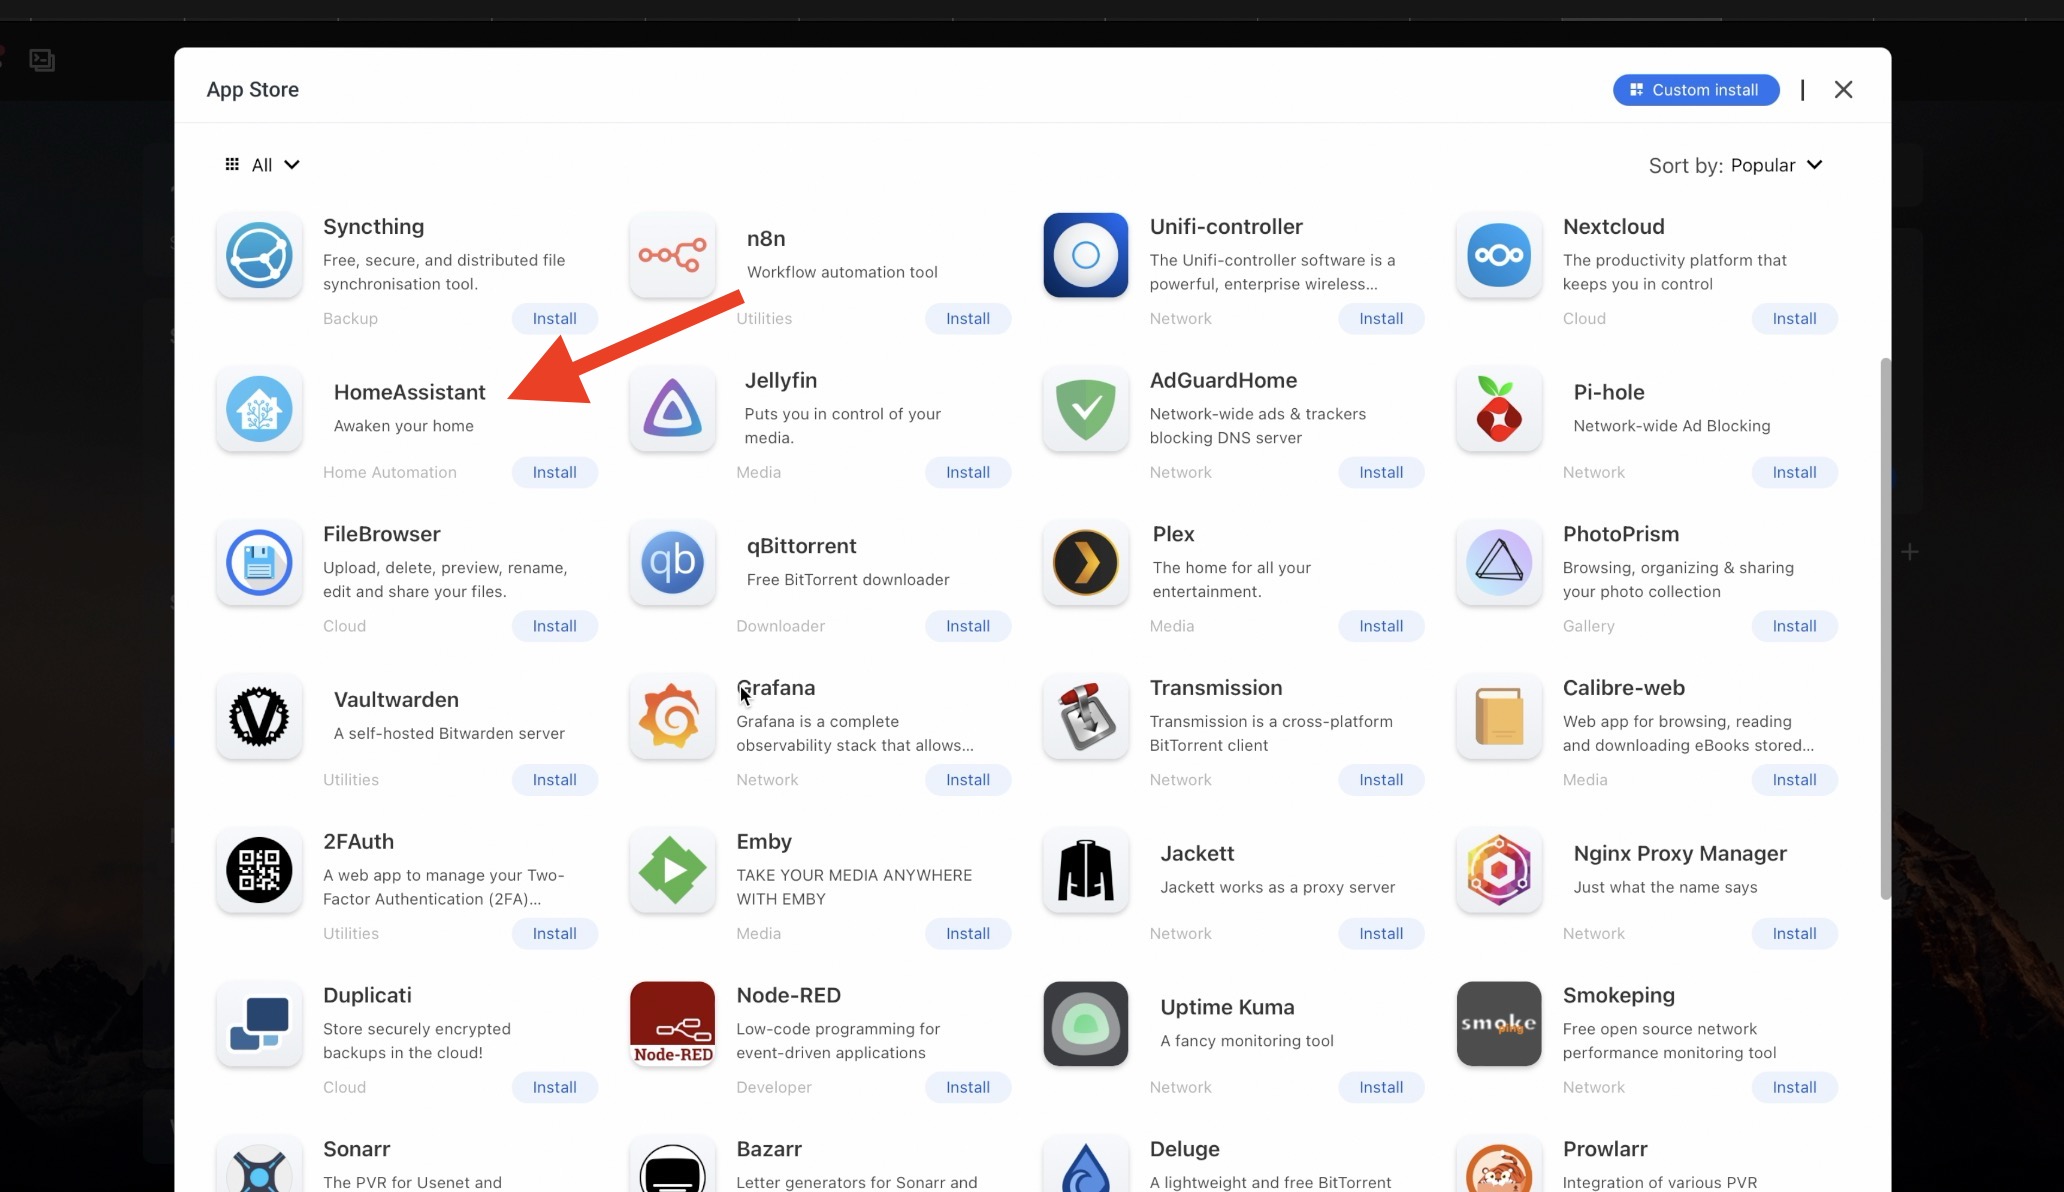
After the Home Assistant Supervised installer completed its job, I accessed the Home Assistant interface by entering the ZimaBoard (Computer where Home Assistant is installed) IP address in my browser followed by :8123 as a default Home Assistant port (Example: 10.0.0.185:8123). I can try to open the http://homeassistant.local:8123 but because I have multiple HA instances at home I prefer to enter a specific IP.
I was welcomed by the Home Assistant Onboarding screen.
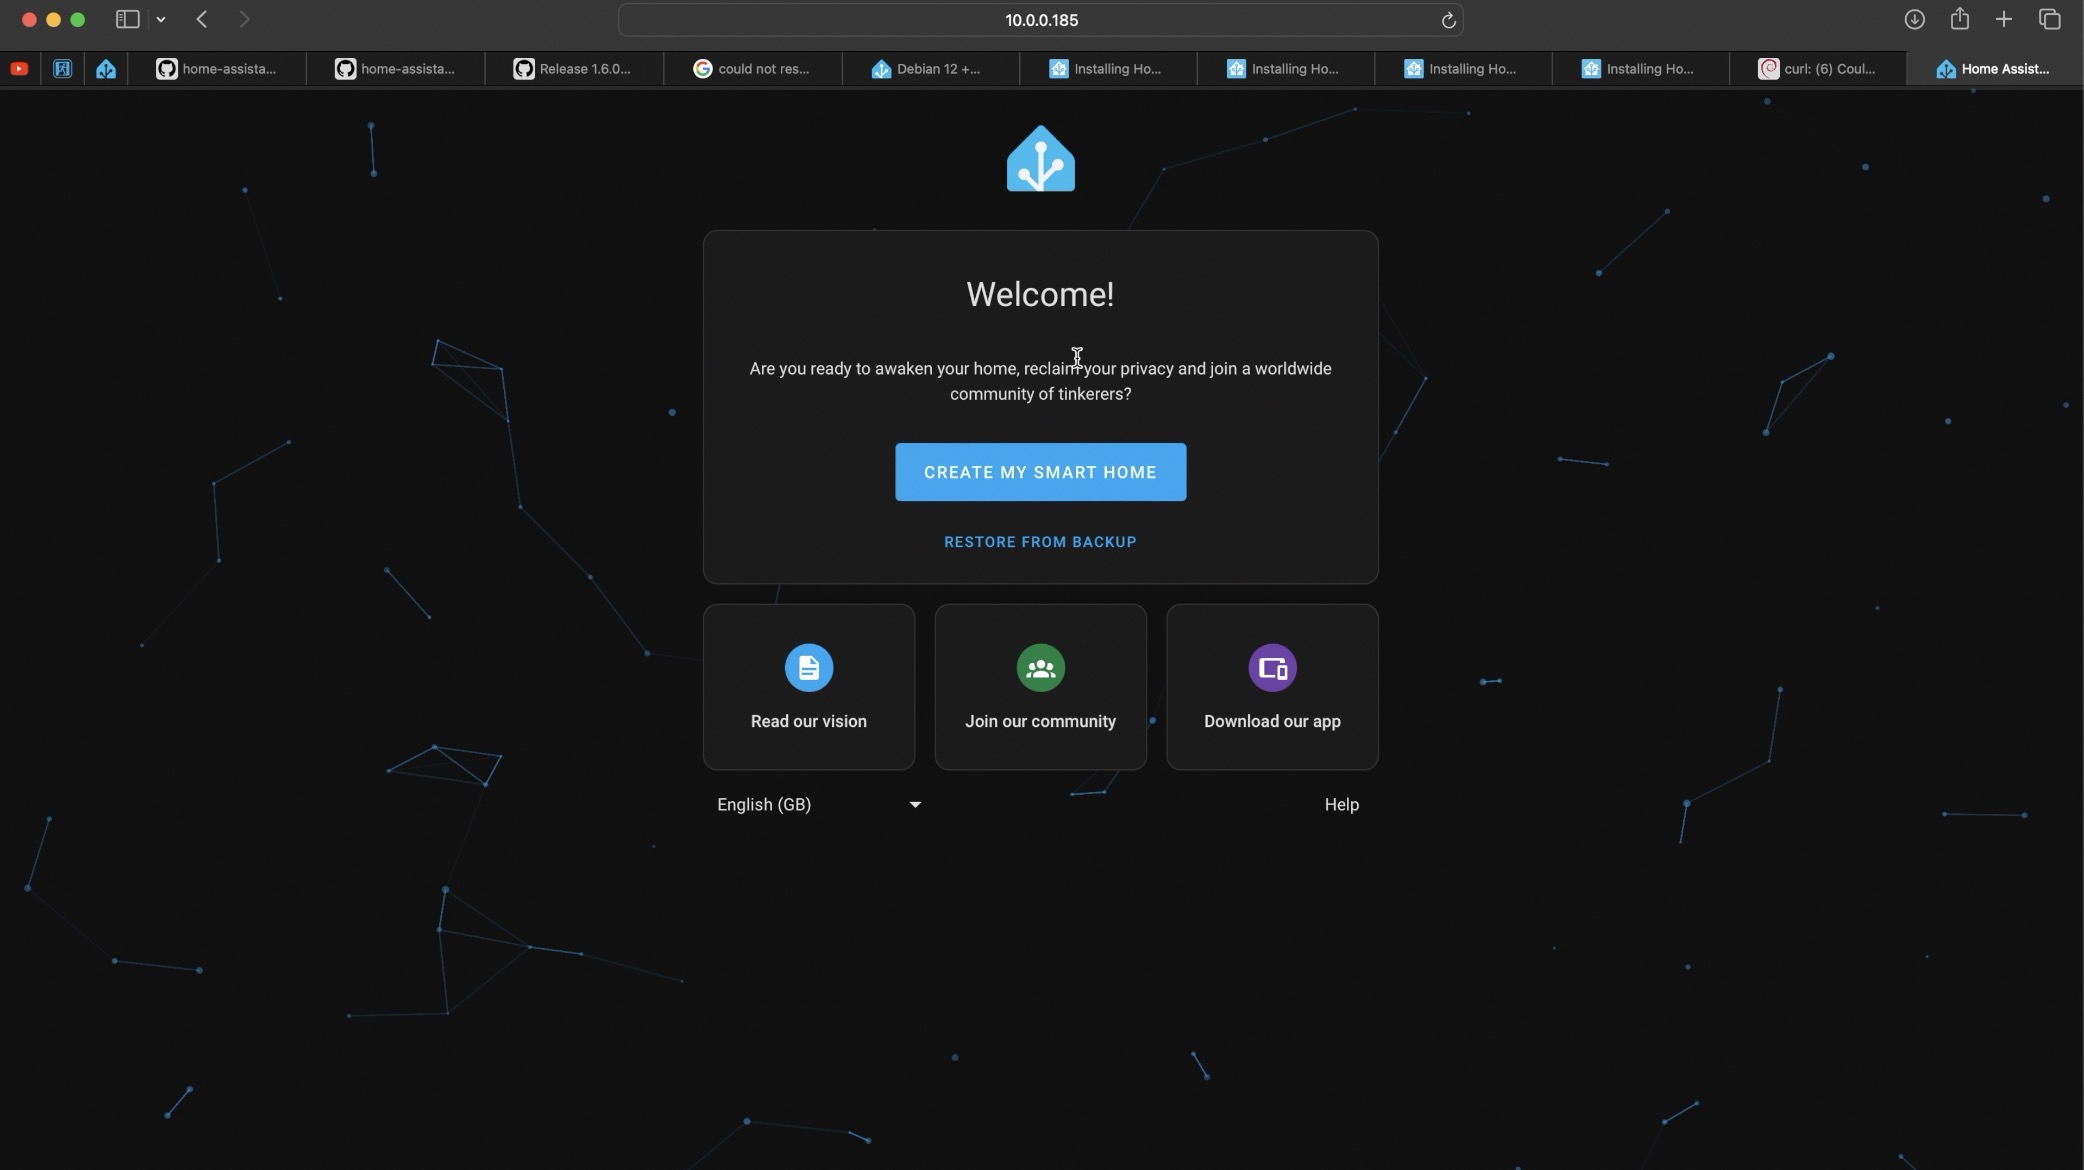
The onboarding process was straightforward, involving quick selections for name, location, Home Assistant username, and password. Within minutes, I had a fully operational Home Assistant Supervised running on Debian on my ZimaBoard.
Home Assistant Supervised final Verifications
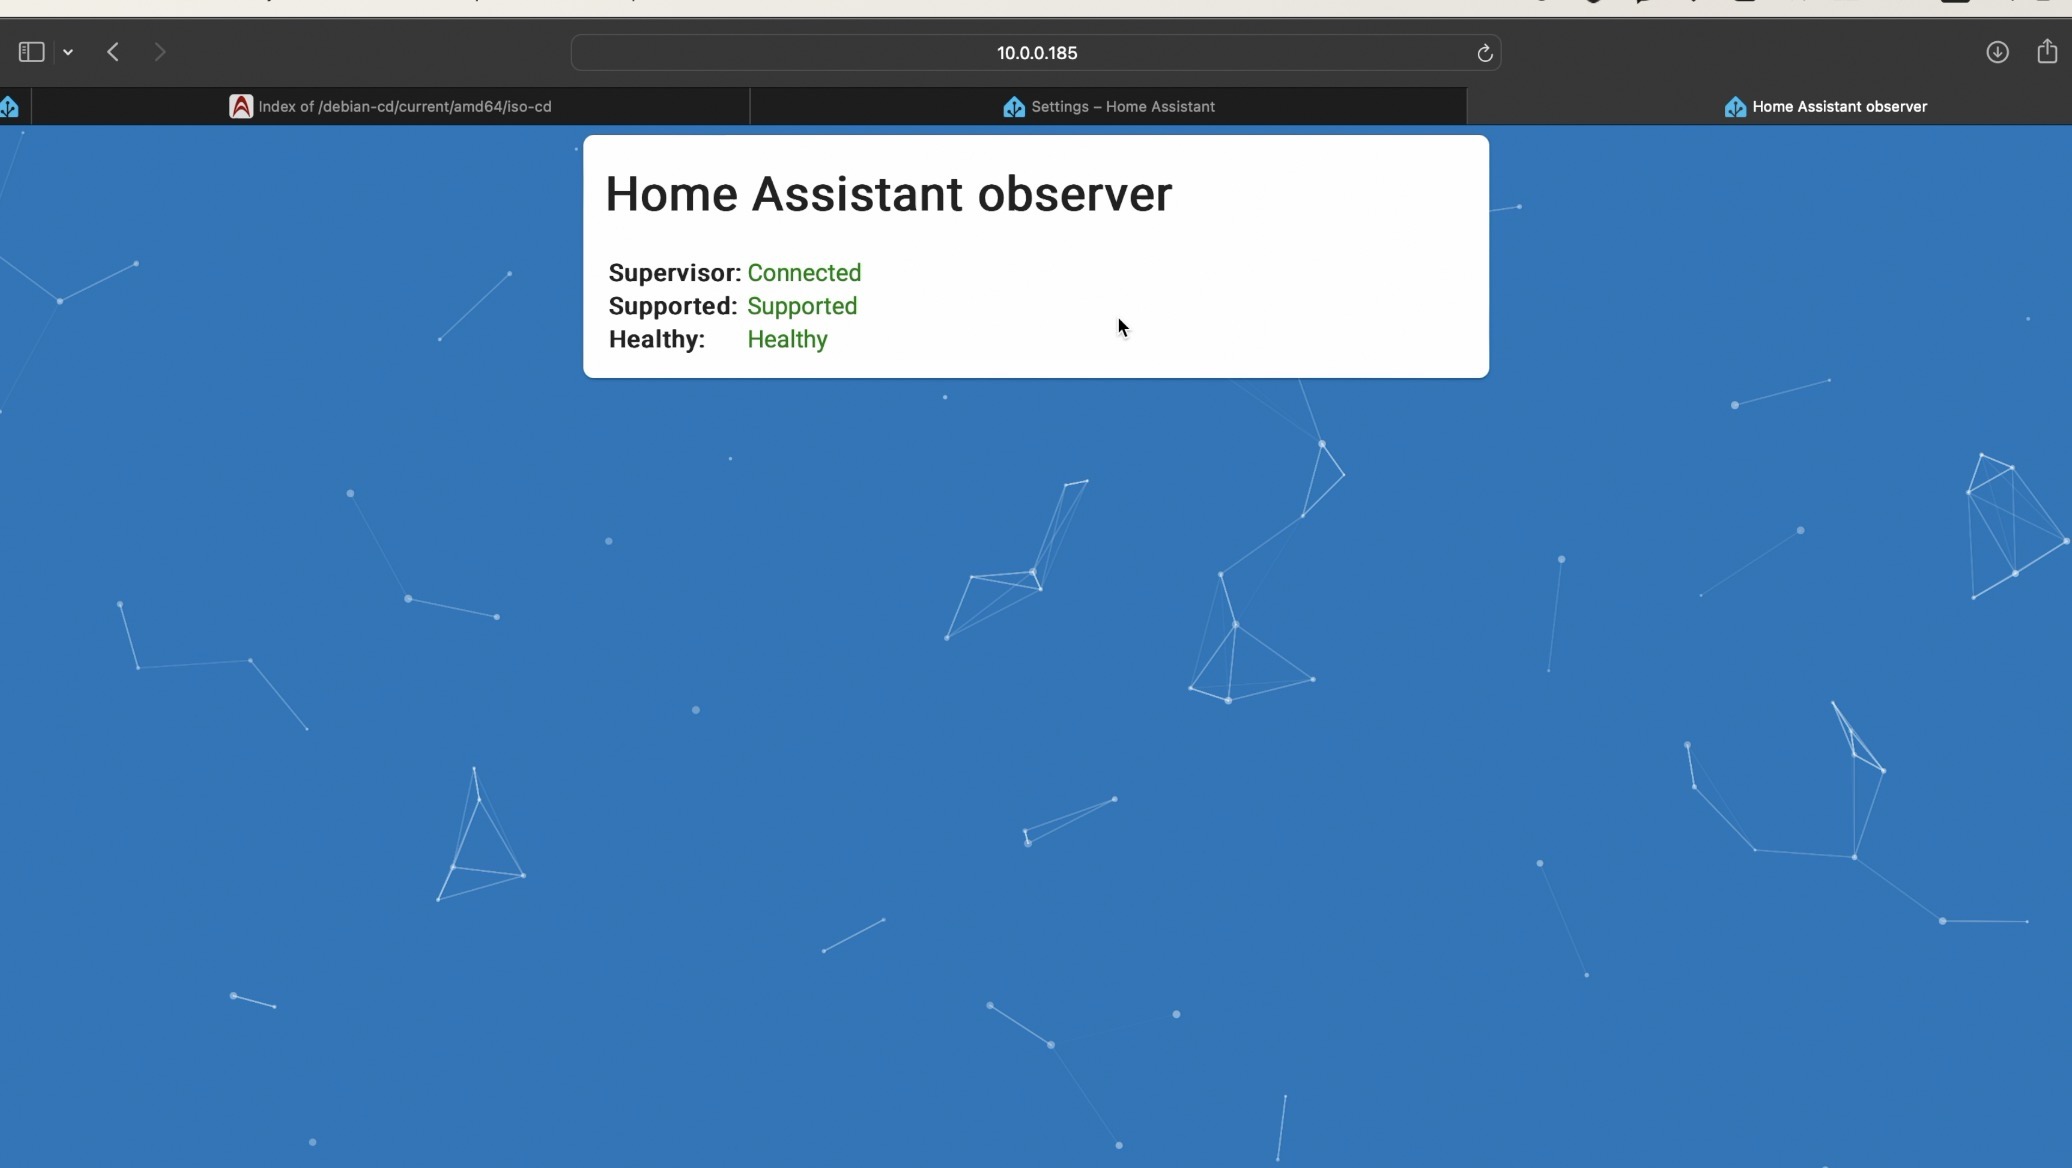
I double checked that everything is fine by opening the Home Assistant observer by typing the IP of my ZimaBoard where Home Assistant is, colon 4357 as port (example: http://10.0.0.185:4357) as a port and as you can see everything is green. Connected, supported & healthy.
Next thing that I wanted to check is in the Home Assistant menus. I went to Settings > System > Repair > Overflow menu in the upper right > System Information and here I want to see two things:
- The first one is that the Installation type is Home Assistant Supervised.
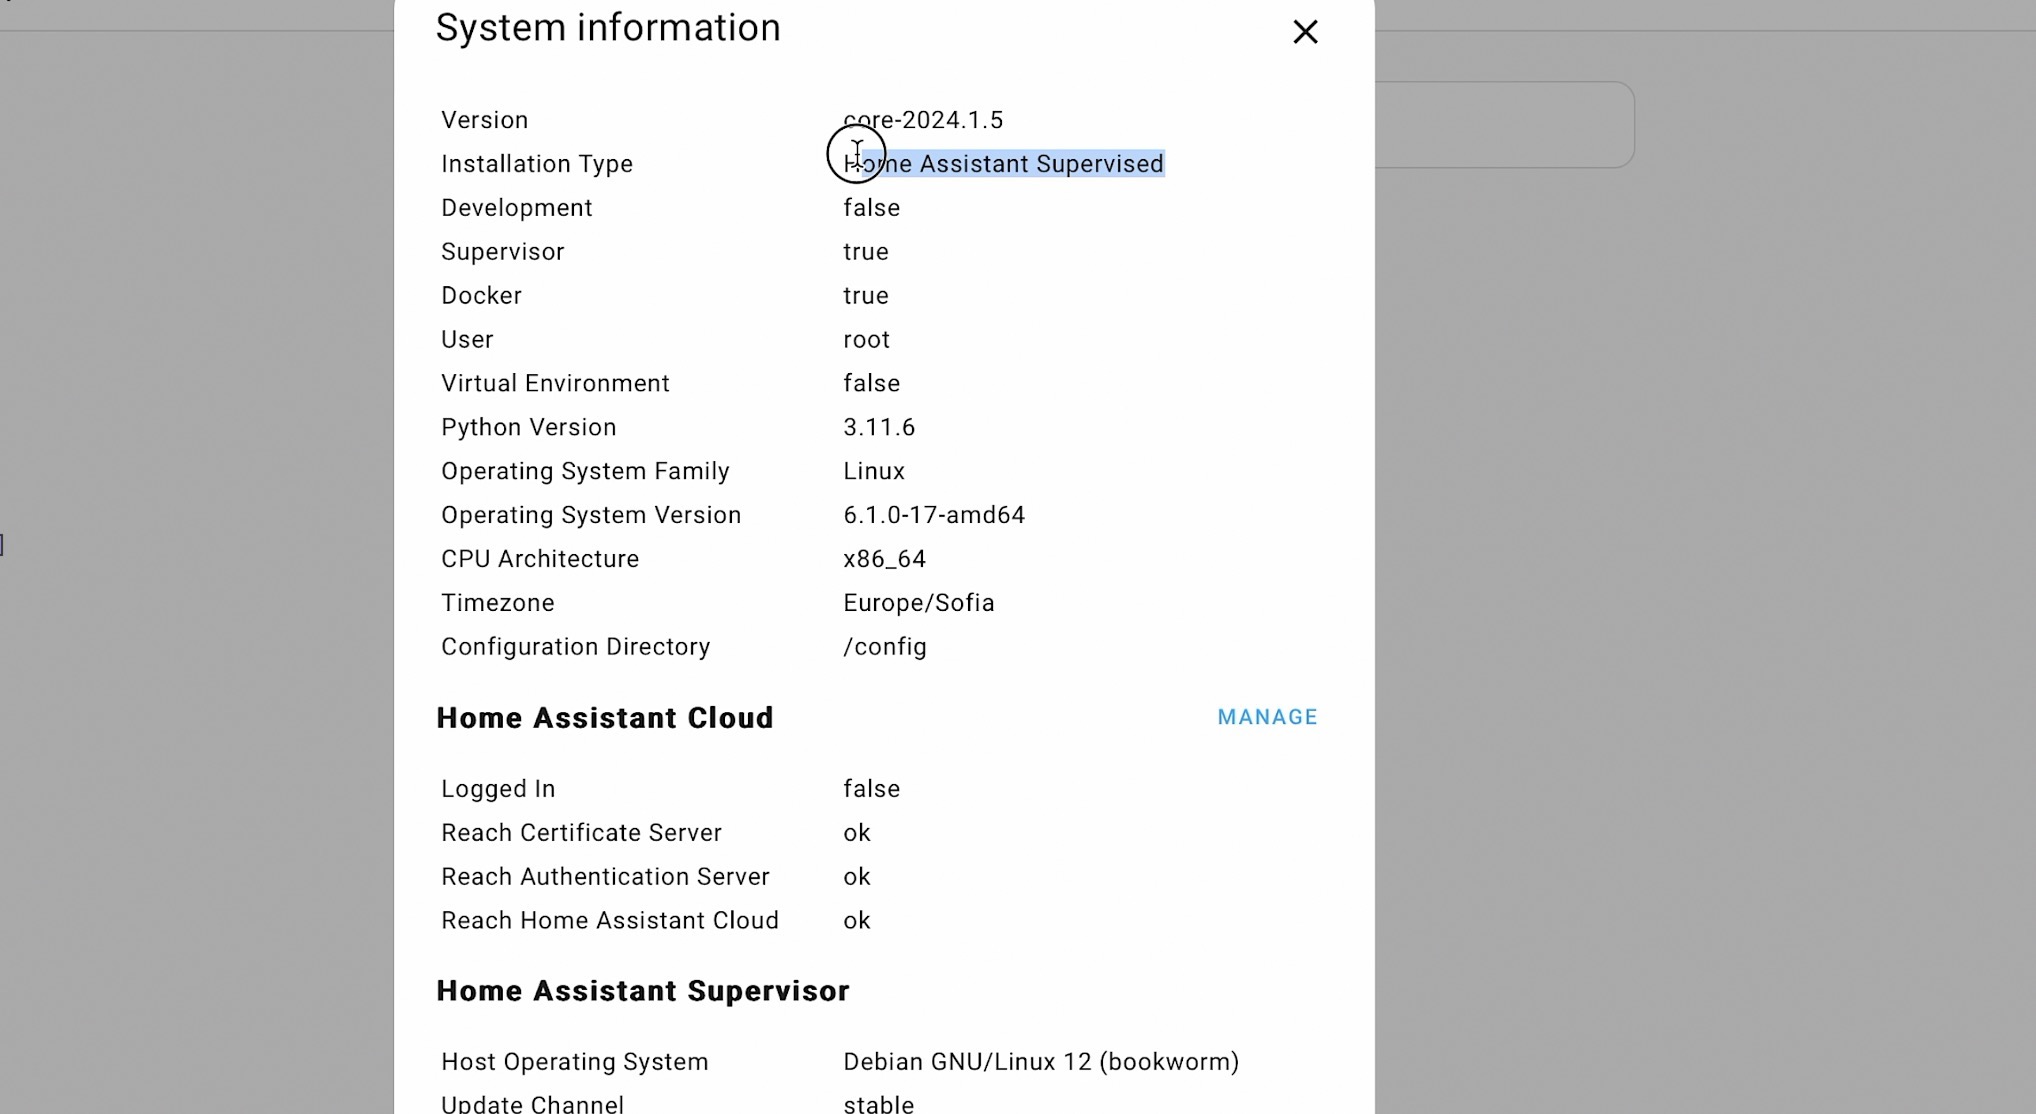
That’s what I’m talking about the whole article!
By the way if you want to know more about the different official Home Assistant installation types, their pros and cons and one stupid simple way to get started with Home Assistant on a PC in under 5 minutes then register right now for my Home Assistant webinar at https://automatelike.pro/webinar the webinar is absolutely free of charge.
- The second thing that I wanted to see in this same menu is down under Home Assistant Supervisor section. And here it is Supported is true.
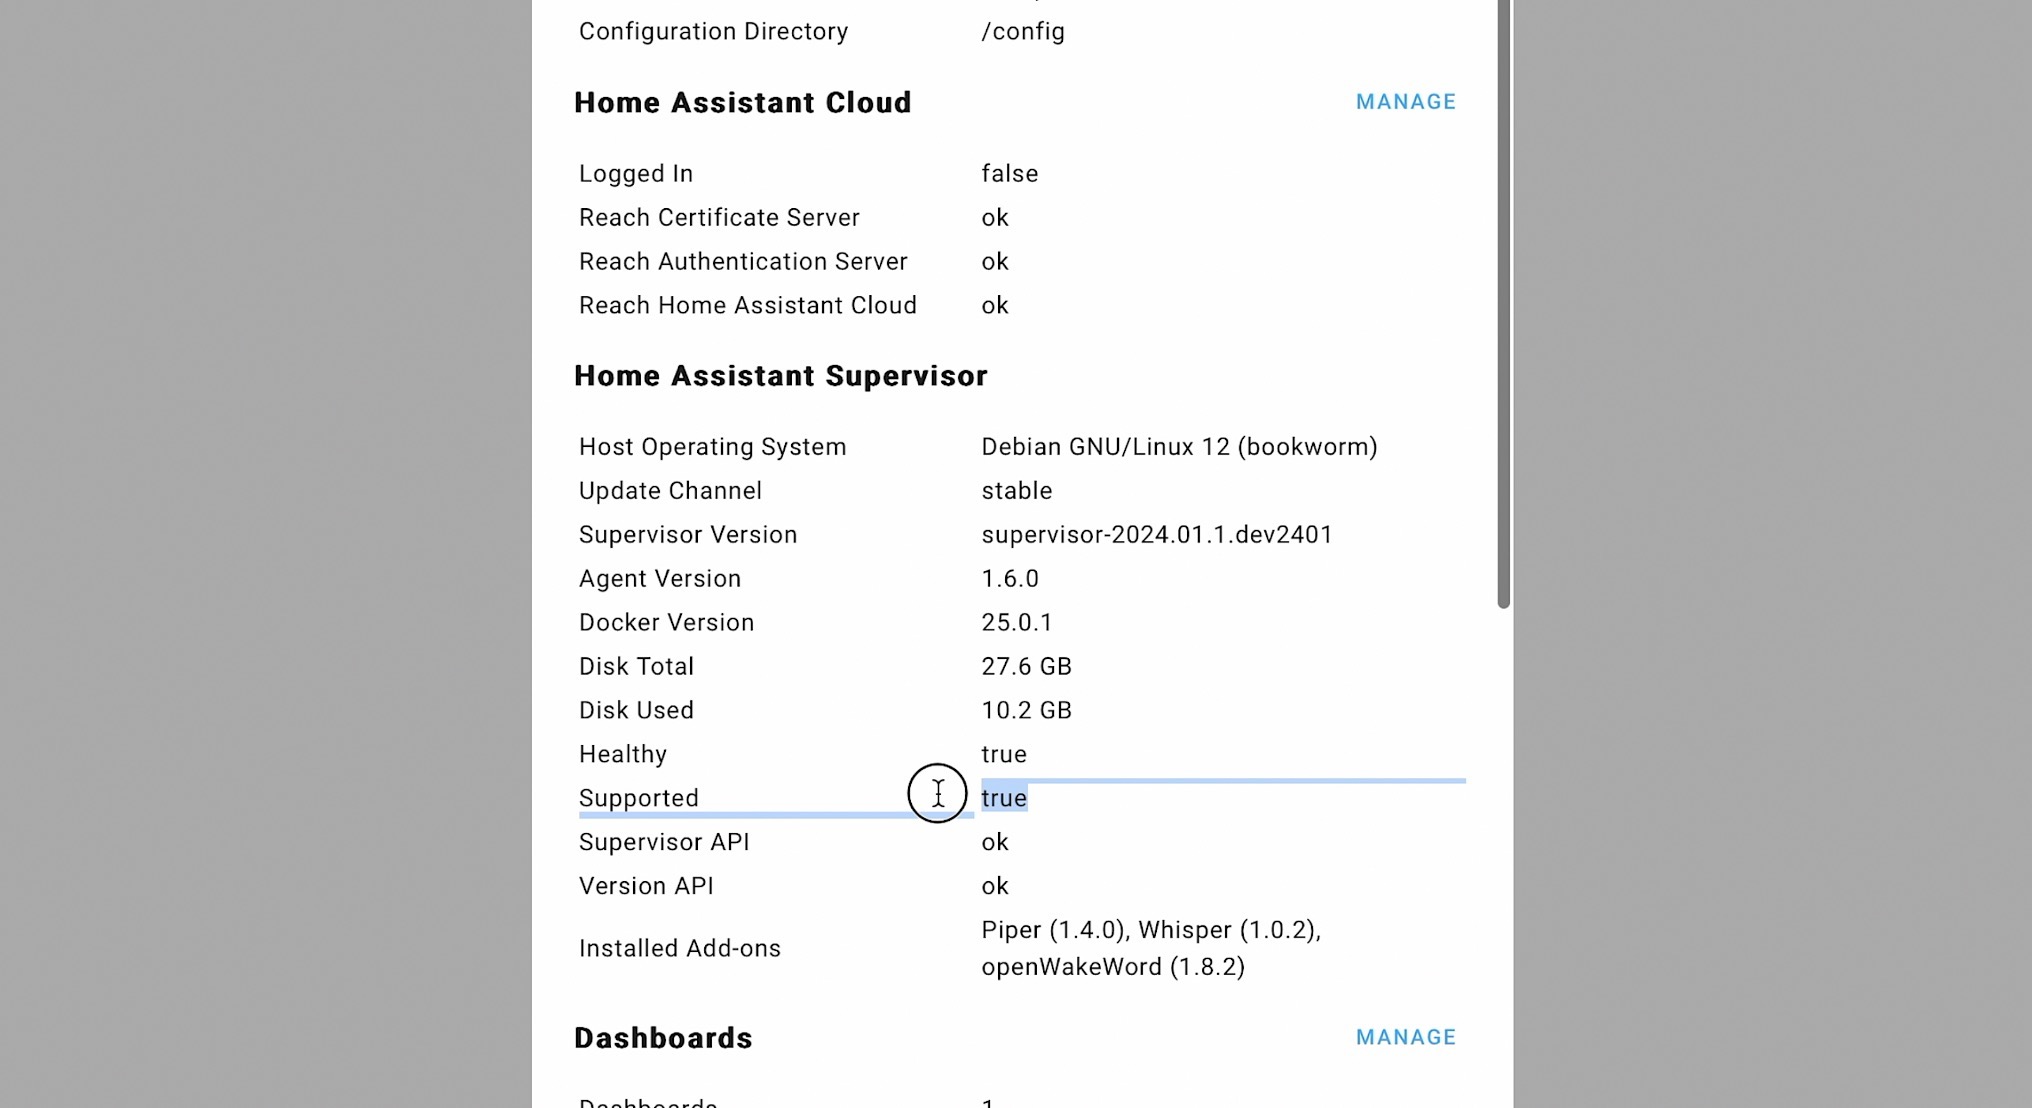
That supported = true label means if I now have some strange problems with my Home Assistant I can freely open an issue in GitHub for example or I can ask in the Home Assistant community for help.
If I did the same steps on another not Debian Linux, for example Ubuntu or Raspberry Pi OS which are Debian based linuxes, but they are not Debian exactly, most probably the whole thing would work probably after applying some workarounds, but the supported label would have a false value here instead.
And if in such case I’m asking for help the first answer would be go preinstall your Home Assistant on a supported OS a.k.a Debian and come back again. So, one small label but with big difference.
Don’t go to the unsupported rabbit hole, as the things may work initially, but after some time and after some updates they may suddenly stopped and no-one but you will be interested in investigating and fixing the issue.
Go supported and thank me later!
Conclusion
Setting up Home Assistant Supervised on Debian, especially on a powerful device like ZimaBoard, provides a stable and officially supported smart home automation platform. Following the outlined steps and ensuring compatibility with the specified hardware and software requirements will result in a seamless Home Assistant experience.
Choose the supported path, and enjoy the benefits of a future-proof and updatable smart home system. If you encounter any terminology that’s unclear, refer to my Smart Home Glossary available on my other website – https://automatelike.pro/glossary
Subscribe for more articles, and stay tuned for the next one, next week!
Great explanation of setting up Home Assistant Supervised on Debian. Unfortunately I get the failure: Unhealthy system – not privileged. Solved it for now with: “sudo docker restart hassio_supervisor”. After restarting updating was possible again. Any suggestions to prevent this behaviour/failure?
Awesome, i’ve just followed your step by step guide using a target x64 pc and at the end it works !!! so rare that I wanted to thank you
Best regards
Thanks for the feedback! Also, you should try my other guides as well 😉
Dear Kiril, I read your article and it is really detailed and magnificent.
I would like to try to install Homme Assistant Supervised on Zimablade where I had installed Home Assistant using the app but as you said I can’t use the add-on!
I’ll try and let you know! Thanks again and greetings from Rome (Italy)
Brilliant….clear and concise procedure. I had a gdm service crash on a Dell machine. Almost got to the point of re-installing Debian. You saved me an awful amount of time and frustration. A BIG thanks!!!!
Glad to help, enjoy! Also, check my other articles as well!
comment écrire la fonction :wget https://github.com/home-assistant/os-agent/releases/download/X.X.X/os-agent_X.X.X_linux_x86_64.deb si on a :
Static hostname: guy
Icon name: computer-desktop
Chassis: desktop ️
Machine ID: d8dbf0f4e5224dfe8324a71e6d19c7b4
Boot ID: e3b844ae5a294eb18643413511f3c700
Operating System: Debian GNU/Linux 12 (bookworm)
Kernel: Linux 6.1.0-37-amd64
Architecture: x86-64
Hardware Vendor: $_DEFAULT_STRING_