
I’ll try to integrate Shelly 1PM with Home Assistant and Node-RED to control my water heater. Because I almost burned my house with Sonoff POW R2.
Fortunately everything ends fine thanks to a non smart fire extinguisher and my barking like crazy dog.

Now I’ll try to connect the water heater with Shelly 1PM and then of course I will add it to Home Assistant and Node-RED.
Table of Contents
The incident
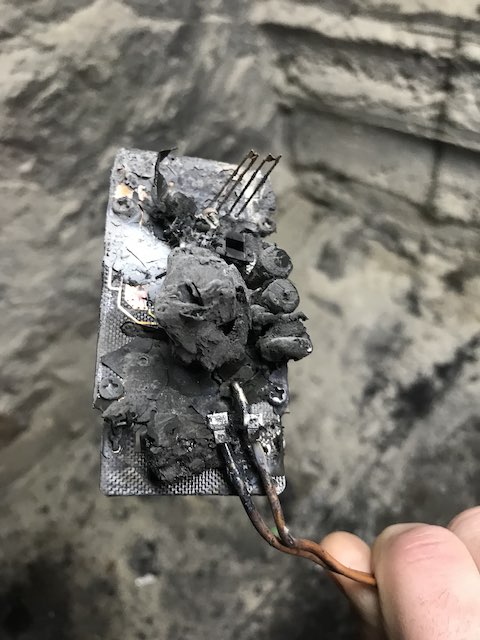
Maybe the mistake with the wiring of the Sonoff was mine or there is something else I cannot say at the moment.
My electric water heater is 3000W and the written max power of the Sonoff POWR2 is 3500W, so this shouldn’t be the problem. Also It was working OK for about a month until it burns out.
Smoke detectors wanted!
I’m trying to find good smart smoke detectors that can be integrated with Home Assistant and are not going to break the bank.
If you know a good solution – please let me know in the comments section below. I will thank you forever.
Let’s talk about Shelly
I just want to say that I smashed the subscribe button!
No, No, No, I wanted to say that this article is NOT sponsored by Shelly in any way and everything you see here is purely my opinion and experience.
What is Shelly 1PM and for what can I use it?
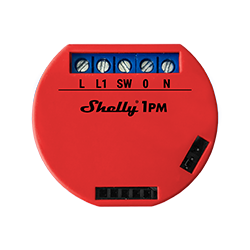
Shelly 1PM is a very small smart switch capable of controlling any electrical appliance (up to 16amps) while measuring its power consumption
The guys from Shelly claim that there is an Internal temperature sensor for overheating protection, so the device will turn off if the temperature of the device goes above some dangerous level.
Something that is becoming must have for me from now on. Unfortunately and clearly the Sonoff POWR2 don’t have such sensor.
I’m from Bulgaria and Shelly is Bulgarian company, so I didn’t have to wait for shipping too much.
In general this is exactly what I needed for my second attempt with the Water Heater and Shelly match all of my criteria perfectly.
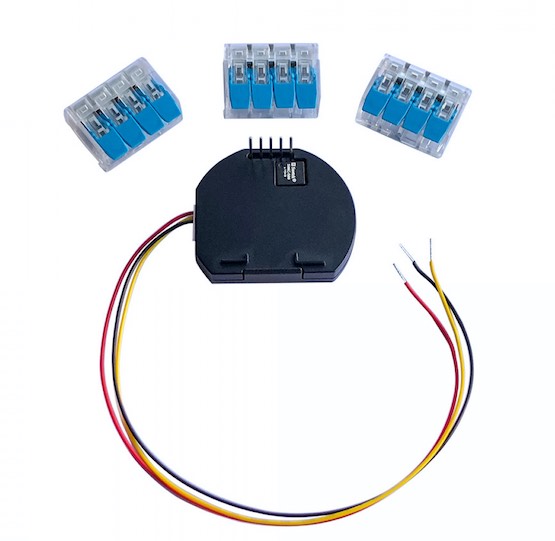
I also bought the Temperature Sensor Add-on compatible with the Shelly 1/1PM,
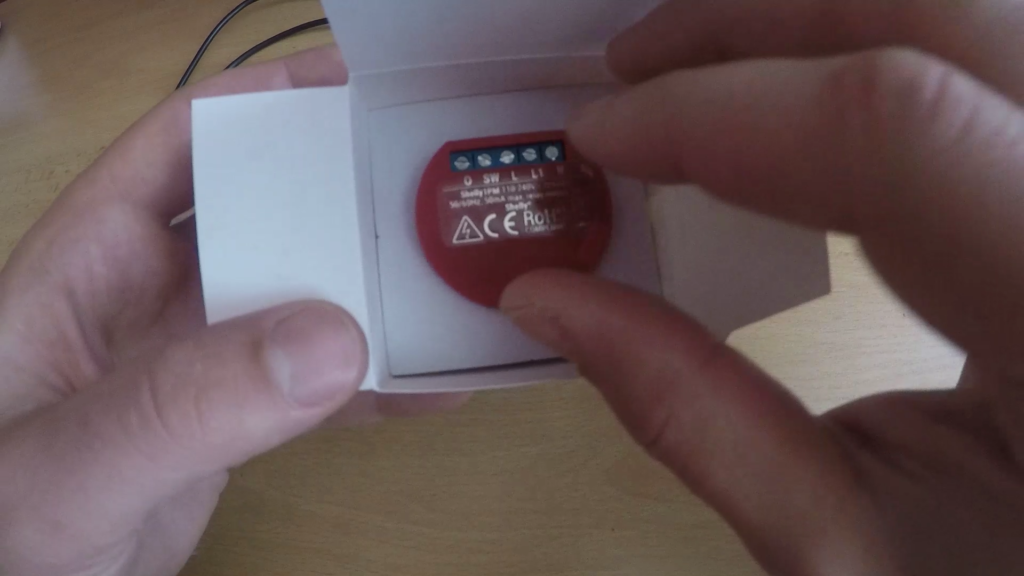
What is in the Box?
So I will quickly show you what is in the box.
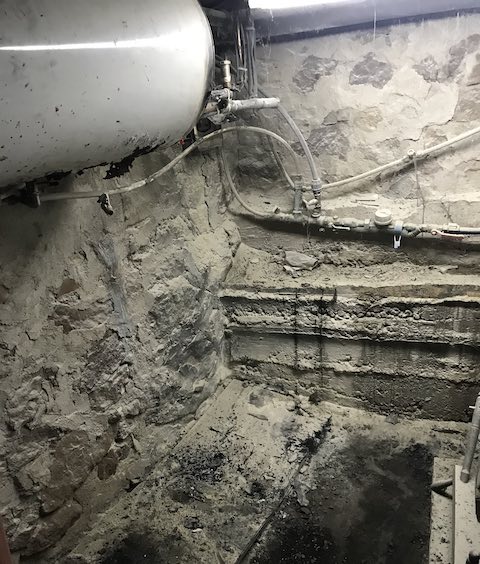
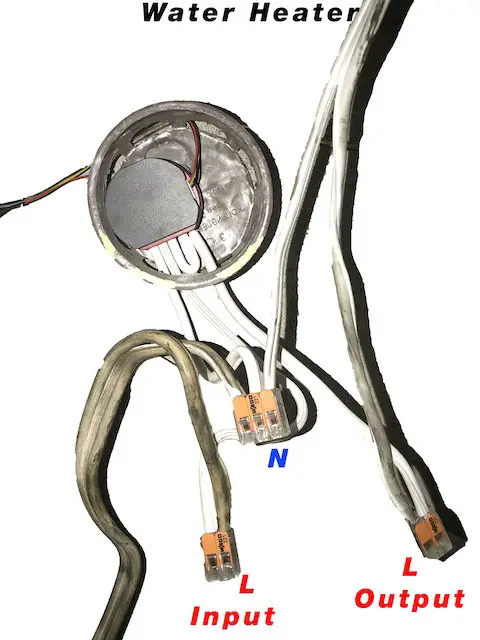
Wiring Shelly 1PM and water heater
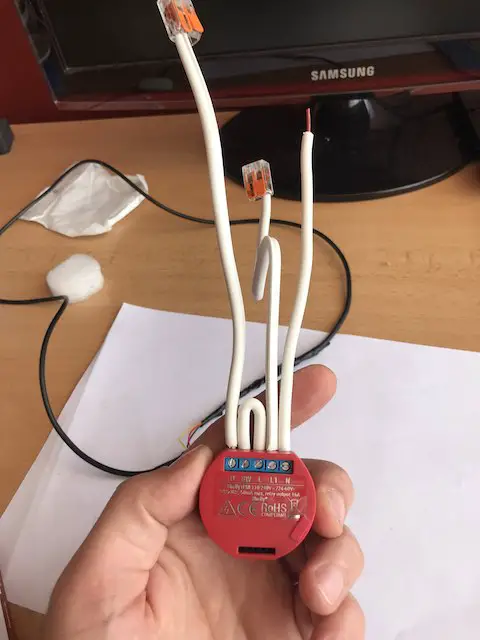
I will show you how I mange to wire my Water Heater.
I had difficulties to insert an 4mm cable into the Shelly device, at the end eventually I did, but I was unable to screw the bolts.
So I have to use Wago connectors to go from 4mm to 2.5mm cable, which is ok for the Shelly.
At the end for the desert I will guide you step-by-step how you can integrate your shelly device with Home Assistant and Node-RED
Hey, if you are still reading – consider subscribing either to my newsletter or to my YouTube channel – best is to both. I will post video articles weekly and I won’t spam.
So enough sweet talks lets get to the action:
Home Assistant integration
The easiest way to add Shelly devices to Home Assistant is to install HACS (Home Assistant Community Store) – This is the video tutorial that you can follow in order to install it – link
Of course you can do it manually by adding ShellyForHass as custom component to your Home Assistant installation. But I recommend to use the HACS method from above.
Using HACS
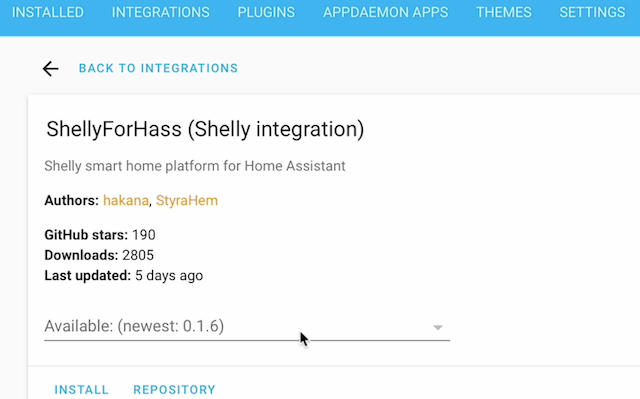
To integrate Shelly with Home Assistant open your HACS, click on the ‘INTEGRATIONS’ tab and search for: Shelly (the full name is ShellyForHass) then click on the ‘INSTALL’ button
Edit your Configuration
Then you have to change a little bit your configuration.yaml file by either using the Configurator plugin or any text editor from the console.
Open your configuration.yaml and add the following
shelly:
Easy isn’t it?
You can also add additional two lines to extract the exact name of the device from the Shelly cloud service:
shelly:
  cloud_auth_key: "XXXXXXXXXXXXXXXXXXXXXXXXXXXXXXXXXXXXXXXXXXXX"
  cloud_server: "shelly-XXXXX.shelly.cloud"
To get your cloud_auth_key you have to visit the following url and login with your Shelly credentials – https://my.shelly.cloud/#user_settings
Don’t forget to click the ‘GET KEY’ button to reveal your cloud_auth_key.
Now you have to restart your Home Assistant and then you can create an ‘ENTITIES’ card in your dashboard/Lovelace.
Add card in Lovelace UI
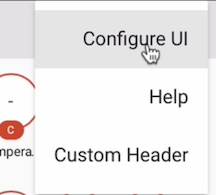
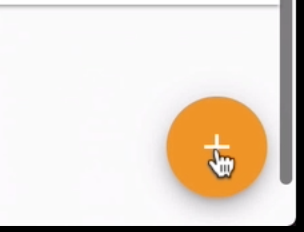
Click on the ‘Configure UI’ in the upper right corner and then on the big orange Plus button in the lower right corner. After that choose ‘ENTITIES’

And the final step is:
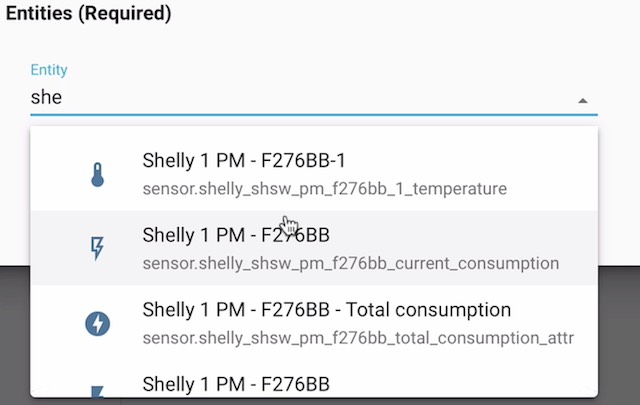
From the Entities Card Configuration, click on the Entity dropdown and search for Shelly…
Last you can proudly click on the ‘SAVE’ button and enjoy your Shelly device from Home Assistant.
Node-RED integration
I will use a collection of HTTP API & MQTT flows for the integration of Shelly device and Node-RED. All the credits for this collection are going to its author Paul – link.
Importing a Flow in Node-RED
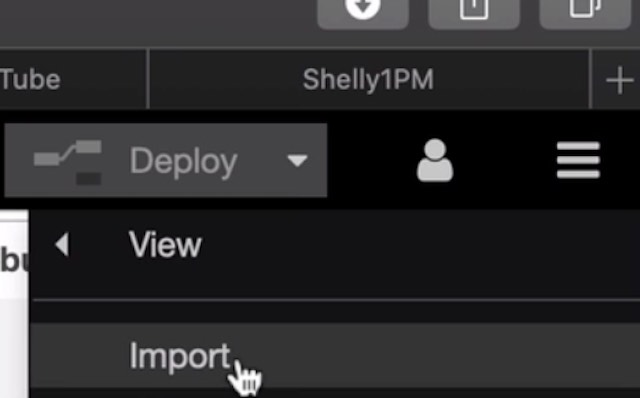
To add this collection to your Node-RED just copy the JSON code from here and click on Import button from your Node-RED menu.
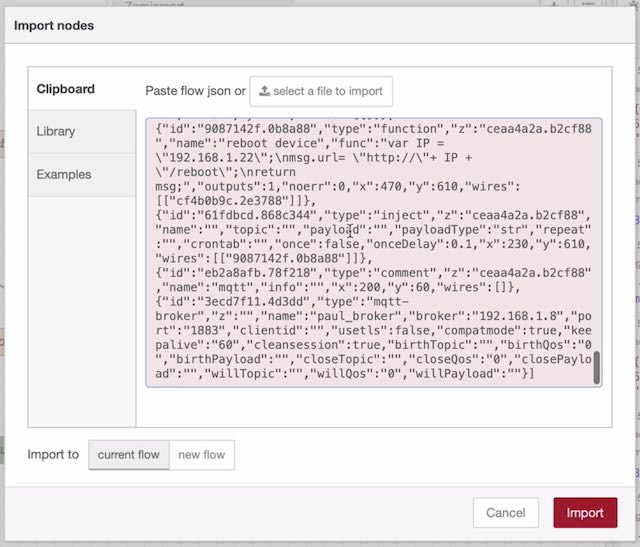
Then just paste the copied text and click on the big red ‘Import’ button.
Quick description of the flow
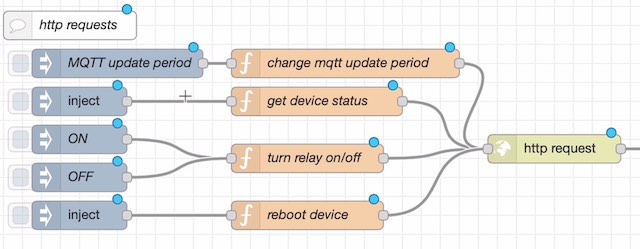
After successful import you will have three sections:
MQTT
Examples showing how to receive data from the Shelly, and also control its relay state using the MQTT protocol.
MQTT flow to accumulate power readings
A flow to receive the the regular power readings from the Shelly device, and create an accumulated reading. The flow maintains continuity even if the shelly is rebooted/loses power etc.
HTTP requests
The HTTP API allows users to not only control the relay state, but also to receive its status, change configuration settings, reboot the device, etc.
Adapt the flows to our needs
If you want to use MQTT on your Shelly devices you have to disable the Shelly cloud service, this is something that I don’t want to do at the moment and it’s out of scope for this tutorial.
Instead, I will focus on the HTTP requests flow in Node-RED to control my Shelly 1PM.
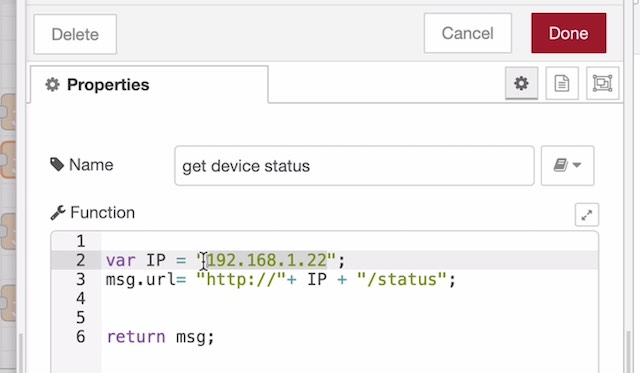
The only thing that you have to do is to edit the ‘function’ nodes.
Just replace the IP value with the IP of your Shelly device and then click on ‘Done’ button
The last and the most fun part is to deploy the flow and after that you can click on the ‘Inject’ nodes to test your configurations.
You should be able to read the status, turn on/off and reboot the device.
Where to buy Shelly 1PM?
If you want to buy Shelly 1PM or any other Shelly relays, you can use the Shelly official store and my affiliate links below, doing so I will earn some small commission from your purchases with no additional cost for you:
- Shelly Amazon Store – https://amzn.to/34d88VR
Support my work
Any sort of engagement on this site and my YouTube channel does really help out a lot with the YouTube algorithm, so make sure you hit the Subscribe, Like my videos and hit Bell buttons If you enjoy this.
Also feel free to add me on Twitter by searching for @KPeyanski.
I really hope that you find this information useful and you now can control Shelly devices like Shelly 1PM from Home Assistant and Nore-RED.
Thank you for watching/reading, stay safe and see you next time.
To integrate an interconnect smoke detector one could use the SM120X relay to a kiddie interconnect smoke detector then Flash an esp8266 with konbected.io. this would integrate easily with home assistant, wouldn’t break the bank and allow one to use “dumb” smoke detectors.
Thanks Anthony, that seems pretty good. I have two questions:
1. did you use such setup at your home?
2. Never heard about konnected before (shame on me), but why to use konnected.io instead of Tasmota for example?
Why can’t you just show how the pins are operated?
Ist the realai potential free? Can u use it without having to use wires together for in and out? Your diagrams and examples are incomplete and not transparent.
Hi Matthias, Can you describe in details what exactly is not transparent and incomplete? I have nothing to hide …
I turn off my water heater between 9:30 and 7:30. I use a Sonoff with a contactor. Been working great, very low load on the smart switch. If you go the contractor route, be aware they hum and locate them accordingly.
Thank you for that comment. What kind of contractor are you using?
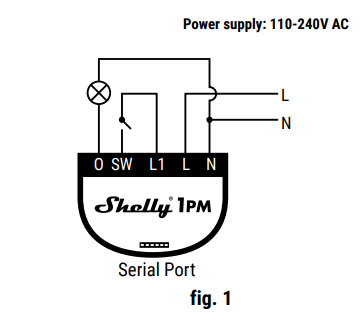
Hello. I have a few questions:
1. Why you connect to each other L1 and SW? Why you just doesn’t leave this connectors empty?
2. I have a question about the solution from node-red, which to save total consultation after 1PM restarting. Can it help to collect consumption if node-red restarted?
Hi, Alexandr
1. I didn’t know that it will work that way back then 🙂 Anyhow, It is not an issue.
2. You can try to save the consumption to file or some kind of SQL DB like SQLite. Or even better you can try InfluxDB and I have tutorial about it. Check it out here – https://peyanski.com/home-assistant-node-red-influxdb-and-grafana-integration
Hello,
Can you share a photo of the place where temperature sensor is mount in heater?
Regards.