This is a follow-up article about one of the most interesting devices of this year so far – the LD2410 presence sensor. This sensor is super sensitive even to hardly noticeable movements and it is natively working with Home Assistant.
Table of Contents
What is a Presence Sensor?
First of all, in case you don’t know – presence sensors are devices that detect movement and presence of people or moving objects in a certain area. They’re commonly used in lighting systems, HVAC systems, security systems, and other applications where it’s important to know whether someone or something is currently available.
What is different in the LD2410 sensors?
What is different in LD2410 sensors is that they can detect even the slightest movement like human breathing and that is because a new and different technology than the regular Passive Infra Red (PIR) sensors is used.
Also these sensor are super cheap. You can get one for less than 5 US dollars in AliExpress.
Be careful which LD2410 version you choose
Be careful which version you are choosing!
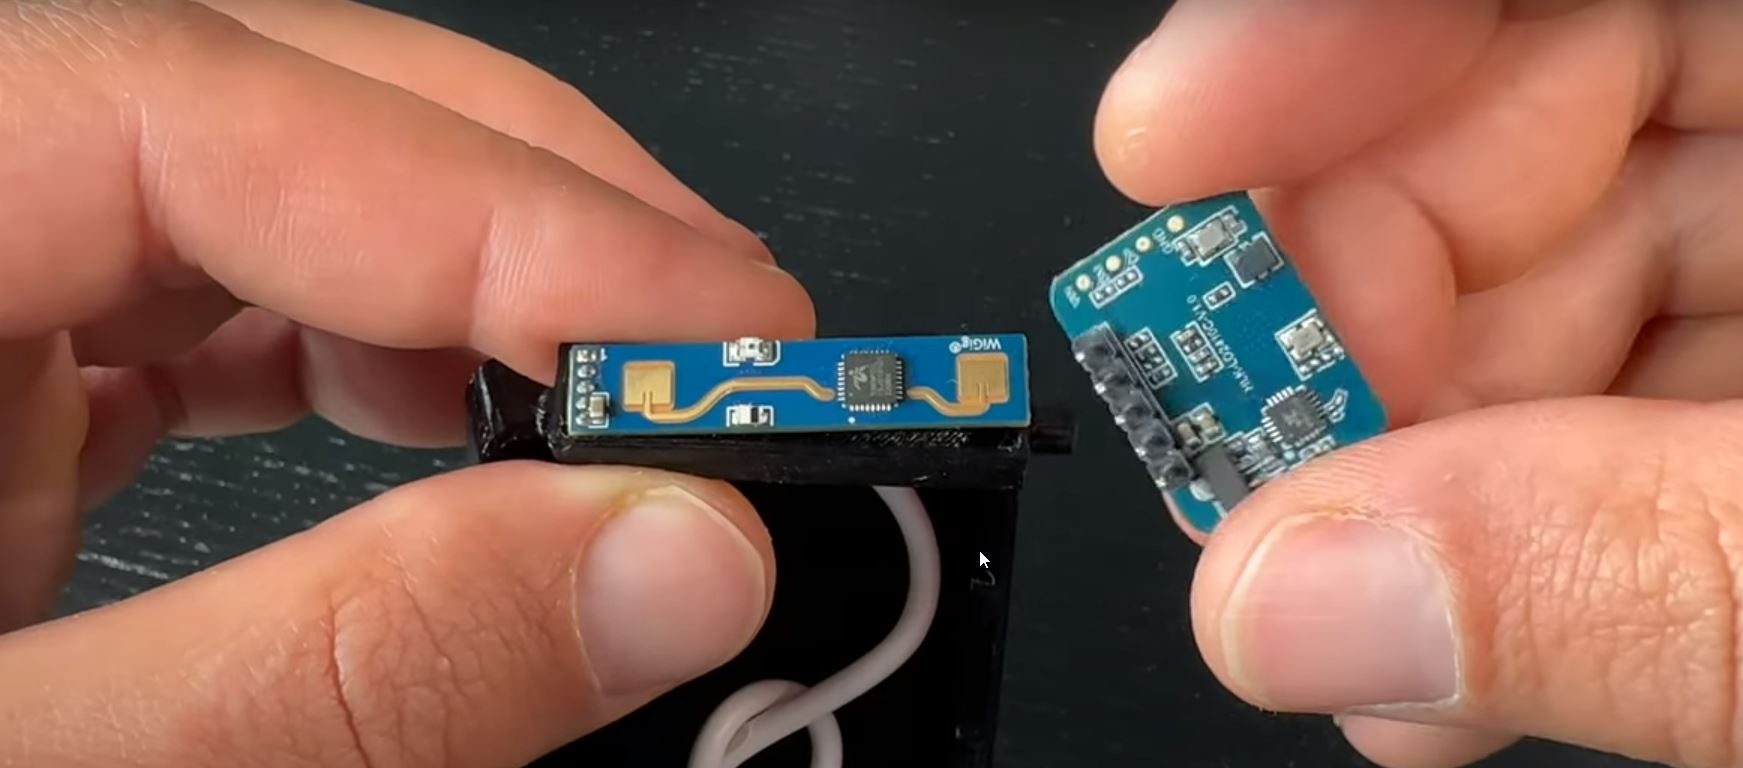
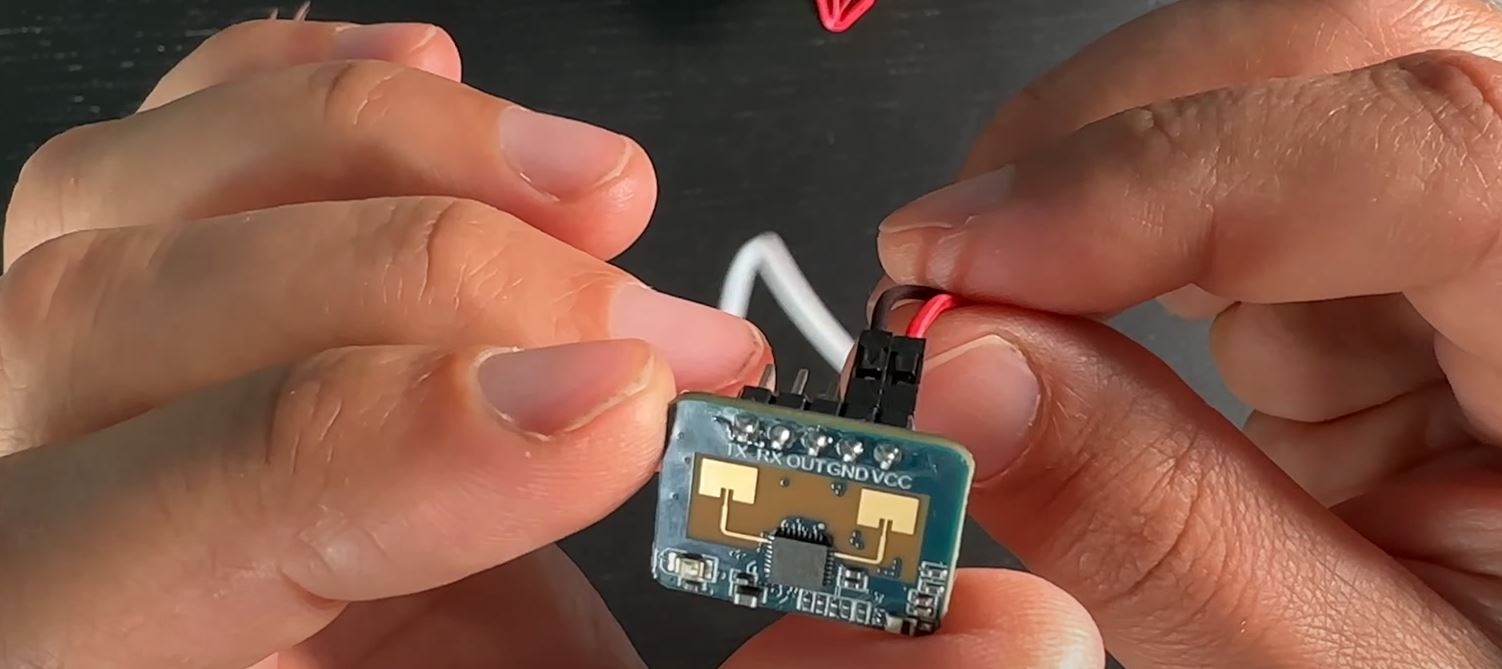
Do not get the regular LD2410 sensor as it is not having a Bluetooth support. Instead, go for the LD2410B or LD2410C sensors.
- The first one is much smaller, it looks like the regular version and it is having very tiny PINs,
- where the second one that is the LD2410C is a little bit bigger in size and it have regular sized PINS.
You can follow these links If you are interested of buying:
- LD2410B (Amazon) – https://amzn.to/43AwPb9
- LD2410B (AliExpress) – https://s.click.aliexpress.com/e/_DFFkfSx
- LD2410C (Amazon) – https://amzn.to/42cDcAe
- LD2410C (AliExpress) – https://s.click.aliexpress.com/e/_DeeEUiv
How to power the LD2410 sensors?
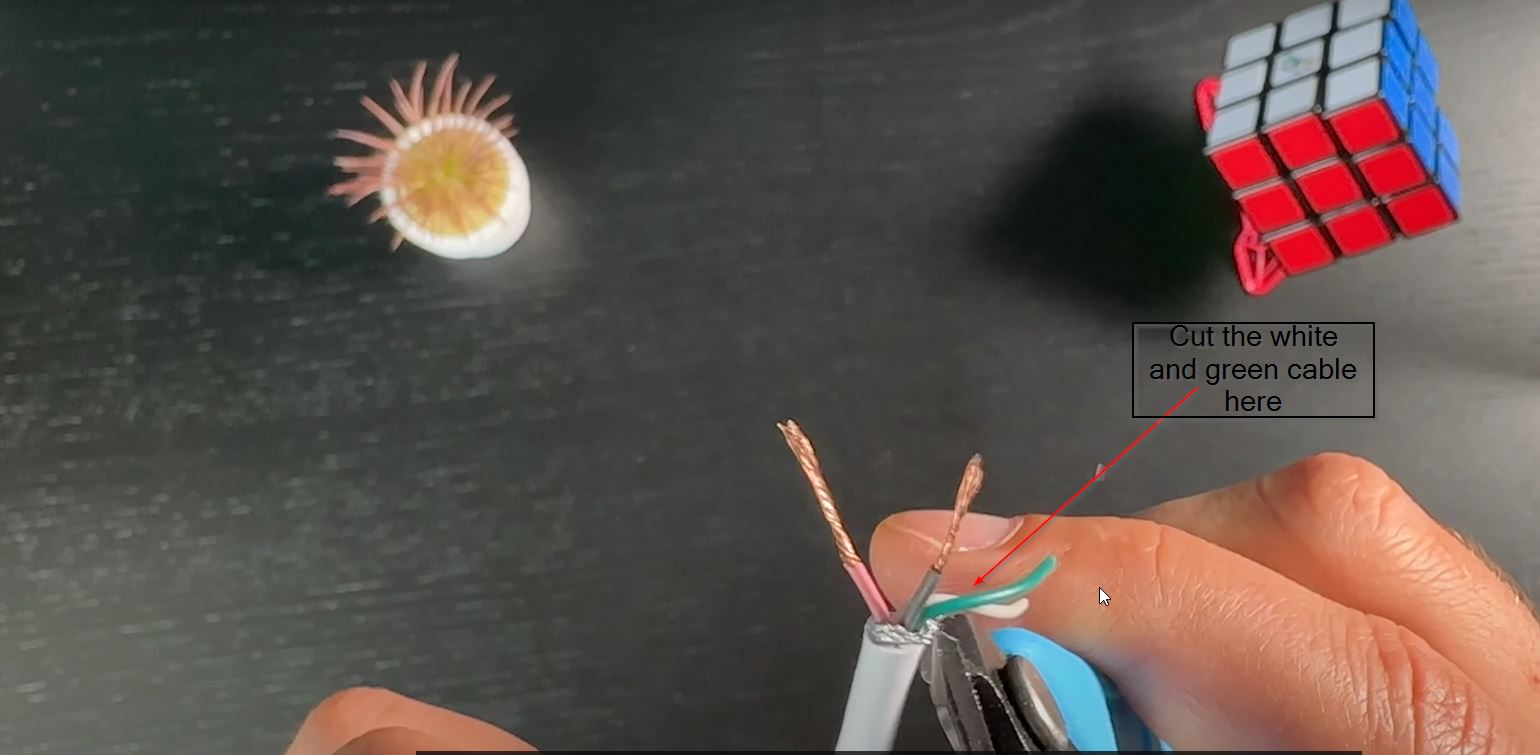
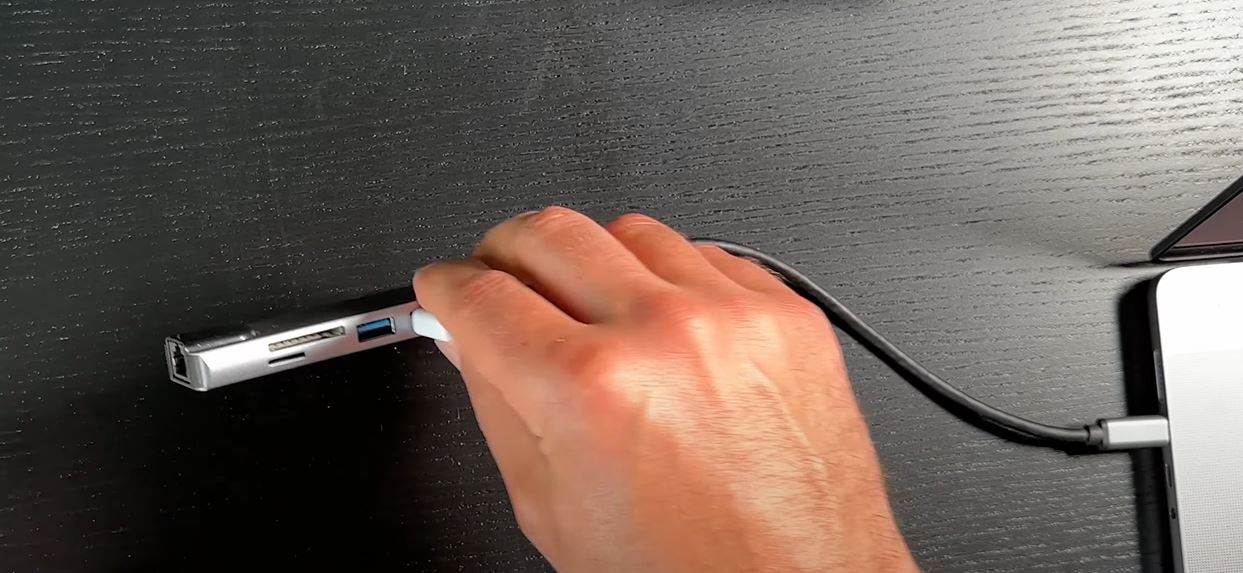
These sensors are not battery powered and to power them up you only need а USB cable that you are ready to cut.
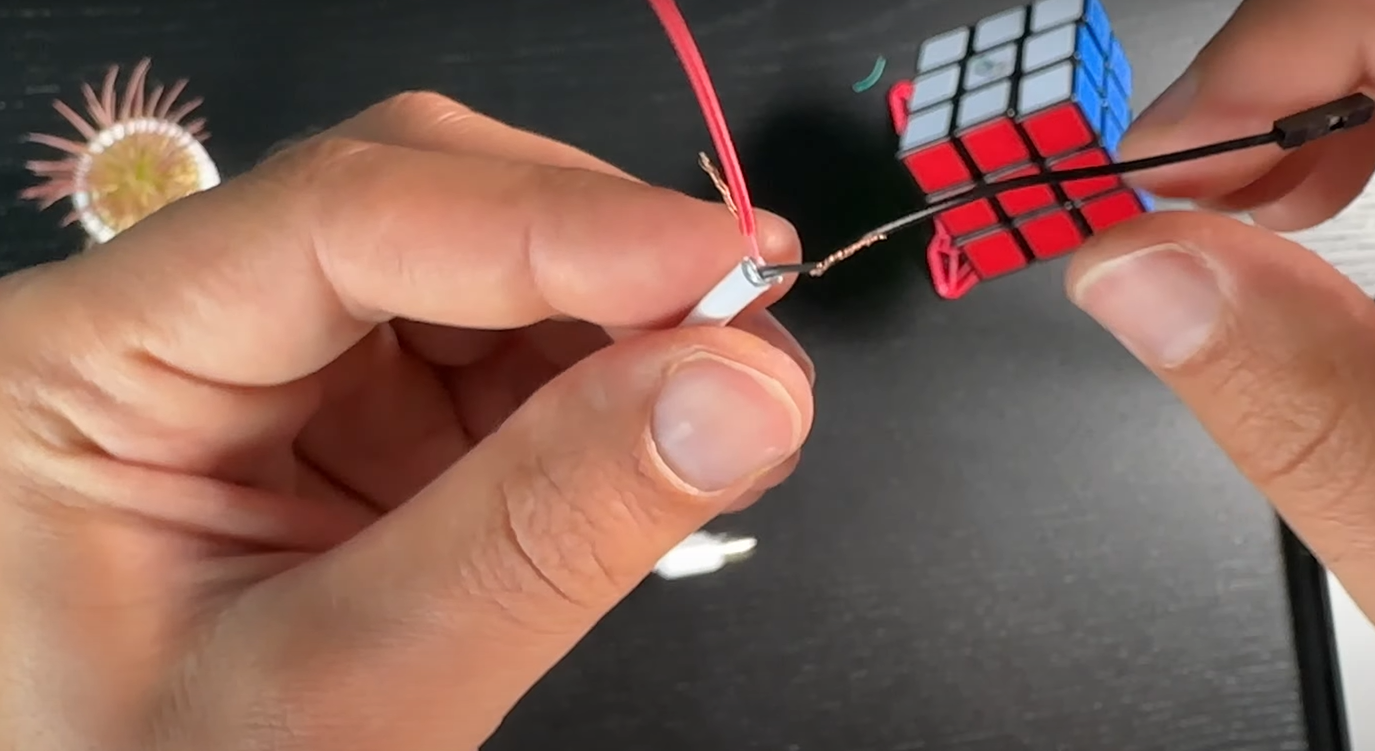
When you do the above, you will have a great presence sensor.
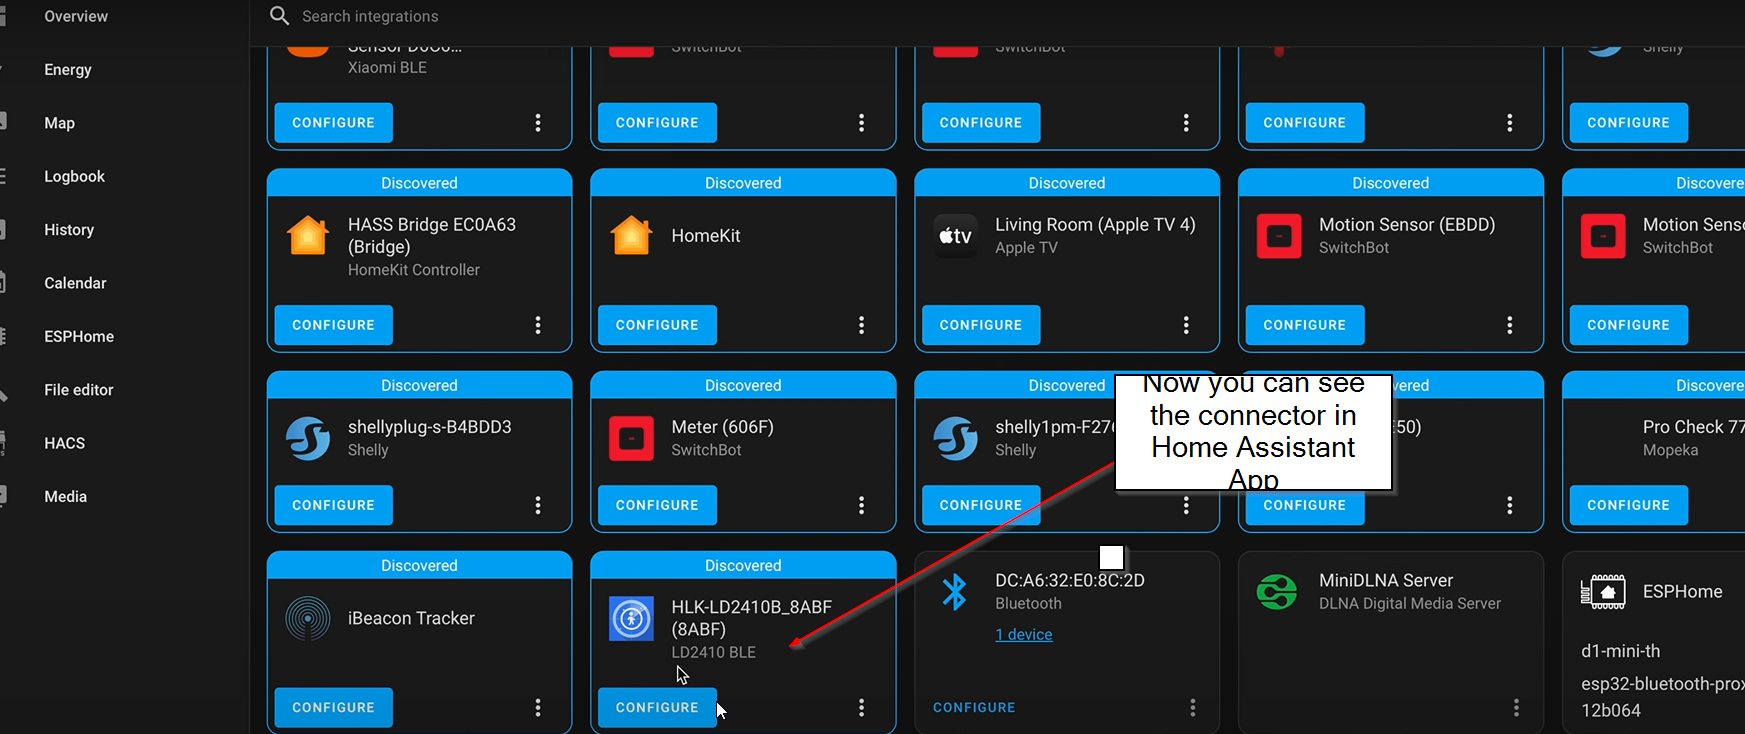
Once you have the sensor and once you connect it to a USB port or power it up using an USB power adapter,
The sensor will be automatically detected by Home Assistant and you can start using it in a variety of Home Automations right away, so you can make your Home Smarter.
Free Home Assistant Webinar
Speaking of Home Assistant feel free to join my webinar where I will talk about the official ways to get Home Assistant + 1 secret way to get started on a PC in under five minutes.
So, if you are interestend, just follow the link: https://automatelike.pro/webinar
How to get LD2410 Distance Sensor working in Home Assistant?
And here comes the fun part!
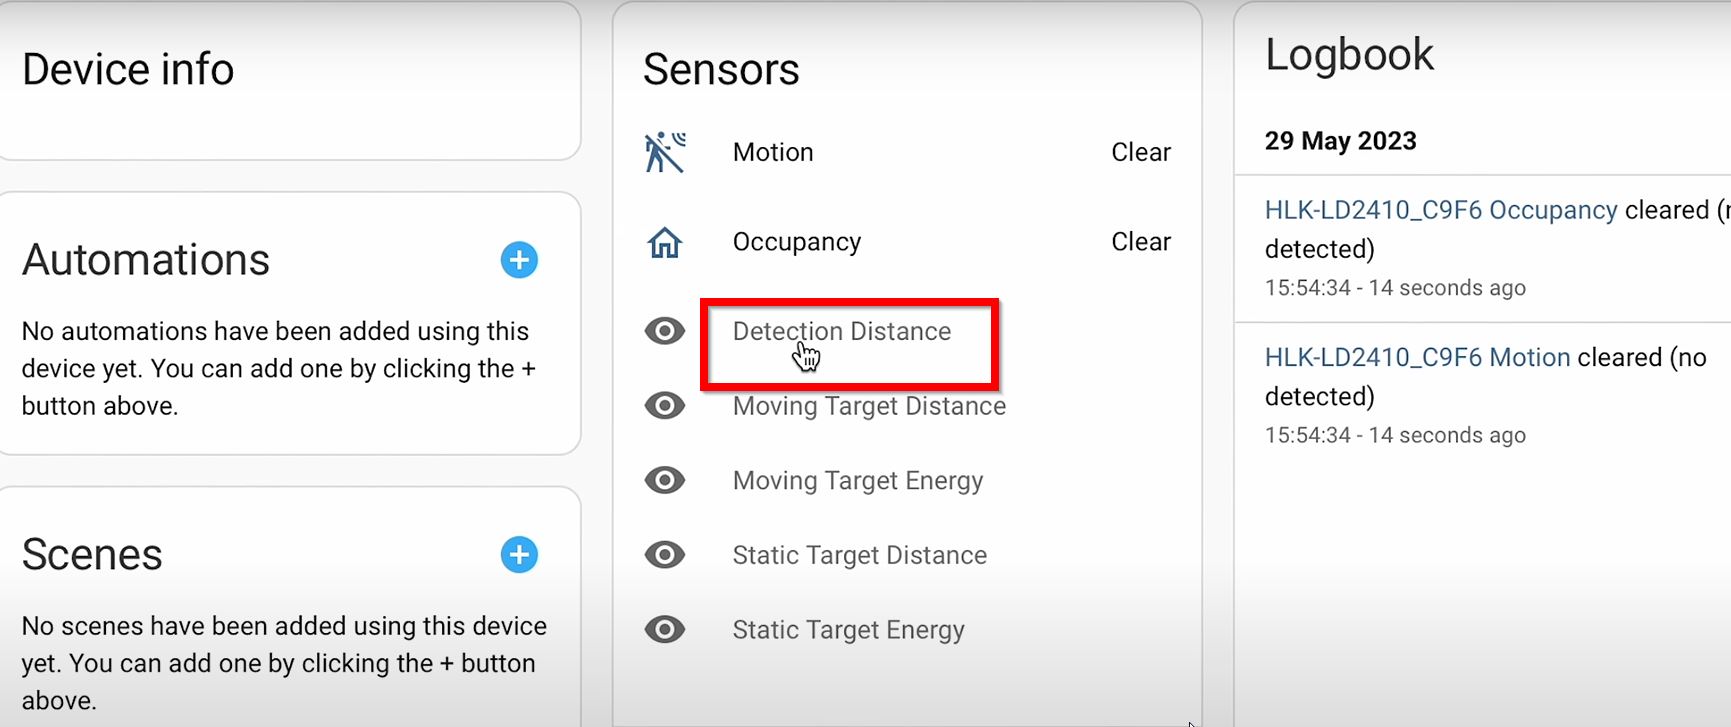
One of the frequently asked questions that I got after my first article (How to detect human presence with LD2410B sensor and Home Assistant) about these sensors is how to get the Distance sensor working. That is easy, once the sensor is added in Home Assistant by default only the Motion and Occupancy sensors are visible.
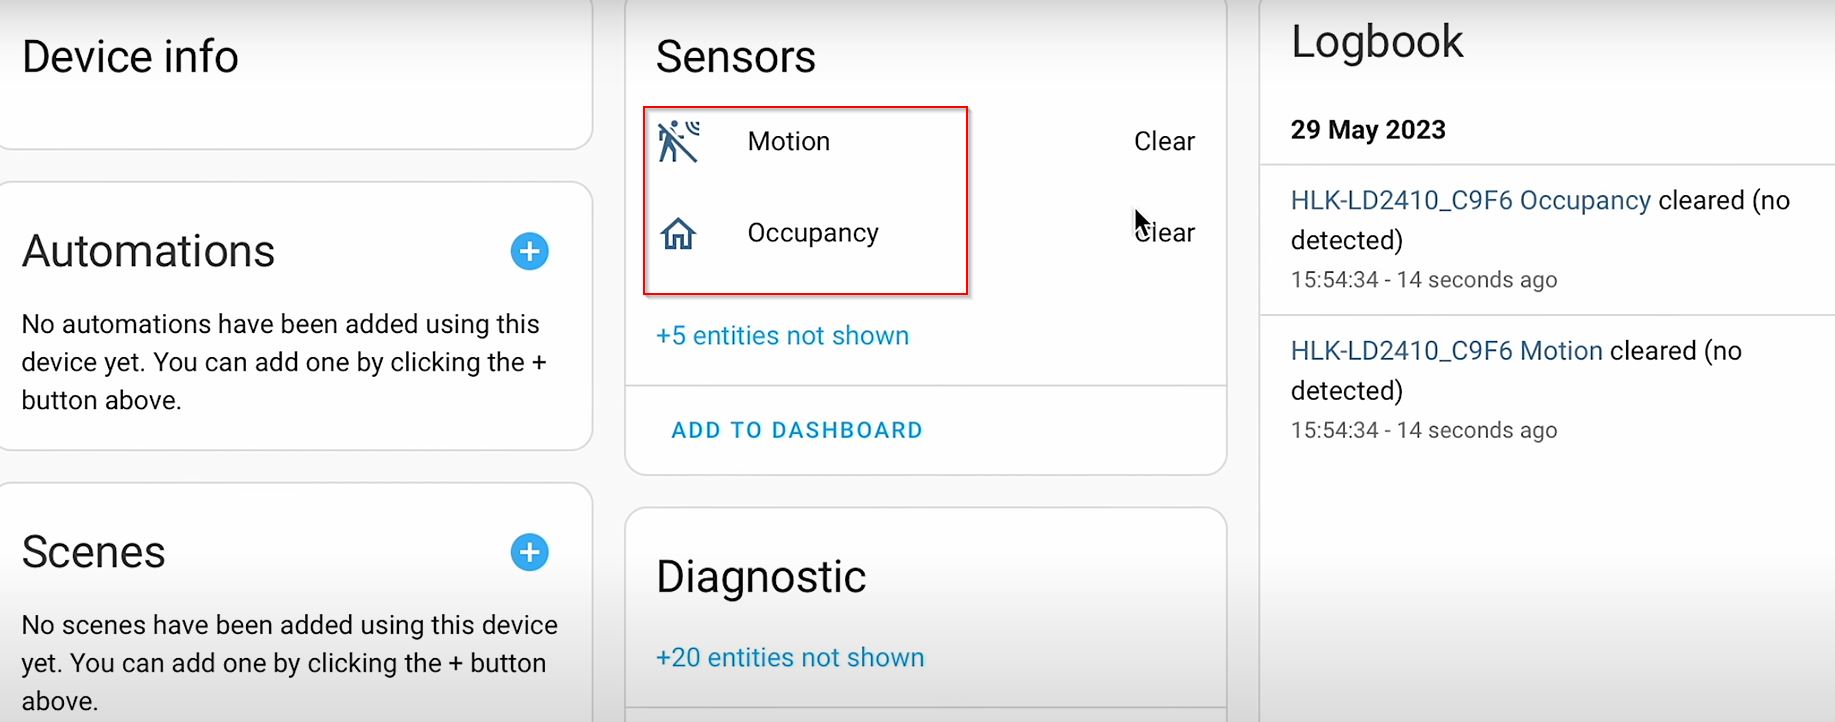
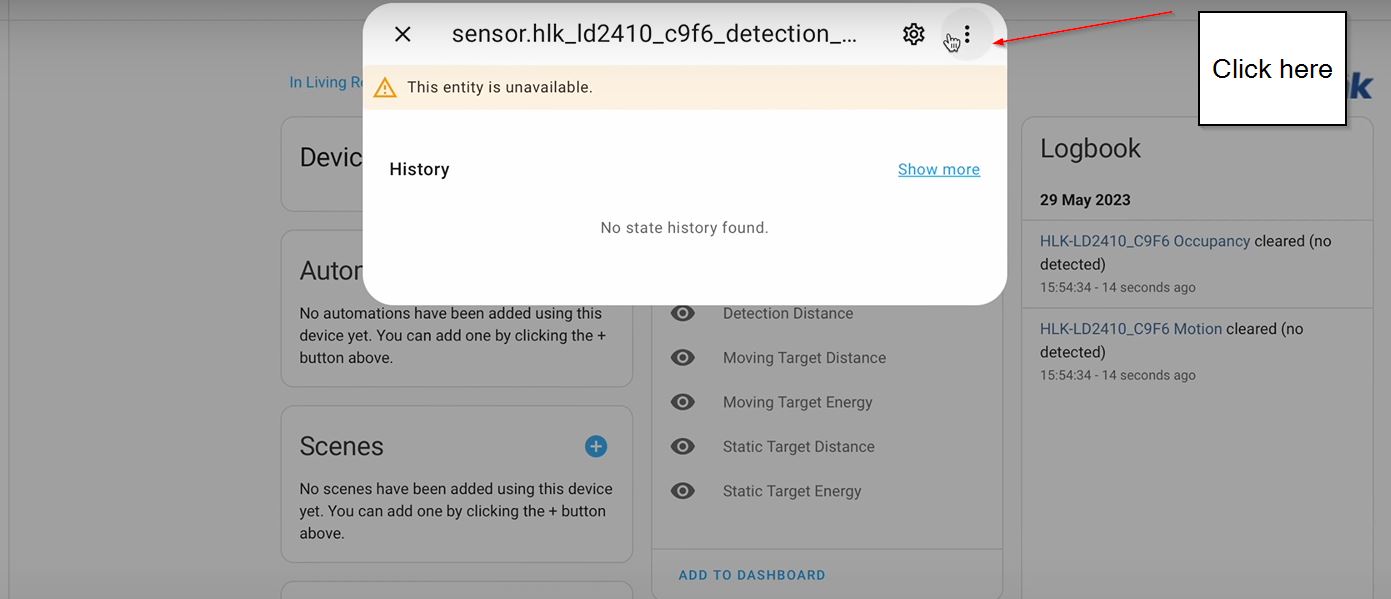
If you want to show also the Detection Distance sensor for example or some of the other distance sensors that are available you just have to enable them from the Home Assistant menus. They are disabled by default for some reason.
What if you have LD2410 connectivity issues?
Some of you are complaining about connectivity issues, and that the sensor is becoming unavailable in Home Assistant after some time. And that only full restart of the system resolves the problem.
I want to say here that my LD2410B sensor is not having such issues at all. So, I guess, it all depends of the Bluetooth receiver that you are having on the device that is running Home Assistant, also the distance between the sensor and the bluetooth receiver and are there any obstacles between these devices.
What I recommend if you have such issues is to try to upgrade the firmware. Also, try to shorten the distance between the devices temporarily and check if there are any differences.
How to upgrade LD2410 firmware?
To upgrade the firmware you have the following options:
- Download HLKRadarTool from Apple App Store (LINK) or for Android (LINK)
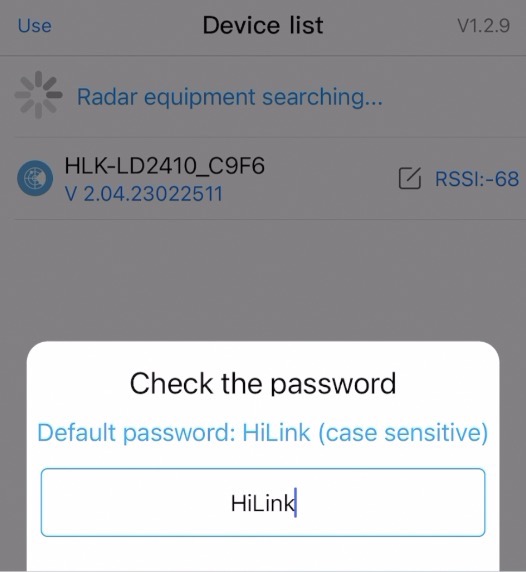
- Open the App and connect to the LD2410 sensor using HiLink as a password
- Click on the More button in the upper right to go to the Settings.
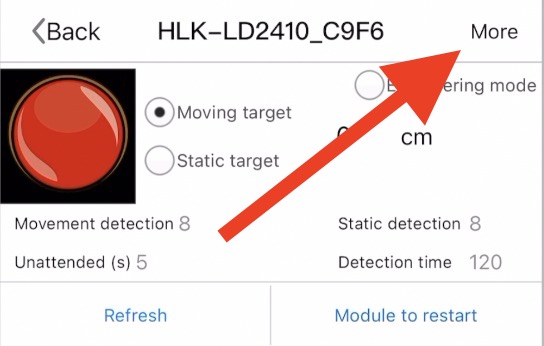
- Then click on More versions > button next to Firmware version on the top of your phone screen.
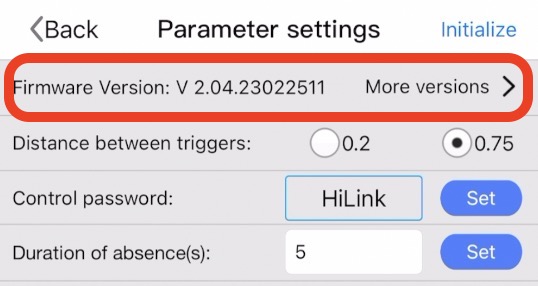
- Tick the new version if any and then click on Upgrade button.
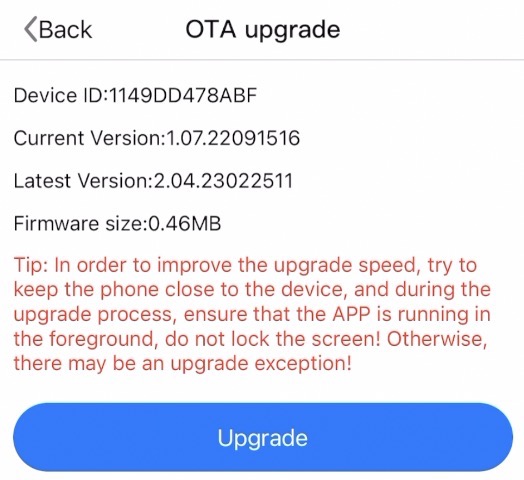
- While the upgrade is in progress do not close the app and do not get your phone too far away from the sensor. Exactly as the TIP in the app suggested.
What are the advantages of LD2410 over traditional PIR sensors?
One of the great advantages of the LD2410 sensors over the traditional PIR sensors is that they can detect movements even through some obstacles like curtains or thin walls.
For example, I have a Shelly Motion 2 sensor in my Camper, which uses the regular Passive Infra Red technology.
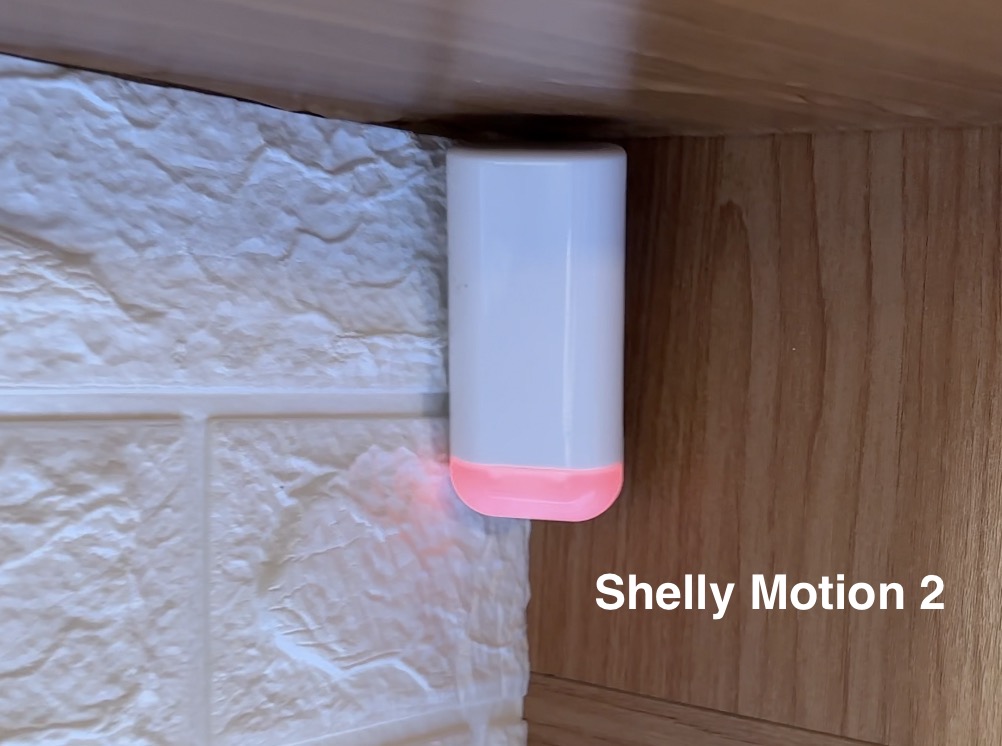
And this sensor cannot detect if someone is moving on the front driver or passenger seat when the curtain is down. But this is not a problem at all for the LD2410B as it can detect occupancy and movements through the curtain which is perfect for my use case as I want privacy and security at the same time.

Are there any false positive alarms triggered by LD2410?
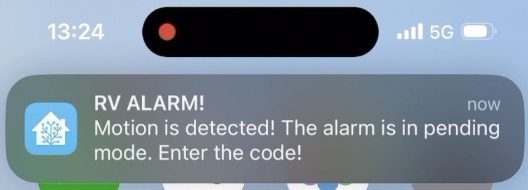
I have to admit here that until now I had 2 or 3 false alarms for several months of non-stop operation from the LD2410B sensor.
And because of my configured Home Assistant automations during these false alarms I received a message and a phone call in the middle of the night saying that movement in my camper is detected, which overall is not a very pleasurable experience.

However, I investigated in details the first of these false positive alarms thanks to the security cameras that I have installed around my house, and all the leads are going to a street cat,

so for the second and third alarm I just checked the cameras and then I returned back to sleep.
3D Printed cases
if you have a 3D printer or such service nearby you can get yourself a beautiful/useful case and the sensor is working through the plastic without a problem, so don’t worry if it is all inside the case.
- https://www.thingiverse.com/thing:5631878
- https://www.thingiverse.com/thing:5581945
- https://www.thingiverse.com/thing:5782554
- https://cults3d.com/en/3d-model/gadget/ld2410c-case
LD2410B vs LD2410C
Overall, both the LD2410B and LD2410C are great presence sensors that offer same features and capabilities with just different form factor. It all depends on your specific preferences and requirements regarding the size of the sensor.

Here are the buying links again if you want to join the club.
- LD2410B (Amazon) – https://amzn.to/43AwPb9
- LD2410B (AliExpress) – https://s.click.aliexpress.com/e/_DFFkfSx
- LD2410C (Amazon) – https://amzn.to/42cDcAe
- LD2410C (AliExpress) – https://s.click.aliexpress.com/e/_DeeEUiv
Free Smart Home Glossary
Grab my Smart Home Glossary for free which is full of useful explanations of the most common Smart Home words and abbreviations.
The link is on my other website – https://automatelike.pro/glossary
I’m Kiril, thanks for reading and we’ll see you in the next one!
How does this get installed? I understand it needs to be angled to get the best sensitivity but how to best angle it and/or mount it? What case did you use? Can it be installed inside plastic or does that affect it’s sensitivity? All thoughts for your next blog post 🙂
Thanks for the comment & questions. I have added a section in the article for you with links to some 3d printable cases. I used one of these cases and it can be even seen in the video and article and I didn’t feel any sensitivity degradation. Have in mind that I didn’t made any exhaustive tests for that conclusion, it is just a feeling. The case that I used for the B version allows angling without any problems.
Thanks for the nice and useful post!
I wonder if the only difference between the “B” and “C” models is just board and pin size, and from these to the plain LD2410 is just Bluetooth… Isn’t there any other difference regarding sensitivity or other features? If I plan to wire these sensors to an ESP32 I would not need Bluetooth, but would I get all the seven sensors you have and the same sensitivity? Moreover, do you know if it would be possible to add more than one LD2410 to a single ESP32?