
The Stable Raspberry Pi 4 USB boot is here! And I will show you how to get it!
Shortly after my previous Raspberry Pi 4 SSD boot article was released the BETA bootloader was promoted to STABLE.
Now I want to show you several things:
- How to enable the Stable Raspberry Pi 4 USB boot from scratch.
- How to upgrade your bootloader from BETA to STABLE that is only if you followed my previous tutorial
Table of Contents
What you will get from this article?
Some of you can use this article to install the latest Stable Raspberry Pi 4 USB bootloader.
Some of you told me that they want to upgrade their beta bootloader to stable.
And I will try to cover all of that, but don’t worry it will be easier than you think.
Compatible USB drives
Although the Stable Raspberry Pi 4 USB boot is now available, it should be still used with caution.
Not all USB drives can be used to boot your Raspberry Pi 4. To see the compatible drives check the table below where I put devices reported by me and other users as working just fine.
| Model | Link |
|---|---|
| SSD HP P600, 250GB, USB 3.1 | https://amzn.to/2B7qIDi |
| Samsung 860 EVO 500GB 2.5 Inch SATA III Internal SSD | https://amzn.to/37o2hNS |
| ELUTENG USB3 SATA Adapter 2.5 Inch SATA to USB 3.0 | https://amzn.to/2MWfd49 |
| SanDisk SSD PLUS 240 GB Sata III 2.5 Inch | https://amzn.to/37AG27e |
| Samsung BAR Plus 64 GB Type-A 200 MB/s USB 3.1 | https://amzn.to/3fqJSCO |
| SanDisk Ultra 32 GB USB Flash Drive USB 3.0 | https://amzn.to/3frXg9J |
| Samsung MZ-MTD1280 (128GB mSATA) & Element14 Pi Desktop (rev 3) HAT | Reported by Steve Kowalski in the comments |
| Sandisk x110 128GB | Reported by Con Ben in my YouTube Channel |
| SanDisk 256GB Extreme PRO USB 3.1 Solid State Flash Drive | https://amzn.to/2NtLyQc |
| Crucial MX500 250GB 3D NAND SATA 2.5 Inch Internal SSD (needs SATA adapter) | https://amzn.to/2YvVAq7 |
| Samsung 860 QVO 1TB Solid State Drive (needs SATA adapter) | https://amzn.to/2YAyGhz |
| CanaKit Raspberry Pi 4 4GB Starter Kit – 4GB RAM | https://amzn.to/3eyGi9S |
| Kingspec Z3 Type C USB 3.1 External SSD (Reported by CraftSense in my YouTube) | Banggood link |
| Geekworm X825 2.5 inch SATA HDD/SSD Expansion Board (Reported by Jay in peyanski.com) | https://amzn.to/2QML60Q |
| Kingston A400 120G Internal SSD M.2 SA400M8 (Reported by Luiz Barreto in peyanski.com) | https://amzn.to/32kRR0k |
I can confirm that the external HP P600 SSD is working without any issues so far.
Now let’s go
Creating a SD card with Raspberry Pi Imager
Go to the download section of https://raspberrypi.org and get the Raspberry Pi Imager for your operating system.
Start it, insert a SD card in your computer or SD card reader.
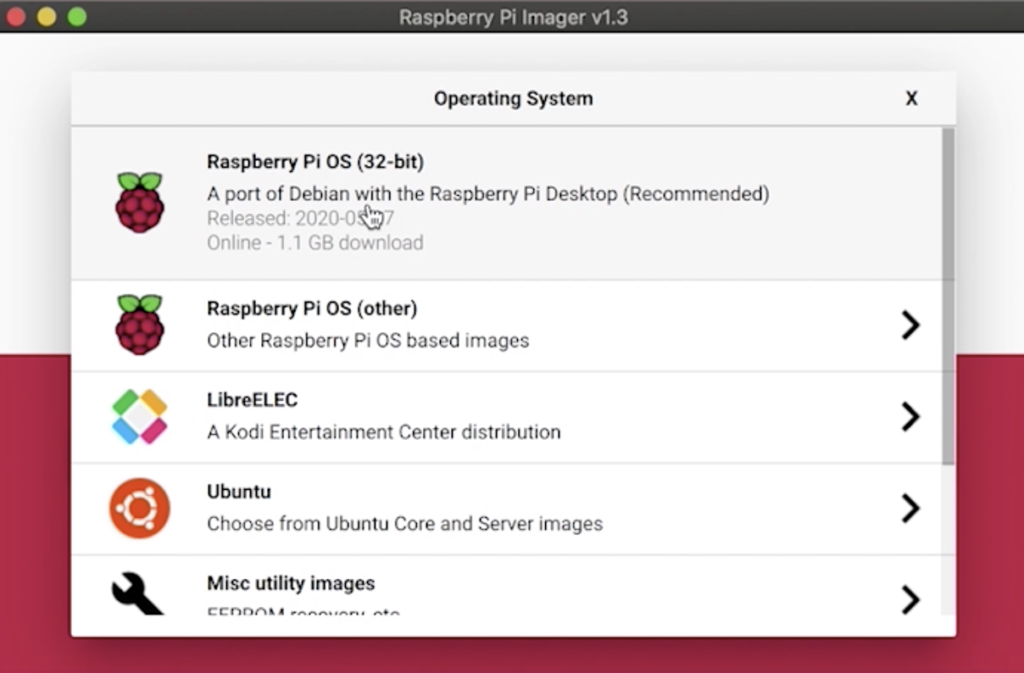
And burn the Raspberry Pi OS image on the card.
Don’t worry we will need the SD card only for a while then we will remove it completely.
When Raspberry Pi Imager finish it will unmount the SD card automatically. Remove the SD card and insert it again to access its contents and to create a file ssh inside it.
Headless Raspberry Pi (Optional)
If you wish you create an empty file called ssh inside the boot partition of your SD card. If you do that you will be able to connect to your Raspberry over the network without even attaching a monitor, keyboard or mouse to it.
The above file will enable a SSH server and you will have the possibility to connect to the raspberry using SSH client.
To do that on MacOS you can execute the following command in the terminal:
touch /Volumes/boot/ssh
For Linux/Windows you can use any text editor or you can copy/paste and rename one of the existing text files inside the boot partition of the SD card.
When you are ready, insert the SD card in your Raspberry and plug it in the electricity.
Getting ready and updating the Raspberry OS
After a minute or two check your router for the IP address assigned to your raspberry and connect to it using the following command on MacOS or Linux:
ssh pi@YOUR_RPI_IP
You will be asked for a password and the default one is “raspberry” without the quotes.
For Windows you can use Putty client for the SSH connection. Just Google for it if you don’t know how to use it.
When you log in successfully, execute the following commands to update your Raspberry Pi 4.
sudo apt-get update
sudo apt-get upgrade -y
sudo rpi-update
sudo reboot
This will reboot your Raspberry Pi when all finish.
Login again and we now need to install a package that will allow us to update the bootloader to enable the Raspberry Pi 4 usb boot.
Execute the following:
sudo apt install rpi-eeprom -y
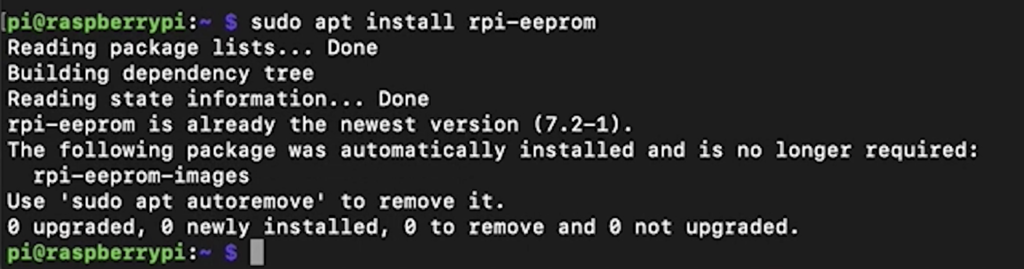
Don’t be surprised if the tool is already installed, that is quite normal.
Stable release
Then run this command to allow Stable Raspberry Pi 4 USB boot. This “one liner” will replace the word critical with stable in the /etc/default/rpi-eeprom-update file.
sudo sed -i 's/critical/stable/g' /etc/default/rpi-eeprom-update
Of course you can use any text editor for that with the same success.
By default only critical firmware updates are allowed in the raspberry OS. With the above command you will allow also the stable track where the Stable Raspberry Pi 4 USB boot firmware is.
then go to “Update the bootloader“
Beta release
Use this ONLY if you are on BETA firmware! In any other case use the command above and skip this Beta section.
This “one liner” will replace the word beta with stable in the /etc/default/rpi-eeprom-update file.
sudo sed -i 's/beta/stable/g' /etc/default/rpi-eeprom-update
Enable Stable Raspberry Pi 4 USB boot
Now it is time to install the new bootloader to enable the stable Raspberry Pi 4 usb boot. Just run the following…
Stable bootloader
To update your bootloader to stable use the following command:
sudo rpi-eeprom-update -d -f /lib/firmware/raspberrypi/bootloader/stable/pieeprom-2020-06-15.bin
It is good idea to replace 2020-06-15 (stable) with the latest .bin file in the above folder.
Please reboot your raspberry after that using the following command.
sudo reboot
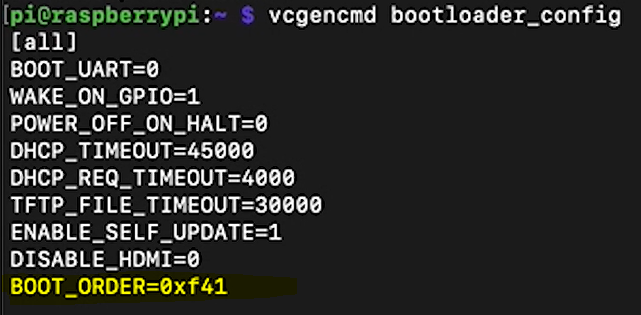
Login again and execute these two commands:
vcgencmd bootloader_version
vcgencmd bootloader_config
The first one will show you the bootloader version. Just search for the date in my case it was Jun 15 2020, but yours may be different (the one that you use in the rpi-eeprom-update command)

And the second command will show you the boot order.
You should look for the last row of the result which should be BOOT_ORDER=0xf41. If you see this that means your Raspberry Pi 4 will first look for SD card and if there isn’t any it will try to boot from a drive connected to the USB ports of the Raspberry.
Burning the Raspberry OS on the SSD
We need to burn the image of the Raspberry Pi OS one more time, but this time on the SSD. The process is exactly the same as with the SD card. Just choose the SSD (USB drive) as a destination.
And don’t forget to create again an empty ssh file in the boot partition of the USB drive to activate the remote SSH login to the Raspberry.
You can skip this step If you have a monitor, keyboard and a mouse attached to your raspberry.
Copy some files from SD to SSD
Burning the raspberry OS on the SSD drive is ready and I will now show you how to mount the drive to copy some files from the SD card. Let’s do it it’s easy.
Plug the SSD/USB to your Raspberry Pi 4 and execute the following commands to mount the SSD/USB disk to your Raspi.
sudo mkdir /mnt/mydisk
sudo mount /dev/sda1 /mnt/mydisk
Then copy the needed files from SD card to SSD/USB disk with the following two commands:
sudo cp /boot/*.elf /mnt/mydisk
sudo cp /boot/*.dat /mnt/mydisk
Stable Raspberry Pi 4 USB boot
Now is the time where you can throw away your SD card!
I actually don’t recommend to throw anything especially your SD card, just remove it from your Raspberry Pi 4 and use it for something else.
But if you feel like you want to throw something after all why don’t you try throwing your mouse click against the Subscribe button below?
[sibwp_form id=2]
I will truly appreciate that. Thank you.
And as I said remove the SD card, leave the USB drive connected and reboot your Raspberry. If everything is OK you should very soon enjoy your Raspberry Pi 4 USB boot with faster speeds and increased reliability.
The speed increase in my case from moving from SD card to SSD is over 10 times as you can see on the following screen.

Enable VNC server for remote GUI connection
Let’s enable the VNC server now in order to allow connecting to the graphical interface of the Raspberry.
Login to your Raspberry and execute:
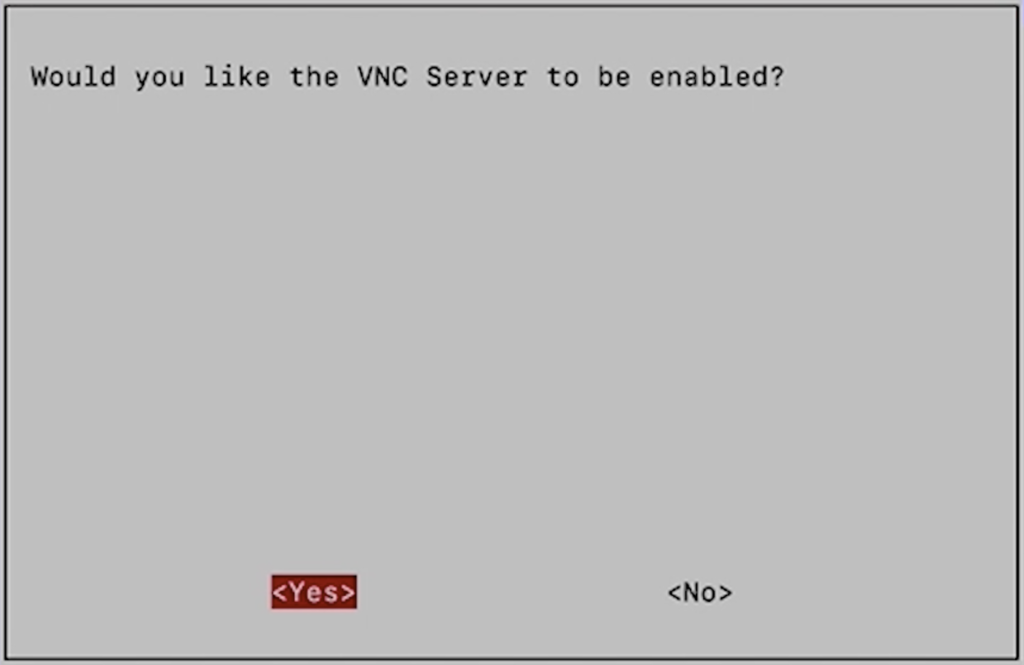
sudo raspi-config
Then go to Interfacing Options > VNC and enable it by selecting Yes.
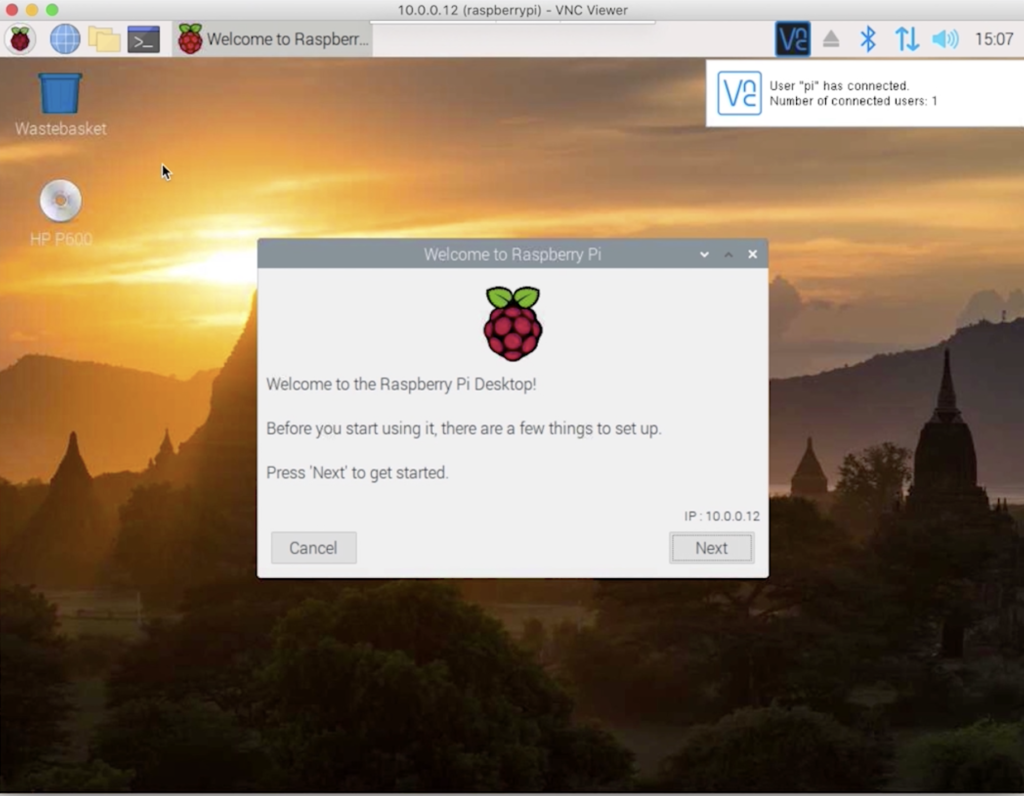
Reboot and try to connect to your Raspberry Pi with a VNC client like VNC Viewer for example. You should use your username and password from the SSH.
Quick Fix if you have issues connecting with VNC
I will show you a quick fix If you face similar error as shown below and you cannot connect with your VNC client to the Raspberry.

Execute:
sudo raspi-config
And this time go to Advanced Options > Resolution
And choose an appropriate resolution for you, then reboot and try again.
You should now see the Raspberry Pi 4 desktop.
Support my Work
If you like what you see so far and you want more content like this you may want to become one of my supporters (actually the first one) check my support page.
Any other sort of engagement on this site and my YouTube channel does really help a lot, so make sure you hit the subscribe, as well as the Like and Bell buttons If you enjoy this article/video.
Also feel free to add me on Twitter by searching for @KPeyanski. You can find me on my Discord server as well.
I really hope that you find this information useful and you now know how to enable the stable Raspberry Pi 4 USB boot using SSD drives and remove your SD card forever.
Thank you for reading and don’t forget Home Smart, but Not Hard!
Stay Safe and see you next time.
Very nice update. The ELUTENG USB3 SATA Adapter seems to be the recommended adapter to use, several streams on the raspberry pi forums recommend it. I am very happy and my pi4 8BG is running like a dream. Thanks for the information.
Yes, it is the recommended adapter 🙂 Can you share for what are you going to use this beast now? Thanks.
Great job, is it works with Full OS ?
Many thanks.
Sorry if i’m a noob. But many tries and i’ve always bootloder root locked.
What to do after sudo cp /boot/*.dat /mnt/mydisk ?
Thanks
Hi Serge, I guess you first burn the raspberry OS image on the USB drive and then you tried to copy the files on it. Can you please confirm that?
Thanks for the information! Is it possible to boot into any other distribution than Raspberry OS? (Like Ubuntu Server?)
I think yes, but maybe some additional steps are needed. Can you tell me why you need ubuntu server? Is there anything specific that is not possible with raspberry os ?
I’m not quite sure if all needed packages are available in Raspberry Pi OS to replace my old bananapi, which is running in Debian Jessie.
It is running multiple nginx instances, mariadb, PHP, pihole, Samba and postfix/dovecot.
I did not dig deep enough yet if Raspberry Pi would be my best choice.
Actually Raspberry Pi OS was a great choice. I downloaded the arm64 image instead the 32bit and followed your guide with no problems.
It runs very smooth. Thanks!
I followed the Stable Raspberry Pi 4 USB boot guide. After I tried to install Home Assistant with Docker. But it does not work. What could be the problem. Thank you.
Can you share the error that you receive? Sorry for the late reply.
Not error.
Nice. Worked right out of the box with a Geekworm X825 SATA hat and an old 860 EVO ssd I had laying around.
Thank you very much that you sharing that Jay. I’ve added this in the compatibility table.
Thank you Kiril for your video. My PI4 now is boot from USB. Thanks ;o)
FYI. But my externall SSD ADATA SE670 is not working for boot :o( for PI4
Thanks for the article! I’ve got my Kingston SA400M8120G – SSD 120GB M.2 SATA Series A400 working fine! Just installed 1 day ago, but so far, so good.
Once up & running chances are that it will stay like this without issues. Thanks for sharing this I will add it to the table.