
Passive Infrared Sensors or PIR sensors for short or just Motion Sensor are completely supported by Home Assistant and ESPHome. I have a question for you why to buy an expensive motion sensor when you can DIY for cheap. In this article I will show you what parts you will need, how to install ESPHome, how to add the motion sensor to Home Assistant and how to make automations.
Table of Contents
Why cheap DIY Motion Sensor?
Using smart motion sensors on strategic places at your home is one of the quick wins when you are turning your home into a smart home. Of course you can use out of the box motion sensors like Shelly Motion or other similar, but they are not coming cheap, especially if you have to buy a lot of them (see my Shelly Motion or Shelly Motion with Home Assistant articles if you want more info about this topic). That is why we are going to create one motion sensor that will cost around $4 US dollars and it will take only few minutes of your time. I will show you everything step-by-step and at the end we will see a real demo with Home Assistant automation.
Automation that works every-time?
When we are talking about automations I can show you one right now that is ridiculously easy – when you click on the Subscribe button you will automatically receive a confirmation mail. When you confirm that you are not a robot you will automatically be subscribed to my Newsletter and you will automatically start to receive articles like this on a weekly basis.
Haa what do you say? And it works every time. Try it out and see by yourself – LINK to my Newsletter page
Now let’s start this article by showing what is needed for our Cheap DIY Motion sensor that works Home Assistant & ESPHome
What is needed to DIY Motion sensor that works with Home Assistant?
You will need the following items to complete the DIY Motion sensor:
Wemos D1 Mini
Wemos D1 Mini is an ESP8266 chip based device that will allow your future smart DIY motion sensor to connect to your Wi-Fi and to communicate with the PIR sensor. It cost around $2-3 US dollars in AliExpress.
Wemos D1 Mini (AliExpress Affiliate Link) – https://s.click.aliexpress.com/e/_AFgAIp

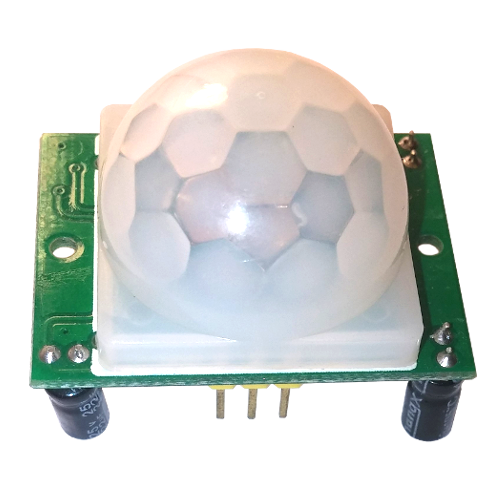
PIR Sensor (HC-SR501)
The exact model of the PIR Sensor that we are going to use is HC-SR501. This sensor is used to detect movements and to send signals to D1 Mini. The model have two knobs to adjust sensitivity and delay. It cost around $1 – 1.5 US dollars and you can buy a pack of 5 which comes even cheaper.
5 Pack Hc-sr501 Pir Motion Ir Sensor Body Module Infrared (AliExpress Affiliate Link) – https://s.click.aliexpress.com/e/_Atijaj
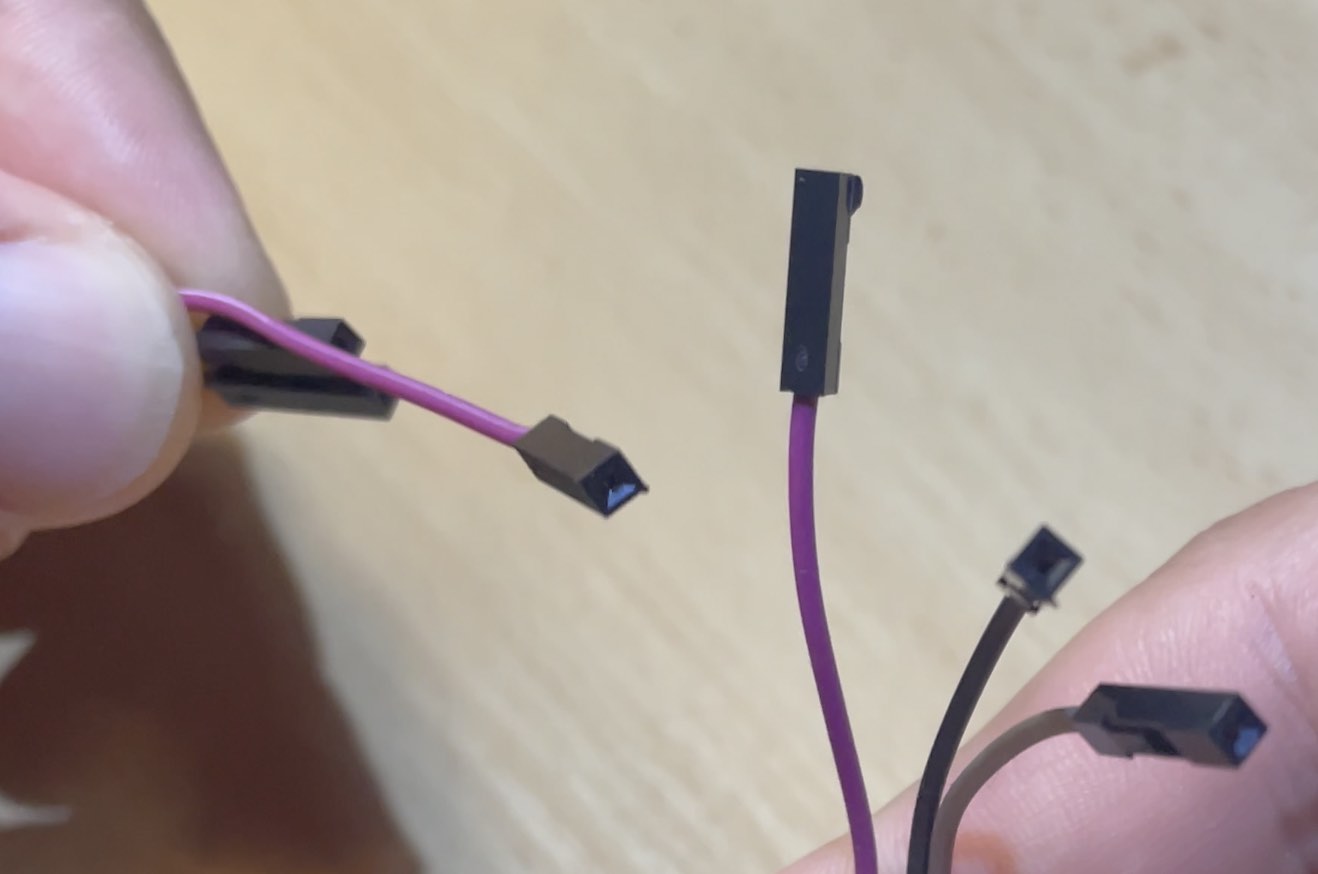
Jumper (Dupont) wires
To connect the D1 Mini to the PIR sensor you will need three wires. The best will be to use dedicated for that wires called jumper or Dupont wires. They are coming in different length and endings, but you will need the 10cm female-to-female models.
40pcs 10cm jumper (Dupont) wires – https://s.click.aliexpress.com/e/_A3YiR3
USB cable
Finally, you will need one USB type-A (regular USB) to microUSB cable. If you have an old phone charger grab the cable from there and tell you spouse that she lost it somewhere
If you don’t have such cable and/or adapter you can use the links below:
- USB to microUSB Cable – https://s.click.aliexpress.com/e/_9QW1Wv
- USB Plug Adapter 1A – https://s.click.aliexpress.com/e/_9xdSIH
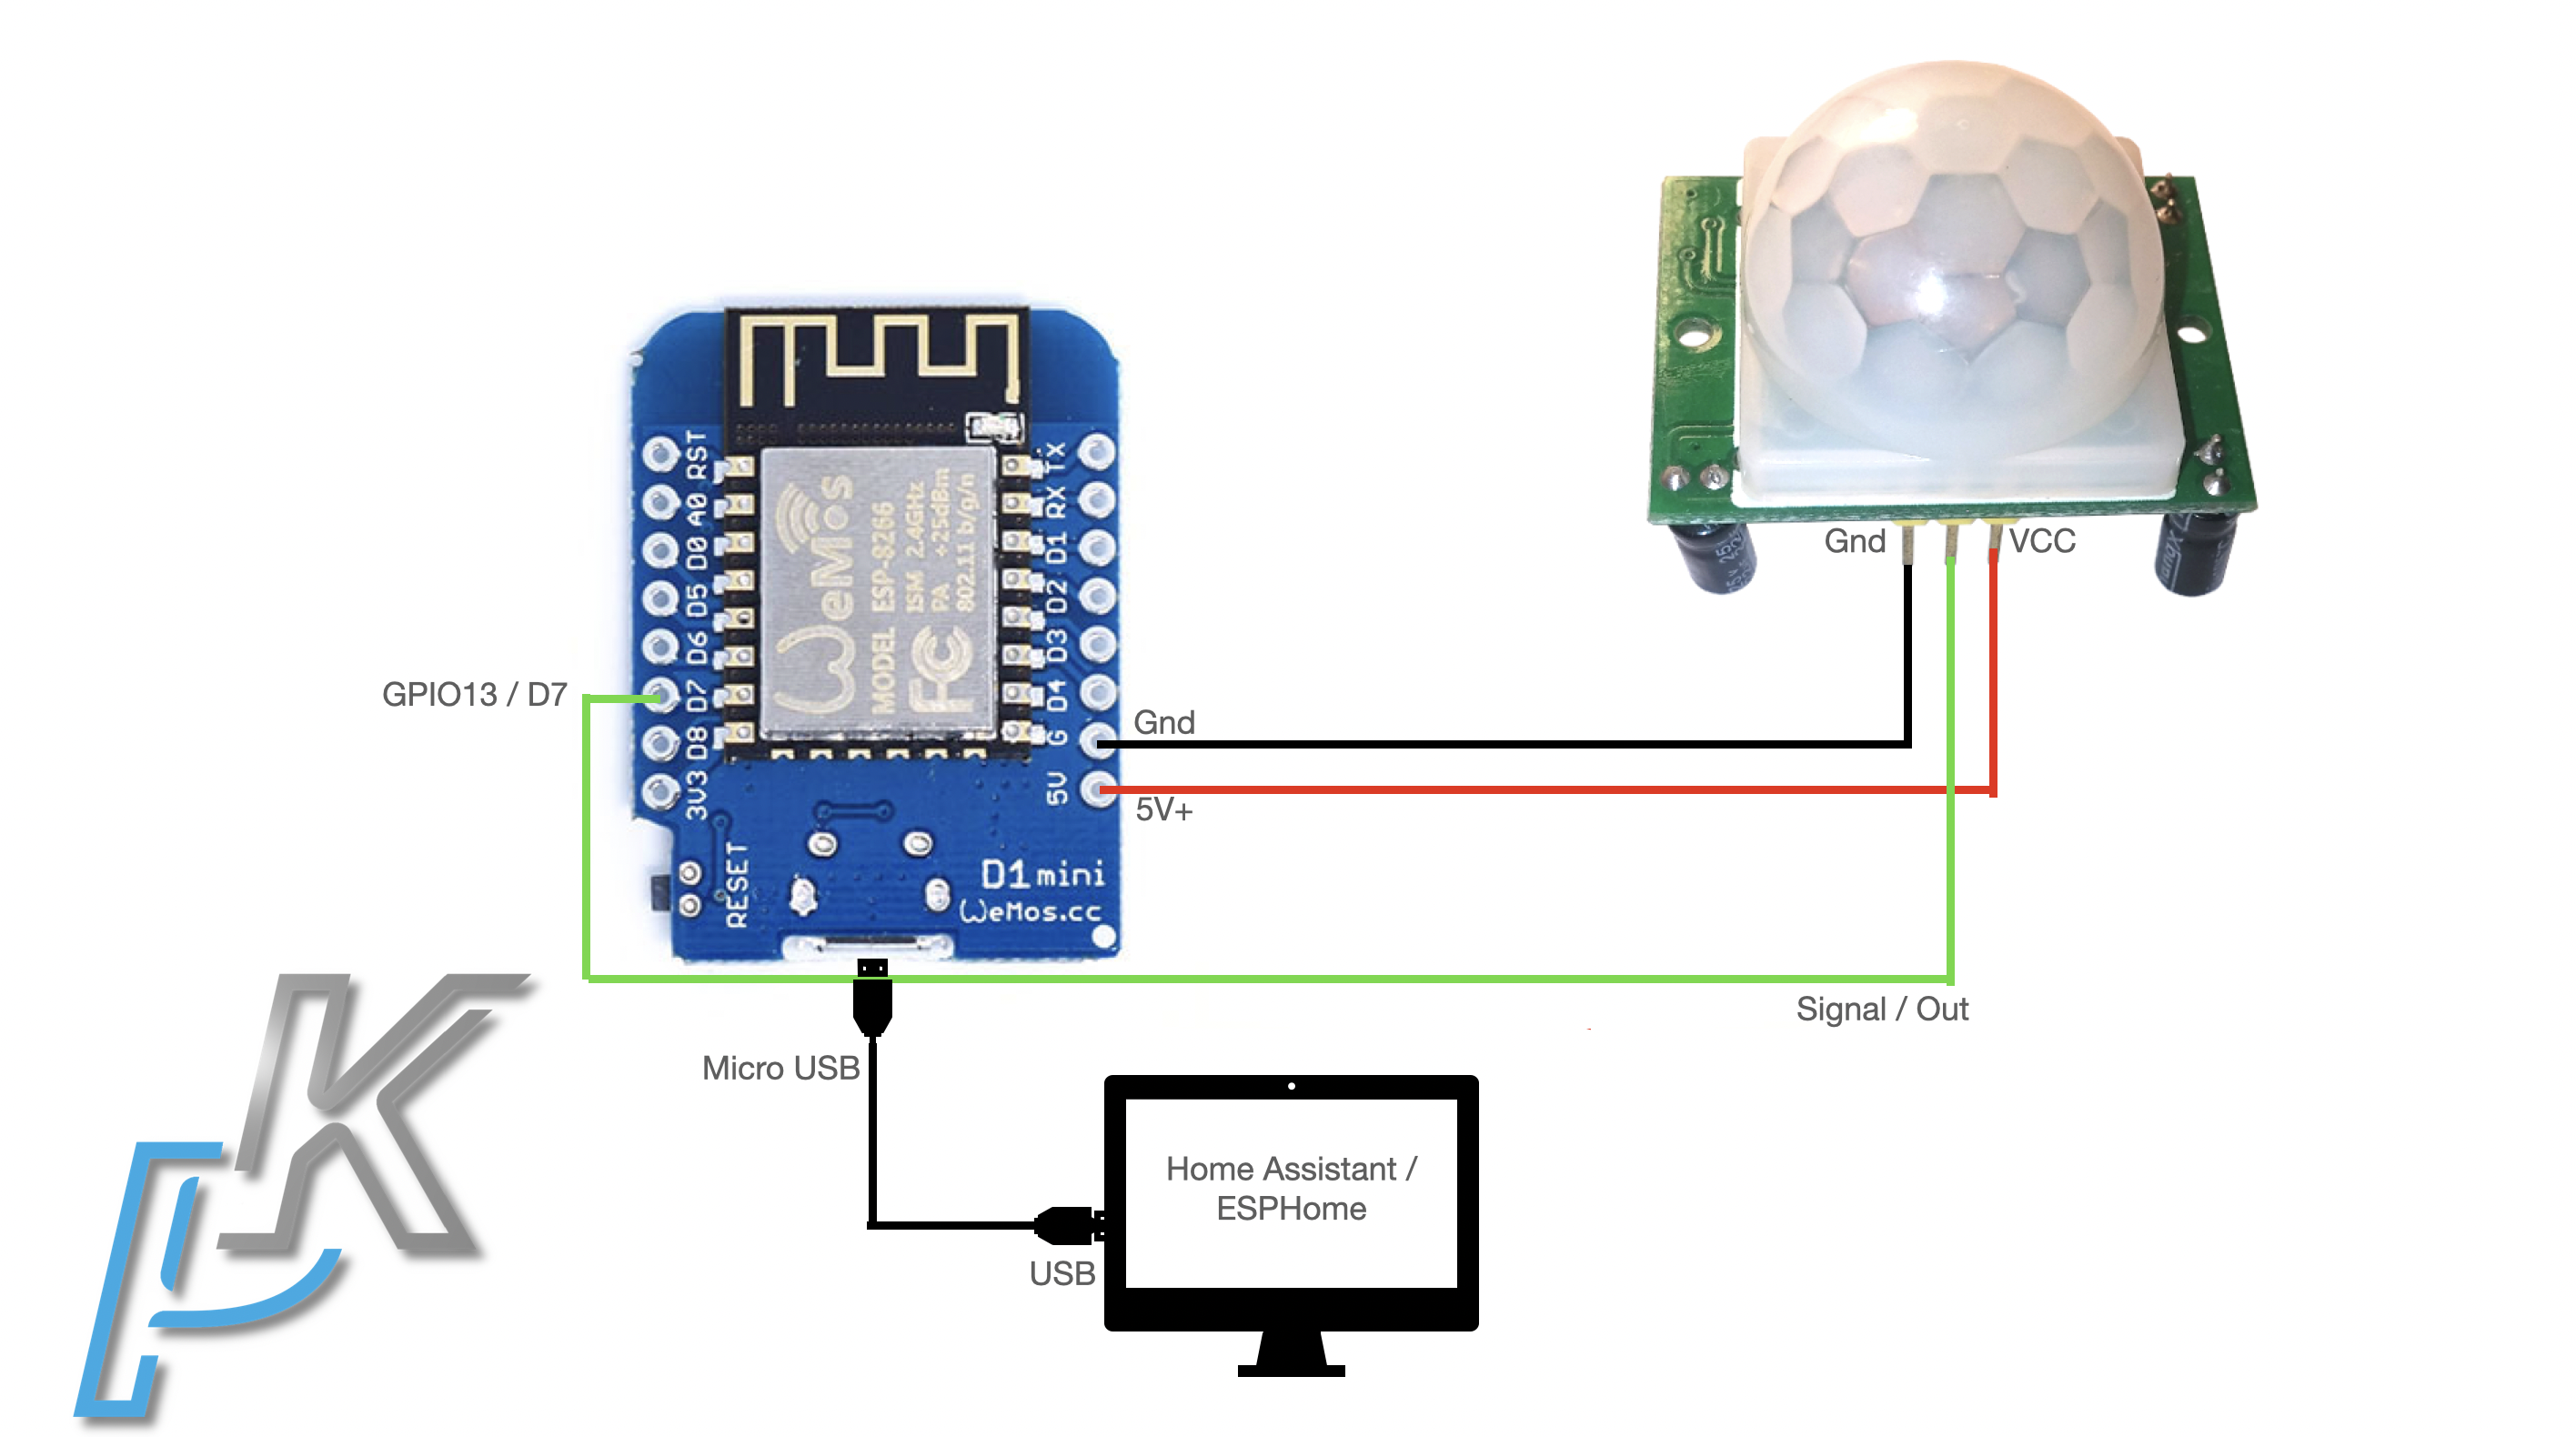
Connecting D1 Mini and PIR sensor
Some PIR sensors have the GND and power supply pins swapped, so please open the plastic dome to see the pin mapping of your PIR sensor. Check that first and then you need to connect GND pin on the PIR Sensor to the GND pin on your D1 Mini board and VCC to a 5V on the D1 Mini. Next you need to connect the PIR Sensor signal pin (OUT) to GPIO13 or D7 as it is written on the D1 Mini.
That was it. Now you need an USB cable and Home Assistant and few more minutes to finish everything (If you don’t have Home Assistant check my article about it – LINK.
Install ESPHome as Home Assistant add-on
Time to install ESPHome as Home Assistant add-on which is pretty easy, but not as easy as subscribing to my YouTube channel and hitting the notification bell (link to my YouTube channel), nevertheless let’s see it.
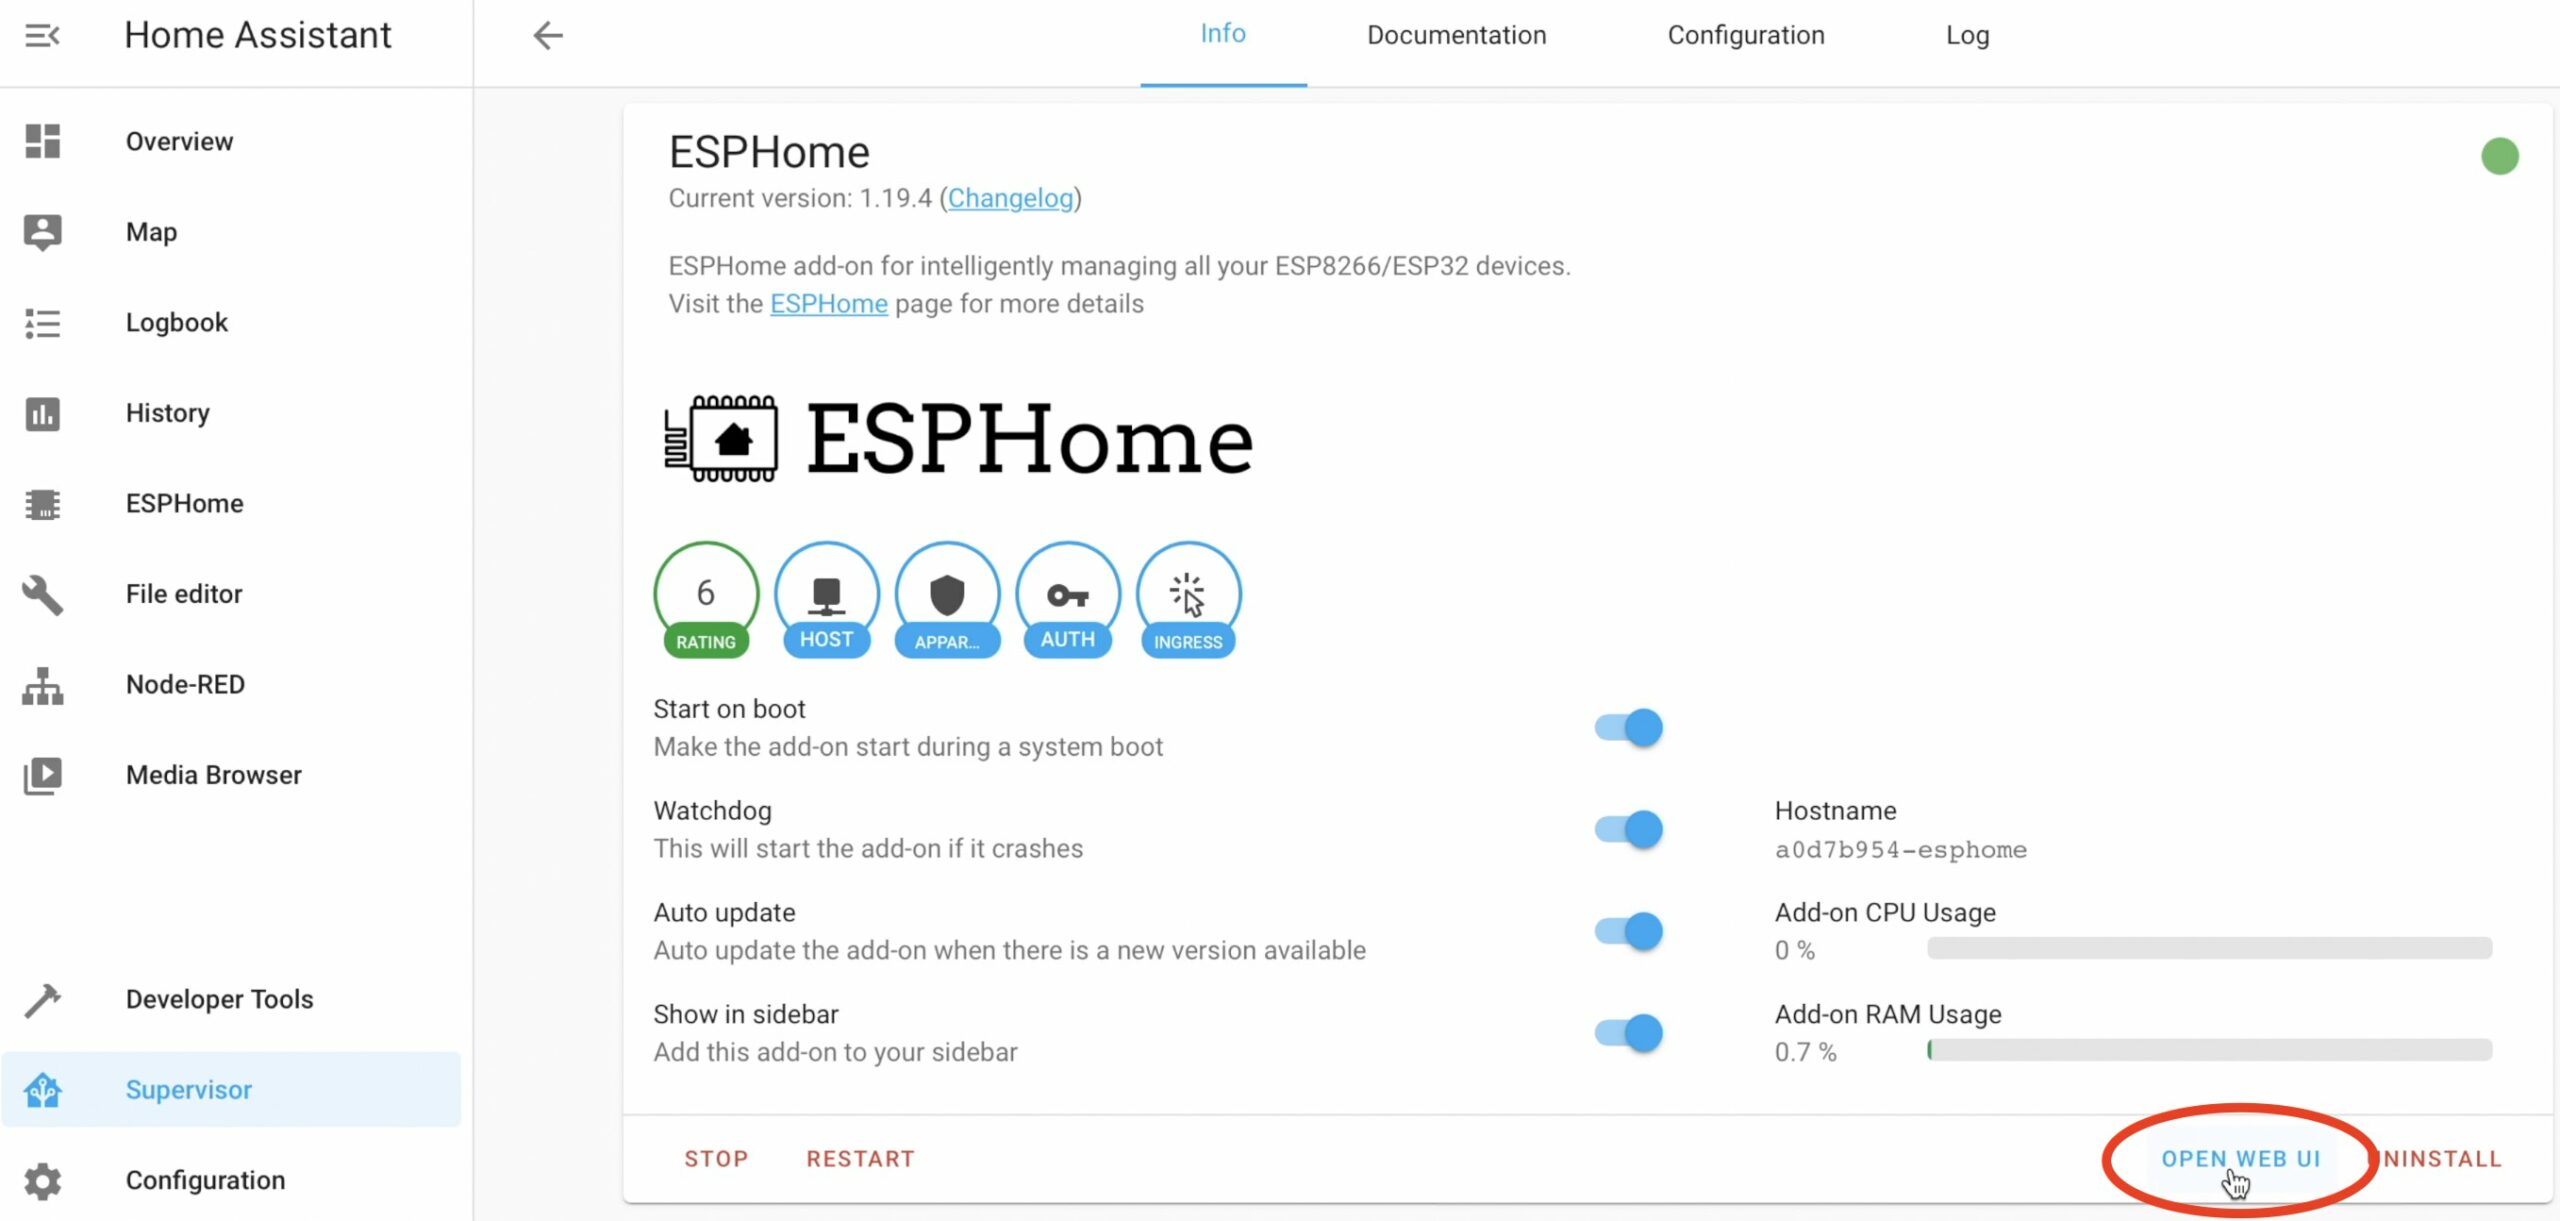
- Open your Home Assistant.
- Go to Supervisor > Add-On Store > Search for ESPHome and click on the result> Click Install button.
- After the installation has finished, click on the Start button and the Open Web UI button.
Editing the ESPHome configuration
We are almost ready with the ESPHome, we just have to edit the ESPHome configuration a little bit and to install the ESPhome firmware on the D1 Mini. Here is how.
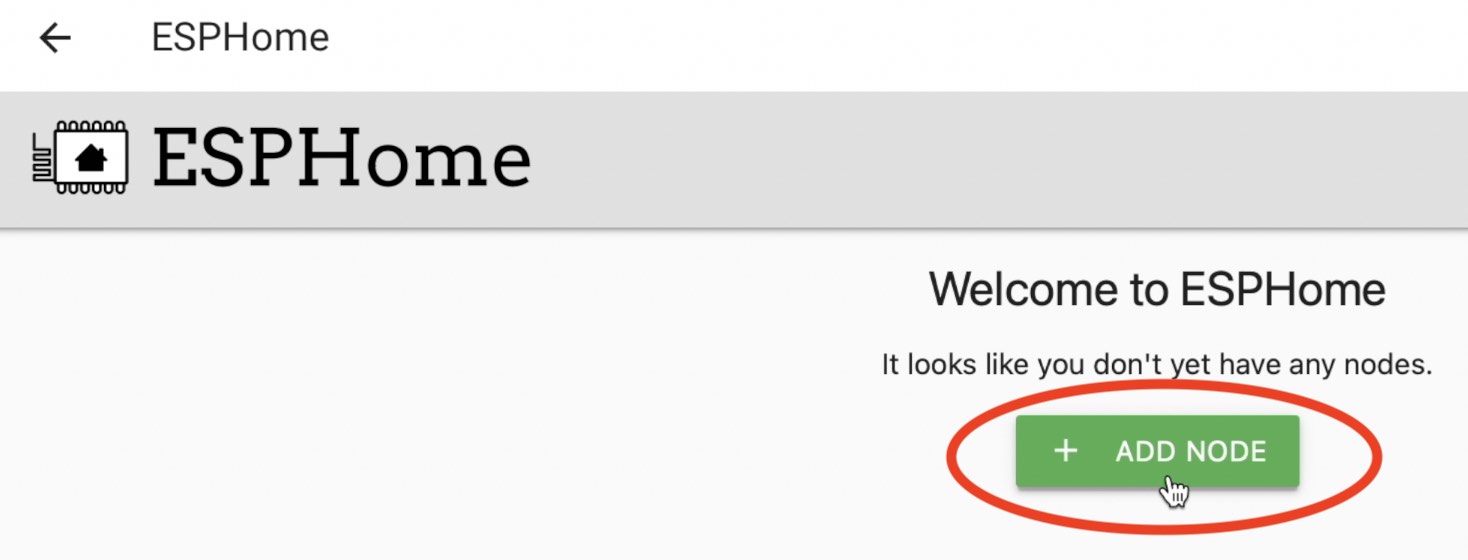
Click on Add Node button inside the ESPHome UI
A new dialog will be shown where you can a type a name (like pir-sensor-1) and your Wi-Fi SSID and password.
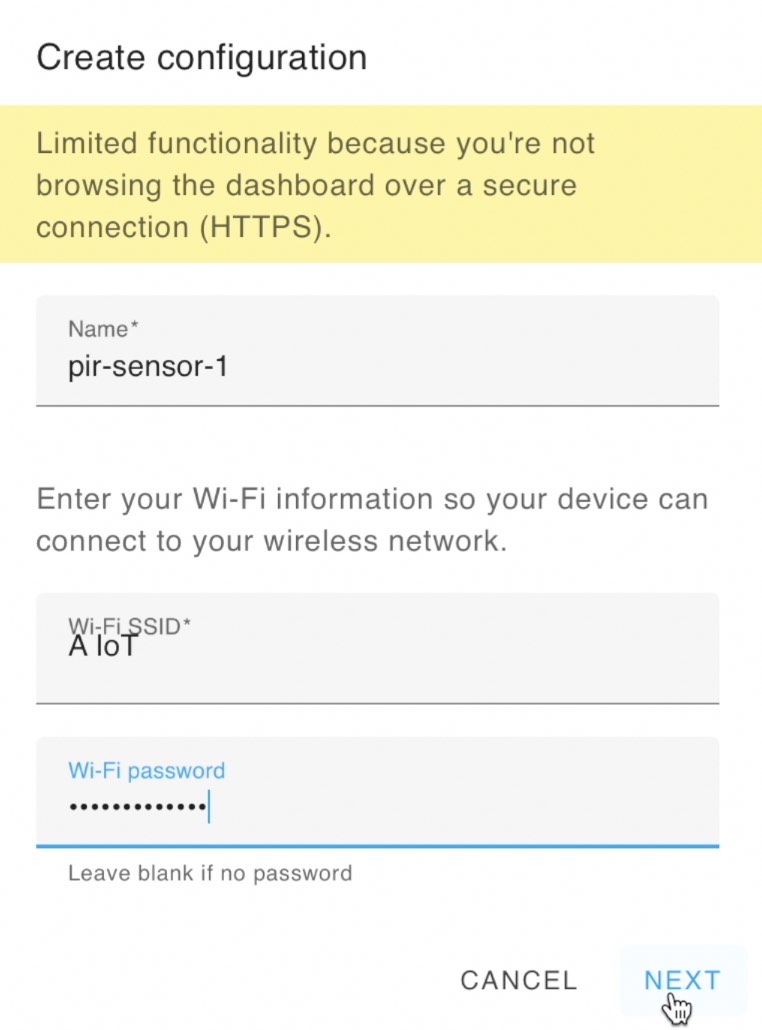
Click Next button when you are ready!
On the next dialog you should select your ESP board. Click on Pick specific board and from the dropdown list select the Wemos D1 and Wemos D1 Mini option, then click Next button.
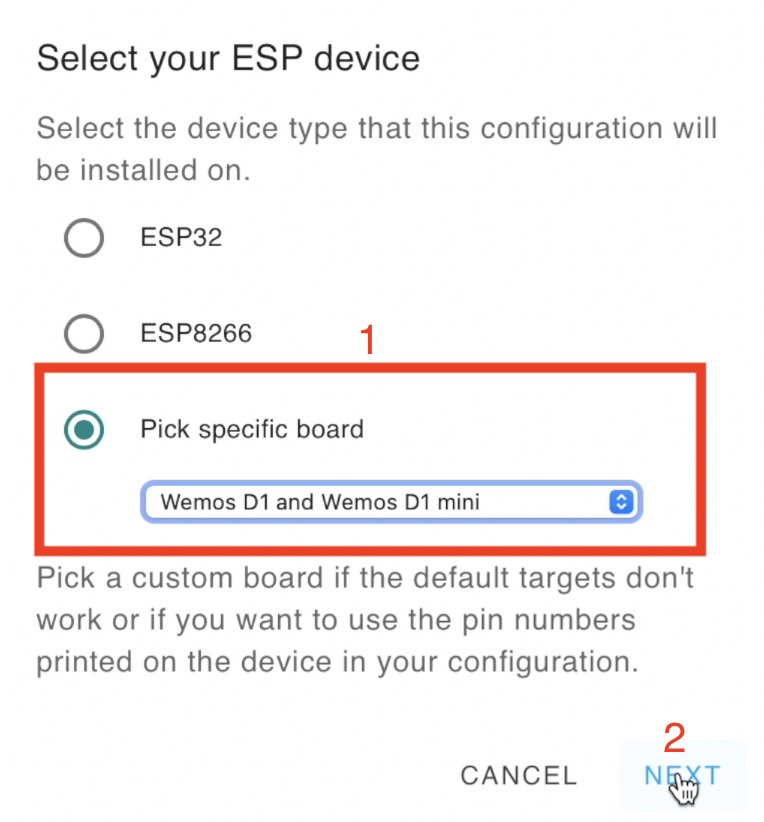
TIP!: If your board is not D1 Mini check the ESPHome website to see what exactly to select here.
Click on the Edit button under the newly created ESPHome node and paste the following code under the captive_portal section:
binary_sensor:
  - platform: gpio
    pin: 13
    name: "PIR Sensor"
    device_class: motion
These instructions are coming from the official ESPhome webpage and the only thing that you have to modify here is the pin section where you should type 13. This is because we connect the PIR Sensor to GPIO13 (D7) on the D1 Mini.
Save the changes and close this window. We are now ready to install ESPHome on the D1 Mini.
Install ESPHome on the D1 Mini
After we edited the ESPHome configuration it is time to install the ESPHome on the D1 mini. Here is how:
- Connect your D1 Mini (our future DIY Motion Sensor) to one of the USB port of your device where Home Assistant and ESPHome are installed.
- Click on Validate button to check if everything is fine with the configuration and then click on the Install button to install the ESPHome on the D1 mini.
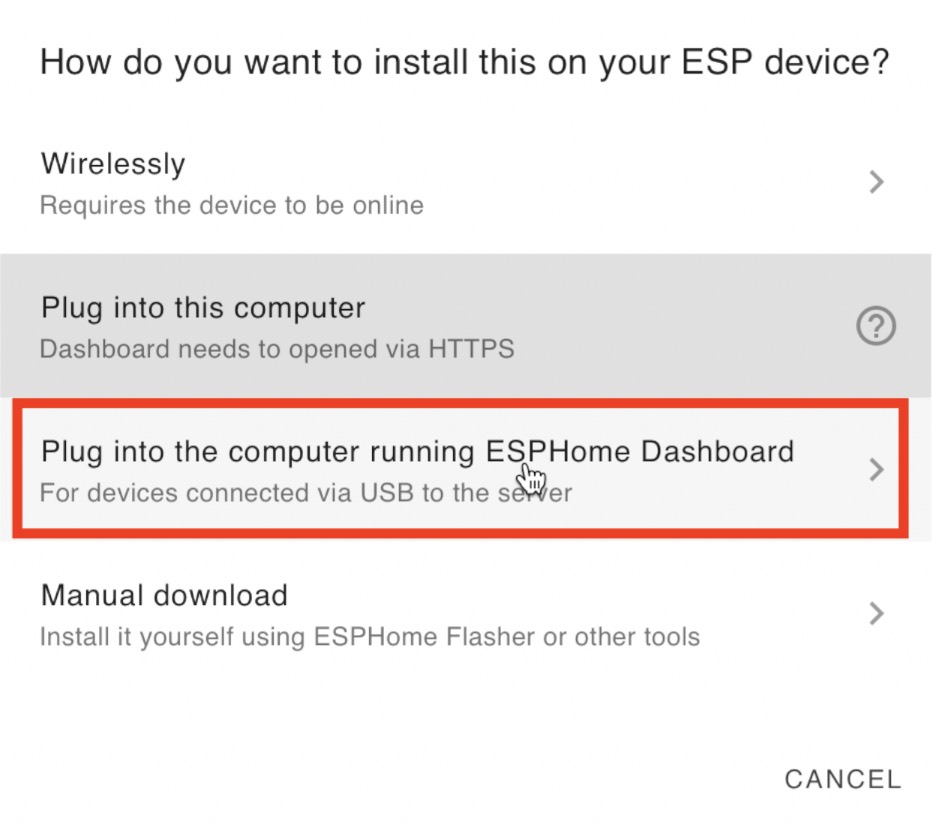
- From the next dialog select the option named – Plug into the computer where running ESPHome Dashboard then pick the port where D1 Mini is connected (usually there is only one option here).
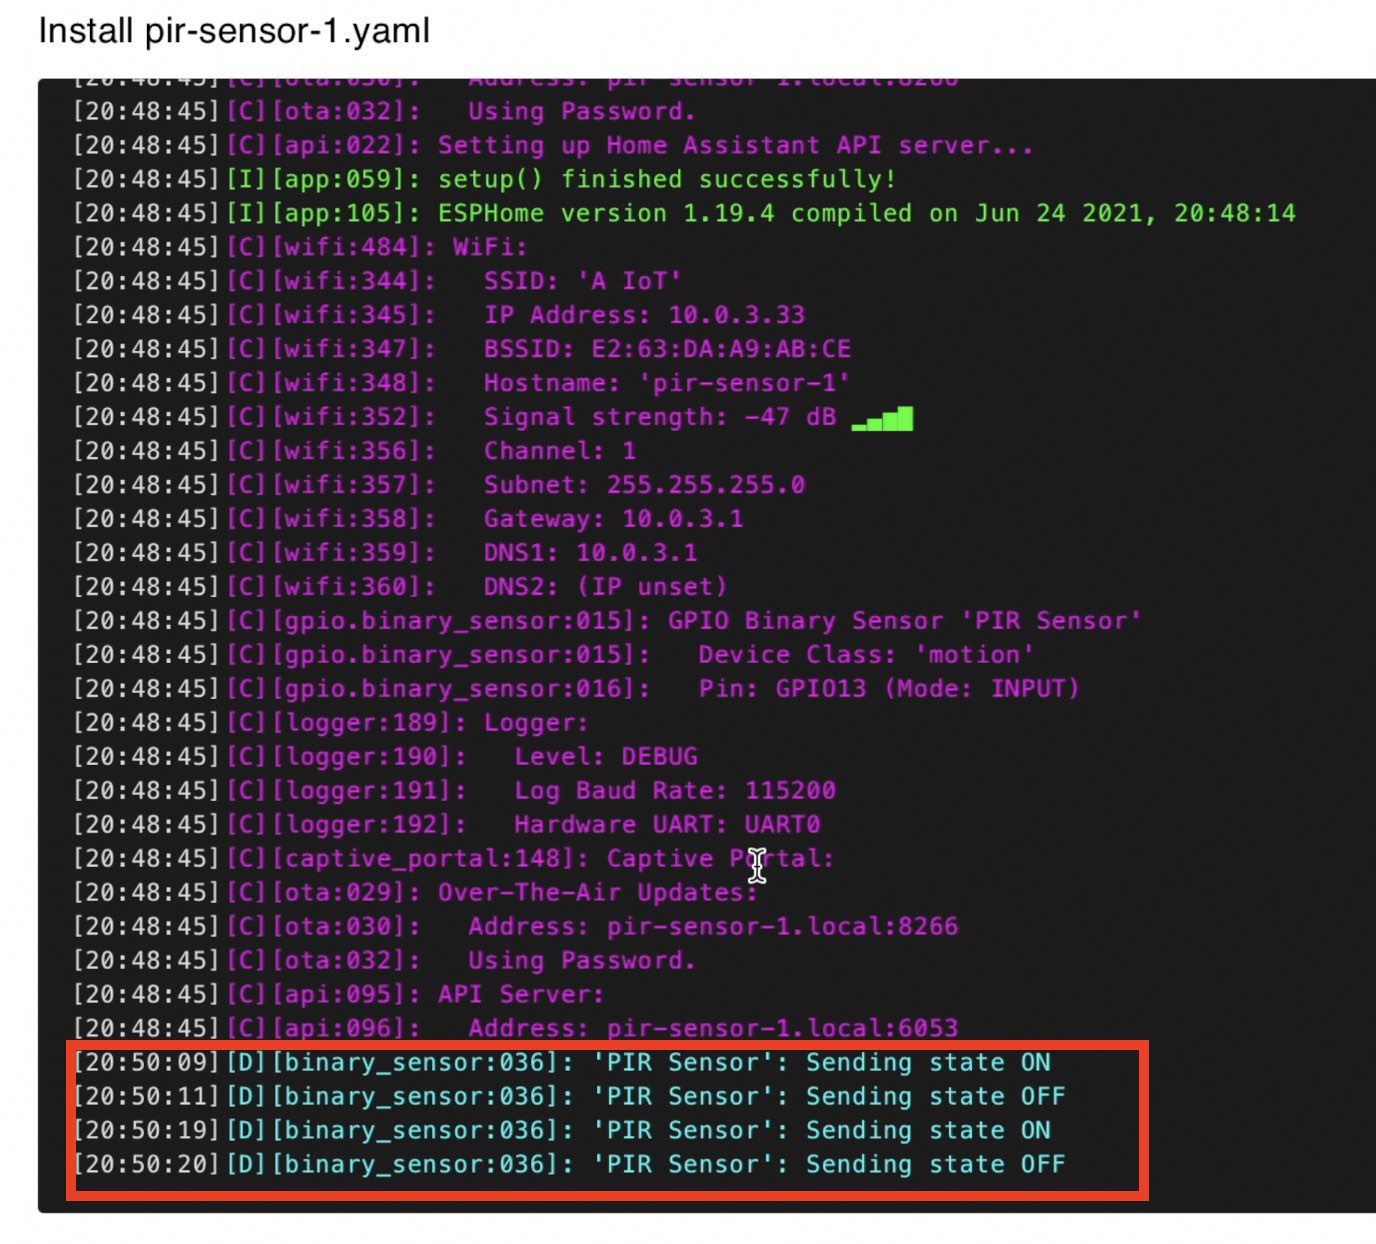
- Wait for the ESPHome installation to finish and if you are having similar screen like the one below – everything is great and you have working DIY Motion Sensor now.
TIP!: Alternatively you can try to use ESP Web Tools (More info can be found in my ESP Web Tools article), but this method require secure connection to your system via HTTPS protocol to work.
We are complete with the hardware part and the EPSHome part. The things that are left is to add our DIY Motion Sensor to Home Assistant and then to create some automations. Let’s do this.
Add the DIY Motion sensor to Home Assistant
When you do all of the steps from above it is very likely the Home Assistant will automatically detect your new device, our brand new DIY Motion Sensor. You can tell that if you see a little notification in the lower left corner of your screen.

Then do the following:
- Click on the notification, and then on Check it out link to see the newly found device.
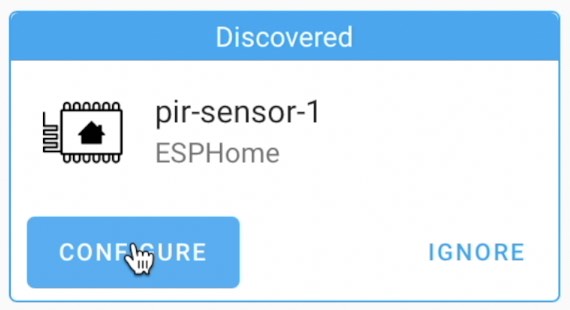
- Locate your new device that has been discovered within your Home Assistant integrations.
- Click on the Configure button > Submit > Finish.
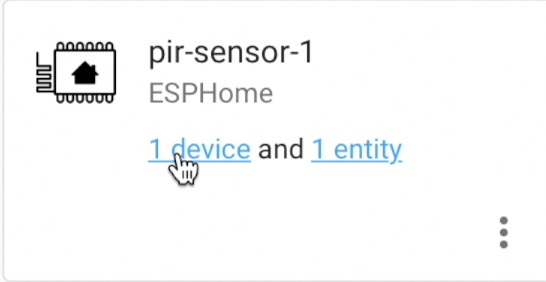
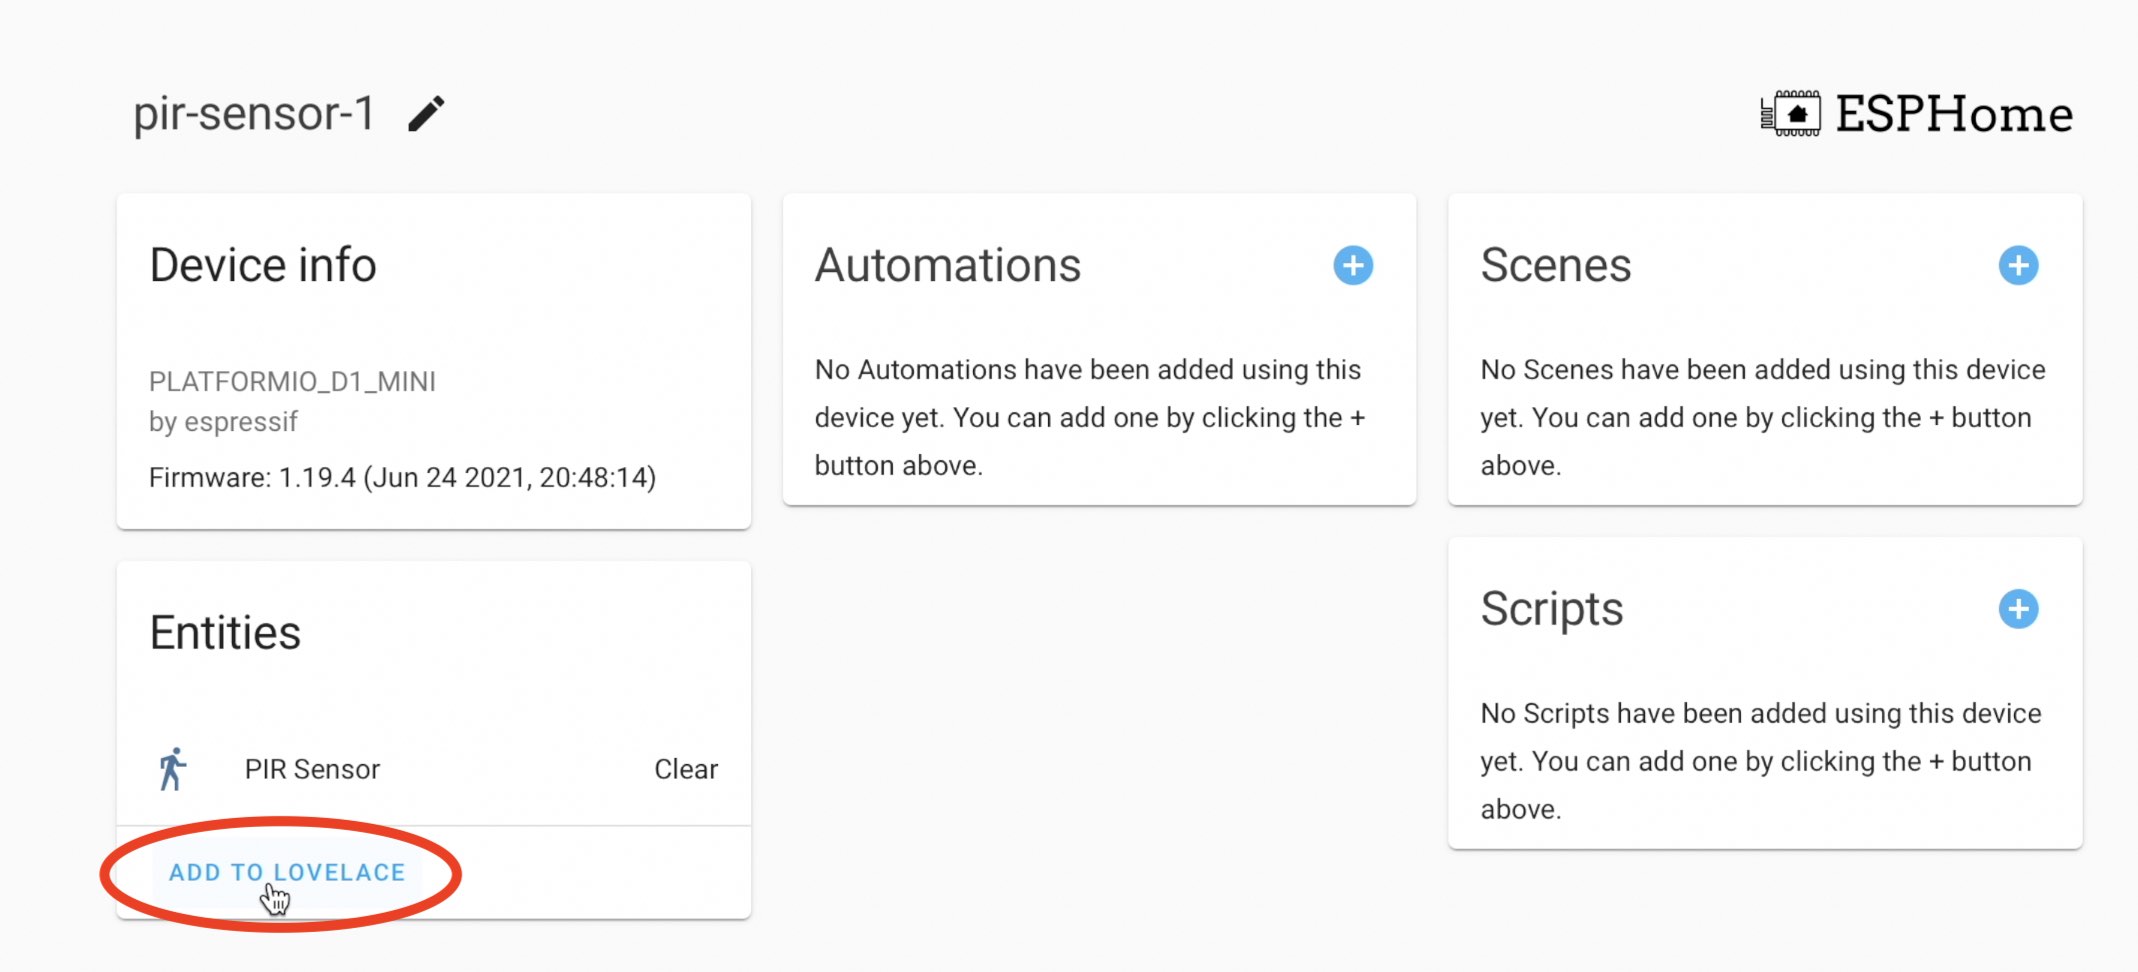
Now you can add the DIY Motion sensor to the Home Assistant Lovelace / Dashboard by click on 1 device link under the already configured device.
Then you just have to click on the Add to Lovelace button. And you will have the DIY Motion Sensor in Home Assistant. Ready to be used and abused
How to make Home Assistant automation with the DIY Motion Sensor?
Time to make a simple yet effective automation which will be the following: when the motion sensor is activated turn a light on.
Before that I have a challenge for you. If you reach this point and your PIR DIY Motion sensor is working at the moment – let me know in the comments by just type: #PIRowned. That will make me as happy as you are.
Now let’s finish this Home Assistant automation.
You can follow the GUI instructions as seen in my video (from time 09:02) or you can edit your automations.yaml file and paste the following YAML inside:
# automations.yaml entry
alias: When PIR motion sensor is activated
description: ''
trigger:
  - platform: state
    entity_id: binary_sensor.pir_sensor
    to: 'on'
condition: []
action:
  - service: light.turn_on
    target:
      entity_id: light.shellybulbduo_8caab5616d5c
mode: single
Make sure that you change the entity_id: binary_sensor.pir_sensor with your sensor name and entity_id: light.shellybulbduo_8caab5616d5c with your light.
Reload your automations from Configuration > Server Controls and you are ready to test the automation. Just move your hand in front of the sensor and your light should automatically turn on
Outro
For around $4 US dollars and several minutes of our life we made a Smart Motion Sensor that can be used in Home Assistant automations to make our Home Smarter. The only thing that is missing is to subscribe to my YT channel if you haven’t done that already as well as 3D printed case for our DIY Motion Sensor.
Here is a link to some 3D printed cases that I found online. I didn’t try them, but you may like something from there. If you manage to make a 3D printed case by yourself let me know in the comments and I promise to add a link to it in the YouTube video description and here on my website.
Feel free to secure this website and channel existence by becoming one of my Patreons or by using any of the other methods listed in this section of my site.
Stay safe and don’t forget Home Smart, but not hard
Thank you for reading and I will see you next Wednesday!
Hello,
thanks for the very interesting contribution to the
DIY motion sensor.
What kind of housing did you use and how did you solve the power supply?
Many thanks and greetings
Juergen
Hi Juergen, I’m looking for a good 3d printed case (but not so hard). Meanwhile I’m using the plastic part of a big kinder surprise egg to power the sensor I’m using regular USB adapter 1A or 2A can’t remember exactly.
How do you power the snsor? using ESPHome, it seems that a battery powered sensor would run out of battery very quickly (few hours, maybe a day)…
I’m powering it using an USB adapter, I don’t know how batteries can be added efficiently
Much appreciated. I spent a good amount of time researching until I found your blog. Thank you! #PIRowned
Welcome on board Adrian! Enjoy your Cheap DIY Motion sensor!
Hi, do you know how to install this sensor on Home Assistant running as virtual machine on Synology NAS drive? Validation went fine, but Install is giving a message “No serial devices found. ” Is it not recognized by NAS? I used the same USB port to run bluetooth dongle and it was recognized by Home assistant, so I know USB is working.
#PIRowned
Thanks for your great articles. They’ve introduced me to this cool new world of ESPHome which, honestly, is pretty hard to understand if you just try to use their website. So far I’ve built this and the mmWave sensor.
Congratulations and welcome to the club! Thanks for the efforts and for the good words about my articles 🙂 Also don’t forget to check my other DIY Smart Sensor articles as I have plenty of them…
HI Thank you for the great video, it was really helpful to understand and getting into HA.
But I’am getting error message in binary_sensor:
can you pls help out.
thanks
#PIRowned
Congrats and welcome to the club! Also Don’t forget to check my other DIY tutorials as well…