The LD2410 human presence sensor is a remarkable device that offers exceptional sensitivity, capable of detecting even the slightest human movement. It works natively with Home Assistant over Bluetooth, but connected that way it have some drawbacks.
Table of Contents
LD2410 Human Presence Sensor Bluetooth Limitations
The LD2410 is affordable, priced at under $4 dollars, and its user-friendly nature make it an ideal choice for creating effective presence-based home automation setups.
In this guide, we will explore a clever solution to overcome potential Bluetooth coverage limitations using an ESP32 board as an intermediary. By utilizing the ESP32’s WiFi capabilities, we can extend the wireless coverage while preserving the benefits of the LD2410 sensor.
Hardware Requirements:
To embark on this DIY project, gather the following hardware components:
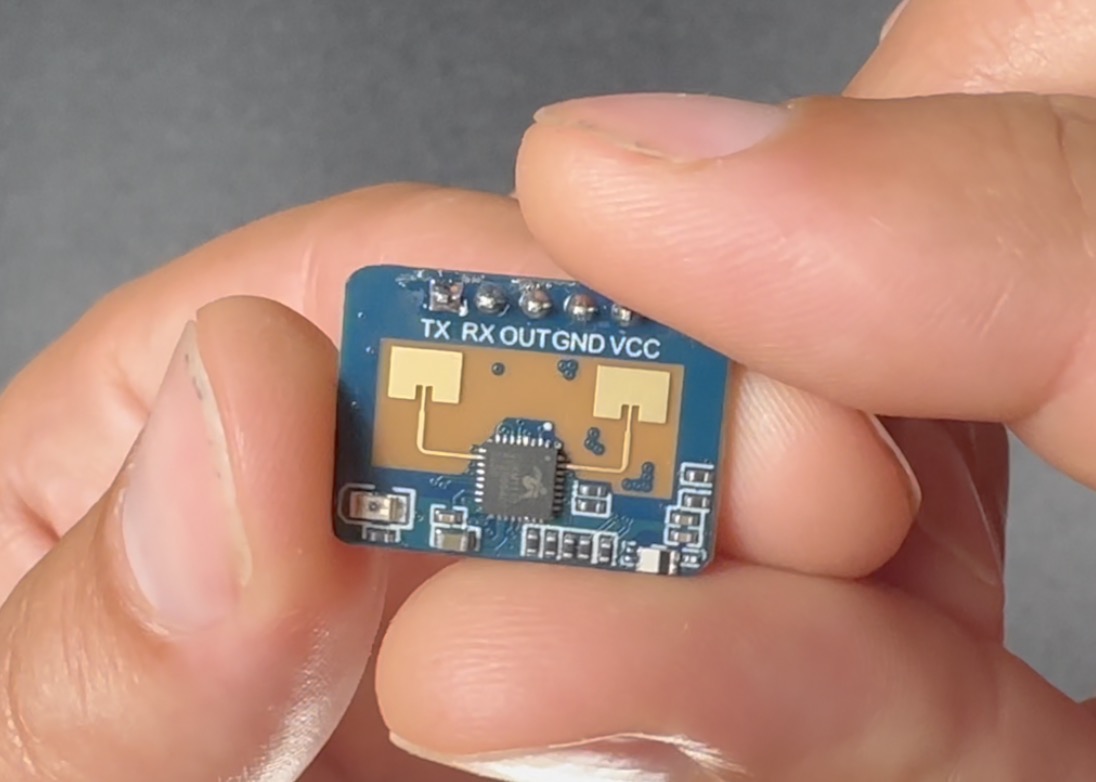
- At least one LD2410 sensor (Bluetooth is not a must)
- An ESP32 or ESP8266 board, such as the D1 Mini ESP32 or similar
- A data Micro USB cable for powering the D1 Mini and uploading ESPHome software
- Jumper / Dupont wires for connections (optionally a breadboard)
- Soldering iron and tin wire (if needed)
Here are some affiliate links from where you can buy everything that is needed for this DIY project:
- LD2410B (Amazon) – https://amzn.to/43AwPb9
- LD2410B (AliExpress) – https://s.click.aliexpress.com/e/_DFFkfSx
- LD2410C (Amazon) – https://amzn.to/42cDcAe
- LD2410C (AliExpress) – https://s.click.aliexpress.com/e/_DeeEUiv
- D1 Mini ESP32 (AliExpress)- https://s.click.aliexpress.com/e/_9R1Z6b
- D1 Mini ESP32 (Amazon) – https://amzn.to/3s8wrms
- Micro USB Cable (AliExpress) – https://s.click.aliexpress.com/e/_DmMNO6L
- Micro USB cable (Amazon) – https://amzn.to/32tdxdF
- Jumper Wires (AliExpress) – https://s.click.aliexpress.com/e/_Aluq3z https://s.click.aliexpress.com/e/_A3YiR3
- Jumper Wires (Amazon) – https://amzn.to/3fRlXyK
- (Optional) USB adapter EU US UK (AliExpress) – https://s.click.aliexpress.com/e/_DkiYZ3H
- (Optional) USB adapter (Amazon) – https://amzn.to/3u2Tdvj https://amzn.to/3qXkJYS
- (Optional) Soldering Iron (Amazon) – https://amzn.to/3l8IGfn
- (Optional) Soldering Iron (AliExpress) – https://s.click.aliexpress.com/e/_Desufz9
Software Requirements:
Ensure you have the following software tools:
- Home Assistant with Add-on store. That is our central home automation hub
- ESPHome Dashboard for installing and managing ESPHome devices
What if you don’t have Add-on store or Home Assistant?
To learn more about Home Assistant official installation types, add-on store, their pros & cons + 1 super simple way to get started on a PC -feel free to join my Webinar where I’ll talk exactly about that.
The Webinar is free and you can reserve your seat right now from my other website https://automatelike.pro/webinar.
Wiring Setup:
Here’s how to connect the components:
- Connect LD2410 VCC pin to D1 Mini ESP32 VCC pin
- Connect LD2410 GND pin to D1 Mini ESP32 GND pin
- Connect LD2410 RX pin to D1 Mini ESP32 TX pin
- Connect LD2410 TX pin to D1 Mini ESP32 RX pin
Below you can find the same thing, but in more visual way
ESP32                 LD2410
5V ------------------ VCC
GND ----------------- GND
RX ------------------- Uart-Tx
TX ------------------- Uart-Rx
Even more visual here is the final result. The resulting connection looks like this:

Initial Configuration:
- Connect the D1 Mini using a Micro USB cable to your Home Assistant and ESPHome setup for initial ESPHome installation.
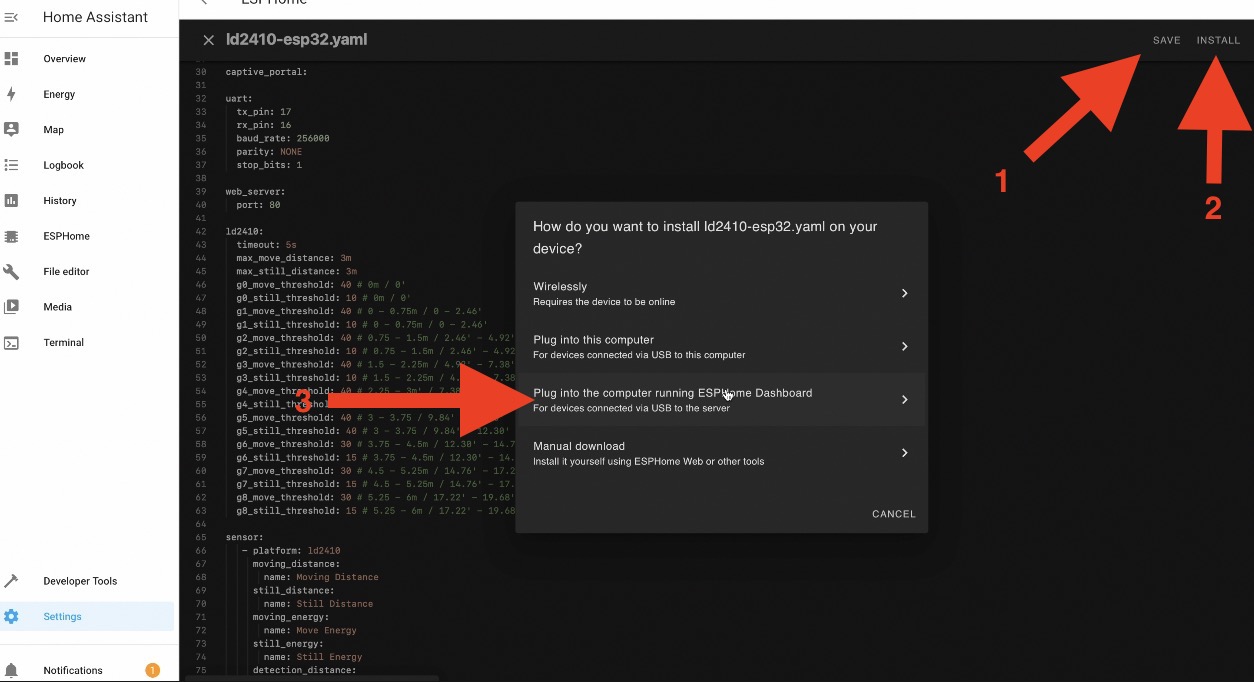
- Create a new ESPHome device in ESPHome Dashboard.
- Paste the provided ESPHome configuration YAML code into the device configuration – LINK
- Save and install the configuration to the device.
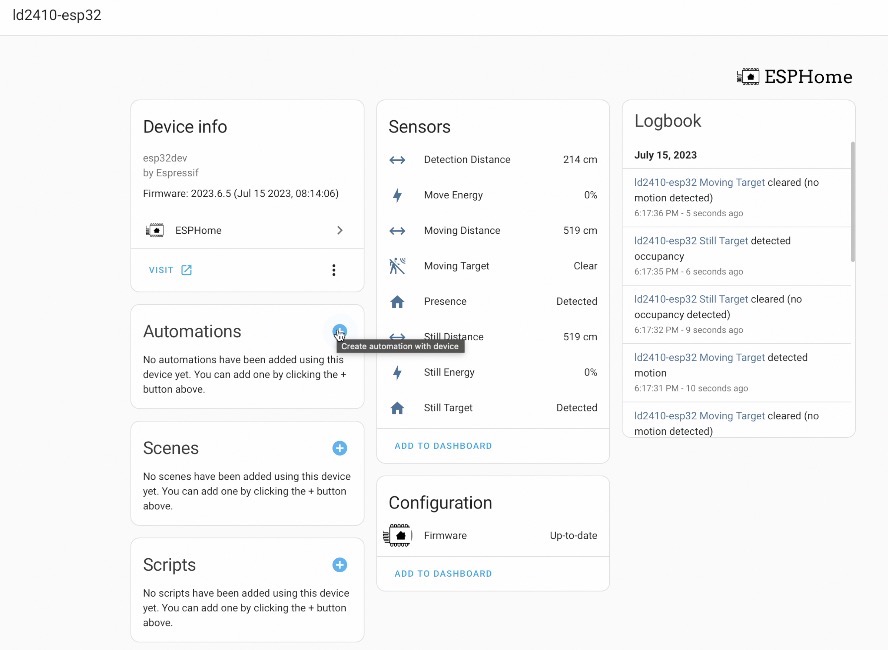
LD2410 & ESP32 Home Assistant Setup:
- Once the device is installed and operational, you can move the D1 Mini 32 and LD2410 sensor to your desired locations, as long as they have USB power and WiFi coverage – they will work!
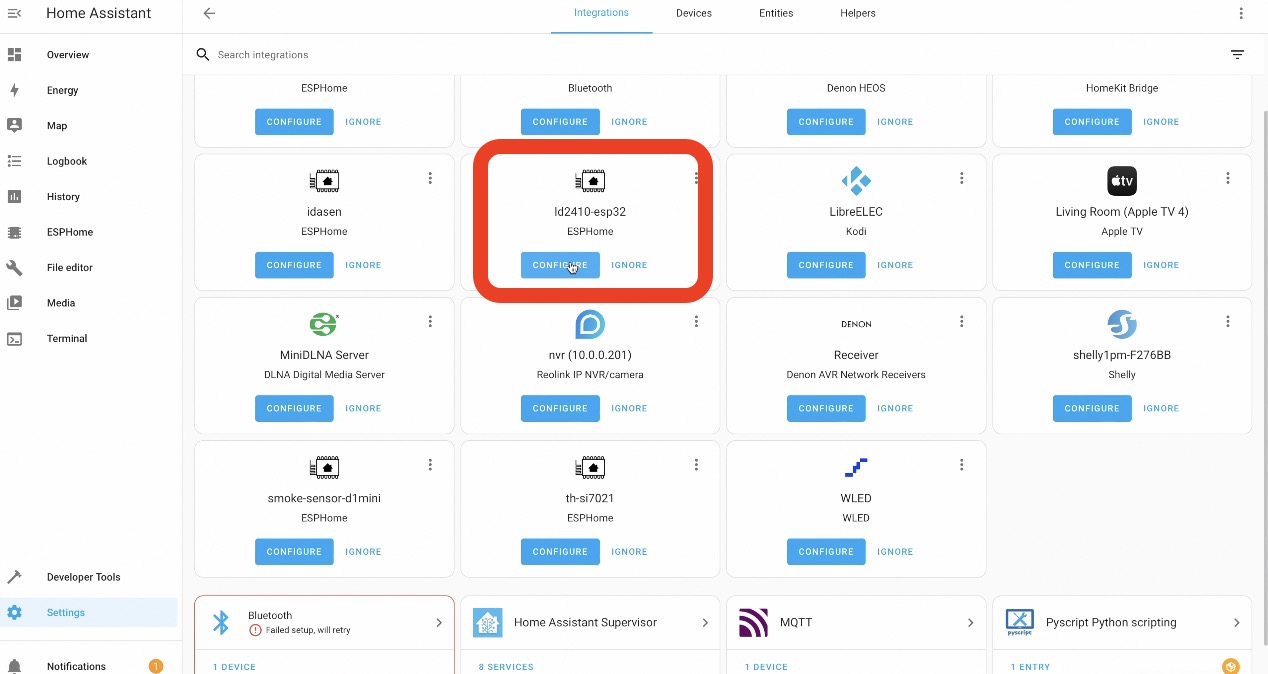
- In Home Assistant Integrations section, the LD2410 sensor should be auto-discovered and ready for use.
- You cn create custom home automations based on presence detection. For example, you can automatically turn on lights when human presence is detected.
What if you want to try LD2410 over Bluetooth?
If you want to ditch the ESP32 board and to use only the LD2410 over Bluetooth in your Home Assistant – no worries. Just check any of my previous articles:
- How to detect human presence with LD2410B sensor and Home Assistant
- Smart Presence Sensor with LD2410 – Cheap and Easy solution
Conclusion:
By leveraging the LD2410 human presence sensor’s sensitivity and combining it with the ESP32’s WiFi capabilities, you can create powerful and flexible home automation solutions. This DIY project offers an affordable way to overcome Bluetooth coverage limitations, extending your home automation possibilities.
Feel free to share your ideas and experiences in the comments section, contributing to a vibrant community of creative home automation enthusiasts.
For simple, but useful explanations of the most common Smart Home words and Acronym download this free Smart Home Glossary available as a PDF file – https://automatelike.pro/glossary
Stay tuned for more exciting projects!
I’m Kiril, and I look forward to seeing you in the next one. Goodbye!
hi.
i m getting that error while compiling
The ‘timeout’ option has been moved to the ‘timeout’ number component
You can get the new ESPHome code from the same link in the article. Can you please try again now and let me know what is the result?
new code works great. thx a lot.
Hi Kiril,
I have been trying this code for two days now, i tried pasting the code, i noticed that your code is for a d1 mini. So i pasted from logger and kept my initial lines for the esp8266 and board esp01_1m. I get an error after install saying:
Failed config
i2c: [source /config/esphome/ld.yaml:42]
–
ESP8266: Invalid pin number: 21.
sda: 21
ESP8266: Invalid pin number: 22.
scl: 22
scan: True
id: bus_a
Me too..
I will try to update the code later today!
You can get the new ESPHome code from the same link in the article. Can you please try again now and let me know what is the result?
Getting this error now:
Remote branch ld2410 not found in upstream origin. source: github://regevbr/esphome@ld2410 components: – ld2410
I tried the latest code (Aug 24) and it doesnt work.
I will fix the code these days, sorry for that but I’m preparing new videos & articles and I’m super busy ATM
Hi Kiril,
The LD2410 boards have arrived, I tried to build one with an ESP8266/ESP32 board. Is it normal that the LD2410 board becomes really hot?
Also, the config YAML does not work! The “api:” is present twice in the config. If I fixed it I got the same error as John. Could you please try and fix it!
Thanks a lot!
I will fix the code these days, sorry for that but I’m preparing new videos & articles and I’m super busy ATM
The code should be fixed now. I tested it and it worked fine 🙂
Hi Kiril,
I’ve installed the ESP like the manual above but for some reason my sensors all display unknown. Tried to do the install all over but it will not show any data. All installation went well but I can;t figure out the problem
same issue here tried d1mini, esps3 and two different LD210B sensors but still no data.
Any chance someone can provide the proper yaml file for an ESP32C3? scl pin number is too high – only 21 pins and I’m not sure what the i2c section represents. Also should note that the yaml file needs modified to match your installation’s parameters (secret/OTA update password/SSID/etc).
Works flawlessly ! amazing actually. Thank you very much for these clear explanations. Any chance to propose or recommend a suitable enclosure for such two boards ? or even a 3-D printer file ?
try an ikea pm2.5 dust sensor as enclosure. It all will fit perfectly and you get the sensor extra. there Kiril has an excellent video about that. https://www.youtube.com/watch?v=BQ222qzYUqw&t=1s
Thanks for the reply and link @Wilfred 🙂
very nice but my sensors all display unknown. Any healp please
hi Kiril,
great project! I follow your guide and i made the sensor and it work great!! I have a question: if i want to install a Light sensor like BH1750 ( it’s some lines in the yaml) how i need to wiring it? thanks
Hi,
Do you have steps for Home Assistant installs that do not have the addin store? My Home Assistant instance is running on a VM of a dietpi image and i do not have a way to install supervisor or the addin store.
Thanks
I have this information on what I can do with it
INFO ESPHome 2024.4.2
INFO Reading configuration /config/esphome/esphome-test.yaml…
WARNING GPIO2 is a strapping PIN and should only be used for I/O with care.
Attaching external pullup/down resistors to strapping pins can cause unexpected failures.
See https://esphome.io/guides/faq.html#why-am-i-getting-a-warning-about-strapping-pins
INFO Starting log output from ld2410-esp32.local using esphome API
WARNING Can’t connect to ESPHome API for ld2410-esp32.local: Error resolving IP address: [Errno -5] No address associated with hostname (APIConnectionError)
INFO Trying to connect to ld2410-esp32.local in the background