
Is Home Assistant SwitchBot MQTT integration possible? SwitchBot offers a battery powered Motion Sensor and Contact sensors that are working perfectly fine if you also have a SwitchBot Hub Mini.
What if you want to go local and you want to integrate the SwitchBot Motion and SwitchBot Contact sensors over MQTT with Home Assistant or Node-RED for example? Let’s see what will happen!
Table of Contents
What I’m going to do for the Home Assistant SwitchBot MQTT integration?
First of all, I will send one SwitchBot product called SwitchBot Tag to one of you absolutely for free!
More on that later in the article, because now I’m going to use a D1 Mini ESP32 as middle layer between SwitchBot sensors and Home Assistant. The SwitchBot Sensors will communicate with the ESP32 device over Bluetooth Low Energy (BLE), and the ESP32 will communicate with Home Assistant using MQTT.
For which SwitchBot products does this method work?
The method that I will show your works with most of the SwitchBot products (bots, curtains, temperature and humidity meters, contact sensors, and motion sensors), but I will focus more on the SwitchBot Contact and SwitchBot Motion sensors.
Which devices I’m going to use?
The SwitchBot Motion & Contact sensors cost around $25 each, but you better check their current price as SwitchBot is making flash sales very often. Affiliate Links can be found below 👇.
- SwitchBot Flash Deals – https://switchbot.vip/3BwF221
- SwitchBot Motion Sensor – https://switchbot.vip/3aSoNkl
- SwitchBot Contact Sensor – https://switchbot.vip/3AOIJzi
The other part that is needed for todays project is a D1 Mini ESP32. The D1 Mini ESP32 cost around $6 in AliExpress and it supports Bluetooth Low Energy or BLE for short. Exactly the same one as in the SwitchBot Motion & Contact sensors. Again, affiliate links for the D1 Mini ESP32 can be found below 👇.
- D1 Mini ESP32 (AliExpress affiliate link) – https://s.click.aliexpress.com/e/_9R1Z6b
- 3 pack D1 Mini ESP32 (Amazon affiliate link) – https://amzn.to/3DQFObh
On the D1 Mini ESP32 I’m going to upload a firmware that will translate the Bluetooth data coming from the SwitchBot sensors to MQTT. As you may know Home Assistant and many other smart home hubs can work flawlessly with MQTT.
Are SwitchBot devices are going to be changed?
I want to mention that doing this whole procedure (described below) will not change your SwitchBot devices at all and you can continue using them exactly the same way and in parallel with the D1 Mini ESP32 “hack”.
In other words you will get the best from both worlds!
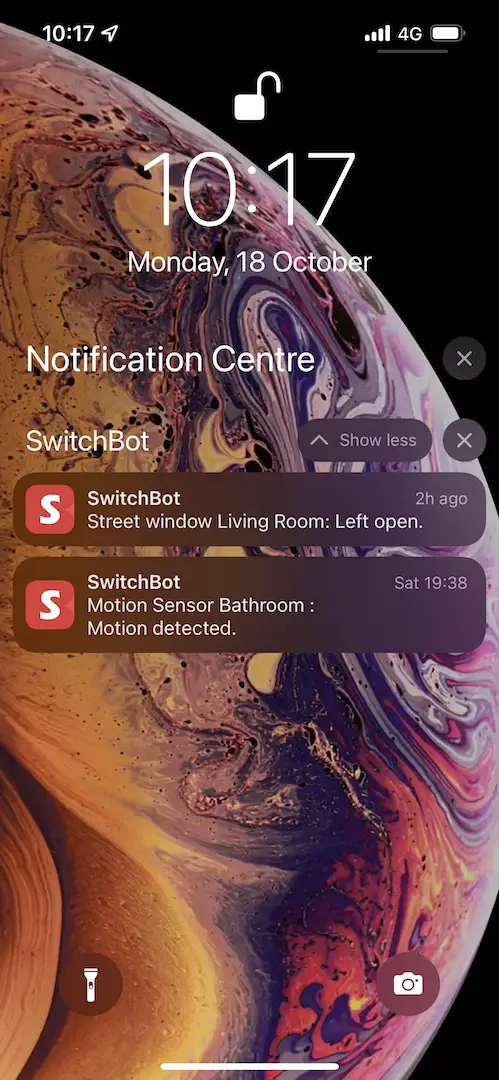
You will be able to check the SwitchBot sensors and to receive notifications form around the world using the official SwitchBot app as usual.
And at the same time you can integrate SwitchBot devices with Home Assistant for more complicated automations and fine granular control.
Is uploading software on ESP32 board hard?
Please, do not worry that working with ESP32 boards and uploading software on them is hard, it is not! If I can do it, you can do it as well! No soldering or special tools are required, just some SwitchBot Devices, and one D1 Mini ESP32 with a micro USB cable and that is all.
Oh, and we are going to use a free software called Arduino IDE to upload the custom firmware on the D1 Mini ESP32.
Where to download and install Arduino IDE?
Let’s start the Home Assistant SwitchBot MQTT Motion Sensor and Contact sensor integration where the first step is to download and install Arduino IDE.
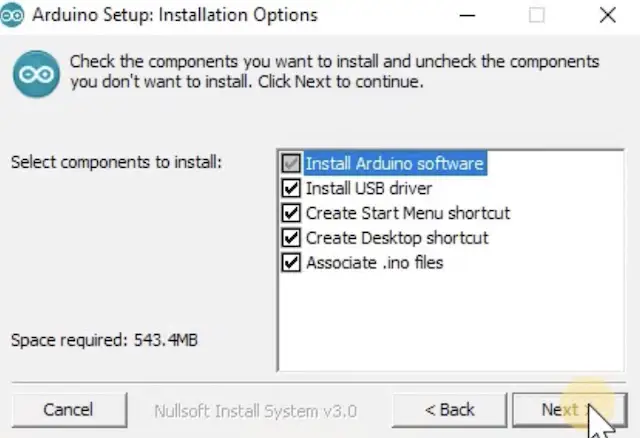
- Go to https://www.arduino.cc > software and download and install the Arduino IDE for your Operating System.
- If you are using Windows, make sure that you select Install USB driver during the Arduino installation.
Side Question: I didn’t manage to make Arduino & PlatformIO to successfully upload software on D1 Mini ESP32 using macOS. I tried different cables, USB A to C convertors, etc, but no dice. Any ideas?
How to configure Arduino IDE for ESP32 boards?
The Arduino is installed, but we have to configure it a bit. Here is how.
In Arduino IDE go to:
- File > Preferences > and paste the following URL:
https://dl.espressif.com/dl/package_esp32_index.jsonin the Additional Board Manager URLs field.

TIP!: If you already have some URLs in that field, just coma separate them!
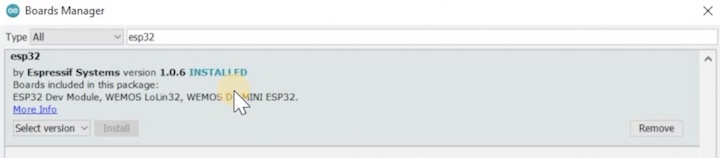
- Then go to: Tools > Board > Boards Manager…
- Search for ESP32 and press Install button, when you see the result named “ESP32 by Espressif Systems“:
How to test software uploading on D1 MINI ESP32 with Arduino IDE?
Time to test if we can upload software on the D1 Mini ESP32. That is to make sure that everything will go smoothly later on with the custom firmware for the D1 Mini ESP32 and our Home Assistant SwitchBot MQTT integration mission.
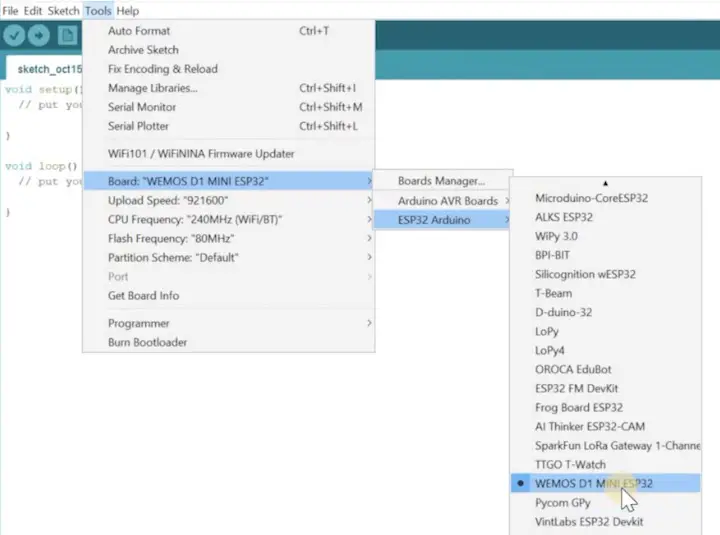
In Arduino IDE go to:
- Tools > Board > ESP32 Arduino > and select Wemos D1 MINI ESP32 (if you have different than D1 Mini ESP32 device, select it instead)
- Then connect the D1 Mini ESP32 device to your computer with a USB cable.
- In Arduino IDE, go to Tools > Port > select the port where D1 Mini ESP32 is connected. Usually, under Windows it is COM4 or COM5 and /dev/usbXXXXX under macOS.
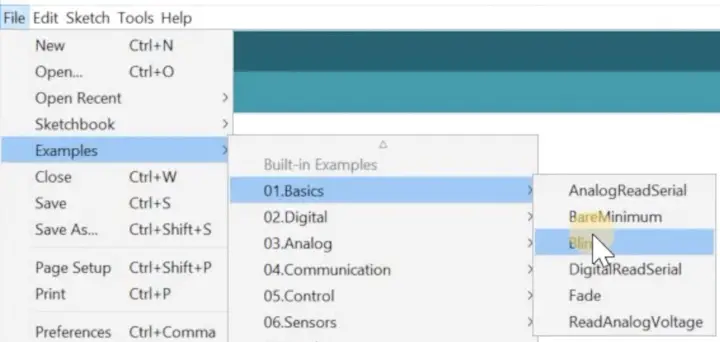
- Then, go to File > Examples > 01 Basics > and select Blink.
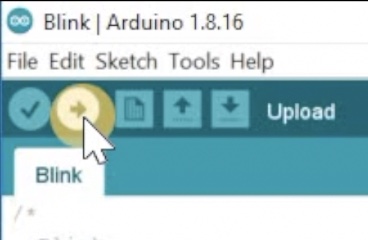
- Finally, click on the Upload button (arrow pointing right) in the upper left corner of the opened Blink example window.
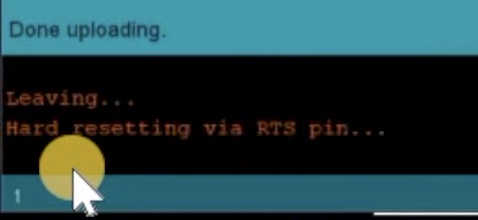
After several seconds, the compiling and uploading process should be finished. You should see a Done uploading message and your device should start blinking. If you see that, then you can continue further.
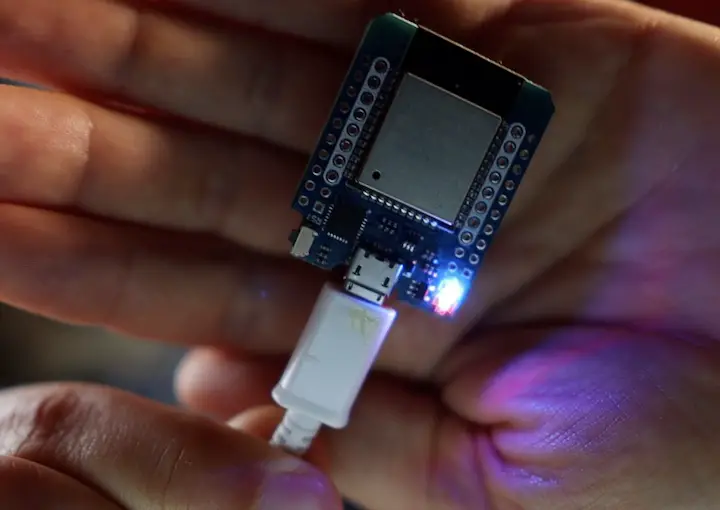
The blue LED of the D1 Mini ESP32 is blinking every second after you upload the Blink example.
How to Install the needed libraries in Arduino IDE for the D1 Mini ESP32 custom firmware?
To successfully compile the SwitchBot-MQTT-BLE-ESP32 firmware (that is the name of the project, but more info about it later) I have to add several libraries in the Arduino IDE, which is very easy.
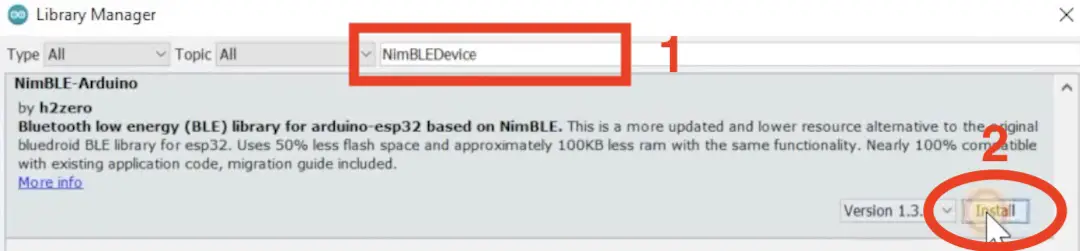
- In Arduino IDE, go to: Tools > Manage Libraries… > In the Library Manager dialog window enter and install one by one the following libraries:
- NimBLEDevice library
- EspMQTTClient library
- ArduinoJson library
- CRC32 library (by Christopher Baker)
- ArduinoQueue library
Checking the SwitchBot-MQTT-BLE-ESP32 project Github page
I’m completely ready with the Arduino installation and configuration. Let’s focus now on the custom firmware called SwitchBot-MQTT-BLE-ESP32 that can be installed on many ESP32 based devices like my D1 Mini ESP32.
This a link to the SwitchBot-MQTT-BLE-ESP32 project 👉 https://github.com/devWaves/SwitchBot-MQTT-BLE-ESP32
Big shoutout to the author – devWaves and the contributors to this open source project as it is just wonderful. Keep up guys, you rock 🤘.
If you go to the project page you will see instructions how to upload the code on ESP32 devices using Arduino IDE and PlatformIO (Visual Studio Code). You can also see some MQTT communication details, and a lot of listed features that this project support.
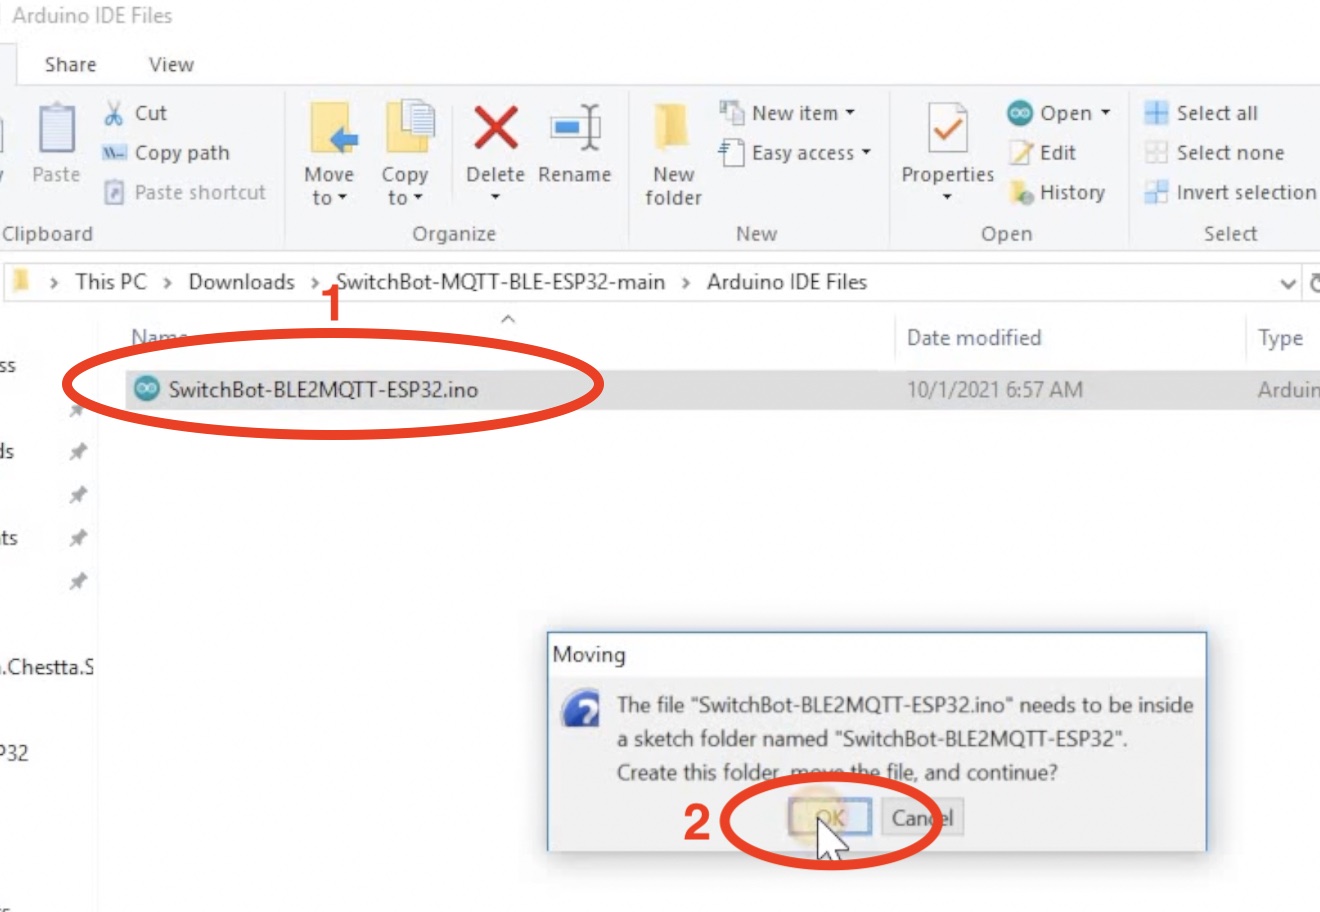
When you are done looking/reading the project GitHub page, download the code as ZIP, and open the .ino file located in Arduino IDE files folder in your Arduino IDE.
How to add WIFI, MQTT and MAC addresses in SwitchBot-MQTT-BLE-ESP32 code?
The things that are left are: to add the Bluetooth MAC addresses of my SwitchBot Sensors and my Wi-Fi & MQTT brokers credentials.
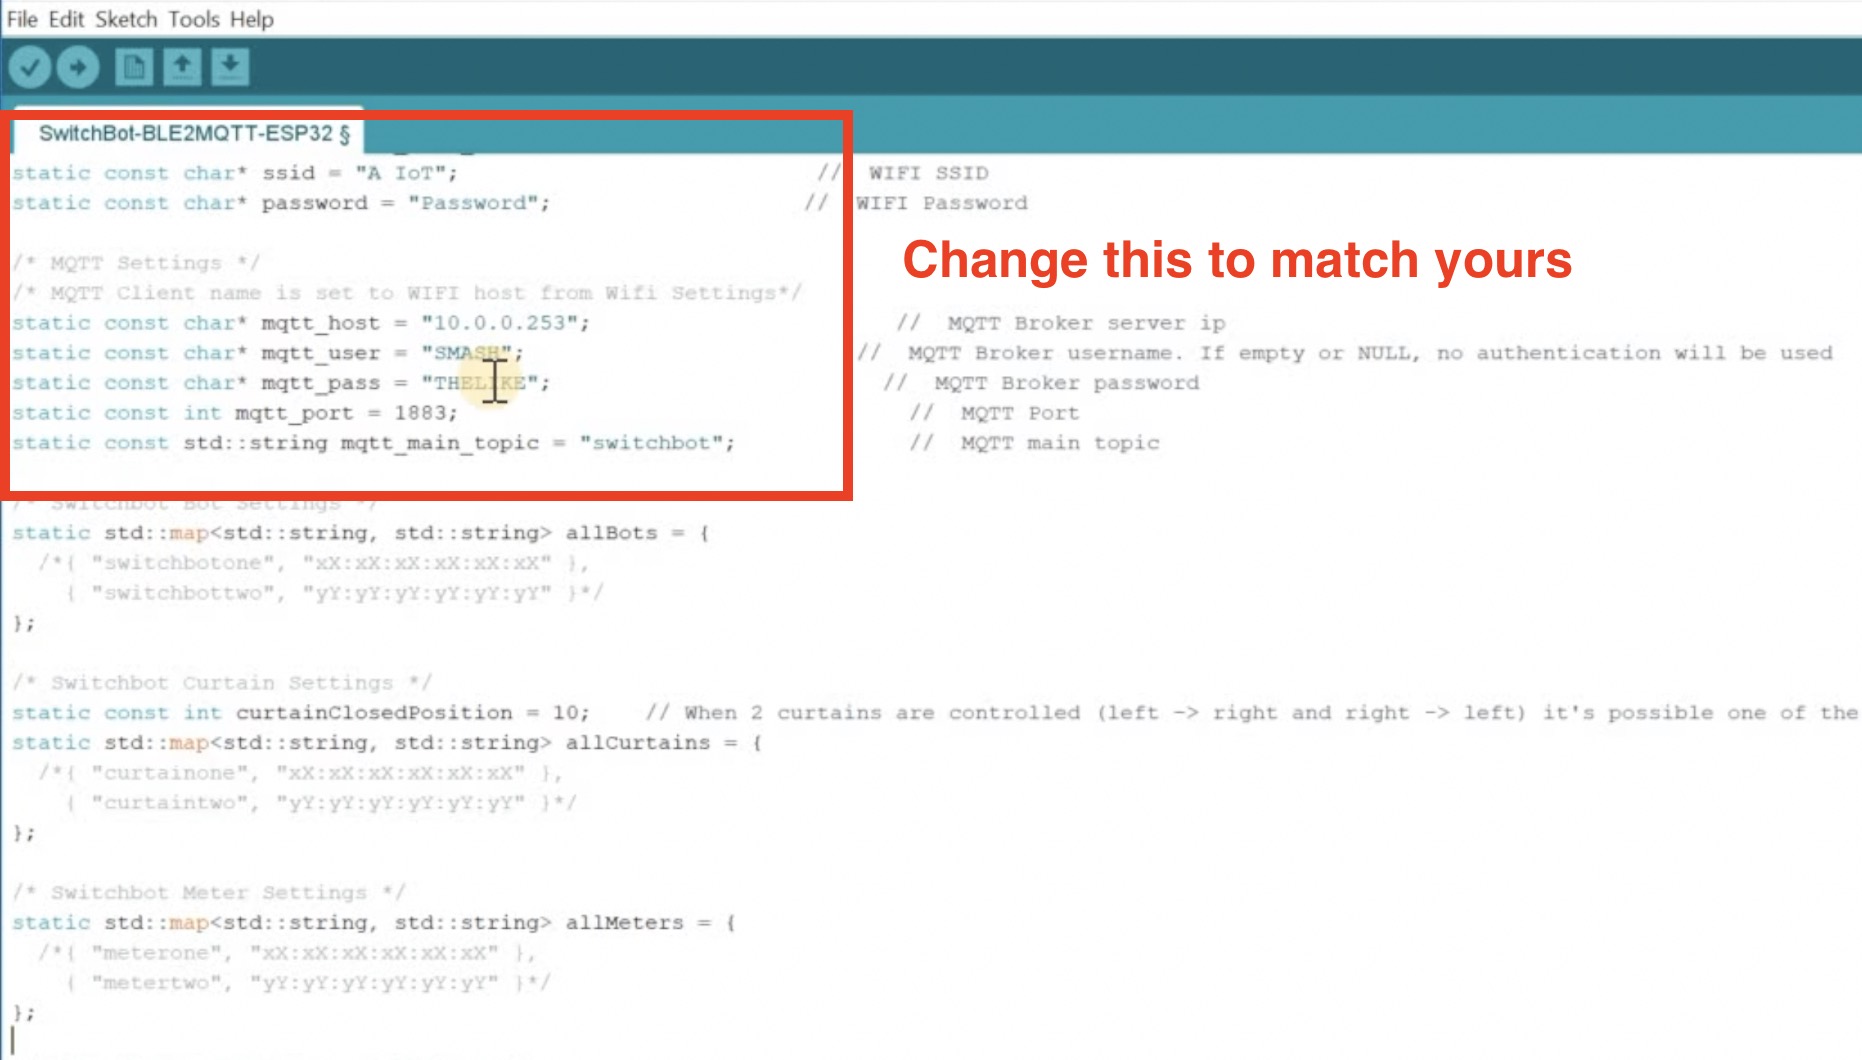
Scroll down until you see the following lines in the SwitchBot-BLE2MQTT-ESP32.ino file.
/****************** CONFIGURATIONS TO CHANGE *******************/

/********** REQUIRED SETTINGS TO CHANGE **********/
TIP!: If you don’t have MQTT Broker/server do not worry, check this tutorial of mine 👉 MQTT Explained + MQTT Home Assistant and Node-RED integration
If you have up & running MQTT Broker, then just enter your Wi-Fi and MQTT credentials as shown below:
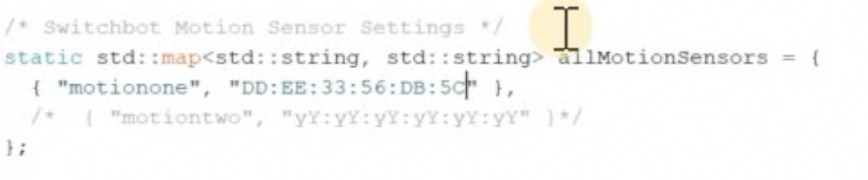
Then uncomment (by moving or removing the /* characters) and enter the BLE MAC addresses of the sensors that you wish to use.
How to upload SwitchBot-MQTT-BLE-ESP32 on D1 mini ESP32 using Arduino IDE?
The SwitchBot-MQTT-BLE-ESP32 custom firmware is locked and loaded. It is time to upload it on the D1 Mini ESP32 device. To do that just click on the Upload button (arrow pointing to the right) in the Arduino IDE.
The code will start compiling and then it will be uploaded on the ESP32 device. Depending of the speed of your computer this can take a while. So be patient….
At the end you should see something similar:
Are there different versions of D1 mini available?
Just to mention that if you are going to buy D1 Mini ESP32 now, please be careful when you order it, as there are older versions without BLE and you don’t want them. You need the ESP32 based version. If you are bit confused just check the affiliate links below.
- D1 Mini ESP32 (AliExpress affiliate link) – https://s.click.aliexpress.com/e/_9R1Z6b
- 3 pack D1 Mini ESP32 (Amazon affiliate link) – https://amzn.to/3DQFObh
Why should I try to open the web interface of the D1 mini ESP32 with uploaded SwitchBot-MQTT-BLE-ESP32?
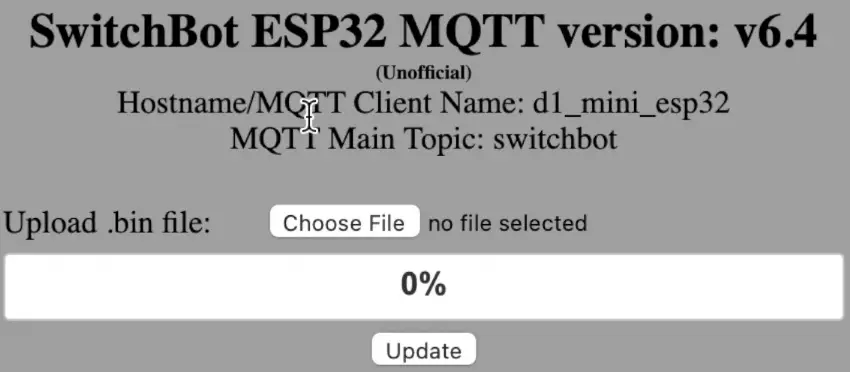
When the uploading of the custom firmware called SwitchBot-MQTT-BLE-ESP32 is completely ready, I can try to open the web interface to confirm that the D1 Mini ESP32 is connected to my Wi-FI. To find the D1 Mini ESP32 device IP I checked it in my router interface.
How to check if the D1 mini ESP32 with SwitchBot-MQTT-BLE-ESP32 is connected to my MQTT?
Good, the D1 Mini ESP32 is connected to my WIFI, but is it connected to my MQTT Broker as well? I will check that with a free tool called MQTT Explorer right now.
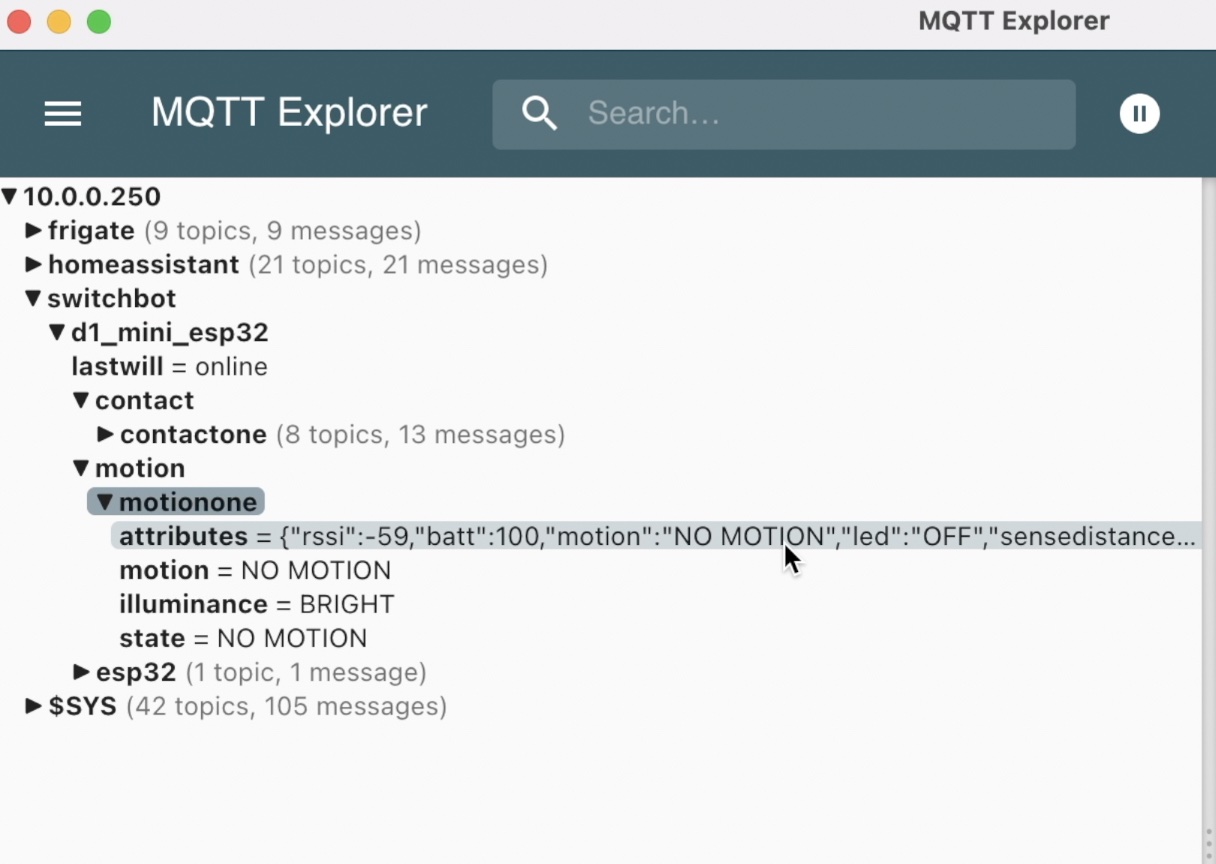
Download and install the MQTT Explorer then connect to your MQTT Broker.
From the picture above can be seen that there is a switchbot MQTT topic with motion and contact sub-topics inside. If you expand the motion sub-topic you can see the state of all of the attributes of the SwitchBot sensor. Which is exactly what is needed! 😎
Is there a 3D printed enclosure for D1 Mini ESP32?
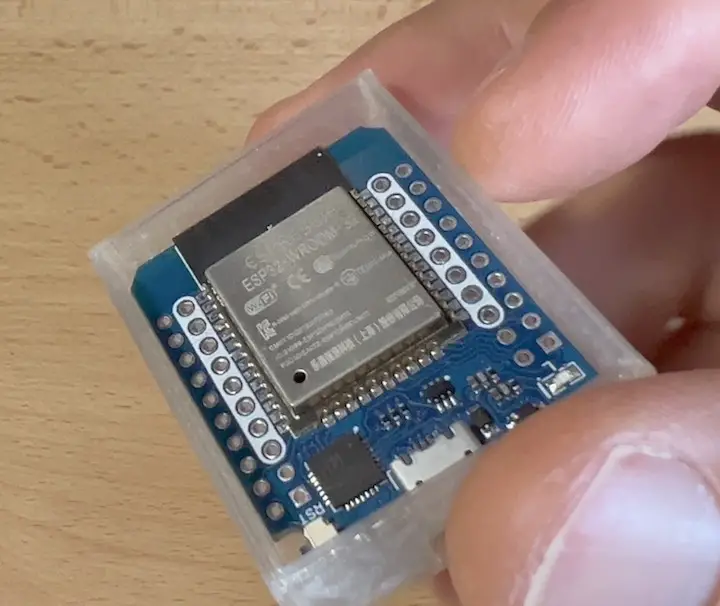
I found and even printed this D1 Mini ESP32 enclosure on my Ender3 v2 3D printer. Here is the link to the 3D model if you wish to do the same 👉 LINK There is a cover of the enclosure as well, but I don’t have a good picture of it.
If you want to know more about my Ender 3 3D printer and my story with it check this 👉 Noob Assembles Ender3 v2 – best 3D printer under $300
Anyways, the 3D printed enclosure is optional, but Home Assistant is a must, at least for me! Let’s begin that Home Assistant SwitchBot MQTT integration.
Home Assistant SwitchBot MQTT Contact Sensor and Motion Sensor integration
You will need the Home Assistant MQTT integration for that. If you already have it – just use it! Otherwise, luckily for you I have a detailed tutorial about how to add it right here 👉 LINK
When you are ready with the Home Assistant MQTT integration, go to Home Assistant > Configuration > Integrations > and search for MQTT integration > click on the X devices link located underneath.
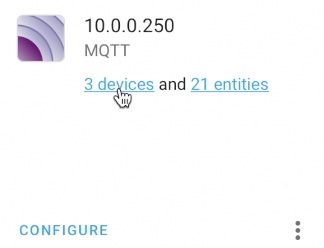
On the next window/page you will see the SwitchBot sensors brought to you by the Home Assistant SwitchBot MQTT integration.
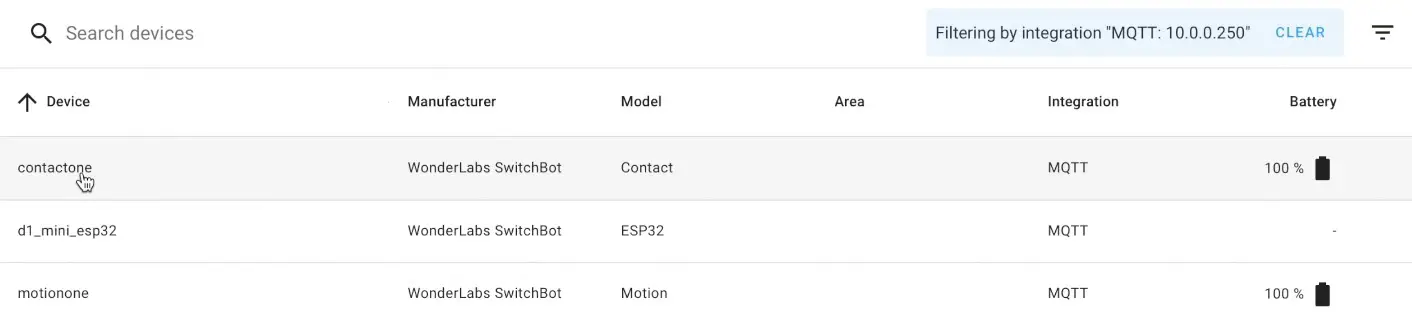
Click on the sensor you wish and you will see all of its attributes like battery, link quality, is it detecting motion, is it open or closed (if applicable) and so on.
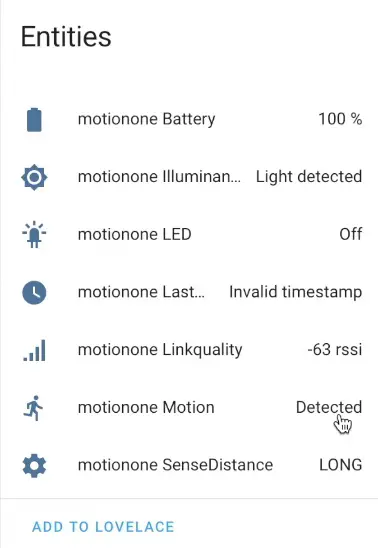
To add the sensor on the Home Assistant Lovelace/Dashboard just click on the Add to Lovelace button.
How to create Home Assistant SwitchBot MQTT automations?
Once I have the SwitchBot sensors in Home Assistant as MQTT sensors. I can create some Home Assistant automations.
The automations can be created either using the Home Assistant graphical interface as I’m showing in the video or you can paste the following YAML code in your automations.yaml file located in your Home Assistant configuration folder.
alias: SB Motion Sensor movement detected
description: ''
trigger:
  - type: motion
    platform: device
    device_id: d3c18e6a6d5aa1687a7fadecb91de2e1
    entity_id: binary_sensor.motionone_motion
    domain: binary_sensor
condition: []
action:
  - service: persistent_notification.create
    data:
      message: SB Motion Sensor detect some movement
mode: single
The things that you want to change in the above automation are: the device_id and the entity_id (if differs). Save the changes in automations.yaml file and reload your automations from Home Assistant Configuration > Server Controls menu.
If everything is fine, from now on you will receive a persistent notification in the Home Assistant UI (lower left corner) containing the following text: SB Motion Sensor detect some movement.
Of course, this automation is just an example, it is very simple and it serves like a proof of concept rather than something very serious. I will be very glad if you share your Home Assistant SwitchBot MQTT automations in the comments bellow. Serious and not so serious all is fine 🙂
Outro
And just like that I have a SwitchBot motion sensor and SwitchBot contact sensor integrated with Home Assistant using a D1 Mini ESP32 device as middle layer and SwitchBot-MQTT-BLE-ESP32 custom firmware. So my Home Assistant SwitchBot MQTT integration is a success!
Now, it is a giveaway time! As I said in the beginning I will send to one of you a SwitchBot NFC Tag 👉 LINK , that can be used to trigger many different automations, no matter are you an iOS or Android user. It is also waterproofed, so you can even leave it somewhere in your bathroom.
To participate in my giveaway you just have to subscribe for my YouTube channel with the notification bell, and to leave a comment under my video there 👉 LINK.
That’s it, we will find who is the winner next Wednesday, so you have one week to join in the giveaway.
Meanwhile don’t forget – Home Smart, But Not Hard!
I’m Kiril and I’m done writing. Bye!
thank you!
You are more than welcome!
really nice guide, I just have a question. I noticed that you have the same problem i have, the motion sensor says invalid timestamp, is there a way to fix that?.
Thank you! Thanks to you I just programmed my first ESP32! Your videos are excellent to and have helped me a lot!
I’m very, very glad to hear that! Enjoy!
Great guide.
I followed the instructions but when compiling I get the following error message:
“error: ‘WiFi’ was not declared in this scope”
How can I fix this??
Thanks