
Home Assistant Xiaomi Temperature & Humidity Sensor integration is possible. The Xiaomi Bluetooth smart temperature & humidity sensor cost around $4 dollars and can work with Xiaomi mobile app and their locked ecosystem, but that is not very interesting isn’t it?
What if we escape from the Matrix and add the Xiaomi Sensor in Home Assistant? All of that with no soldering and over-the-air (OTA).
Let’s see how to do it.
Table of Contents
Who want T&H sensor in Home Assistant?
Who doesn’t want another temperature and humidity sensor added in Home Assistant for another room or just like that for fun. On top the sensor to be small, battery powered, cheap and looking good enough…
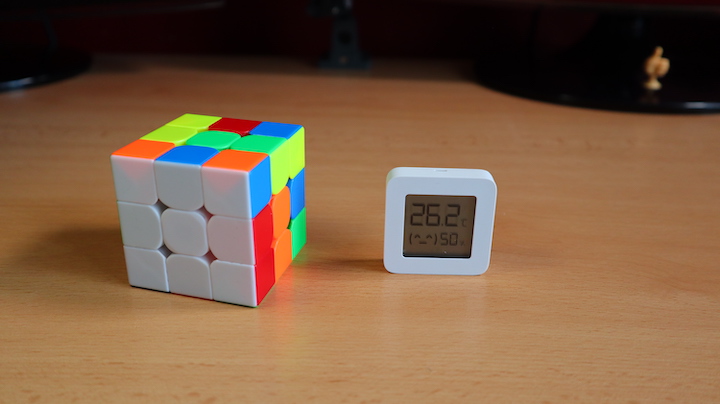
Well, now there is such sensor, it comes from Xiaomi, the exact model is this one LYWSD03MMC and you can get it from AliExpress for around $4 (It will be cheaper if you buy a pack of four)
- Xiaomi Temperature & Humidity Sensor LYWSD03MMC from 1 to 4pcs (AliExpress affiliate) – LINK
There is a small problem with Xiaomi TH sensor
However, as I said in the beginning there is one problem. The Xiaomi Temperature & Humidity (LYWSD03MMC) is locked and the data it emits over Bluetooth is encrypted, so you cannot freely use it. That means no Home Assistant Xiaomi Temperature & Humidity Integration is possible.
Not to worry too much here, thanks to Aaron, who made a web tool that can extract the encryption key (something that you will see later) and an optional custom firmware – this Xiaomi ecosystem locking thing is no longer an issue. Whole process of unlocking is done wirelessly, without any soldering or complicated procedures.
All that is needed is: you, the sensor and your phone or laptop!
So big shoutout to Aaron and his great work! This is the link to his YT channel if you want to support him. He deserves that by large margin.
Staying with Xiaomi T&H sensor stock firmware.
Before we continue further, I just want to say that I will stay with the original Xiaomi firmware of the sensor intentionally and I will show you how to do that as well. If you want to go with the custom firmware option I will point you to the right direction later in the article.
Now, let’s get down to business and see the detailed instructions of Home Assistant Xiaomi Temperature & Humidity Sensor integration.
Adding Xiaomi HT sensor to Xiaomi App
Adding the sensor to the Xiaomi mobile app is mandatory step for the Home Assistant Xiaomi Temperature & Humidity Integration with original firmware of the sensor and you have to do it:
- Download the Xiaomi Mi app from your official mobile store (Xiaomi MI app links in Apple App Store link or Google Play link)
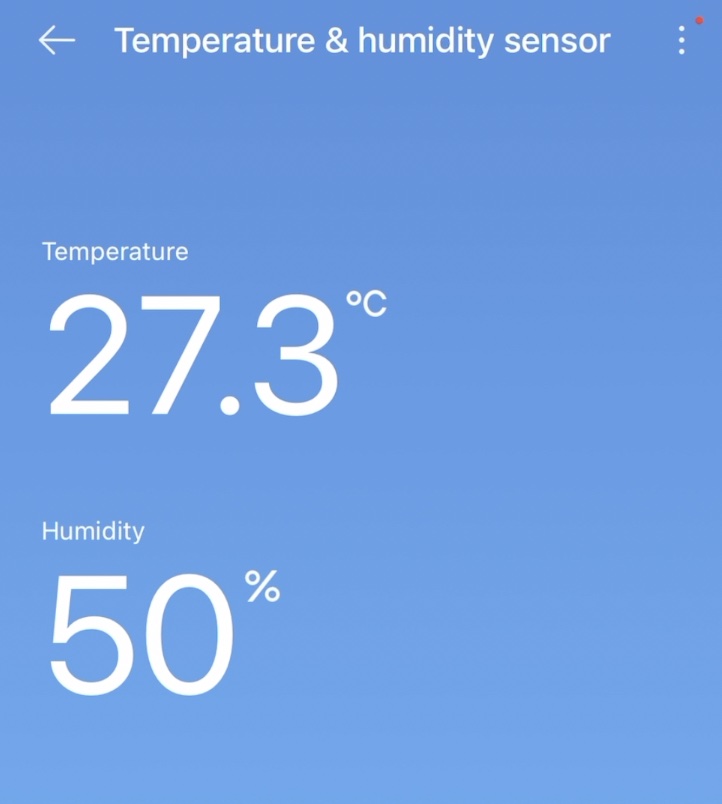
- Tap on a plus sign in upper right corner and follow the instructions to add the Xiaomi Temp & Humidity sensor. No special guidance is needed here as everything is well described inside the app and it is easy-peasy.
Add the end you should see something similar in your mobile app.
How to Obtain Xiaomi bind key?
To continue with the Home Assistant Xiaomi Temperature & Humidity sensor integration we have to obtain the Xiaomi encryption a.k.a bind key using the Telink Flasher web tool that Aaron made.
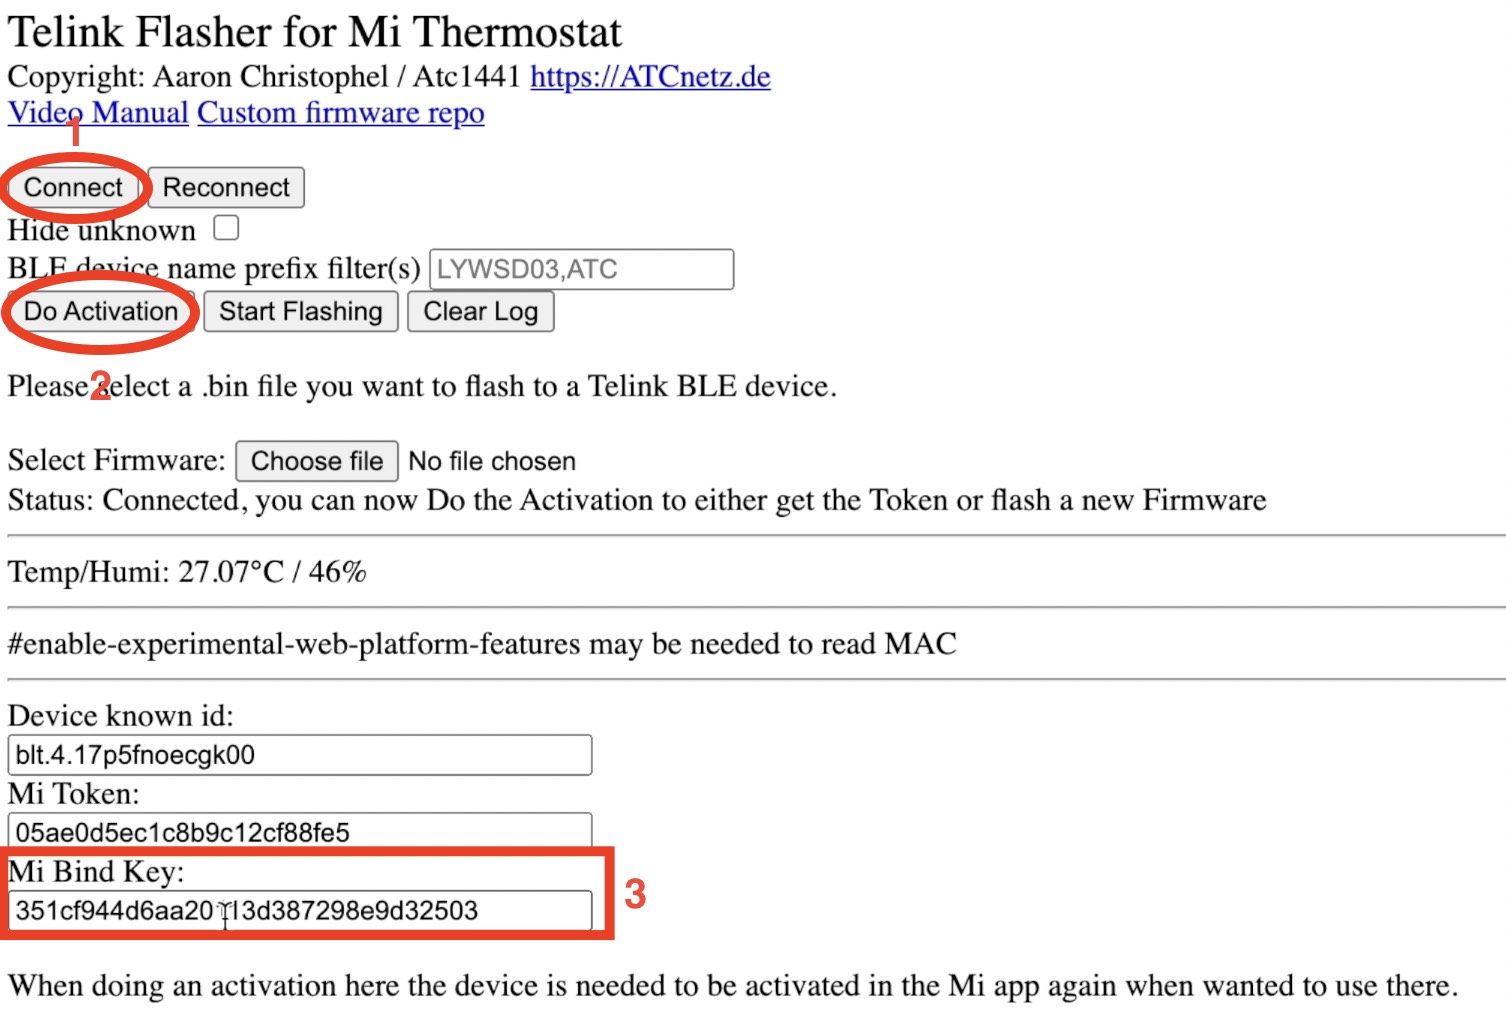
- Open the Telink Flasher web tool – LINK from a Laptop or Phone with Bluetooth enabled in any of the supported browsers (I used Chrome).
- Click on Connect button! A dialog with the available Bluetooth devices will appear.
- Look for device named LYWSD03MMC. If you can’t see it, then remove the Xiaomi Temperature and Humidity sensor battery, and put it back. Also, make sure that the sensor is close to your device where Telink Flasher is opened.
- Select the LYWSD03MMC and click on Pair button.
- Wait a bit (preferably until you see the Temp & Humidity readings) and then click on Do Activation button.
- Mi Bind Key field should be filled with some nonsense letters and numbers. That is your encryption a.k.a bind key.
- Copy your Bind Key and store it somewhere safe.
Home Assistant Device with Bluetooth or ESP32?
Before we continue, have in mind that your device where your Home Assistant is installed should have Bluetooth capabilities. I’m using Raspberry Pi 4 (Check the current price of the Raspberry Pi 4 in Amazon) for my Test and Prod Home Assistant environments and I’m fine with that requirement.
Alternatively, if your Home Assistant device is not having a Bluetooth, you can use an ESP32 device as middle layer between Home Assistant and Xiaomi sensor as described in these two video of these two great guys.
- Mostlychris – https://www.youtube.com/watch?v=l5ea7lQWpMk
- Intermit.Tech – https://www.youtube.com/watch?v=K-HG7qs9hK0
They are also showing the custom firmware, so if you are interested use the links above.
Add Passive BLE Monitor custom component in Home Assistant
Now back to our mission of the Home Assistant Xiaomi Temperature and Humidity sensor integration with stock firmware to Home Assistant. Use this method below only if your Home Assistant device have Bluetooth support.
Our next step Is to add a Passive BLE Monitor custom component in Home Assistant. This can be done manually:
- By copying the integration files from the GitHub repo of the Passive BLE Monitor project to your Home Assistant custom_components folder.
- Or by using Home Assistant Community Store also known as HACS (easier method).
If you don’t have HACS yet, now is a great moment to get it. I’m describing how to do that in details in this article of mine. So go read it (or watch my video tutorial), install HACS and come back here.
If you already have HACS just continue reading.
- Go to HACS section > Integrations > Explore & Add Repositories > Search for Passive BLE or just BLE
- Click on the result, then click on the Install this Repository in HACS > Install buttons.
- Restart you Home Assistant (Configuration > Server Controls > Restart).
Quick question for the readers reached this point!
Just out of curiosity! Can you share do you have any Xiaomi devices in your house?
Leave just yes or no in the comments bellow.
Add & configure the Passive BLE Monitor integration in Home Assistant
Time to add our new shiny Passive BLE Monitor integration in Home Assistant and to configure it which is the final step of our Home Assistant Xiaomi Temperature and Humidity sensor integration. Let’s see how.
After Home Assistant has started:
- Go to Configuration > Integrations > Add Integration > Search fro ble > click on the result and wait for the Passive BLE monitor setup to complete.
While you are waiting Make sure that you are subscribed to my newsletter. If you already did that then you can subscribe to my YouTube channel. If you did that as well send me a message in my Discord server and I will re-tweet a tweet of yours if you follow me on Twitter
Now, let’s just finish this.
- A new dialog window will appear after the Passive BLE monitor setup is complete.
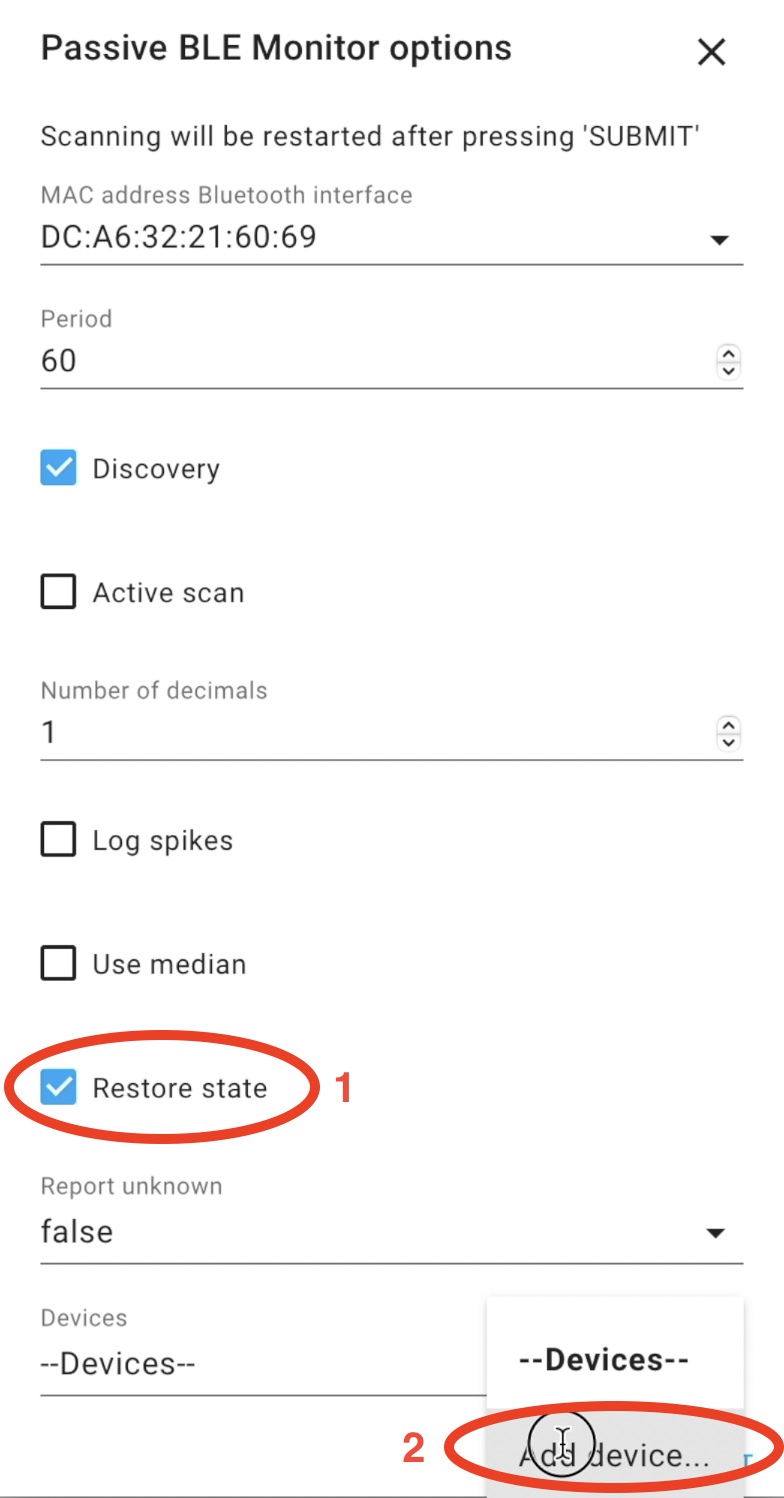
- You can leave all options unmodified with one exception – optionally you can check the Restore state option.
- Click on Devices dropdown menu > Add device… > Submit buttons.
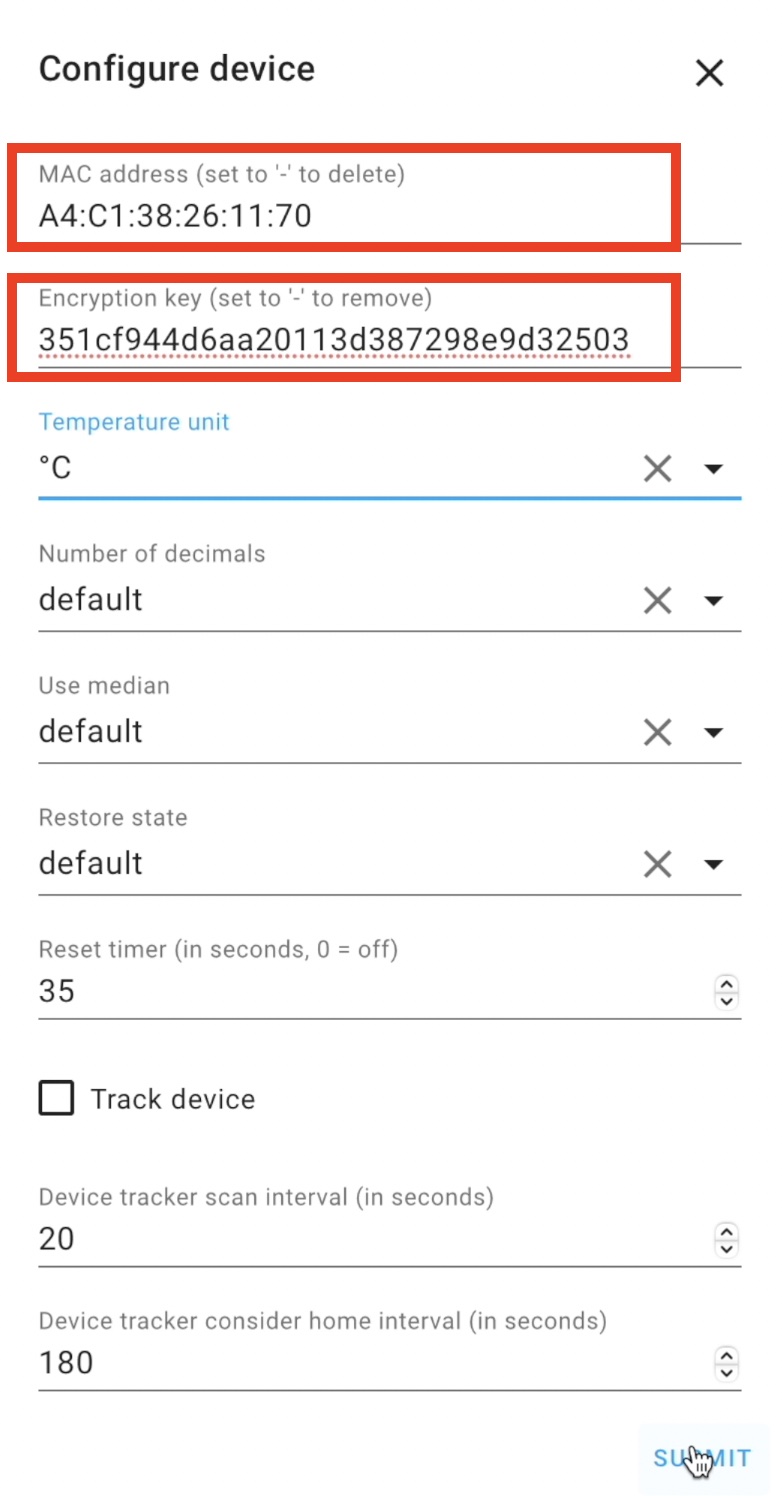
- On the next dialog you will need to enter the MAC address of your Xiaomi Temperature & Humidity sensor. To Get the MAC address, go to the Xiaomi Mi app > tap on your Xiaomi TH sensor > three dots menu > About.
- Your encryption (bind) key that is extracted thanks to the Telink Flasher Tool is also needed here. Paste it in the respected field.
- Select Celsius or Fahrenheit as temperature unit and click Submit button twice.
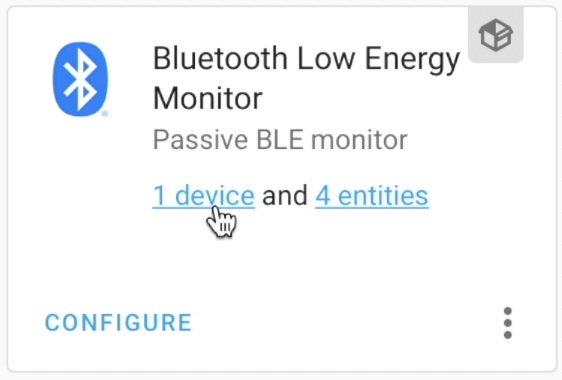
- Now, you just have to wait (up to 10minutes). After you wait enough you will be able to see 1 device and 4 entities under your Passive BLE Monitor integration
If you click on that 1 device you will see the device battery, humidity, temperature & voltage readings as sensors.
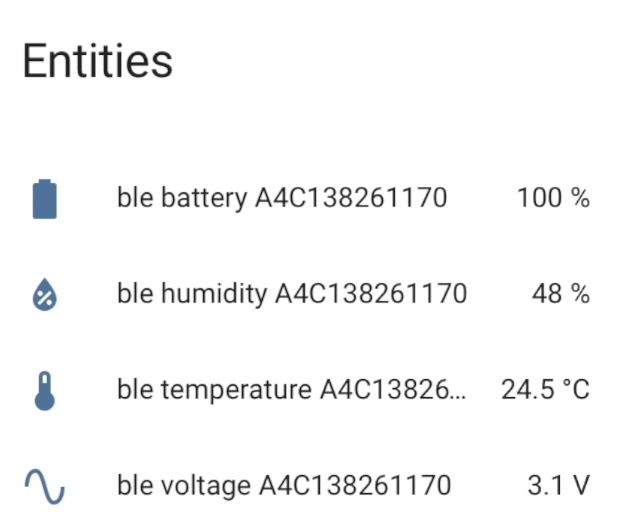
You can add these sensors as a card to your Home Assistant Lovelace or you can start making automations (or both).
And just like that the Home Assistant Xiaomi Temperature & Humidity sensor with stock firmware integration is complete.
Outro
Next Wednesday, I will release a new video & article! Meanwhile, you can check some of my previous ones like this $4 motion sensor in Home Assistant HOW-TO.
Stay safe and don’t forget – Home Smart, but not Hard!
I’m Kiril and I’m done writing.
Hi, thanks for the guide. What if I want to use the integration with a custom firmware loaded on my xiaomi sensor? the temperature reading is waaaay too off, so I would like to calibrate it.
Never tested this, but from what I saw while researching this you can customize the refresh rate interval in the custom FW settings. Just read the documentation and you will find it. The downside of this can result in shorter battery life. Good Luck!
I’ve installed per your instructions and have the temp sensor working with HA but when I moved them temp sensor about 6 feet away from my Raspberry Pi HA server and into my wine cabinet (behind a glass door), the temp sensor lost the bluetooth connection with my server. So, the card in my dashboard is not updating with the actual temp readout from the Xiaomi.
Sorry to hear that the signal was lost. I guess that there is something that is stopping it, maybe the glass is kind of special one…
Hi, thanks for the guide but i using model LYWSD02MMC of xiaomi. I don’t know can i use the link of earon???
Can I somehow use it with Homekit? I Really wouldnt like to run around and do this with all the devices I have, especially given today I changed battieries 😉