
In this article we will install Nextcloud on Raspberry pi 4, so we can upload our files from mobile and desktop devices just like Google Drive, OneDrive, Dropbox and others, but directly to our homes with a lot more privacy.
Table of Contents
What will you see in this article?
You will see a step-by-step tutorial on how to install Nextcloud on Raspberry Pi, how to activate SSL certificate for and start using it behind DuckDNS sub-domain for free.
What is Nextcloud?
Nextcloud is an open-source project that allows you to control and upload documents, pictures, and all files that you wish on your own personal computer at home from everywhere using Nextcloud web interface or clients.
In a times where pretty much every big company tracks you down from everywhere and it is almost impossible to escape them if you are using Internet. Nextcloud and a local computer is kind of fresh air of personal privacy.
What do you need for Nextcloud?
To successfully implement this you will need:
- Raspberry Pi (where Raspberry Pi 4 is preferred) with installed RaspberryOS and secure shell (SSH) access to it. If you don’t know how to do that – check this Headless Raspberry Pi article/video of mine and come back right here.
- You will also need a public static IP. You can contact your Internet Service Provider for that if you don’t have it.
- You will need some kind of storage the more the better. If you want to store your pictures and videos you will need a lot. The storage of a modern mobile phone is starting from 64GB and it can go until 512GB. You can do the math if you have several of these and you want to upload the media on Nextcloud. If you just want to save only important documents – several Gigabytes (2 – 4GB) will be more than enough.
If you don’t have what it needs…
Most probably you will have to buy it!
I will share what I’m using right now with some Amazon Affiliate links where I will earn a small commission if you buy something from there.
- CanaKit Raspberry Pi 4 4GB Starter Kit – 4GB RAM – https://amzn.to/3eyGi9S
- Samsung 64GB MicroSDXC EVO Plus Memory – https://amzn.to/3jmOawN
- SSD HP P600, 250GB, USB 3.1 – https://amzn.to/2B7qIDi
What am I using?
For this demo I will use a Raspberry Pi 4 with 4GB RAM, a SD card for the RaspberryOS and a USB flash drive for the Nextcloud storage (which is actually again SD card, but with USB card reader).
It is recommended for the Raspberry boot to use SSD drives if you have some spares around. And if you don’t know how to do that check this another article/video of mine for Raspberry USB Boot and come back right here.
Now let’s install Nextcloud on Raspberry Pi to see what will happen…
Installing Nextcloud on Raspberry Pi
First you must connect to your Raspberry Pi. You can do the following steps either on the Raspberry, but you have to have attached Monitor, keyboard & mouse. Or you can access it using the SSH. Here is how you can do that on MacOS and Linux (For Windows you will need a SSH client like Putty).
Open a terminal on your Mac/Linux and type:
ssh pi@YOUR_RASPBERRY_IP
If you are connecting for the first time to the Raspberry you will be asked to confirm the certificate and you should type “y” to proceed.
Then you will be asked for the password. The default password of Raspberry Pi is: raspberry
It is good idea to change the password with the passwd command and to update your Raspberry installation to the latest packages.
sudo apt-get update && sudo apt-get upgrade -y
After that you can start the Nextcloud on Raspberry Pi installation by execute the following script:
curl -sSL https://raw.githubusercontent.com/nextcloud/nextcloudpi/master/install.sh | sudo bash
After some time (in my case it was 20-30minutes) the installation should finish

and Nextcloud should be ready to be opened for the first time.
Nextcloud initial setup
Copy the IP of the Raspberry Pi and paste it in a new browser/tab.
Depending of the browser that you are using you will be greeted by multiple warnings saying that the connection is not private/secure and so on and so forth.
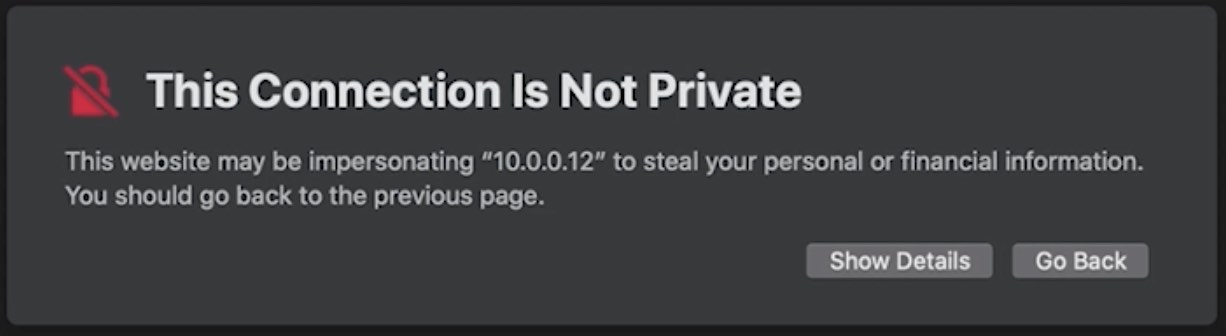
Don’t be afraid or something, that is because the exchanged data is not encrypted using SSL certificate yet, but we will fix that later on.
After you break through all of the SSL warnings you should see the Nextcloud Activation screen similar to the one below.

Here you have to do several things:
- To remember that the default Nextcloud user is: ncp
- To copy and paste somewhere safe both of the passwords on the screen.
- To remember both local URLs on the screen (one is the Nextcloud web interface and the other is the NextCloudPi administration panel)
When you are ready with the above just hit the “Activate” button.
As user type: ncp and as password type: the first password from your Nextcloud activation screen.
If you log in successfully you will be greeted by the Nextcloud configuration wizard.
Now is the best time to format our storage drive, thankfully we have a nice tool for that – the wizard.
This wizard will help you to format the storage that Nextcloud will use in the correct format (BTRFS). It is very easy just follow the wizard instructions.

Forward Nextcloud ports in your router
You will be also asked whether you are going to access Nextcloud from outside your house. Select “Yes” and then choose “I will do it manually“.
We need to forward some ports in our router, so when you type your public static IP – your router will forward the request to the Raspberry where Nextcloud is installed.
Just log in to your router and forward ports 80 & 443 to your Raspberry Pi address.
If you have difficulties with that, just try to search in Google “your_router_model port forward” and you will find a lot of info how to accomplish that.
Next you will be asked for your Dynamic DNS provider. And because we are going to use DuckDNS which is not among the listed clients just click on “Skip“.
Finishing the Nextcloud wizard
At the end of the wizard you will similar screen with two images that are leading to two different interfaces.
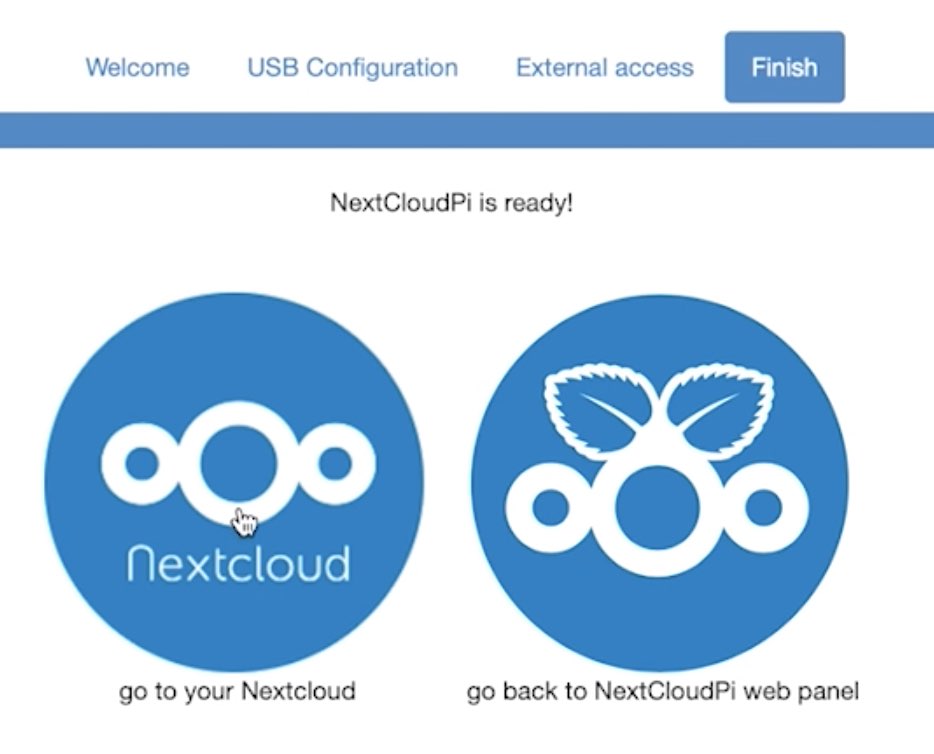
You can open both links in different tabs to see what they actually are:
- The left one (Nextcloud) is the web interface of the Nextcloud which is very similar to Microsoft OneDrive and Dropbox and others.
- The right one (NextCloudPi) is the configuration panel where you can setup a lot of things for your Nextcloud.
The user for both interfaces is ncp, but the passwords are different and they are the ones that you saved during the Nextcloud activation screen.
Nextcloud SSL certificate
Currently our Nextcloud is running on HTTP which means that the exchanged data is not encrypted. And if you leave it like that you will be vulnerable to a “man-in-the-middle” attacks for example.
But don’t worry we will fix that in no time with a sub-domain from DuckDNS and a SSL certificate from Let’s encrypt.
DuckDNS sub-domain
This one is easy, just head over to https://duckdns.org and log in with one of the available options there.
Create a sub-domain from the DuckDNS interface and make sure that you enter your Real Static IP address in the “current ip” field next to your DuckDNS sub-domain and also that you click on the “update ip” button.
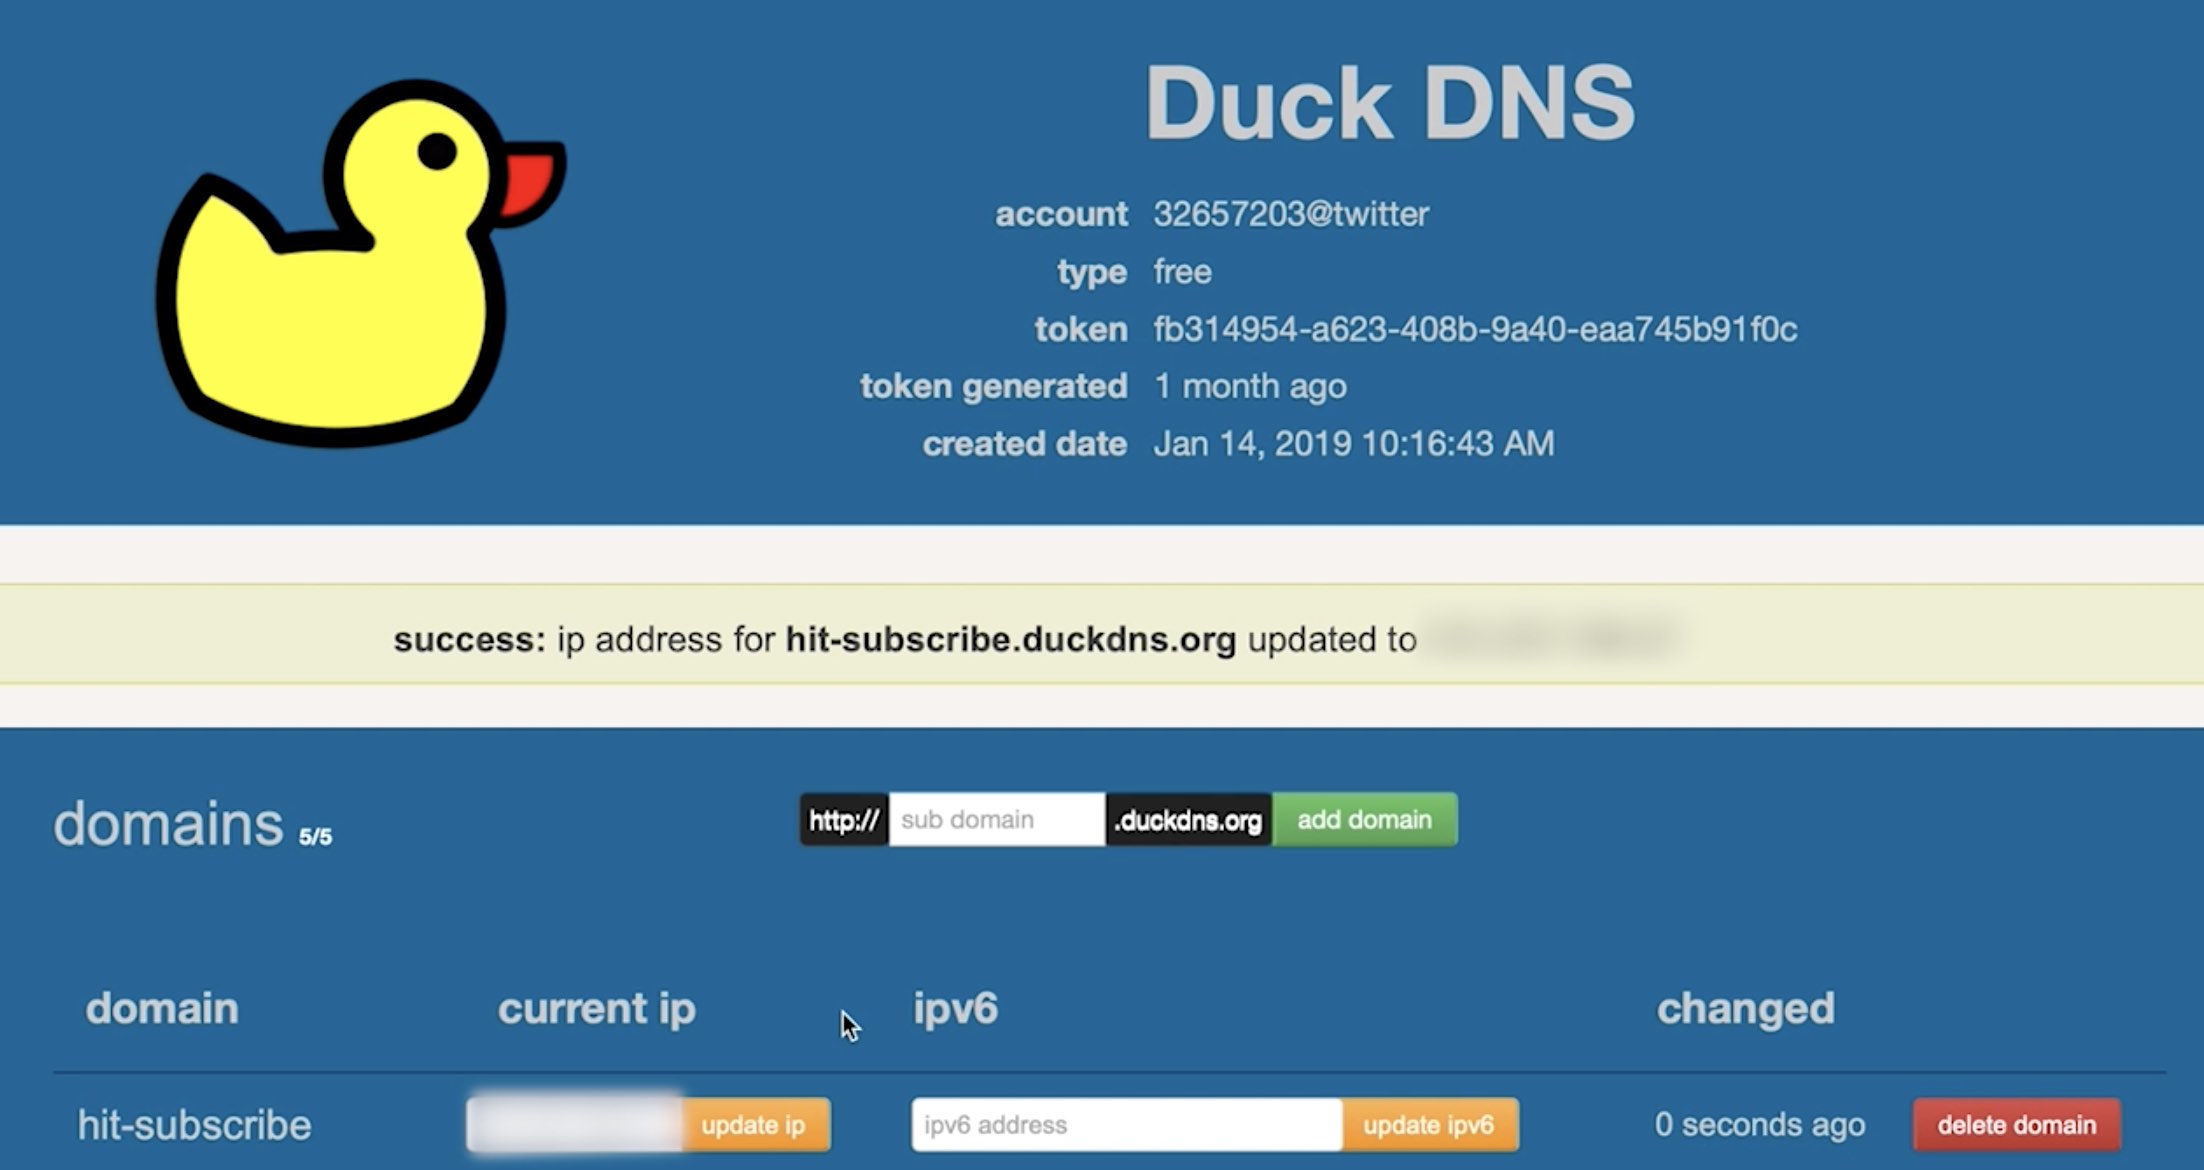
Hit-subscribe
I’m using hit-subscribe.duckdns.org sub-domain for this demo, which reminds me to kindly ask you to hit subscribe for my Newsletter.
I will send new articles like this one weekly and I will not Spam. If you don’t like what you get for some reason you can always unsubscribe, which will make me really sad.
Now let’s continue …
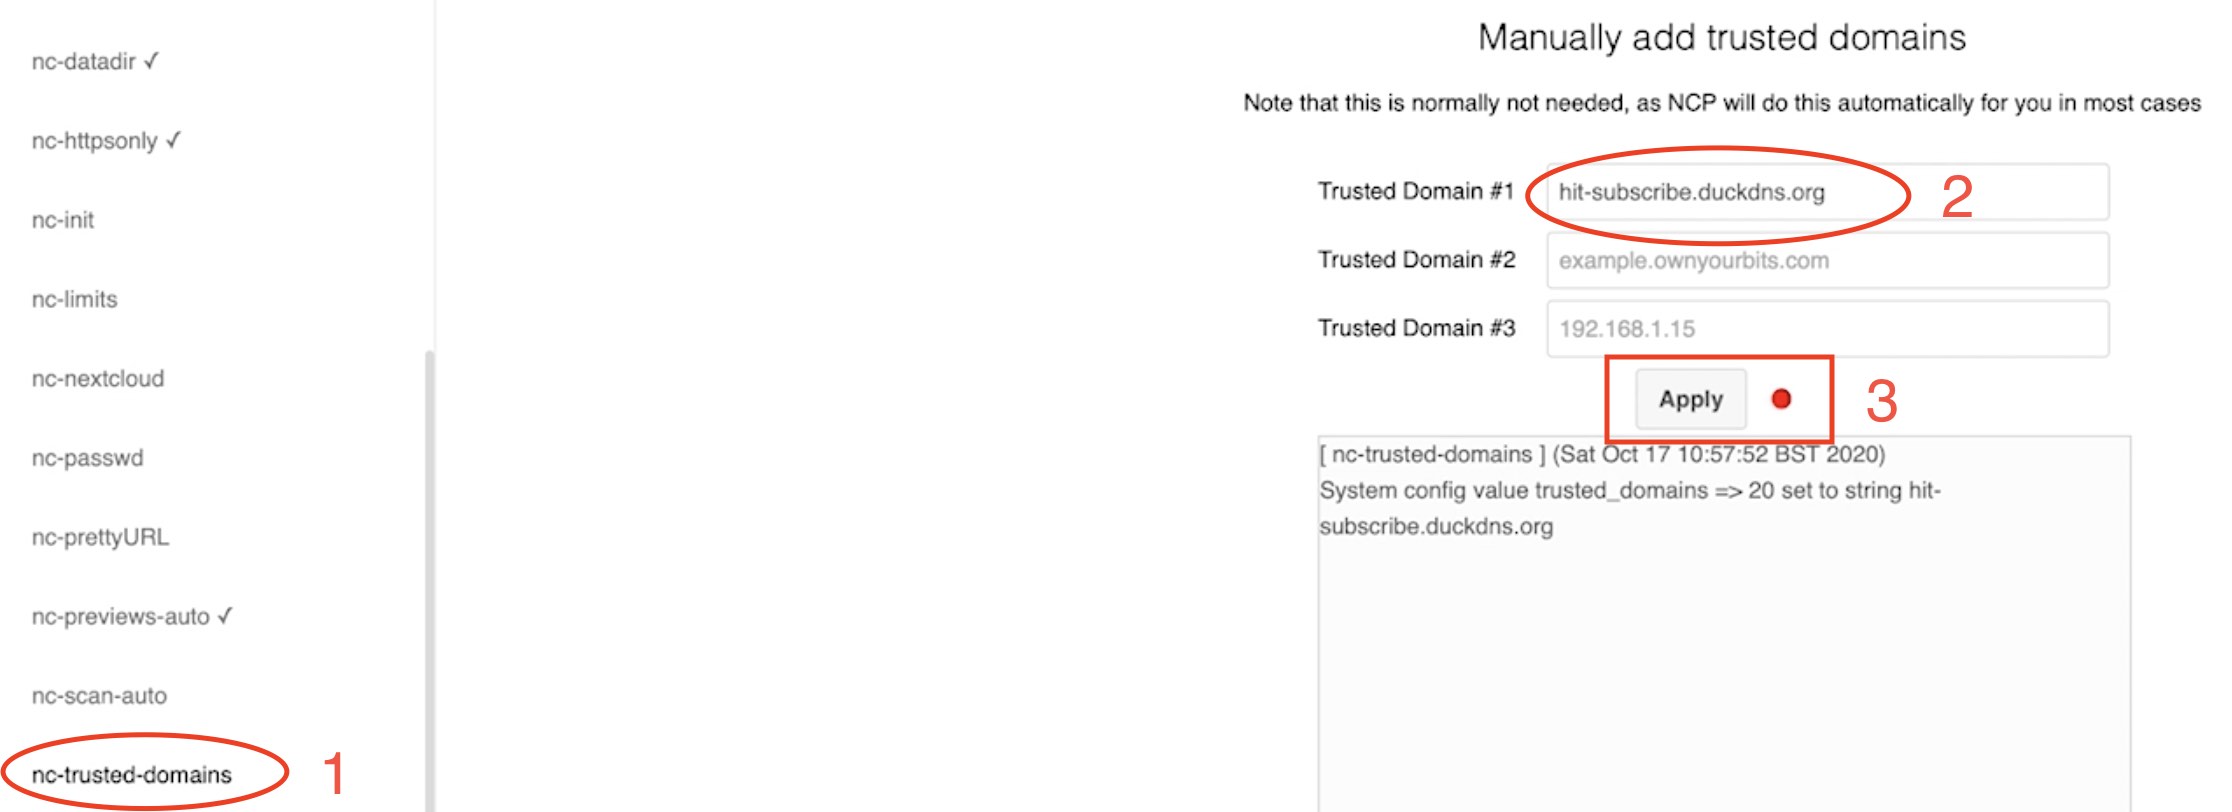
Nextcloud trusted domains
We have to add our newly created DuckDNS sub-domain in the trusted domains section of Nextcloud.
For that we will need the NextCloudPi panel. If you can’t remember where it was go remind yourself in the Finishing the Nextcloud wizard section (hint: it is the right link with the Raspberry leaves).
When you log in successfully to that configuration panel search for nc-trusted-domains in the left side panel. Enter you domain in the Trusted domain #1 field and click on “Apply” button.
Generating Let’s encrypt SSL certificate
Login again to your Raspberry Pi if for some reason you logged out and boldly enter the following command:
sudo apt install certbot python-certbot-apache -y
That will install the certbot script which will help us a lot with generating a free SSL certificate from Let’s encrypt. To start the script execute this command:
sudo certbot --apache
You will be asked several questions, try to answer them all like this:
- Enter email address – just enter your email address.
- Agree to Let’s encrypt Terms of Service – type “a” and press enter.
- Would you like to share your e-mail with certbot foundation – personal choice here, I said No, but you can decide otherwise.
- Please enter in your domain name(s) – just enter your DuckDNS subdomain here.
- Which virtual host would you like to choose? – type “1” for nextcloud.conf and hit enter.
- Whether or not to redirect HTTP traffic to HTTPS – type “2” to Redirect all the traffic to HTTPS.
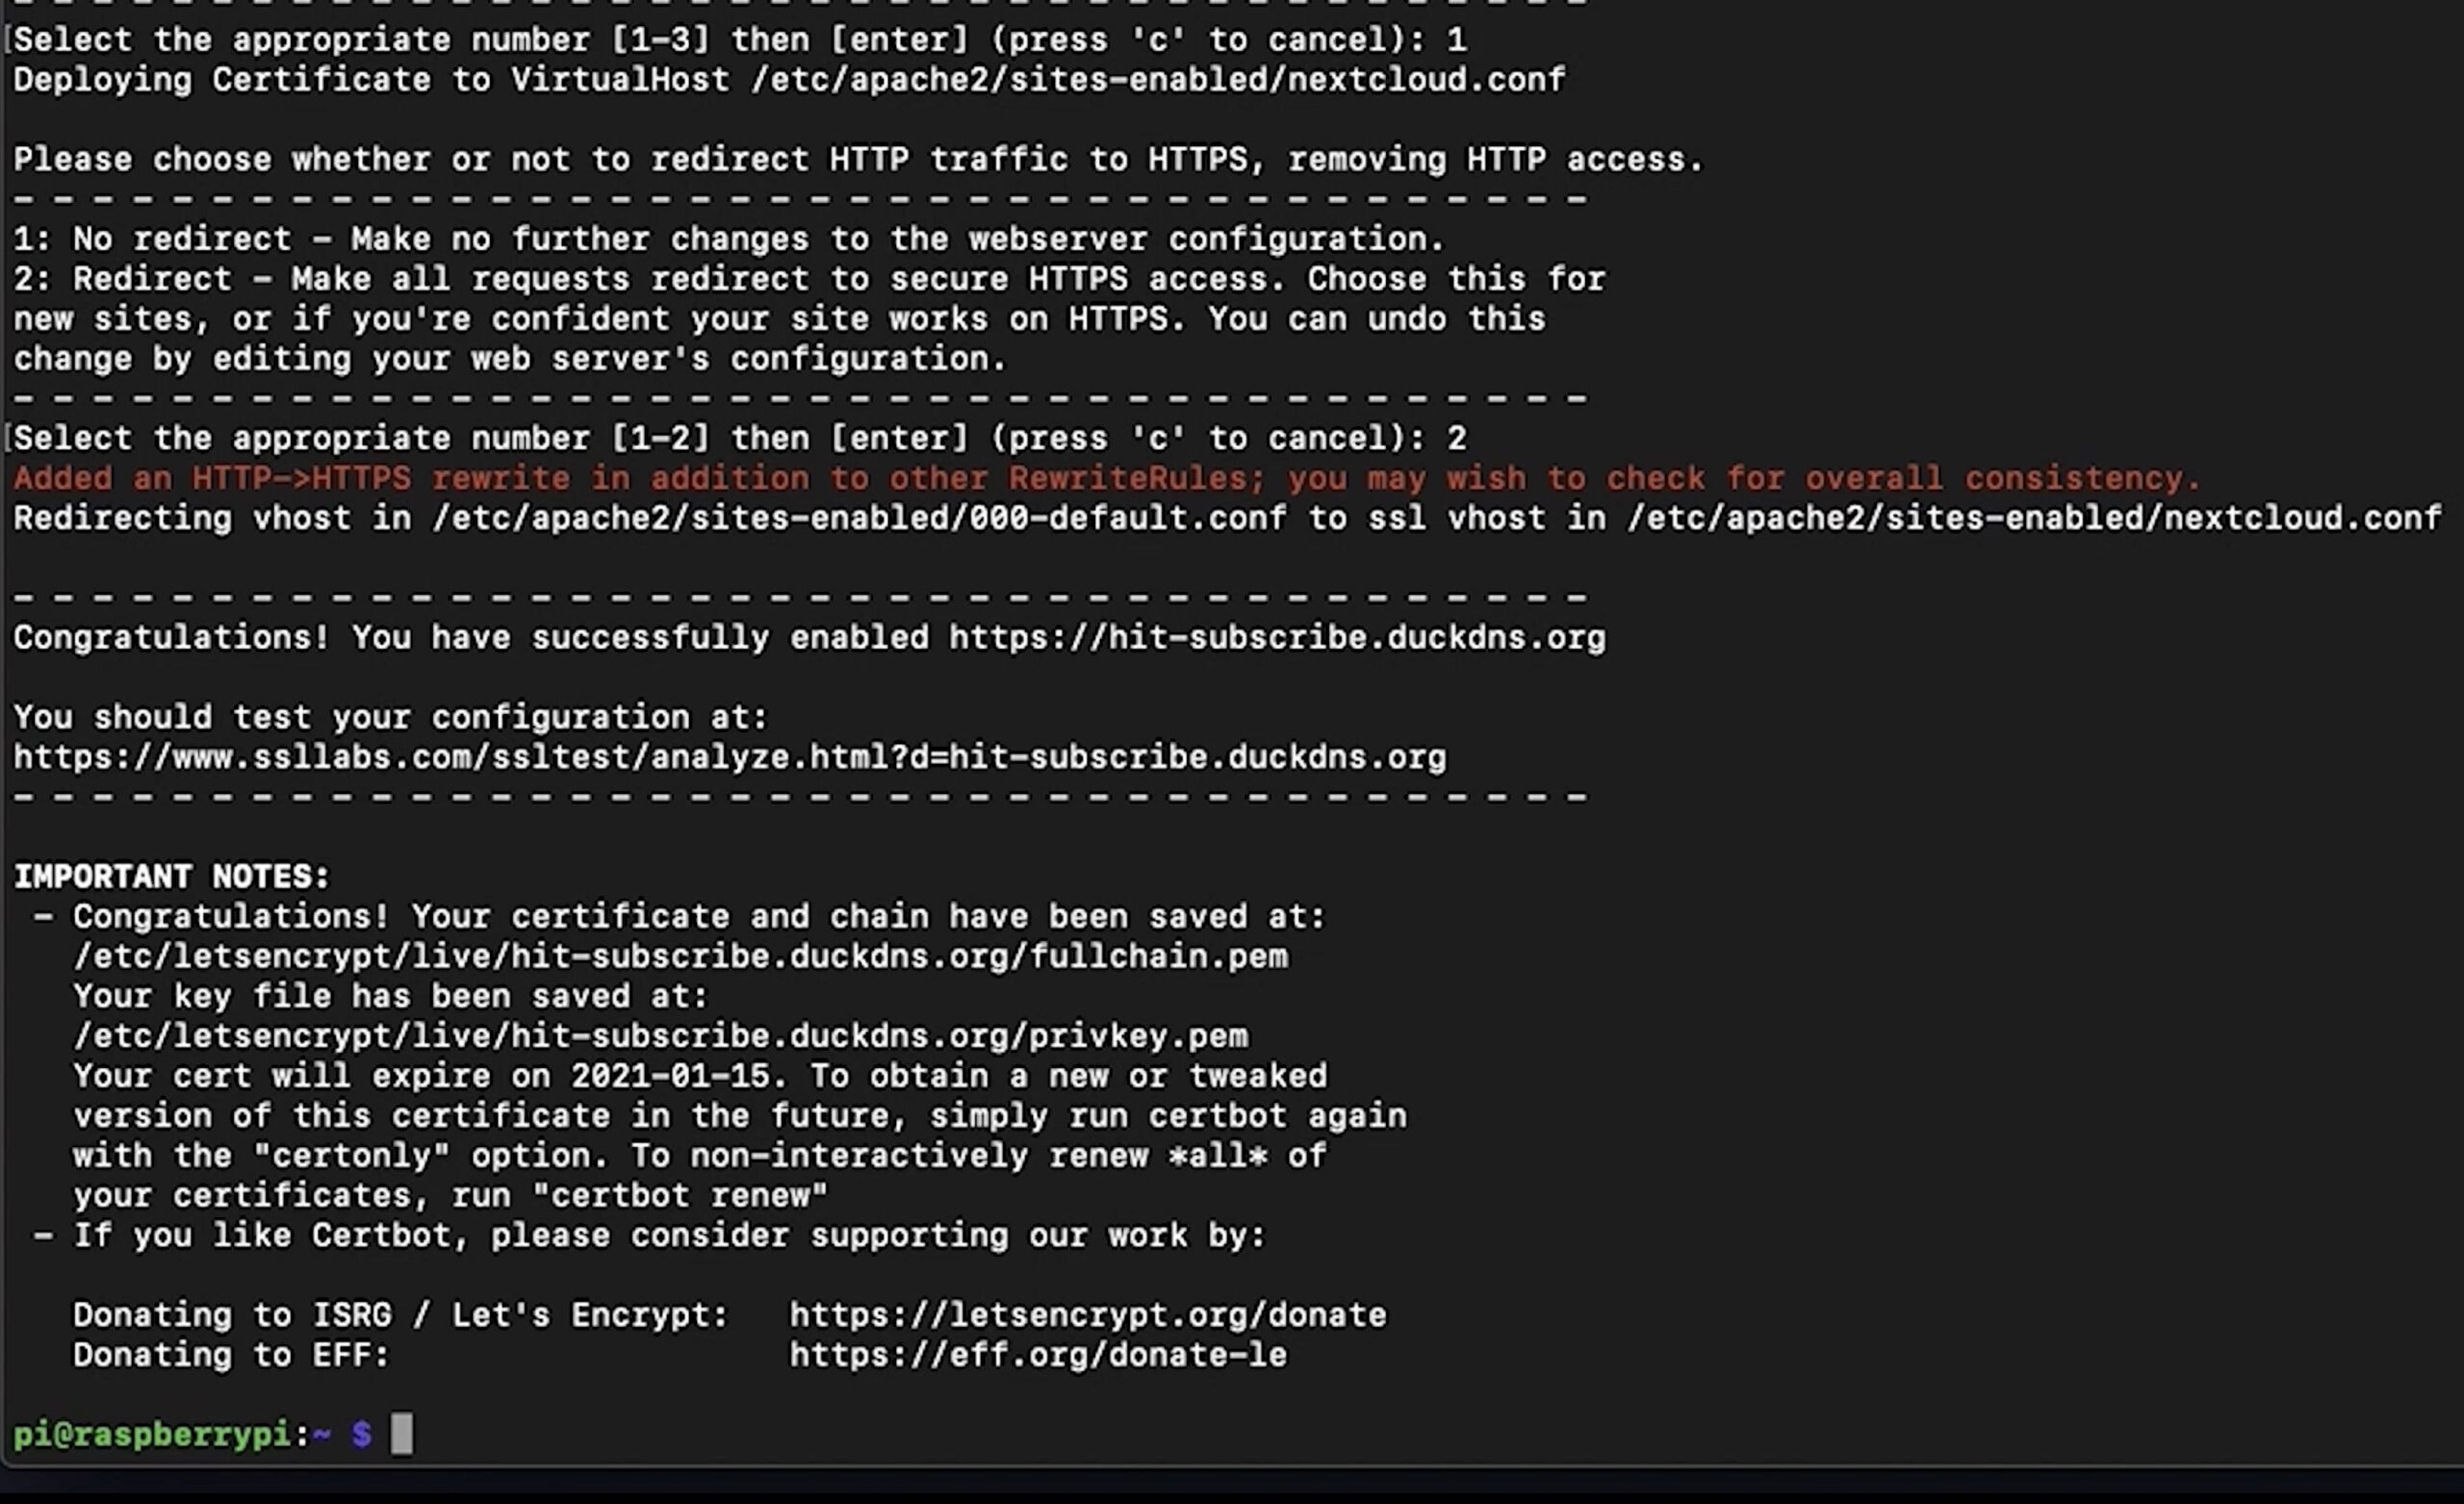
Now you can test if everything is green by open your DuckDNS sub-domain in a new browser/tab, but with https:// prefix, something like https://your_domain.duckdns.org.
You should receive no warnings and you will have a valid SSL for your Nextcloud on Raspberry Pi installation.
Nextcloud on Raspberry Pi availability note
Quick note here. The Nextcloud will be as reliable as your Raspberry Pi, Internet connection and electricity network at your home is.
The personal cloud from home using Nextcloud on Raspberry Pi will not be as reliable as the big cloud services in terms of availability unless, you have good UPS device, more than one independent Internet providers and regular backups. But most of the time the service should be up and running and you can enjoy it for regular home usage.
Question for You!
If you read everything up until now, can you make one more little effort for me by answering the question below?
Can you share are you already using any local or cloud storage service? And if yes are you happy? I will wait your answers my in the comment section below.
Nextcloud desktop and mobile clients
Now when you have your Nextcloud on Raspberry Pi installed and a DuckDNS sub-domain and a free SSL certificate from Let’s encrypt the only thing left is the easiest and it give the most fun. You just have to download and install Nextcloud client for your device(s).
There are clients for Windows, Linux, Mac, and for iOS and Android. Just Download the one that you wish and enter your SSL enabled DuckDNS during the configuration wizard as well as your Nextcloud credentials.
You can upload something from any of the clients and you should see it synced in the Nextcloud on Raspberry. That means your personal cloud is working perfect.
Congratulations! If you are as happy as I’m hit me up in the social networks, discord, in the comments or in YouTube with something simple like – “Nextcloud owned” or something more clever and I will know for what are you talking about.
Support my Work!
If you want to secure this blog existence you can become one of my supporters. You can see exactly how in this section of my site.
Any other sort of engagement on this site and my YouTube channel does really help out a lot with the Google & YouTube algorithms, so make sure you hit the subscribe, as well as the Like and Bell buttons.
You can also buy my Smart Home Getting Started Actionable Guide right here -> LINK
Also feel free to add me on Twitter by searching for @KPeyanski. You can find me on my Discord server as well.
I really hope that you find this information useful and you now know how to create personal cloud using Nextcloud on Raspberry Pi.
Stay safe and don’t forget – Home Smart, But Not Hard!
Thank you for reading, I will see you in the next article.
Great and precise tutorial .Nextcloud on Raspberry Pi. Being new at all if this I loved it. Thank you so much.
Sincerely
Steve
You are welcome! Thanks for that comment, and I’m really glad that I help somehow.
I do use a cloud service and I am not happy 🙁
Great article though, very helpful!
Hey there, glad you like the article you can check my other articles as well. BTW for which cloud service you are not happy?
I ran the script on my recently purchased PI 4 I can then see the password web page and noted the passwords but the activation action runs forever. Any ideas what is wrong.
The script seem to do a massive amount of work, not easy to see what went wrong, one message near the end says MySQL not supported, I don’t know if that a clue?
I used your tutorial with success but ended up borking my setup trying to move some data around. Is there a simple way to remove all the installation to start fresh without starting out with a whole new raspberry pi os image?
Check these instructions – https://help.nextcloud.com/t/how-to-completely-remove-nextcloud-server/34314
Have in mind that I never tried them before but they seems legit. Backup important stuff before you proceed.
I have followed your guide to install Nextcloud on Raspberry Pi 4. How do I backup NextCloud, all the database and details? can you please let me know
Hi there, you can check this guide for the Nextcloud backup – https://docs.nextcloud.com/server/latest/admin_manual/maintenance/backup.html
Been trying to re-install nextcloudpi on Raspberry Pi 4, 4gb, for last 2-3 months, but have been unable to do so. Your installation has got further than any other process (e.g. direct from nextcloud pi, .img, docker etc..), but activation still does not work sometimes and when it does, then loading each page afterwards is extremely slow. I am using Mac Big Sur, deactivated pop-up blockers, allowed all content. Using a proper power supply and SSD etc. I have been using nextcloudpi for 1-2 yrs now nwithout problems until now.
I don’t know what could be the problem to be honest. Did you try looking at any logs for errors?
Hi, good day. This is my first time using raspberry pi 4, i tried follow your instructions on nextcloud installation. Every things running smoothly finally it works. But one thing very strange that I can login via my pc & handphone using nextcloud user panel but can’t login to the nextcloudpi admin configuration page(ie. eg.xxx.ddns.et:4443) it shows “This site can’t be reached xxx.ddns.net took too long to respond.
Try:
Checking the connection
Checking the proxy and the firewall
Running Windows Network Diagnostics
ERR_CONNECTION_TIMED_OUT”
what is wrong? that means I can’t access server side configuration anymore?
Looking forward to your reply.
thanks for all your excellence tutorials.
Regards,
John
I get an error when running the script distro not supported Ubuntu 21.04 \n \l. Is there a way to fix this?
I’m not aware of that, sorry!