
Today I’m going to review 3 new products, a Wi-Fi router, a Network Attached Storage and personal hybrid cloud, a Wi-Fi router, a Network Attached Storage and personal hybrid cloud! Аre you getting it?
It’s a one and the same product that have all of these features and it’s called Amber Plus.
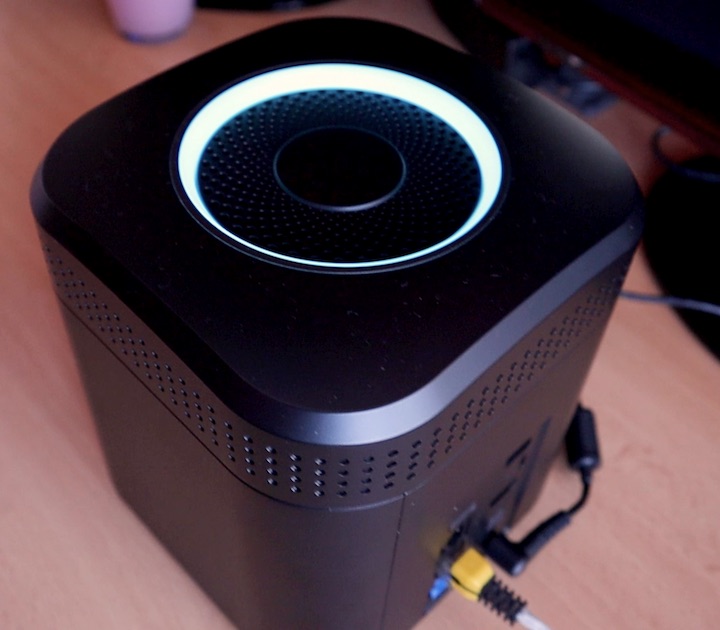
Get ready for another review where Home Assistant and Nextcloud are involved. This time I’ll also have my hands on one Hybrid and I’m not taking about a Prius or something, but about this all in one device called Amber Plus – a personal hybrid cloud.
With the size of a small home stereo speaker this device is having dual hard drives in RAID1 (your data is saved on two HDD to reduce the risk of data loss), a 4×4 MIMO router (AC2600) and Intel Processor (Dual Core Gemini Lake) inside capable of virtualisation and running Docker containers which opens to you almost endless possibilities.
If you want to buy Amber you can use the following affiliate link – https://amberpro.net/shop?aff_key=0S4QZJ35
Before we continue further I want to to tell you that at the moment I have:
- Always on NAS running on FreeNAS,
- Always on Home Assistant server,
- And a UniFi Dream Machine router.
All of these devices can be replaced by the Amber Plus. And I got a feeling that I will retire or at least offload some stuff around here after installing the Amber Plus.
Table of Contents
Setup the Device
To setup the device I will use the Amber Manager mobile app available for iOS and Android.
Download and install the mobile app and then just scan the QR code that is located under the Amber Plus device.
The Amber OS will be downloaded, the storage will be prepared for use and when all finish. You can login with the:
- Default username: admin
- Default password: admin1234
Then you can name your device and you have to create a LatticeNest ID (this is vendor of the Amber), which is free and very straightforward with the standard email confirmation.
In front or behind router?
Amber Plus can be used in front of the another router or behind an existing one. I will use it behind my router as I don’t want to replace mine just yet. This is from where you can change these settings:

Amber OS – the OS of a Personal Hybrid Cloud
Now when we are finished with the router configuration let’s check the Amber OS.
The Amber OS is accessible via Web Interface (you just have to type the IP of the Amber in a browser). And Amber OS looks like this:
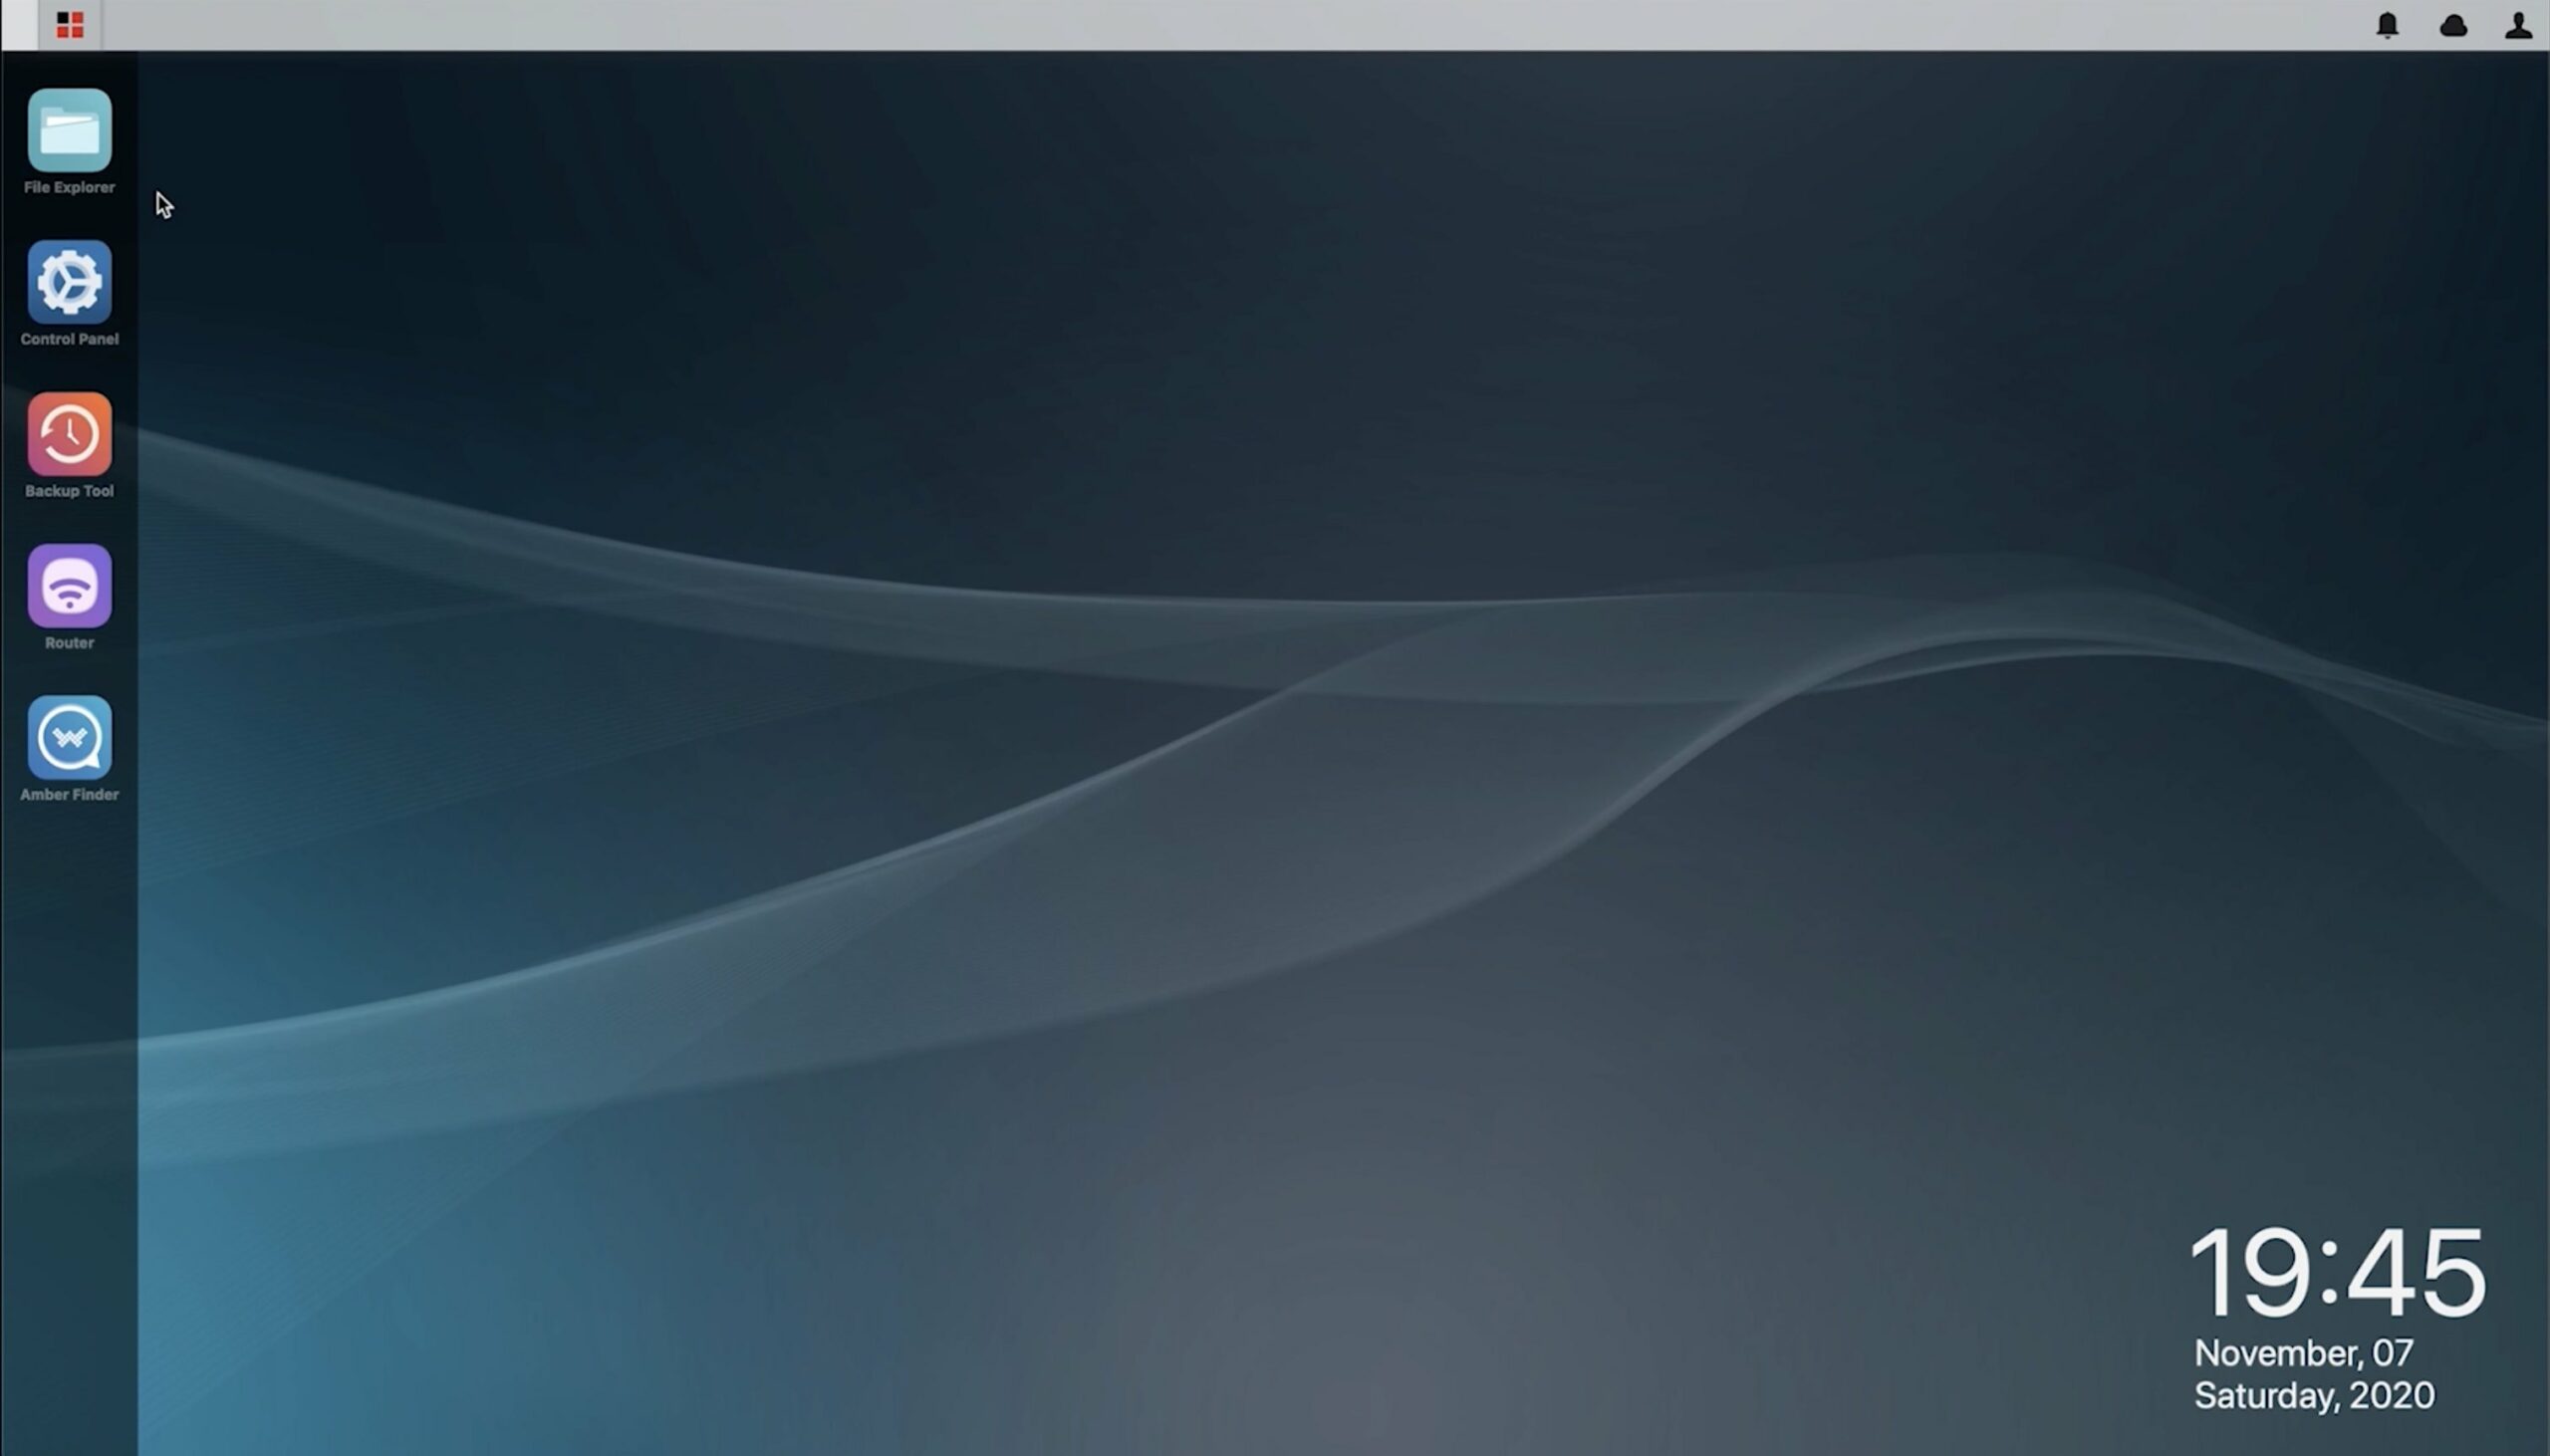
From here you can add/remove users and groups, share folders, set and change space quotas, enable/disable Time Machine, creating backups and snapshots, setting the built-in router and many, many more things.
But the one of the most important and fun options that you can do is to install the Amber Pro service. Amber Pro service allows you to install Docker containers on top of the Amber Plus device from the comfort of the web interface.
To install it click on the Control Panel (gear wheel icon) > Amber Pro (beta) > Install Now
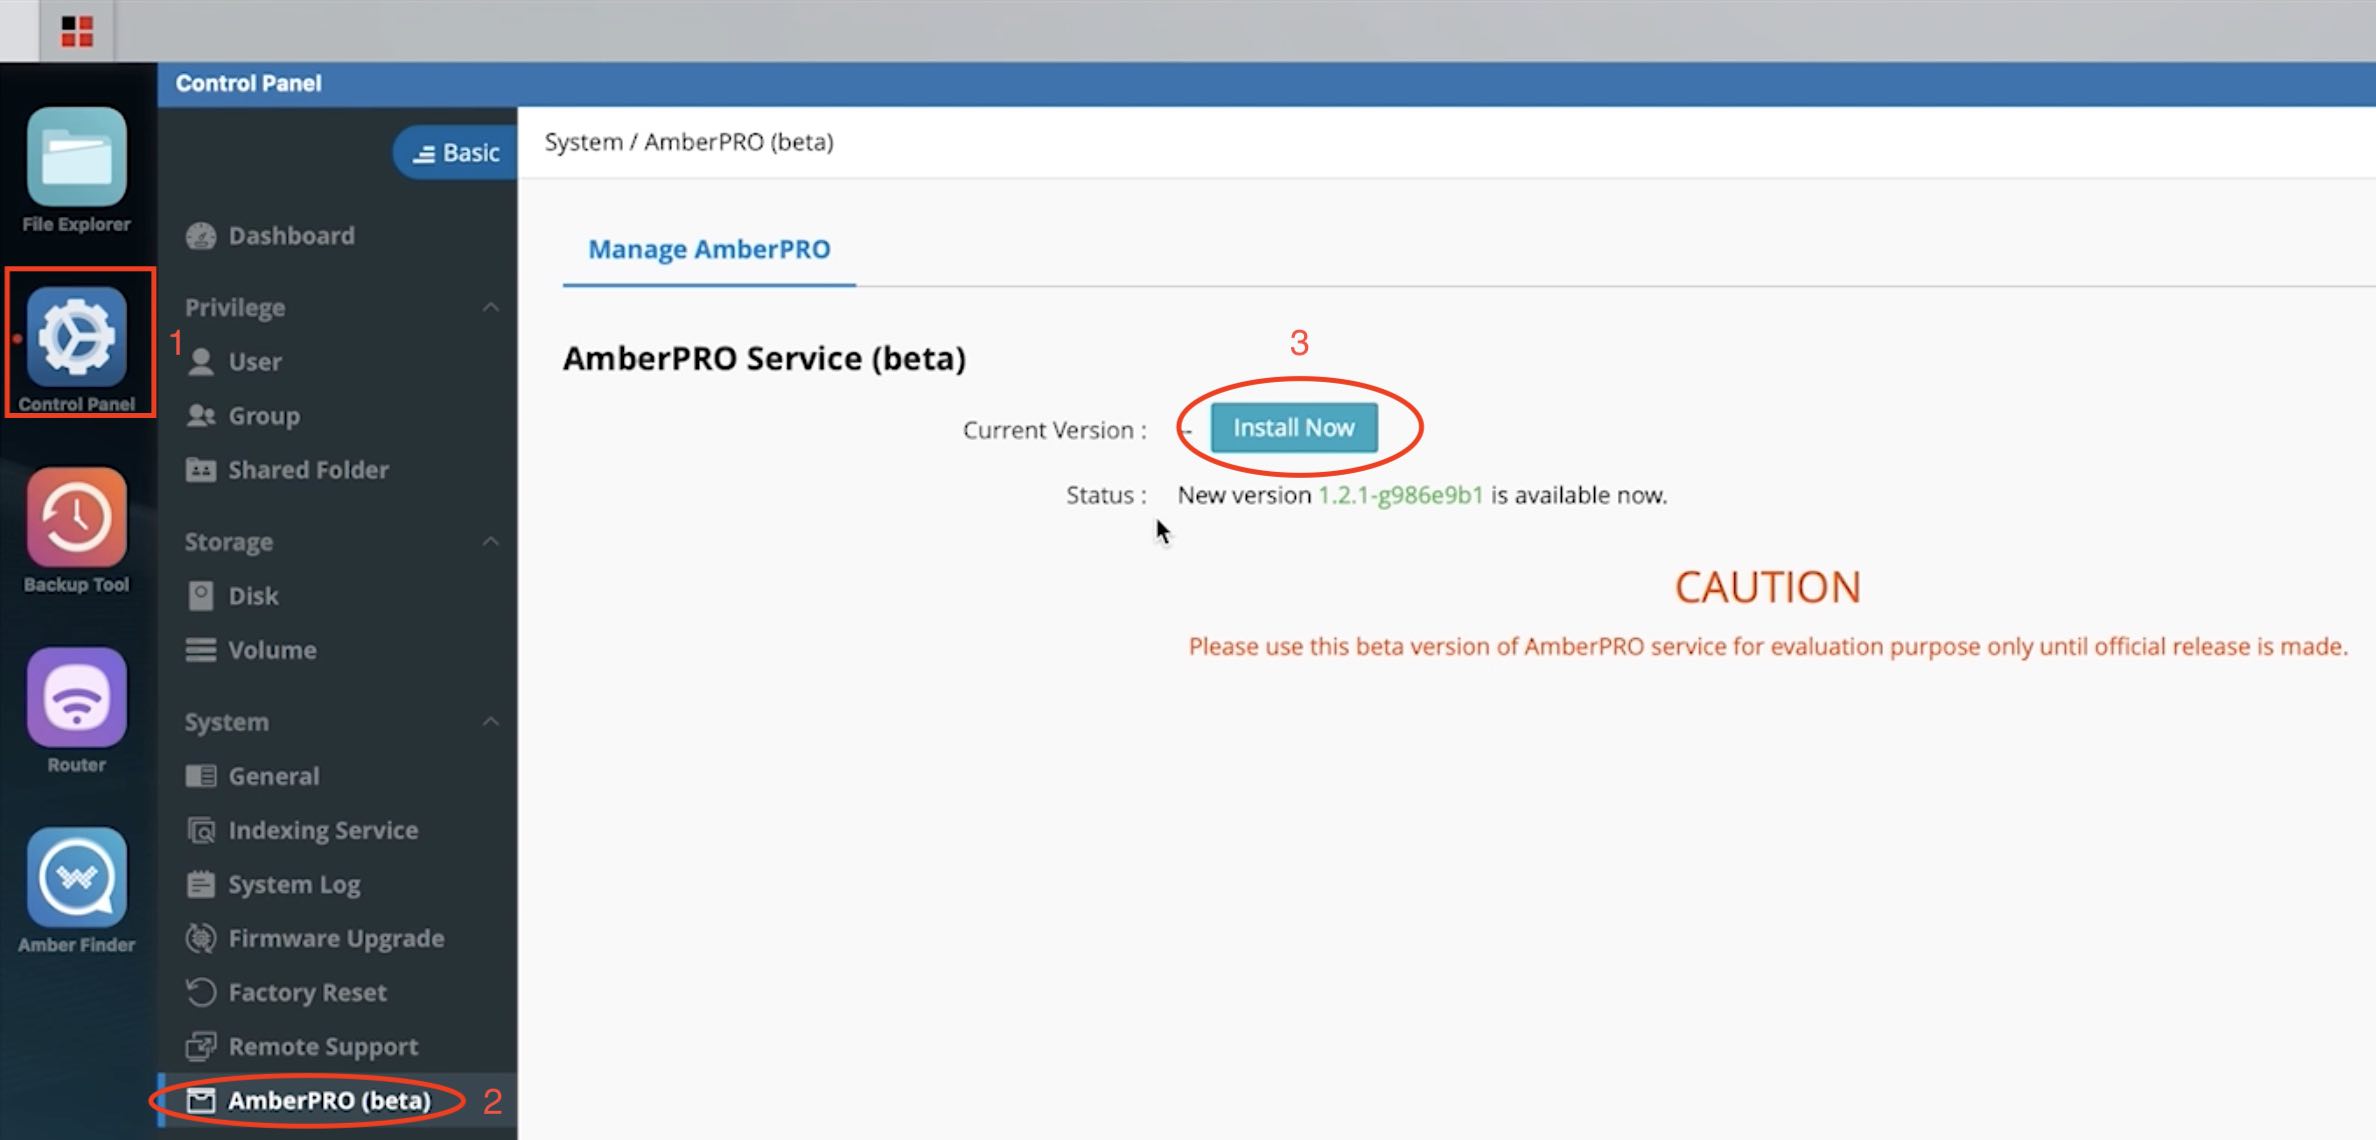
After successful installation your Amber OS will have one more green Icon where all of the new things related to Docker are located.
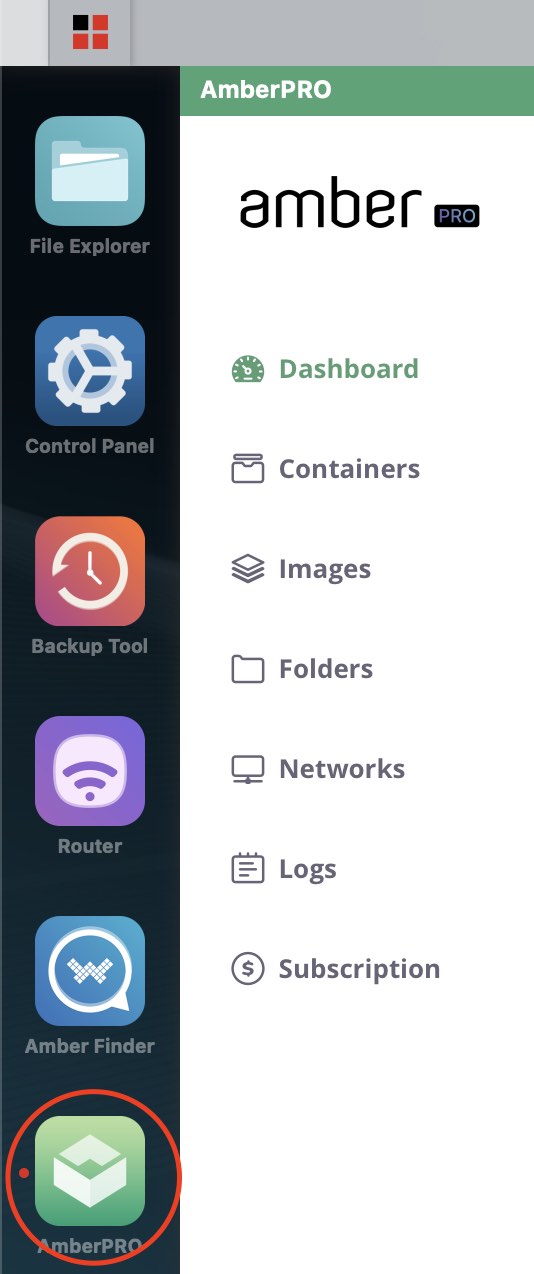
From Amber Pro you can create Docker Containers & Networks.
Before start creating Docker containers in Amber
Before you continue further with Docker it is a good idea to create one folder in Amber Plus that you can use to map your Docker containers folders. In other words you need a place in Amber where to expose the internal folders from Docker containers.
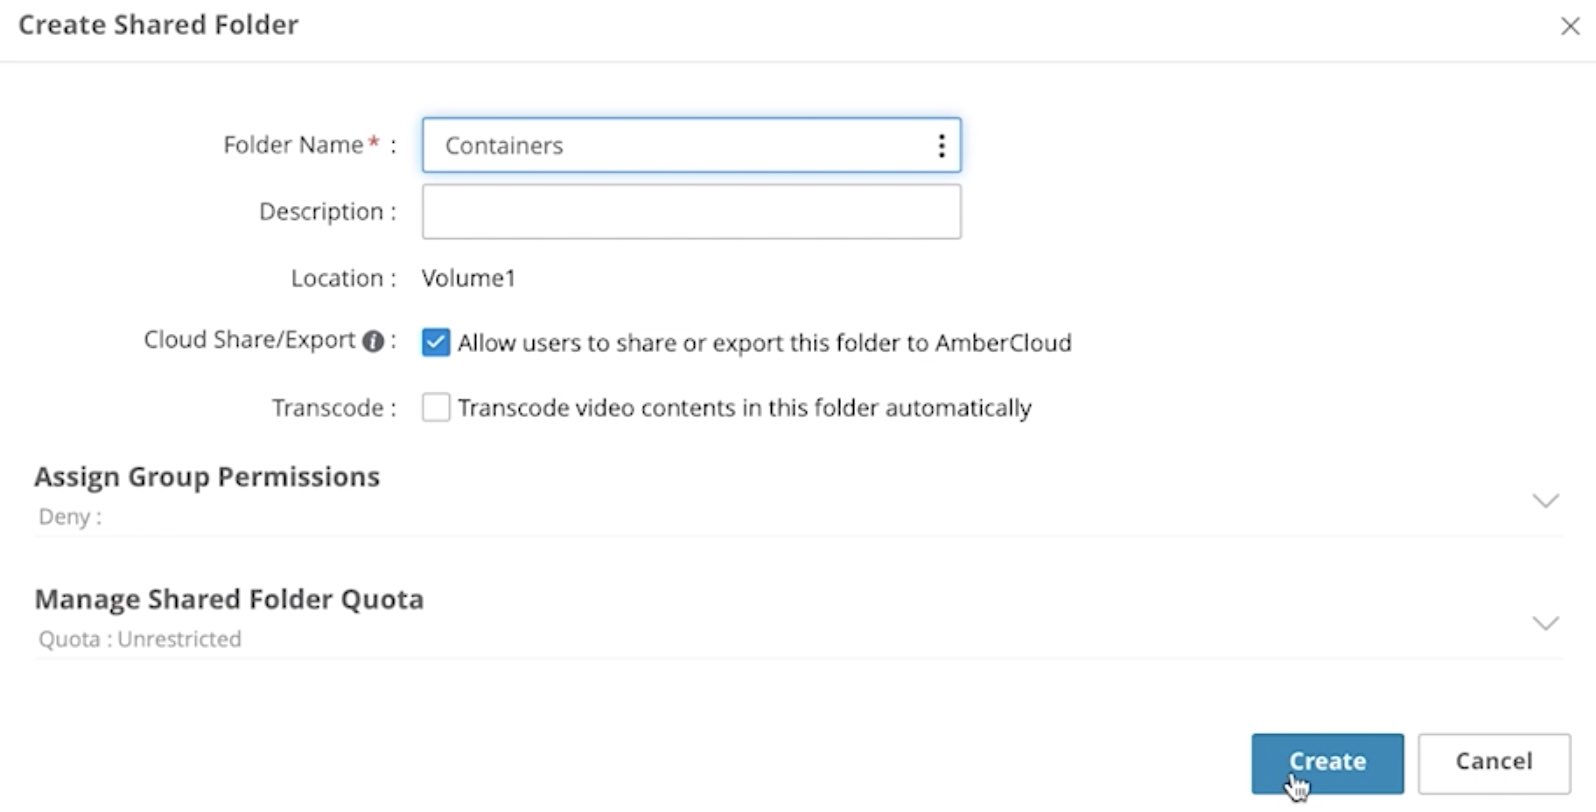
Go to AmberPRO > Folders > Manage > Create > Type a Folder Name, where “Containers” is a good suggestion and hit the Create button.
From now on you can create subfolders inside this “Container” folder for every Docker container you wish. You will see this in action in the next two sections where we will add Home Assistant and Nextcloud as Docker containers in Amber Plus.
Install Home Assistant on Amber Plus
It is time to run Home Assistant on Amber Plus using Docker container.
First create a container folder if you haven’t done that already.
Inside Amber OS web interface go to: AmberPRO > Containers > Create Container > Manually create.
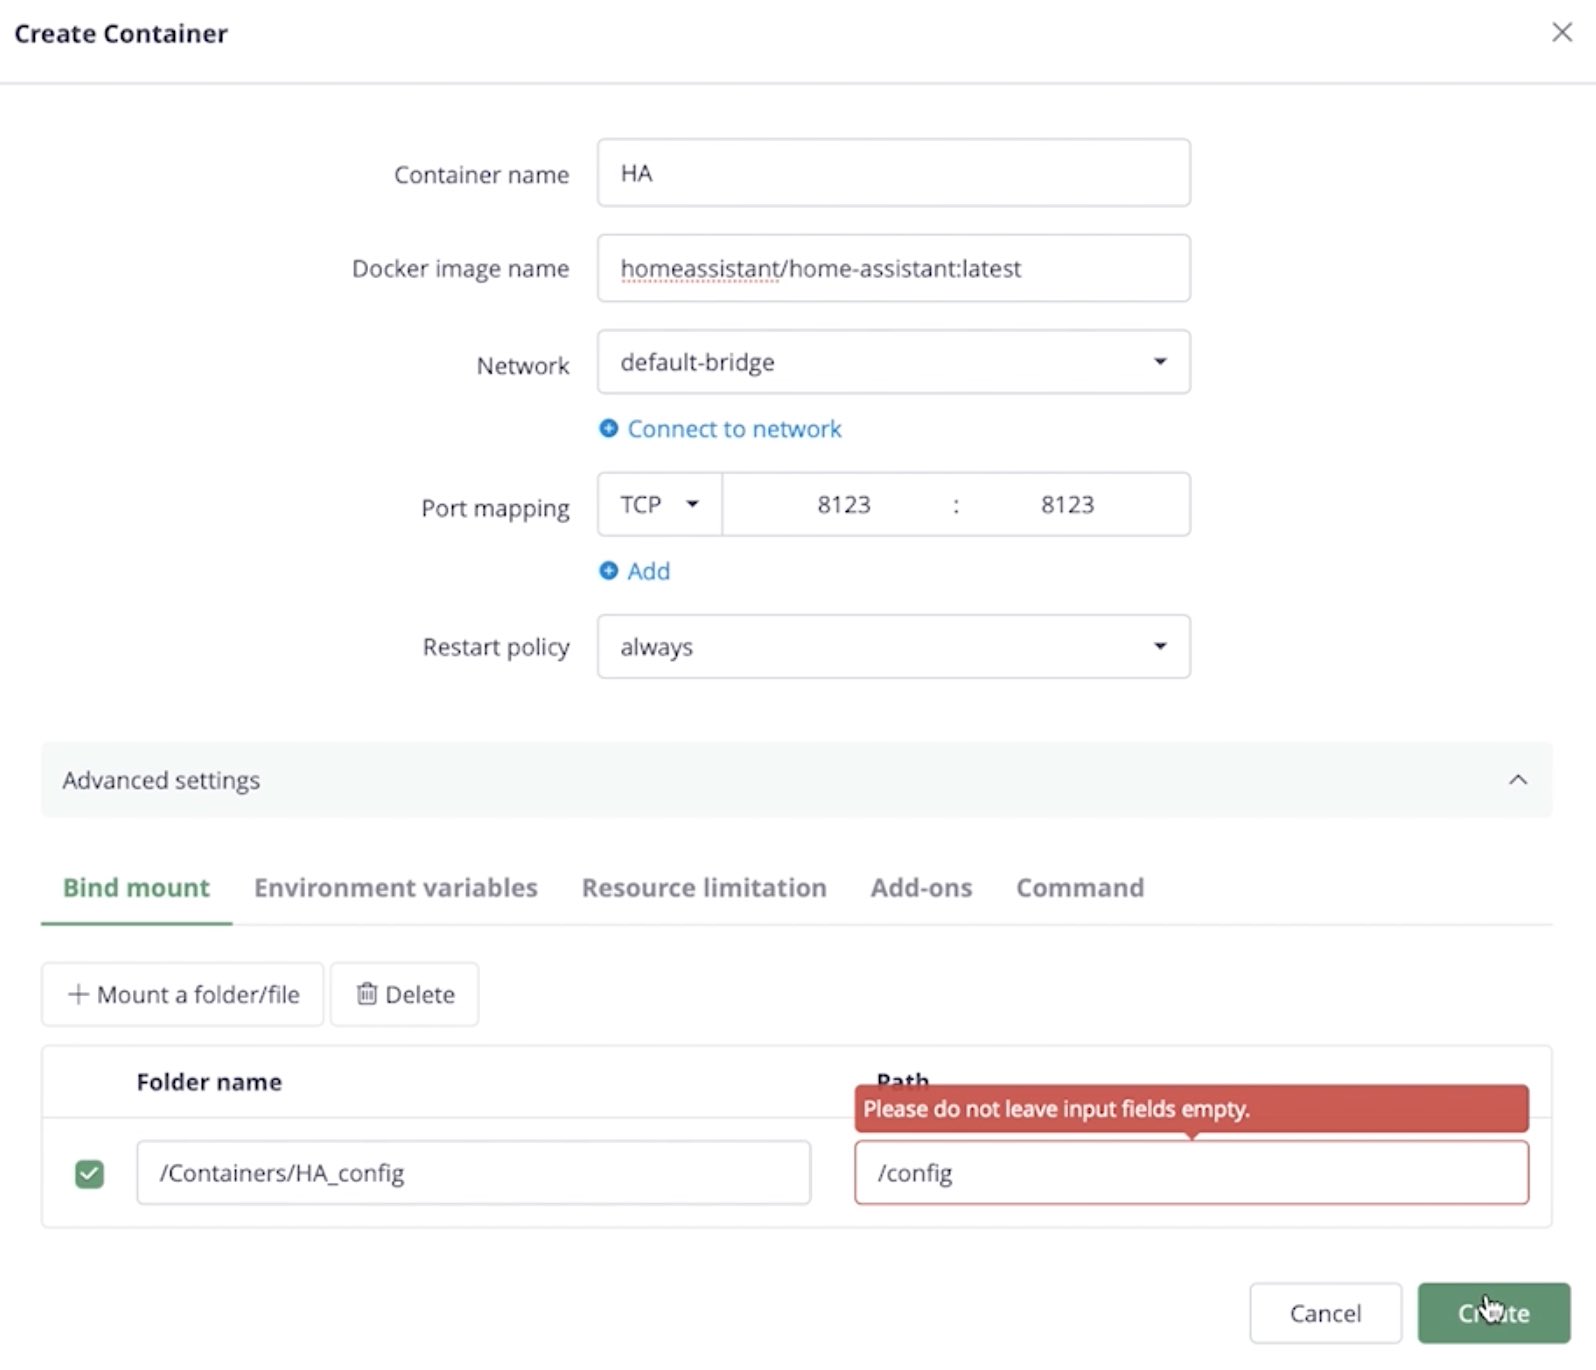
- As Container name type “HA” or whatever you wish.
- For Docker image name type: homeassistant/home-assistant:latest
- Network stays: default-bridge
- For Port mapping type: 8123 for both Amber port and Container port.
- Scroll down and click on Mount a folder/file button:
- Select the tick that is on the left side of the Mount a folder/file.
- Click on the Mount a folder/file and select the Shared (Container) folder that you create above.
- Inside this folder create a new one called “HA_config” for example and click on Add button.
- In the next text box called Path type: /config
- Finally click on Create button.
The latest Home Assistant image will be automatically downloaded from https://hub.docker.com and the container will be started after all finish. As a result you will have Home Assistant up & running in no time.
You can access the Home Assistant by open a browser and type: http://YOUR_AMBER_IP:8123
If you follow the above steps exactly as I’m showing you can find the Home Assistant configuration folder inside /Containers/HA_Config of your Amber Plus.
Install Nextcloud on Amber Plus
That was easy I can now have Home Assistant container version in under two minutes. Let’s now try to install Nextcloud. And if you don’t know what Nextcloud is check this tutorial of mine.
First create a container folder if you haven’t done that already.
Inside Amber OS web interface go to: AmberPRO > Containers > Create Container > Manually create.
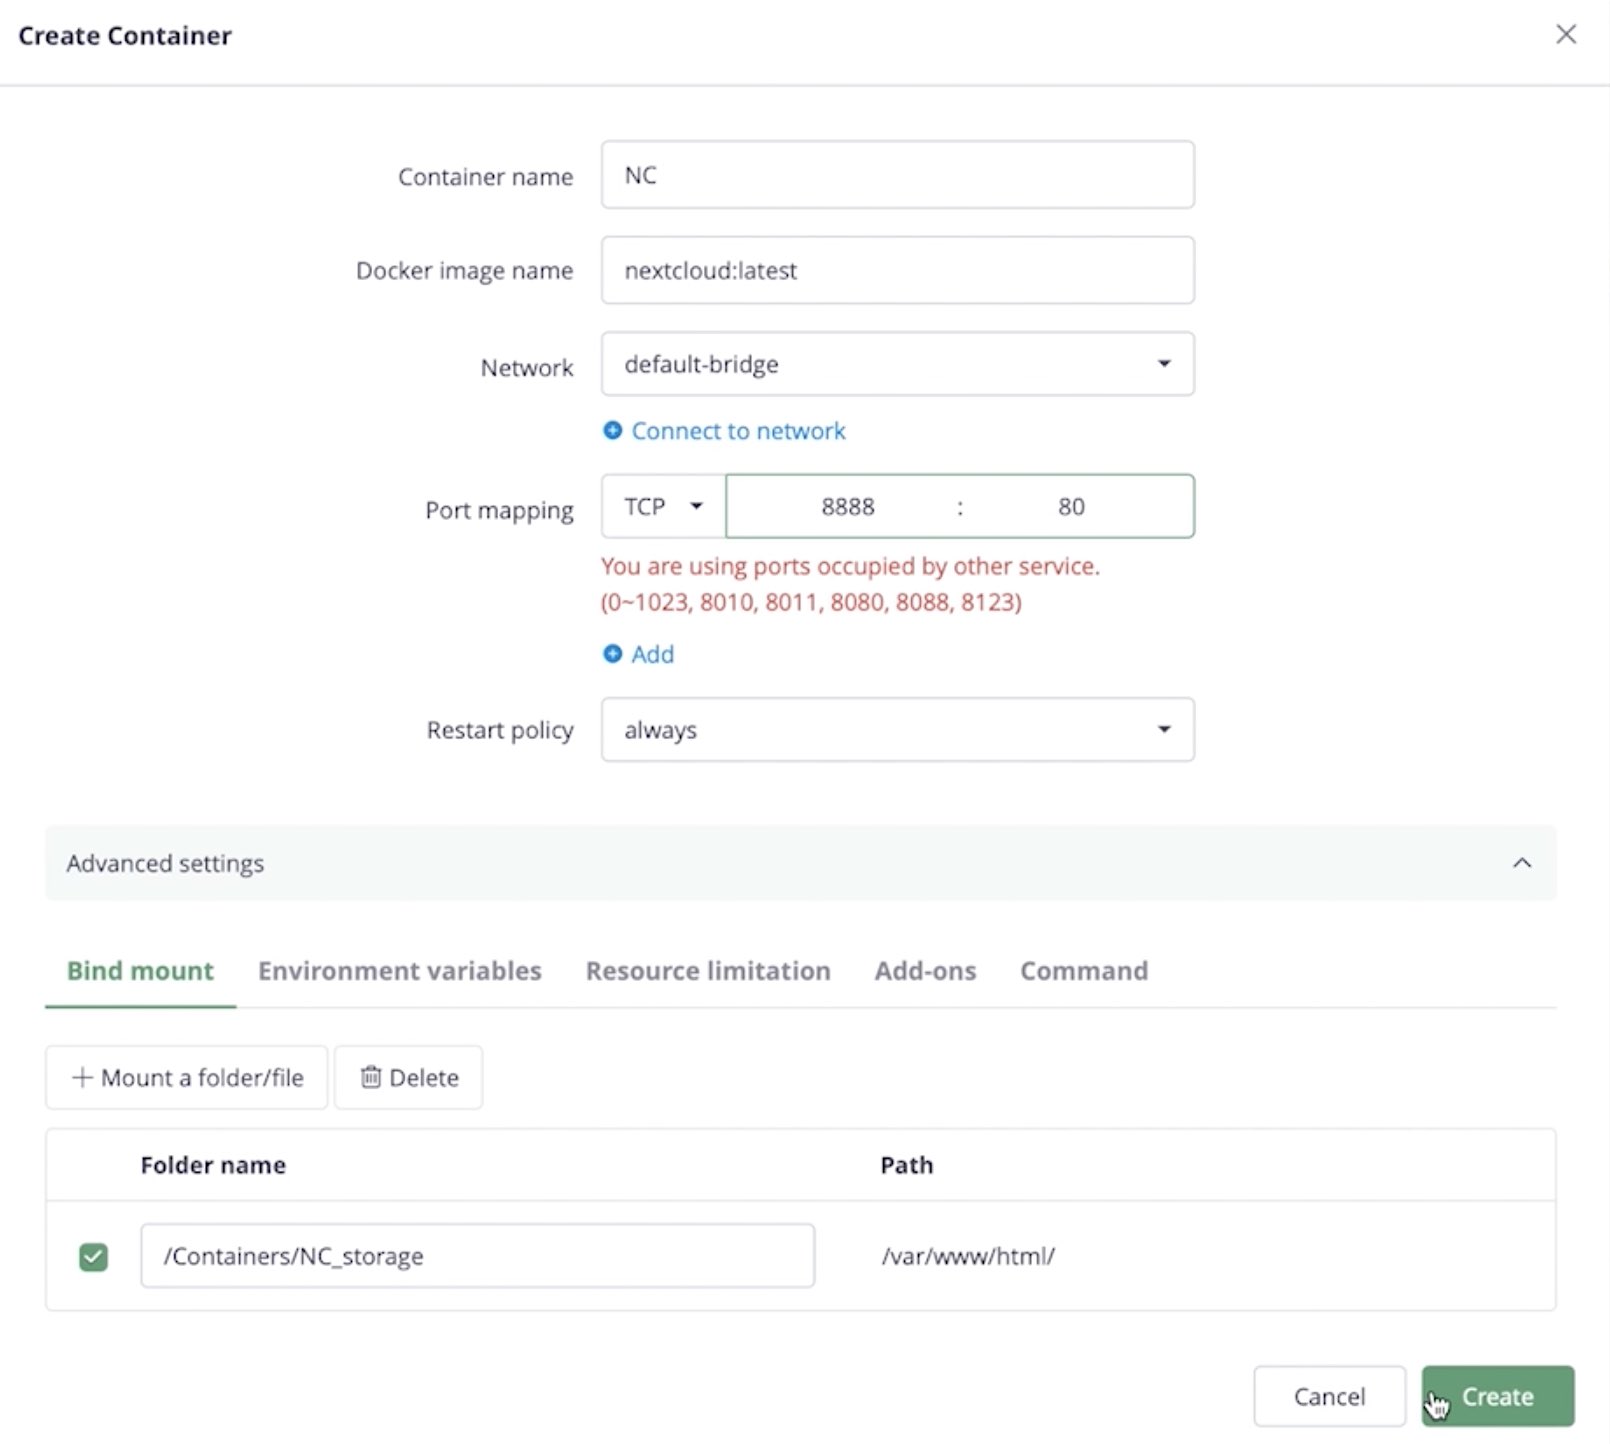
- As Container name type “NC” or whatever you wish.
- For Docker image name type: nextcloud:latest
- Network stays: default-bridge
- For Port mapping type: 8888 for Amber port and 80 for Container port.
- Scroll down and click on Mount a folder/file button:
- Select the tick that is on the left side of the Mount a folder/file.
- Click on the Mount a folder/file and select the Shared (Container) folder that you create above.
- Inside this folder create a new one called “NC_storage” for example and click on Add button.
- In the next text box called Path type: /var/www/html/
- Finally click on Create button.
You can access Nextcloud by open a browser and type: http://YOUR_AMBER_IP:8888
If you follow the above steps exactly as I’m showing you can find the Nextcloud configuration folder inside /Containers/NC_storage of your Amber Plus.
Check System Utilization
Now both Home Assistant and Nextcloud Docker containers are running, let’s quickly check how much resources we have left on the Amber Plus.
Open Amber OS web interface and go to: Control Panel > Dashboard

With two Docker Containers (Home Assistant and Nextcloud) running simultaneously the Amber Plus usage is around 50% memory and 5% – 30% CPU.
Which is really nice and everything looks green!
Where to Buy Amber Plus?
If you are reading up until here – good job! You earn it 🙂
You can get a 10% discount if you buy an Amber Plus from https://amberpro.net/
You just have to use the discount code: KIRIL
during the checkout process. Good luck!
Support my Work!
If you want to secure this blog existence you can become one of my supporters. You can see exactly how in this section of my site.
Any other sort of engagement on this site and my YouTube channel does really help out a lot with the Google & YouTube algorithms, so make sure you hit the subscribe, as well as the Like and Bell buttons.
You can also buy my Smart Home Getting Started Actionable Guide right here -> LINK
I really hope that you find this information useful and you now know more about Amber Plus and running Home Assistant and Nextcloud docker containers on it.
Also feel free to add me on Twitter by searching for @KPeyanski. You can find me on my Discord server as well.
Stay safe and don’t forget – Home Smart, But Not Hard!
Thank you for reading, I will see you in the next article.