
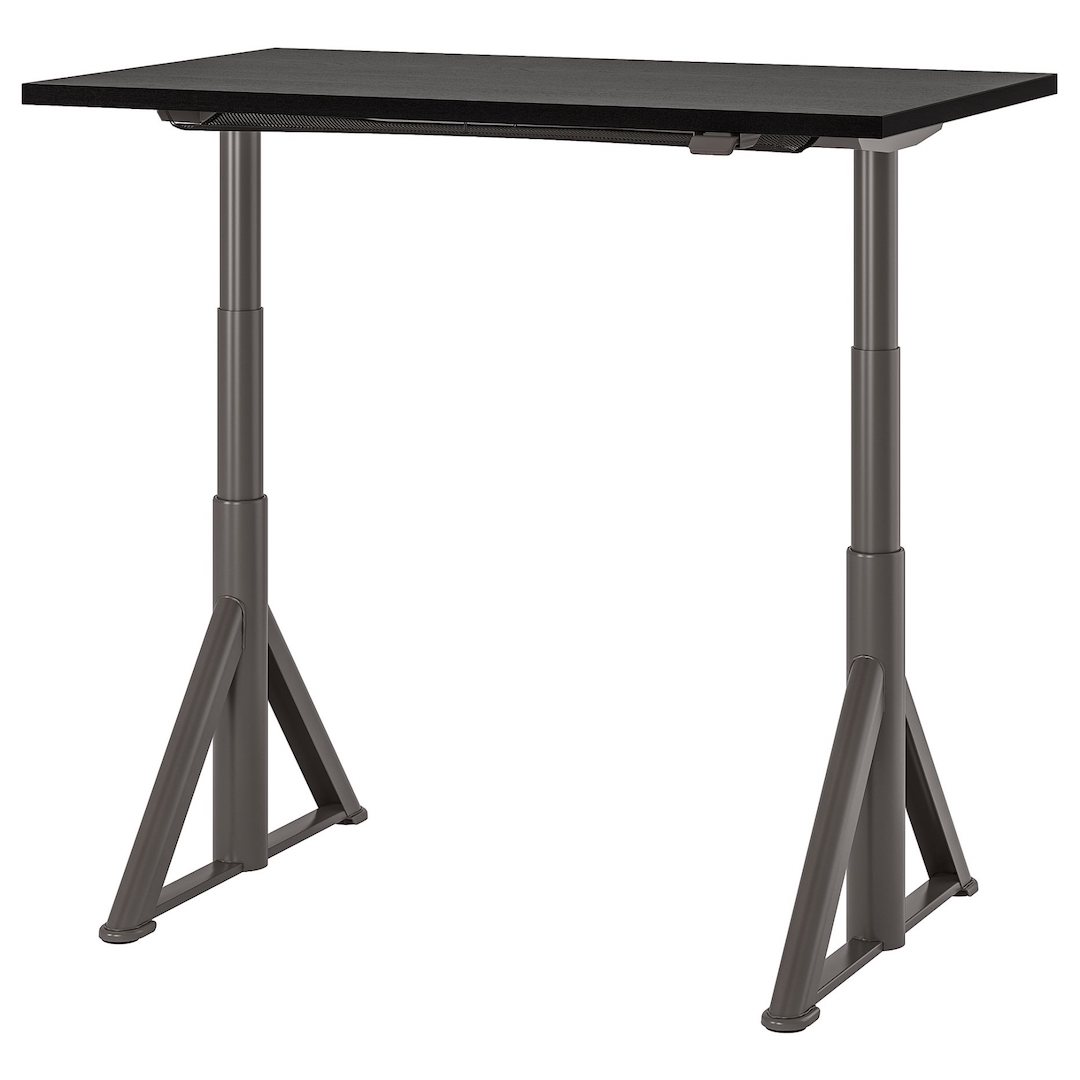
I bought an IKEA IDASEN standing desk which can be moved up and down with a push of a button and I love it. But there is one major problem – the IKEA desk have no memory and I cannot set it to a predefined fixed height.
However, thanks to Home Assistant, ESPHome and an ESP32 device I made my IDASEN IKEA Desk smart.
Table of Contents
What is the main problem?
Just a quick story before I start the actual implementation:
I’m working from home most of the time lately and I spend most of my time sitting on a chair. The problem is that my neck and back are not very happy about that fact, as they started to shudder and hurt.
That is why I tried to change my old chair with a better one (I’m a big fan of IKEA and I also bought the chair from there), but then my desk turns out to be low in height, so I started to look around for a new desk as well. I had read somewhere about the standing desks and their benefits, so I dig into the topic more and then I decided to go for it.

It turns out that the IKEA is selling one of the best desks with motors, so you can have a stand desk and when you get tired to – lower it down and to sit on a chair as usual (and vice versa).
These IKEA standing desks doesn’t come cheap, quite the opposite they are freaking expensive, but I prefer to spend my money now on a standing desk, than later on doctors.
So I bought one.
IDASEN vs BEKANT Standing Desks
Quick tip here, if you decide to buy similar standing desk from IKEA have in mind that they have two very similar models:
- One is called – IDASEN
- The other is called – BEKANT
Price-wise they are almost the same here in Europe\Bulgaria, but try to avoid BEKANT as it is problematic and it is not as stable as IDASEN. I test them both and I read and watched a lot of reviews, so to save you some time – go for IDASEN standing desk and ignore the other.
What is the end goal?
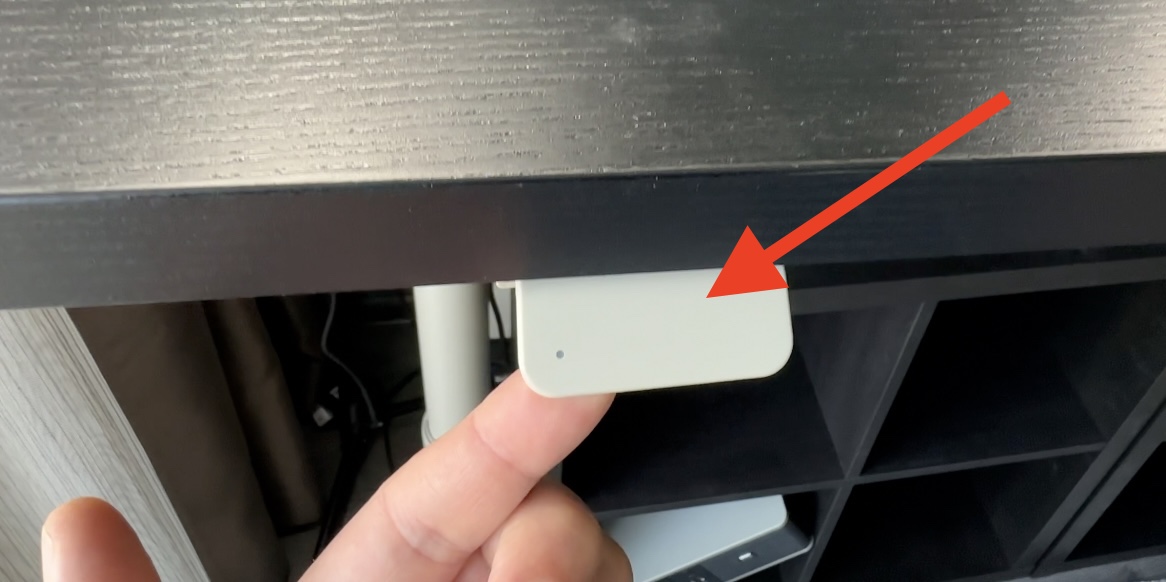
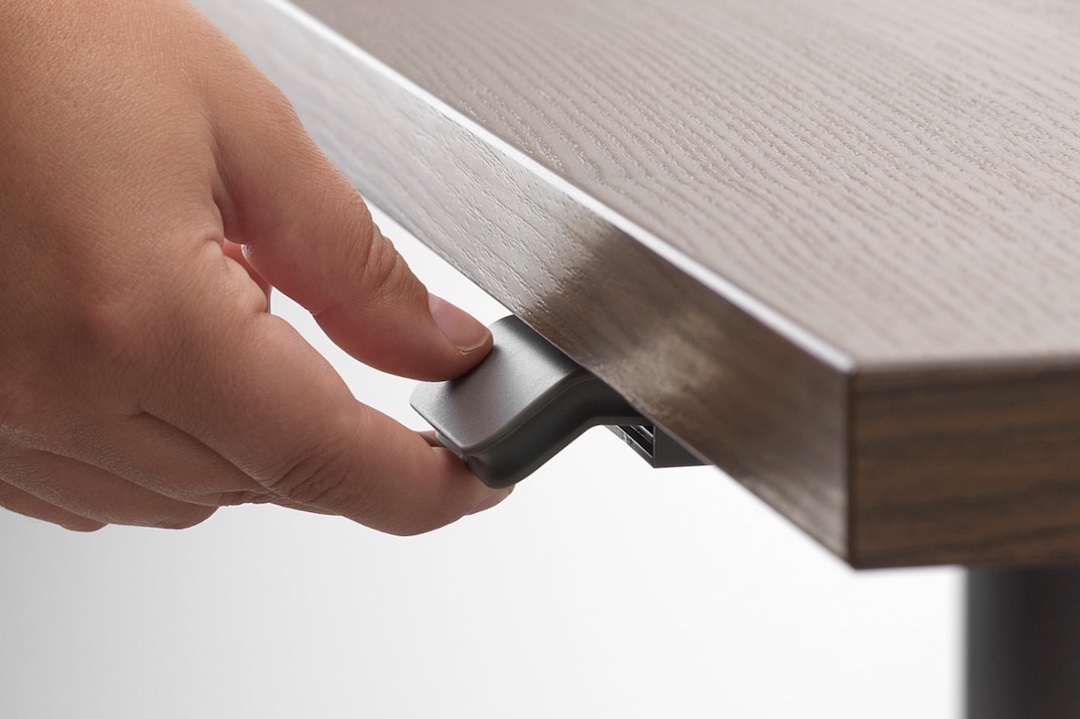
The IDASEN standing desk is having up and down switch and Bluetooth support, but as I said in the beginning, there is no memory and you cannot move the desk to a certain fixed height.
The lack of memory buttons is not such a big of deal, but as I love to automate things, I decided to try adding the IDASEN standing desk to my Home Assistant.
What is needed to make the IKEA IDASEN Desk smart?
Here is what is used to make my IKEA standing desk smart. Have in mind that I’m sharing affiliate links to the needed products. If you buy something from these links I will receive a small commission from your purchase with no additional cost for you.
D1 Mini ESP32 (the brain)
First thing that is needed is a D1 Mini ESP32 board that cost around $4-6 in AliExpress website and a little more in Amazon.

- D1 Mini ESP32 (AliExpress) – https://s.click.aliexpress.com/e/_DDTSWkb
- D1 Mini ESP32 (Amazon) – https://amzn.to/3S7X6ar
The above board (D1 Mini ESP32) will be used to communicate with the IDASEN standing desk from one side and with Home Assistant from the other. This will be become possible after installation of the ESPHome software on the D1 Mini ESP32. Do not worry the procedure is very simple, as you will see later.
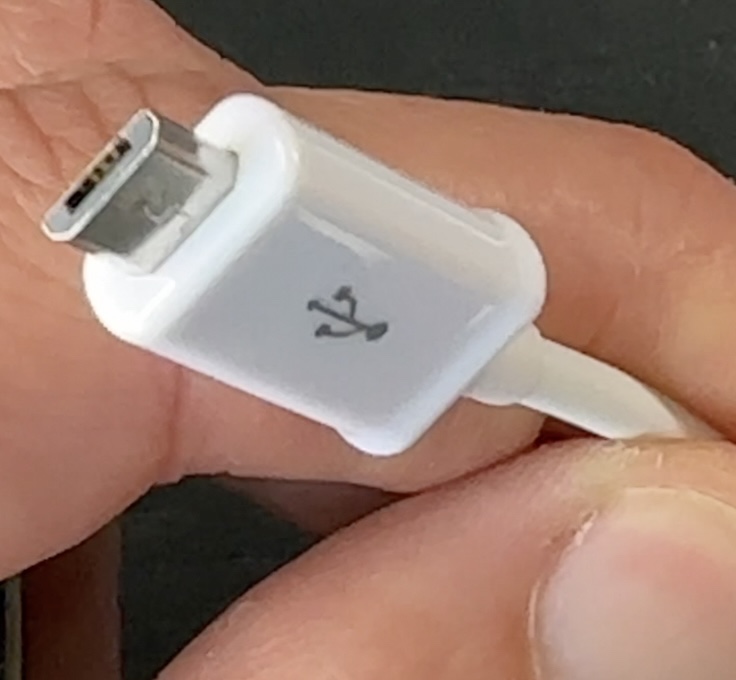
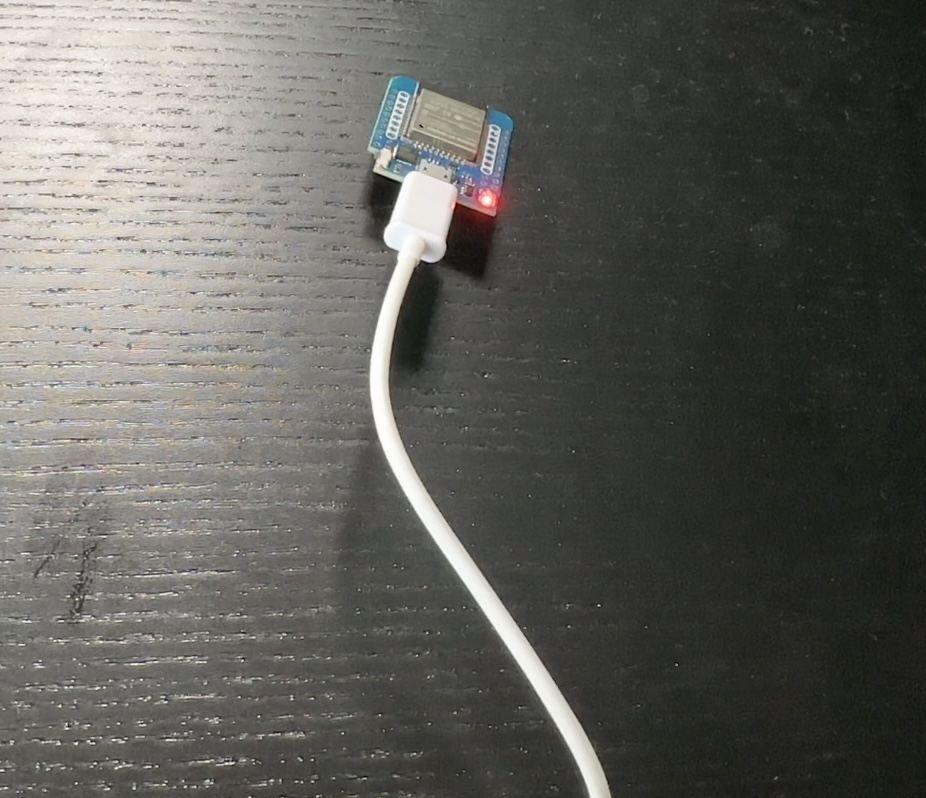
Micro USB cable
Also a Micro USB cable is needed to initially flash and to power the D1 Mini ESP32.
Quick Tip: Some Micro USB cables are cheaper and for charging purposes only (some wires are missing inside them). Try to avoid the charging only cables and buy DATA Micro USB cables, as they can be used for both flashing and charging.
- Micro USB Cable (AliExpress) – https://s.click.aliexpress.com/e/_DBkxndZ
- Micro USB Cable (Amazon) – https://amzn.to/3rJ3aeM
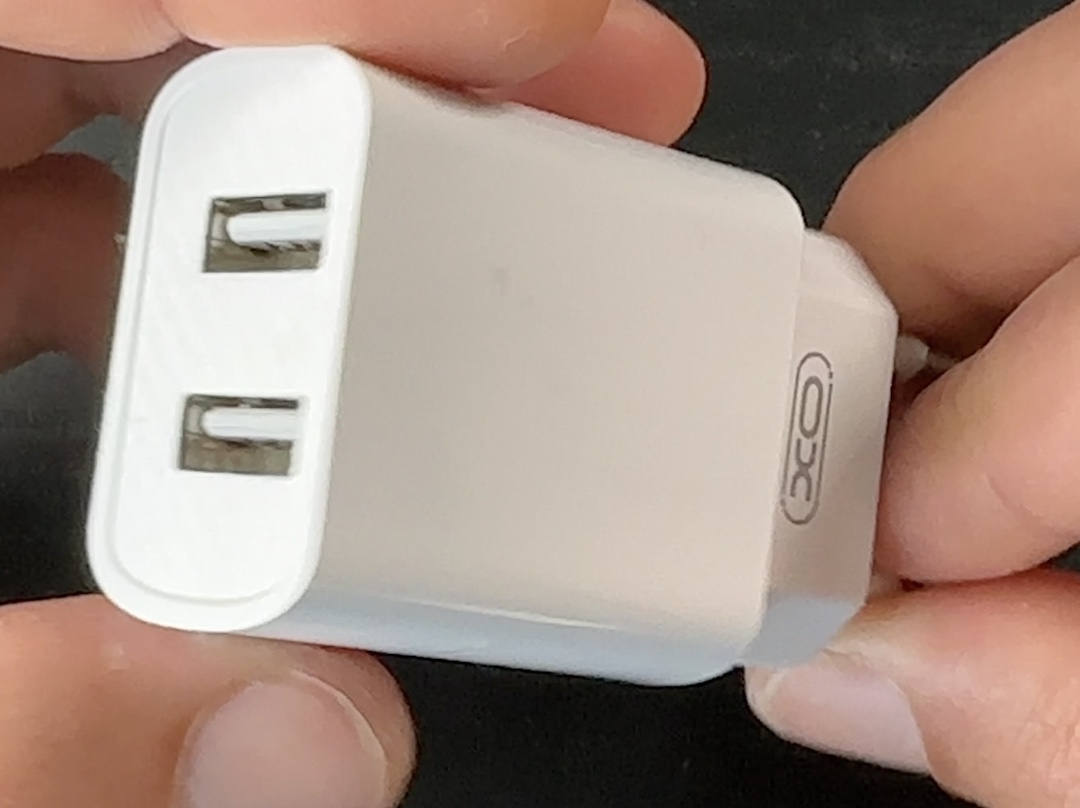
USB adapter / wall charger (optional)
Optionally, an USB adapter / wall charger is also needed. The D1 Mini ESP32 can be powered from any standard USB Socket, but if there is no free socket available, then an USB wall charger may be needed.
- EU/US USB adapter + cable (AliExpress) – https://s.click.aliexpress.com/e/_DcI4Vf9
- EU USB adapter/charger (Amazon) – https://amzn.to/3CMdysL
- US USB adapter/charger (Amazon) – https://amzn.to/3SRDEjm
Home Assistant & ESPHome Dashboard
Apart from the parts listed above – Home Assistant & ESPHome Dashboard is also needed. ESPHome Dashboard can be easily installed as Home Assistant add-on, but of course other methods are also possible. Check my article for ESPHome if you need more info – Complete ESPHome Installation Guide: 4 different ways to install ESPHome
About Home Assistant, what can I say? I’m talking about it all the time, because it is such a great and free Smart Home Hub.
If you still don’t have it or you want to understand what are the 4 official & supported ways to get Home Assistant + 1 secret and super easy way to start it on your PC in under 5 minutes, then go and register for my free Webinar which is available on my other website – https://automatelike.pro/webinar
How to get the IDASEN Bluetooth MAC address?
Before I continue to the installation of the ESPHome software on the D1 Mini ESP32 device, I have to pair my IDASEN desk with my computer or with my phone, so I can get the Bluetooth MAC address of the desk and later to use that address in the ESPHome configuration.
Possible ways to get the IDASEN Bluetooth MAC address are the following:
Using a phone and BLE Scanner app
I’ve heard that BLE Scanner 4.0 app for iOS and Android can help extract the Bluetooth address of the IDASEN desk, but I never tried it. Let me know if you have any experience with any of the above apps.
Using Windows
I’m pretty sure that getting the IDASEN Bluetooth MAC address from Windows OS is as easily possible, but to be honest I don’t know what are the possible methods there, if you happen to know that let me know in the comments section.
Using macOS
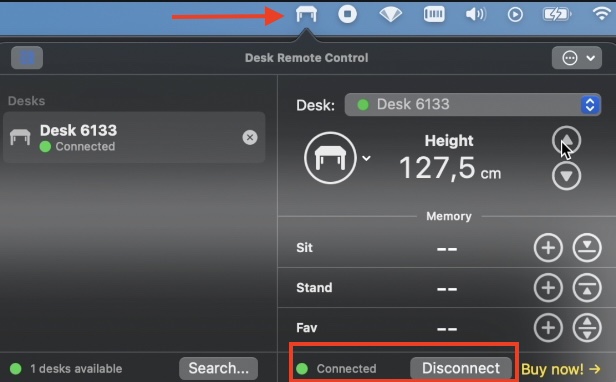
I’m using macOS and I will use the Desk Remote Control application available in the macOS App Store to get the IDASEN Bluetooth MAC address. Here are the steps that I did:
- I downloaded and started the Desk Remote Control
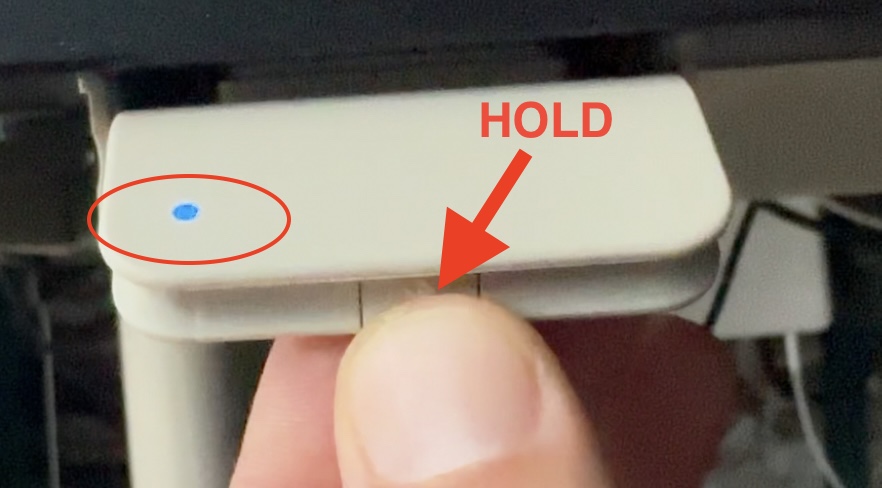
- I put the IDASEN Desk into a pairing mode by holding the Bluetooth button until the blue LED start flashing.
- Inside Desk Remote Control, I searched for a new Bluetooth desk and I connected to it.
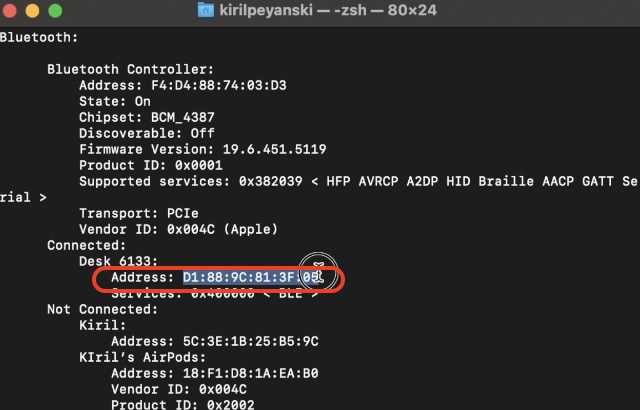
- I opened the Terminal app in macOS and I typed:
system_profiler SPBluetoothDataTyp- I searched for my IKEA desk Bluetooth Mac address within the result of the above command.
Installation and Configuration of the ESPHome Software on D1 Mini ESP32
Now, I have everything that is needed to install the ESPHome software on my D1 Mini ESP32, so I can make the IKEA IDASEN desk – smart.
Here is what I did:
- I connected the D1 Mini ESP32 to the computer where Home Assistant & ESPHome Dashboard are installed, so I can flash the ESPhome firmware on the ESP32-CAM.
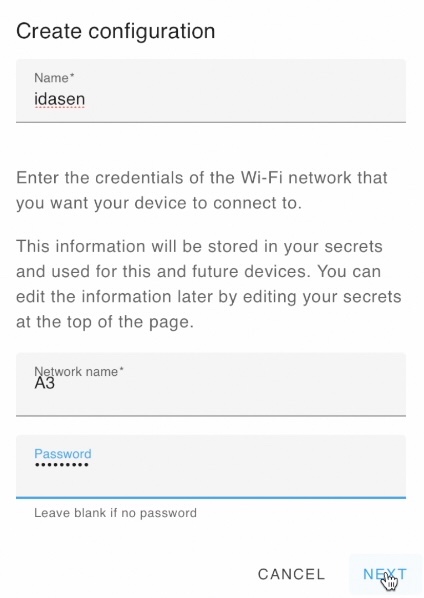
- I entered a device name (in my case: Idasen), as well as my WIFI name and password.
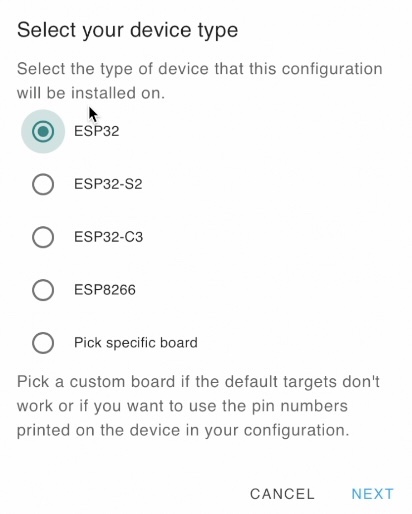
- On the next dialog, as device type I selected ESP32 and I clicked Next.
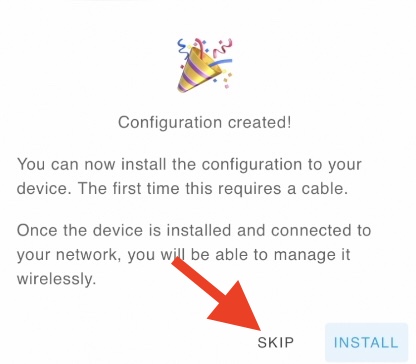
- The basic ESPHome configuration was created and I was able install it on the D1 Mini ESP32, but before that, I wanted to modify the ESPHome configuration, so I clicked on the SKIP button.
- I clicked the Edit button on the newly created IDASEN ESPHome Device.

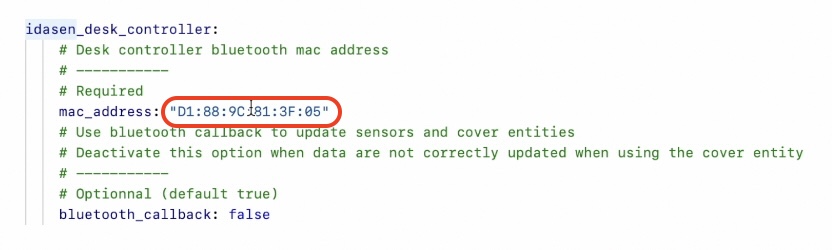
- Below is the ESPHome configuration that I used. I put it in on GitHub (as gist file), so it can be easily accessed. The only thing that have to be changed inside the YAML code is the MAC address of the IDASEN desk.
https://gist.github.com/peyanski/260e5ee2744ff080e6ac80cba46b5751
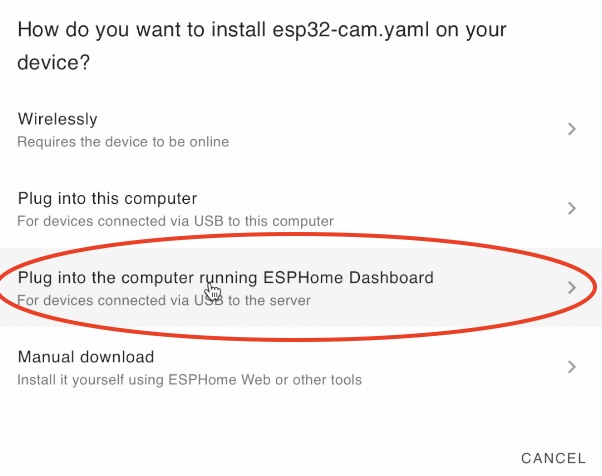
- Then I clicked on the Save and then Install buttons.

- At this point, I selected the third option from the dialog (Plug into the computer running ESPHome Dashboard)
- I picked the server port where the D1 Mini ESP32 adapter was connected and the ESPHome installation began.

- After several minutes the ESPHome installation was finished and my ESPhome Device (called Idasen) become online in the ESPHome Dashboard

- I restarted the D1 Mini ESP32 (from the USB cable just in case) and I checked the logs of the device form the ESPHome Dashboard.
- I didn’t saw nothing interesting at first, but then I put the IDASEN desk in pairing mode again by holding the Bluetooth button for several seconds and Voila – I saw the Idasen Desk height in the ESPHome logs.

All of the above means that my ESPHome device is ready to be added in Home Assistant, so I can start making Home Assistant Automations & Scripts & Scenes that will move the Idasen desk to my desired positions
How to add the IDASEN D1 Mini ESP32 controller in Home Assistant?
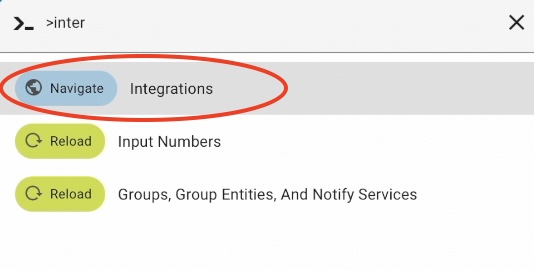
- Inside Home Assistant I pressed the “c” button to invoke the Home Assistant command search bar.
- Then I typed: integration and I selected Navigate Integrations
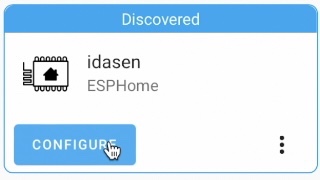
- There is a big chance the Idasen ESPHome device to be auto discovered in the Home Assistant Integrations section. In such a case clicking on the Configure button will setup the device in seconds.
- If the device is not auto-discovered, it has to be added manually. This can happen by clicking on the + Add Integrations, then searching for ESPHome and selecting No, set up an other instance of ESPHome

- As Host, idasen.local have to be typed, because this was the name of the ESPHome device in the configuration that I shared above. It is also possible here the IP address to be used, which can be seen in the logs of the device or in the wireless router interface.
- Finally, the Submit button have to be pressed.
Help is needed
One quick remark, before I move on.
I’m using a custom ESPHome component that creates a Bluetooth bridge between the IKEA Idasen desk, D1 Mini ESP32 device and Home Assistant. Many thanks to Julien who is the author of this component. All the credits for this project are going to him and his contributors.
However, the code of the component is a little outdated, as there are no new commits in the last 6 months or so. Meanwhile, a lot of Bluetooth changes happened in the ESPHome and Home Assistant space during these last 6 months. That means the project needs a little push to stay on track.
I will leave the link of the Julien’s Project GitHub repo below, so if you have the ability and time – maybe you can help and make it up to date again.
https://github.com/j5lien/esphome-idasen-desk-controller
What is working and workarounds
Anyways, as end result I managed to extract from the current state of the project a cover entity with two binary sensors in Home Assistant.
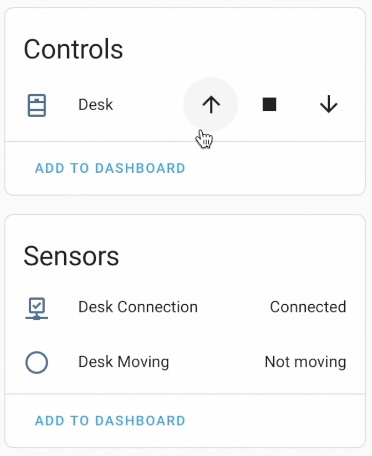
Usually, the Home Assistant covers can be moved up and down, but in this case with the configuration that I have and after all of the tests that I did, I managed to make the desk to move only up. Maybe it’s just me and it will work just fine for you, I don’t know.
Nevertheless, I found a workaround, which is to use cover set position Home Assistant service and that way I can move the desk up & down to a specific percentage from 0 to 100. The best of all, is that I can use this approach in any Home Assistant Automations, scripts & scenes.
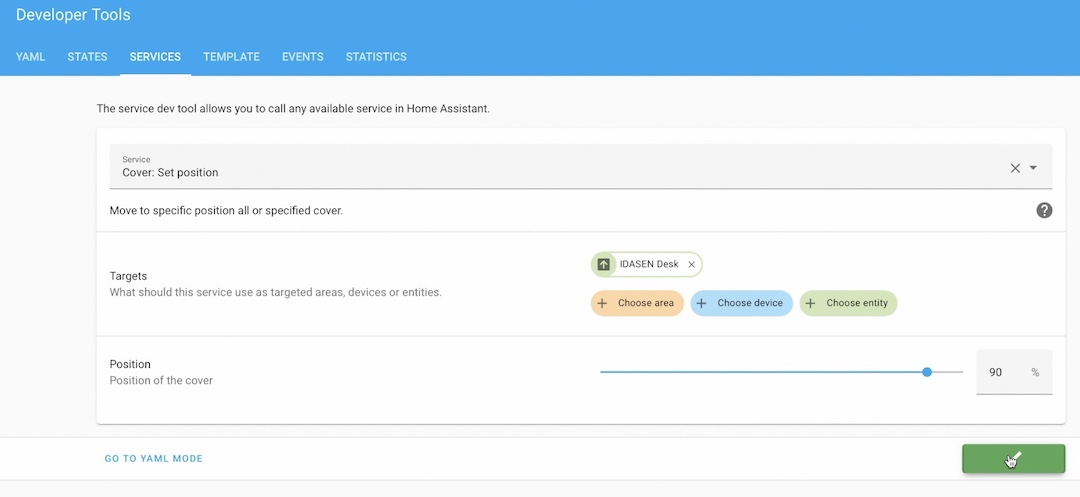
Below is the YAML code of the set cover service that will move the IDASEN desk to 50% of its max possible height. Of course, the position number can be changed to whatever percentage/number is needed.
service: cover.set_cover_position
entity_id: cover.idasen_desk
data: {
  position: 50
}
How to create a Home Assistant Script that moves the IKEA IDASEN Desk?
On top, I managed to find a great custom card in Home Assistant Community Store, which have sit and stand buttons that are also working fine. But enough sweet talks I will first show you how I created a quick Home Assistant script that set a custom height of the IDASEN Standing desk and then I will show you the custom card from HACS.
And this is a simple Home Assistant script that will move the IDASEN desk to 70% of its height. The percentage is adjustable.
alias: Move idasen to 70%
sequence:
  - device_id: 7916a8fbd977fae5bf91263e7920946c
    domain: cover
    entity_id: cover.idasen_desk
    type: set_position
    position: 70
mode: single
icon: mdi:arrow-down-bold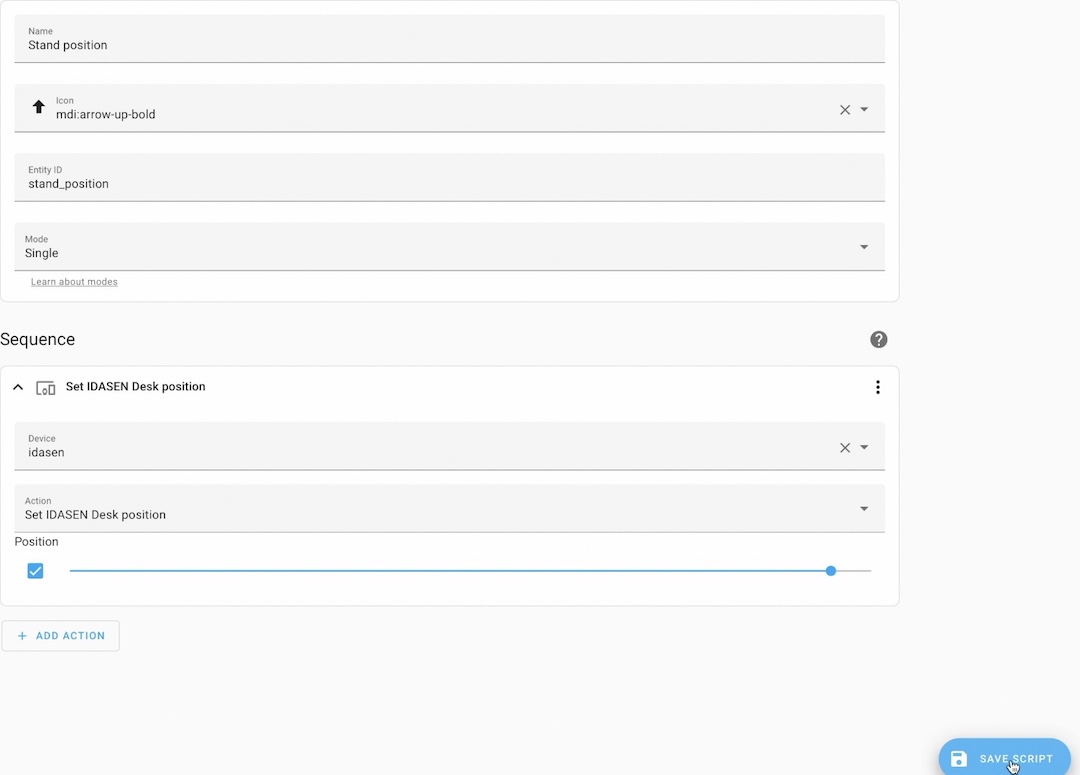
Linak Desk Card in Home Assistant Community Store (HACS)
This Is the section in which I will talk about the custom card available in HACS or Home Assistant Community Store that I told you about. If you don’t have HACS or you want to know more about it, you can check this HACS article of mine.
To find the card you have to search for Linak Desk card in the Frontend section of the HACS and to install that custom card.
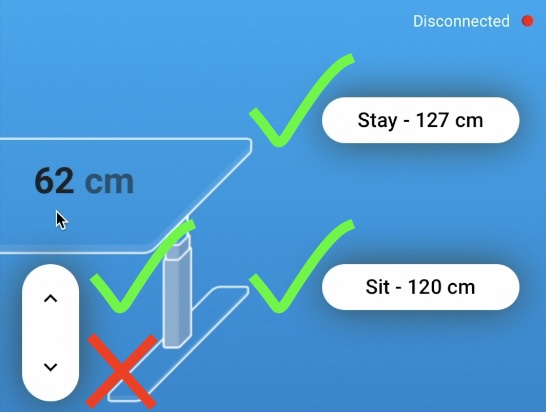
Because I didn’t manage to get the current desk height sensor working, this digit below on the card is not changing.
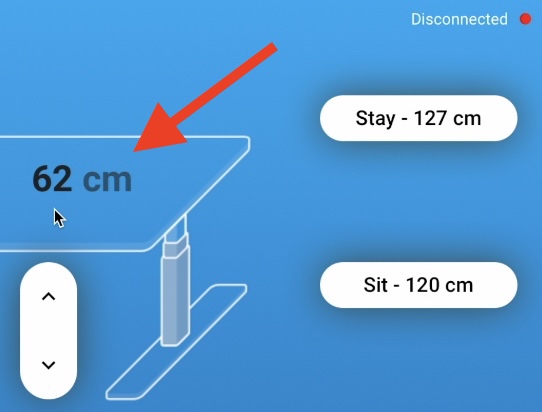
The up button is working, but down button is down and out of order. Fortunately, stay and sit buttons are working just fine and setting a desired height is easily possible by just editing the Card.
This below is an example card code
type: custom:linak-desk-card
desk: cover.idasen_desk
height_sensor: sensor.desk_height
moving_sensor: binary_sensor.idasen_desk_moving
connection_sensor: binary_sensor.idasen_desk_moving
min_height: 62
max_height: 127
presets:
  - label: Stay
    target: 127
  - label: Sit
    target: 100
name: ''
3D Printed case for the D1 Mini ESP32
Next optional thing is a 3D case for the D1 Mini ESP32.
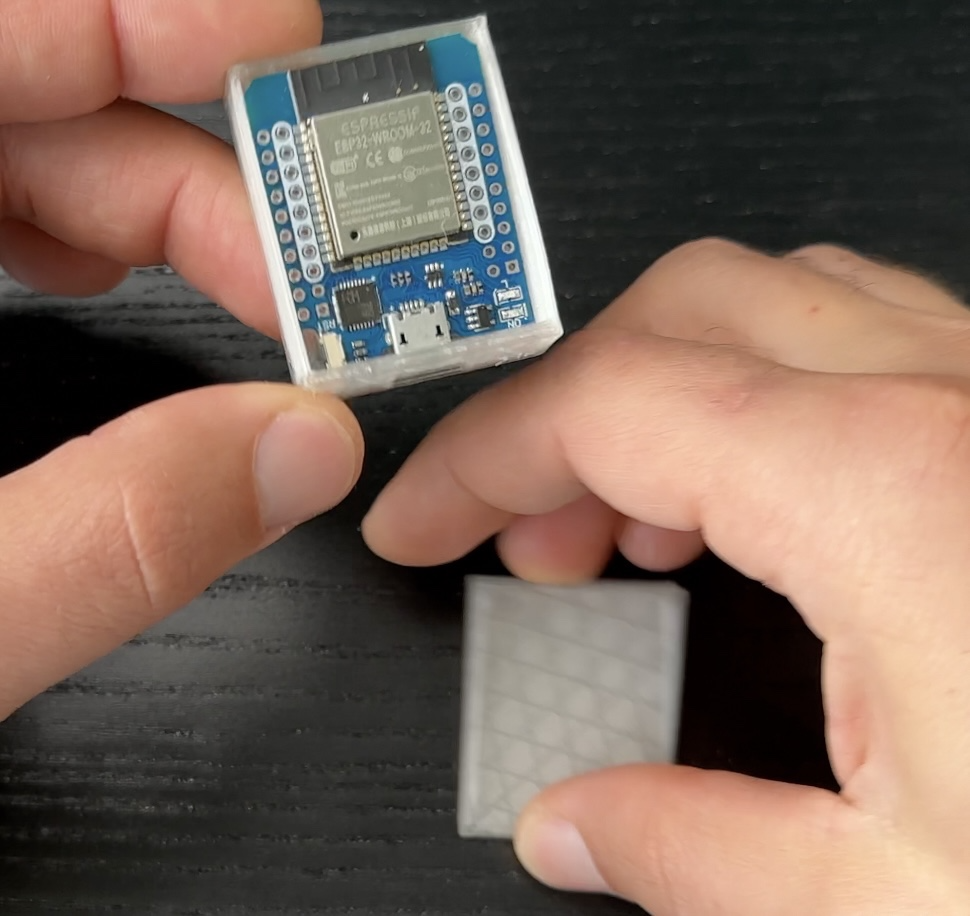
Below you can find a link to this 3D model if you want to print the same.
https://www.thingiverse.com/thing:3740349
Of course, it is also fine to leave the D1 Mini as it is, without any case, that is if it is not fighting with your Feng Shui design.
Smart Home Glossary
One more thing, because I’m constantly using some Smart Home words and abbreviations that may sound strange to you, I made a Smart Home glossary in a form of a PDF document. I want to give you that document free of any charge, so it can help you further in your Smart Home journey.
Inside that glossary you will find simple, but useful explanations of a lot of Smart Home stuff. Basically, everything that I can think of.
So, go to my other website and download it right now.
Link to the Smart Home Glossary -> https://automatelike.pro/glossary
Thank you for reading. I’m Kiril and I’m done writing. Bye!
Hey :), we had contact via YouTube. This module is now fully working, with the height sensor, and everything.
My config is here: https://pastebin.com/E1Cvpv22