
Adding Victron MPPT to Home Assistant is now possible. Using this method that you are about to see, you can add any Victron device with VE.Direct port in Home Assistant.
Table of Contents
What is the goal of today’s project?
In my article from last week I added a Victron MPPT and an EDECOA Inverter in my Camper, so that I can have AC electricity inside. This is the full article if you are interested – DIY Camper Van Solar System Upgrade with Victron SmartSolar MPPT Controller & EDECOA Inverter
Today, I will add that Victron MPPT in my Home Assistant, so I can see the Victron readings on my Home Assistant Dashboard.
To do that I will connect one cheap ESP board to the VE.Direct port of the Victron MPPT. I will flash that ESP board with ESPHome, so that Home Assistant will be able to communicate with the board and as a result I will have all of the important sensors inside my Home Assistant.
I will show you what I did in details and I will share all the tips and tricks and of course, difficulties that I faced, so you can avoid them beautifully.
I want to thank…
Before I begin I just want to say big thank you to my friend Grigor, who not only guided me during the whole process, starting from choosing the right components, through researching, and even sending me some parts like connectors and level shifters.
So, thank you Grigor, I needed that help and I truly appreciate it.
Now let’s start this.
Some Requirements for the Victron MPPT to Home Assistant with ESPHome
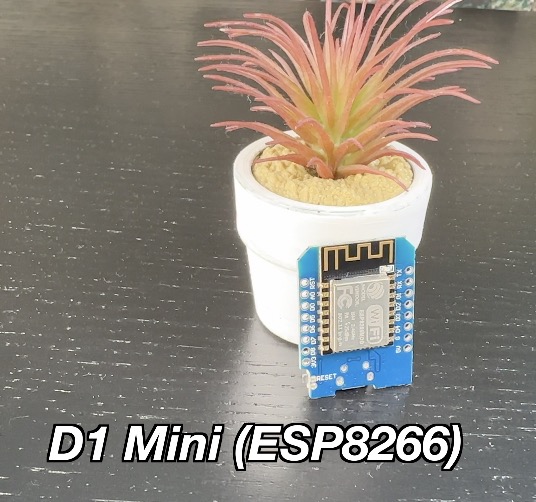
I will use a D1 Mini board which is an ESP8266 board that can be bought from AliExpress for less than $3 US dollars. I will show you how I wired everything later in the article, because now I want to say few words about Home Assistant and ESPHome.
Home Assistant & ESPHome Dashboard
There is a nice chain here that I will try to explain:
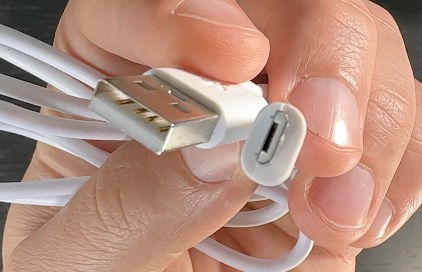
ESPHome Dashboard is needed for this project, so that I can upload the ESPHome Software on the D1 mini or any other ESP board using a simple Micro USB cable. There are several ways to run the ESPHome Dashboard and they are all well explained in this article of mine – Complete ESPHome Installation Guide: 4 different ways to install ESPHome
However, one of the easiest way is to use use the one-click installable ESPHome Dashboard add-on available in Home Assistant Add-on store. For that, of course, you need a working Home Assistant installation type with Add-on store.
To understand which Home Assistant installation types have that damn Add-On store, and everything around this topic, I’m personally inviting you to my upcoming Webinar, where I’ll be talking exactly about that – What are the official methods to start Home Assistant and their pros & cons!
So, go and reserve your seat right now on my other website:
https://automatelike.pro/webinar
It is all free.
What will I use to integrate Victron MPPT in Home Assistant?
As summary, to make this project working:
- A Victron Device with VE.Direct port is needed that could be a MPPT, inverter, shunt, and many more.
- Also an ESP board like the D1 Mini,
- USB cable and few wires are also needed.
- It is not a bad idea to get one 4-pin JST 2.0 PH connector for the VE.Direct port, unless you find some other way to connect to the Victron device physically.

I will put some affiliate links below to all of the needed components if you want to check their current prices in AliExpress and Amazon.
- Victron MPPT SmartSolar 100 | 20 (Amazon) – https://amzn.to/400AFbU
- Victron MPPT BlueSolar 75 | 15 (Amazon) – https://amzn.to/40kgPbu
- Victron Phoenix Inverter 3000VA (Amazon) – https://amzn.to/3JTSljR
- EDECOA 1500W 2500W pure sine wave power inverter (AliExpress) – https://s.click.aliexpress.com/e/_DCxSPoZ
- D1 Mini ESP8266 – https://s.click.aliexpress.com/e/_AFgAIp
- D1 Mini ESP8266 (Amazon) – https://amzn.to/3zaMZe3
- Jumper / Dupont wires (AliExpress) – https://s.click.aliexpress.com/e/_A3YiR3
- Jumper / Dupont wires (Amazon) – https://amzn.to/3LWiLD8
- Micro USB cable (AliExpress) – https://s.click.aliexpress.com/e/_AnrsGw
- Micro USB cable (Amazon) – https://amzn.to/32tdxdF
- JST PH2.0 Connector for the VE.Direct (AliExpress) – https://s.click.aliexpress.com/e/_DEk6ZTL
- JST PH2.0 Connector for the VE.Direct (Amazon) – https://amzn.to/40wtQPy
If you buy something from the above links you will support my channel, because I will receive a small commission from your purchases with no additional cost for you.
Wiring the D1 mini to the Victron VE.Direct port
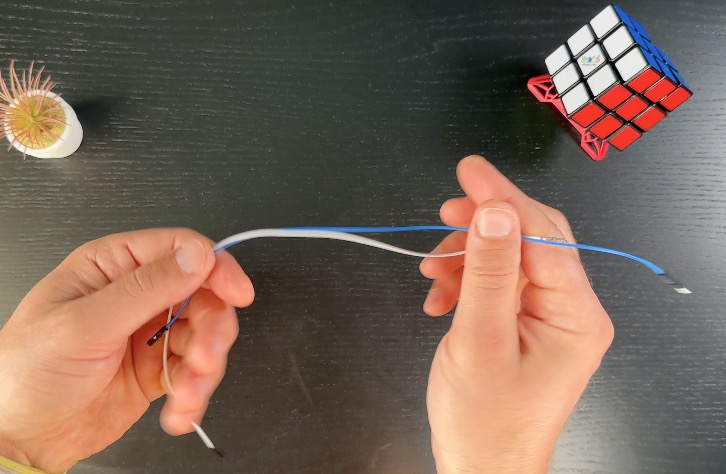
Next thing that I did is the actual wiring.
- I connected the TX pin on the Victron Device to the D7 pin on the D1 mini board.
- Next, I connected the GND from the Victron Device to the GND pin on the D1 mini board.
- After that, I connected the D1 mini board to the device where Home Assistant and ESPHome are running, In my case it is a Raspberry Pi 4. I plan to leave that cable permanently, because the Victron VE.Direct port is not not having enough power to powering the D1 Mini board.
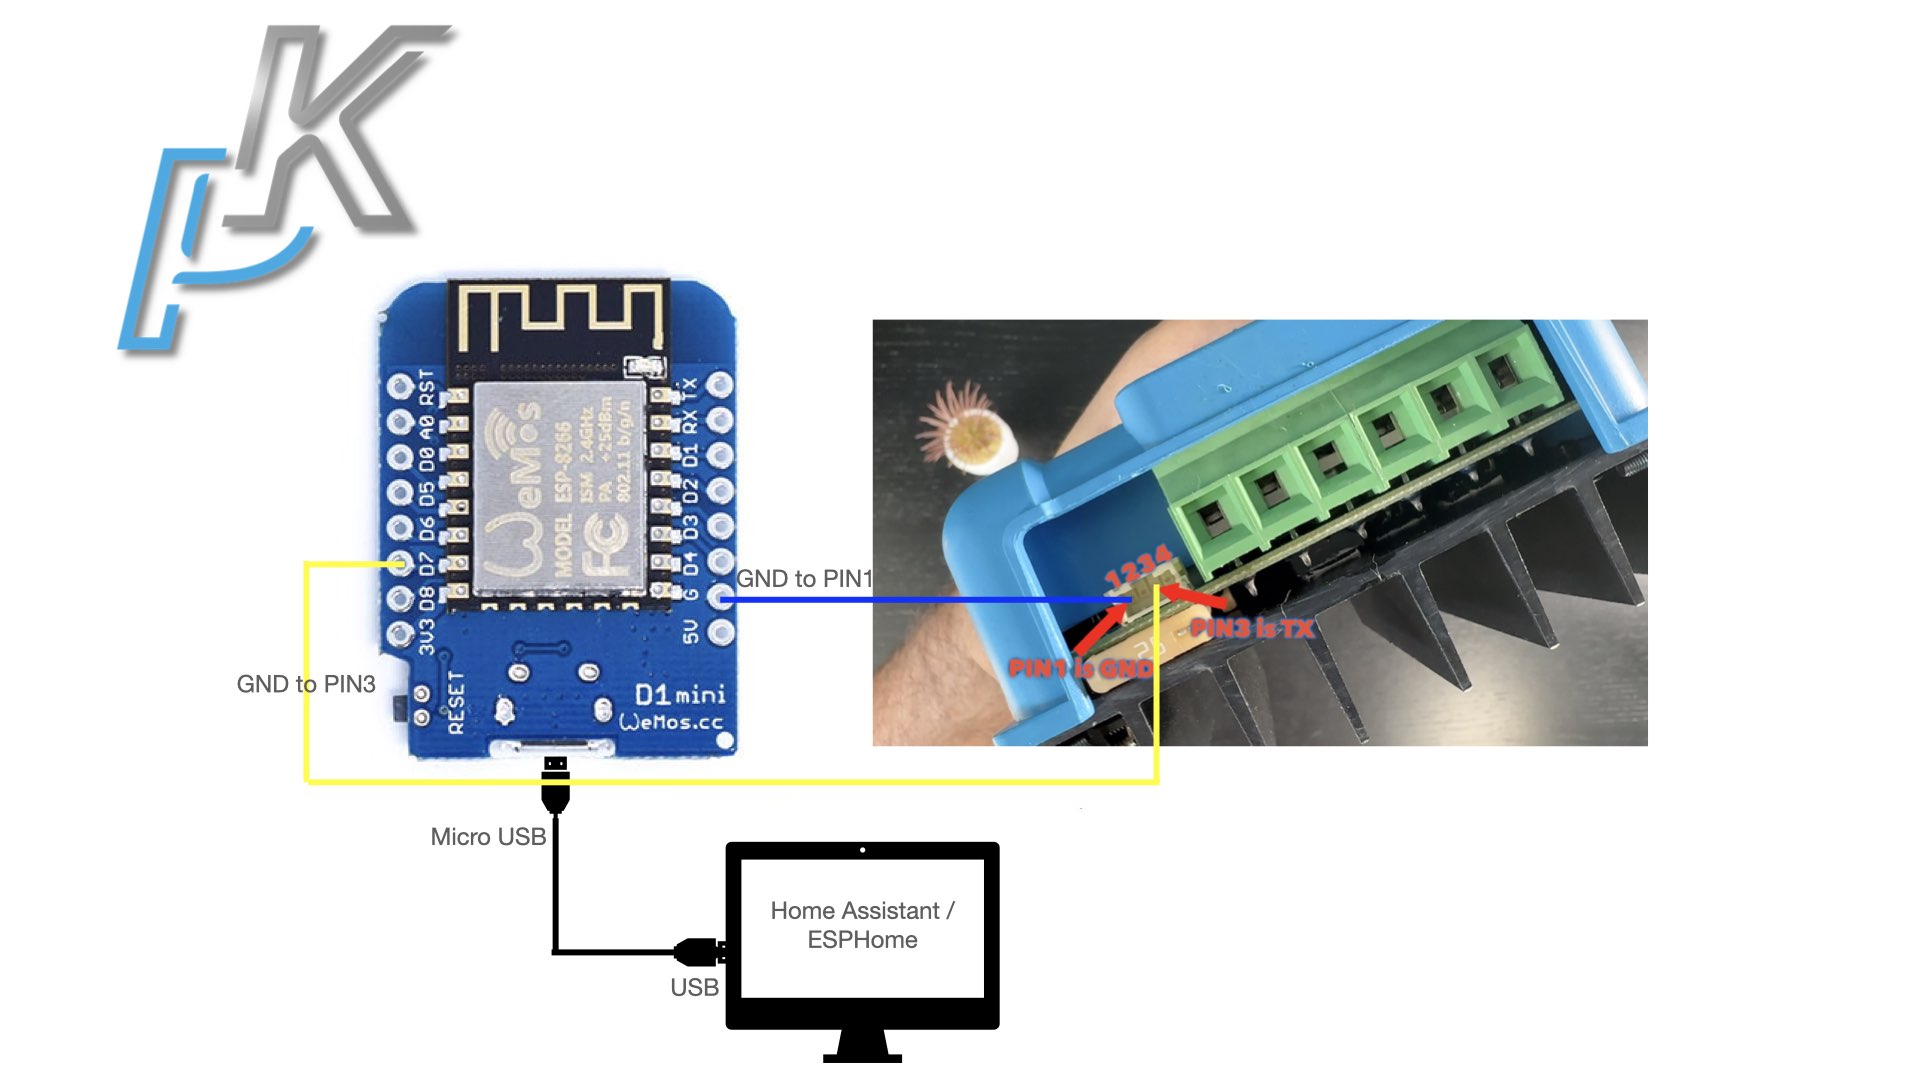
REMARK: It is also possible to use a logic level converter or voltage divider between the Victron device and the ESP board, as the MPPT voltage is 5V and the native voltage of the ESP board is 3.3v (but D1 Mini is 5v compatible). So if you want to be on the super, super safe side – buy one logic level converter or voltage divider which may help with the working voltage inconsistency.
And now the fun part begins.
Installation of the ESPHome on the D1 mini with the Victron MPPT ESPHome integration
The steps that I executed are the following:
- Inside Home Assistant opened my ESPHome Dashboard.
- I clicked on the NEW DEVICE button.
- I typed a device name. The name doesn’t matter in my case it was Victron-mppt.
- Then I entered my WIFI name and password and I clicked Next.
- I chose ESP8266 option, because D1 Mini is such a board and I clicked on SKIP button, because, I don’t want to install ESPHome yet.
- I clicked on the EDIT button on my new ESPHome deviceand I’ll head on to the Jiri’s GitHub Page. This is the GitHub Project of the VictronMPPT-ESPHOME
- I opened the
smartsolar-mppt-esp8266-examplefile. And I copied everything inside. - Then I’ll go to my ESPHome dashboard again and I overwrited the content of my newly created ESPHome device with the copied code.
Now is the best moment to say that all of the credits here for the code are going to Jiri from Czech Republic, which is the author of this integration and of course his contributors.
You can find the link to his GitHub repo in the steps above and I will paste it again here for your convenience – https://github.com/KinDR007/VictronMPPT-ESPHOME
As next steps, I did the following:
- I made just a few changes in the code
- I uncommented the
APIrow, because I want this integration to work using the native Home Assistant API. - And I commented the MQTT section. If you have a MQТТ broker you can leave it as it is, but I don’t want to use it. I will use the Home Assistant native API instead.
- I uncommented the
- This is my final version if you want to use it as well – LINK
- Everything else will stay as it is. I clicked SAVE and then INSTALL in the upper right corner.
- I selected PLUG INTO THE COMPUTER RUNNING ESPHOME DASHBOARD option.
- Before that I connected my D1 Mini to the Raspberry Pi 4 where Home Assistant and ESPHome Dashboard are running.
- I selected the Server Port and the ESPHome installation begins.
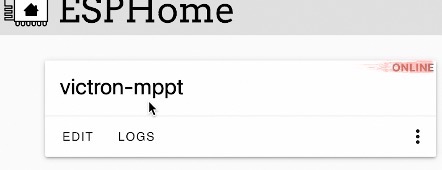
After around 5 minutes the ESPHome installation is now complete. And after closing some of the opened windows, I saw that my victron-mppt device is now online.
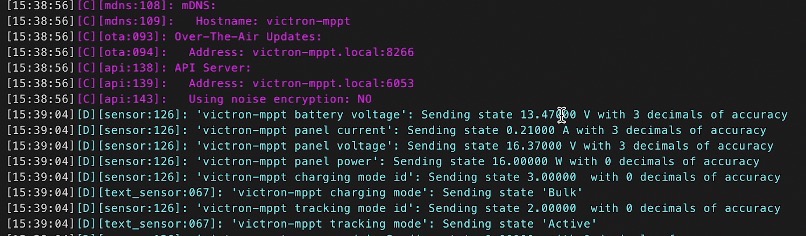
I can check the LOGS wirelessly, because ESPHome device is already running. And as you can see I have some readings. For example, the battery voltage is 13.47V and so on and so forth.
This is a very good sign.
Adding the Victron MPPT Sensors in Home Assistant
As a next step I will open my Home Assistant integrations section in hope that inside I will find my auto discovered new ESPHome device.
To do that I did the following:
- While I was inside Home Assistant, I pressed the “c” button on my keyboard and I typed Integrations in the appeared command search bar.
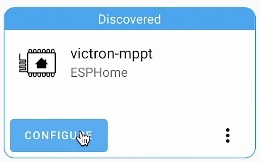
- I selected Navigate Integrations and there I found one new device called victron-mppt, which was auto discovered by Home Assistant.
- I clicked CONFIGURE, then SUBMIT and I selected an area(but this is optional of course) and then FINISH.
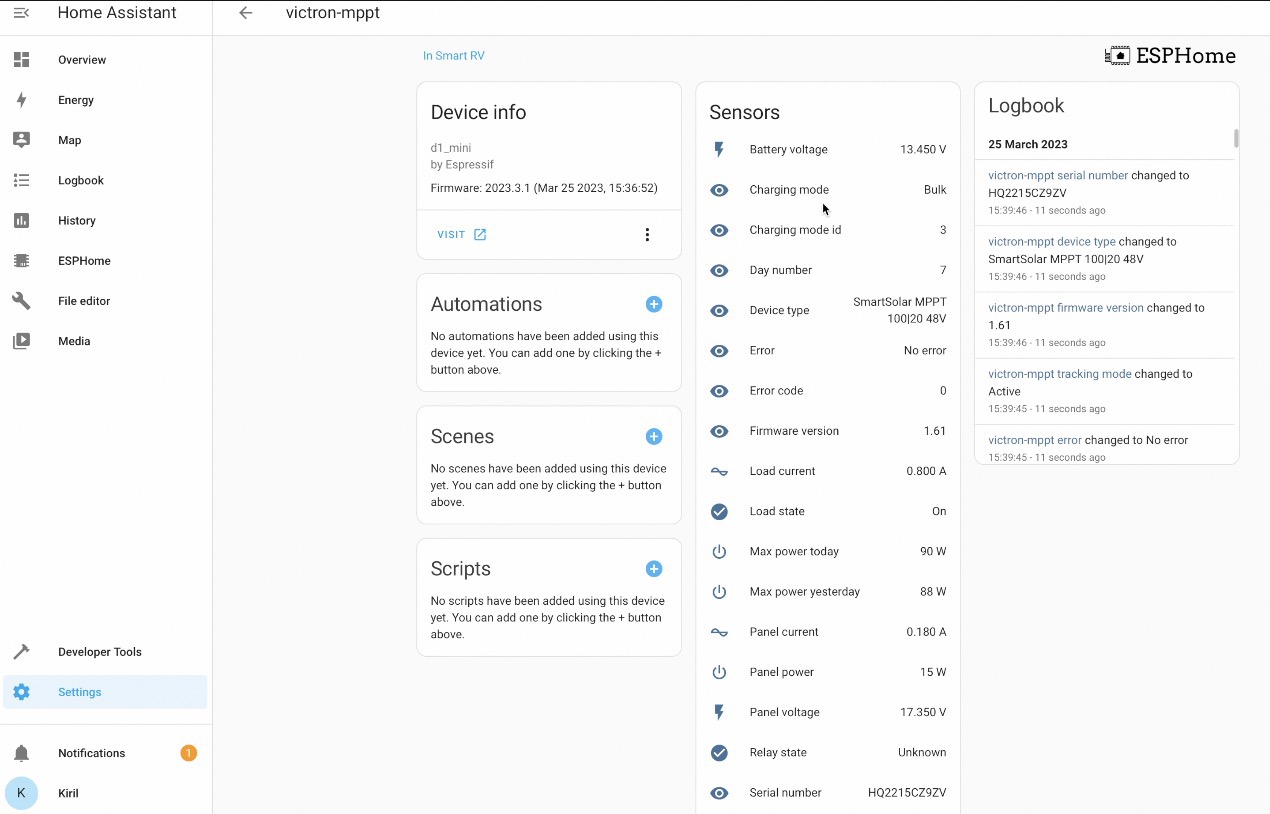
- As a result I got 1 Device with 23 entities under my ESPHome integration.
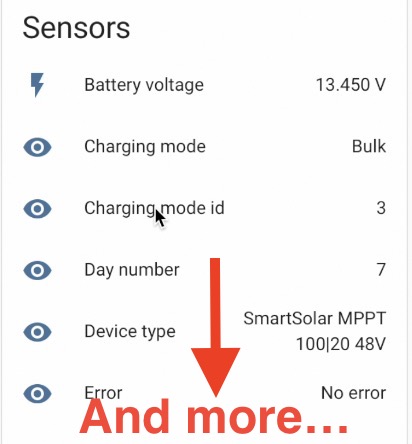
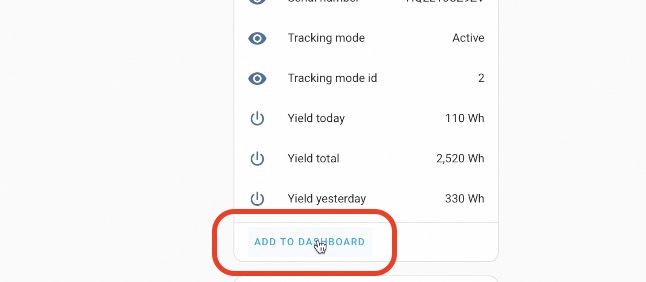
If I click on that new ESPHome device l see all of the sensors that Victron MPPT have. For example: Battery Voltage, Charging Mode, Load Current, Yield Today, Yield Total, Panel Power, Max Power Today, and more and everything seems to work.
Next steps
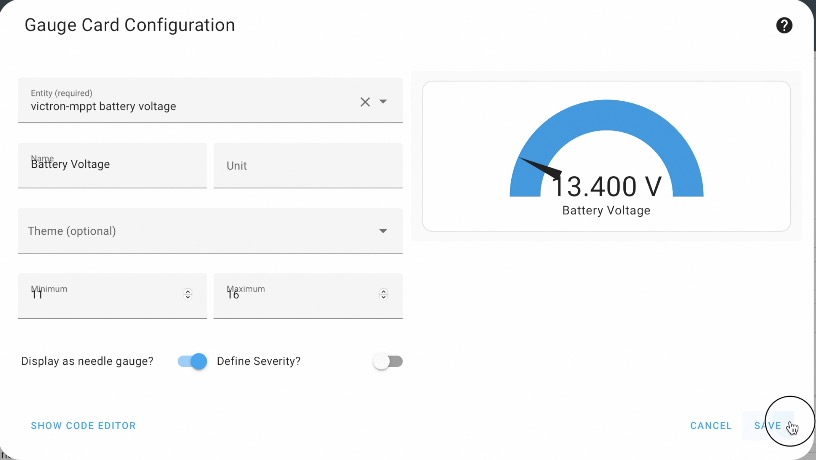
I can add this data to my Home Assistant Dashboard. I’ll add it like that and I’ll beautify it later.
As next step, I can make few automations that can notify me when something is wrong or when some thresholds are reached. Also, I can play a bit to make this data more beautiful using some different Home Assistant cards.
Comparison between VictronConnect App and Home Assistant readings
As comparison, I will show the readings from the VictronConnect mobile app on my phone and the readings in Home Assistant and the numbers are matching.
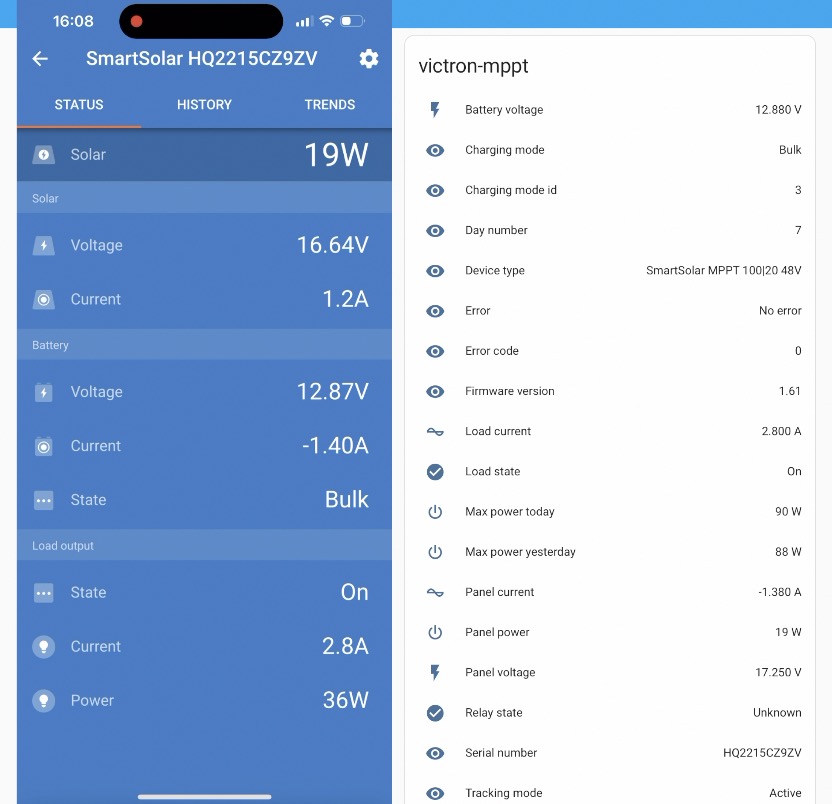
All of that means that I can now stop using the VictronConnect mobile app and start using my Victron to Home Assistant integration either from the Internet or from my Smart Control Panel.

Smart Home Glossary?
If some of the terms that I’m using are not so clear for you make sure that you download my Smart Home Glossary available from my other website – https://automatelike.pro/glossary.
It is totally free.
Thanks for reading, I’m Kiril and I’ll see you next week. Bye!
I tried making this today using the 75/15 version. it connected to home assistant ok but doesn’t give any information via the sensors. I tried flashing two boards and made 2 separate connectors just to be sure. Same result each time. Any thoughts on the issue or suggestions?
Disregard the previous statement. I looked closer at the wiring pic and despite being the same model the fuse area was modified and flipped. This includes the ve.direct connection so my pins were in the wrong place. I rewired and it’s working now. Thanks for the tutorial.
Hello,
I had the same problem with the wiring.
But now everything works.
There is still a small error hidden here:
battery_current:
name: “${name} panel current”
It should probably mean:
battery_current:
name: “${name} battery current”
Many thanks for the very helpful instructions and descriptions…
Greetings Jürgen
Looking to add this to a new install on my ‘boat assistant’. Has anyone tried the Vcc output on to power the D1 mini. Is it 3.3v and does it really not have enough power for this device?
I ask because it is far from the HA and would be much neater without an extra external circuit
The victron devices are generally limited to 20mA, so no – they won’t be able to supply an ESP8266, altough if you wanted to try – you could add a super cap and somehow modify the code to send data at a reduced interval, say 30 seconds or 1 minute intervals.
Let us know if you try that!
sarebbe interessante poter alimentare l’esp direttamente dal mppt
Good Day to you.
My English is not so good.
But i have one Question to sorcecode.
I build this victron-app for my homeassistant Core 2024.7.2
Everthing is looking good. Only the sensor -> victron_mppt_state_of_charge is displayed
as “not available”.
I would like to see the value because. the SOC of my batteries is for further application necessary.
If you find time to answer me – wouldt be great.
btw. Your Site is very readable and fine.
Greetings Tom from Germany
Hi,
Great project, and exactly what I am in need of. Before I implement this, can anyone please explain what the “external components” are that this code references?
I’ve got a Victron charge controller already connected to an ESP8266 and HA
Now I’ve ordered a Victron Shunt.
Can I connect that to the same ESP8266 or do I need a second one?
ie Can I define 2 UARTs with different IDs/GPIOs and then define the Victron and Sensor components accordingly?
A very interesting project. I’d be interested in modifying the code to be specific to the ESP32. And communication between the ESP32 board and the Victron solar controller will be via BLE, not cable.