After the latest Home Assistant 2022.3 update, it is now possible to add Play Media Action in your Home Assistant automations. That means you can play camera streams, local media like songs and video clips or even online radios when an automation trigger is activated. In this article I’m also going to discuss the new fast and easy method to upload Home Assistant media as well as the Home Assistant DLNA integration. Let’s start!
Table of Contents
Free Home Assistant Webinar
If you are still struggling to understand the different official installation methods of Home Assistant I have something just for you. It is a free Webinar in which I’m talking about four official plus one secret way to install Home Assistant.
Check it out on my https://automatelike.pro/webinar website.
Home Assistant Play Media Action
Now, I’ll stop just talking and I’ll show you the new Home Assistant play media action in action 🤣. And then we’ll see the Home Assistant DLNA integration as well.
Just as an example, I will make the following automation for you – If movement is detected from a motion sensor (I will use my DIY Motion sensor described in this article) play some online radio using the new Home Assistant play media action.
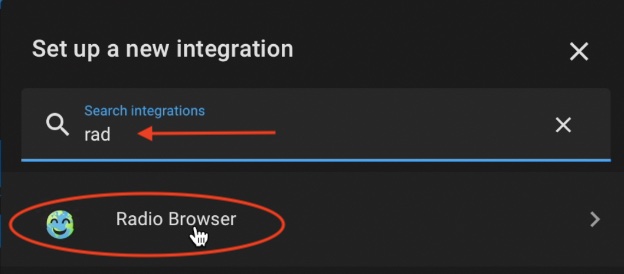
- I’ll start with the Home Assistant radio browser integration. For that I’ll go to my Home Assistant > Configuration > Devices & Services > Add integration and I’ll search for radio.
- Alternatively, the My Home Assistant link below can be used (it is doing the same steps described above).

- After that, I’ll go back to Home Assistant configuration, but this time I’ll choose Automations & Scenes and I’ll create a new empty automation.
- The name of the automation will be – play radio when motion is detected, but of course the name can be anything.
- As trigger of my automation I’ll use state trigger, where entity will be my DIY motion sensor and when this motion sensor becomes ON, I’ll call the play media action.
- As media player I can select any of the supported media players by Home Assistant and I’ll use the LibreELEC or Kodi integration. I have a full article about that integration if you’re interested how to get it as well check it here.
- Then, I’ll just click on the big plus sign to pick a media.
- I have several options here: I can choose camera, local media, text-to-speech, but I want the Home Assistant radio browser first.
- The radios here are sorted by country, by category and by language, also there is a Popular category I’ll choose it and I’ll select Radio Paradise for example and I’m ready.
- I’ll save the automation and below you can find the full YAML code of the automation if you want to re-use it.
alias: Play Radio when motion is detected
description: ''
trigger:
  - platform: state
    entity_id: binary_sensor.pir_sensor # change this with yours
    to: 'on'
condition: []
action:
  - service: media_player.play_media
    target:
      entity_id: media_player.kodi_248ae94ed94725f7a83fa157eb8ef5e7 # change this with yours
    data:
      media_content_id: media-source://radio_browser/9617a958-0601-11e8-ae97-52543be04c81
      media_content_type: audio/aac
    metadata:
      title: Radio Paradise (320k)
      thumbnail: https://www.radioparadise.com/favicon.ico
      media_class: music
      children_media_class: null
      navigateIds:
        - {}
        - media_content_type: app
          media_content_id: media-source://radio_browser
        - media_content_type: music
          media_content_id: media-source://radio_browser/popular
mode: single- and if I now move my hand in front of the motion sensor the selected online radio will be played from the selected in the automation media player.
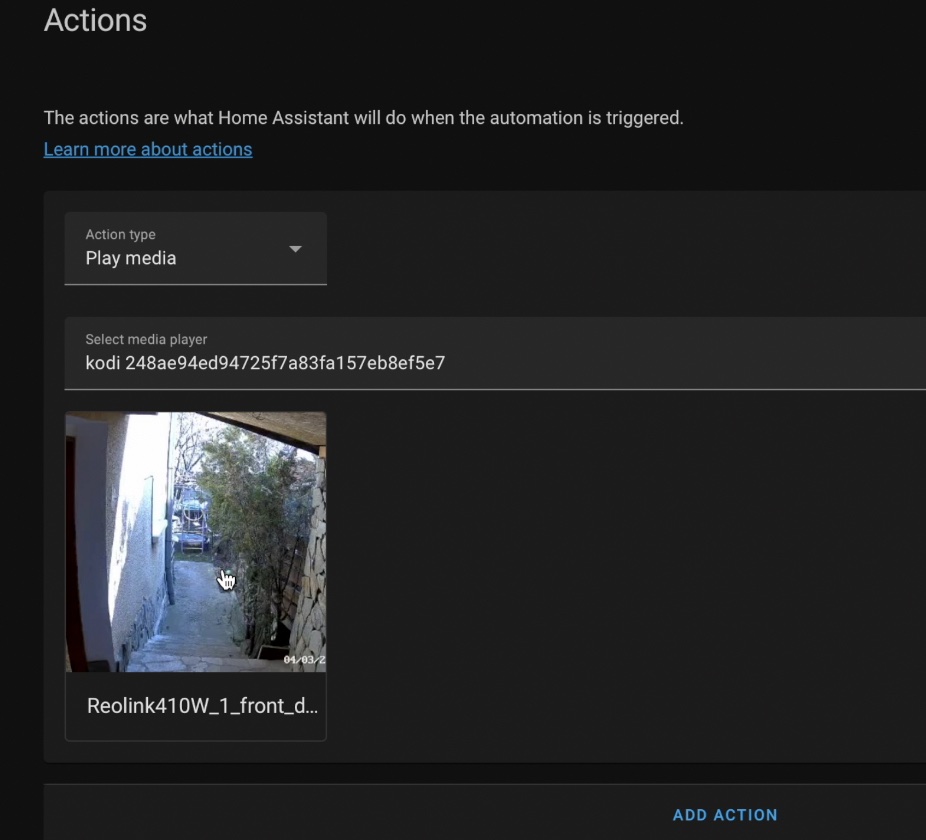
Play Media Action – Camera Stream
Of course, I can change a bit my Home Assistant automation and my play media action by selecting a different media. For example, I can select a security camera and the camera stream will be shown when the automation trigger is activated.
Play Media Action – Text-To-Speech (TTS)
The next cool thing that you can use as play media is text-to-speech. You can type any text and this text will be played through the supported media player in Home Assistant as voice message.
Upload Media from Home Assistant browser
After the Home Assistant 2022.3 release you can upload media to the Home Assistant straight from the browser. Until very recently the possible options were File Editor add-on and Samba share add-on (If you want more info about these methods check this article of mine). I still believe that if you have to upload multiple files or bigger files it is better to use Samba share add-on instead of the Home Assistant front-end, so the article could be very helpful for you if you are going to do that.
However, the new method to upload media is highly appreciated and here is how to actually use it.
- Select Play Media action in the Home Assistant automation editor.
- Select media player.
- Click on the big plus button and select Local Media.
- Click on the Manage button in the upper right corner of the shown dialog and select the media files that you wish to upload to Home Assistant.
Home Assistant DLNA integration
The next thing that I want to show you is the Home Assistant DLNA integration that recently have been updated as well. The DLNA Digital Media Server integration allows you to browse and play media from DLNA digital media server. Configured devices act as a media source and can be browsed in the media section. To demonstrate you the Home Assistant DLNA integration better I’ll integrate a miniDLNA server installed on my FreeNAS server with Home Assistant. Let’s begin.
- In Home Assistant, I’ll go to Configuration > Devices & Services > Add integration.
- Then I’ll search for DLNA and I’ll select the DLNA digital media server.
- Alternative to the above steps is clicking on the My Home Assistant link below.
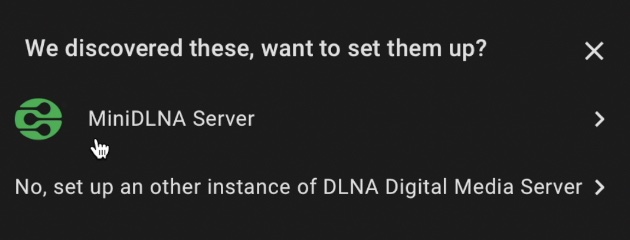
- It is possible the DLNA server to be auto discovered by Home Assistant if they share same local network. If that is the case just click on the discovered instance. Otherwise, you have to enter manually the IP of the DLNA server.
- To conclude with the Home Assistant DLNA integration – click on Submit and then on Finish buttons.
- Now if I go to Home Assistant media section I can select my DLNA server from my media library and I will actually see my entire DLNA library.
From now on, instead of uploading local media files in my media section in Home Assistant I can use my DLNA server with the same success. The media files doesn’t have to be uploaded anywhere else and they can be casted to my Home Assistant thanks to the DLNA integration.
Outro
If you are a bit lost with the Smart Home words and abbreviations that I’m using during this article – just download my free smart home glossary which is available here 👉 payanski.com/glossary.
I’m Kiril Peyanski and I’m done writing! Bye!
Hey dude 🙂
I have a chant running 24/7 from my phone to a speaker. This means I have to charge a lot. What I want to do is cast the chant from my dlna server to home assistant to my google home display.
I have got it running fine but cant figure out how to keep repeating it.
Any help would be appreciated 🙂
Thanks for your Home Assistant info, you look as if you may be able to point me in the right direction
I’m searching for a method to initiate the Party Mode Autostart Addon for Kodi
service.partymode.autostart
this is what I’m trying to use but doesn’t cut it…
> alias: OSMC_Partymode
> service: kodi.call_method
> data:
> method: Addons.ExecuteAddon
> addonid: service.partymode.autostart
> params:
> command: activate
> target:
> entity_id: media_player.osmc
The github for the add on is here
https://github.com/elbowz/partymode-autostart-xbmc-service/blob/master/PartymodeAutostart.py
Thanks in advance
Calvin