
The Shelly door window sensor detects and reports the opening and closing of door and windows, tilt angle, vibration and lux. And guess what I will integrate this sensor in Home Assistant and Node-RED without any flashing or modifications.
Table of Contents
Shelly Door Window sensor
I bought this brand new battery powered creation from Shelly which supports MQTT protocol out of the box.
And MQTT is a widely used protocol in the Smart Home world for communication between IoT devices.
In this article I will do:
- A quick unboxing,
- Then I will pair the Shelly door/window sensor with the Shelly mobile application.
- I will also disable the cloud connection to enable the MQTT support.
- And for dessert I will:
- Integrate the Shelly Door/Windows sensor with Home Assistant and I will create an example automation with notification there.
- For the Node-RED part I will create a flow that will detect the sensor changes using MQTT nodes and then again I will send some kind of notification.
And before we go further I just want to tell you that this video is not sponsored by Shelly and all that you will see here is my honest opinion about the product.
You can be the sponsor though and actually this will cost you nothing more than a few moves and one mouse click to smash the subscribe button.
[sibwp_form id=2]
On top you will receive my EXCLUSIVE FREE Bonus Smart Home Guide that I will send to you immediately.
Now let’s go
Shelly Door/Window sensor specification
Nothing extraordinary here. The sensor have two magnetic parts.

And this is the full specification of the product.
Specification
Power Supply
2x 3V CR123A Batteries
Battery life
2 years
Complies with EU standards
• RE Directive 2014/53/EU • LVD 2014/35/EU
• EMC 2004/108/WE
• RoHS2 2011/65/UE Working temperature
-10 ÷ 50°C
Temperature meas. range:
-10°C ÷ 50 °C (± 1°C)
Radio signal power:
1mW
Installation Instructions
Radio protocol
WiFi 802.11 b/g/n
Frequency
2400 – 2500 MHz
Operational range (depending on local construction):
• up to 50 m outdoors
• up to 30 m indoors Dimensions
• Sensor 82x23x20mm
• Magnet 52x16x13mm
Electrical consumption
• Static current: ≤10 μA
• Alarm current: ≤60 mA
Where to buy the Shelly Door Window sensor?
You can buy the Sensor from this affiliate link – https://amzn.to/34d88VR
If you do so, I’ll earn a small commission with no additional cost for you.
Of course, you are not obligated to do so, but it does help fund these articles in hopes of bringing value to you!
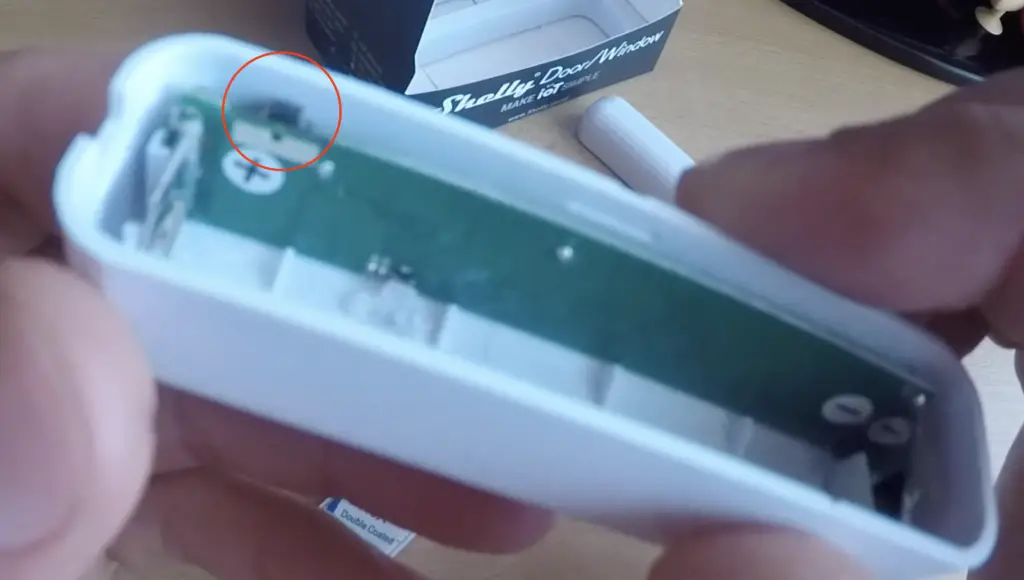
Quick note about the batteries
In the bigger part you have to insert the 2x CR123A batteries.
I had some difficulties to find the exact model of the required batteries. Just don’t confuse the batteries CR123A with CR23A as they are quite different.
I wish that Shelly was to include the batteries in the package as this is not a cheap price for a door window sensor.
The batteries are in place and we know the product specification, so let’s pair it with the Shelly mobile application.
Pairing the sensor with the Shelly Mobile Application
I had some issues with pairing this device during the last step of the process, but maybe it’s my WIFI to blame. At the end I made a hotspot from my phone and that do the trick to successfully pair it. Let me know in the comments if you have the same device and you have any issues or everything went smoothly.
Device Inclusion
To add a new Shelly device, insert the batteries and follow the steps below:
Step 1
Place your Shelly Door Window sensor in the room where you want to use it.
Press the reset Button – the LED should turn on and flash slowly.
WARNING: If the LED does not flash slowly, press and hold the Button for at least 10 seconds. The LED should then flash quickly.
Step 2
Open your Shelly Mobile Application and choose “Add Device”.
Type the name and password for the WiFi network, to which you want to add Shelly. Be careful here the WIFI network should be 2.4GHz
Step 3:
Approximately 30 seconds after discovery of any new devices оn the local WiFi network, а list will be displayed by default in the “Discovered Devices” room.

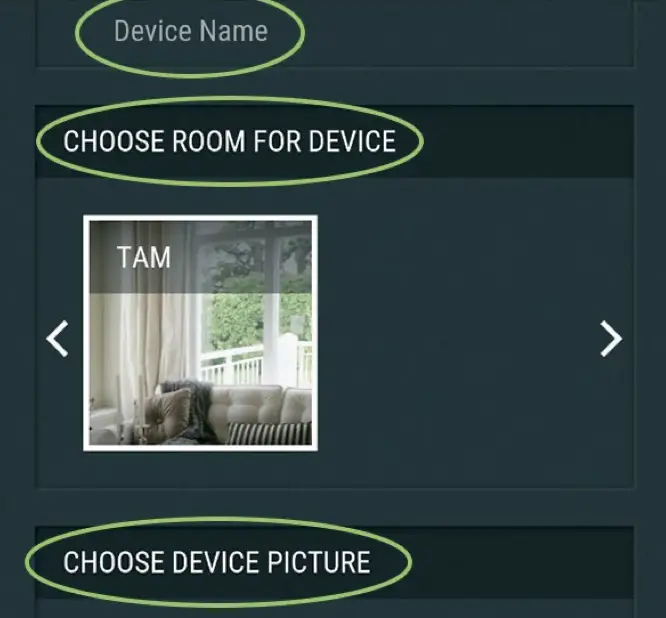
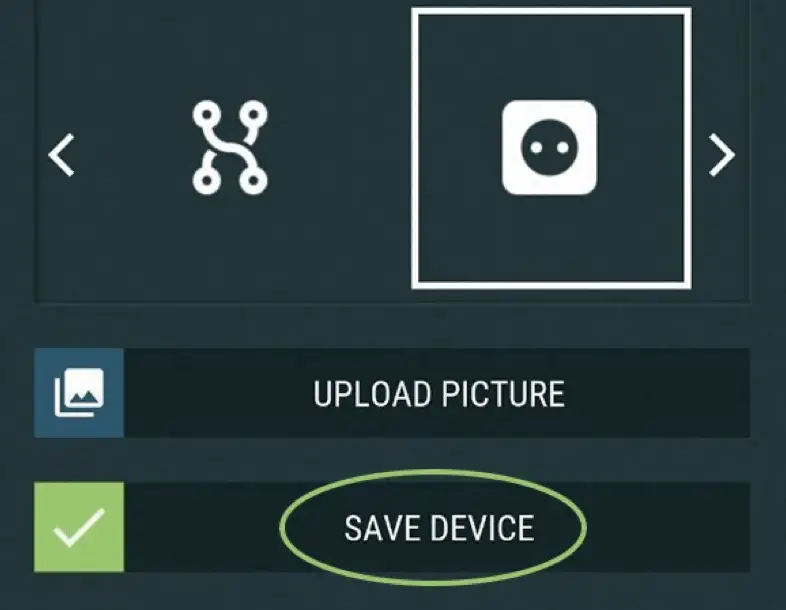
Step 4:
Enter a name for the Device. Choose a Room, in which the device has to be positioned. You can choose an icon or upload a picture to make it easier to recognize. Press “Save Device”.
Enabling MQTT from Shelly Door window Sensor Web Interface
First of all – you will need a MQTT broker to make this sensor to communicate as we want to..
I can two hands recommend the Mosquitto as MQTT broker. You can install it using Home Assistant add-on store or for example using the IOTstack as I’m describing in this article.
Open you Shelly Door Window sensor web interface by typing the IP of the device in a browser. If you don’t know the IP check it in your router.
Inside the Web Interface click on “Internet & Security” button and search for “ADVANCED – DEVELOPER SETTINGS”
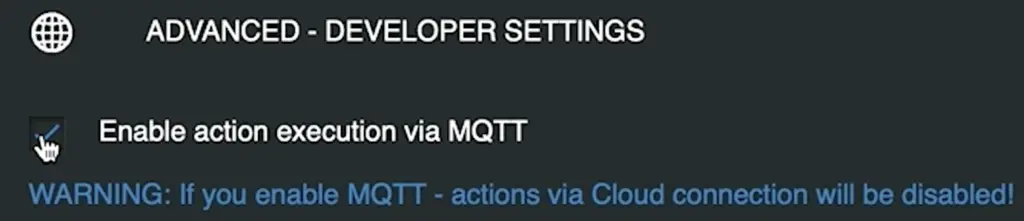
As you can see in the blue text below this option – If you enable it you will lose the cloud connection to this device.
That means that you will not be able to check the sensor status outside your home network without using VPN. Don’t worry about it, if you need a VPN just read and implement one of my following VPN tutorials and you are good to go.
Of course after you enable the option, you have to enter the IP, Port and username and password for your MQTT broker/server.
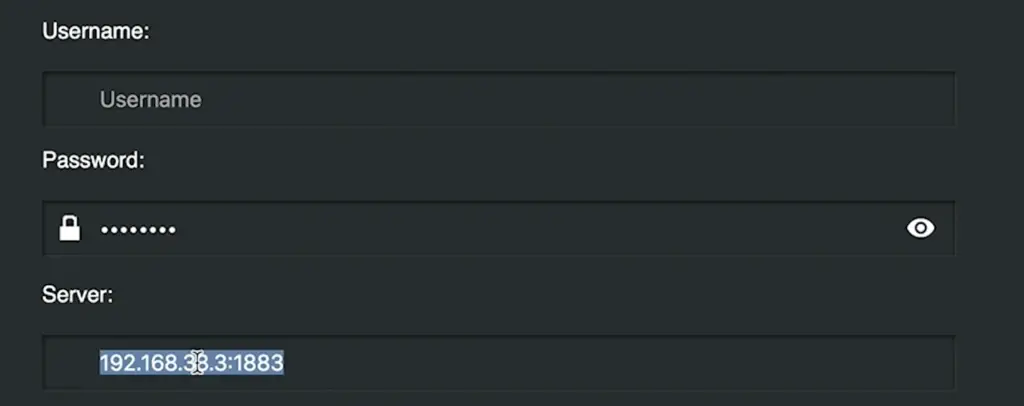
You can enable QoS by setting the Max QoS to either 1 or 2, but this is optional and you can skip it if you don’t need it.
Just don’t forget to hit the “SAVE” button when you are ready.
Make the things easier with MQTT Explorer
To make the things even easier with the MQTT stuff. I will use a tool called MQTT Explorer. It’s a free tool and it works on all major operating systems without any issues.
Download and install MQTT explorer and then start it and enter inside your MQTT server IP, PORT and username and password to connect to it.
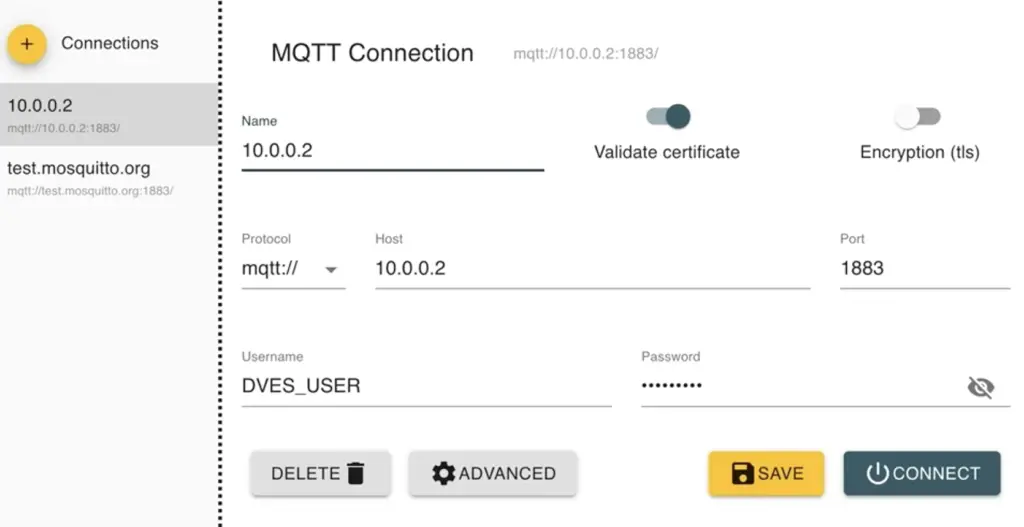
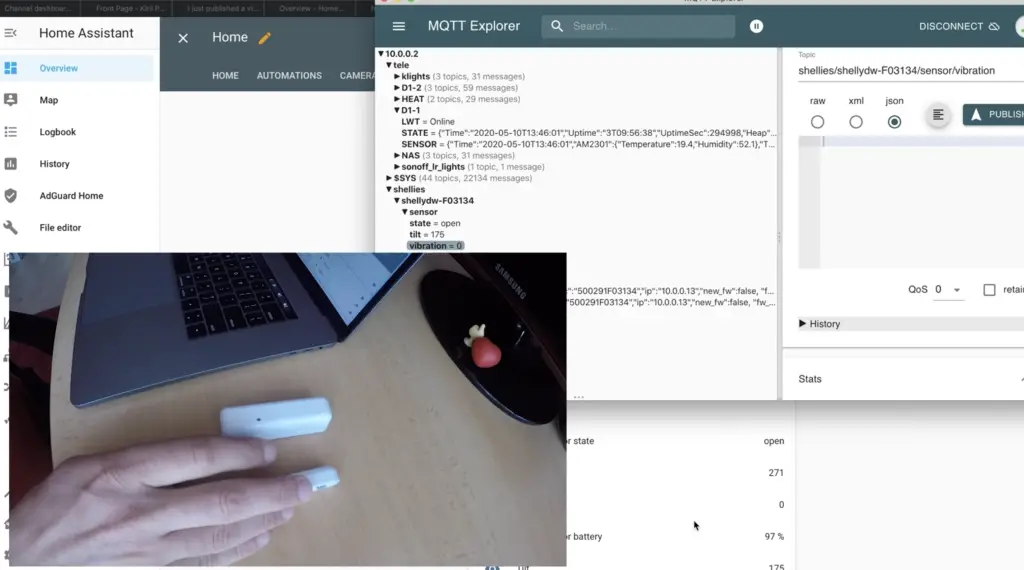
When you successfully connect to your MQTT server in the upper left corner you will see all of the MQTT topics available at the moment.
If you don’t see the “shellies” topic you should open/close your sensor to make it to announce its state change.
If you still don’t see anything you probably have some issue and you are missing something. Just go up and double check everything up until now again.
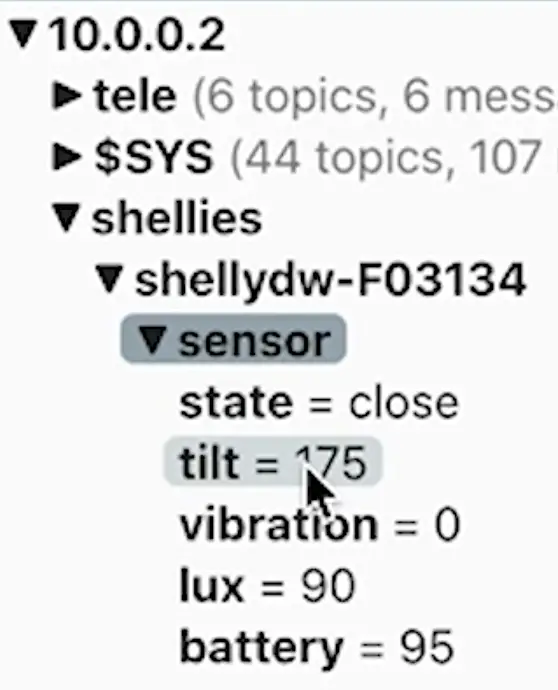
You can freely look around under the shelledw-YOUR_SENSOR_ID topic and you will see all of the extras there like:
- state – either open or close we will use this topic later in Home Assistant and Node-RED
- tilt – is the tilt angle of the sensor in degrees
- vibration – 0 means no vibration, 1 means vibration is detected
- lux – a value in luxes, lower means darker
- battery – is a percentage of your remaining battery
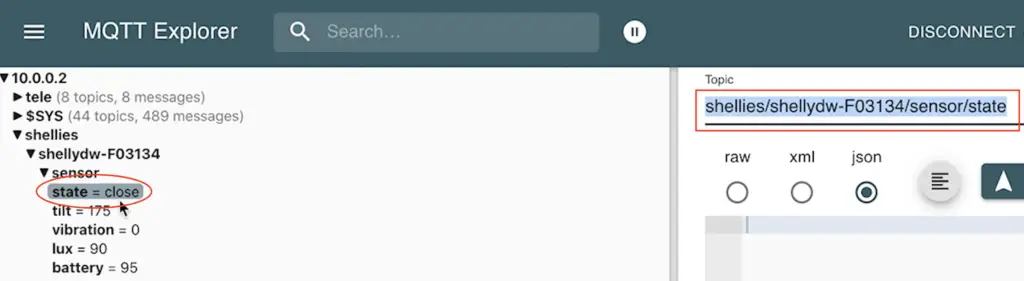
Now click on the state and search for Topic in the right. Mark this text and copy it we will use it to integrate the Shelly door window sensor with Home Assistant and Node-RED.
Start Shelly Door Window sensor and Home Assistant integration
It’s time for Home Assistant. I will configure an automation that will send emails when the sensor change its state. Or in other words when a door or window is opened or closed.
If you don’t have Home Assistant check one of these tutorials of mine:
- Installation of Home Assistant with VirtualBox
- Installation of Home Assistant on Raspberry Pi with Docker and a menu
Open your Home Assistant and find File editor. If you don’t have File editor you can install it from Home Assistant -> Supervisor -> Add-on store.
Of course you can use other ways to edit your Home Assistant configuration, but File editor is the easiest in my opinion.
Then open your configuration.yaml file and paste these lines inside it:
# Add this to configuration.yaml file
sensor:
  - platform: mqtt
    name: "Shelly sensor state"
    state_topic: "shellies/shellydw-YOUR_ID/sensor/state"
  - platform: mqtt
    name: "Tilt"
    state_topic: "shellies/shellydw-YOUR_ID/sensor/tilt"
  - platform: mqtt
    name: "Vibration"
    state_topic: "shellies/shellydw-YOUR_ID/sensor/vibration"
  - platform: mqtt
    name: "Lux"
    state_topic: "shellies/shellydw-YOUR_ID/sensor/lux"
  - platform: mqtt
    name: "Shelly sensor battery"
    state_topic: "shellies/shellydw-YOUR_ID/sensor/battery"
    unit_of_measurement: "%"
If you already have a “sensor” section inside your configuration then just remove this line “sensor:” and paste the rest.
This whole thing will add all of the needed Sensor topics as a sensors in Home Assistant.
Just don’t forget to change the shellydw-YOUR_ID with yours.
Next open your automations.yaml file and past the following text:
# Add this to automations.yaml file
# Shelly Door Window sensor state change
- id: 'Lik3 t41s v1de0'
  alias: Front door is opened
  trigger:
    platform: state
    entity_id: sensor.YOUR_SHELLY_SNSOR_state
#    from: close
#    to:  open
  action:
  - data:
      message: Someone just {{states ('sensor.YOUR_SHELLY_SNSOR_state') }} the front door.
    service: notify.gmail
The trigger of this Home Assistant automation is any change of the state of sensor sensor.YOUR_SHELLY_SNSOR_state.
If you want to catch the specific state change remove the # in front of from and to rows.
The action of the automation is sending a text using Gmail notify service. If you want to enable Gmail notifications in your Home Assistant follow this guide.
The text is kind of dynamic as it includes the current state of the sensor. This is done by using the curly brackets template.
{{states ('sensor.YOUR_SHELLY_SNSOR_state') }}
Of course you can use any other notification service that you have or wish for this automation.
Save all changes in configuration.yaml and automations.yaml files and then go to Configuration -> Server Control -> Check Configuration.
If it’s green you can restart your Home Assistant by hit the “RESTART” button under Server management.
After the restart to quickly check if everything is OK by going to Developer Tools.
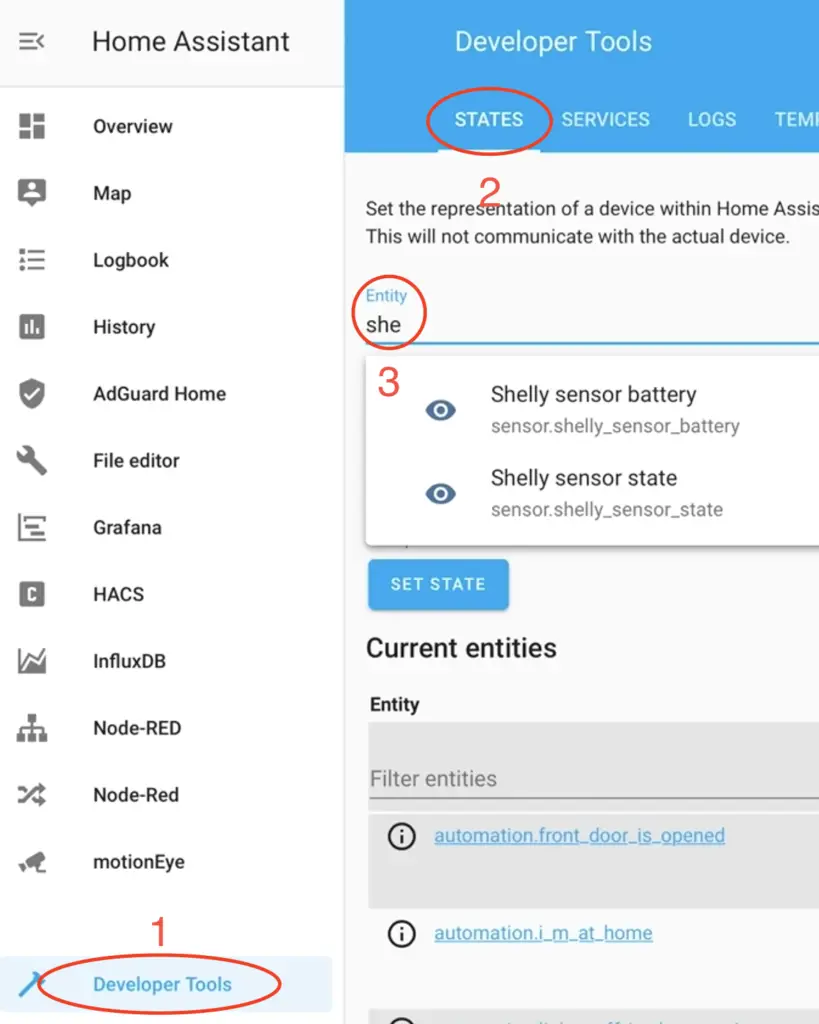
Type your sensor names in the Entity field and if you see them you are a real ninja from the white ones.
And the fun part is just ahead of us.
Quick Question For YOU!
I put this just before the most interesting part on purpose, so you will eventually see this and finally answer me.
What sensors are you using for your doors and windows in your smart home?
Let me know in the comments section below.
Now let’s continue with the Home Assistant
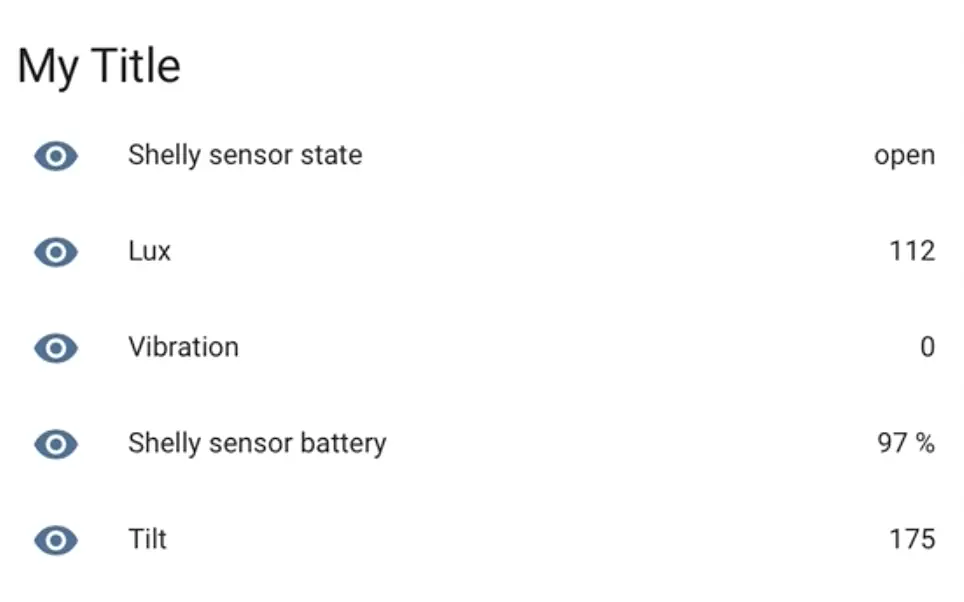
Before you test the Shelly Door Window sensor and Home Assistant automation. You can add a card in Home Assistant that looks like this:
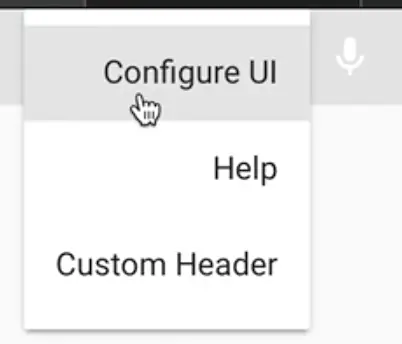
Just click on the dots in the upper right conrner and select “Configure UI”.
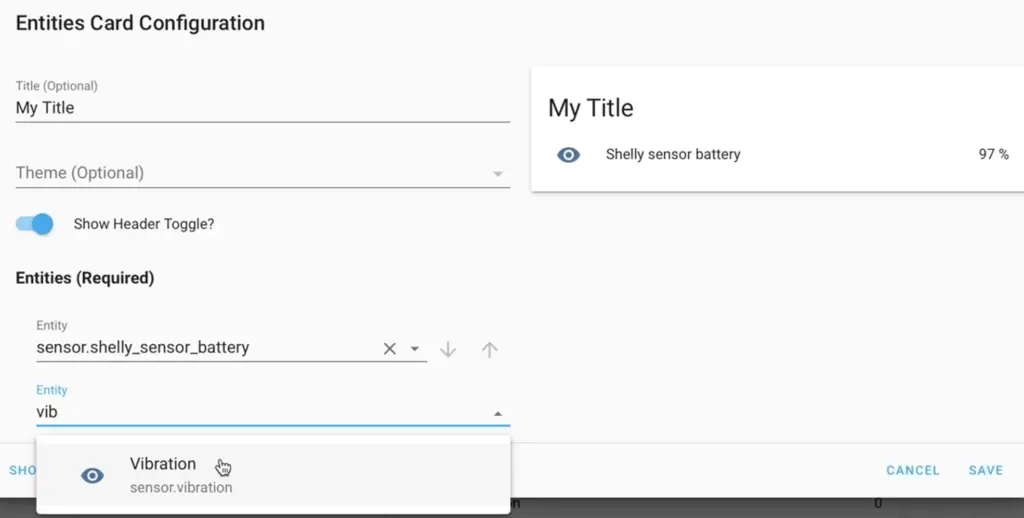
Then you have to click on the big plus orange button in the lower right corner and search for “Entities” card. Under the Entities (Required) add all of the sensors that we added in configuration.yaml file.
Now we can finally test everything end to end.
If you came this far and everything up until now is working you should just open or close your Shelly Door Window sensor and you should receive your notification.
Whether in your Google mail account as an e-mail or whatever you configured in the action section of your automation.

Start Shelly Door Window sensor and Node-RED integration
Let’s get Node-RED and shelly door windows sensor the best friends
If you don’t have Node-RED check one of the following tutorials of mine:
- Install Home Assistant using VirtualBox and then Node-RED as add-on
- Installation of Node-RED on Raspberry Pi with Docker and a menu
Open your Node-RED web interface. For this example I will use Node-RED installed as an Add-on in Home Assistant. You can do that as well by installing it from Home Assistant Add-on store.
Of course you can use your standalone Node-RED installation if you have such.
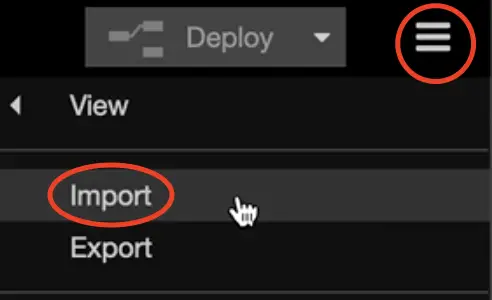
Head over to the Node-RED menu.
The menu is in the upper right corner and select Import button.
Copy and paste the following JSON in the big text box:
https://gist.github.com/peyanski/174980683f7ee93a33900e5973b45b21
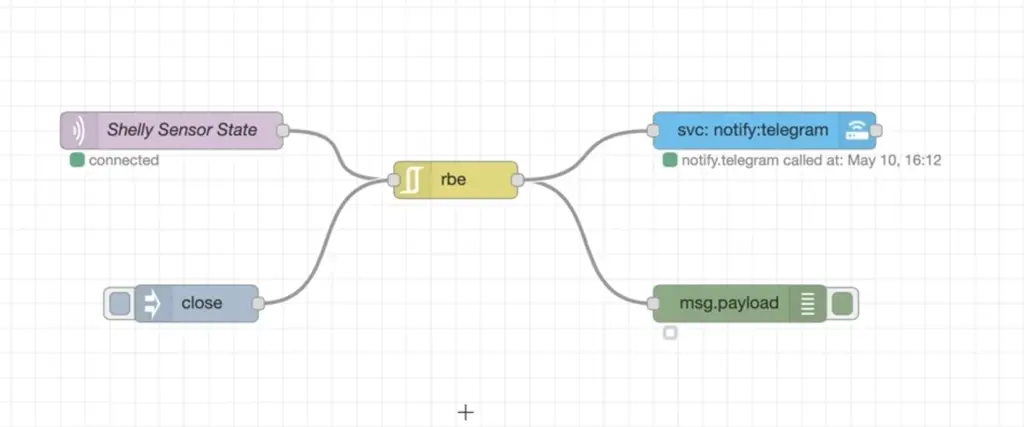
You should have the following flow if you manage to do that successfully.
In my setup this is working just fine, but you have to make some customisation to make it work for yours.
Double click on the upper left node (MQTT IN node) and change the Topic and MQTT Server.

For the Topic you should use the same string as with the Home Assistant.
For the Server you should enter your MQTT server IP, port and credentials.
Next node that in the middle is the “rbe” node or Report by Exception node. This node will block every message unless the value of the message is changed.
In other words: only if there is some change in the message the message will be pass forward, otherwise it will be blocked.
And this will make us a great favour, because the MQTT in node will send new messages/statuses regularly and they will be exactly the same most of the time.
We don’t want to receive a new notification every few minutes with the same information that the sensor is closed for example. We want to receive notification only when there is a change of the state, that is why the rbe node is here to help us.
The Close node is Inject node. If pressed it will send a “close” message to the rbe node to simulate the MQTT in node. This Inject node is here only for testing purposes and it is completely optional.
Same is valid and for the debug node. It’s optional and it will display something only if the rbe node pass the message forward.
The final node in the flow is the Home Assistant call service node.
I’m using this node to call a notification service in Home Assistant from Node-RED.
To use this node you have to have installed the node-red-contrib-home-assistant-websocket collection nodes in Node-RED (From the menu -> manage palette). Or if you installed Node-RED as add-on from Home Assistant everything will be preinstalled and configured correctly.
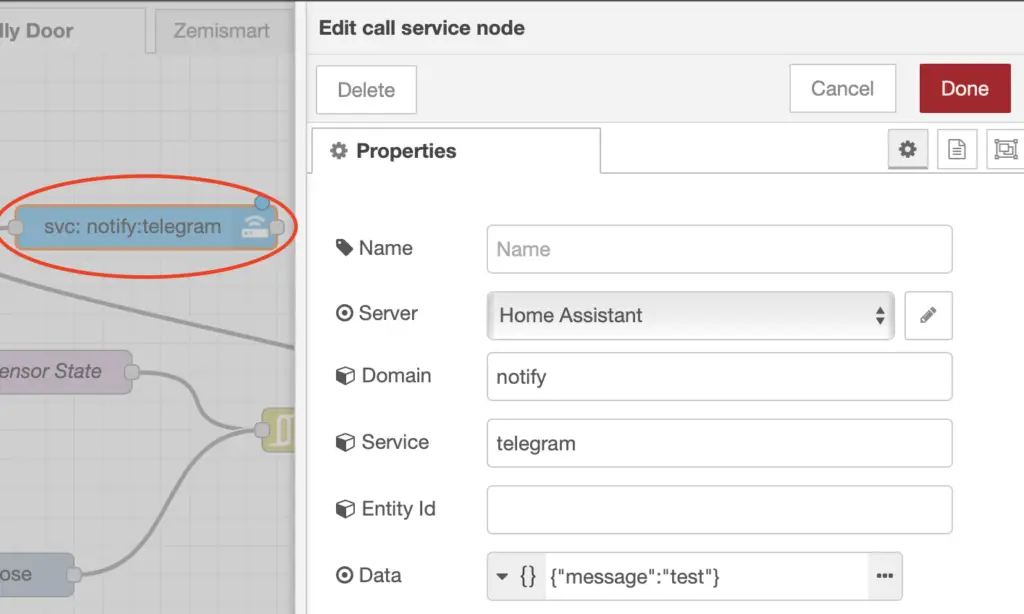
Inside this Home Assistant call service you should define your Home Assistant Server (it’s already configured when using Node-RED as a Home Assistant add-on), Domain, Service and Data (the actual message).
If you don’t have a Telegram notification service in your Home Assistant you can use this tutorial about the topic or you can use something else.
When you fill out all of the things above you can make a test and you should receive a Telegram message every time you open or close the Shelly Door Window sensor.

Where to buy Shelly Door & Window?
If you want to buy Shelly Door & Window sensor, you can use the Shelly official store and my affiliate link below, doing so I will earn some small commission from your purchases with no additional cost for you:
- Shelly Amazon Store – https://amzn.to/34d88VR
Support my work
Any sort of engagement on my YouTube channel or my site here does really help out a lot with the YouTube and Google algorithms, so make sure that you hit the subscribe, Like and Bell buttons If you enjoy the video or the article or both.
Also feel free to add me on Twitter by searching for @KPeyanski.
You can find me on my Discord server as well.
I really hope that you find this information useful and you now know how to configure Shelly Door window sensor with Home Assistant and Node-Red using MQTT.
Thank you for reading or watching, stay at home, stay safe and see you next time.