
Automating lights and making them Smart is one of the quick wins of every Smart Home. Why? Because they are immediately visible from every family member or guest and most importantly they can save you money by reducing the electricity cost in the long run.
What are the possible ways to convert an existing bulb or light into a Smart one, without braking the budget, without complicated re-wiring procedures or without damaging the design of your rooms?
Well, there are 3 recommended ways and they all have some pros and cons.
Table of Contents
Recommended ways to make your existing lights Smart
The recommended ways to make your existing lights Smart are 3:
- To use a Smart Bulbs,
- To use a Smart Relays,
- To use a Smart Switches.
I will cover all of the above methods one-by-one in a minute, but let’s clear something first.
How to control them all?
There is one very important question that is valid for all there ways.
And the question is: How are you going to control, combine and automate these Smart lights?
The answer to that question and that problem is called – Smart Home hub.
Attention here, not every Smart Home hub is local and universal enough to allow adding and controlling most of the Smart home products available at the moment.
Here comes Home Assistant!
In my humble opinion the best possible Smart hub at the moment is Home Assistant, the second best is Home Assistant, third best is Home Assistant, and probably on 4th place is Alexa & Google Home voice assistants, but they are not local.
Wanna know more about Home Assistant?
To learn more about Home Assistant (again that is the best and free option at the moment) I want to invite you on my Home Assistant Webinar where I’m talking about the all 4 official and supported ways to get it + 1 secret and super simple way to get started with Home Assistant on your PC in under 5 minutes.
The Webinar is completely free and you can register on my other website – https://automatelike.pro/webinar
Not Sponsored!
One more thing that I want to say before we begin – that this article is not sponsored by anyone as usual and as usual, I’m sharing my own opinion and experience so far.
Let’s start.
The First method – Smart Bulbs
The first method that can be used to make your existing lights Smart, is to buy a Smart Bulb or Bulbs and to replace your existing dumb bulbs with them.
Smart Bulbs – Pros
This method is probably the easiest, as the Smart bulbs are no different in form and size than their dumb brothers & sisters. Smart Bulbs are designed for installation in a standard sockets – like E27.
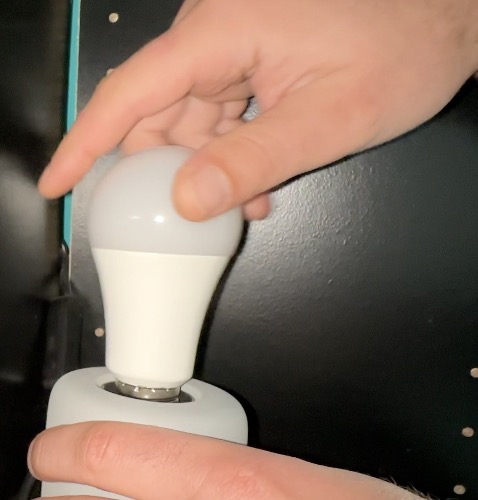
All that have to be done is to unscrew the old dumb bulb and to screw the new Smart bulb and then to pair it with your smart home hub.
The Smart bulbs are relatively cheap, and both white & color (RGB) models are available, so this is another big plus of this method, but what are the minuses?
Smart Bulbs – Cons
As anything in life, this method have pros & cons. The first disadvantage is that if you switch off the Smart bulb from the light switch you will lose the wireless connection to your smart bulb and you will not be able to control it from your hub and home automations.

That means, you have to turn on the light switch and to literally leave it in that position forever, so you can always have wireless access and possibility to control to the bulb from your hub, phone, voice whatever.
Next cons of this methods is that it Is not universal. In other words, if you don’t use standard dumb bulbs the conversion will be not as easy.
Imagine the following scenario: you already have an expensive and beautiful LED lights in your room.
Would you like to remove these LED lights and to place one single Smart bulb instead? The answer will be probably – big no. In such a case the second and third methods that I will talk about in few moments are going to be much better choice.
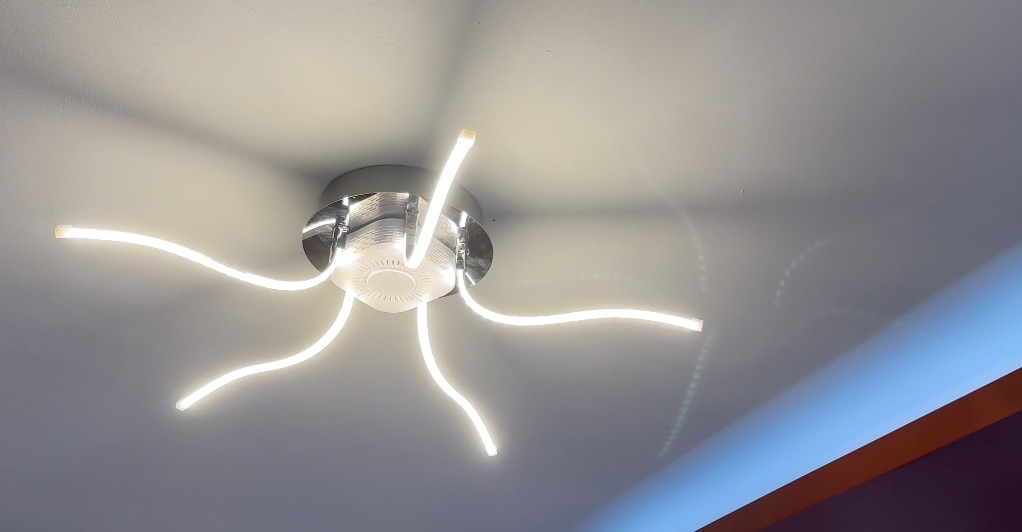
Not that expensive & not that beautiful LED lights, but you get the point here.
What Smart Bulbs do I recommend?
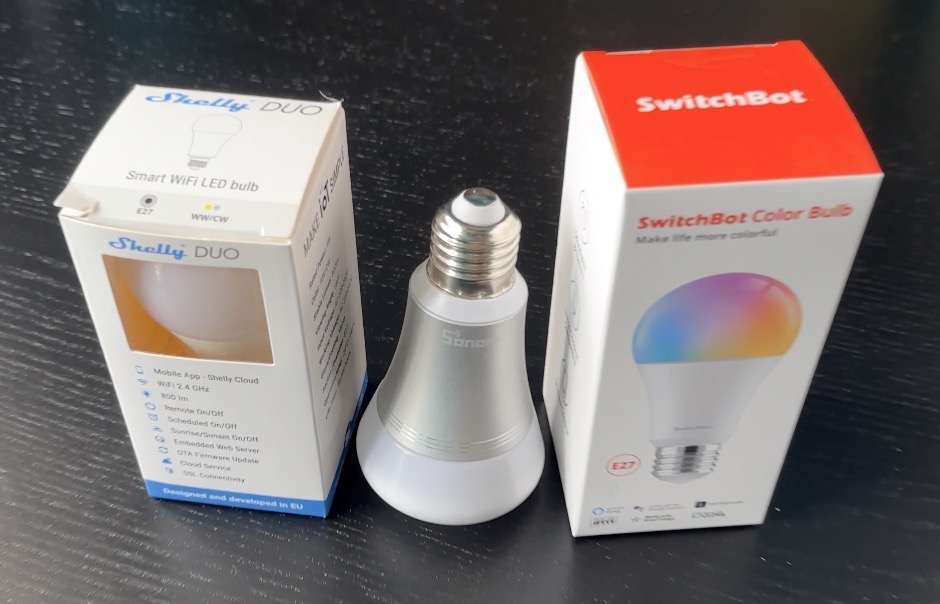
The Smart bulbs that I used so far аre from Shelly, SwitchBot and Sonoff. They are all working just fine, but I’m most happy with the Shelly Bulbs as they are out of the box Home Assistant compatible and you can start automating them right away.
- Shelly Bulb Duo – https://amzn.to/34d88VR
- Shelly Bulb RGBW Color – https://amzn.to/34d88VR
- Shelly Bulb RGBW Color GU10 – https://amzn.to/34d88VR
- SwitchBot Color Bulb – https://bit.ly/3GBDnh9
- Sonoff RGB Bulb – https://amzn.to/3tO5P8f
The Second method – Smart Plays
The next method that can help you make your existing lights Smart is to use a smart relay(s). This is probably the cheapest method, but it requires some electricity wiring skills and a place where you can hide the relay.
The usual possible places to hide the smart relays are two:
- Behind the light switch
- Inside the cover of the lights.
That is of course, if you are converting existing lights. If you are wiring brand new ones you have more hiding options.
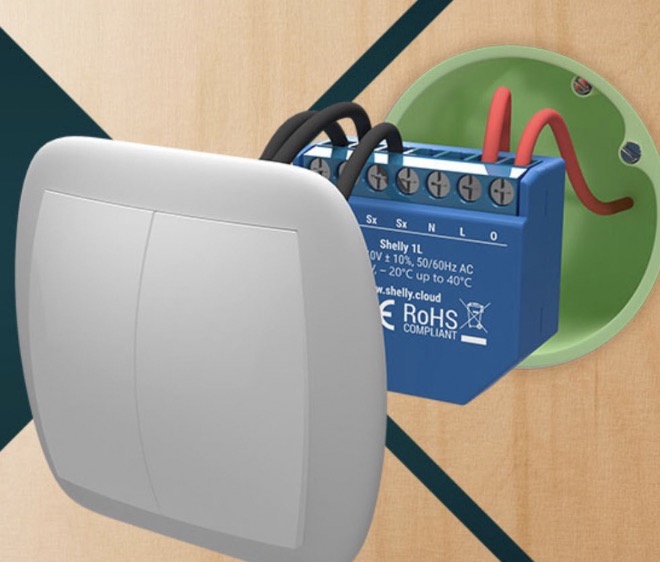
This is one of the way to hide the smart relay, behind the regular/dumb light switch
Smart Relays – Cons
With smart relays you can also wirelessly cut off yourself exactly the same way as with the Smart bulbs. That means if you turn off the light switch, you will lose wireless connection to the smart relay until you turn on the light switch again. And believe me, realizing that you have no access to your smart lights, because someone have turned off the light switch is happening all the time and it is happening exactly when you want to use this Smart feature the most.
Basically, you have to stand up and turn the lights on manually which is kind of frustrating and not very different than having a dumb lights at first place.
Smart Relays – Pros
What I said until now for the smart relays can be considered as cons, but here are the pros of using the Smart relay method.
- Depending of the brand and the model, the smart relays can add few other benefits like showing the electricity consumption which is a very nice feature.
- Also there are relays that can be installed on a places where you have no neutral wire, which is also a big plus – Convert your existing Lights into Smart Lights with Shelly 1L and Home Assistant
- On top, some relays have embedded safety features like overheating, over-power and over-voltage protection – Are Shelly Plus 1 & Shelly Plus 1PM better than the old Shelly relays
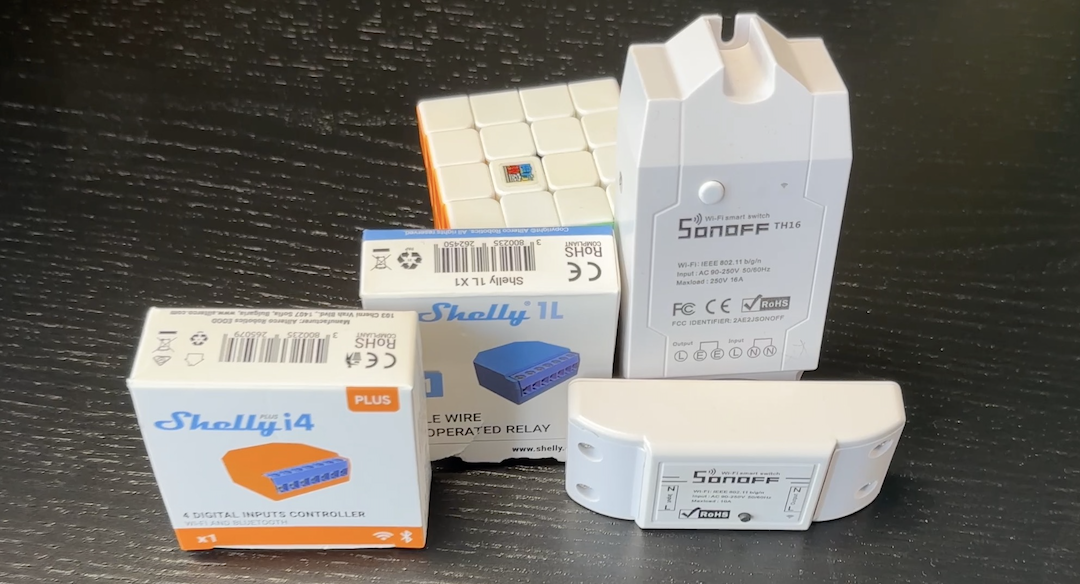
What Smart Relays do I recommend?
What I used until now and what I can recommend are the Sonoff Smart relays and Shelly Smart relays. Both brands are just fine!
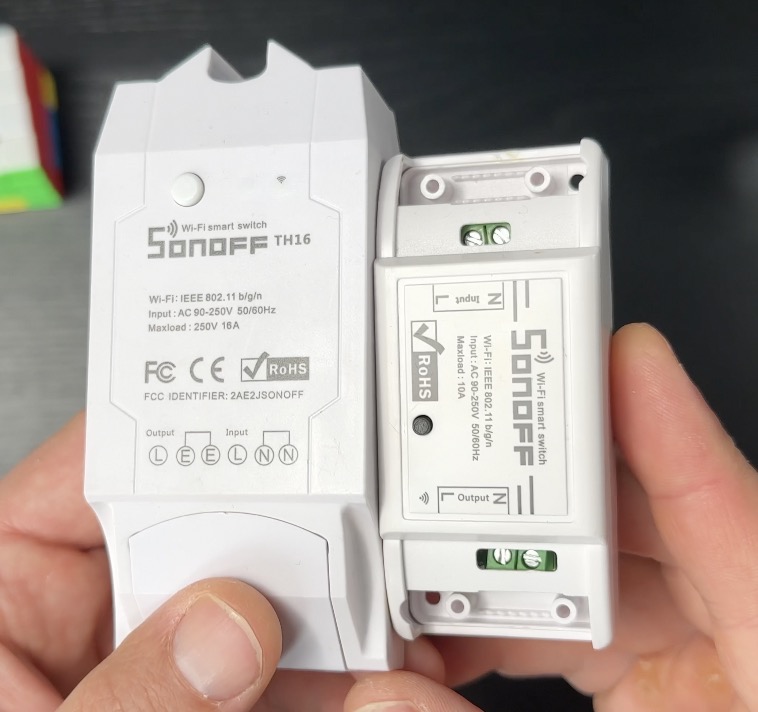
Sonoff relays are a bit cheaper and easier to operate, but they cannot work out of the box with Home Assistant.
For Sonoff Relays, you have to add either some Home Assistant custom components or you have to flash them with another firmware like Tasmota or ESPHome. These procedures are not that hard, but for beginners they could be challenging.
Here is one of the most popular relay – Sonoff Basic R2 – https://amzn.to/3ESYN8o
Shelly relays on the other hand are a bit more expensive, but they are better in almost every aspect. They come with more features, they have more built-in protection mechanisms and they can work with Home Assistant out of the box.
Some popular Shelly Smart relays:
- Shelly 1L – https://amzn.to/34d88VR
- Shelly Plus 1 – https://amzn.to/34d88VR
- Shelly Plus i4 – https://amzn.to/34d88VR
- Shelly 1 – https://amzn.to/34d88VR
- Shelly Plus 1PM – https://amzn.to/34d88VR
Smart Home Glossary
Before I move on, I must say that I’m constantly using some Smart Home words and abbreviations that may not sound familiar to you. To help you easily understand them, I created one PDF document that I called – The Smart Home Glossary
Inside that Glossary you can find simple, but useful explanations of every Smart Home word or acronym that I could think of.
Download this Glossary free of any charge from my site and use it whenever you like – https://automatelike.pro/glossary
The Third method – Smart Wall Switches
Let’s move to the third possible method to make your existing lights Smart. In this method all that you have to do is to replace your old, dumb light switch with a Smart one.
The procedure is a little harder than changing a bulb (that was the first method that we talked about), but in most cases it should be easier than adding a Smart Relay, which was the second method listed in this article.
The Smart Switches are usually having from 1 to 4 buttons, they have versions that can work with or without neutral wire, which is a big plus. On top, you cannot cut off easily your wireless connection to your Lights. When you press the Smart Switch hardware button to turn off the lights you will still be able to power on the lights wirelessly using your hub, phone, voice or whatever.
In my opinion using Smart Switches is probably the best option so far, but unfortunately it is also the most expensive one.
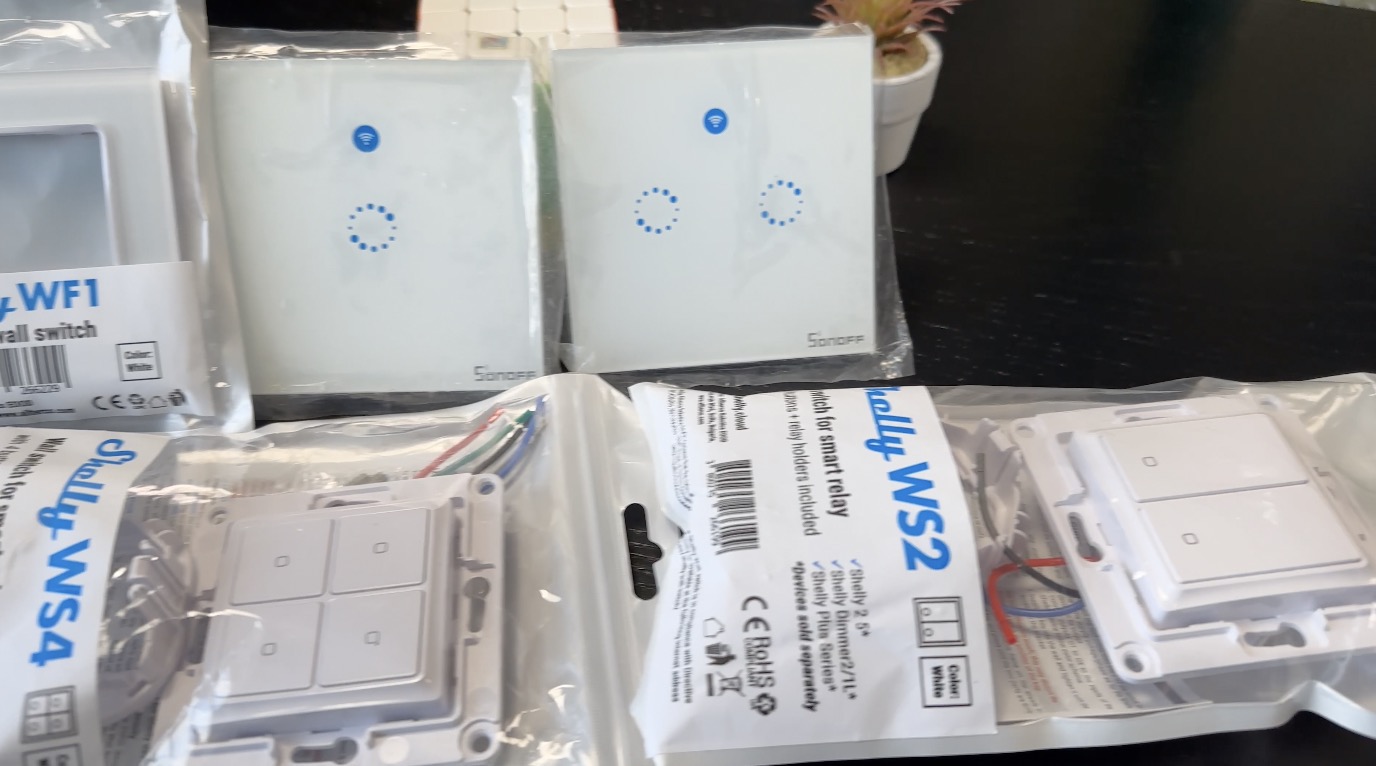
What Smart Switch do I recommend?
The Smart Switches that I used so far are from Sonoff, Shelly & Aqara.
Again Sonoff Switches require a bit more work to be added in Home Assistant.
Sonoff Amazon Store Smart Switch section – https://amzn.to/3TYQUCJ
Shelly, which basically are offering relays with a well designed light switches that can hold the relay.
- Shelly Wall switch 4 + Shelly Plus i4 (White) – https://amzn.to/34d88VR
- Shelly Wall switch 4 + Shelly Plus i4 (Black) – https://bit.ly/3HxhJv3
And the last Brand that I used is Aqara. I think I’m most happy with Aqara here, but they are using Zigbee for the wireless communication. Which require additional hub/dongle or Home Assistant Yellow.
- Aqara Smart Wall Switch H1 (No Neutral, Double Rocker) – https://amzn.to/3VjSZu4
- Aqara Smart Wall Switch H1 (with Neutral, Single Rocker) – https://amzn.to/3ExAmfe
What Smart Lights method to choose?
Finally, what to choose to convert your existing lights into a Smart lights?
There is no definite answer to that question, it all depends of your existing lights, your budget and your wiring skills if you wish.
- If you are a beginner I can suggest to start simple and fast with a Smart bulb or bulbs, test, validate, hook up and then proceed with other methods if needed.
- If you are an advanced user and connecting few wires is not scary for you, go for the Smart relays.
- If you are somewhere in the middle and you have the budget – try Smart switches and stay there, as I said this is probably the best option in most of the cases.
I will leave some affiliate links below to the official stores of the recommended brands that I use, so you can freely browse the offered by them bulbs, relays & switches.
Affiliate links means that I will receive a small commission if you decide to buy something from these links and this will not add any additional cost for you.
- Shelly Amazon Store – https://amzn.to/34d88VR
- SwitchBot Flash Deals – https://switchbot.vip/3BwF221
- Aqara Amazon Store – https://amzn.to/3EpeCSb
Bye!
Thank you for reading. I’m Kiril and I’m done writing for this week. Bye!