
Today I will show the latest 4K cameras from Reolink with local Person & Vehicle detection + NVR from Reolink and Home Assistant – working together seamlessly in a beautiful combination. This is probably the best security cameras solution that you can have in terms of features and lowest price.
I would challenge you to prove me wrong and show me a better solution in the comments, but first read the whole article or watch the entire video.
Table of Contents
The Goal of this article is?
The ultimate goal here is to have a security cameras system that can record 24 by 7 on a dedicated NVR, a 4K cameras with local Artificial Intelligence (AI) and integrated Home Assistant where you can set a ton of useful automations.
It is going to be a great article so it will be amazing to hit the subscribe button for my newsletter and confirm your registration with the follow up mail that you will receive.

Here is a picture of a baby Panda if you still hesitate:
Now let’s start with the needed components and quick talk about their features.
Reolink RLC-810A Camera
This is the latest 4k PoE camera from Reolink called RLC-810A where A in the model probably stands for AI and AI stands for Artificial Intelligence.
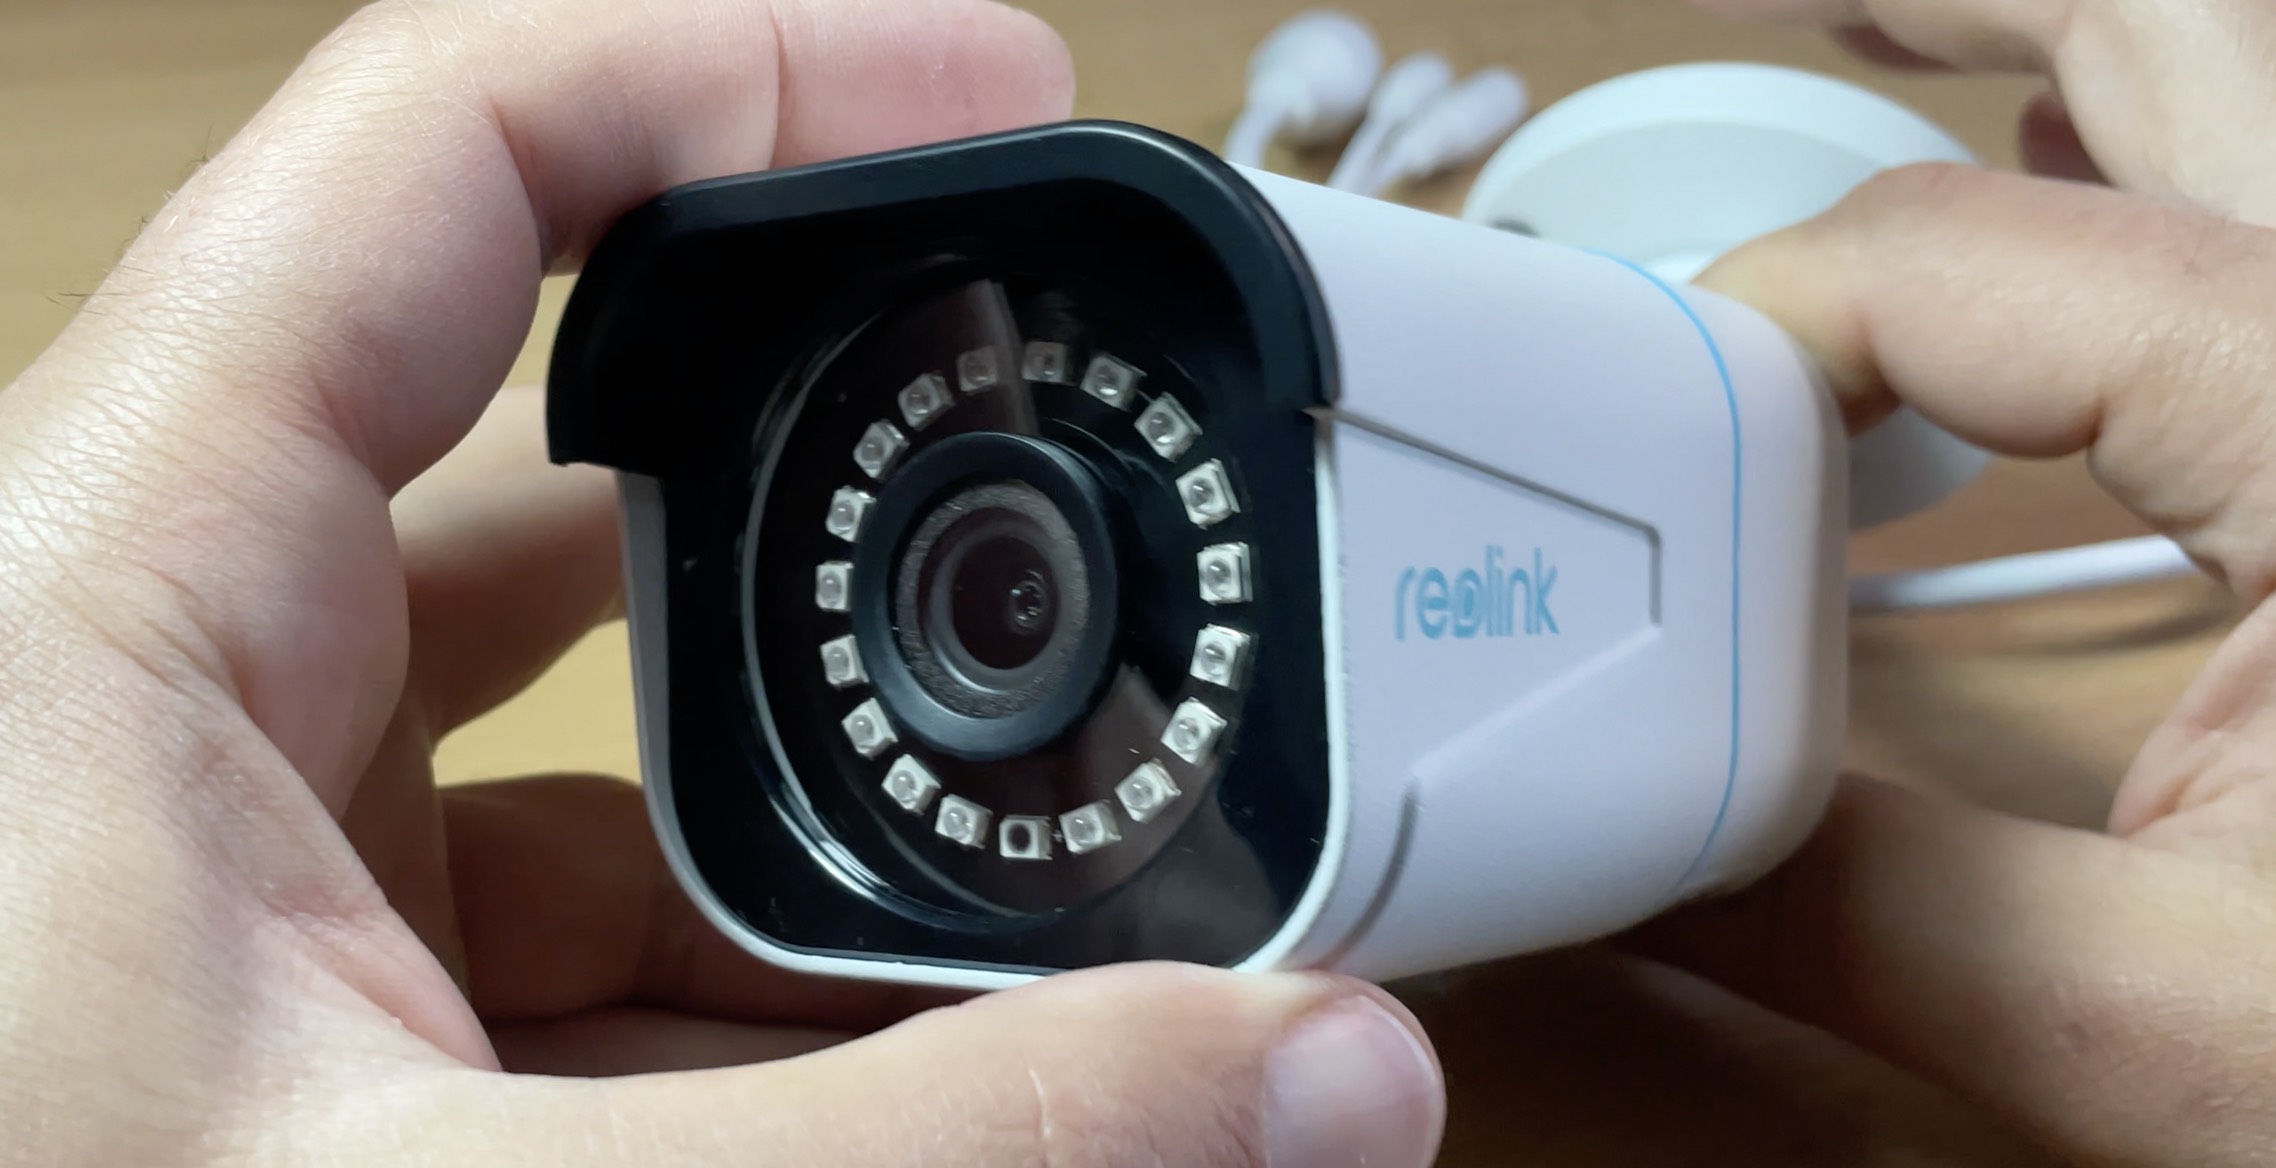
The Artificial Intelligence here means Person and Vehicle detection performed locally. And you heard that right locally – without invoking any suspicious cloud services.
Reolink RLC-810A is a bullet type camera with 8MP sensor capable of shooting 4K at 25 frames per second. It supports ONVIF and RTSP protocols, which means you can connect it to a lot of third party systems like Blue Iris, motionEye and Home Assistant, but more on that later.
The camera costs around 85 US dollars or a little above 90 EUR depending of your location (the price may vary depending of the available promotion)
Check the current price on the official Reolink site 👉 LINK
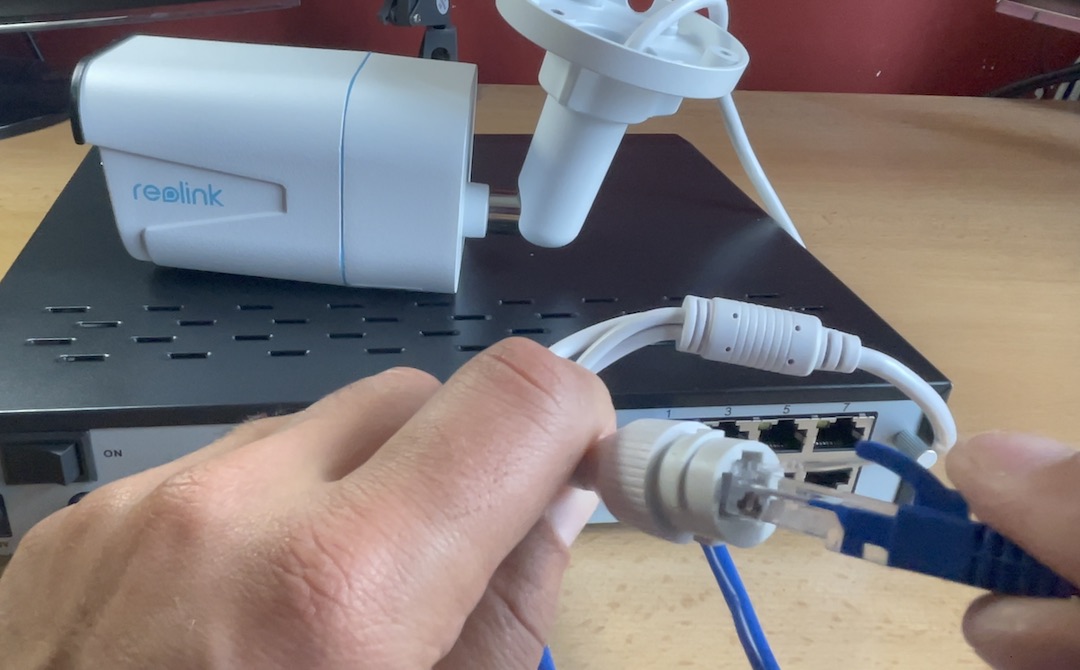
Reolink RLN8-410 NVR
The RLN8-410 Reolink NVR have 2TB internal storage and can handle up to 8 PoE cameras. Connecting the Reolink cameras to the Reolink NVR is a piece of cake. You just have to use one LAN cable per camera and that is all.
You can use the Reolink App from your mobile device or the NVR Web interface to setup and configure the entire security camera system. Check this video of mine if you want detailed instructions about how to setup the Reolink NVR 👉 LINK
The RLN8-410 Reolink NVR cost around 200 US Dollars 👉 LINK
That means you can get a NVR and 4 AI enabled cameras that support 4k for around 550 US dollars. There are also bundles that can cost even lower than that 👉 LINK
I can suggest to check the current Reolink NVR prices as they may vary depending of the promotions & discounts that are often available
Which Reolink NVR support AI Cameras?
Be careful here, not every Reolink NVR support the AI functions available in the latest Reolink cameras. For example the RLN8-410 NVR will give you the full potential of your RLC-810A camera only if the hardware version is N2MB02 or H3MB18. Take a look at the Reolink support article if you want to double check this.
If the NVR hardware version is older an AI capable camera will work just fine, but without the Person & Vehicle detection. However, you don’t have to worry about that if you are going to buy a brand new NVR now from the official Reolink site 👉 LINK
Just be careful with re-sellers or second hand NVRs – that is all!
Reolink and Home Assistant
Next component is optional (not for me, but never mind). You can integrate the Reolink cameras and NVR with Home Assistant. Home Assistant is free and can be run on almost any hardware or in virtual environment.
One of the cheapest and easiest ways in my opinion is to use a Raspberry Pi and Home Assistant OS or Home Assistant Supervised installation. More info can be found in this video/article of mine as well as detailed instructions about how to install it 👇⬇️👇
How to enable Person & Vehicle Detection in Reolink?
Now let’s see a Person & Vehicle detection in action from Reolink RLC-810A camera connected to RLN8-410 Reolink NVR. Afterwards we will add the Home Assistant and we will start making automations.
First you have to enable the Person & Vehicle detection from the Reolink mobile app or from the NVR web interface.
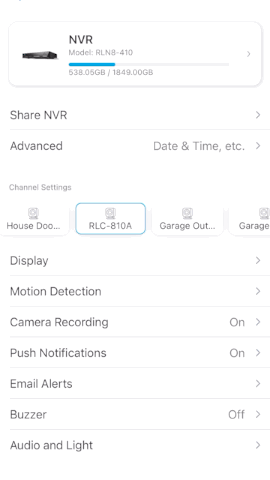
To enable AI (Person & Vehicle detection) – Open Reolink Mobile App > click on the cog button > Select a camera from the Channel Settings > Click on Push Notifications > Schedule > Select Person and Vehicle from the Detection Type > Save.
TIP!: Have in mind that if your camera or NVR does not support AI you will not see these buttons.
To test if the AI (Person & Vehicle Detection) is working as expected – just park your car or walk in front of your camera and you should receive push notification with possibility to view the recording on your mobile device.
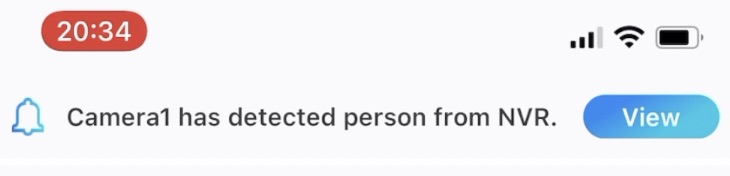
When you click on that View button you will see the recording that AI of the camera manage to detect.
Now let see the Reolink Camera + NVR from Reolink and Home Assistant integration.
Native Reolink Home Assistant Integration (not the main focus here)
Please have in mind that you can add the Reolink Cameras & NVR using the native RTSP or ONVIF Home Assistant integration. To do this just go to:
Home Assistant > Configuration > Integrations > Add integration > and search and install – ONVIF
Unfortunately the camera motion sensors and other useful stuff will not work as expected that way at the time of writing this article. You can only get the camera stream which is only fine for real time monitoring.
But this is not what we want don’t we?
That is why I will show you an actively developed custom component integration called reolink_dev.
What is reolink_dev?
Reolink_dev is custom component integration for Home Assistant that makes Reolink and Home Assistant to work very well by adding a lot of sensors and entities that you can control or monitor in Home Assistant. Reolink_dev is an open source project in GitHub, originally developed by another nice guy from Netherlands called fwestenberg.
Asking Frenck & Fwestenberg to make reolink_dev native HA integration.
Come on @Frenck talk to your fellow countryman – fwestenberg and make this reolink_dev integration the native one for Home Assistant. It is working far better than the current one.
I know if you manage to do this it will automatically make the next part of the article (about installing reolink_dev) obsolete, but at the end of the day it will be best for the community.
Now let’s see the reolink_dev custom integration in Home Assistant.
Reolink_dev custom component integration installation in Home Assistant
We need to transfer the reolink_dev integration files to Home Assistant config folder and there are several ways to do that. I used Samba Home Assistant add-on 👉 LINK
Installation of the Samba add-on is very easy and you shouldn’t face any problems installing and configure it. If you do, then let me know in the comments below and me or some other nice guy here will try to help.
Of course you can use other methods to transfer these files and here are the steps that you need to perform, no matter how you choose to transfer the files.
- Download the files from the official reolink_dev Integration GitHub repo as ZIP file 👉 LINK
- Extract the archive and copy and paste the custom_components folder and all of its content to your Home Assistant config folder.
- You have to have /config/custom_components/reolink_dev structure in your Home Assistant. And inside reolink_dev folder you should have multiple .py files.
- After you are ready with the above restart your Home Assistant.
- Go to Configuration > Integrations > Add integration > Search for Reolink and click on it.
- A dialog asking for Host, Port, Username & Password will appear. Enter the IP of your NVR and your NVR credentials, the port should stay 80. After you are ready – click Submit.
- Select a NVR channel with Reolink Camera connected that you want to add to Home Assistant and click Submit & Finish.
- If you want to add more cameras, you just have to repeat the above three steps and to select different channel.
- You can find the new reolink_dev integration in Home Assistant under Configuration > Integrations menu.
- Click on the device(s) under the Reolink integration and add all of the entities as Home Assistant card – exactly as I did in the video that I created along with this article.
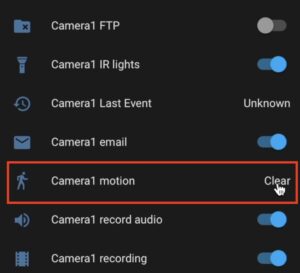
This camera motion sensor added by the reolink_dev custom component is going to be used for the Home Assistant automation ahead.
At the moment in Home Assistant Person & Vehicle detection is not working. Only generic motion detection is fine. I promise to monitor this topic closely and to let you know if something is changed. Meanwhile I can recommend to use the Frigate or DOODS software if you want a solution with camera object detection and Home Assistant integration.
Home Assistant automation when motion is detected
Time to create a Home Assistant automation when motion is detected from the Reolink Camera. You can use the Home Assistant UI as I’m doing in the video about this topic or you can edit the automations.yaml file in Home Assistant config folder. If you choose the second option – paste the following YAML code inside automations.yaml file and reload automations afterwards:
alias: when reolink camera detect motion
description: ''
trigger:
  - platform: state
    entity_id: binary_sensor.camera1_motion
    to: 'on'
condition: []
action:
  - service: persistent_notification.create
    data:
      message: motion is detected by reolink camera
mode: single
You may wish to change the entity_id: binary_sensor.camera1_motion with your entity name and of course the action can be anything. In the case above it is a persistent notification that will pop up the following text “motion is detected by reolink camera” in your Home Assistant UI.

If you run out of ideas about Home Assistant notifications options – check my YouTube Home Assistant Notifications playlist, where you can see how to setup all kind of messages, voice calls, text-to-speech, and so on in your Home Assistant 👉 LINK
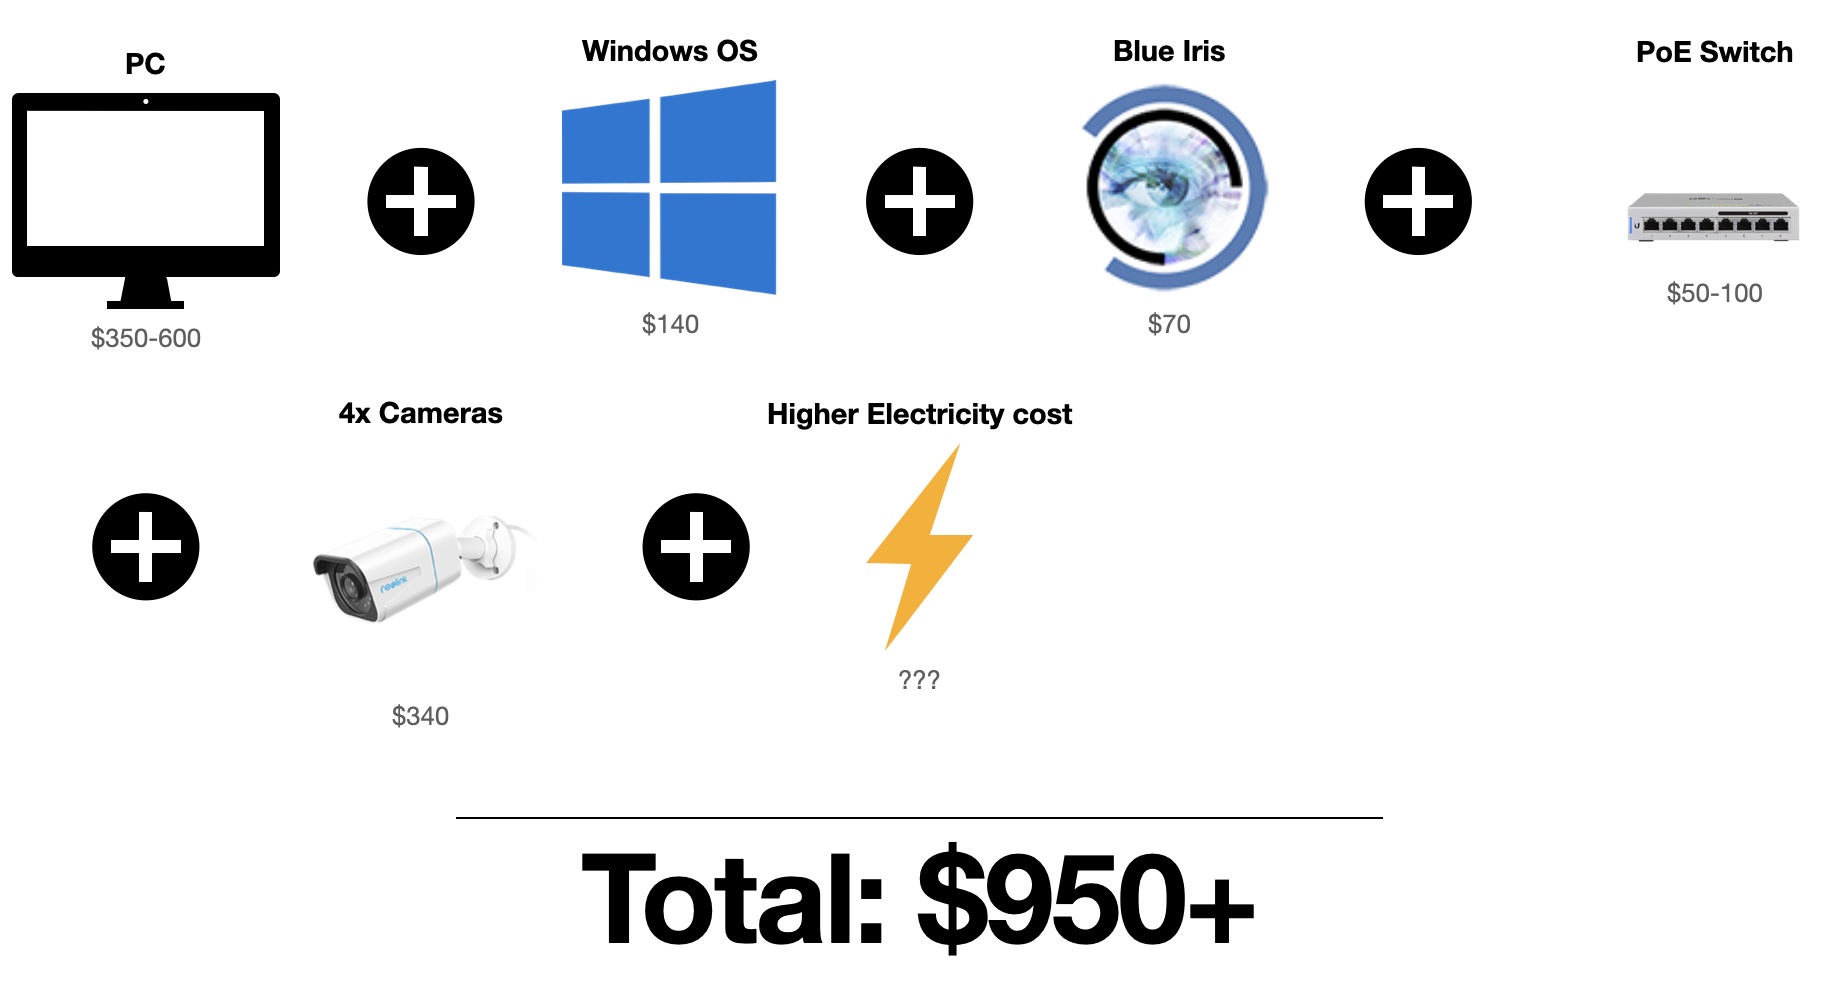
Reolink vs Blue Iris based system (price comparison)
Blue Iris is a paid software for Windows OS (software NVR) that you can use as one stop security camera solution. You can connect different camera brands and record 24 by 7 or with predefined schedule or when motion is detected.
As comparison a Blue Iris system requires a powerful enough PC ($350-600) + the price of the Windows OS (~$140) + the price of the Blue Iris ($70) + the price of the PoE switch ($50-$100) + the price of 4 cameras ($340) + higher electricity cost. As total such system can cost you more than $950 US dollars.
Summary
As a summary I can boldly say that until now I don’t know a better security camera solution for a better price than the one provided by Reolink (4k cameras + NVR).
Having in mind that you can access your Reolink system only locally or from anywhere in the world. The included features & quality provided by the vendor plus possibility to add Home Assistant integration. I think it is hard to beat this Reolink bundle even by a Blue Iris based system.
If you want to buy a Reolink gear now is great time as they have a Prime Day Sale during the whole mont of June.
- Reolink RLC-810A 4K AI Camera – http://shrsl.com/301h9
- Reolink Flash Deals – http://shrsl.com/301ih
- Reolink RLN8-410 8port PoE NVR with AI – http://shrsl.com/301im
If you use any of the links in this article and buy something – you will automatically support my site and YT channel with no additional cost for you.
And If you want to support my site/channel even more check my Patreon page and select any of the available tiers 👉 LINK
If you are new to the Smart Home world you can buy my Smart Home Getting Started Actionable Guide ⬇️
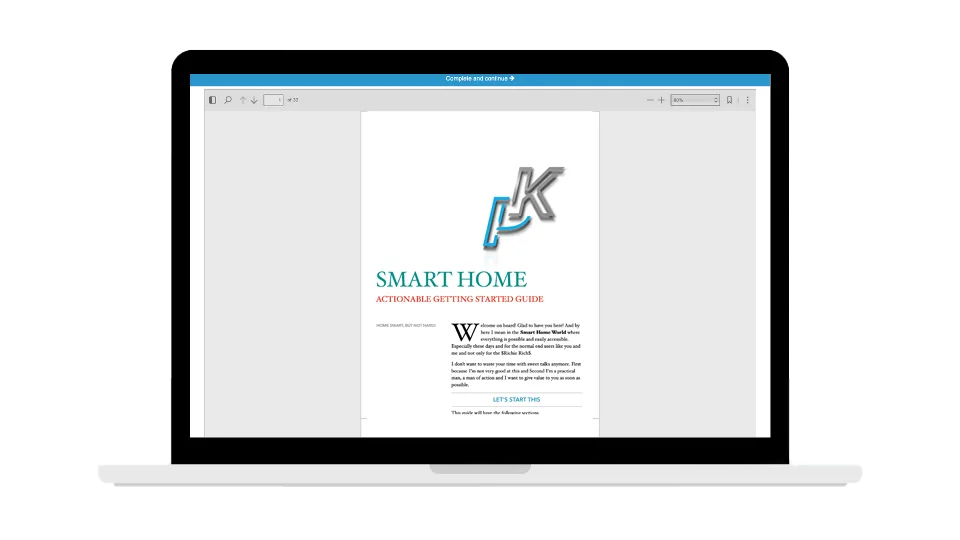
SMART HOME Getting Started Actionable Guide
28 unique printable pages in a Smart Home Getting Started Actionable Guide designed to help you make the best decisions and your Home Smart right away!
With that being said stay safe and don’t forget – Home smart, but not hard!
Thanks for reading and I will see you next Wednesday!
Hello, I’ve installed HA supervised on docker following your guide, but I don’t find the config folder needed to add the add on. Could you please help? Thanks!
Hi Fabio, I will answer the same as the question is pretty much the same. Use the Samba add-on available in the Add-on store to access the config folder on your HA and to upload folder. If you want to just edit files there or upload single files you can use File editor add-on instead. Good luck!
It still looks like Person Detection is not working. Have you seen it working yet?
Thanks so much for this guide. I’ve been trying to get this set up all day, but I can only see an option for a single camera channel. I’m using the same NVR you mention here and have successfully installed ONVIF and the reolink_dev integrations in Home Assistant. Everything is just as you said except I can only ever see an option for one camera channel. Am I missing some internal setting on the NVR?
Does anyone know if the motion detection for people and vehicles is working yet?
Hi! Great instruction! One more question 😉 Hoe can I manage to set up multiple cameras via NVR. As I understood it I can only chose one channel. Right?
No, you can manage all channels you just have to use different RTSP link for every channel. For example: rtsp://user:[email protected]:554/h264Preview_07_sub will show you the 8-th channel of the NVR, same URL but with 00 instead of 07 will show you the first one and so on.
For anyone else who has problems with ONVIF / RTSP , you can enable this in the Windows app, Settings, Network Settings, Advanced, Port Settings
They seem to be disabled by default now. (RLC-502A)